SRC Shocks Installation Advice - Superior Engineering
SRC Shocks Installation Advice - Superior Engineering
SRC Shocks Installation Advice - Superior Engineering

You also want an ePaper? Increase the reach of your titles
YUMPU automatically turns print PDFs into web optimized ePapers that Google loves.
<strong>SRC</strong> <strong>Shocks</strong> <strong>Installation</strong> <strong>Advice</strong><br />
All <strong>SRC</strong> <strong>Shocks</strong> are shipped with the knobs fully closed to prevent damage to them during shipping.<br />
Bump stops must be checked so the shock cannot be bottomed out on full compression, warranty is void<br />
if the shocks have been bottomed out.<br />
During installation, please open the knob fully as a start in the damper tuning.<br />
Winding the adjuster clock wise ( in ) will effectively make the shock harder.<br />
Winding the shock anti clockwise (out) will effectively make the shock softer.<br />
Approx settings and how they change the shock<br />
0 being fully wound in.<br />
30 being fully wound out.<br />
0-10<br />
0 fully wound in maximum compression / rebound damping force<br />
10 is softer on compression/ rebound approx 30% rebound<br />
Approx 70% Compression<br />
At equal rate<br />
11 – 30<br />
50/50 ratio of compression and rebound adjustment<br />
11 being the hardest and 30 being the softest.
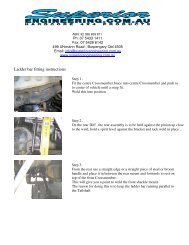
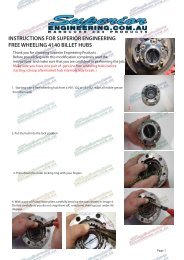
When fitting <strong>SRC</strong> shocks with remote canisters you will be supplied with mounting hardware.<br />
For the rear, the shock is fitted with the remote line at the top facing into the center of the vehicle.<br />
Figure 1<br />
Passenger side 1<br />
Driver side 1
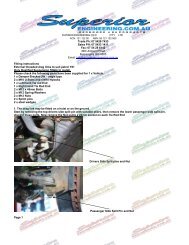
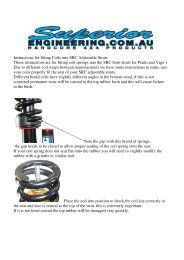
The canisters should be fixed to the control arms with the blocks and zip ties provided. See figure 2<br />
Figure 2<br />
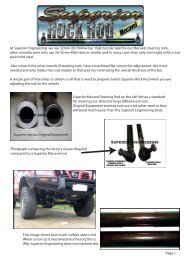
The front <strong>SRC</strong> shocks are positioned as to allow the transfer line to continue out the mount around the<br />
back of the shock tower then in to position of the bolt on canister mount, which replaces the standard<br />
coil top plate, this is only a recommendation and it is up the person fitting the shocks to check the<br />
position they have mounted the lines will not interfere with any parts on the vehicle.<br />
See Figure 3<br />
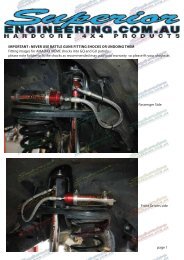
There are two possible mounting positions for the canister, please consult the pictures below.<br />
But ensure the transfer lines are clear of any moving parts to avoid wear.
Figure 3<br />
Passenger side 2<br />
Driver side 2<br />
<strong>SRC</strong> <strong>Shocks</strong> will not be covered by warranty if they are fitted incorrectly or the shock is bottomed out<br />
due to insufficient bump stop height.
All spherical bushes should be greased well before installation and at regular intervals to prevent premature<br />
wear.<br />
1. Clean all oil and dirt from the bush first<br />
2. Apply a generous amount of grease to both sides of the bush, ensuring that all areas are covered
3. Once the grease is applied wipe off any excess
4. This is how the ends should look after the grease is applied<br />
This should be a part of your regular maintenance schedule.