- Page 1 and 2: Summit Switch Installation and User
- Page 3 and 4: Contents Introduction xvii Terminol
- Page 5 and 6: Configuring Management Access 3-8 D
- Page 7 and 8: VLAN Names 5-13 Default VLAN 5-14 C
- Page 9 and 10: Displaying Router Settings 9-17 Res
- Page 11 and 12: 13 USING EXTREMEWARE VISTA Enabling
- Page 13 and 14: Figures 1-1 Dual-homing configurati
- Page 15 and 16: Tables 1 Notice Icons xviii 2 Text
- Page 17 and 18: Preface This Preface provides an ov
- Page 19 and 20: RELATED PUBLICATIONS Table 2: Text
- Page 21 and 22: 1 Summit Overview This chapter desc
- Page 23 and 24: SUMMARY OF FEATURES • Distance Ve
- Page 25 and 26: SUMMARY OF FEATURES FULL-DUPLEX The
- Page 27 and 28: SUMMARY OF FEATURES The Summit supp
- Page 29 and 30: NETWORK CONFIGURATION EXAMPLE In th
- Page 31 and 32: SUMMIT2 FRONT VIEW SUMMIT2 FRONT VI
- Page 33 and 34: SUMMIT4 FRONT VIEW SUMMIT4 FRONT VI
- Page 35 and 36: SUMMIT48 FRONT VIEW SUMMIT48 FRONT
- Page 37 and 38: SUMMIT REAR VIEW SUMMIT REAR VIEW F
- Page 39 and 40: FACTORY DEFAULTS Table 1-4: Summit
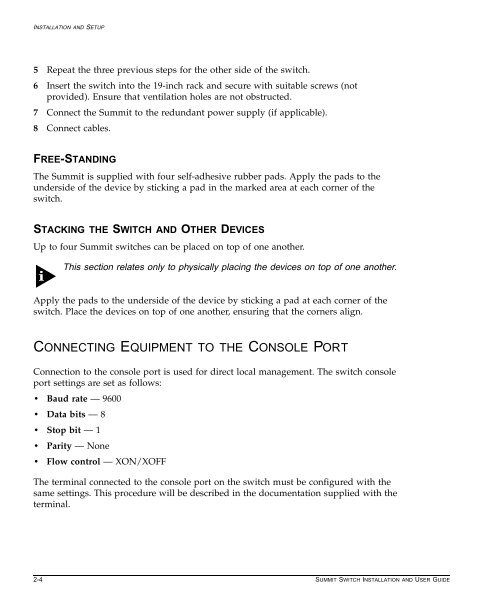
- Page 41 and 42: 2 Installation and Setup This chapt
- Page 43: INSTALLING THE SUMMIT For more info
- Page 47 and 48: LOGGING IN FOR THE FIRST TIME 4 At
- Page 49 and 50: 3 Accessing The Switch This chapter
- Page 51 and 52: UNDERSTANDING THE COMMAND SYNTAX AB
- Page 53 and 54: LINE-EDITING KEYS LINE-EDITING KEYS
- Page 55 and 56: COMMON COMMANDS Table 3-3: Common C
- Page 57 and 58: CONFIGURING MANAGEMENT ACCESS DEFAU
- Page 59 and 60: METHODS OF MANAGING THE SUMMIT DELE
- Page 61 and 62: USING TELNET The switch MAC address
- Page 63 and 64: USING TELNET 8 When you are finishe
- Page 65 and 66: USING EXTREMEWARE VISTA USING EXTRE
- Page 67 and 68: USING SNMP Table 3-6: Supported MIB
- Page 69 and 70: USING SNMP DISPLAYING SNMP SETTINGS
- Page 71 and 72: CHECKING BASIC CONNECTIVITY MTRACE
- Page 73 and 74: 4 Configuring Ports Ports on the Su
- Page 75 and 76: PORT COMMANDS PORT COMMANDS Table 4
- Page 77 and 78: LOAD SHARING Table 4-1: Port Comman
- Page 79 and 80: LOAD SHARING Table 4-5: Port Combin
- Page 81 and 82: PORT-MIRRORING PORT-MIRRORING COMMA
- Page 83 and 84: SUMMIT VIRTUAL CHASSIS Table 4-8: S
- Page 85 and 86: SUMMIT VIRTUAL CHASSIS VLANS AND SU
- Page 87 and 88: 5 Virtual LANs (VLANs) Setting up V
- Page 89 and 90: TYPES OF VLANS For example, in Figu
- Page 91 and 92: TYPES OF VLANS Figure 5-3 illustrat
- Page 93 and 94: TYPES OF VLANS Figure 5-4 illustrat
- Page 95 and 96:
TYPES OF VLANS Figure 5-6 illustrat
- Page 97 and 98:
TYPES OF VLANS PROTOCOL-BASED VLANS
- Page 99 and 100:
VLAN NAMES — snap — Ethertype i
- Page 101 and 102:
CONFIGURING VLANS ON THE SUMMIT Tab
- Page 103 and 104:
DISPLAYING VLAN SETTINGS DISPLAYING
- Page 105 and 106:
6 Switch Forwarding Database (FDB)
- Page 107 and 108:
CONFIGURING FDB ENTRIES ASSOCIATING
- Page 109 and 110:
DISPLAYING FDB ENTRIES DISPLAYING F
- Page 111 and 112:
7 Spanning Tree Protocol (STP) Usin
- Page 113 and 114:
STP CONFIGURATIONS Two STPDs are de
- Page 115 and 116:
CONFIGURING STP ON THE SUMMIT CONFI
- Page 117 and 118:
CONFIGURING STP ON THE SUMMIT Table
- Page 119 and 120:
DISABLING AND RESETTING STP DISABLI
- Page 121 and 122:
8 Quality of Service (QoS) This cha
- Page 123 and 124:
BUILDING BLOCKS — Medium — High
- Page 125 and 126:
BUILDING BLOCKS EGRESS TRAFFIC GROU
- Page 127 and 128:
PORT QUEUE MONITOR You can assign a
- Page 129 and 130:
CONFIGURING QOS SAMPLE INGRESS MODE
- Page 131 and 132:
9 IP Unicast Routing This chapter d
- Page 133 and 134:
OVERVIEW OF IP UNICAST ROUTING POPU
- Page 135 and 136:
OVERVIEW OF IP UNICAST ROUTING Once
- Page 137 and 138:
OVERVIEW OF IP UNICAST ROUTING 8 As
- Page 139 and 140:
CONFIGURING IP UNICAST ROUTING CONF
- Page 141 and 142:
CONFIGURING DHCP/BOOTP RELAY VERIFY
- Page 143 and 144:
CONFIGURING DHCP/BOOTP RELAY Table
- Page 145 and 146:
ROUTING CONFIGURATION EXAMPLE Table
- Page 147 and 148:
DISPLAYING ROUTER SETTINGS config F
- Page 149 and 150:
10 Routing Protocols This chapter d
- Page 151 and 152:
OVERVIEW OF RIP OVERVIEW OF RIP RIP
- Page 153 and 154:
OVERVIEW OF OSPF OVERVIEW OF OSPF O
- Page 155 and 156:
OVERVIEW OF OSPF VIRTUAL LINKS In t
- Page 157 and 158:
CONFIGURING RIP Table 10-1: RIP Con
- Page 159 and 160:
RIP CONFIGURATION EXAMPLE 192.207.3
- Page 161 and 162:
RESETTING AND DISABLING RIP RESETTI
- Page 163 and 164:
CONFIGURING OSPF Table 10-4: OSPF C
- Page 165 and 166:
OSPF CONFIGURATION EXAMPLE Area 5 i
- Page 167 and 168:
RESETTING AND DISABLING OSPF SETTIN
- Page 169 and 170:
11 IP Multicast Routing This chapte
- Page 171 and 172:
CONFIGURING IP MULTICASTING ROUTING
- Page 173 and 174:
CONFIGURING IP MULTICASTING ROUTING
- Page 175 and 176:
DISPLAYING IP MULTICAST ROUTING SET
- Page 177 and 178:
12 Status Monitoring and Statistics
- Page 179 and 180:
STATUS MONITORING Table 12-1: Switc
- Page 181 and 182:
STATUS MONITORING Table 12-1: Switc
- Page 183 and 184:
PORT STATISTICS Table 12-1: Switch
- Page 185 and 186:
PORT MONITORING DISPLAY KEYS The fo
- Page 187 and 188:
SWITCH LOGGING LOCAL LOGGING The sw
- Page 189 and 190:
SWITCH LOGGING Table 12-5: Logging
- Page 191 and 192:
RMON A typical RMON setup consists
- Page 193 and 194:
RMON EVENT ACTIONS The actions that
- Page 195 and 196:
13 Using ExtremeWare Vista ExtremeW
- Page 197 and 198:
ACCESSING EXTREMEWARE VISTA ACCESSI
- Page 199 and 200:
SAVING CHANGES Table 13-1: Multi-Se
- Page 201 and 202:
14 Software Upgrade and Boot Option
- Page 203 and 204:
SAVING CONFIGURATION CHANGES SAVING
- Page 205 and 206:
BOOT OPTION COMMANDS BOOT OPTION CO
- Page 207 and 208:
A Safety Information IMPORTANT SAFE
- Page 209 and 210:
IMPORTANT SAFETY INFORMATION FUSE
- Page 211 and 212:
B Technical Specifications Physical
- Page 213 and 214:
C Troubleshooting If you encounter
- Page 215 and 216:
USING THE COMMAND-LINE INTERFACE Tr
- Page 217 and 218:
USING THE COMMAND-LINE INTERFACE VL
- Page 219 and 220:
Index A access levels 3-8 accounts,
- Page 221 and 222:
IP unicast routing BOOTP relay 9-10
- Page 223 and 224:
RMON alarm actions 12-17 Alarms gro
- Page 225 and 226:
Index of Commands C clear counters
- Page 227:
enable rip poisonreverse 10-8 enabl


