CATIA Teamcenter Interface - CMI.
CATIA Teamcenter Interface - CMI.
CATIA Teamcenter Interface - CMI.

You also want an ePaper? Increase the reach of your titles
YUMPU automatically turns print PDFs into web optimized ePapers that Google loves.
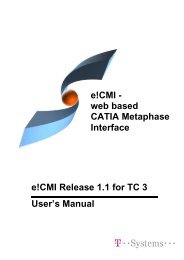
e!<strong>CMI</strong> -<br />
web based<br />
<strong>CATIA</strong> Metaphase<br />
<strong>Interface</strong><br />
e!<strong>CMI</strong> Release 1.1<br />
Installation &<br />
Administration Guide
Copyright<br />
© 1999, 2000, 2001, 2002, 2003 T-Systems International GmbH.<br />
All rights reserved. Printed in Germany.<br />
Contact<br />
T-Systems International GmbH<br />
BC EPDM/D<br />
Fasanenweg 5<br />
70771 Leinfelden-Echterdingen Germany<br />
cmi_support@t-systems.com<br />
www.cmi-support.com<br />
Manual History<br />
Version<br />
1.0<br />
1.1<br />
Date<br />
January 2003<br />
May 2003<br />
Trademarks<br />
<strong>CATIA</strong> is a registered trademark of Dassault Systèmes.<br />
Metaphase is a registered trademark of Metaphase Technology, Inc.<br />
<strong>Teamcenter</strong> is a registered trademark of EDS PLM Solutions.<br />
Names of other products mentioned in this manual are used only for identification<br />
purpose and may be trademarks of their companies.<br />
ii<br />
e!<strong>CMI</strong> Installation & Administration Manual
Preface<br />
This manual describes the installation and administration of e!<strong>CMI</strong>. e!<strong>CMI</strong> is the web<br />
based solution of <strong>CMI</strong> and depends on <strong>CMI</strong>.<br />
About this Guide<br />
This guide provides installation and configuration information for the web based <strong>CATIA</strong><br />
Metaphase <strong>Interface</strong> called e!<strong>CMI</strong>. Before using this guide, be sure you understand:<br />
the UNIX- / Windows (2000, NT) based operating system<br />
the administration of the <strong>CATIA</strong> system<br />
the administration of Collaboration Foundation (Metaphase) system<br />
the installation and administration of standard <strong>CMI</strong><br />
Related Documents<br />
The following manuals contain information about the usage of e!<strong>CMI</strong> and installation,<br />
usage and customizing of the standard <strong>CATIA</strong> Metaphase <strong>Interface</strong> called <strong>CMI</strong>:<br />
Manual Title<br />
Release<br />
<strong>CATIA</strong> Metaphase <strong>Interface</strong> Installation & Administration Guide 8.3<br />
<strong>CATIA</strong> Metaphase <strong>Interface</strong> User’s Manual 8.3<br />
<strong>CATIA</strong> Metaphase <strong>Interface</strong> Customizing Guide 8.3<br />
Web based <strong>CATIA</strong> Metaphase <strong>Interface</strong> User’s Manual 1.1<br />
Your Comments are Welcome<br />
Please feel free to give us your opinion; we are always interested in improving our<br />
publications. Mail your comments to:<br />
T-Systems International GmbH<br />
Business Center EPDM/D<br />
Fasanenweg 5<br />
70771 Leinfelden-Echterdingen Germany<br />
mailto: cmi_support@t-systems.com<br />
e!<strong>CMI</strong> Installation & Administration Manual<br />
iii
Table of Contents<br />
CHAPTER 1................................................................................................................... 1<br />
OVERVIEW.................................................................................................................... 1<br />
ASSUMPTIONS FOR THIS DOCUMENT................................................................................ 1<br />
SYSTEM AND SOFTWARE REQUIREMENTS FOR E!<strong>CMI</strong> ....................................................... 1<br />
SHIPMENT FOR E!<strong>CMI</strong>.................................................................................................... 2<br />
LOADING THE SOFTWARE FROM CD-ROM....................................................................... 2<br />
CHAPTER 2................................................................................................................... 3<br />
INSTALLATION OF THE E!<strong>CMI</strong> SOLUTION FOR PRODUCT COLLABORATION............................. 3<br />
PREREQUISITES ............................................................................................................ 3<br />
INSTALLATION OF E!<strong>CMI</strong>................................................................................................. 3<br />
CHAPTER 3................................................................................................................... 5<br />
CONFIGURATION NEEDED FOR USING E!<strong>CMI</strong>..................................................................... 5<br />
E!<strong>CMI</strong> USER ................................................................................................................. 5<br />
TRANSFER MAP AND <strong>CATIA</strong> SETTINGS............................................................................ 5<br />
CLASSPATH SETTINGS................................................................................................ 7<br />
CHAPTER 4................................................................................................................... 9<br />
INSTALLATION OF <strong>CATIA</strong> V5 - E!<strong>CMI</strong> MODULE ................................................................ 9<br />
LOADING E!<strong>CMI</strong>CATV5 SOFTWARE FROM CD-ROM........................................................ 9<br />
E!<strong>CMI</strong>CATV5 INSTALLATION........................................................................................ 10<br />
Configuring the installation..................................................................................... 10<br />
USER DEPENDENT CONFIGURATIONS ............................................................................. 17<br />
Testing the installation ........................................................................................... 17<br />
CHAPTER 5................................................................................................................. 21<br />
LICENSE CONFIGURATION............................................................................................. 21<br />
LICENSE MANAGER INSTALLATION ................................................................................. 21<br />
Loading licman Software from CD-ROM ................................................................ 21<br />
LICMAN Installation ............................................................................................... 21<br />
License Configuration ............................................................................................ 21<br />
e!<strong>CMI</strong> Installation & Administration Manual<br />
v
Table of Figures<br />
FIGURE 1: THE <strong>CMI</strong> PREFERENCES.................................................................................... 5<br />
FIGURE 2: THE E!<strong>CMI</strong> PREFERENCES................................................................................. 6<br />
FIGURE 3: DIRECTORY STRUCTURE OF THE <strong>CMI</strong>CATV5 INSTALLATION FILES........................ 10<br />
FIGURE 4: E!<strong>CMI</strong> TOOLBAR ............................................................................................. 18<br />
FIGURE 5: <strong>CATIA</strong> V5 GENERAL->GENERAL SETTINGS....................................................... 18<br />
FIGURE 6: <strong>CATIA</strong> V5 GENERAL->DOCUMENT SETTINGS.................................................... 19<br />
e!<strong>CMI</strong> Installation & Administration Manual<br />
vii
CHAPTER 1<br />
Overview<br />
The installation of the web based <strong>CATIA</strong> Metaphase <strong>Interface</strong> (e!<strong>CMI</strong>) contains the<br />
following steps.<br />
1. Installation of Collaboration Foundation 2.0 (server installation)<br />
2. Installation of standard <strong>CMI</strong> version 8.3 (or higher)<br />
3. Installation of a web application server (e.g. Websphere, Web Logic, Tomcat 3.3.1)<br />
4. Installation of Product Collaboration (thin client)<br />
with solution “Parts & Document Management” and solution “e!<strong>CMI</strong>” on the web<br />
application server<br />
5. Installation of <strong>CATIA</strong> V5 and the <strong>CATIA</strong> V5 module for e!<strong>CMI</strong><br />
Assumptions for this document<br />
1. Collaboration Foundation 2.0 has been installed including the following modules<br />
(required for Product Collaboration “Parts & Document Management”)<br />
OMF, APC, ISC, LCM, DMM, EDT<br />
For more information about installing Collaboration Foundation 2.0 please refer to the<br />
following installation manuals of the EDS documentation: “Installation on Windows<br />
2000/NT or Unix Servers”.<br />
2. The <strong>CMI</strong> and GMI servers have been installed within Collaboration Foundation 2.0.<br />
For more information about installing standard <strong>CMI</strong> please refer to the document:<br />
”<strong>CATIA</strong> Metaphase <strong>Interface</strong> Installation Manual, Release 8.3”.<br />
3. A web application server has been installed and set up (for example Websphere,<br />
Web Logic or Tomcat 3.3.1).<br />
4. Product Collaboration (solution “Parts & Document Management”) has been installed<br />
on the web application server and all installation files are in the directory<br />
WEB_ROOT.<br />
For more information about installing the solution “Parts & Document Management”<br />
please refer to the Chapter “Installing Web Tier Components” in the manual<br />
“Installation on Windows 2000 / NT / UNIX”.<br />
5. <strong>CATIA</strong> V5 is installed on your system.<br />
System and Software Requirements for e!<strong>CMI</strong><br />
<strong>Teamcenter</strong> Product Collaboration (thin client) on web application server<br />
on the following operation systems: Windows 2000 / NT<br />
All UNIX platforms<br />
Software requirements:<br />
Java Runtime Environment<br />
(version 1.3.1 or higher)<br />
e!<strong>CMI</strong> Installation & Administration Manual 1
<strong>CATIA</strong> V5 Client Version V5R8 GA Level or higher<br />
on the following operation systems: All UNIX platforms<br />
Windows 2000 / NT<br />
Shipment for e!<strong>CMI</strong><br />
The software will be delivered on a CD-ROM in ISO-9660 format containing the following<br />
parts (depending on desired operating system architecture):<br />
e!<strong>CMI</strong> solution for thin client<br />
<strong>CATIA</strong> V5 extension<br />
Licman 1.2 license manager<br />
Documents<br />
<br />
<br />
<br />
<br />
Loading the Software from CD-ROM<br />
The <strong>CMI</strong> product family software is distributed on a ISO-9660 formatted CD-ROM (“High<br />
Sierra”, hsfs, cdfs). Magnetic tape distribution is optionally available. The following steps<br />
describe how to mount the software CD-ROM.<br />
Log in as root user to a host with a CD-ROM drive. If your host does not have a CD-ROM<br />
drive, log into another host that is NFS-accessible to the installation host.<br />
(If necessary) Create a mount-point directory for the CD-ROM:<br />
# mkdir /cdrom<br />
Place the <strong>CMI</strong> CD-ROM in the drive. On Solaris and SGI hosts, the volume manager<br />
mounts the CD-ROM automatically, so you can skip the next step.<br />
Mount the CD-ROM:<br />
Note: CD-ROM device names vary from host to host. Thus, you may need to adjust the<br />
mount command listed below.<br />
Architecture Mnemonic Mount Command<br />
Solaris solaris2 not necessary<br />
HP-UX hpux mount –F cdfs –r/dev/dsk/c3d0s2 /cdrom<br />
IRIX 6 mips not necessary<br />
AIX 4 aix mount –o ro –v cdrfs /dev/cd0 /cdrom<br />
If the CD-ROM drive is not on the installation host, use NFS facilities to export the CD-<br />
ROM drive’s mount point from its host, and mount it on the installation host. For example:<br />
On the host with the CD-ROM drive:<br />
# exportfs –i –o ro /cdrom<br />
On the installation host:<br />
# mount drive-host:/cdrom /cdrom<br />
Now you can run the installation scripts as described in the following chapters.<br />
2 e!<strong>CMI</strong> Installation & Administration Manual
CHAPTER 2<br />
Installation of the e!<strong>CMI</strong> solution<br />
for Product Collaboration<br />
Prerequisites<br />
The EDS solution “Parts & Document Management” has been installed and your Web<br />
tier installation directory (WEB_ROOT) still exists on your computer.<br />
Installation of e!<strong>CMI</strong><br />
Copy the installation files for e!<strong>CMI</strong> (TSYSTEMS_E<strong>CMI</strong>.EXE (Windows) or<br />
TSYSTEMS_E<strong>CMI</strong>.TZ (Unix)) from the <strong>CMI</strong> CD-ROM to the WEB_ROOT directory where<br />
all the other installation files are.<br />
Copy the documentation installation files for e!<strong>CMI</strong> (TSYSTEMS_API_DOCS.EXE<br />
(Windows) or TSYSTEMS_API_DOCS.TZ (Unix)) from the <strong>CMI</strong> CD-ROM to the<br />
WEB_ROOT directory where all the other installation files are.<br />
Copy the two ICD files “toc_tsystems_ecmi.icd” and “toc_tsystems_ecmi_docs.icd”<br />
from the CD to the directory WEB_ROOT\icd.<br />
Run the installation program insweb.exe in WEB_ROOT and<br />
you will see the following:<br />
Web Components Installer Startup<br />
Main Menu<br />
1. Install Solutions<br />
2. Generate/Re-generate Web Application file<br />
3. Change MTI Host<br />
4. Change MTI Port<br />
5. Configure Cache Manager<br />
6. Enable/Disable Shared Login<br />
7. EXIT<br />
Please enter in command:<br />
Choose “Install Solutions” and therefore enter 1<br />
you will then see the following:<br />
e!<strong>CMI</strong> Installation & Administration Manual 3
Solutions Menu<br />
1. Parts & Document Management<br />
2. TeamCenter Toolkit<br />
3. TeamCenter Toolkit Java API Documentation<br />
4. e<strong>CMI</strong><br />
5. e<strong>CMI</strong> Java API Documentation<br />
6. Extended Enterprise<br />
7. Main Menu<br />
Please enter one solution number:<br />
Choose solution number 4 for installing the e!<strong>CMI</strong> components. The files will be extracted<br />
automatically.<br />
Choose solution number 5 for installing the e!<strong>CMI</strong> API documentation. The files will be<br />
extracted automatically.<br />
After successfully having installed e!<strong>CMI</strong>, choose number 7 “Main Menu” and then<br />
number 2 in the Main Menu “Generate/Re-generate Web Application file”.<br />
Copy this new created war-file to the deploy directory of your web application server. (e.g.<br />
for Tomcat this will be the webapps directory) and restart your web application server.<br />
First you have to do some configurations (see next chapter). After that you can start the<br />
mux and dispatcher. When mux and dispatcher are running you can try to log in and test<br />
this installation. Information about using e!<strong>CMI</strong> you can find in the document “Web based<br />
<strong>CATIA</strong> Metaphase <strong>Interface</strong> User’s Manual”.<br />
4 e!<strong>CMI</strong> Installation & Administration Manual
CHAPTER 3<br />
Configuration needed for using<br />
e!<strong>CMI</strong><br />
For running e!<strong>CMI</strong> properly you have to do some configuration first.<br />
e!<strong>CMI</strong> user<br />
The first thing is that all e!<strong>CMI</strong> users have to be created within the OMF client by an<br />
administrator like the usual OMF client users. Via the web browser there is no possibility<br />
to manage administration tasks yet.<br />
Transfer Map and <strong>CATIA</strong> settings<br />
For all e!<strong>CMI</strong> users you have to set some special <strong>CMI</strong> preferences and e!<strong>CMI</strong><br />
preferences.<br />
Therefore first open the “<strong>CMI</strong> Preferences” dialog box via<br />
<strong>CATIA</strong> Workbench à Options à Change Preferences à <strong>CMI</strong> Preferences.<br />
You have to change the values for working with the right <strong>CATIA</strong> system (V5) as you can<br />
see in Figure 1:<br />
Figure 1: The <strong>CMI</strong> Preferences<br />
e!<strong>CMI</strong> Installation & Administration Manual 5
The following preferences have to be set:<br />
Enable <strong>CATIA</strong> V5 Support<br />
Work With <strong>CATIA</strong><br />
Use <strong>CATIA</strong> V5 Product Files<br />
CATProduct Worklocation<br />
Description<br />
It is possible to send models to <strong>CATIA</strong><br />
V5. e!<strong>CMI</strong> allows handling of<br />
CATDrawing and CATPart.<br />
User can choose between work with<br />
<strong>CATIA</strong> V4 or <strong>CATIA</strong> V5.<br />
For e!<strong>CMI</strong> only <strong>CATIA</strong> V5 is supported<br />
yet!<br />
Preference permits handling of<br />
CATProduct files for <strong>CATIA</strong> V5. If not set<br />
no CATProducts will be sent to <strong>CATIA</strong><br />
V5.<br />
If the preference above (Use <strong>CATIA</strong> V5<br />
Product Files) is set to TRUE then it is<br />
required to set this preference, too.<br />
The worklocation normally is used as a<br />
storage place for newly created Product<br />
files.<br />
It is not possible yet to create new<br />
Product files in e!<strong>CMI</strong> therefore this<br />
directory will not be needed and it is<br />
supposed to set its value to any<br />
temporary directory.<br />
Value<br />
TRUE<br />
V5<br />
TRUE<br />
or<br />
FALSE<br />
/temp<br />
or<br />
C:\temp<br />
After setting all preferences you have to save these settings with the button “Save…” in<br />
the dialog window. Then drag&drop this saved preferences file onto the “Startup<br />
Preferences” in the Home Collection Browser.<br />
You have to drop it onto the Startup Preferences” in the Home Collection Browser. The<br />
changes will have effect the next time the user logs in again.<br />
The next step is to do some settings in the e!<strong>CMI</strong> preferences.Therefore first open the<br />
“<strong>CMI</strong> Preferences” dialog box via<br />
<strong>CATIA</strong> Workbench à Options à Change Preferences à e!<strong>CMI</strong> Preferences.<br />
You have to fill in valid values for the e!<strong>CMI</strong> Transfer Map of the user. The Transfer Map<br />
is the directory to which all <strong>CATIA</strong> models will be either downloaded or copied to when<br />
working with e!<strong>CMI</strong> and <strong>CATIA</strong> V5. It has to be the same directory as the <strong>CMI</strong>XMAP for<br />
<strong>CATIA</strong> V5 !!!<br />
Figure 2: The e!<strong>CMI</strong> Preferences<br />
6 e!<strong>CMI</strong> Installation & Administration Manual
The following preferences have to be set:<br />
e!<strong>CMI</strong> Transfer Map UNIX<br />
e!<strong>CMI</strong> Transfer Map Windows<br />
Description<br />
The directory for <strong>CATIA</strong> V5 files when<br />
working with e!<strong>CMI</strong> on a UNIX platform<br />
The directory for <strong>CATIA</strong> V5 files when<br />
working with e!<strong>CMI</strong> on a Windows<br />
platform<br />
Value<br />
Path to<br />
directory<br />
Path to<br />
directory<br />
After setting all preferences you have to save these settings with the button “Save…” in<br />
the dialog window. Then drag&drop this saved preferences file onto the “Startup<br />
Preferences” in the Home Collection Browser.<br />
You have to drop it onto the Startup Preferences” in the Home Collection Browser. The<br />
changes will have effect the next time the user logs in again.<br />
CLASSPATH settings<br />
The java classes (jar files) of xalan and xerces for XML transformation tasks need to be<br />
at the beginning of your CLASSPATH of the web application server. Without this settings<br />
e!<strong>CMI</strong> won’t work.<br />
Therefore you have to download the file xalan-j_2_4_1.zip (recommended version).<br />
You can find this for example at: http://xml.apache.org/xalan-j/<br />
Unpack the zip file and add the following three jar files to your CLASSPATH:<br />
CLASSPATH:<br />
“YOUR_PATH\xalan-j_2_4_1\bin\ xercesImpl.jar;YOUR_PATH\ xalan-j_2_4_1\bin\xmlapis.jar<br />
;YOUR_PATH\xalan-j_2_4_1\bin\xalan.jar<br />
e!<strong>CMI</strong> Installation & Administration Manual 7
CHAPTER 4<br />
Installation of <strong>CATIA</strong> V5 -<br />
e!<strong>CMI</strong> module<br />
The e!<strong>CMI</strong>CATV5 (e!<strong>CMI</strong>-<strong>CATIA</strong> V5 Integration) module of T-Systems International<br />
GmbH extends the <strong>CATIA</strong> V5 functionality to work with the <strong>Teamcenter</strong> e!<strong>CMI</strong> solution.<br />
You should perform the following steps with your <strong>CATIA</strong> system administrator. The<br />
e!<strong>CMI</strong>CATV5 module includes all of the supported platform data in a compressed file.<br />
Thus, you should choose an installation location for all <strong>CATIA</strong> V5 clients.<br />
In the following example sections it is supposed that the software will be installed in<br />
directory /catia/cmicatv5 on unix and c:\catia\cmicatv5 on Windows 2000. You can<br />
choose another destination for the module if you want.<br />
Loading e!<strong>CMI</strong>CATV5 Software from CD-ROM<br />
Mount CD-ROM. See chapter “Loading the Software from CD-ROM” .<br />
UNIX<br />
Change to any temporary installation directory:<br />
catusr~> cd /home/catusr<br />
Unpack the compressed file:<br />
catusr~> cat /cdrom/<strong>CMI</strong>CATV5_R10_V300.tar.Z|uncompress –c | tar xvf -<br />
Windows 2000<br />
Use the Windows Explorer to locate the d:\cmicatv5\<strong>CMI</strong>CATV5_V300.tar.Z file on<br />
the CD. Extract the content of the archive file to a temporary installation location.<br />
e!<strong>CMI</strong> Installation & Administration Manual 9
e!<strong>CMI</strong>CATV5 Installation<br />
Configuring the installation<br />
After you have successfully transferred the installation files to your installation host; the<br />
following steps will install the files and configure your installation.<br />
The <strong>CMI</strong>CATV5_R10_V300 Installation Directory has the following structure:<br />
<strong>CMI</strong>CATV5_Rx_Vy<br />
config<br />
data<br />
install<br />
licman<br />
unix<br />
nt_os<br />
aix_a<br />
hpux_a<br />
irix_a<br />
solaris_a<br />
intel_a<br />
unix<br />
nt_os<br />
Figure 3: Directory structure of the <strong>CMI</strong>CATV5 installation files<br />
The config directory contains the file cmiEnv.txt. During the installation (UNIX) the file is<br />
merged with the actual <strong>CATIA</strong> V5 environment.<br />
The config directory also contains sample <strong>CATIA</strong> V5 Configuration files for UNIX and<br />
Windows 2000. The unix configuration contains two sample environment settings for the<br />
shells sh and csh. The nt_os configuration contains a sample <strong>CATIA</strong> V5 Environment<br />
file for the <strong>CATIA</strong> V5 Environment editor.<br />
The data directory contains the binary distributions for the <strong>CMI</strong>CATV5 module for the<br />
supported operating system mnemonics.<br />
The supported operation systems and their mnemonics are:<br />
AIX4.3<br />
HPUX 11<br />
IRIX 6.5<br />
Solaris 2.7<br />
Windows 2000 SP2<br />
aix_a<br />
hpux_a<br />
irix_a<br />
solaris_a<br />
Intel_a<br />
UNIX<br />
F<br />
You do not need root access to install the e!<strong>CMI</strong> <strong>CATIA</strong> V5 module.<br />
The licman license manager must be installed on the <strong>CATIA</strong> V5 client host. If the <strong>CMI</strong><br />
<strong>CATIA</strong> V4 module is installed on this host the licman is already installed.<br />
Start the installation script and follow the instructions. Your installation setting will be<br />
stored in the file config.env. This file will be located in the same directory as the install.sh<br />
script.<br />
Catusr~> <strong>CMI</strong>CATV5_R10_V300/install/unix/install.sh<br />
*********************************************************<br />
10 e!<strong>CMI</strong> Installation & Administration Manual
* *<br />
* <strong>CMI</strong> <strong>CATIA</strong> V5 PRODUCT FAMILY INSTALLATION *<br />
* *<br />
* *<br />
* <strong>CMI</strong> <strong>CATIA</strong> V5 *<br />
* *<br />
* e!<strong>CMI</strong> <strong>CATIA</strong> V5 *<br />
* *<br />
* s!<strong>CMI</strong> <strong>CATIA</strong> V5 *<br />
* *<br />
* <strong>CMI</strong> <strong>CATIA</strong> V5 + Import Tool *<br />
* *<br />
* *<br />
* The installation performs two steps *<br />
* *<br />
* 1. Step: Configuration *<br />
* *<br />
* 2. Step: Installation *<br />
* *<br />
*********************************************************<br />
You can interrupt with cntr-C or continue with Return<br />
*********************************************************<br />
* *<br />
* Which Products of the <strong>CMI</strong> Family do you want to *<br />
* install *<br />
* *<br />
* 1. <strong>CMI</strong> *<br />
* (<strong>CATIA</strong> Metaphase / <strong>Teamcenter</strong> <strong>Interface</strong>) *<br />
* *<br />
* 2. e!<strong>CMI</strong> *<br />
* (<strong>CATIA</strong> <strong>Teamcenter</strong> Thin Client Web <strong>Interface</strong>) *<br />
* *<br />
* 3. s!<strong>CMI</strong> *<br />
* (Supplier Integration of <strong>CMI</strong>) *<br />
* *<br />
* 4. <strong>CMI</strong> + Import Tool *<br />
* (<strong>CMI</strong> + Import of existing <strong>CATIA</strong> V5 strucures to *<br />
* Metaphase / <strong>Teamcenter</strong>) *<br />
* *<br />
* 5. <strong>CMI</strong> + Import Tool + e!<strong>CMI</strong> + s!<strong>CMI</strong> *<br />
* (Complete Installation only useful for evaluation) *<br />
* *<br />
* Note: Every package needs a different license *<br />
* *<br />
*********************************************************<br />
Which package you want to install[1]:2<br />
*********************************************************<br />
* *<br />
* Installing Package: *<br />
* e!<strong>CMI</strong> <strong>CATIA</strong> V5 package<br />
* *<br />
* 1. Step: Configuration *<br />
* *<br />
*********************************************************<br />
In which directory would you like to install<br />
the e!<strong>CMI</strong> <strong>CATIA</strong> V5 package<br />
Type the full path or hit return to accept the default.<br />
[/home/catusr/cmicatv5_r10_v300]<br />
Installation directory of standard <strong>CATIA</strong>.<br />
Type the full path or hit return to accept the default.<br />
e!<strong>CMI</strong> Installation & Administration Manual 11
[/usr/DassaultSystemes/B10]<br />
Environment file of standard <strong>CATIA</strong><br />
Type the full path or hit return to accept the default.<br />
[/CATEnv/<strong>CATIA</strong>.V5R10.B10.txt]<br />
e!<strong>CMI</strong> <strong>CATIA</strong> V5 package<br />
needs a local directory to perform the file exchange<br />
between Metaphase / <strong>Teamcenter</strong> OS user and <strong>CATIA</strong>.<br />
This directory is located in the $HOME directory of<br />
each user, e.g. if you want to use $HOME/xmap then type<br />
xmap. Make sure this directory exists for every user.<br />
[xmap]<br />
*********************************************************<br />
* e !<strong>CMI</strong> <strong>CATIA</strong> V5 package Installation<br />
* *<br />
* 2. Step: Installation *<br />
* *<br />
*********************************************************<br />
* *<br />
* If you are not sure if all settings are correct *<br />
* (see below) this is your last chance to interrupt *<br />
* the installation and make corrections in config.env: *<br />
* *<br />
*********************************************************<br />
*<br />
* Installation dir : /home/catusr/cmicatv5_r10_v300<br />
* <strong>CMI</strong> exchange map : $HOME/xmap<br />
* <strong>CATIA</strong> V5 environment : /CATEnv/<strong>CATIA</strong>.V5R10.B10.txt<br />
*<br />
*********************************************************<br />
You can interrupt with cntr-C or continue with Return<br />
For which architecture do you wish to make this installation<br />
type one of the following or enter for all:<br />
aix_a hpux_b irix_a solaris_a :<br />
install for all architectures!<br />
/home/catusr/cmicatv5_r10_v300 created<br />
/home/catusr/cmicatv5_r10_v300/config created<br />
installing aix_a<br />
aix_a/<br />
aix_a/code/<br />
aix_a/code/productIC/<br />
aix_a/code/productIC/<strong>CMI</strong>FrameworkIC.script<br />
aix_a/code/lib/<br />
aix_a/code/lib/<strong>CMI</strong>Addin.exp<br />
aix_a/code/lib/<strong>CMI</strong>Backbone.exp<br />
< installing many files ><br />
Generating new environment files<br />
. . . . . . . . . . . . . . . . . . . . . . . . . . . . . . . . . . .<br />
. . . . . . . . . . . . . . . . . . . . . . . . . . . . . . . . . . .<br />
. . . . . . . . . . . . . . . . . . . . . . . . . . . . . . . . . . .<br />
. . . . . . . . . . . .<br />
Do you wish to install the license manager<br />
now y/n: [y]<br />
Debis License Manager 1.2 Installation<br />
--------------------------------------<br />
12 e!<strong>CMI</strong> Installation & Administration Manual
Modules are available for the following operating systems :<br />
aix_4.3.2 aix_4.3.3 hp7_10.20 hp7_10.20_pa2.0 hp7_11.00 sgi_6.5<br />
sgi_6.5_mips4 sol_5.7<br />
Specify the operating system(s) identifier <br />
selected archs = aix_4.3.3 hp7_11.00 sgi_6.5_mips4 sol_5.7<br />
Using script installation directory<br />
/home/catusr/cmicatv5_r10_v300/licman ...<br />
Using binary installation directory<br />
/home/catusr/cmicatv5_r10_v300/licman/bin/aix_a ...<br />
Installing shell scripts ...<br />
Installing modules for operating system aix_4.3.3 ...<br />
Using binary installation directory<br />
/home/catusr/cmicatv5_r10_v300/licman/bin/hpux_b ...<br />
Installing modules for operating system hp7_11.00 ...<br />
Using binary installation directory<br />
/home/catusr/cmicatv5_r10_v300/licman/bin/irix_a ...<br />
Installing modules for operating system sgi_6.5_mips4 ...<br />
Creating installation directory<br />
/home/catusr/cmicatv5_r10_v300/licman/bin/solaris_a ...<br />
Installing modules for operating system sol_5.7 ...<br />
*********************************************************<br />
* *<br />
* <strong>CMI</strong> <strong>CATIA</strong> V5 Installation finished *<br />
* *<br />
*********************************************************<br />
* *<br />
* e!<strong>CMI</strong> <strong>CATIA</strong> V5 package Licese:<br />
* To get a trial license please fill the form at: *<br />
* http://www.cmi-support.com/trial_license.html *<br />
* Copy the licenses (clients) file to *<br />
* /home/catusr/cmicatv5_r10_v300/licman/data<br />
* *<br />
* You can start <strong>CATIA</strong> V5 with the script *<br />
* cmicatstart.sh or cmicatstart.csh *<br />
* in the installation directory *<br />
* /home/catusr/cmicatv5_r10_v300<br />
* *<br />
* For more information refer to the file *<br />
* /home/catusr/cmicatv5_r10_v300/README<br />
* *<br />
*********************************************************<br />
F<br />
The installation procedure creates two scripts to launch <strong>CATIA</strong> V5 with <strong>CMI</strong>. One can be<br />
used if you use a C-shell the other if you use a K-shell in your pdmsetup.<br />
The start scripts use the new generated <strong>CATIA</strong> V5 environment file “cmicatiaenv.txt”.<br />
This environment includes the old <strong>CATIA</strong> V5 environment and the <strong>CMI</strong> settings.<br />
If you already have an existing licman installation you have to change the licman<br />
configuration in the start script.<br />
It is not possible to have more than one licman installation on one host.<br />
e!<strong>CMI</strong> Installation & Administration Manual 13
The start script for the C-shell looks like this:<br />
#!/usr/bin/csh –f<br />
#########################################################################<br />
# #<br />
# Example start script to start <strong>CATIA</strong> V5 with a <strong>CMI</strong> product #<br />
# #<br />
#########################################################################<br />
# directory of the <strong>CMI</strong> <strong>CATIA</strong> V5 installation<br />
setenv <strong>CMI</strong>_INSTDIR /home/catusr/cmicatv5_r10_v300<br />
# directory of the <strong>CATIA</strong> V5 installation<br />
setenv <strong>CMI</strong>_CATINSTDIR /usr/DassaultSystemes/B10<br />
# name of the <strong>CATIA</strong> environment<br />
setenv <strong>CMI</strong>_CATENVNAME cmicatiaenv.txt<br />
# <strong>CATIA</strong> architecture<br />
setenv <strong>CMI</strong>_OS `$<strong>CMI</strong>_CATINSTDIR/GetOSDS`<br />
# choose architecture<br />
switch (`uname`)<br />
case AIX:<br />
setenv LIC_OS AIX<br />
breaksw<br />
case HP-UX:<br />
setenv LIC_OS HP-UX<br />
breaksw<br />
case IRIX*:<br />
setenv LIC_OS IRIX<br />
breaksw<br />
case SunOS<br />
setenv LIC_OS SunOS<br />
breaksw<br />
default:<br />
echo "No OS found"<br />
exit 1<br />
endsw<br />
# debis Licman installation<br />
setenv debisLICDIR /home/catusr/cmicatv5_r10_v300/licman/data<br />
setenv debisLICBIN /home/catusr/cmicatv5_r10_v300/licman/bin/$LIC_OS<br />
# launch licman<br />
/home/catusr/cmicatv5_r10_v300/licman/licman12 lld<br />
# launch <strong>CATIA</strong> V5<br />
setenv CMD "$<strong>CMI</strong>_CATINSTDIR/$<strong>CMI</strong>_OS/code/command/catstart"<br />
$CMD -env $<strong>CMI</strong>_CATENVNAME -direnv $<strong>CMI</strong>_INSTDIR/config<br />
The README shows additional information about the installation / configuration of the<br />
<strong>CATIA</strong> V5 part of <strong>CMI</strong><br />
*********************************************************<br />
* *<br />
* <strong>CMI</strong> <strong>CATIA</strong> V5 package README<br />
* *<br />
*********************************************************<br />
1. Contact<br />
2. Licensing<br />
3. Adapting <strong>CMI</strong> <strong>CATIA</strong> V5<br />
1. Contact<br />
14 e!<strong>CMI</strong> Installation & Administration Manual
T-Systems International GmbH<br />
Fasanenweg 5<br />
70771 Leinfelden-Echterdingen<br />
Germany<br />
http://www.cmi-support.com<br />
cmi_support@t-systems.com<br />
2. Licensing<br />
1 License:<br />
To get a trial license please fill the form at:<br />
http://www.cmi-support.com/trial_license.html<br />
Copy the licenses (clients) file to<br />
/home/catusr/cmicatv5_r10_v300/licman/data<br />
For more information refer to:<br />
/home/catusr/cmicatv5_r10_v300/licman/doc/licman12.pdf<br />
3. Adapting <strong>CMI</strong> <strong>CATIA</strong> V5<br />
You can start <strong>CATIA</strong> V5 with one of the following scripts:<br />
/home/catusr/cmicatv5_r10_v300/cmicatstart.sh<br />
(use this start script if you work with a k-shell: sh / ksh / bash)<br />
/home/catusr/cmicatv5_r10_v300/cmicatstart.csh<br />
(use this start script if you work with a c-shell: csh / tcsh)<br />
The start scripts use the file cmicatiaenv.txt to get the<br />
<strong>CATIA</strong> V5 environment.<br />
Environment files (all containing the same environment):<br />
/home/catusr/cmicatv5_r10_v300/config/cmicatiaenv.txt<br />
/home/catusr/cmicatv5_r10_v300/config/cmicatiaenv.ksh<br />
/home/catusr/cmicatv5_r10_v300/config/cmicatiaenv.csh<br />
To start <strong>CATIA</strong> V5 without the start script use:<br />
( sh / ksh / bash )<br />
# source <strong>CATIA</strong> V5 environment<br />
. /home/catusr/cmicatv5_r10_v300/config/cmicatiaenv.ksh<br />
# set licman environment and start licman<br />
debisLICDIR=/home/catusr/cmicatv5_r10_v300/licman/data<br />
export debisLICDIR<br />
debisLICBIN=/home/catusr/cmicatv5_r10_v300/licman/bin/$OSDS<br />
export debisLICBIN<br />
/home/catusr/cmicatv5_r10_v300/licman/licman12 lld<br />
# start <strong>CATIA</strong><br />
CNEXT<br />
( csh / tcsh )<br />
# source <strong>CATIA</strong> V5 environment<br />
source /home/catusr/cmicatv5_r10_v300/config/cmicatiaenv.csh<br />
# set licman environment and start licman<br />
setenv debisLICDIR /home/catusr/cmicatv5_r10_v300/licman/data<br />
setenv debisLICBIN /home/catusr/cmicatv5_r10_v300/licman/bin/$OSDS<br />
/home/catusr/cmicatv5_r10_v300/licman/licman12 lld<br />
# start <strong>CATIA</strong><br />
CNEXT<br />
Change of the <strong>CMI</strong> <strong>CATIA</strong> environment:<br />
e!<strong>CMI</strong> Installation & Administration Manual 15
If you change the <strong>CMI</strong> <strong>CATIA</strong> environment please provide the<br />
changes to the 3 environment files the same way.<br />
/home/catusr/cmicatv5_r10_v300/config/cmicatiaenv.txt<br />
/home/catusr/cmicatv5_r10_v300/config/cmicatiaenv.ksh<br />
/home/catusr/cmicatv5_r10_v300/config/cmicatiaenv.csh<br />
Variable<br />
<strong>CMI</strong>XMAP<br />
Value Description<br />
exchange directory between Metaphase/<br />
<strong>Teamcenter</strong> and <strong>CATIA</strong> V5<br />
<strong>CMI</strong>_CALC_BBOX ON calculate bounding boxes<br />
<strong>CMI</strong>_DEBUG ON generate debug output of the <strong>CMI</strong><br />
<strong>CATIA</strong> module.<br />
Windows 2000<br />
Use the Windows Explorer to copy the intel_a directory from the temporary installation<br />
location to the installation directory (e.g. c:\catia\cmicatv5)<br />
Use the Windows Explorer to copy the sample <strong>CATIA</strong> Environment file to the <strong>CATIA</strong><br />
Environment directory.<br />
Edit the sample environment scripts with an editor of your choice.<br />
<strong>CMI</strong>V5DIR must point to the CatiaV5Module install directory. 'intel_a' must be included.<br />
For example: c:\catia\cmicatv5\intel_a<br />
DSINSTALLDIR points to the main <strong>CATIA</strong> V5 install directory. for example: c:\Program<br />
Files\Dassault Systemes<br />
set <strong>CMI</strong>V5DIR=c:\catia\cmicatv5\intel_a<br />
set DSINSTALLDIR=c:\Program Files\Dassault Systemes<br />
in a command shell<br />
or for the main environment with<br />
MyComputer->properties->advanced->Environment->add<br />
For the Installation of the license manager please refer to the Licman 1.2 Installation<br />
Manual.<br />
The licman license manager must installed on the <strong>CATIA</strong> V5 client host, please refer to<br />
section<br />
License manager installation on page 21.<br />
16 e!<strong>CMI</strong> Installation & Administration Manual
User dependent configurations<br />
Name of<br />
Environment Variable<br />
<strong>CMI</strong>XMAP<br />
The following Environment settings are possible for the user<br />
Short Description<br />
location of the cmi exchange map<br />
can be the same as the exchange map<br />
for the <strong>CMI</strong> <strong>CATIA</strong>V5 module (see<br />
Fehler! Verweisquelle konnte nicht<br />
gefunden werden. on page Fehler!<br />
Textmarke nicht definiert.)<br />
<strong>CMI</strong>_CALC_BBOX Calculate bounding boxes ON<br />
Possible Values<br />
<strong>CMI</strong>_DEBUG<br />
generate debug output of the <strong>CMI</strong><br />
<strong>CATIA</strong> module.<br />
ON<br />
Testing the installation<br />
Common prerequisites<br />
1. The <strong>CMI</strong>XMAP (<strong>CMI</strong> exchange map) environment variable must point to a directory<br />
with write permissions and has to be the same as the TransferMap in the <strong>CMI</strong><br />
Preferences.<br />
2. The debisLICDIR environment variable must point to licman installation directory.<br />
3. The licman license manager must be started.<br />
4. For testing purpose,(using the functionality), the e!<strong>CMI</strong> browser must be started and<br />
the <strong>CATIA</strong> Workbench (in Metaphase) must be opened.<br />
UNIX<br />
Source the environment scripts<br />
start the <strong>CATIA</strong> V5 executable<br />
CNEXT<br />
Windows 2000<br />
Start <strong>CATIA</strong> V5 with the following commands from a command shell (CNEXT.exe must<br />
be found in the path set by your PATH environment variable)<br />
set CNEXTOUTPUT=CONSOLE<br />
(to open a command Window with the <strong>CATIA</strong> output)<br />
CNEXT.exe -env Catia<strong>CMI</strong>Env -direnv C:\CatiaV5Env\CATEnv<br />
(C:\CatiaV5Env is the <strong>CATIA</strong> Environment directory, this Directory is chosen as an<br />
example)<br />
<strong>CATIA</strong> V5<br />
After the <strong>CATIA</strong> V5 has started the following message should appear in the command<br />
window:<br />
"@(#)###################################"<br />
"@(#)# <strong>CMI</strong> <strong>CATIA</strong>V5 Module #"<br />
"@(#)# Version: 3.0 #"<br />
"@(#)# <strong>CATIA</strong>V5R10 #"<br />
"@(#)# (c) T-Systems 2002 #"<br />
e!<strong>CMI</strong> Installation & Administration Manual 17
"@(#)###################################"<br />
e!<strong>CMI</strong>: Module Number 1017 : license successful allocated<br />
The License Module Number may vary.<br />
Figure 4: e!<strong>CMI</strong> Toolbar<br />
The e!<strong>CMI</strong> Toolbar should be present if a CATProduct, CATPart, or an CATDrawing is<br />
the active <strong>CATIA</strong>V5 window, because the <strong>CMI</strong> Toolbar is only present in the Product<br />
Structure, Part Design and Drafting workshop.<br />
In the <strong>CATIA</strong> Settings the following options must be set as described below:<br />
The Load Referenced documents option must be set in Tools->Options-> General<br />
settings (see Figure 5).<br />
Figure 5: <strong>CATIA</strong> V5 General->General Settings<br />
In the Linked Document localization the Options Folder of the link and Folder of the<br />
pointing document must be set to yes (see Figure 6).<br />
18 e!<strong>CMI</strong> Installation & Administration Manual
Figure 6: <strong>CATIA</strong> V5 General->Document Settings<br />
For <strong>CMI</strong> functionality please refer to the <strong>CATIA</strong> Metaphase <strong>Interface</strong> User’s Manual.<br />
e!<strong>CMI</strong> Installation & Administration Manual 19
CHAPTER 5<br />
License configuration<br />
License manager installation<br />
Loading licman Software from CD-ROM<br />
Mount CD-ROM. See chapter “Loading the Software from CD-ROM” on page 1.<br />
UNIX<br />
Windows 2000<br />
The licman installation is part of the <strong>CMI</strong> <strong>CATIA</strong> V5 module installation.<br />
Use the Windows Explorer to locate the d:\licman12\ licman12win2000.zip file on<br />
the CD. Extract the content of the archive file to a temporary installation<br />
location.<br />
LICMAN Installation<br />
Please refer to the Licman Installation Manual (Licman.pdf) located on the CD in the<br />
licman12 folder.<br />
License Configuration<br />
The use of <strong>CMI</strong> is controlled by a license manager. Thus, to run <strong>CMI</strong> a license file and a<br />
license manager installation is needed. The license manager is a part of this delivery.<br />
If you are new with <strong>CMI</strong> and you are not owner of a license file, contact us for a<br />
temporary license (cmi_support@t-systems.de). For license file generation we need only<br />
a free port number at your <strong>CATIA</strong> machine.<br />
Client/Server file<br />
Only if you have a floating license, you need to put a file called “clients” into the<br />
debisLICDIR on the client machine.<br />
This file is a table that describes which client (LLD) machines should use which GLD<br />
host.<br />
The format is like follows:<br />
Each line contains the name or IP of a client machine, followed by the name or IP of the<br />
GLD server host. On subsequent lines you can omit the server host if it is the same.<br />
You can use a “*” on the last line, clients that are not explicitly given will use the current<br />
GLD host.<br />
Example:<br />
clienthost1<br />
clienthost2<br />
clienthost3<br />
serverhost1<br />
serverhost2<br />
e!<strong>CMI</strong> Installation & Administration Manual 21
*<br />
In this example “clienthost1” and “clienthost2” will use the GLD on “serverhost1”,<br />
“clienthost3” and all other clients will use “serverhost2”.<br />
22 e!<strong>CMI</strong> Installation & Administration Manual