2012 CX-9 Smart Start Guide - Mazda
2012 CX-9 Smart Start Guide - Mazda
2012 CX-9 Smart Start Guide - Mazda
You also want an ePaper? Increase the reach of your titles
YUMPU automatically turns print PDFs into web optimized ePapers that Google loves.
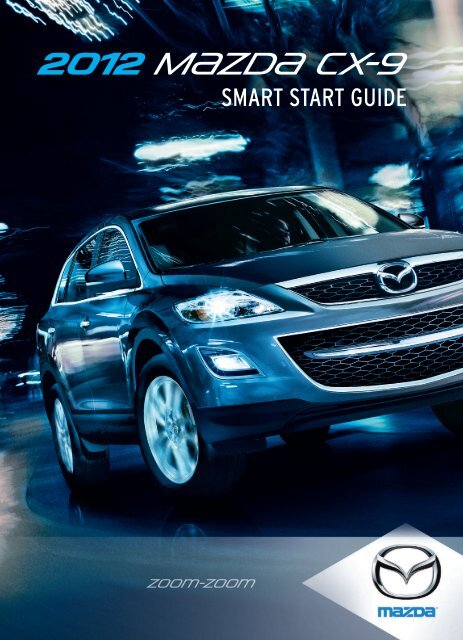
<strong>2012</strong> M{zd{ cx-9<br />
SMART START GUIDE<br />
zoo}-zoo}
Key<br />
www.<strong>Mazda</strong>USA.com<br />
Advanced Key<br />
Lock<br />
Unlock<br />
KEYLESS ENTRY SYSTEM<br />
ADVANCED KEYLESS ENTRY SYSTEM<br />
• This system allows you to lock and<br />
unlock the doors, open the liftgate and<br />
even start the engine without taking<br />
the key out of your pocket or purse.<br />
While Carrying the Advanced Key…<br />
• Unlock the driver’s door by pushing<br />
the driver’s door request switch once.<br />
• Unlock all doors and the liftgate<br />
by pushing the driver’s door request<br />
switch twice or by pushing the<br />
passenger’s door request switch<br />
or the liftgate request switch.<br />
• Lock all doors and the liftgate<br />
by pushing the driver’s door or<br />
passenger door request switch or<br />
liftgate request switch once.<br />
• Open the front windows and moon<br />
roof by pushing the unlock button on<br />
the advanced key and then pushing<br />
again and holding; release to stop.<br />
• Close front windows and moon roof<br />
by pushing and holding the driver’s<br />
door request switch; release to stop.<br />
This system remotely locks and unlocks the doors and the liftgate, and opens<br />
the power windows and moon roof.<br />
Release Button<br />
• Push to extend key.<br />
• Push & fold to retract key.<br />
Unlock<br />
<br />
Liftgate<br />
Panic Alarm<br />
Door Request Switch<br />
Liftgate Request Switch<br />
Lock<br />
• Push once to lock all<br />
doors and liftgate.<br />
• Push twice (within five<br />
seconds) for horn sound<br />
verification that all doors<br />
are locked.<br />
STARTING THE ENGINE<br />
While Carrying the Advanced Key…<br />
• <strong>Start</strong> the engine by pushing the start knob in and turning it (like a<br />
normal key) while depressing the brake pedal.<br />
• Shut the engine OFF by turning the start knob to the ACC position<br />
and then pushing in and turning to the Lock position.<br />
• The KEY indicator light will show green when the advanced key is<br />
detected. If the KEY indicator light flashes green, the advanced key<br />
transmitter battery power is low.<br />
With the Auxiliary Key…<br />
1 To start engine, remove the <strong>Start</strong> knob<br />
cover by squeezing both release<br />
buttons and pulling the cover off.<br />
2 Push the key release to remove the<br />
auxiliary key.<br />
3 Insert the auxiliary key into the key<br />
cylinder and turn it to start the engine.<br />
Genuine <strong>Mazda</strong> Accessory Remote<br />
<strong>Start</strong> is available at your <strong>Mazda</strong> Dealer.<br />
LIFTGATE<br />
• To open, unlock the liftgate, pull up on<br />
the handle and raise the liftgate.<br />
• To close, push liftgate down until it<br />
securely locks, but do not slam.<br />
POWER LIFTGATE<br />
Liftgate<br />
Handle<br />
Release Buttons<br />
Liftgate Handle<br />
Power Liftgate Switch<br />
• To open or close using the advanced keyless transmitter, unlock the<br />
liftgate and push and hold the open/close button for one second or more.<br />
• To open or close from the driver’s seat, unlock the liftgate and push and<br />
hold the power liftgate switch on the dashboard (see Driver’s View) for<br />
one second or more.<br />
• To close when the liftgate is open, push and hold the power liftgate<br />
switch located on the lower edge of the liftgate panel for one second<br />
or more.<br />
• Push once to unlock<br />
driver’s doors.<br />
• Push twice (within three<br />
Panic Alarm<br />
seconds) to unlock all<br />
• Push for one second or<br />
doors and liftgate.<br />
more to activate alarm.<br />
Power liftgate will only operate under the following conditions:<br />
• Push twice and hold<br />
• Push Lock, Unlock, or<br />
1 to open front windows<br />
Panic Alarm to turn<br />
1 The power liftgate is unlocked.<br />
2<br />
and moon roof.<br />
Retractable Key alarm off.<br />
2 The shift lever is in park (P) when the ignition is switched ON.
Seats<br />
www.<strong>Mazda</strong>USA.com<br />
ELECTRONICALLY OPERATED SEAT W/MEMORY<br />
Recline Switch<br />
Push forward or backward<br />
to adjust seatback angle.<br />
Slide/Tilt Switch<br />
Seat can be moved back<br />
and forth, raised, lowered,<br />
or tilted with this control.<br />
Memory Seat Switch<br />
Lumbar Switch<br />
To Program the Driver’s Seat Position<br />
1 Park the vehicle.<br />
2 Adjust the seat to the desired position using the slide/tilt and<br />
recline switches.<br />
3 Push the memory seat SET button followed by one of the programming<br />
buttons (1-3) until a beep is heard. Programming is now complete.<br />
Program the remaining two buttons as desired.<br />
NOTE: You can also program a seat position for each advanced key/retractable type<br />
key used with the vehicle. See Owner’s Manual for programming instructions.<br />
To Move the Seat to a Programmed Position<br />
Push forward or backward to increase or<br />
decrease lumbar support.<br />
1 Shift the selector lever to the P position.<br />
2 Push the programming button (1-3) that you selected when<br />
programming your seat position.<br />
SPLIT FOLDING THIRD-ROW SEAT<br />
To create a flat luggage compartment<br />
space, fold the seatbacks forward.<br />
1 Open liftgate.<br />
2 Lower head restraints.<br />
3 Pull each strap on the rear of<br />
the seat while pushing the left<br />
and right seat forward to lay flat.<br />
To Return to the Original Position<br />
Pull the strap to return the seatback to the original position.<br />
THIRD-ROW SEAT ACCESS<br />
• Pull the third-row seat access lever on the<br />
side of the second-row seatback to fold<br />
and slide the seat forward to access<br />
third-row seating.<br />
• Return the second-row seatback to the<br />
normal upright position by pulling up on<br />
the seatback until it locks into place.<br />
• Slide the second-row seat forward or back<br />
for proper legroom using the lever under<br />
the front of the seat.<br />
NOTE: The third row seats are equipped with foldable head<br />
restraints. To fold the head restraint, pull the strap on the back<br />
of the head restraint and fold the head restraint downward. To<br />
return the head restraint to its upright position, lift it upward.<br />
SECOND ROW SEATBACK RECLINE<br />
Straps<br />
Seatback folding<br />
lever<br />
Third-row seat<br />
access lever<br />
Strap<br />
To recline the seatback, lean forward slightly while folding lever. Then lean<br />
back to the desired position and release the lever.<br />
FOLDING THE SECOND-ROW SEATS<br />
1 Unfasten the lap portion of the center-rear seat belt.<br />
2 Slide seat all the way back toward rear of vehicle.<br />
3 Lower head restraints.<br />
4 Pull the seatback folding lever and fold the seatback forward.<br />
3 4
Driver’s View (shown with optional<br />
Navigation System)<br />
www.<strong>Mazda</strong>USA.com<br />
LIGHTING/TURN SIGNALS<br />
(P. 9)<br />
INFORMATION<br />
DISPLAY<br />
(PP. 14, 15)<br />
HAZARD<br />
WARNING<br />
NAVIGATION/<br />
AUDIO<br />
(PP. 21-24)<br />
PASSENGER<br />
AIRBAG OFF<br />
INDICATOR 1<br />
BLIND SPOT<br />
MONITORING<br />
(BSM)<br />
(P. 13)<br />
POWER<br />
LIFTGATE<br />
SWITCH<br />
(P. 2)<br />
AUDIO WITHOUT<br />
NAVIGATION<br />
(PP. 17-18)<br />
AUDIO WITHOUT<br />
NAVIGATION<br />
(PP. 19-20)<br />
HEADLIGHT<br />
LEVELING<br />
(P. 9)<br />
TRACTION<br />
CONTROL<br />
SYSTEM (TCS)<br />
HOOD<br />
RELEASE<br />
BLUETOOTH ®<br />
HANDS-FREE<br />
(P. 25)/<br />
AUDIO<br />
(PP. 17-22)<br />
TILT/TELESCOPING<br />
STEERING WHEEL<br />
LEVER (behind<br />
steering wheel)<br />
CRUISE CONTROL/<br />
NAVIGATION VOICE<br />
RECOGNITION<br />
5 than approximately 66 lbs. Always wear your seat belt and secure children in the rear seats in 6<br />
1<br />
WIPER/<br />
WASHER<br />
(P. 10)<br />
CLIMATE<br />
CONTROL<br />
(PP. 15-16)<br />
SEAT<br />
WARMERS<br />
(PP. 15-16)<br />
ACCESSORY<br />
SOCKET<br />
This indicator light illuminates to remind you that the front passenger’s front/side airbags and seat belt<br />
pretensioner will not deploy during a collision. The reason for this is that the weight in the seat is less<br />
appropriate child restraints. See the Owner’s Manual for important information on this safety feature.
Instrument Cluster<br />
The instrument cluster has a dimmer function that<br />
can be cancelled to make the illumination brighter<br />
during the day when the headlights are on. If<br />
the illumination is too dim during the day,<br />
press the knob, or if the illumination does<br />
not dim when turning on the headlights<br />
at night, press the knob.<br />
When dimmed, rotate the<br />
knob to adjust the brightness<br />
of the illumination.<br />
www.<strong>Mazda</strong>USA.com<br />
INSTRUMENT<br />
CLUSTER DIMMER 1<br />
Low Fuel Level<br />
KEY KEY Warning Light (RED)<br />
Advanced key not detected<br />
or transmitter battery is dead.<br />
KEY KEY Indicator Light (GREEN)<br />
On: Advanced key detected; engine<br />
is ready to start.<br />
Flashing: Advanced key battery is low.<br />
Check Fuel Cap<br />
ABS (Antilock Brake<br />
System) Malfunction<br />
Lights On (Exterior)<br />
FUEL GAUGE TACHOMETER SHIFT LEVER<br />
ODOMETER/ SPEEDOMETER ENGINE COOLANT TRIP METER<br />
POSITION INDICATOR TRIP METER<br />
TEMPERATURE GAUGE SELECTOR 2<br />
GLOSSARY OF WARNING AND INDICATOR LIGHTS<br />
NOTE: See Owner’s Manual for more details and explanations.<br />
TCS<br />
OFF<br />
BSM<br />
OFF<br />
Tire Pressure<br />
Monitoring System<br />
(TPMS) Warning Light<br />
On/Warning Beep: Low tire<br />
pressure in one or more tires.<br />
Flashing: TPMS Malfunction<br />
TCS OFF<br />
(Traction Control System)<br />
Charging System Malfunction<br />
Powertrain Malfunction/<br />
Reduced Power<br />
BSM OFF<br />
(Blind Spot Monitoring)<br />
Check Engine Light<br />
NOTE: Low ambient temperature and/or high altitude causes tire pressures to drop<br />
and may turn the TPMS warning light on. If the warning light comes on, check the tire<br />
Brake Warning Light<br />
Parking brake on/low brake<br />
fluid/malfunction<br />
Turn Signals/Hazard<br />
Warning Indicator Lights<br />
Automatic Transmission<br />
Malfunction<br />
Shift Position Indicator Light<br />
Headlight High Beams On<br />
Traction Control System<br />
(TCS)/Dynamic Stability<br />
Control (DSC)<br />
On: TCS/DSC malfunction<br />
Flashing: TCS/DSC operating<br />
Air Bag/Front Seat Belt<br />
Pretensioner System<br />
Malfunction<br />
Low Engine Oil Pressure<br />
Security Indicator Light<br />
Door/Liftgate Ajar<br />
4WD 4WD<br />
On: System is not normal; dealer<br />
inspection required.<br />
Flashing: Differential oil temperature<br />
is high; dealer inspection required.<br />
Seat Belt<br />
Unbuckled/Malfunction<br />
Cruise Main Indicator<br />
Light On (AMBER)/<br />
Cruise Set Indicator<br />
Light On (GREEN)<br />
Low Washer Fluid Level<br />
7 pressure and fill the tires as soon as possible, preferably before moving the vehicle and<br />
8<br />
warming up the tires. Tire pressure should be checked when the tires are cold.<br />
1 If the instrument cluster and other dashboard illuminations do not dim when turning on the headlights,<br />
push the Instrument Cluster Dimmer knob.<br />
2 • Push to toggle between trip meter A & B.<br />
• When a trip meter is selected, push and hold to reset to zero.
Feature Highlights<br />
www.<strong>Mazda</strong>USA.com<br />
LIGHTING CONTROL/TURN SIGNAL LEVER<br />
: Turns tail,<br />
parking, and<br />
dashboard<br />
lights on.<br />
AUTO: The light sensor<br />
automatically determines<br />
when to turn the headlights<br />
on or off.<br />
: Turns fog lights<br />
on only when<br />
headlights<br />
are on.<br />
WINDSHIELD/REAR WINDOW WIPER/WASHER CONTROL LEVER<br />
AUTO: The rain sensor senses the amount of rainfall and turns the<br />
wipers on or off. Rotate inner ring away from you (clockwise) for less<br />
sensitivity (requires more rain to turn wipers on) and towards you<br />
(counterclockwise) for more sensitivity (requires less rain to turn wipers on).<br />
Push for<br />
High Beams<br />
Less sensitive<br />
MIST<br />
OFF<br />
Pull<br />
to Flash<br />
High Beams<br />
More sensitive<br />
Pull lever to dispense<br />
windshield washer fluid<br />
3<br />
2<br />
1<br />
HI<br />
AUTO<br />
LO<br />
: Turns tail, parking, dashboard,<br />
and headlights on.<br />
Rear Window<br />
Wiper/Washer<br />
INT: Intermittent<br />
ON: Normal speed<br />
HEADLIGHT LEVELING<br />
: Washer/wiper<br />
Adjust headlight<br />
(hold as desired)<br />
angle with headlight<br />
leveling switch<br />
NOTE: Vehicles not equipped with AUTO<br />
wipers will have INT wipers. Set the lever to INT<br />
depending on vehicle<br />
and choose an interval timing by rotating the<br />
passengers & load<br />
ring between fast and slow.<br />
(example: Driver only<br />
= 0, Driver + Passengers = 1 or<br />
2, etc.). Refer to your Owner’s<br />
CAUTION: When the ignition is ON turn the AUTO wipers OFF when<br />
9 Manual for complete details.<br />
going through a car wash, or while cleaning or touching the windshield. 10
Feature Highlights<br />
www.<strong>Mazda</strong>USA.com<br />
SPORT A/T MANUAL SHIFT MODE<br />
The Sport A/T Manual Shift Mode gives you the<br />
feel of driving a manual transmission by allowing<br />
you to manually shift to control engine rpm and<br />
torque when more control is desired.<br />
To Use Manual Shift Mode:<br />
• Shift lever from D to M.<br />
NOTE: Changing to manual mode<br />
can be done while driving the vehicle.<br />
To Shift Up to a Higher Gear:<br />
• Tap shift lever back (+) once.<br />
To Shift Down to a Lower Gear:<br />
• Tap shift lever forward (-) once.<br />
Lower<br />
Gear<br />
Higher<br />
Gear<br />
The transmission will automatically adjust how and when it shifts gears<br />
based on road conditions and your driving style. The transmission may stay<br />
in a lower gear longer than usual when going up or down hills or driving<br />
around corners. This feature gives you better control and a more connected<br />
driving experience.<br />
FUEL DOOR RELEASE<br />
(located on floor inside driver’s side door)<br />
To open, pull the remote fuel<br />
door release.<br />
NOTE: Fuel requirement 87 Octane.<br />
AUTO-DIMMING MIRROR AND HOMELINK ®<br />
HomeLink<br />
Auto-Dimming<br />
Indicator Light<br />
On<br />
Rear<br />
Light<br />
Sensor<br />
Off<br />
Auto-Dimming<br />
On<br />
Auto-Dimming<br />
Off<br />
Auto-Dimming Mirror<br />
• Auto-dimming will automatically darken your rearview mirror to reduce<br />
headlight glare from vehicles behind you.<br />
• Auto-dimming is activated every time the vehicle is started.<br />
NOTE: In addition to the auto-dimming mirror’s rear light sensor, there is also a<br />
front light sensor (not shown). Do not place or hang any objects over the front or rear<br />
mirror light sensors; otherwise, the auto-dimming mirrors will not operate properly.<br />
HomeLink ®<br />
• This feature provides a convenient way to replace up to three<br />
transmitters such as garage door openers, home lighting remotes<br />
and other radio frequency devices.<br />
• Refer to your Owner’s Manual for complete programming details.<br />
NOTE: Genuine <strong>Mazda</strong> Accessory Auto-Dimming Mirror with Compass and<br />
Homelink or Auto-Dimming Mirror with Rearview Camera is available at your<br />
<strong>Mazda</strong> dealer.<br />
ALUMINUM WHEEL CARE<br />
Fuel Door<br />
To avoid scratching the paint during<br />
refueling, secure the fuel filler cap<br />
tether over the hook as shown.<br />
Your aluminum wheels have a protective<br />
coating on them. Only use a mild soap<br />
or neutral detergent with a sponge or<br />
soft cloth to clean them. Using a wire<br />
brush, polishing compound, solvent,<br />
or any type of abrasive cleaner may<br />
damage the protective coating.<br />
11 Genuine <strong>Mazda</strong> Accessory Wheel Locks are available at your 12<br />
<strong>Mazda</strong> dealer.
Feature Highlights<br />
www.<strong>Mazda</strong>USA.com<br />
BLIND SPOT MONITORING (BSM) SYSTEM<br />
The Blind Spot Monitoring (BSM) system is designed to assist the driver<br />
by monitoring the blind spots to the rear of the vehicle on both sides.<br />
• If your vehicle speed is 20 mph (32 km/h) or more, the BSM will warn<br />
you of vehicles in the detection area by illuminating the BSM warning<br />
lights located on the left and right door mirrors.<br />
• If you operate a turn signal in the direction of an illuminated BSM<br />
warning light, the system will also warn you with a beeping sound and<br />
warning light flash.<br />
• BSM sensors are located under the left and right rear bumper areas.<br />
The BSM system may not operate properly if the rear bumper gets too<br />
dirty, so keep the rear bumper area clean.<br />
Please refer to your Owner’s Manual for complete details.<br />
Turning BSM System Off<br />
To manually turn the BSM system off, push the BSM OFF switch on the dash.<br />
The BSM OFF indicator will illuminate in the instrument cluster when the BSM<br />
system is off. The BSM system will automatically turn on the next time the<br />
vehicle is started.<br />
Your Vehicle<br />
PORTABLE AUDIO PLAYER INTEGRATION USING THE AUX JACK<br />
Your vehicle is equipped with an AUX or auxiliary<br />
jack that will allow you to play your portable audio<br />
player through the vehicle’s audio system. Learn<br />
the system when parked and do not let it distract<br />
you while driving.<br />
NOTE: Available at your <strong>Mazda</strong> dealer is the Genuine <strong>Mazda</strong> Accessory 3.5 mm<br />
audio cable which can be used to connect your portable audio player into the<br />
aux jack.<br />
1 Locate the AUX jack inside the center console.<br />
2 Plug 3.5 mm audio cable into the portable audio player and into the<br />
AUX jack. Turn portable audio player on.<br />
3 Turn the vehicle audio system on.<br />
4 • Without Navigation System: Push AUX button on audio system<br />
OR push MODE button on steering wheel controls until “AUX”<br />
is displayed.<br />
• With Navigation System: Push SOURCE button on audio<br />
system, then push AUX1 on screen OR push MODE button on<br />
steering wheel controls until “AUX1” is displayed.<br />
5 Use the portable audio player controls to play music.<br />
IMPORTANT: Set the volume level on your portable audio player to the highest<br />
level before distortion starts, then adjust the volume on the audio system.<br />
INFORMATION DISPLAY<br />
Detection Areas<br />
Driver Side Interior<br />
Set Temperature<br />
Clock<br />
Outside Temperature/<br />
Passenger Side<br />
Set Temperature<br />
NOTE: Do not rely completely on the BSM system and be sure to look over<br />
your shoulder before changing lanes:<br />
• The BSM system can assist the driver in confirming the safety of the surroundings,<br />
but is not a complete substitute.<br />
• The driver is responsible for ensuring safe lane changes and other maneuvers.<br />
• Always pay attention to the direction in which the vehicle is traveling and the<br />
vehicle’s surroundings.<br />
• The BSM system does not operate when the vehicle speed is lower than about<br />
20 mph (32 km/h).<br />
Climate<br />
Control<br />
13 14<br />
Audio<br />
NOTE: For standard audio and Navi only. Mid Audio shows Trip computer here.
Automatic Climate Control<br />
www.<strong>Mazda</strong>USA.com<br />
INFORMATION DISPLAY<br />
FRONT SEAT WARMERS<br />
The driver and front passenger seats can be warmed by pushing the<br />
applicable seat warmer button while the ignition is ON.<br />
• Seat temperature increases as the number of indicator lights<br />
increases. Two lights equal high, one light equals low.<br />
• When the seat warmers are not needed, push button until indicator<br />
lights are off.<br />
Driver Temperature<br />
Control Dial<br />
AUTO ON: Push dial<br />
to turn Automatic<br />
Air Conditioning<br />
system on. Rotate<br />
dial to select<br />
your desired set<br />
temperature (shown<br />
in information<br />
Display above). The<br />
airflow mode and<br />
amount of airflow<br />
will be automatically<br />
controlled in<br />
accordance with<br />
the set temperature.<br />
Push to select<br />
airflow mode.<br />
Fan Control Dial<br />
• Push OFF to turn climate<br />
control system off.<br />
• Rotate the dial to select<br />
the desired fan speed.<br />
FRONT<br />
REAR<br />
Push to defrost<br />
windshield.<br />
Push to defrost<br />
rear window.<br />
Push to recirculate<br />
cabin air to reduce<br />
outside odors and<br />
improve cooling<br />
(indicator on) or<br />
receive fresh air<br />
(indicator off).<br />
P u s h t o<br />
manually turn<br />
air conditioning<br />
ON or OFF.<br />
Passenger<br />
Temperature<br />
Control Dial<br />
• Push to turn DUAL<br />
mode on or off.<br />
• With DUAL mode<br />
ON (indicator on),<br />
rotate the dial to<br />
set passenger<br />
side temperature<br />
separate from the<br />
driver’s side (shown<br />
in the Information<br />
Display above).<br />
• With DUAL mode<br />
OFF (indicator off),<br />
driver controls the<br />
temperature setting<br />
on both sides.<br />
REAR<br />
Push to allow<br />
control from the<br />
rear controls<br />
(indicator on).<br />
REAR CLIMATE CONTROL<br />
Operation from Front Seats<br />
1 Turn the front air conditioning on.<br />
2 Push the REAR control button<br />
on the front control panel<br />
(indicator on).<br />
3 Selection of the airflow mode,<br />
airflow amount and temperature<br />
will be automatically controlled<br />
to the same setting as the front<br />
air conditioner.<br />
Operation from Rear Seats<br />
Rear Control Panel<br />
AUTO ON:<br />
1 Turn the front air conditioning on.<br />
2 Push AUTO ON button on the rear control panel to turn Rear<br />
Automatic Air Conditioning system on. Push Temperature setting<br />
button on the rear control panel to select your desired set<br />
temperature. The air flow mode and amount of air flow will be<br />
automatically controlled in accordance with the set temperature.<br />
NOTE: If the rear AUTO button is pushed while the front A/C button is off, the<br />
rear air conditioning operates only to circulate air. Setting the temperature to the<br />
maximum high or low will not provide the desired temperature at a faster rate.<br />
NOTE: The automatic temperature control always works, even if the AUTO ON<br />
indicator light comes off after rotating the Fan Control Dial or changing vent mode.<br />
OUTSIDE P u s h t o<br />
TEMP<br />
NOTE: Automatic climate control will allow you to maintain individual preset cabin<br />
15<br />
display outside<br />
temperatures for the driver and passenger when DUAL mode is selected. 16<br />
temperature.
Audio Controls Without Navigation<br />
www.<strong>Mazda</strong>USA.com<br />
SETTING YOUR CLOCK<br />
1. Push and hold the CLOCK button<br />
until displayed time flashes.<br />
2. Push and hold the H (hours)<br />
button to the correct hour.<br />
3. Push and hold the M (minutes)<br />
button to the correct minute.<br />
BLUETOOTH ®<br />
HANDS-FREE (P. 25)/<br />
AUDIO (PP. 17-22)<br />
TO LOAD/PLAY A CD<br />
(if equipped with 6-CD changer)<br />
1.P u s h t h e LOAD button.<br />
2.After “IN” is displayed on the<br />
Information Display, insert the CD.<br />
3.Repeat steps 1 and 2 until up<br />
to 6 CDs are loaded.<br />
To Change Music CD<br />
Push the DISC button ( or )<br />
during playback.<br />
To Change MP3 CD<br />
Push the DISC button ( or ) for<br />
1.5 seconds or more during playback.<br />
POWER ON<br />
Push the POWER/VOLUME to turn<br />
the audio system on.<br />
NOTE: Play/Pause button is only<br />
functional when using SIRIUS Radio ® .<br />
CLOCK<br />
Push to display clock.<br />
BLUETOOTH ® AUDIO<br />
Bluetooth ® enabled phones and<br />
INFO<br />
MEDIA SELECTION<br />
TUNING<br />
audio players provide an opportunity<br />
Push to display the trip computer to play music through the audio<br />
Radio: Push FM/AM button to<br />
Manual: Turn the TUNE dial to<br />
in place of the clock. The trip<br />
system with no wires attached,<br />
select the FM1, FM2, or AM band.<br />
manually change the frequency.<br />
computer can display:<br />
however, there are some limitations:<br />
Seek: Push the TRACK/SEEK<br />
Satellite Radio: Push the SAT<br />
• Current fuel economy<br />
• During playback, the song title<br />
tuning buttons to automatically<br />
button for SIRIUS Radio ® . If your<br />
seek a higher or lower frequency<br />
• Average fuel economy<br />
or artist will be shown on the<br />
vehicle is equipped with SIRIUS<br />
with a station.<br />
• Approximate distance you<br />
vehicle’s information display. (This<br />
Radio ® (satellite radio antenna on<br />
Scan: Push the SCAN button to<br />
can travel on the available<br />
may vary due to the specification<br />
roof or trunk lid), your new <strong>Mazda</strong><br />
automatically sample strong<br />
fuel in your gas tank.<br />
of your phone or player (AVRCP<br />
includes a free introductory<br />
stations for seconds each. Push<br />
• Average vehicle speed.<br />
1.3 required). To obtain further<br />
subscription with a limited term trial<br />
information, please refer to the<br />
again to cancel.<br />
• When average fuel economy<br />
offer. Call 888-539-7474 to activate!<br />
Owner’s Manual). This is not a<br />
Preset Channel: Push the Preset<br />
or average velocity is displayed,<br />
See the Owner’s Manual and/or<br />
problem with the vehicle, phone,<br />
Channel buttons (1-6) to select a<br />
push INFO button more than<br />
dealer for details. Contact your<br />
or player. The current audio profile<br />
station stored in memory. To store a<br />
1.5 seconds to reset.<br />
does not send this information.<br />
<strong>Mazda</strong> dealer about adding SIRIUS<br />
station, push and hold a button (1-6)<br />
Radio ® if your <strong>Mazda</strong> <strong>CX</strong>-9 is not<br />
• Not all controls on the phone or<br />
until a beep is heard.<br />
already equipped with it.<br />
PLAYING BLUETOOTH ®<br />
player will be active when paired<br />
Auto Memory Tuning: Push the<br />
CD: Push CD button to select the<br />
(BT) AUDIO<br />
to the vehicle.<br />
AUTO-M button to store an additional<br />
CD player.<br />
1 Make sure BT audio device • Wireless signal strength can affect<br />
6 stations on each FM and AM band<br />
is paired.<br />
audio streaming.<br />
Auxiliary Input: Push AUX button without disturbing the previously<br />
2 Turn on BT audio device.<br />
• Sound quality of streaming audio<br />
to switch to jack input or Rear Seat stored stations. Refer to the Owner’s<br />
3 Push the AUX button until<br />
varies depending on the device.<br />
17 Entertainment System (RSES). Manual for complete details.<br />
“BT AUDIO” is displayed.<br />
18
Audio Controls Without Navigation<br />
www.<strong>Mazda</strong>USA.com<br />
SETTING YOUR CLOCK<br />
• Push the H button to set<br />
the hour.<br />
• Push the M button to set<br />
the minutes.<br />
BLUETOOTH ®<br />
HANDS-FREE (P. 25)/<br />
AUDIO (PP. 17-22)<br />
Selection<br />
Buttons<br />
1-4<br />
Selection<br />
Buttons<br />
5-8<br />
INFO<br />
Push to display the trip<br />
computer in place of the<br />
clock on the information<br />
display. The trip computer<br />
can display:<br />
• Current fuel economy<br />
• Average fuel economy<br />
• Approximate distance you<br />
can travel on the available<br />
fuel in your gas tank.<br />
• Average vehicle speed.<br />
• When average fuel<br />
economy or average<br />
velocity is displayed, push<br />
INFO button more than<br />
1.5 seconds to reset.<br />
POWER ON<br />
TUNING<br />
Push the Power/Volume dial to turn Manual: Turn the TUNE dial to<br />
LOADING A CD<br />
BLUETOOTH ® AUDIO<br />
the audio system on.<br />
manually change the frequency.<br />
Single CD Player<br />
Bluetooth<br />
Seek: Push the SEEK or TRACK<br />
• Insert the CD into the slot,<br />
® enabled phones<br />
and audio players provide an<br />
MEDIA SELECTION<br />
tuning buttons to automatically<br />
label-side up.<br />
opportunity to play music through<br />
Radio: Push FM/AM button to select seek a higher or lower frequency<br />
In-Dash CD Changer<br />
the audio system with no wires<br />
the FM1, FM2, or AM band.<br />
with a station.<br />
• Push the LOAD button and when attached, however, there are<br />
“Please Insert a Disc” is displayed,<br />
CD: Push the CD/AUX button to Scan: Push the SCAN button to<br />
some limitations:<br />
insert the CD.<br />
select the CD player which plays automatically sample strong stations for<br />
• During playback, the song title<br />
CDs, MP3s, and WMAs. See the seconds each. Push again to cancel.<br />
or artist will be shown on the<br />
PLAYING A CD<br />
Owner’s Manual for complete details. Preset Channel: Push Selection<br />
vehicle’s information display.<br />
• Push a Selection button to select<br />
Auxiliary Input: Push the CD/AUX<br />
Button 2, 3, 4, 6, 7, or 8 to select<br />
(This may vary due to the<br />
a CD (6 CD changer).<br />
a station stored in memory. To store<br />
specification of your phone or<br />
button to select the auxiliary jack.<br />
a station, push and hold Selection<br />
• Push CAT or FOLDER to select player (AVRCP 1.3 required).<br />
Satellite Radio: Push the SIRIUS<br />
a folder (MP3/WMA).<br />
Button 2, 3, 4, 6, 7, or 8 until<br />
To obtain further information,<br />
button for SIRIUS Radio ® . If your station is displayed.<br />
• Push SEEK or TRACK to<br />
please refer to the Owner’s<br />
vehicle is equipped with SIRIUS<br />
select previous or next track.<br />
Manual). This is not a problem<br />
Category (SIRIUS Radio ® only):<br />
Radio ® (satellite radio antenna on<br />
• Push CAT or FOLDER to<br />
with the vehicle, phone, or<br />
Push the CAT or FOLDER to<br />
roof or trunk lid), your new <strong>Mazda</strong><br />
select previous or next folder<br />
player. The current audio profile<br />
change to a different category.<br />
(for MP3s and WMAs).<br />
does not send this information.<br />
includes a free introductory<br />
Auto Memory Tuning: Push and<br />
• Not all controls on the phone<br />
subscription with a limited term trial hold the AUTO-M button to store<br />
offer. Call 888-539-7474 to activate!<br />
PLAYING BLUETOOTH<br />
an additional 6 stations on each FM<br />
® (BT) AUDIO or player will be active when<br />
See the Owner’s Manual and/or<br />
1 Make sure BT audio device<br />
paired to the vehicle.<br />
and AM band without disturbing the<br />
dealer for details. Contact your<br />
is paired.<br />
• Wireless signal strength can<br />
previously stored stations. To return<br />
<strong>Mazda</strong> dealer about adding SIRIUS<br />
2 Turn on BT audio device.<br />
affect audio streaming.<br />
to previously stored stations, push<br />
Radio<br />
19 ® if your <strong>Mazda</strong> <strong>CX</strong>-9 is not<br />
3 Push the CD/AUX button until<br />
• Sound quality of streaming audio<br />
the FM or AM button. Refer to the<br />
“BT AUDIO” is displayed.<br />
varies depending on the device.<br />
already equipped with it.<br />
Owner’s Manual for complete details.<br />
20
Audio Controls With Navigation<br />
www.<strong>Mazda</strong>USA.com<br />
TO LOAD/PLAY A CD<br />
1. P u s h LOAD / .<br />
2.Select the CD (DISC) on-screen button.<br />
3.Wait for the screen to lower.<br />
4. Insert the CD after “IN” is displayed on<br />
the Information Display. The CD will begin<br />
playing after the screen closes.<br />
BLUETOOTH ®<br />
HANDS-FREE (P. 25)/<br />
AUDIO (PP. 17-22)<br />
SETTING YOUR CLOCK<br />
1. Push the MENU button.<br />
2. Select the Set Clock tab.<br />
3. Scroll to “Display Type” and select; then<br />
select a 24-hour or a 12-hour display.<br />
4. Use the + hour and - hour tabs to enter<br />
the correct hour.<br />
5. Use the +1 min (minutes) and -1 min<br />
to move minutes ahead or back.<br />
NOTE:<br />
• When Auto Time Zone is switched ON, the<br />
time cannot be adjusted manually.<br />
• When Auto Time Zone is switched OFF,<br />
the daylight saving time on-screen button<br />
cannot be operated.<br />
POWER ON<br />
Push the POWER/VOLUME button to<br />
turn the radio on.<br />
MEDIA SELECTION<br />
Push the SOURCE button to select the<br />
appropriate on-screen button:<br />
Radio: Select FM or AM button for<br />
FM1, FM2, or AM band.<br />
DISC: Select for CD player.<br />
Satellite Radio: Select SAT for SIRIUS<br />
Radio ® . If your vehicle is equipped with<br />
SIRIUS Radio ® (satellite radio antenna<br />
on roof or trunk lid), your new <strong>Mazda</strong><br />
includes a free introductory subscription<br />
with a limited term trial offer. Call<br />
888-539-7474 to activate! See the<br />
Owner’s Manual and/or dealer for details.<br />
Contact your <strong>Mazda</strong> dealer about adding<br />
SIRIUS Radio ® if your <strong>Mazda</strong> <strong>CX</strong>-9 is not<br />
already equipped with it.<br />
AUX 1: Select to switch to AUX<br />
jack input.<br />
NOTE: AUX 1 illuminates only if external<br />
device is connected to AUX 1 jack.<br />
iPod: Select to play iPod ® .<br />
NOTE: iPod illuminates only if dealer<br />
installed iPod integration kit and device<br />
is connected.<br />
BT-Audio: Select for Bluetooth ® Audio.<br />
PLAYING BLUETOOTH ® (BT) AUDIO<br />
1 Make sure BT audio device<br />
is paired.<br />
2 Turn on BT audio device.<br />
3 Push the CD/AUX button until<br />
“BT AUDIO” is displayed.<br />
TUNING<br />
Manual: Turn the TUNE/AUDIO dial to<br />
manually change the frequency.<br />
Seek/Track: Push and hold the SEEK/<br />
TRACK buttons to automatically<br />
seek a higher or lower frequency or<br />
track, depending on media selected.<br />
NOTE: If you continue to push and hold<br />
the buttons, the frequency will continue<br />
changing without stopping until released.<br />
Scan: Push the SCAN button to<br />
automatically sample strong stations for<br />
seconds each. Push again to cancel.<br />
1 Push the SOURCE button.<br />
2 Select AM/FM or SAT.<br />
3 For FM, select FM1/2<br />
button, for SAT, select<br />
PRESETS button.<br />
4 Tune to the desired station<br />
using the SEEK/TRACK<br />
button or by turning the<br />
TUNE/AUDIO dial.<br />
5 Select and hold any channel<br />
preset on-screen button for<br />
about two seconds until a<br />
beep is heard.<br />
• Repeat to store other stations.<br />
INFO<br />
Push to display the trip<br />
computer in place of the clock<br />
on the information display. The<br />
trip computer can display:<br />
• Current fuel economy<br />
• Average fuel economy<br />
• Approximate distance you<br />
can travel on the available<br />
fuel in your gas tank.<br />
• Average vehicle speed.<br />
• When average fuel economy<br />
or average velocity is<br />
displayed, push INFO<br />
Auto Memory Tuning:<br />
Select and hold the AUTO-M on-screen<br />
button until beep is heard to store an<br />
additional 8 stations on each FM and AM<br />
band without disturbing the previously<br />
stored stations. Refer to the Owner’s<br />
Manual for complete details.<br />
BLUETOOTH ® AUDIO<br />
Bluetooth ® enabled phones and audio<br />
players provide an opportunity to play<br />
music through the audio system with<br />
no wires attached, however, there are<br />
some limitations:<br />
• During playback, the song title or<br />
artist will be shown on the vehicle’s<br />
information display. (This may vary<br />
due to the specification of your phone<br />
or player (AVRCP 1.3 required). To<br />
obtain further information, please refer<br />
to the Owner’s Manual). This is not a<br />
problem with the vehicle, phone, or<br />
player. The current audio profile does<br />
not send this information.<br />
• Not all controls on the phone or player<br />
will be active when paired to the vehicle.<br />
• Wireless signal strength can affect<br />
audio streaming.<br />
AUX 2: Select to switch to Rear Seat<br />
Entertainment System (RSES).<br />
Preset Channel: Can be used to<br />
21 NOTE: AUX 2 illuminates only if RSES<br />
button more than 1.5<br />
• Sound quality of streaming audio varies<br />
store 8 AM, 16 FM and 18 SIRIUS<br />
22<br />
is powered on.<br />
seconds to reset.<br />
depending on the device.<br />
Radio ® stations.
Navigation System<br />
www.<strong>Mazda</strong>USA.com<br />
INSERTING THE MAP DISC<br />
HAWAII<br />
Disc DISC A<br />
PUERTO RICO<br />
HAWAII<br />
Disc B<br />
DISC B<br />
Insert map disc into lower DVD slot<br />
Your navigation system operates using the map discs supplied.<br />
• Disc A covers most of the Midwest and Western states including<br />
Hawaii and Alaska.<br />
• Disc B covers some of the Midwest and all of the Eastern states<br />
including Puerto Rico.<br />
• Both discs cover all of Canada.<br />
PUERTO RICO<br />
NOTE: If the “state your address is in” is not displayed when entering a destination,<br />
you may have the wrong disc in the navigation system.<br />
SELECTING A DESTINATION<br />
You can choose setting a destination using a street address, point of<br />
interest, emergency, memory point, home, preset destination, previous<br />
destination, freeway on/off ramp, coordinates, or select from map.<br />
1 Push “MENU” button on navigation face.<br />
2 Select “Destination Entry”.<br />
3 Select “Address”.<br />
4 Select the “State” or “Province”.<br />
• Scroll down past the States to find Canadian Provinces.<br />
5 Select “City”.<br />
6 Select “Input City Name”.<br />
7 Use the keyboard to enter the city name.<br />
8 Select “Street”.<br />
9 Use the keyboard to enter the street name.<br />
10 Select “House No”.<br />
11 Use the keyboard to enter the house number, then select “OK”.<br />
12 When the map appears, select “Destination”.<br />
13 Select “<strong>Start</strong>” or just start driving.<br />
NOTE:<br />
• For safety reasons, some navigation functions cannot be performed via the<br />
Navigation screen while driving.<br />
• When entering numbers for a street name, (e.g., 1st Ave.), push “Sym.”<br />
button to switch to the numeric keyboard.<br />
• Map Orientation: “North Up” - Geographic north is up.<br />
“Head Up” - The direction you are heading is up.<br />
• Route Preferences: Select “Prefer” or “Avoid” for toll roads, major roads,<br />
ferries, restricted roads and border crossing.<br />
• RETURN button: Push button to return to the previous navigation screen.<br />
• VOICE button: Push to replay a voice navigation assist from the<br />
navigation system.<br />
• DISP button: Push to set screen angle, brightness, contrast, day/night<br />
screen and display on/off.<br />
SET HOME LOCATION<br />
1 Push LOAD .<br />
2 When “Load/Eject” screen appears select “MAP”. Wait for navigation<br />
screen to tilt open.<br />
3 Remove current map disc (if installed) and insert the desired map disc,<br />
with the printed side facing up, into the lower DVD MAP slot.<br />
4 Read the Caution carefully and select the “AGREE” on-screen button.<br />
NOTE: Home address must be stored in ADDRESS BOOK before proceeding.<br />
Follow “SELECTING A DESTINATION” step 1-11 and on step 12 select “Memory<br />
Pt.” instead of “Destination” to store address.<br />
1 Push “MENU” button on navigation face.<br />
2 Select “ADDRESS BOOK”.<br />
3 Select “Memory Points/Home”.<br />
4 Select “List”.<br />
Please refer to your Navigation System Owner’s Manual for complete<br />
5 Select home address from list.<br />
details and important safety information.<br />
23 6 Select “Category”.<br />
24<br />
7 Select “Home”.
®<br />
Bluetooth<br />
www.<strong>Mazda</strong>USA.com<br />
25<br />
PAIRING YOUR BLUETOOTH ® PHONE OR AUDIO DEVICE<br />
NOTE:<br />
• For safety reasons, you cannot pair a phone while driving.<br />
• Before pairing your cell phone or audio device, it is recommended that you<br />
refer to its manual for steps to turn on Bluetooth ® and perform pairing.<br />
• For toll-free Bluetooth ® Hands-Free customer service and device compatibility<br />
call 800-430-0153 or go to www.<strong>Mazda</strong>USA.com/bluetooth for assistance.<br />
• IMPORTANT: Set the volume level on your cell phone or audio device to the<br />
highest level before distortion starts, then adjust the volume on the audio system.<br />
1 Push and release the or button<br />
located on the steering wheel and wait<br />
for a beep.<br />
2 After the beep say, “Set-up”.<br />
3 After the beep say, “Pairing options”.<br />
4 After the beep say, “Pair”.<br />
5 After the beep, say any 4-digit code.<br />
6 Place phone or audio device in Discovery<br />
mode; if necessary, consult its manual,<br />
or go to www.mazdausa.com/bluetooth<br />
and select model, Bluetooth ® , then follow<br />
screen prompts.<br />
7 Input the 4-digit code you chose earlier.<br />
8 After the phone or audio device is recognized, you<br />
will be prompted to name the paired device, such<br />
as “Tom’s phone or player”.<br />
9 When paired, a symbol will be displayed in the<br />
information display - a phone symbol for a phone<br />
and a music symbol for an audio device. If the symbol<br />
is not displayed, the Bluetooth ® device is not paired.<br />
NOTE: If your compatible Bluetooth ® phone is equipped with a music player and<br />
supports the Bluetooth ® profile A2DP, your phone will pair for both hands-free calling<br />
as well as Bluetooth ® audio during the pairing process, and will be considered one<br />
unit. Please refer to your Owner’s Manual for complete details on how to “pair” up to<br />
7 Bluetooth ® phones and audio devices, and how to use the built-in tutorial and other<br />
important safety information.<br />
TO MAKE OR RECEIVE A HANDS-FREE CALL<br />
Basic Operation:<br />
button: To Make/Receive/Swap (during call interruption) a call.<br />
button: To End/Reject a call.<br />
button: To Skip voice guidance (for speeding up your operation).<br />
Auto Re-connect: On engine start, the last-connected device will be<br />
automatically re-connected. The system is operable several seconds after<br />
engine start.<br />
When using Bluetooth ® audio function:<br />
The sound quality of Bluetooth ® streaming audio varies depending on the<br />
device, even when recorded with a recommended bit rate of 128 kbps.<br />
My<strong>Mazda</strong>.com<br />
—The Official Site<br />
for <strong>Mazda</strong> Owners<br />
• Insider access to exclusive events and promotions<br />
• Personalized maintenance schedules<br />
• Zoom-Zoom Owner Magazine<br />
• Warranty information and on-line Owner’s Manuals<br />
• Wallpaper, videos and other fun stuff<br />
• Accessories specifically designed for your vehicle<br />
• Car Care Discount Coupons available from your <strong>Mazda</strong> Dealer<br />
Visit and register at My<strong>Mazda</strong>.com today!<br />
Roadside assistance is available 24 hours a day, 365 days a<br />
year. Using the toll free phone number or the <strong>Mazda</strong> Roadside<br />
Assistance <strong>Smart</strong>phone app - <strong>Mazda</strong> Assist. (which uses<br />
GPS-enabled technology to determine your exact location),<br />
will put you in touch with a roadside assistance agent.<br />
Phone: 1-800-866-1998<br />
The app can be downloaded, free of charge, from the App store for<br />
the iPhone ® and Android Market for Android powered devices. After<br />
downloading app, customer name, email, iPhone number and VIN<br />
are required.<br />
PERSONALIZE YOUR MAZDA <strong>CX</strong>-9 WITH GENUINE MAZDA ACCESSORIES:<br />
• All-Weather Floor Mats<br />
• Auto-Dimming Rearview<br />
Mirror with Compass<br />
• Cargo Mat, Carpet<br />
• Cargo Net<br />
• Cargo Tray<br />
• Fog Lights<br />
• Front Mask<br />
• Hood Bug Deflector<br />
• iPod ® Integration<br />
• Moonroof Wind Deflector<br />
• Rear Bumper Guard<br />
• Rearview Camera<br />
with Auto-Dimming<br />
Mirror Display<br />
• Remote Engine <strong>Start</strong><br />
Register today on My<strong>Mazda</strong>.com<br />
—the ultimate destination for<br />
<strong>Mazda</strong> Owners. Once registered,<br />
you’ll be able to take advantage<br />
of benefits exclusively for<br />
<strong>Mazda</strong> Owners:<br />
• Retractable Cargo Cover<br />
• Roof Rack and Attachments<br />
• SIRIUS Satellite Radio<br />
• Splash Guards<br />
• Touch-Up Paint<br />
• Trailer Hitch (Class II)<br />
• Wheel Locks<br />
• Windshield Sunscreen
Customer Delivery Checklist<br />
Customer Delivery Checklist<br />
VEHICLE PRESENTATION:<br />
Refer to the <strong>Smart</strong> <strong>Start</strong> <strong>Guide</strong> during presentation<br />
DEALERSHIP<br />
DATE<br />
Keyless Entry................................1-2<br />
• Keyless Transmitter<br />
• Advanced Key*<br />
• Door Request Switches*<br />
• Liftgate Request Switch*<br />
• Power Door Locks<br />
Fuel Door....................................... 11<br />
• Fuel-Filler Door Release<br />
Auto-Dimming Mirror................... 12<br />
HomeLink ® ..................................... 12<br />
SALES CONSULTANT<br />
VIN<br />
CUSTOMER’S NAME<br />
E-MAIL<br />
<strong>Start</strong>ing The Engine........................ 2<br />
• <strong>Start</strong> Knob Ignition<br />
(Advanced Key*)<br />
Blind Spot Monitoring.................. 13<br />
AUX Input....................................... 14<br />
Climate Control..........................15-16<br />
• Front Controls • Rear Controls<br />
PRESENTATION OF OWNER’S MATERIALS:<br />
Review the following items with the customer<br />
Liftgate............................................. 2<br />
• Manual Operation<br />
• Power Liftgate (PLG) Operation*<br />
Seats............................................. 3-4<br />
• Adjustment<br />
• Memory Seat Function*<br />
Rear Seat Access........................... 4<br />
• 2nd and 3rd row seating access<br />
Driver’s View................................ 5-6<br />
• Location of Switches and Controls<br />
Instrument Cluster...................... 7-8<br />
• Review indicator light function<br />
and location<br />
Lighting Control.............................. 9<br />
Wiper/Washer................................10<br />
Sport A/T Manual Shift Mode ......11<br />
Audio Controls...........................17-22<br />
• SIRIUS ® Satellite Radio Operation<br />
• Trip Computer (INFO Button)<br />
• Back-Up Camera (Navigation only)<br />
Set Clock...............................17, 19, 22<br />
Navigation System*..................23-24.<br />
• 2 Disc System, Insert Disc<br />
• Selecting a Destination<br />
• Set Home Location<br />
Bluetooth ® Hands-Free................ 25<br />
• Tutorial • Toll-Free<br />
• Pair Phone Customer Service<br />
• Make a Call 800-430-0153<br />
*if equipped<br />
All items in the Customer Delivery Checklist have been reviewed with the customer and<br />
the first maintenance appointment has been scheduled:<br />
SALES CONSULTANT DATE CUSTOMER DATE<br />
Signed copy must be placed in dealer jacket<br />
<strong>Smart</strong> <strong>Start</strong> <strong>Guide</strong><br />
• Remove this checklist from<br />
<strong>Smart</strong> <strong>Start</strong> <strong>Guide</strong><br />
• Personalization Features<br />
(including all Auto Lock/Unlock<br />
function settings, refer to your<br />
Owner’s Manual)<br />
Warranty Information<br />
Warranty <strong>Start</strong> Date:<br />
Customer Initial:<br />
• Basic Vehicle –<br />
36 months/36,000 miles<br />
• Roadside assistance program<br />
SERVICE DEPARTMENT<br />
Introduce Service Manager;<br />
provide business cards<br />
Review Service and Parts Department<br />
hours of operation<br />
Explain free Full Circle<br />
Service Inspection<br />
Schedule first maintenance service<br />
My<strong>Mazda</strong>.com<br />
• Offer to register customer on<br />
My<strong>Mazda</strong>.com<br />
Owner’s Manual<br />
Floor Mats<br />
• Ensure floor mats are properly<br />
hooked after cleaning<br />
• Do not install two floor mats, one on<br />
top of the other, on the driver side<br />
• Accessory rubber floor mats should<br />
be cleaned with mild soap and<br />
water only
GENUINE MAZDA SERVICE<br />
Because you and your <strong>Mazda</strong> deserve the best<br />
Your new <strong>Mazda</strong> deserves nothing less than the very best. To keep it running<br />
like new for years to come, trust the experts at your local Authorized <strong>Mazda</strong><br />
Dealer. Simply bring your vehicle in for your scheduled maintenance and any<br />
needed repairs.*<br />
At participating <strong>Mazda</strong> Full Circle Service Centers,** our technicians will<br />
automatically perform a complimentary Full Circle inspection on your vehicle<br />
and issue a detailed report card at every visit. This is designed to help you<br />
keep track of your <strong>Mazda</strong>’s critical operating condition. Our factory-trained<br />
technicians know your vehicle inside out and use Genuine <strong>Mazda</strong> Parts,<br />
giving your vehicle the optimum care and maintenance it requires to run<br />
with flawless precision.<br />
Remember, to further enhance your driving experience, visit your local<br />
<strong>Mazda</strong> Service Center for your scheduled maintenance. It’s also the place<br />
where you can find a wide variety of tires, parts, and accessories that are<br />
just right for your vehicle.<br />
* See vehicle’s scheduled-maintenance program for details.<br />
** Visit the <strong>Mazda</strong> Owners website at My<strong>Mazda</strong>.com/fullcircle to find a<br />
participating <strong>Mazda</strong> Full Circle Service Dealer.<br />
Customer Assistance Center: 1-800-222-5500<br />
Roadside Assistance Contact: 1-800-866-1998<br />
FREE FULL CIRCLE<br />
SERVICE INSPECTION<br />
We’re committed to providing<br />
expert <strong>Mazda</strong> service.<br />
You love to drive your <strong>Mazda</strong>, and we love to service your <strong>Mazda</strong>. With our Full Circle<br />
Service, we’ll give your vehicle a COMPLIMENTARY MULTI-POINT INSPECTION.<br />
Your <strong>Mazda</strong> will receive a thorough review of its most crucial components.<br />
This easy-to-use <strong>Smart</strong> <strong>Start</strong> <strong>Guide</strong> is intended to help you more fully appreciate some<br />
of the unique features and functions of your new vehicle. However, it is not intended to<br />
replace your Owner’s Manual. The Owner’s Manual contains more detailed information<br />
to help you better understand the important safety warnings, features, operation, and<br />
maintenance of your vehicle. All information, specifications, photographs and illustrations<br />
in this publication are those in effect at the time of printing. <strong>Mazda</strong> reserves the right to<br />
change specifications or design without obligation.<br />
© <strong>Mazda</strong> North American Operations<br />
Printed in U.S.A. 07/11<br />
Print 1<br />
9999 95 011C 12SS<br />
www.<strong>Mazda</strong>USA.com


