User Guide - Soundcraft
User Guide - Soundcraft
User Guide - Soundcraft
- No tags were found...

Create successful ePaper yourself
Turn your PDF publications into a flip-book with our unique Google optimized e-Paper software.
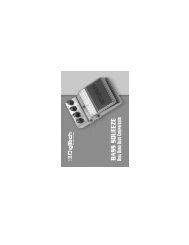
GREAT SOUND MADE EASY<br />
<strong>User</strong> <strong>Guide</strong>
IMPORTANT<br />
Please read this manual carefully before using<br />
your mixer for the first time.<br />
© Harman International Industries Ltd. 2003<br />
All rights reserved<br />
Parts of the design of this product may be protected by worldwide<br />
patents.<br />
Part No. ZM10107-01<br />
Issue: 1<br />
<strong>Soundcraft</strong> is a trading division of Harman International Industries Ltd.<br />
Information in this manual is subject to change without notice and does<br />
not represent a commitment on the part of the vendor. <strong>Soundcraft</strong><br />
shall not be liable for any loss or damage whatsoever arising from the<br />
use of information or any error contained in this manual.<br />
No part of this manual may be reproduced, stored in a retrieval system,<br />
or transmitted, in any form or by any means, electronic, electrical,<br />
mechanical, optical, chemical, including photocopying and recording, for<br />
any purpose without the express written permission of <strong>Soundcraft</strong>.<br />
Harman International Industries Limited<br />
Cranborne House<br />
Cranborne Road<br />
POTTERS BAR<br />
Hertfordshire<br />
EN6 3JN<br />
UK<br />
Tel: +44 (0)1707 665000<br />
Fax: +44 (0)1707 660742<br />
http://www.soundcraft.com<br />
2
CONTENTS<br />
IMPORTANT SAFETY INSTRUCTIONS ........................ 4<br />
Introduction ............................................................ 7<br />
Quick Start <strong>Guide</strong> .................................................... 8<br />
A Note on Channel Use ........................................... 14<br />
Front and Rear Panels ............................................ 15<br />
Master Section GigRac 600.................................... 18<br />
Master Section GigRac 300.................................... 24<br />
Rear Panel GigRac 600 .......................................... 28<br />
Rear Panel GigRac 300 .......................................... 30<br />
Rackmounting Your GigRac ...................................... 32<br />
Connectors and Leads ............................................ 33<br />
Block Diagram GigRac 600 ..................................... 34<br />
Block Diagram GigRac 300 ..................................... 35<br />
Warranty .............................................................. 36<br />
Gigrac 300 / 600 Specifications .............................. 37<br />
Your Notes: ........................................................... 38<br />
NOTE: This equipment has been tested and found to comply with the<br />
limits for a Class A digital device, pursuant to Part 15 of the FCC Rules.<br />
These limits are designed to provide reasonable protection against<br />
harmful interference when the equipment is operated in a commercial<br />
environment. This equipment generates, uses, and can radiate radio<br />
frequency energy and, if not installed and used in accordance with the<br />
instruction manual, may cause harmful interference to radio<br />
communications. Operation of this equipment in a residential area is<br />
likely to cause harmful interference in which case the user will be required<br />
to correct the interference at his own expense.<br />
3
IMPORTANT SAFETY INSTRUCTIONS<br />
CAUTIONS<br />
• To avoid the risk of fire, replace the mains fuse only with the correct<br />
type and value fuse, as marked on the rear of the product.<br />
• ATTENTION: - Afin de réduire le risque de feu remplacer seulement avec<br />
fusible de même type.<br />
• MAINS VOLTAGE SELECTION<br />
This setting is NOT <strong>User</strong> Adjustable.<br />
The units are capable of operating at either 230V AC or 115V AC<br />
mains voltages ±10%.<br />
• REPLACING MAINS FUSE<br />
Remove the mains lead from the connector. Use a small screwdriver<br />
to unscrew the fuse carrier from its location to the left of the<br />
mains power connector. Check the fuse is of the correct type and<br />
value and replace if necessary; also check that the voltage rating<br />
as marked on the rear panel is correct for the mains supply level<br />
before switching the unit ON again.<br />
If the mains fuse fails repeatedly this may be because an electrical<br />
safety hazard exists. The unit must be taken out of service and<br />
referred to the <strong>Soundcraft</strong> dealer from where the equipment was<br />
purchased.<br />
• THIS UNIT MUST BE EARTHED<br />
Under no circumstances should the mains earth be disconnected<br />
from the mains lead.<br />
• ATTENTION: - Cet appareil doit être branché à la terre.<br />
The wires in the mains lead are coloured in accordance with the following<br />
code:<br />
UK & EU<br />
US & CAN<br />
Earth / Ground:<br />
Green and Yellow Green and Yellow<br />
Neutral: Blue White<br />
Live: Brown Black<br />
4
As the colours of the wires in the mains lead may not correspond<br />
with the coloured markings identifying the terminals in your plug,<br />
proceed as follows:<br />
The wire which is coloured Green and Yellow must be connected<br />
to the terminal in the plug which is marked with the letter E<br />
or by the earth / ground symbol:<br />
The wire which is coloured Blue or White must be connected<br />
to the terminal in the plug which is marked with the letter N.<br />
The wire which is coloured Brown or Black must be connected<br />
to the terminal in the plug which is marked with the letter L.<br />
Ensure that these colour codings are followed carefully in<br />
the event of the plug being changed.<br />
Replacement Part No: FJ8016 (UK) : FJ8017 (EU) : FJ8018 (US &<br />
CAN)<br />
• Do not install near any heat sources such as radiators, heat<br />
resistors, stoves, or other apparatus (including amplifiers)<br />
that produce heat.<br />
• Do not use this apparatus near water. The apparatus must<br />
not be exposed to dripping or splashing. Objects containing<br />
liquid must not be placed on the apparatus.<br />
• The disconnect device is the mains plug or the appliance<br />
connector: either one must remain accessible so as to be<br />
readily operable in use.<br />
• Do not defeat the safety purpose of the polarized or grounding<br />
type plug.<br />
A polarized plug has two blades with one wider than the other.<br />
A grounding type plug has two blades and a third grounding<br />
prong. The wide blade or the third prong are provided for your<br />
safety. When the provided plug does not fit into your outlet,<br />
consult an electrician for replacement of the obsolete outlet.<br />
• Protect the power cord from being walked on or pinched<br />
particularly at plugs and convenience receptacles.<br />
• Only use cables and hardware specified by the manufacturer.<br />
5
• Unplug this apparatus during lightning storms or when unused<br />
for long periods of time.<br />
• Refer all servicing to qualified service personnel. Servicing is<br />
required when the apparatus has been damaged in any way<br />
such as, the power-supply cord or plug is damaged, liquid has<br />
been spilled or objects have fallen into the apparatus, the<br />
apparatus has been exposed to rain or moisture, the<br />
apparatus does not operate normally or has been dropped.<br />
• It is recommended that all maintenance and service on the<br />
product should be carried out by <strong>Soundcraft</strong> or its authorised<br />
agents. <strong>Soundcraft</strong> cannot accept any liability whatsoever<br />
for any loss or damage caused by service, maintenance or<br />
repair by unauthorised personnel.<br />
• If a trolley is used, use caution when moving the trolley /<br />
apparatus combination to avoid injury from tip-over.<br />
WARNINGS<br />
• Read these instructions.<br />
• Keep these instructions.<br />
• Heed all warnings.<br />
• Follow all instructions.<br />
• This unit contains no user serviceable parts. Refer all servicing<br />
to a qualified service engineer, through the appropriate<br />
<strong>Soundcraft</strong> dealer.<br />
• Clean the apparatus only with a dry cloth.<br />
• DO NOT block any of the ventilation openings. DO NOT install<br />
where air cannot flow over the rear of the unit. DO Install in<br />
accordance with the manufacturers instructions.<br />
6
Introduction<br />
Firstly we’d like to thank you for choosing the <strong>Soundcraft</strong> GigRac. We<br />
hope you have many happy years together!<br />
Features<br />
8 Microphone Inputs<br />
48V Phantom Power for condenser microphones (Inputs 1-4 only)<br />
PAD buttons for controlling loud input signals (Inputs 1-4 only)<br />
4 Stereo compatible inputs<br />
Treble and Bass controls<br />
Individual volume controls on each channel for Monitor level.<br />
Individual volume controls on each channel for Main level.<br />
Individual send controls for GiGFX on each channel<br />
7 Band Graphic Equaliser<br />
8 x Digital Effects (24 Bit/48 kHz)<br />
Record Output<br />
FX bypass switch<br />
FX bus output socket<br />
Submix input<br />
Amplifier ‘Clip’ warning light<br />
10 segment LED output level meter<br />
The GigRac case.<br />
Your GigRac is cased in a structural foam copolymer polypropylene resin,<br />
which gives an optimum combination of strength and impact resistance.<br />
This material also helps to keep the shell in good condition as it very<br />
resistant to dents and scratches.<br />
The nature of the moulding process leaves the irregular streaky surface<br />
finish that gives the GigRac its tough and unique look.<br />
Amplifier Power Ratings<br />
GigRac 300 GigRac 600<br />
1 x 300W @ 4 Ohms 2 x 300W @ 4 Ohms<br />
1 x 220W @ 8 Ohms 2 x 220W @ 8 Ohms<br />
7
Quick Start t <strong>Guide</strong><br />
If like most people you can’t wait to use your GigRac for the first time,<br />
then use the Quick Start <strong>Guide</strong> to get things started. The Quick Start<br />
<strong>Guide</strong> covers the following:<br />
1. Connecting up your loudspeakers to the GigRac<br />
2. Plugging in a vocal microphone<br />
3. Adding Treble or Bass to the signals<br />
4. Plugging in a guitar or stereo keyboard<br />
5. Apply one of the 8 GigFX digital effects to the signals<br />
Note: We recommend that you read through the entire<br />
GigRac user guide to familiarise yourself with all of the<br />
features on offer.<br />
8
GigRac 600 shown.<br />
9
1. Connecting up your loudspeakers to the GigRac<br />
Note: Make sure your GigRac is not powered up. This<br />
is very important to prevent any damage to either the<br />
GigRac or your loudspeakers!<br />
Using good quality speaker cables connect the loudspeakers to the<br />
Speaker outputs on the rear of the GigRac.<br />
If you have cables equipped with Neutrik Speakon connectors then use<br />
the Speakon connectors on the rear of the GigRac. Alternatively if you<br />
have cables equipped with jack plugs then use the jack sockets on the<br />
rear of the GigRac.<br />
Note: Because the GigRac 300 and GigRac 600 are<br />
mono mixers there is no difference between the signals<br />
sent to the Left or Right speakers i.e. both speakers<br />
will receive the same signal equally all of the time.<br />
Make sure that the Main Master Volume control (1) is turned fully down<br />
Now switch the GigRac on using the Power switch on the rear of the<br />
unit.<br />
2. Plugging in a vocal microphone<br />
Note: Before connecting a microphone to channels 1-4,<br />
make sure that the 48V phantom power switch is<br />
switched off (The red LED should not be illuminated)<br />
Connect the microphone cable to one of the first four inputs on the<br />
front of the GigRac.<br />
(The inputs on the GigRac can receive either 3-Pin XLR or standard Jack<br />
connectors.)<br />
10
Turn the Main Master Volume control (1) up to about half-way.<br />
Now gradually turn up the Main Volume control (2) on the microphone<br />
channel you have chosen to use. You should now hear the microphone<br />
signal appearing in the loudspeakers as you begin to speak.<br />
You should also be able to see activity on the Output Meter (4)<br />
Note: The XLR input on channels 1 - 4 is very sensitive.<br />
Depending on your microphone or your application, you<br />
may need to press the PAD button to prevent<br />
distortion occurring; don’t worry, this is perfectly<br />
normal.<br />
Note: Be careful not to point the microphone at the<br />
loudspeakers or you could accidentally create<br />
unpleasant feedback sounds.<br />
A note on Condenser Microphones<br />
If your microphone is a condenser microphone that requires phantom<br />
power you will need to switch on the 48V phantom power switch (3)<br />
located to the left of the Graphic Equaliser. Before doing this make sure<br />
that the Main Volume control (2) on the chosen channel is turned fully<br />
off to avoid causing an unpleasant sound that might damage your<br />
speakers.<br />
11
3. Adding Treble or Bass to the signal<br />
The GigRac offers simple Treble and Bass control for changing the tone<br />
of the signal.<br />
Treble (5)<br />
To add or remove some brightness or ‘sparkle’ to or from a signal, use<br />
the Treble control. In the center ‘click’ position (0) the Treble control<br />
has no effect. Turning it clockwise will boost the treble frequencies<br />
making the signal sound brighter. Turning it anti-clockwise will have the<br />
opposite effect by removing the treble frequencies and making the signal<br />
sound less bright.<br />
The Treble control is handy for adding some sparkle for example to an<br />
acoustic guitar, or for reducing the ‘s’ sound from sibilant vocals.<br />
Bass (6)<br />
To add some ‘bass thump’ to a signal or remove some ‘boominess’ or<br />
rumble, use the Bass control. In the center ‘click’ position (0) the Bass<br />
control has no effect. Turning it clockwise will boost the Bass frequencies<br />
making the signal sound punchier and more ‘bassy’. Turning it anticlockwise<br />
will have the opposite effect by removing the bass frequencies<br />
and making the signal sound less ‘boomy’.<br />
The Bass control is useful for making a bass drum sound punchier, or<br />
alternatively could be used for reducing explosive ‘b’ and ‘p’ sounds from<br />
a vocal signal.<br />
12
4. Plugging in an Acoustic Guitar, Stereo Keyboard or CD<br />
Player<br />
The GigRac will happily receive signals from instruments with either mono<br />
or stereo outputs such as guitars (Mono) or stereo keyboards and CD<br />
Players (Stereo)<br />
Before plugging in, make sure the Main Volume control (2) for the chosen<br />
channel is turned fully off to avoid accidental damage to your speakers.<br />
Acoustic Guitars<br />
Set the Main Master Volume control (1) to about halfway.<br />
Make sure the Main Volume control (2) on the channel you are about to<br />
use is turned fully down.<br />
Plug the guitar lead into the jack socket in the center of the combination<br />
input socket (7) on the channel of your choice. Turn up the volume<br />
control on your guitar to about halfway, and then gradually turn up the<br />
Main Volume control (2) until you hear the guitar signal appearing in the<br />
loudspeakers.You should also see activiity on the Main Ouptut meter<br />
(4).<br />
Stereo Keyboards and CD Players<br />
The GigRac offers four channels that can receive stereo inputs. Two of<br />
these channels are equipped with RCA/Phono connectors (Channel 5<br />
and 6) (8) and two with Jack connectors (Channels 7 and 8) (9).<br />
Connect up the Left and Right outputs of your CD player or Cassette<br />
deck to the Left and Right RCA/Phono inputs on either Channel 5 or 6 of<br />
the GigRac. Turn up the Main Master Volume control (1) to about halfway,<br />
and then turn up the Main Volume control (2) on the chosen channel<br />
until you hear the signal appearing in the loudspeakers.<br />
Connect up the Left and Right outputs of your Stereo Keyboard to the<br />
Left and Right Jack inputs on either Channel 7 or 8 of the GigRac. Set<br />
the volume control of your keyboard to about halfway. Turn up the Main<br />
Master Volume control (1) to about halfway, and then turn up the Main<br />
Volume control (2) on the chosen channel until you hear the signal<br />
appearing in the loudspeakers.<br />
You may now use the Treble and Bass controls as mentioned above to<br />
change the tone of the signals.<br />
13
5. Apply one of the 8 GigFX digital effects to the signals<br />
The GigRac’s GIGFX Processor (10) has a choice of 8 studio quality<br />
digital effects that can be added to any individual or group of signals<br />
running through the mixer. Usually vocals require some digital reverb or<br />
echo to be added to them in order to create a more spatial sound that<br />
is pleasing to the listener.<br />
Make sure the ‘FX On’ button is selected<br />
To try this out simply select one of the 8 GigFX presets such as Hall<br />
Reverb using the selector knob (14). Make sure the ‘Bypass’ switch<br />
(11) is not selected.<br />
Turn the ‘FX to Main’ control (12) to about halfway and then gradually<br />
turn up the individual ‘FX’ send control (13) on the channel you wish to<br />
add the effect to. As you turn up the ‘FX’ send level you should hear the<br />
signal change.<br />
By pressing the ‘FX On’ (11) switch to the off position you can compare<br />
the original ‘dry’ signal with the ‘wet’ effected signal.<br />
You can now turn the selector knob (14) to select different types of<br />
effects for comparative purposes<br />
A Note on Channel Use<br />
Channels 1-4 are the most sensitive. It is better to use these channels<br />
for microphones (particularly if your microphones are fitted with jack<br />
plugs), and guitars with passive pickups. It is likely that you will need to<br />
have the pad buttons pressed in if you use mics fitted with XLRs.<br />
Channels 5-8 are less sensitive, they are ideal for line-level devices such<br />
as keyboards, CD players and tape players. They will also work with<br />
guitars with active pickups. Microphones fitted with XLRs will also work<br />
(unless they need phantom power).<br />
14
Front and Rear Panels<br />
Front Panel (GigRac 300 and 600)<br />
Input channel<br />
The GigRac has a total of 8 channels. Channels 1-4 are designed to<br />
handle mono microphone or mono line level signals only. Channels 5-8<br />
are designed to handle mono microphone and mono line level signals but<br />
will also accommodate stereo signals as well. (The GigRac 300 and 600<br />
are mono devices and therefore any stereo signals connected will be<br />
automatically summed to mono before being output.)<br />
(1) Input Connector<br />
7<br />
6<br />
5<br />
4<br />
3<br />
1<br />
2<br />
Input Channel<br />
This connector is a combination Jack/3 Pin XLR connector and can receive<br />
any of the following types of input connectors<br />
Microphone cables with Jack connectors<br />
Microphone cables with 3 pin XLR connectors<br />
Line input cables with Jack connectors (e.g. guitars, keyboards<br />
etc.)<br />
Line input cables with 3 pin XLR connectors.<br />
15
(2) PAD AD switch (Channels 1-4 only)<br />
Pressing the PAD switch reduces the input level by 20dB allowing line or<br />
mic level signals that would normally be too loud for the Input stage to<br />
handle to be connected without any audible distortion.<br />
(3) Main Volume Control<br />
ol<br />
The Main Volume Control determines the amount of level sent from the<br />
channel to the main output mix.<br />
This allows each channel’s relative volume level to be ‘blended’ together<br />
to create the final mix whose overall level is then controlled by the Main<br />
Master Volume control (8) .<br />
(4) Mon Volume Control<br />
ol<br />
The Monitor (Mon) Volume Control determines the amount of level sent<br />
from the channel to the Monitor (Mon) Output (20) and also the Phones<br />
Output(18)<br />
This allows each channel’s relative volume level to be ‘blended’ together<br />
to create a separate monitor mix whose overall level is then controlled<br />
by the Mon Master Volume control (9). This feature is used mainly for<br />
creating a ‘foldback’ mix for the musicians and would normally be sent to<br />
a monitor speaker with its own amplifier. (This could also be used for<br />
creating a headphone mix)<br />
The Mon Volume Control operates independent of the Main Volume Control<br />
and will therefore not be affected if the Main Volume Control is turned<br />
up or down. (For the more technically minded, the signal is sourced Pre-<br />
Fader and Post EQ)<br />
(5) FX Control<br />
The FX Control determines the amount of level sent from the channel to<br />
the GigFX digital effects processor and also to the ‘FX Bus output’<br />
connector (21)<br />
This allows each channel’s relative level to be ‘blended’ together to create<br />
a separate effects mix whose overall level is then controlled by the ‘FX<br />
to Main’ (24) and ‘FX to Mon’ (25).<br />
The FX Bus Output connector could also be used to connect to other<br />
external devices such as effects processors or recorders.<br />
16
(6) Bass Control<br />
ol<br />
The Bass Control is set at 80Hz and allows you to either add or remove<br />
the low frequency content of the signal by 15dB.<br />
Rotating the control clockwise will ’boost’ the signal, rotating the control<br />
anticlockwise will ‘cut’ the signal.<br />
This control is useful for adding more ‘thump’ to low frequency signals<br />
such as bass guitars and kick drums but can also be used to remove<br />
unwanted rumble or boominess from signals such as vocal or instrument<br />
microphones.<br />
(7) Treble Control<br />
ol<br />
The Treble Control is set at 12kHz and allows you to either add or remove<br />
the high frequency content of the signal by 15dB.<br />
Rotating the control clockwise will ‘boost’ the signal, rotating the control<br />
anticlockwise will ‘cut’ the signal.<br />
This control is useful for adding ‘crispness’ or ‘sizzle’ to signals with a lot<br />
of high frequency content such as guitars and cymbals but can also be<br />
used to remove unwanted sibilance from signals such as vocals.<br />
17
Master Section GigRac 600<br />
18
(8) Main Master Volume Control<br />
This control determines the overall level that is sent to the internal<br />
amplification and to the Main Output socket.(19)<br />
(9) Mon (PHONES) Master Volume Control<br />
This control determines the overall level that is sent to the Monitor<br />
Output (Mon Output) and Phones socket.<br />
(10) Phantom 48V switch<br />
This switch turns the 48v phantom power On/Off for the 3 pin XLR<br />
sockets on channels 1-4. When the switch is turned On the red LED<br />
will illuminate.<br />
48V phantom power is used to power condenser microphones and DI<br />
boxes.<br />
NB! To avoid possible damage to your loudspeakers,<br />
make sure that the Main and Monitor Master Volume<br />
controls are turned down fully before switching on the<br />
48V phantom power.<br />
(11) Graphic Equaliser<br />
The Graphic Equaliser is divided into 7 frequency bands. Each frequency<br />
band can be used to either ‘cut’ or ‘boost’ the Main Output signal by up<br />
to 10dB.<br />
The Graphic Equaliser is very useful for compensating for poor room<br />
acoustics or improving the performance of your loudspeakers.<br />
(12) To Main/To Mon switch (GigRac 600 only)<br />
This switch determines which signal path is sent to the Graphic Equaliser.<br />
Normally the Graphic Equaliser operates on the Main Mix output path<br />
(To Main) but it might be desirable for some applications to have the<br />
Graphic Equaliser assigned to the Mon Mix output path.<br />
19
(13) Power LED<br />
The red Power LED illuminates when the GigRac is switched on.<br />
(14) Main to Amp 1/Mon to Amp 2 - Main to Amp 1/Main to<br />
Amp 2 switch (GigRac 600 only)<br />
This switch determines which signals are sent to Amp 1/Speaker Output<br />
1 and Amp 2/Speaker Output 2.<br />
The Choices are:<br />
Main to Amp 1/Main to Amp 2 – The Main Mix is sent to both Speaker<br />
Output 1 and Speaker Output 2.<br />
Main to Amp 1/Mon to Amp 2 – The Main Mix Output will appear on<br />
Speaker Output 1 and the mon Mix Output will appear on Speaker Output<br />
2<br />
20
(15) Amp Clip LED<br />
The red Amp Clip LED illuminates when the input level to the internal<br />
amplifier is too high. It is acceptable for this LED to come on momentarily<br />
every now and then but the Main or Monitor Master Volume (depending<br />
on which mode has been selected: see (14) above) should be turned<br />
down if the Amp Clip LED illuminates consistently.<br />
22<br />
NB! Continued use of the GigRac with the Amp Clip<br />
LED illuminated could cause serious damage to your<br />
GigRac and your loudspeakers!<br />
(16) Main Output meter<br />
The 10-segment output meter shows the signal level output from the<br />
Main Master Volume control.<br />
It is best to aim to have the red 10dB LED lighting up regularly during<br />
the loudest signals peaks playing through your GigRac and the 16dB<br />
LED flicking on very occasionally. This will ensure that a good level is<br />
passing through the mixer.<br />
(17) Record Output<br />
The Record Output is for connecting a recording device such as a<br />
cassette or mini disk recorder.<br />
The signal output at the Record Output socket is a post fade signal<br />
derived from the Main Mix output. The amount of signal level leaving the<br />
GigRac via the Record Outputs is determined by the Main Master Volume<br />
control. (8)<br />
(18) Phones Output<br />
Connect headphones to the Phones Output. The Phones Output derives<br />
its signal from the Monitor (Mon) controls on each channel and the over<br />
all volume of the headphones output is determined by using the Mon<br />
(Phones) Master Volume control (9)<br />
(19) Main Output<br />
The Main Output carries the Main Mix signal after it has passed through<br />
the Graphic Equaliser and the Main Master Volume control (i.e. the<br />
same signal that is sent to the internal amplification). This output can
e used to send the Main Mix to another amplifier or powered speaker<br />
or alternatively it can be used to send a ‘submix’ to another mixer’s<br />
input channel or another recording device.<br />
(20) Mon Output<br />
The Mon Output carries the Monitor Mix signal derived from the Mon<br />
controls on each channel. The Mon output level is controlled by the Mon<br />
Master Volume control.(9)<br />
This output is used mainly to send the Mon Mix signal to an on stage fold<br />
back speaker system of some kind.<br />
(21) FX Bus Output<br />
The FX Bus Output carries the FX Mix signal as derived from the FX<br />
controls on each channel. This allows additional external effects<br />
processing devices to be used in conjunction with the GigRac’s built in<br />
GigFX digital effects processor.<br />
(22) Submix Input<br />
The Submix Input allows the output from another mixer to be blended<br />
with the Main Mix Output of the GigRac. This input could also be used<br />
for connecting an effects return signal from an external effects<br />
processing device.<br />
(23) FX Bypass Footswitch<br />
The FX Bypass Footswitch socket is used for connecting an optional foot<br />
switch to turn the GigFX processor On and Off.<br />
(24) Effect on switch<br />
The effect on switch has a toggle action, the adjacent LED indicates<br />
when the FX unit is on.<br />
23
Master Section GigRac 300<br />
(8) Main Master Volume Control<br />
This control determines the overall level that is sent to the internal<br />
amplification and to the Main Output socket.<br />
(9) Monitor Master Volume Control (Mon Master Volume Control)<br />
This control determines the overall level that is sent to the Monitor<br />
Output (Mon Output) and Phones socket.<br />
24
(10) Phantom 48V switch<br />
This switch turns the 48v phantom power On/Off for the 3 pin XLR<br />
sockets on channels 1-4. When the switch is turned On the red LED<br />
will illuminate.<br />
48V phantom power is used to power condenser microphones and DI<br />
boxes.<br />
NB! To avoid the possible damage to your loudspeakers,<br />
make sure that the Main and Monitor Master Volume<br />
controls are turned downfully before switching on the<br />
48V phantom power.<br />
(11) Graphic Equaliser<br />
The Graphic Equaliser is divided into 7 frequency bands. Each frequency<br />
band can be used to either ‘cut’ or ‘boost’ the Main Output signal by up<br />
to 10dB.<br />
The Graphic Equaliser is very useful for compensating for poor room<br />
acoustics or improving the performance of your loudspeakers.<br />
(12) Main To Amp/Mon To Amp switch<br />
This switch is usually set to ‘Main To Amp’ (Up position), which means<br />
that the output from the Main Master Volume (8) is sent to the internal<br />
amplification and then out of the Speaker Outputs on the rear of the<br />
GigRac.<br />
Alternatively it is possible by pressing the switch down, to send the<br />
output from the Mon Master Volume (9) to the internal amplification<br />
and then out of the Speaker Outputs.<br />
When the ‘Mon to Amp’ mode is selected the Main Output is not sent to<br />
the Speaker 1 and Speaker 2 outputs but is available at the Main output<br />
Jack socket (18)<br />
(13) Power LED<br />
The red Power LED illuminates when the GigRac is switched on.<br />
25
(14) Amp Clip LED<br />
The red Amp Clip LED illuminates when the input level to the internal<br />
amplifier is too high. It is acceptable for this LED to come on momentarily<br />
every now and then but the Main or Monitor Master Volume (depending<br />
on which mode has been selected – see (12) above) should be turned<br />
down if the Amp Clip LED illuminates consistently.<br />
26<br />
NB! Continued use of the GigRac with the Amp Clip<br />
LED illuminated could cause serious damage to your<br />
GigRac and your loudspeakers!<br />
(15) Main Output meter<br />
The 10-segment output meter shows the signal level output from the<br />
Main Master Volume control. (8)<br />
It is best to aim to have the red 10dB LED lighting up regularly during<br />
the loudest signals peaks playing through your GigRac and the 16dB<br />
LED flicking on very occasionally. This will ensure that a good level is<br />
passing through the mixer.<br />
(16) Record Output<br />
The Record Output is for connecting a recording device such as a<br />
cassette or mini disk recorder.<br />
The signal output at the Record Output socket is a post fade signal<br />
derived from the Main Mix output. The amount of signal level leaving the<br />
GigRac via the Record Outputs is determined by the Main Master Volume<br />
control.(8)<br />
(17) Phones Output<br />
Connect headphones to the Phones Output. The Phones Output derives<br />
its signal from the Monitor (Mon) controls on each channel and the over<br />
all volume of the headphones output is determined by using the Mon<br />
(Phones) Master Volume control (9)<br />
(18) Main Output<br />
The Main Output carries the Main Mix signal after it has passed through<br />
the Graphic Equaliser and the Main Master Volume control (i.e. the<br />
same signal that is sent to the internal amplification). This output can
e used to send the Main Mix to another amplifier or powered speaker<br />
or alternatively it can be used to send a ‘submix’ to another mixer’s<br />
input channel or another recording device.<br />
(19) Mon Output<br />
The Mon Output carries the Monitor Mix signal derived from the Mon<br />
controls on each channel. The Mon output level is controlled by the Mon<br />
Master Volume control.(9)<br />
This output is used mainly to send the Mon Mix signal to an on stage fold<br />
back speaker system of some kind.<br />
(20) FX Bus Output<br />
The FX Bus Output carries the FX Mix signal as derived from the FX<br />
controls on each channel. This allows additional external effects<br />
processing devices to be used in conjunction with the GigRac’s built in<br />
GigFX digital effects processor.<br />
(21) Submix Input<br />
The Submix Input allows the output from another mixer to be blended<br />
with the Main Mix Output of the GigRac.<br />
This input could also be used for connecting an effects return signal<br />
from an external effects processing device.<br />
(22) FX Bypass Footswitch<br />
The FX Bypass Footswitch socket is used for connecting an optional<br />
foot switch to turn the GigFX processor On and Off.<br />
(23) Effect On Switch<br />
The effect on switch has a toggle action, the adjacent LED indicates<br />
when the FX unit is on.<br />
27
Rear Panel GigRac 600<br />
(1) Power Switch<br />
This switch turns the GigRac On or Off. The red Power LED (13) on the<br />
front panel will illuminate to confirm this.<br />
NB! Before switching the GigRac On or Off, make sure<br />
that the Main and Mon Master Volume controls are<br />
turned fully down.<br />
(2) Power Socket<br />
Connect the supplied power cable to this socket.<br />
(3) Speakers Outputs (Amp 1 and Amp 2)<br />
The Speaker Outputs are available as Neutrik Speakon connectors and<br />
standard ¼” Jack connectors.<br />
Connect your loudspeakers to these outputs. The signal sent to the<br />
Speakon connectors and the Jack sockets is exactly the same.<br />
Use the appropriate connector type to match the input connectors on<br />
your loudspeakers. The GigRac 600 is designed to work with loudspeakers<br />
rated at either 8 ohms or 4 ohms.<br />
The minimum load that either of the amplifiers inside the GigRac 600<br />
should be presented with is 4 ohms. this means that a single 4 or 8 ohm<br />
speaker can be connected to each amplifier outputs as shown in Fig 1.<br />
Alternatively, two 8 ohm speakers can be connected in parallel to each<br />
amplifier output, as shown in Fig 2. Two speakers connected like this<br />
gives a combined load of 4 ohms.<br />
28
Rear Panel GigRac 300<br />
(1) Power Switch<br />
This switch turns the GigRac On or Off. The red Power LED (13) on the<br />
front panel will illuminate to confirm this.<br />
NB! Before switching the GigRac On or Off, make sure<br />
that the Main and Mon Master Volume controls are<br />
turned fully down.<br />
(2) Power Socket<br />
Connect the supplied power cable to this socket.<br />
(3) Speakers Outputs<br />
The Speaker Outputs are available as Neutrik Speakon connectors and<br />
standard ¼” Jack connectors.<br />
Connect your loudspeakers to these outputs. The signal sent to the<br />
Speakon connectors and the Jack sockets is exactly the same.<br />
Use the appropriate connector type to match the input connectors on<br />
your loudspeakers.<br />
The minimum load that the amplifier inside the GigRac should be presented<br />
with is 4 ohms. This means that a single 8 ohm speaker can be connected<br />
to each of the speaker outputs as shown in Fig1, or two 8 ohm speakers<br />
can be connected in parallel to one of the speaker outputs as shown in<br />
Fig 2. Two speakers connected like this gives a combined load of 4<br />
ohms.<br />
30
Rackmounting Your GigRac<br />
The GigRac 300 or 600 can be rack mounted into a standard 19’’rack.This<br />
is useful for fixed instalations or for applications where the GigRac might<br />
need to be installed into a portable 19’’ rack along with other equipment.<br />
32
Connectors and Leads<br />
33
Block Diagram GigRac 600<br />
34
Block Diagram GigRac 300<br />
35
War<br />
arranty<br />
ranty<br />
1 <strong>Soundcraft</strong> is a trading division of Harman International Industries Ltd .<br />
End <strong>User</strong> means the person who first puts the equipment into regular<br />
operation.<br />
Dealer means the person other than <strong>Soundcraft</strong> (if any) from whom the<br />
End <strong>User</strong> purchased the Equipment, provided such a person is authorised<br />
for this purpose by <strong>Soundcraft</strong> or its accredited Distributor.<br />
Equipment means the equipment supplied with this manual.<br />
2 If within the period of twelve months from the date of delivery of the<br />
Equipment to†the End <strong>User</strong> it shall prove defective by reason only of<br />
faulty materials and/or workmanship to such an extent that the effectiveness<br />
and/or usability thereof is materially affected the Equipment or<br />
the defective component should be returned to the Dealer or to<br />
<strong>Soundcraft</strong> and subject to the following conditions the Dealer or<br />
<strong>Soundcraft</strong> will repair or replace the defective components. Any components<br />
replaced will become the property of <strong>Soundcraft</strong>.<br />
3 Any Equipment or component returned will be at the risk of the End<br />
<strong>User</strong> whilst in transit (both to and from the Dealer or <strong>Soundcraft</strong>) and<br />
postage must be prepaid.<br />
4 This warranty shall only be valid if:<br />
a) the Equipment has been properly installed in accordance with<br />
instructions contained in <strong>Soundcraft</strong>ís manual; and<br />
b) the End <strong>User</strong> has notified <strong>Soundcraft</strong> or the Dealer within 14<br />
days of the defect appearing; and<br />
c) no persons other than authorised representatives of <strong>Soundcraft</strong><br />
or the Dealer have effected any replacement of parts maintenance<br />
adjustments or repairs to the Equipment; and<br />
d) the End <strong>User</strong> has used the Equipment only for such purposes as<br />
<strong>Soundcraft</strong> recommends, with only such operating supplies as meet<br />
<strong>Soundcraft</strong>ís specifications and otherwise in all respects in accordance<br />
with <strong>Soundcraft</strong>ís recommendations.<br />
5 Defects arising as a result of the following are not covered by this<br />
Warranty: faulty or negligent handling, chemical or electro-chemical or<br />
electrical influences, accidental damage, Acts of God, neglect, deficiency<br />
in electrical power, air-conditioning or humidity control.<br />
6 The benefit of this Warranty may not be assigned by the End <strong>User</strong>.<br />
7 End <strong>User</strong>s who are consumers should note their rights under this<br />
Warranty are in addition to and do not affect any other rights to which<br />
they may be entitled against the seller of the Equipment.<br />
36
Gigrac 300 / 600 Specifications<br />
Noise<br />
EIN 150 ohms 20 - 22kHz CH1 - CH4<br />
EIN 150 ohms 20 - 22kHz CH5 - CH6<br />
Main out Level control mid<br />
Mon out Level control mid<br />
Amp out<br />
-123 dBu<br />
-123 dBu<br />
-78 dBu<br />
-80 dBu<br />
-57 dBu<br />
Crosstalk<br />
Main cutoff<br />
-80 dB<br />
Mon cutoff<br />
-80 dB<br />
Frequency Response<br />
20 - 22Khz rel 1kHz Line in to Main out +0.2/-2.5 dB<br />
THD+N<br />
Mic i/p -20dB Pad 0dBu I/P at Main out (22Hz-22kHz) 0.15 %<br />
Mic i/p to Amp Out @ full power 22-22kHz 0.15%<br />
INPUTS<br />
Mic Input Impedance<br />
Line Input Impedance<br />
Max Input Mic (20dB pad )<br />
Max Input Line (20dB pad )<br />
Max Mic gain to main out<br />
INPUTS CH5 CH8<br />
Mic Input Impedance<br />
Line Input Impedance<br />
Max Input Mic<br />
Max Input Line<br />
Max Mic gain to main out<br />
5.5 kohms<br />
30 kohms<br />
-3.5 dBu<br />
10 dBu<br />
60 dB<br />
2.4 kohms<br />
40 kohms<br />
-18 dBu<br />
3 dBu<br />
50 dB<br />
OUTPUTS<br />
Max out main / mon<br />
Power Output Gigrac 300:<br />
Power Output Gigrac 600:<br />
18dBu<br />
300W into 4 ohms<br />
2 X 300W into<br />
4 ohms<br />
CONNECTORS<br />
(All Jacks are 3 pole 1/4")<br />
Mic: Balanced XLR combi connectors/ Balanced jack combi connectors<br />
Line: Balanced Jack / combi connectors / Unbalanced RCA phono<br />
FX bus output: Impedance Balanced Jack<br />
Submix in: Unbalanced Jack<br />
Main out: Impedance Balanced Jack<br />
Mon out: Impedance Balanced Jack<br />
Record out: unbalanced RCA phono<br />
Phones: Jack<br />
Speakers: Speakon (pins +1 and -1) and Jack<br />
37
Your Notes:<br />
38
<strong>Soundcraft</strong><br />
Harman International Industries Ltd<br />
Cranborne House, Cranborne Road, Potters Bar, Herts, EN6 3JN, UK<br />
TEL: +44 (0)1707 665000 FAX: +44 (0)1707 660742 EMAIL: info@soundcraft.com<br />
<strong>Soundcraft</strong> USA<br />
8500 Balboa Blvd., Northridge, CA 91329, USA<br />
TEL: +1-818-920-3212 FAX: +1-818-920-3208 EMAIL: soundcraft-usa@harman.com<br />
www.gigrac.com<br />
<strong>Soundcraft</strong> reserves the right to improve or otherwise alter any information supplied in this document or any other documentation supplied hereafter. E&OE 11/03.<br />
This equipment complies with the EMC Directive 89/336/EEC


![2 Use the CATEGORY [DEC] / [INC] but - Pro Music](https://img.yumpu.com/43682164/1/190x245/2-use-the-category-dec-inc-but-pro-music.jpg?quality=85)