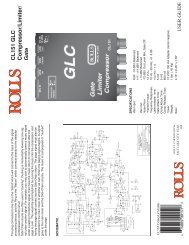
User Guide - Soundcraft
User Guide - Soundcraft
User Guide - Soundcraft
- No tags were found...

You also want an ePaper? Increase the reach of your titles
YUMPU automatically turns print PDFs into web optimized ePapers that Google loves.
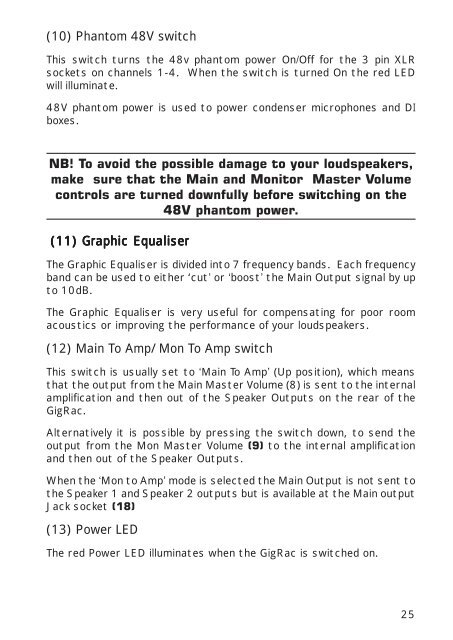
(10) Phantom 48V switch<br />
This switch turns the 48v phantom power On/Off for the 3 pin XLR<br />
sockets on channels 1-4. When the switch is turned On the red LED<br />
will illuminate.<br />
48V phantom power is used to power condenser microphones and DI<br />
boxes.<br />
NB! To avoid the possible damage to your loudspeakers,<br />
make sure that the Main and Monitor Master Volume<br />
controls are turned downfully before switching on the<br />
48V phantom power.<br />
(11) Graphic Equaliser<br />
The Graphic Equaliser is divided into 7 frequency bands. Each frequency<br />
band can be used to either ‘cut’ or ‘boost’ the Main Output signal by up<br />
to 10dB.<br />
The Graphic Equaliser is very useful for compensating for poor room<br />
acoustics or improving the performance of your loudspeakers.<br />
(12) Main To Amp/Mon To Amp switch<br />
This switch is usually set to ‘Main To Amp’ (Up position), which means<br />
that the output from the Main Master Volume (8) is sent to the internal<br />
amplification and then out of the Speaker Outputs on the rear of the<br />
GigRac.<br />
Alternatively it is possible by pressing the switch down, to send the<br />
output from the Mon Master Volume (9) to the internal amplification<br />
and then out of the Speaker Outputs.<br />
When the ‘Mon to Amp’ mode is selected the Main Output is not sent to<br />
the Speaker 1 and Speaker 2 outputs but is available at the Main output<br />
Jack socket (18)<br />
(13) Power LED<br />
The red Power LED illuminates when the GigRac is switched on.<br />
25

![2 Use the CATEGORY [DEC] / [INC] but - Pro Music](https://img.yumpu.com/43682164/1/190x245/2-use-the-category-dec-inc-but-pro-music.jpg?quality=85)