Manual (PDF) - Bender
Manual (PDF) - Bender
Manual (PDF) - Bender

You also want an ePaper? Increase the reach of your titles
YUMPU automatically turns print PDFs into web optimized ePapers that Google loves.
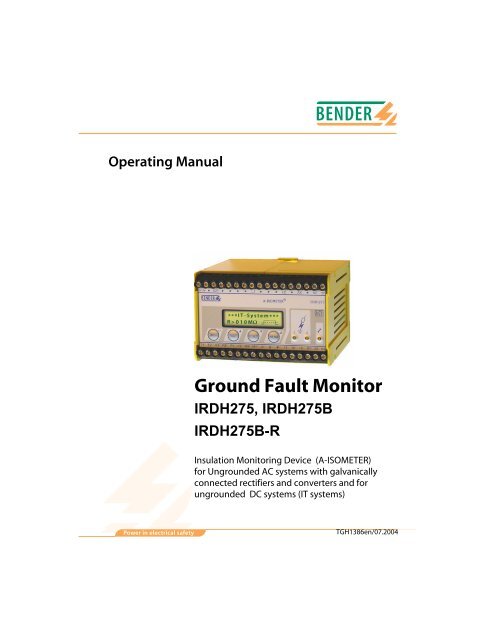
Operating <strong>Manual</strong><br />
Ground Fault Monitor<br />
IRDH275, IRDH275B<br />
IRDH275B-R<br />
Insulation Monitoring Device (A-ISOMETER)<br />
for Ungrounded AC systems with galvanically<br />
connected rectifiers and converters and for<br />
ungrounded DC systems (IT systems)<br />
Power in electrical safety<br />
TGH1386en/07.2004
<strong>Bender</strong> Inc.<br />
700 Fox Chase<br />
Coatesville, PA 19320<br />
Tel.: 1-610-383-9200<br />
Fax: 1-610-383-7100<br />
E-Mail: info@bender.org<br />
Internet: http://www.bender.org<br />
© 2004 BENDER<br />
All rights reserved.<br />
Reprinting only with permission<br />
of the publisher.<br />
Subject to change without notice.
Table of Contents<br />
1. Safety information ............................................................................ 7<br />
1.1 Use for the intended purpose ........................................................ 7<br />
1.2 Warranty and liability ........................................................................ 7<br />
1.2.1 Personnel ............................................................................................... 8<br />
1.2.2 About the operating manual .......................................................... 8<br />
1.2.3 Hazards when handling the A-ISOMETER® IRDH275 ............. 8<br />
1.2.4 Inspection, transport and storage ................................................ 9<br />
1.2.5 Note ......................................................................................................... 9<br />
1.3 Explanations of symbols and warnings ................................... 10<br />
1.4 Directions for installation .............................................................. 11<br />
2. Function ........................................................................................... 13<br />
2.1 Common characteristics<br />
(IRDH275 / IRDH265B / IRDH275B-R) ........................................ 13<br />
2.2 Additional characteristics “R” Option ....................................... 13<br />
2.3 Additional characteristics “B” Option ....................................... 13<br />
2.4 Product description ........................................................................ 14<br />
2.5 Function .............................................................................................. 14<br />
2.6 Additional functions “R” Option.................................................. 16<br />
2.7 Additional functions “B” Option ................................................. 17<br />
3. Setup flow chart (threepart) ......................................................... 21<br />
4. Connection ...................................................................................... 25<br />
4.1 Wiring ................................................................................................... 25<br />
4.2 Wiring diagrams with coupling devices .................................. 28<br />
TGH1386en/07.2004<br />
3
Table of Contents<br />
4.2.1 Connection with AGH150W-4 ..................................................... 28<br />
4.2.2 Connection with AGH520S ........................................................... 29<br />
4.2.3 Connection with AGH204S-4 ....................................................... 30<br />
5. Operation and setting .................................................................... 33<br />
5.1 Operating features and displays IRDH275 .............................. 33<br />
5.1.1 Display in the standard mode ...................................................... 34<br />
5.1.2 Display in the menu mode ............................................................ 34<br />
5.1.3 Function keys ..................................................................................... 35<br />
5.2 Menu structure .................................................................................. 38<br />
5.2.1 Diagram menu structure ............................................................... 39<br />
5.3 Menu HISTORY INFO (IRDH275B..) ............................................. 40<br />
5.3.1 Diagram HISTORY INFO (IRDH275B..) ........................................ 41<br />
5.4 Menu ISO SETUP:<br />
Setting of the basic A-ISOMETER® functions .......................... 42<br />
5.4.1 Response values Alarm 1 and Alarm 2 ...................................... 42<br />
5.4.2 Operating principle of the alarm relays ................................... 42<br />
5.4.3 Memory setting (on/off) ................................................................ 44<br />
5.4.4 Current output (IRDH275B..) ........................................................ 44<br />
5.5 Menu ISO ADVANCED:<br />
Setting of the extended functions ............................................. 45<br />
5.5.1 External coupling devices (AGH: no) ......................................... 45<br />
5.5.2 Adaptation to the system leakage capacitance<br />
(Cemax : 150 µF) ................................................................................ 46<br />
5.5.3 Changing the measuring principle from AMP to DC<br />
(Measure: AMP) ................................................................................. 46<br />
5.5.4 Automatic self test (Autotest: 24h) ............................................ 46<br />
5.5.5 Real-time clock (Clock) (IRDH275B..) ......................................... 46<br />
5.5.6 Date (Date) (IRDH275B..) ................................................................ 46<br />
5.5.7 Test (Test) (IRDH275B..) .................................................................. 46<br />
5.5.8 Diagram ISO ADVANCED ............................................................... 47<br />
4 TGH1386en/07.2004
Table of Contents<br />
5.6 Menu COM SETUP:<br />
Setting the RS485 bus (BMS protocol) ..................................... 48<br />
5.6.1 Bus address “Addr:” (IRDH275B..) .............................................. 48<br />
5.6.2 ISOnet function (IRDH275B..) ....................................................... 48<br />
5.6.3 ISO monitor (IRDH275B..) .............................................................. 48<br />
5.6.4 Diagram COM SETUP (IRDH275B..) ............................................ 49<br />
5.7 Menu PASSWORD ............................................................................ 50<br />
5.7.1 Activating and setting the password ........................................ 50<br />
5.7.2 Diagram PASSWORD ...................................................................... 50<br />
5.8 Menu LANGUAGE ........................................................................... 51<br />
5.8.1 Setting the national language .................................................... 51<br />
5.8.2 Diagram Language .......................................................................... 51<br />
5.9 Menu SERVICE ................................................................................... 52<br />
6. Serial interfaces .............................................................................. 53<br />
6.1 IsoData protocol (standard IRDH275) ...................................... 53<br />
6.2 RS485 interface (IRDH275B..) ....................................................... 54<br />
6.3 Topology (IRDH275B..) ................................................................... 55<br />
6.3.1 Correct arrangement ...................................................................... 55<br />
6.3.2 Wrong arrangement ....................................................................... 55<br />
6.3.3 Wiring ................................................................................................... 55<br />
6.4 <strong>Bender</strong> Measuring Device Interface<br />
(BMS protocol) (IRDH275B..) ........................................................ 56<br />
6.4.1 BMS Master ........................................................................................ 56<br />
6.4.2 BMS Slave ............................................................................................ 57<br />
6.4.3 Setup of a BMS network ................................................................ 58<br />
7. Technical data IRDH275 / 275R / 275B ....................................... 61<br />
7.1 Data in tabular form ........................................................................ 61<br />
7.2 Standards ............................................................................................ 64<br />
7.3 Characteristic curves ....................................................................... 65<br />
TGH1386en/07.2004<br />
5
Table of Contents<br />
7.4 Ordering details ................................................................................ 72<br />
7.4.1 Standard version ............................................................................... 72<br />
7.4.2 Coupling devices .............................................................................. 73<br />
7.4.3 Measuring instruments .................................................................. 73<br />
7.4.4 Label for modified versions .......................................................... 73<br />
6 TGH1386en/07.2004
1. Safety information<br />
1.1 Use for the intended purpose<br />
The A-ISOMETER, Model IRDH275 Series is intended for:<br />
• monitoring the insulation resistance of ungrounded (IT) systems<br />
Any other use, or any use which goes beyond the foregoing, is deemed to<br />
be use other than for the intended purpose. The BENDER companies shall<br />
not be liable for any losses or damage arising there from.<br />
Use for the intended purpose also includes<br />
• compliance with all information in the operating instructions, and<br />
• compliance with test intervals.<br />
As a basic priciple, our "General conditions of Sale and Delivery" shall apply.<br />
At the latest, these shall be available to the operator when the contract is concluded.<br />
1.2 Warranty and liability<br />
Warranty and liability claims in cases of damage to persons and property<br />
shall be excluded if they are attributable to one or more of the following<br />
causes:<br />
• Use of the A-ISOMETER® other than for the intended purpose<br />
• Incorrect assembly or installation, commissioning, operation and maintenance<br />
of<br />
the A-ISOMETER®.<br />
• Failure to comply with the information in the operating instructions regarding<br />
transport, commissioning, operation and maintenance of the A-ISOMETER®.<br />
• Unauthorized structural modifications to the A-ISOMETER®.<br />
• Failure to comply with the technical data<br />
• Improperly executed repairs, and the use spare parts or accessories which are<br />
not recommended by the manufacturer.<br />
• Cases of disaster and force majeure<br />
• Assembly and installation with device combinations not recommended.<br />
TGH1386en/07.2004<br />
7
Safety information<br />
This operating manual, especially the safety information, must be observed<br />
above all by personnel who work on the A-ISOMETER®. In addition, the<br />
rules and regulations that apply for accident prevention at the place of use<br />
must be observed.<br />
1.2.1 Personnel<br />
Only appropriately qualified staff may work on the A-ISOMETER®. Qualified<br />
means familiar with the installation, commissioning and operation of the<br />
product and with training appropriate to the work. Personnel must have<br />
read and understood the safety section and warning information in this operating<br />
manual.<br />
1.2.2 About the operating manual<br />
This operating manual has been compiled with the greatest possible care.<br />
Nevertheless, errors and mistakes cannot be entirely ruled out. The BENDER<br />
companies assume no liability whatsoever for any injury to persons or damage<br />
to property which may be sustained as a result of faults or errors in this<br />
operating manual.<br />
1.2.3 Hazards when handling the A-ISOMETER® IRDH275<br />
The A-ISOMETER® IRDH275 is constructed according to the state-of-the-art<br />
and recognized technical safety rules. Nevertheless, when it is being used,<br />
hazards may occur to the life and limb of the user or third parties, or there<br />
may be adverse effects on the A-ISOMETER® or on other valuable property.<br />
The A-ISOMETER® must only be used:<br />
• for the purpose for which it is intended<br />
• when it is in perfect technical conditions as far as safety is concerned<br />
Any faults which may impair safety must be eliminated immediately. Impermissible<br />
modifications and the use of spare parts and additional devices<br />
which are not sold or recommended by the manufacturer of the devices may<br />
cause fires, electric shocks and injuries.<br />
Unauthorized persons must not have access to or contact with the A-ISOME-<br />
TER®. Warning signs must always be easily legible. Damaged or illegible<br />
signs must be replaced immediately.<br />
8 TGH1386en/07.2004
Safety information<br />
1.2.4 Inspection, transport and storage<br />
Inspect the dispatch packaging and equipment packaging for damage, and<br />
compare the contents of the package with the delivery documents. In the<br />
event of damage in transit, please inform the BENDER company immediately.<br />
The devices must only be stored in areas protected from dust, damp and<br />
spray or dripping water, and in which the specified storage temperatures are<br />
maintained.<br />
1.2.5 Note<br />
Make sure that the system and supply voltage is correct!<br />
Prior to insulation and voltage tests, the A-ISOMETER® must be disconnected<br />
from the power system for the duration of these tests.<br />
In order to check the proper connection of the device, it is recommended to<br />
carry out a functional test.<br />
Make sure that the basic settings meet the requirements of the system.<br />
Unauthorized persons must not have access to or contact with the A-ISOME-<br />
TER®.<br />
TGH1386en/07.2004<br />
9
Safety information<br />
1.3 Explanations of symbols and warnings<br />
The following designations and signs are used for symbols and warnings in<br />
BENDER documentation.<br />
This symbol means a possible threat of danger to the life and health of human<br />
beings.<br />
Warning<br />
Failure to comply with these warnings means that death, serious<br />
physical injury or substantial damage to property will ensue if the relevant<br />
precautions are not taken.<br />
Caution<br />
This symbol means a possibly dangerous situation. Failure to comply<br />
with these warnings means that slight physical injury or damage to<br />
property may ensue if the relevant precautions are not taken.<br />
This symbol gives important information about the correct handling<br />
of the A-ISOMETER®. Failure to comply with this information can result<br />
in faults on the A-ISOMETER® or in its environment.<br />
10 TGH1386en/07.2004
Safety information<br />
1.4 Directions for installation<br />
Only one insulation monitoring device may be used in each interconnected<br />
ungrounded (IT) system.<br />
When insulation or voltage test are to be carried out, the device shall<br />
be isolated from the system for the test period.<br />
The terminals and KE shall be connected by a separate wire to the equipment<br />
grounding conductor, GND (PE). If the terminals L1, L2 of the device<br />
are connected to a system under operation, the terminals and KE must<br />
not be disconnected from the equipment grounding conductor, GND (PE).<br />
In order to check the proper connection of the device, it is recommended to<br />
carry out a functional test using a genuine ground fault, e.g. via a suitable<br />
resistance, before starting the A-ISOMETER®.<br />
The devices, variant -4.. are delivered with the following factory setting:<br />
ISO SETUP: Alarm 1 / Alarm 2 =40 kΩ / 10 kΩ<br />
(Response values)<br />
ISO SETUP: Operating principle K1/K2 = N/O operation *<br />
ISO SETUP:<br />
Memory = off<br />
ISO ADVANCED: System leakage capacitance = 150 µF<br />
COM SETUP:<br />
Bus address = 3 (slave)<br />
* N/O = Normally De-energized Mode<br />
Please check if the basic setting of the A-ISOMETER® complies with the requirements<br />
of the system to be monitored.<br />
Insulation faults in DC circuits connected to the AC system are only monitored<br />
correctly when the rectifiers carry a continuous load of > 5 ... 10 mA.<br />
TGH1386en/07.2004<br />
11
Safety information<br />
12 TGH1386en/07.2004
2. Function<br />
2.1 Common characteristics (IRDH275)<br />
• A-ISOMETER® for ungrounded (IT) AC systems with galvanically connected<br />
rectifiers and for ungrounded (IT) DC systems<br />
(IT is the IEC term for ungrounded / floating system)<br />
• The operating range of the nominal voltage U n can be extended via high-voltagecoupling<br />
devices (e.g. AGH150W-4, AGH204S-4, AGH520S).<br />
• Automatic adaptation to the existing system leakage capacitance<br />
• measuring principle (Patent: EP 0 654 673 B1)<br />
• Two separately adjustable ranges of the response value1 kΩ ... 10 MΩ<br />
(Alarm 1, Alarm 2)<br />
• Two-line LCD display<br />
• Connection monitoring (monitoring of the system and ground connections)<br />
• Automatic device self-test<br />
• Option "W":<br />
This option provides: improved shock and vibration resistance for use in ships,<br />
on rolling stock and in seismic environment.<br />
2.2 Additional characteristics IRDH275 with "R" option<br />
• Increased ambient temperature: -40 °C ... +70 °C<br />
2.3 Additional characteristics IRDH275 with "B" option<br />
• Memory with real--time clock to store all alarm messages with date and time<br />
stamp.<br />
• RS485 interface (BMS protocol) for data exchange with other <strong>Bender</strong> devices<br />
(RS485 electrically isolated).<br />
• Internal disconnection of the A-ISOMETER from the system to be monitored<br />
(using a control signal; terminals F1/F2) , e.g. if several A-ISOMETERs® are interconnected.<br />
• Current output 0(4)...20mA (galvanically separated) in relation to the measured<br />
insulation value.<br />
TGH1386en/07.2004<br />
13
Function<br />
2.4 Product description<br />
The A-ISOMETER® type IRDH275 monitors the insulation resistance of ungrounded<br />
(IT) systems. It is suitable for universal use in 3(N)AC, AC/DC and<br />
DC systems. AC systems may include extensive DC supplied loads, such as<br />
converters or thyristor-controlled DC drives. The device automatically adapts<br />
itself to the existing system leakage capacitance.<br />
Suitable coupling devices are available to extend the nominal voltage range<br />
U n .<br />
The IRDH275B can be used in combination with a control and indicating device,<br />
PRC1470 version 2 or higher, for example, on the BMS (BMS = <strong>Bender</strong><br />
Measuring Device Interface) bus.<br />
2.5 Function<br />
The A-ISOMETER® IRDH275 is connected between the ungrounded system<br />
and the equipment grounding conductor, GND (PE).<br />
The response values and other function parameters are set via the function<br />
keys. The parameters are indicated on the LCD display and are stored in a<br />
non-volatile memory (EEPROM) after the setting is completed.<br />
A microprocessor-controlled pulsating AC measuring voltage is superimposed<br />
on the system ( measuring principle*). The measuring cycle<br />
consists of positive and negative pulses of the same amplitude. The period<br />
depends on the respective system leakage capacitances and the insulation resistances<br />
of the system to be monitored.<br />
An insulation fault between system and ground closes the measuring circuit.<br />
From the measured current value, the microprocessor calculates the insulation<br />
resistance which is indicated on the LCD display or the external kOhm<br />
measuring instrument.<br />
The measuring time is determined by the system leakage capacitances, the<br />
insulation resistance, and the system-related interference disturbances. System<br />
leakage capacitances do not influence the measuring accuracy.<br />
If the reading is below the selected response values Alarm 1/Alarm 2, the associated<br />
alarm relays respond and the alarm LEDs "Alarm 1/2“ light up and<br />
the measuring value is indicated on the LCD display (in the event of DC insulation<br />
faults, the faulty supply line is indicated). If the terminals R1/R2 are<br />
bridged (external RESET button [NC contact] or wire bridge), the fault indication<br />
will be stored. Pressing the RESET button, resets the fault message,<br />
14 TGH1386en/07.2004
Function<br />
provided that the currently displayed insulation resistance is at least 25%<br />
above the actual response value. The fault memory behaviour can also be set<br />
in the "ISO SETUP" menu, by selecting the sub menu Memory: on/off.<br />
By pressing the TEST button, the function of the A-ISOMETER® IRDH275<br />
can be tested. In this way, all essential measuring functions as well as connections<br />
to the system and to ground are checked. Depending on the setting<br />
in the menu, this self-test can automatically be carried out every hour or every<br />
24 hours (factory setting: Autotest:24h). The self test is automatically carried<br />
out after the supply voltage has been switched on.<br />
The connections for external kOhm display supplied by the current output<br />
0 ... 400 µA or 0(4)...20 mA ("B" option) at M+/M- are galvanically isolated.<br />
*) measuring principle "Adaptive Measuring Pulse", a measuring<br />
principle developed by BENDER (Patent: EP 0 654 673 B1).<br />
Self test<br />
In order to guarantee high functional reliability, the A-ISOMETER® IRDH275<br />
provides comprehensive self test functions. After switching the supply voltage<br />
on, all internal measuring functions, the components of the process control<br />
such as data and parameter memory as well as system and ground<br />
connections are checked using the self test functions. The progress of the self<br />
test is indicated on the display by a bar graph. Depending on the system conditions,<br />
the self test is running 15...20 seconds, then the message "Test ok!“<br />
appears on the LCD display for approximately 2 seconds. Then the device<br />
returns to normal measuring mode and the current measuring value is displayed<br />
after the expiry of the measuring time.<br />
When a fault is found, the message "!Error!" appears on the display, the system<br />
fault LED lights up, the relay K2 (21-22-24) switches and the respective<br />
fault message (see table) is indicated. If such a system fault occurs, a self test<br />
is started again every minute. If no more malfunction is detected, the fault<br />
message is deleted automatically and the system fault LED extinguishes.<br />
During operation, the self test function can be started by pressing the TEST<br />
button (internal or external) or automatically every hour or every 24 hours<br />
by selecting "ISO ADVANCED: Autotest:" in the menu. The alarm relays<br />
Alarm1/2 only switch after starting the self test function by pressing the TEST<br />
button, that means if an automatic self test has been selected, the alarm relays<br />
do not switch.<br />
TGH1386en/07.2004<br />
15
Function<br />
Error message Meaning Steps to be taken<br />
System connection<br />
Connection PE<br />
Device error x<br />
No low-resistance<br />
connection of terminals<br />
L1, L2, L3<br />
to the system<br />
No low-resistance<br />
connection of the<br />
terminals and<br />
KE to ground<br />
Internal device<br />
error<br />
1. Check the wiring of terminal L1, L2 to<br />
the system<br />
2. Press the test button<br />
3. Switch the supply voltage off and on.<br />
4. Check the fuses<br />
1. Check wiring of terminal and KE to<br />
your equipment ground, GND (PE)<br />
2. Press TEST button<br />
3. Switch the supply voltage off and on<br />
1. Press TEST button<br />
2. Switch the supply voltage off and on<br />
3. Contact BENDER<br />
If the on/off switching of the supply voltage is not possible for technical<br />
reasons, a RESET of the process control can be carried out by pressing<br />
the "ESC“, "RESET“ and "MENU“ key.<br />
2.6 Additional functions IRDH275 with "R" Option<br />
The IRDH275 with the "R" option features an increased ambient temperature<br />
range of -40 °C ... +70 °C. (e.g. IRDH265B-R...)<br />
16 TGH1386en/07.2004
Function<br />
2.7 Additional functions IRDH275 with "B" option (e.g IRDH275B..)<br />
Current output for external measuring instrument<br />
The current output provides 0(4)...20 mA.<br />
Real-time clock<br />
The real-time clock serves as a time base for the memory and self test functions.<br />
At first, the correct time and date must be set in the menu "ISO AD-<br />
VANCED". If time and date are not set, a "C" (clock) is flashing in the standard<br />
display. In the event of a supply voltage failure, time and date will be stored<br />
for at least thirty days.<br />
If the 24 V test is activated in the "ISO ADVANCED" menu, a special time of<br />
day can be selected for the execution of the self test in the menu "TEST:<br />
12:00". Then a self test will be started automatically once a day exactly at the<br />
preset time. If the 1 h test has been selected, the self test is automatically carried<br />
out every full hour.<br />
Interconnected systems<br />
When using A-ISOMETERs® in (IT) ungrounded systems, make sure that<br />
only one active A-ISOMETER® is connected in each interconnected system.<br />
If the ungrounded systems are interconnected via coupling switches, make<br />
sure that A-ISOMETERs® not currently used are disconnected and deactivated<br />
via a control system. Ungrounded systems coupled via diodes or capacitances<br />
may also influence the insulation monitoring process. Hence, also in<br />
this case a central control of the different A-ISOMETERs® is required.<br />
Function input F1/F2<br />
The A-ISOMETER® can be disconnected from the system and set to STAND-<br />
BY mode with the function input F1/F2. If the input F1/F2 is bridged, the<br />
connections L1/L2 are switched off via internal coupling relays, the measuring<br />
function is stopped and the message "STANDBY" appears on the display.<br />
After opening the input F1/F2, the connection to the IT system will be restored<br />
and a completely new measuring cycle for insulation monitoring is<br />
started.<br />
With this function, selective disconnection of an IRDH275 in interconnected<br />
IT systems can be carried out via auxiliary contacts of the respective coupling<br />
switch. One coupling switch each in a line-type or ring-type arrangement can<br />
deactivate a subsequent IRDH275. This arrangement guarantees that only<br />
one A-ISOMETER® is active in each galvanically connected system. In a ringtype<br />
arrangement with all coupling switches closed, it can be assumed that<br />
TGH1386en/07.2004<br />
17
Function<br />
all A-ISOMETERs® are deactivated. In order to prevent this, a BMS Master<br />
(IRDH275B BMS address 1) monitors the condition of the function input F1/<br />
F2 of all Slave A-ISOMETERs®. When all Slave A-ISOMETERs® are in the<br />
STANDBY mode, the insulation monitoring function of the Master A-ISOME-<br />
TER® and hence the function input F1/F2 of the Master are without function<br />
in this mode.<br />
Details are shown in the graphic below.<br />
BMS bus (A/B, RS485)<br />
F1/F2<br />
IRDH275B<br />
Addr. 1 Addr. 2<br />
F1/F2 IRDH275B<br />
PE<br />
PE<br />
G<br />
IT system 1 IT system 2<br />
G<br />
G<br />
IT system 4<br />
IT system 3<br />
G<br />
IRDH275B<br />
PE<br />
Addr. 4 Addr. 3<br />
IRDH275B<br />
F1/F2 F1/F2<br />
PE<br />
18 TGH1386en/07.2004
Function<br />
ISOnet Function (COM SETUP)<br />
Select "ISOnet=ON" from the menu COM SETUP to activate this function.<br />
This function is a type of scanning function. The BMS Master the ISOnet<br />
function of which has been activated controls the ISOnet Slave devices via<br />
the BMS bus. Once an A-ISOMETER® has finished its measurement cycle, the<br />
authorization for measuring the insulation resistance is passed on from the<br />
ISOnet Master to the next Slave. While an A-ISOMETER® is carrying out a<br />
measurement all other A-ISOMETERs® are in the STANDBY mode. In this<br />
way it can be prevented that the A-ISOMETERs® disturb each other in interconnected<br />
systems. In comparison to the solution coupling switches and<br />
function input F1/F2, the response time is prolonged since no continuous<br />
measurement takes place. The advantage is that no auxiliary contact of a coupling<br />
switch are required. Furthermore, this solution is ideally suited for capacitive<br />
IT systems or IT systems connected via diodes.<br />
An SOnet-Slave checks whether there is a Master available in the network. If<br />
there is no Master available, the fault message "ISOnet Master" appears on<br />
the display. When the ISOnet function is activated, the function input F1/F2<br />
will be disconnected.<br />
BMS bus (A/B, RS485)<br />
IRDH275B<br />
Addr. 1 Addr. 2<br />
IRDH275B<br />
PE<br />
PE<br />
G<br />
IT system 1 IT system 2<br />
G<br />
G<br />
IT system 4<br />
IT system 3<br />
G<br />
IRDH275B<br />
Addr. 4 Addr. 3<br />
IRDH275B<br />
PE<br />
PE<br />
TGH1386en/07.2004<br />
19
Function<br />
20 TGH1386en/07.2004
3. Setup flow chart (three-part)<br />
The encircled figures in the flow chart correspond to the figures in the legend<br />
to the wiring diagram.<br />
Setup of the A-ISOMETER® (1)<br />
Is the system to be monitored an<br />
unearthed system (IT system)<br />
no<br />
The IRDH275 is not suitable for this<br />
application( contact BENDER).<br />
Is the maximum nominal voltage<br />
AC 793 V or DC 650 V <br />
no<br />
The system voltage is too high for<br />
direct connection. A coupling device<br />
providing the respective voltage<br />
range must be connected.<br />
Deenergize the installation<br />
before connecting the device!<br />
yes<br />
Device connection<br />
Recommended wire cross section of<br />
connecting cable<br />
single wire 0.2 ... 4 mm2<br />
flexible 0.2 ... 2.5 mm2<br />
yes<br />
Optional device<br />
connection<br />
The two PE connections and KE must<br />
be connected separately to the<br />
equipotential bonding.<br />
The terminals L1 and L2 must be<br />
connected to the system to be monitored<br />
Un according to the wiring diagram .<br />
Connect the supply voltage Us<br />
to the terminals A1/+ and A2/-. Consider<br />
the details indicated on the nameplate.<br />
6<br />
2<br />
3<br />
4<br />
5<br />
1<br />
An external kOhm measuring instrument<br />
at M+/M- with a display range of<br />
10 kOhm to 1000 kOhm,<br />
Scale centre point: 120 kOhm<br />
Output current IRDH275: 0-400 mA<br />
Output current IRDH275B: 0/4-20 mA<br />
External TEST button (NO contact) to the<br />
terminals T1 and T2<br />
External RESET button (NC contact) to the<br />
terminals R1 and R2<br />
10<br />
7<br />
8<br />
When using the RS485 interface, take care<br />
that a 120 Ohm resistor is connected at<br />
the beginning and the end of the network.<br />
11<br />
The output contacts of the alarm relays<br />
Alarm 1 (11-12-14)<br />
Alarm 2 (21-22-24)<br />
12<br />
13<br />
TGH1386en/07.2004<br />
21
Setup flow chart (three-part)<br />
Setup of the A-ISOMETER® (2)<br />
Connect the supply voltage<br />
Connect the voltage of the<br />
system to be monitored<br />
The A-ISOMETER carries out a<br />
self test. The display indicates<br />
the insulation value after finishing<br />
the measurement.<br />
Only IRDH275B:<br />
set the clock<br />
Shall the basic setting<br />
be changed<br />
Alarm1 = 40 kOhm<br />
Alarm2 = 10 kOhm<br />
K1/K2 = N/O operation<br />
Memory = off<br />
no<br />
yes<br />
Select ISO SETUP<br />
(see chapter operation and setting)<br />
Does one of the alarm LEDs<br />
light up<br />
no<br />
yes<br />
The insulation value of the system<br />
being monitored is below the preset<br />
response value. Change the response<br />
value or improve the insulation<br />
condition of the system.<br />
22 TGH1386en/07.2004
Setup flow chart (three-part)<br />
Setup of the A-ISOMETER® (3)<br />
In order to check the proper<br />
connection, a functional test<br />
using a suitable resistance is<br />
to be carried out.<br />
Size of the resistance:<br />
50% of the preset response<br />
value Alarm 2.<br />
Do both alarm LEDs light up<br />
Did the alarm relays switch <br />
yes<br />
no<br />
Check the connecting leads !<br />
Is voltage Un applied to the<br />
terminals L1/L2 <br />
When a coupling device is<br />
used, is it correctly connected <br />
Check the voltages with a voltmeter !<br />
Do both alarm LEDs light <br />
Did the alarm relays switch<br />
Remove the resistor !<br />
yes<br />
Alarm LEDs extinguished <br />
Did the output relays change<br />
their position <br />
no<br />
yes<br />
The IRDH275is correctly<br />
connected and functions reliably !<br />
TGH1386en/07.2004<br />
23
Setup flow chart (three-part)<br />
24 TGH1386en/07.2004
4. Connection<br />
4.1 Wiring<br />
The connections A1/+ and A2/- to the supply voltage shall be provided with<br />
protective devices in accordance with IEC 60364-4-473 to afford protection<br />
in the event of a short circuit (a 6 A fuse is recommended).<br />
Devices for protection against short-circuit in conformity with IEC 60364-4-<br />
473 for the system coupling L1/L2 can be omitted if the wiring is carried out<br />
in such a manner as to reduce the risk of a short-circuit to a minimum (a<br />
short-circuit-proof and ground-fault-proof wiring is recommended).<br />
The TEST and RESET button must not be connected in parallel (collective<br />
testing of several insulation monitoring devices).<br />
External coupling devices connected via the terminal AK cannot be switched<br />
off via the internal coupling relays.<br />
If no coupling device is used, the terminal AK remains free.<br />
TGH1386en/07.2004<br />
25
Connection<br />
3 AC system<br />
Un<br />
L1<br />
3 Un<br />
4<br />
L1<br />
L2<br />
L3<br />
AC system<br />
L2<br />
L1<br />
L2<br />
L1<br />
L2<br />
2<br />
3 AC system<br />
Un<br />
L1<br />
L2<br />
L3<br />
N<br />
DC system<br />
Un<br />
L+<br />
L-<br />
5<br />
1<br />
+/~<br />
-/~<br />
L1<br />
L2<br />
L1<br />
L2<br />
6<br />
PE<br />
A1/+ A2/- L1 L2 AK KE<br />
IRDH275(B)<br />
K1<br />
K2<br />
T1 T2 R1 R2 F1 F2 M+ M- A B 11 12 14 21 22 24<br />
mA<br />
120W<br />
7 8 9 10 11 12 13<br />
26 TGH1386en/07.2004
Connection<br />
Legend to wiring diagram:<br />
1 Supply voltage Us (see nameplate) via 6 A fuse<br />
2, 3 Connection of the 3AC system to be monitored:<br />
connect terminals L1, L2 to neutral conductor N or<br />
terminals L1, L2 to conductor L1, L2<br />
4 Connection of the AC system to be monitored:<br />
connect terminals L1, L2 to conductor L1, L2<br />
5 Connection of the DC system to be monitored:<br />
connect terminal L1 to conductor L+, terminal L2 to conductor L-<br />
6 Separate connection of and KE to Ground (PE)<br />
7 External TEST button (NO contact)<br />
8 External RESET button (NC contact or wire jumper),<br />
when the terminals are open, the fault message will not be stored<br />
9 STANDBY by means of the function input F1, F2:<br />
When the contact is closed, insulation measurement does not take<br />
place;<br />
system disconnection<br />
10 IRDH275 standard: current output, galvanically separated: 0 ... 400 µA<br />
with "B" option: current output, galvanically separated:<br />
0...20 mA or 4...20 mA (e.g. IRDH275B..)<br />
11 Serial interface RS485 (termination 120 Ohm resistor)<br />
12 Alarm relay: Alarm 1<br />
13 Alarm relay: Alarm 2<br />
TGH1386en/07.2004<br />
27
Connection<br />
4.2 Wiring diagrams with coupling devices<br />
Please observe the settings in the "ISO ADVANCED AGH“ menu ! . Adapt<br />
the settings to the coupling device to be used.<br />
4.2.1 Connection with AGH150W-4<br />
Connected to the A-ISOMETER® this coupling device extends the nominal<br />
voltage range to DC 1760 V.<br />
AK<br />
KE<br />
AK160<br />
AGH150W-4<br />
IRDH275<br />
Achtung Hochspannung<br />
Danger High Voltage<br />
+ -<br />
Un<br />
DC 0 ... 1760 V<br />
L+<br />
L-<br />
PE<br />
28 TGH1386en/07.2004
Connection<br />
4.2.2 Connection with AGH520S<br />
Connected to the A-ISOMETER® this coupling device extends the nominal<br />
voltage range to AC 7200 V in pure AC systems. In case of 3 AC systems, Pin<br />
2 of AGH520S is to be connected to L1, in case of 3/N/AC systems, Pin 2 is<br />
to be connected to the N-conductor.<br />
Un 3/(N)/ AC 42...460 Hz 0...7200 V<br />
L1<br />
L2<br />
L3<br />
N<br />
3/N/ AC<br />
3 AC<br />
2<br />
AK<br />
KE<br />
AGH520S<br />
5 4 3<br />
IRDH275<br />
PE<br />
TGH1386en/07.2004<br />
29
Connection<br />
4.2.3 Connection with AGH204S-4<br />
This coupling device extends the nominal voltage range of A-ISOMETERs®<br />
used in AC systems including rectifiers.<br />
1<br />
2<br />
AK<br />
KE<br />
AK160<br />
AK80<br />
IRDH275<br />
AGH204S-4<br />
U3 V3 W3<br />
Un<br />
L1<br />
L2<br />
L3<br />
N<br />
PE<br />
1 without rectifiers U n = 3AC 0....1650 V (DC max. 1000 V)<br />
2 with rectifiers U n = 3AC 0....1300 V (max. AC voltage; max. DC voltage<br />
after rectifiers in intermediate circuits of frequency converters:1840<br />
V)<br />
The maximum DC voltage is the voltage permitted to occur in the AC part of<br />
the system to ground GND (PE) when the IRDH275 is coupled with<br />
AGH204S-4 in this part of the system. This voltage is dependent on the level<br />
of the nominal voltage, the type of rectification 6 pulse, 12 pulse,...), the type<br />
of converter intermediate circuit (current... or voltage...), and the converter<br />
30 TGH1386en/07.2004
Connection<br />
technology. In case of converters, the maximum DC voltage in the intermediate<br />
circuit usually corresponds to the phase-to-phase voltage of the supplying<br />
AC system multiplied by 1.414.<br />
In case of current-controlled intermediate circuits of frequency convertors,<br />
higher DC voltages are to be expected.<br />
The given voltage values for AC/DC systems take into account values found<br />
by previous experience (factor 1.414 between DC voltage and AC voltage).<br />
The maximum DC voltage in case of insulation faults in the DC part of the<br />
system, for example converter intermediate circuit, is DC 1840 V. From this,<br />
the maximum nominal AC voltage is calculated:<br />
U max = DC 1840 V / 1.414 = AC 1300 V<br />
TGH1386en/07.2004<br />
31
Connection<br />
32 TGH1386en/07.2004
5. Operation and setting<br />
5.1 Operating features and displays IRDH275<br />
A-ISOMETER®<br />
IRDH275<br />
***IT-SYSTEM****<br />
R =086kW H<br />
ESC<br />
INFO TEST RESET MENU<br />
1 2<br />
k<br />
1 2 3 4 5 6 7<br />
1 INFO key: to query standard information /<br />
ESC-function: back to the menu function<br />
2 TEST button: to call up the self test/<br />
Arrow key up: parameter change, scrolling<br />
3 RESET button: to delete insulation and fault messages (only A-ISOMETER®)<br />
Arrow key down: parameter change, scrolling<br />
4 Menu key: to activate the menu system / Enter key: confirmation parameter<br />
change<br />
5 Alarm LED 1 lights up: insulation fault, first warning level reached<br />
6 Alarm LED 2 lights up: insulation fault, second warning level reached<br />
7 LED lights: system fault<br />
TGH1386en/07.2004<br />
33
Operation and setting<br />
5.1.1 Display in the standard mode<br />
1<br />
2<br />
Insulation<br />
Rs=011kW<br />
Fault<br />
. H<br />
4<br />
3<br />
1 Indication of the insulation resistance in kΩ<br />
2 Additional information about the insulation<br />
resistance:<br />
"+" = insulation fault at L+<br />
"–" = insulation fault at L–<br />
"s" = new measurement has started<br />
3 = polarity of the measuring pulse<br />
. = valid bus communication signals<br />
H = new entry in the memory data base<br />
C = flashing, clock is to be set<br />
4 Messages:<br />
- Insulation fault<br />
- Connection system<br />
- Connection PE<br />
- Device error x<br />
- *****STAND BY*****<br />
5.1.2 Display in the menu mode<br />
1. EXIT<br />
2. HISTORY INFO<br />
Parameter change is permitted<br />
Parameter change is blocked,<br />
enabling by a password<br />
34 TGH1386en/07.2004
Operation and setting<br />
5.1.3 Function keys<br />
Two functions are assigned to each function key. In addition to the basic<br />
function marked with a circle, all the keys allow navigation within the menu.<br />
Pressing the INFO key provides the following information<br />
ESC without opening the menu:<br />
INFO<br />
• Device name, firmware version<br />
• Response values Alarm 1 and Alarm 2<br />
• Leakage capacitance C e (only indication if insulation resist<br />
ances > 20 kΩ)<br />
• Setup status (for details refer to the table of the status<br />
numbers on page 70)<br />
• COM-Setup (IRDH275 bus address)<br />
Please have the details above on hand if you have a problem and if you contact<br />
BENDER for technical questions.<br />
Activating the TEST button starts the A-ISOME-<br />
TER® self test.<br />
TEST RESET<br />
Pressing the RESET button resets insulation and<br />
fault messages of the A-ISOMETER®. This function<br />
is only available after activating the fault memory in the ISO SETUP menu or<br />
after bridging R1/R2. Furthermore, the A-ISOMETER® can only be reset<br />
when the present insulation value is 25 % higher than the preset response<br />
value.<br />
The menu system is called up by pressing the MENU key.<br />
MENU<br />
TGH1386en/07.2004<br />
35
Operation and setting<br />
For controlling the menu system, the arrow keys, the ENTER key and the ESC<br />
key are used:<br />
TEST<br />
Arrow up:<br />
Moving within the scroll menu, increasing a parameter<br />
RESET<br />
Arrow down:<br />
Moving in the scroll menu, reducing a parameter<br />
MENU<br />
INFO<br />
ESC<br />
ENTER key<br />
Selecting a menu point, confirming or storing a parameter<br />
change and jumping to the next input area, or going to the next<br />
main menu.<br />
ESC key:<br />
Return to the previous menu.<br />
When the menu is not closed, the device automatically returns to<br />
the display mode again after approximately five minutes.<br />
For the sake of clarity, the following symbols are used for the functions RE-<br />
TURN, UP/DOWN and Escape in the menu diagrams of this operating manual:<br />
ESC<br />
36 TGH1386en/07.2004
Operation and setting<br />
TGH1386en/07.2004<br />
37
Operation and setting<br />
5.2 Menu structure<br />
The menu structure consists of various levels, the main menu and several sub<br />
menus. After pressing the MENU key, the main menu opens. The respective<br />
sub menu can be selected with the scroll keys. A flashing cursor indicates<br />
which sub menu is selected. If you have reached the end of the main menu<br />
list, it will be indicated by "Arrow UP".The selected sub menu can be opened<br />
by pressing the ENTER key. With the scroll keys, the different parameters<br />
can be selected from the sub menus. Pressing the ENTER key makes the cursor<br />
jump to the field where the parameter can be changed. If a password is<br />
activated (symbol "padlock closed" on the top right of the display), the<br />
correct password is queried before the parameters can be changed with the<br />
scroll keys. Once the password is entered, all parameters can be changed as<br />
long as you stay in the menu.<br />
Changing the parameter usually has an immediate effect on the measuring<br />
and alarm functions. The changed parameter is stored in a volatile memory<br />
by pressing the ENTER or ESC key after returning to the selection level (flashing<br />
cursor in column 1). Clicking the ESC key allows fast jumping from a sub<br />
menu to the display mode without selecting the menu point "EXIT".<br />
If the main manu is called up again, another parameter change is only possible<br />
after entering the password. If no key is pressed in a main or sub menufor<br />
approximately five minutes, the system automatically returns to the<br />
display mode.<br />
During menu operations, all measuring and alarm functions carry on working<br />
as usual.<br />
38 TGH1386en/07.2004
Operation and setting<br />
5.2.1 Diagram menu structure<br />
*** IT-SYSTEM ***<br />
R >010 M<br />
H<br />
ESC<br />
1. EXIT<br />
2. HISTORY INFO<br />
3. ISO SETUP<br />
4. ISO ADVANCED<br />
5. COM SETUP<br />
6. PASSWORD<br />
7. LANGUAGE<br />
8. SERVICE<br />
HISTORY INFO ISO SETUP ISO ADVANCED COM SETUP PASSWORD LANGUAGE SERVICE<br />
Nr.: 01 #Nr.: 02<br />
Power on<br />
1. Exit<br />
2. AGH : no<br />
3. Ce max: 150 µF<br />
4. Measure: AMP<br />
5. Autotest: 24h<br />
6. Clock: 19:08<br />
7. Date: 01.01.01<br />
8. Test: 00:00<br />
1. Exit<br />
2. Password: XXX<br />
3. Status: off<br />
Insert Service<br />
Password: XXX<br />
1. Exit<br />
2. Alarm1 040 k<br />
3. Alarm2 010 k<br />
4. K1 : NO<br />
5. K2 : NO<br />
6. Memory: on<br />
7. M+/M-: 0-20 mA<br />
1. Exit<br />
2. Addr: 003<br />
3. ISONet: off<br />
4. ISO Monitor<br />
1. Exit<br />
2. Text: Deutsch<br />
Version<br />
IRDH275B<br />
to measured value display<br />
Standard version<br />
IRDH275<br />
TGH1386en/07.2004<br />
39
Operation and setting<br />
5.3 Menu HISTORY INFO (IRDH275B)<br />
99 events with date and time stamp can be stored in the memory database.<br />
The database is designed as a ring memory, i.e. the eldest entry is overwritten.<br />
Data is written into a non-volatile memory and therefore provides protection<br />
against voltage failure.<br />
Data record Event<br />
Display indication<br />
1 Switch the supply voltage on Power On<br />
2 Lowest measured value Rmin<br />
3...99 Response value Alarm 1 released Alarm1<br />
3...99 Response value Alarm 1 cleared Alarm1<br />
3...99 Response value Alarm 2 released Alarm2<br />
3...99 Response value Alarm 2 cleared Alarm2<br />
3...99 Error system connection released System connection<br />
3...99 Error system connection cleared System connection<br />
3...99 Error PE connection released PE connection<br />
3...99 Error PE connection cleared PE connection<br />
3...99 Device error released Device error<br />
3...99 Device error cleared Device error<br />
3...99 System reset (watchdog) System reset<br />
Before storing the events with the actual date and time stamp, set the<br />
real-time clock in the ISO ADVANCED menu (refer to “Diagram ISO AD-<br />
VANCED” auf Seite 47).<br />
The following function keys are provided to query data from the "HISTORY<br />
INFO" menu: the scroll keys to change the data record number, the ENTER<br />
key to jump from the data record number to the menu point "Clear all:on" to<br />
delete the memory storage, and the ESC key to leave the menu.<br />
A new entry into the memory is signalled with an "H" on the standard display.<br />
The "H" will be deleted as soon as the "HISTORY INFO" menu is called<br />
up.<br />
40 TGH1386en/07.2004
Operation and setting<br />
5.3.1 Diagram HISTORY INFO (IRDH275B)<br />
*** IT-SYSTEM ***<br />
R >010 M<br />
H<br />
1. EXIT<br />
2. HISTORY INFO<br />
3. ISO SETUP<br />
4. ISO ADVANCED<br />
5. COM SETUP<br />
6. PASSWORD<br />
7. LANGUAGE<br />
8. SERVICE<br />
ESC<br />
Nr.: 01 #Nr: 08<br />
Power on<br />
Nr.: 01 #Nr: 08<br />
Clear all: off<br />
Nr.: 01 #Nr: 08<br />
28.08.01 17:43<br />
Nr.: 02 #Nr: 08<br />
Clear all: off<br />
Nr.: 02 #Nr: 08<br />
Rmin: 010k<br />
Nr.: 02 #Nr: 08<br />
Clear all: off<br />
Nr.: 02 #Nr: 08<br />
25.08.01 10:13<br />
Nr.: 02 #Nr: 08<br />
Clear all: off<br />
Version<br />
IRDH275B<br />
Standard version<br />
IRDH275<br />
TGH1386en/07.2004<br />
41
Operation and setting<br />
5.4 Menu ISO SETUP: Setting of the basic A-ISOMETER® functions<br />
All alarm functions such as Alarm 1 and Alarm 2 (prewarning and main<br />
alarm), the operating principle of the output relays K1 and K2 - N.O = Normally<br />
De-energized, N.C = Normally Energized (Failsafe Mode), the fault storage<br />
and a selection of two current output ranges are set in this menu.<br />
5.4.1 Response values Alarm 1 and Alarm 2<br />
The response values Alarm 1 and Alarm 2 are selected with the scroll keys<br />
and stored with the ENTER key.<br />
5.4.2 Operating principle of the alarm relays<br />
K1/K2 are factory set to N.O Test, that means N/O operation. When the supplement<br />
"Test" has been selected, the alarm relays switch over during a manual<br />
self test.<br />
If, for any reason, the alarm relays may not switch over during a manual self<br />
test, the settings N.C or N.O are to be selected.<br />
K1: N.C Test = N/C operation contacts 11-12-14, with relay test<br />
(the alarm relay is energized during normal operation)<br />
K1: N.O Test = N/O operation contacts 11-12-14, with relay test<br />
(the alarm relay is deenergized during normal operation)<br />
K1: N.C = N/C operation contacts 11-12-14, without relay test<br />
(the alarm relay is energized during normal operation)<br />
K1: N.O = N/O operation contacts 11-12-14, without relay test<br />
(the alarm relay is deenergized during normal operation)<br />
K1: Flash = Flashing function contacts 11-12-14<br />
(the alarm relay and the LED flash in the event of an alarm<br />
message, approximately 0.5 Hz<br />
K2: N.C Test = N/C operation contacts 21-22-24, with relay test<br />
(the alarm relay is energized during normal operation)<br />
K2: N.O Test = N/O operation contacts 21-22-24, with relay test<br />
(the alarm relay is deenergized during normal operation)<br />
K2 : N.C = N/C operation contacts 21-22-24, without relay test<br />
K2 : N.O<br />
(the alarm relay is energized during normal operation)<br />
= N/O operation contacts 21-22-24, without relay test<br />
(the alarm relay is deenergized during normal operation)<br />
K2 : Flash = Flashing function contacts 21-22-24<br />
(the alarm relay and the LED flash in the event of an alarm<br />
message, approximately 0.5 Hz)<br />
42 TGH1386en/07.2004
Operation and setting<br />
Diagram ISO SETUP<br />
*** IT-SYSTEM ***<br />
R >010 M<br />
1. EXIT<br />
2. HISTORY INFO<br />
3. ISO SETUP<br />
4. ISO ADVANCED<br />
5. COM SETUP<br />
6. PASSWORD<br />
7. LANGUAGE<br />
8. SERVICE<br />
1. Exit<br />
2. Alarm1: 100 KW<br />
3. Alarm2: 200 KW<br />
4. K1 : N.O<br />
5. K2 : N.O<br />
6. Memory: off<br />
7. M+/M-: 0-20 mA<br />
Alarm1 : 100 KW<br />
Alarm2 : 200 KW<br />
K1: N.O Test<br />
K2: N.O Test<br />
K1: N.O Test<br />
K1: N.C Test<br />
K1: Flash<br />
K1: N.O<br />
K1: N.C<br />
Memory: off<br />
Memory: on<br />
Memory: off<br />
Version<br />
IRDH275B<br />
M+/M-: 0-20 mA<br />
M+/M-: 0-20 mA<br />
M+/M-: 4-20 mA<br />
Standard device<br />
IRDH275<br />
TGH1386en/07.2004<br />
43
Operation and setting<br />
During the 24 hour self test the relays are not switched over.<br />
When a system fault occurs at the A-ISOMETER®, the relay K2 will automatically<br />
be activated as a system fault relay .<br />
5.4.3 Memory setting (on/off)<br />
Memory: on = Fault memory is activated<br />
The device must be reset with the RESET button after<br />
clearing the fault.<br />
Memory: off = Fault memory deactivated (factory setting)<br />
5.4.4 Current output with "B" option (IRDH275B..)<br />
Factory setting: 0-20 mA<br />
The current output of the IRDH275 can be set to "0-20 mA" oder "4-20 mA"<br />
via the menu point "M+/M-:". The maximum load is 500 Ohm.<br />
Function 0-20 mA:<br />
Rf = insulation fault, I= current in mA<br />
Function 4-20 mA:<br />
Rf = insulation fault, I= current in mA<br />
R f =<br />
R f =<br />
20 mA x 120 kOhm<br />
I<br />
16 mA x 120 kOhm<br />
I - 4 mA<br />
- 120 kOhm<br />
- 120 kOhm<br />
The associated characteristic curves are illustrated on Page 68.<br />
44 TGH1386en/07.2004
Operation and setting<br />
5.5 Menu ISO ADVANCED: Setting of the extended functions<br />
5.5.1 External coupling devices (AGH: no)<br />
Basic setting "no", when no coupling device is used (factory setting).<br />
AGH: 204 AK80<br />
Terminal AK of the IRDH275 is connected to terminal AK80 of the AGH204S-<br />
4. The nominal voltage range is extended to 3AC 0...1650 V. Only current<br />
converters with an output voltage not exceeding DC 1000 V are allowed to<br />
be connected (see "operation with coupling device" on Page 30).<br />
AGH: 520S<br />
Terminal AK of the IRDH275 is connected to terminal 5 of the AGH520S.<br />
The nominal voltage range is extended to AC 0...7200 V. Only current converters<br />
with an output voltage not exceeding DC 1000 V are allowed to be<br />
connected.<br />
AGH: 204 AK160<br />
Terminal AK of the IRDH275 is connected to terminal AK160 of the<br />
AGH204S-4. The nominal voltage range is extended to 3AC 0...1300 V. Only<br />
current converters with an output voltage not exceeding DC 0...1840 V are<br />
allowed to be connected (see "operation with coupling device" on Page 30).<br />
AGH: 150 AK160<br />
Terminal AK of the IRDH275 is connected to terminal AK160 of the<br />
AGH150W-4. The nominal voltage range is extended to DC 0...1760 V.<br />
The coupling monitoring is deactivated when an external coupling<br />
device is connected.<br />
TGH1386en/07.2004<br />
45
Operation and setting<br />
5.5.2 Adaptation to the system leakage capacitance (Cemax : 150 µF)<br />
This menu allows to adapt the A-ISOMETER® to the maximum system leakage<br />
capacitance (max. 500 µF). Please note that the basic measuring time will<br />
be increased to approximately 10 seconds when the setting is C e = 500 µF.<br />
Factory setting = 150 µF.<br />
5.5.3 Changing the measuring principle from AMP to DC (Measure: AMP)<br />
The DC measuring principle is only suitable for pure AC systems.<br />
Factory setting = AMP.<br />
5.5.4 Automatic self test (Autotest: 24h)<br />
The automatic self test can be set to 1 hour respectively 24 hours.<br />
Factory setting = 24 h<br />
5.5.5 Real-time clock (Clock) (IRDH275B)<br />
The setting of the real-time clock is the time base for the memory and for the<br />
automatic self test. In case of failure of the supply voltage, the real-time clock<br />
keeps running for approximately 30 days. When the device will be switched<br />
on after this period, a flashing "C" appears on the display and the clock has<br />
to be set again.<br />
5.5.6 Date (Date) (IRDH275B)<br />
The date is also required for the memory. In the event of power supply failure,<br />
the date function is not influenced for at least 30 days. If the device is<br />
switched on again after this period, date and time of the real-time clock have<br />
to be reset.<br />
5.5.7 Test (Test) (IRDH275B)<br />
If the 24h self test is activated in the ISO ADVANCED menu, it is possible to<br />
set the time (hour) when the self test is to be carried out by means of the<br />
"TEST: 12:00" sub menu. Then the self test is automatically carried out once<br />
a day at a given time. If the 1 hour auto test has been selected, the self test<br />
will be carried out at every full hour.<br />
46 TGH1386en/07.2004
Operation and setting<br />
5.5.8 Diagram ISO ADVANCED<br />
*** IT-SYSTEM ***<br />
R >010 M<br />
1. Exit<br />
2. AGH: no<br />
3. Ce max : 150µF<br />
4. Measure: AMP<br />
5. Autotest: 24h<br />
6. Clock: 21:09<br />
7. Date: 01.01.01<br />
8. Test: 12:00<br />
1. EXIT<br />
2. HISTORY INFO<br />
3. ISO SETUP<br />
4. ISO ADVANCED<br />
5. COM SETUP<br />
6. PASSWORD<br />
7. LANGUAGE<br />
8. SERVICE<br />
AGH: no<br />
Ce max : 150µF<br />
Measure: AMP<br />
no<br />
150 AK160<br />
204 AK160<br />
520S<br />
204 AK80<br />
150µF<br />
500µF<br />
DC<br />
AMP<br />
Autotest: 24h<br />
24h<br />
no<br />
01h<br />
Clock: 21:09<br />
Date: 01.01.01<br />
Version<br />
IRDH275B<br />
Test: 00:00<br />
00:00<br />
.<br />
.<br />
23:00<br />
Standard version<br />
IRDH275<br />
TGH1386en/07.2004<br />
47
Operation and setting<br />
5.6 Menu COM SETUP: Setting the RS485 bus (BMS protocol)<br />
5.6.1 Bus address "Addr:" (IRDH275B..)<br />
This menu point is used to set the RS485 bus address of the IRDH275. Since<br />
there are several A-ISOMETERs in one system, take care that the bus address<br />
is not assigned twice.<br />
The device is factory set to address 3 and hence acts as a Slave.<br />
If several IRDH275 are operated on one BMS bus, the addresses of other<br />
A-ISOMETERs must be assigned one after the other, since only one device<br />
may represent the Master.<br />
5.6.2 ISOnet function (IRDH275B..)<br />
In the ISOnet = ON sub menu of the COM SETUP, the ISOnet function can<br />
be set. The ISOnet function of all A-ISOMETERs existing in the system must<br />
be in "ON" position.<br />
A BMS Master the ISOnet function of which has been activated, controls the<br />
ISOnet slave devices via BMS. If an A-ISOMETER® has completed the measuring<br />
cycle, the permission for insulation measurement is given from the<br />
ISOnet Master to the next Slave. During the measurement process carried out<br />
by an A-ISOMETER®, all other A-ISOMETERs® are in the STANDBY mode.<br />
5.6.3 ISO monitor (IRDH275B..)<br />
This function allows to query locally the current measured value as well as<br />
the current messages of all IRDH275 devices existing in the network. After<br />
selecting the bus address, the information available on the BMS bus are collected<br />
and indicated on the display. The display indication is structured similar<br />
to the standard indication, but instead of the indication of the measuring<br />
pulse, the selected bus address is indicated. Without pressing a key, the indication<br />
changes to the standard indication after about five minutes.<br />
If there is no information available on the bus about the selected bus address,<br />
the message "!!!!NO DATA!!!!" will be displayed.<br />
Information is being searched<br />
No data found<br />
Current data address 03<br />
<br />
R= K ADR:02<br />
!!!!NO DATA!!!!<br />
R= K ADR:02<br />
Insulation Fault<br />
R= 010K ADR:03<br />
48 TGH1386en/07.2004
Operation and setting<br />
5.6.4 Diagram COM SETUP (IRDH275B)<br />
*** IT SYSTEM ***<br />
R >010 M<br />
1. EXIT<br />
2. HISTORY INFO<br />
3. ISO SETUP<br />
4. ISO ADVANCED<br />
5. COM SETUP<br />
6. PASSWORD<br />
7. LANGUAGE<br />
8. SERVICE<br />
1. Exit<br />
2. Addr: 003<br />
3. ISONet: off<br />
4. ISO Monitor<br />
Addr : 003<br />
ADR: 001<br />
.<br />
.<br />
ADR: 030<br />
Standard version<br />
IRDH275<br />
Version<br />
IRDH275B<br />
ISONet : off<br />
! ! ! ! NO DATA ! ! ! !<br />
R= ADR: 01<br />
ADR: 01<br />
.<br />
.<br />
ADR: 30<br />
ISONet : off<br />
ISONet : on<br />
TGH1386en/07.2004<br />
49
Operation and setting<br />
5.7 Menu PASSWORD<br />
5.7.1 Activating and setting the password<br />
This menu can be used to activate a "Password" query. This protects the A-<br />
ISOMETER® against unauthorized settings and modifications. The desired<br />
password (menu point 2. Password: xxx) can be set with the arrow keys and<br />
confirmed with the ENTER key. The password can be activated in the menu<br />
point "3. Status: on" by clicking the ENTER key. The basic setting is "3. Status:<br />
off", that means that the password is deactivated.<br />
5.7.2 Diagram PASSWORD<br />
*** IT-SYSTEM ***<br />
R >010 M<br />
1. EXIT<br />
2. HISTORY INFO<br />
3. ISO SETUP<br />
4. ISO ADVANCED<br />
5. COM SETUP<br />
6. PASSWORD<br />
7. LANGUAGE<br />
8. SERVICE<br />
1. Exit<br />
2. Password: XXX<br />
3. Status: off<br />
Password: XXX<br />
Password: XXX<br />
Password: 000<br />
Password: . . .<br />
Password: 999<br />
Status: off<br />
Status: off<br />
Status: on<br />
50 TGH1386en/07.2004
Operation and setting<br />
5.8 Menu LANGUAGE<br />
5.8.1 Setting the national language<br />
The menu point "Language" allows to select different languages for the display<br />
of the A-ISOMETER®. The setting "2. Text: Deutsch" or "2. Text: English"<br />
refers to the first line of the display, that means it refers to a pure fault message.<br />
The device menu is not influenced by the language selection.<br />
5.8.2 Diagram Language<br />
*** IT-SYSTEM ***<br />
R >010 M<br />
1. EXIT<br />
2. HISTORY INFO<br />
3. ISO SETUP<br />
4. ISO ADVANCED<br />
5. COM SETUP<br />
6. PASSWORD<br />
7. LANGUAGE<br />
8. SERVICE<br />
1. Exit<br />
2. Text: Deutsch 2. Text: Deutsch<br />
2. Text: Deutsch<br />
2. Text: English<br />
TGH1386en/07.2004<br />
51
Operation and setting<br />
5.9 Menu SERVICE<br />
This menu point is provided for the BENDER service personnel and is protected<br />
by a password against erroneous settings. It is intended to provide fast<br />
fault clearance by qualified experts in the event of a device error.<br />
52 TGH1386en/07.2004
6. Serial interfaces<br />
6.1 IsoData protocol (standard IRDH275 without "B" option)<br />
• Serial interface (RS485) galvanically isolated (= ASCII - RS485)<br />
• Connection to terminal A and B<br />
• Maximum cable length 1200 m<br />
• Transmission protocol 9600 baud - 1 start bit - 1 stop bit - 8 data bit<br />
• After each valid measurement, the following data block is provided:<br />
Start US= Unit separator US US<br />
02H 0FH 30H 30H 30H 31H 32H 38H 0FH 30H 30H 30H 30H 36H 30H 0FH<br />
Measuring value<br />
e.g. 128 kOhm<br />
Response value<br />
Alarm1 e.g. 60 kOhm<br />
US US US US End<br />
LF<br />
CR<br />
30H 30H 30H 31H 32H 30H 0FH 30H 0FH 30H 0FH 30H 0FH 03H<br />
10H<br />
13H<br />
Response value<br />
Alarm2 e.g. 120 kOhm<br />
30H = No alarm<br />
31H = Alarm1<br />
32H = Alarm2<br />
33H = Alarm1/2<br />
30H = K1 off, K2 off<br />
31H = K1 on, K2 off<br />
32H = K1 off, K2 on<br />
33H = K1 on, K2 on<br />
30H = AC Fault<br />
31H = DC- Fault<br />
32H = DC+ Fault<br />
Example: terminal display<br />
Measuring value<br />
128 K<br />
Alarm1<br />
60 K<br />
Alarm2<br />
120 K<br />
AC Fault<br />
Alarm2<br />
K1 off, K2 on<br />
Data transmission is continuously carried out and can neither be interrupted<br />
by the data slave station nor be influenced in any other way. This interface<br />
cannot be used in combination with the BMS bus.<br />
TGH1386en/07.2004<br />
53
Serial interfaces<br />
For data evaluation via PC or Laptop, the terminal software "IsoData" and an<br />
interface converter of the ASCII-RS485/RS232 type is required.<br />
6.2 RS485 interface (IRDH275B..)<br />
The galvanically isolated RS485 interface serves as a physical transmission<br />
medium for the BMS protocol. If several IRDH375B or other bus-compatible<br />
devices are interconnected in a network via the RS485 bus, the RS485 bus<br />
must be terminated at both ends with a 120 Ohm resistor.<br />
An RS485 network that is not terminated, is likely to get instable and may<br />
result in malfunctions. Only the first and the last device may be terminated.<br />
Devices in between must not be terminated. Hence, stub feeders in the network<br />
must not be terminated. The length of the stub feeders is restricted to<br />
1 meter.<br />
1st device ... device last device<br />
A B A B A B<br />
120 Ohm<br />
0.4 W<br />
Stub feeder<br />
maximum 1 m<br />
120 Ohm<br />
0.4 W<br />
Maximum length of the RS485 bus: 1200 m<br />
54 TGH1386en/07.2004
Serial interfaces<br />
6.3 Topology (IRDH275B..)<br />
The optimum topology for the RS485 bus is a daisy-chain connection. In this<br />
connection, device 1 is connected to device 2, device 2 to device 3, device 3<br />
to device n etc. The RS485 bus represents a continuous path without branches.<br />
6.3.1 Correct arrangement<br />
Three examples for correct arrangement:<br />
6.3.2 Wrong arrangement<br />
Three examples for wrong arrangement:<br />
6.3.3 Wiring<br />
A suitable type of cable for the wiring of the RS485 bus is:<br />
screened cable, wire cross section 0.6 mm 2<br />
(e.g. JY [ST] y 2x0,6), screen on one side connected to ground GND (PE).<br />
Connection to the terminals A and B.<br />
The number of bus nodes is restricted to 32 devices. When more devices are<br />
to be connected, <strong>Bender</strong> recommends to use an RS485 repeater DI1.<br />
33 64<br />
1 32<br />
DI1<br />
TGH1386en/07.2004<br />
55
Serial interfaces<br />
6.4 <strong>Bender</strong> Measuring Systems Protocol (BMS) (IRDH275B..)<br />
This protocol is an essential part of the <strong>Bender</strong> Measuring Systems Interface<br />
(BMS protocol). Data transmission generally makes use of ASCII characters.<br />
Interface data are:<br />
• Baud rate: 9600 baud<br />
• transmission: 1 start bit, 7 data bits, 1 parity bit, 1 stop bit (1, 7, E, 1)<br />
• Parity: even<br />
• Checksum: sum of all transmitted bytes = 0 (without CR and LF)<br />
The BMS protocol works according to the Master-Slave principle. That means<br />
that one device represents the Master while all other bus nodes are Slaves.<br />
It is important that only one Master is present in each network. All bus nodes<br />
are identified by a unique address. The Master scans all other devices on the<br />
bus cyclically, listens to their signals and then carries out specific commands.<br />
Address 1 is assigned to the Master, thus to one of the IRDH275B.. devices.<br />
6.4.1 BMS Master<br />
A Master can query all warning and operating messages from a Slave.<br />
If the bus address 1 has been selected for one IRDH275B.., this device automatically<br />
represents the Master, that means that all addresses between 1 and<br />
150 are cyclically scanned for warning and operating messages via the RS485<br />
bus. If the Master receives no answer from five subsequent addresses, the<br />
scanning cycle is started again. If the Master recognizes incorrect answers<br />
from a Slave, the fault message "Fault RS485" is issued by the Master.<br />
Fault RS485<br />
Rs=011kW<br />
. H<br />
Faults may be caused when:<br />
• addresses are assigned twice<br />
• a second master exists on the BMS bus<br />
• interference signals occur on the bus lines<br />
• a defective device is connected to the bus<br />
• terminating resistors are not activated<br />
56 TGH1386en/07.2004
Serial interfaces<br />
6.4.2 BMS Slave<br />
All IRDH275B.. are factory set to Slave mode (address 3). In a BMS network,<br />
one address must be selected from the address range 2 ... 30 for each Slave.<br />
There may be no gaps of more than five subsequent addresses, so that all<br />
Slaves can be scanned by the Master. For IRDH275B.. a BMS address can be<br />
selected from the address range 1 ... 30. When assigning the addresses, also<br />
other devices such as the EDS47x-12 must be considered.<br />
The correct reception of BMS data is indicated by a flashing point on the display<br />
on the right of the measuring pulse indication.<br />
***IT-SYSTEM***<br />
R+=500K<br />
Flashing point:<br />
BMS data received<br />
If no flashing point appears, it may be attributed to the following:<br />
• no Master available in the network<br />
• more than one Master available in the network<br />
• RS485 interface (terminal A/B) not connected or reversed<br />
TGH1386en/07.2004<br />
57
Serial interfaces<br />
The following table gives an overview about the alarm messages and the assignment<br />
of the messages indicated on display or operator panels, e.g.<br />
PRC1470.<br />
Message Channel Meaning<br />
Insulation Fault 1 Insulation resistance < setting Alarm 1<br />
Insulation Fault 2 Insulation resistance < setting Alarm 2<br />
Connection system<br />
3 Connection error L1/L2 against system<br />
Connection PE 4 Connection error /KE against ground<br />
GND (PE) conductor<br />
Device error 5 Internal device error<br />
The BMS function is completely available in the standby mode.<br />
6.4.3 Commissioning of a BMS network<br />
• Connect the terminals A and B of all bus nodes in one line<br />
• Switch the terminating resistors on at the beginning and end of the BMS bus<br />
or in case of devices without a terminating switch, at the end of the bus, connect<br />
a 120 Ohm resistor to the terminals A and B.<br />
• Switch the supply voltage on.<br />
• Determine one IRDH275B as the Master and assign address 1.<br />
• Assign the addresses (2...30) subsequently to all other IRDH275B devices and<br />
other bus nodes (see table below).<br />
• Check whether a flashing point appears on all devices<br />
(BMS commands are being received).<br />
• In the "ISO-Monitor" menu all preset Slave addresses can be checked.<br />
58 TGH1386en/07.2004
Serial interfaces<br />
BMS-bus address ranges<br />
Addresses* Device Meaning<br />
0 There is no device with address 0 !<br />
Information sent to address 0 apply to all devices<br />
connected to the interface (broadcast)<br />
1 PRC1470 Control and indicating device<br />
1...30 IRDH275B/ Insulation monitoring device<br />
575<br />
1...30 FTC470... Protocol converter<br />
2...30 EDS47x-12 Insulation fault evaluators (localisation)<br />
31...60 SMO480-12 Signal converter relay<br />
61...90 EDS47xE-12 Insulation fault evaluators (localisation)<br />
111...119 PGH47x Test device for insulation fault location<br />
121...150 PGH47xE Test device for insulation fault location<br />
* When assigning addresses, take care that there are no gaps greater than five<br />
in the respective ranges (1-30, 31-60, 61- 90, 111-119 und 121-151).<br />
TGH1386en/07.2004<br />
59
Serial interfaces<br />
60 TGH1386en/07.2004
7. Technical data IRDH275...<br />
7.1 Data in tabular form<br />
The values marked with * are absolute values<br />
Insulation coordination acc. to IEC 60664-1<br />
Rated voltage ................................................................................................................................AC 800 V<br />
Rated impulse voltage/pollution degree ....................................................................................... 8 kV / 3<br />
Voltage ranges<br />
IRDH275....:<br />
Nominal voltage range U n ................................................................................ 1AC / 3 (N) AC 0...793 V*<br />
Nominal frequency f n (for f
Technical data IRDH275...<br />
Permissible extraneous DC voltage U fg ................................................................................ ≤ DC 1200 V<br />
Permissible system leakage capacitance C e ............................................................................. ≤ 500 µF<br />
Factory setting ................................................................................................................................. 150 µF<br />
Displays<br />
Display, illuminated..................................................................................................... double-line display<br />
Characters (number of characters) .................................................................................................. 2 x 16<br />
Display range , measuring value ...................................................................................... 1 kΩ .... 10 MΩ<br />
Relative percentage error (1 kΩ .... 10 MΩ)................................................................................. ±1 kΩ<br />
Relative percentage error (10 kΩ .... 10 MΩ).................................................................. ±10 %<br />
Outputs/inputs<br />
TEST/ RESET button ..........................................................................................................internal/external<br />
Cable length TEST/RESET button external ..................................................................................... ≤ 10 m<br />
Current output for measuring instrument SKMP (scale centre point = 120 kΩ):....................................<br />
Current output IRDH275 (max. load).............................................................................. 400 µA 12.5 kΩ)<br />
Current output IRDH275B (max. load)...............................................................................20 mA (500 Ω)<br />
Accuracy current output (1 kΩ ... 1 MΩ)....................................................................... ±10%, ±1 kΩ<br />
Serial interface<br />
Interface / Protocol IRDH275.................................................................................................RS485 / ASCII<br />
Interface / Protocol IRDH275B ...............................................................................................RS485 / BMS<br />
Connection............................................................................................................................ terminals A/B<br />
Cable length .............................................................................................................................. ≤ 1200 m<br />
Recommended cable (screened, screen on one site connected to PE) .............................. J(Y)STY 2x0.6<br />
Terminating resistor ............................................................................................................120 Ω (0.5 W)<br />
Device address, BMS bus................................................................................ 1...30 (factory setting = 3)<br />
Switching components<br />
Switching components .......................................................................................... 2 changeover contacts<br />
Operating principle................................................................................................... N/O or N/C operation<br />
Factory setting (Alarm 1/Alarm 2) ............................................Normally De-Energized (N/O) operation<br />
Electrical endurance ..................................................................................... 12 000 switching operations<br />
Contact class ........................................................................................IIB acc. to DIN IEC 60255 part 0-20<br />
Rated contact voltage.................................................................................................AC 250 V / DC 300 V<br />
Making capacity................................................................................................................................ UC 5 A<br />
Breaking capacity...........................................................................................2 A, AC 230 V, cos phi = 0.4<br />
.................................................................................................................... 0,2 A, DC 220 V, L/R = 0.04 s<br />
Minimum contact current at DC 24 V ................................................................................ 2 mA (50 mW)<br />
62 TGH1386en/07.2004
Technical data IRDH275...<br />
General data<br />
EMC immunity ................................................................................................................. acc. to EN 61326<br />
EMC emission .................................................................................................................. acc. to EN 61326<br />
Shock resistance IEC 60068-2-27 (device in operation) ...................................................... 15 g / 11 ms<br />
Bumping IEC 60068-2-29 (during transport)........................................................................ 40 g / 6 ms<br />
Vibration resistance IEC 60068-2-6 (device in operation)...............................................1 g / 10-150 Hz<br />
Vibration resistance IEC 60068-2-6 (during transport)...................................................2 g / 10-150 Hz<br />
Ambient temperature (during operation for standard version).................................... -10 °C ... +55 °C<br />
Storage temperature range ............................................................................................. -40 °C ... +70 °C<br />
Climatic class acc. to IEC 60721-3-3 ....................................................................................................3K5<br />
Operating mode........................................................................................................continuous operation<br />
Mounting ......................................................................................................... as indicated on the display<br />
Connection ........................................................................................................................ screw terminals<br />
Connection, rigid, flexible............................................................................0.2 - 4 mm 2 / 0.2 - 2.5 mm 2<br />
Connection, flexible with connector sleeve, without/with plastic sleeve....................... 0.25-2.5 mm 2<br />
Conductor sizes (AWG)......................................................................................................................24-12<br />
Protection class, internal components (DIN EN 60529) ......................................................................IP30<br />
Protection class, terminals (DIN EN 60529) .........................................................................................IP20<br />
Type of enclosure ................................................................................................. X112, free from halogen<br />
DIN rail mounting ...................................................................................................................... IEC 60715<br />
Flammability class ....................................................................................................................... UL94 V-0<br />
Weight approx. .................................................................................................................................. 510 g<br />
Option "R"<br />
Ambient temperature (during operation) .................................................................... -40 °C ... +70 °C<br />
Option "W"<br />
Shock resistance IEC 60068-2-27 (Device in operation) ...................................................... 30 g / 11 ms<br />
Bumping IEC 60068-2-29 (during transport).......................................................................... 40 g / 6 ms<br />
Vibration resistance IEC 60068-2-6 .......................................................................... 1,6 mm / 10 -25 Hz<br />
........................................................................................................................................... 4 g / 25 -150 Hz<br />
Ambient temperature (during operation) ........................................................................ -25°C ... +70°C<br />
Storage temperature range ............................................................................................... -40°C ... +85°C<br />
Screw mounting ...............................................................................................................................2 x M4<br />
The values marked with * are absolute values<br />
TGH1386en/07.2004<br />
63
Technical data IRDH275...<br />
7.2 Standards<br />
The A-ISOMETER® was designed under consideration of the following<br />
standards:<br />
- DIN EN 61557-8 (VDE 0413 Teil 8):1998-05, EN 61557-8:1997-03,<br />
IEC 61557-8:1997-02, IEC 61326:2002-02<br />
- DIN VDE 0110 T1: April 1997<br />
- DIN VDE 0110 T3: Mai 1998<br />
- ASTM F1669M-96<br />
- ASTM F1134-94<br />
- ASTM F1207M-96<br />
64 TGH1386en/07.2004
Technical data IRDH275...<br />
7.3 Characteristic curves<br />
A-ISOMETER response times in relation to system leakage capacitances of:<br />
C e = 1...500µF, U n = 0...793 V / 50 Hz<br />
1000<br />
t an [s]<br />
≤ 10 MΩ<br />
R f<br />
100<br />
≥ 0kΩ<br />
10<br />
1<br />
1 10 100 1000<br />
C e [µF]<br />
TGH1386en/07.2004<br />
65
Technical data IRDH275...<br />
Max. AC voltage between system and ground in the frequency range
Technical data IRDH275...<br />
Current output 0-400 µA (only standard IRDH275)<br />
R f =<br />
400 mA x 120 kOhm<br />
I<br />
- 120 kOhm<br />
Rf = Insulation fault in kOhm<br />
I = Current output in mA<br />
TGH1386en/07.2004<br />
67
Technical data IRDH275...<br />
Current output 0-20 mA (IRDH275B..)<br />
Rf[KOhm]<br />
10000,00<br />
1000,00<br />
100,00<br />
10,00<br />
1,00<br />
0,0 5,0 10,0 15,0 20,0 25,0<br />
I[mA]<br />
R f =<br />
20 mA x 120 kOhm<br />
I<br />
- 120 kOhm<br />
Rf = Insulation fault in kOhm<br />
I = Current output in mA<br />
68 TGH1386en/07.2004
Technical data IRDH275...<br />
Current output 4-20 mA (IRDH275B..)<br />
Rf[KOhm]<br />
10000,00<br />
1000,00<br />
100,00<br />
10,00<br />
1,00<br />
0,0 5,0 10,0 15,0 20,0 25,0<br />
I[mA]<br />
R f =<br />
16 mA x 120 kOhm<br />
I - 4 mA<br />
- 120 kOhm<br />
Rf = Insulation fault in kOhm<br />
I = Current output in mA<br />
TGH1386en/07.2004<br />
69
Technical data IRDH275...<br />
Status number<br />
Position<br />
of<br />
numbers<br />
from the<br />
left<br />
Value of the respective number<br />
0 = 1 = 2 = 3 = 4 =<br />
1 K1: N/O operation Test K1: N/C operation Test K1: flashing function K1: N/O operation K1: N/C operation<br />
2 K2: N/O operation Test K2: N/C operation Test K2: flashing function K2: N/O operation K2: N/C operation<br />
3 no external coupling AK AGH204S 80K AK AGH520S AK AGH204S 160K AK AGH150W 160K<br />
4 Cemax 1 µF ** Cemax 10 µF ** Cemax 150 µF Cemax 500 µF<br />
5<br />
6 Self test every 24 hours Self test every hour no periodic self test<br />
7 Language German Language English<br />
Password protection not Password protection<br />
8<br />
activated<br />
activated<br />
9<br />
10<br />
AMP measuring<br />
principle<br />
max. filter frequency<br />
0.1Hz **<br />
DC measuring principle<br />
max. filter frequency 1Hz<br />
**<br />
max. filter frequency<br />
10Hz **<br />
max. filter frequency<br />
50Hz **<br />
11<br />
min. filter frequency<br />
0,1Hz **<br />
min. filter frequency 1Hz<br />
**<br />
min. filter frequency<br />
10Hz **<br />
min. filter frequency<br />
50Hz **<br />
12 BMS mode ** Isodata ** test data **<br />
Bus address in the tens<br />
13<br />
place IRDH275 Value: 5 ... 9<br />
Bus address in the units<br />
14<br />
place IRDH275 Value: 5 ... 9<br />
15 Number of pulses 2-9 ** Value: 5 ... 9<br />
** The parameters marked with two asterisks are settable via the Service menu item! A password is required for that<br />
purpose !<br />
70 TGH1386en/07.2004
Technical data IRDH275...<br />
Dimension diagram enclosure IRDH275<br />
ø 4,5 mm<br />
81 mm<br />
• DIN rail mounting according to IEC 60715<br />
or<br />
• Screw mounting DIN EN 50155/VDE 0115 T.200<br />
by means of a plug-in trapezoidal support<br />
Order No.: 990056 (Option W)<br />
TGH1386en/07.2004<br />
71
Technical data IRDH275...<br />
7.4 Ordering details<br />
7.4.1 Standard version<br />
Type<br />
Nominal voltage<br />
U n<br />
Supply voltage<br />
U s<br />
Art.-No.<br />
IRDH275-435<br />
3(N)AC 0...793 V<br />
DC 0...650 V<br />
AC 88...264 V<br />
DC 77...286 V<br />
B 9106 5100<br />
IRDH275W-435 „ „ B 9106 5100W<br />
IRDH275B-435 „ „ B 9106 5101<br />
IRDH275BW-435 „ „ B 9106 5101W<br />
IRDH275-427 „ DC 19,2...72 V B 9106 5104<br />
IRDH275W-427 „ „ B 9106 5104W<br />
IRDH275B-427 „ „ B 9106 5105<br />
IRDH275BW-427 „ „ B 9106 5105W<br />
IRDH275B-R435 „<br />
AC 88...264 V<br />
DC 77...286 V<br />
B 9106 5113<br />
IRDH275B-R427 „ DC 19,2...72 V B 9106 5114<br />
The IRDH275B.. version provides a BMS interface, a memory with real-time<br />
clock and other features. An overview about these features is shown in the<br />
menu structure on Page 38 and in the product and function description on<br />
Page 14.<br />
Devices with "R" option offer wider temperature range from -40 °C ... +70 °C.<br />
Devices with ending "W" provide improved shock and vibration resistance.<br />
A special varnish of the electronics provides higher resistance against mechanical<br />
stress and moisture. This makes the devices suitable for use in ships,<br />
on rolling stock and in seismic environment.<br />
72 TGH1386en/07.2004
Technical data IRDH275...<br />
7.4.2 Coupling devices<br />
Type Nominal voltage Art. No.<br />
range U n<br />
AGH204S-4 AC 0 ... 1650 V B 914 013<br />
AGH520S AC 0 ... 7200 V B 913 033<br />
AGH150W-4 DC 0 ... 1760 V B 9801 8006<br />
7.4.3 Measuring instruments<br />
Type Measuring range Dimensions Art. No.<br />
7204-1421 0 ... 400 µA 72 x 72 mm B 986 763<br />
9604-1421 0 ... 400 µA 96 x 96 mm B 986 764<br />
7204S-1421 0 ... 400 µA 72 x 72 mm B 986 804<br />
9604S-1421 0 ... 400 µA 96 x 96 mm B 986 784<br />
9620-1421 0 ... 20 mA 96 x 96 mm B 986 841<br />
9620S-1421 0 ... 20 mA 96 x 96 mm B 986 842<br />
7.4.4 Label for modified versions<br />
There will only be a label in this field if the A-ISOMETER is different from<br />
the standard versions listed in this manual.<br />
TGH1386en/07.2004<br />
73
Technical data IRDH275...<br />
74 TGH1386en/07.2004
INDEX<br />
A<br />
Alarm LED 1 33<br />
Alarm LED 2 33<br />
Alarm messages 58<br />
Automatic self test 46<br />
B<br />
<strong>Bender</strong> Measuring Device Interface 56<br />
BMS bus<br />
- correct arrangement 55<br />
- wrong arrangement 55<br />
BMS-bus<br />
- address ranges 59<br />
BMS-bus address ranges 59<br />
BMS-Master 56<br />
BMS-Slave 57<br />
C<br />
Changing the measuring principle 46<br />
Characteristic curves 65<br />
Commissioning flow chart 21<br />
Commissioning of a BMS network 58<br />
Coupling devices<br />
- ordering details 73<br />
- wiring diagram 28<br />
Current output 4-20 mA 69<br />
D<br />
Dimension diagram enclosure IRDH275<br />
71<br />
Directions for installation 11<br />
Display in the menu mode 34<br />
E<br />
Explanations of symbols and warnings 10<br />
External coupling devices 45<br />
External RESET button 27<br />
External TEST button 27<br />
F<br />
Factory setting 11<br />
Flashing point 57<br />
Function 14<br />
Function input F1/F2 17<br />
I<br />
INFO key 33<br />
Inspection, transport and storage 9<br />
Interconnected systems 17<br />
ISO monitor (IRDH275B) 48<br />
IsoData protocol 53<br />
M<br />
Memory database 40<br />
Menu<br />
- COM SETUP 48<br />
- HISTORY INFO 41<br />
- ISO ADVANCED 45<br />
- ISO SETUP 42<br />
- LANGUAGE 51<br />
- PASSWORD 50<br />
- SERVICE 52<br />
Menu structure 39<br />
O<br />
Operating 33<br />
TGH1386en/07.2004<br />
75
Operating features and<br />
displays 33<br />
Option „W“ 13<br />
Ordering details 72<br />
P<br />
Product description 14<br />
R<br />
Real-time clock 17<br />
RESET button 14, 33<br />
RS485 interface 54<br />
S<br />
Self test, A-ISOMETER 33<br />
Setting the bus address for IRDH275B 48<br />
Setting the date (IRDH275B) 46<br />
Setting the system leakage capacitance 46<br />
Standards 64<br />
Status number 70<br />
T<br />
Technical data IRDH275 61<br />
TEST button 33<br />
Topology (IRDH275B) 55<br />
W<br />
Wiring 55<br />
wiring diagram A-ISOMETER 27<br />
Wrong arrangement 55<br />
TGH1386en/07.2004<br />
76
INDEX<br />
77 TGH1386en/07.2004
<strong>Bender</strong> Inc.<br />
700 Fox Chase<br />
Coatesville, PA 19320<br />
Tel.: 1-610-383-9200<br />
Fax: 1-610-383-7100<br />
E-Mail: info@bender.org<br />
Internet: http://www.bender.org