30'' sheet metal machine - Grizzly Industrial Inc.
30'' sheet metal machine - Grizzly Industrial Inc.
30'' sheet metal machine - Grizzly Industrial Inc.
You also want an ePaper? Increase the reach of your titles
YUMPU automatically turns print PDFs into web optimized ePapers that Google loves.
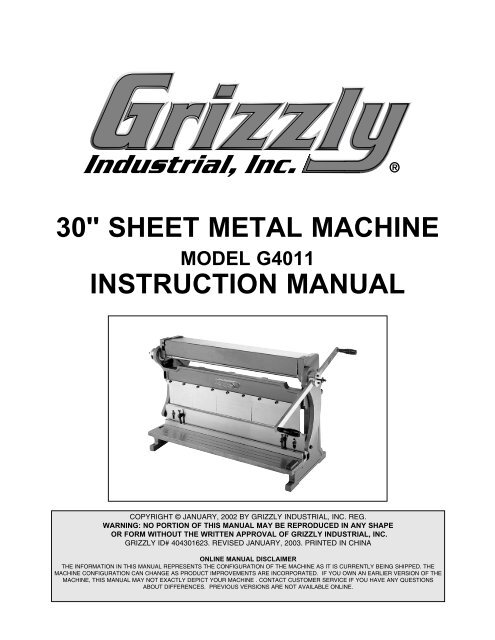
<strong>30''</strong> SHEET METAL MACHINE<br />
MODEL G4011<br />
INSTRUCTION MANUAL<br />
COPYRIGHT © JANUARY, 2002 BY GRIZZLY INDUSTRIAL, INC. REG.<br />
WARNING: NO PORTION OF THIS MANUAL MAY BE REPRODUCED IN ANY SHAPE<br />
OR FORM WITHOUT THE WRITTEN APPROVAL OF GRIZZLY INDUSTRIAL, INC.<br />
GRIZZLY ID# 404301623. REVISED JANUARY, 2003. PRINTED IN CHINA<br />
ONLINE MANUAL DISCLAIMER<br />
THE INFORMATION IN THIS MANUAL REPRESENTS THE CONFIGURATION OF THE MACHINE AS IT IS CURRENTLY BEING SHIPPED. THE<br />
MACHINE CONFIGURATION CAN CHANGE AS PRODUCT IMPROVEMENTS ARE INCORPORATED. IF YOU OWN AN EARLIER VERSION OF THE<br />
MACHINE, THIS MANUAL MAY NOT EXACTLY DEPICT YOUR MACHINE . CONTACT CUSTOMER SERVICE IF YOU HAVE ANY QUESTIONS<br />
ABOUT DIFFERENCES. PREVIOUS VERSIONS ARE NOT AVAILABLE ONLINE.
SECTION 1: SAFETY<br />
For Your Own Safety Read Instruction<br />
Manual Before Operating This Equipment<br />
The purpose of safety symbols is to attract your attention to possible dangers. This manual uses<br />
a series of symbols which are intended to convey the level of criticality of the safety message.<br />
The progression of symbols is described below. Remember that safety messages by themselves<br />
do not eliminate danger and are not a substitute for proper accident prevention measures.<br />
Failure to obey a DANGER symbol and notation WILL result<br />
in serious personal injury including loss of life or body parts.<br />
Failure to obey a WARNING symbol and notation can result<br />
in serious injury to yourself and others.<br />
Failure to obey a CAUTION symbol and notation may result in<br />
minor or moderate property damage or personal injury.<br />
NOTICE<br />
This symbol is used to alert the user to useful information about<br />
proper operation of the equipment.<br />
Safety Instructions For Tools<br />
1. KEEP GUARDS IN PLACE and in working<br />
order.<br />
2. REMOVE ADJUSTING KEYS AND<br />
WRENCHES. Form habit of checking to<br />
see that keys and adjusting wrenches are<br />
removed from tool before turning on.<br />
5. KEEP CHILDREN AND VISITORS<br />
AWAY. All children and visitors should be<br />
kept a safe distance from work area.<br />
6. MAKE WORK SHOP CHILD PROOF with<br />
padlocks, master switches, or by removing<br />
starter keys.<br />
3. KEEP WORK AREA CLEAN. Cluttered<br />
areas and benches invite accidents.<br />
4. DON’T USE IN DANGEROUS ENVIRON-<br />
MENT. Don’t use power tools in damp or<br />
wet locations, or where any flammable or<br />
noxious fumes may exist. Keep work area<br />
well lighted.<br />
G4011 30" Sheet Metal Machine<br />
7. DON’T FORCE TOOL. It will do the job<br />
better and safer at the rate for which it was<br />
designed.<br />
8. USE RIGHT TOOL. Don’t force tool or<br />
attachment to do a job for which it was not<br />
designed.<br />
-1-
Safety Instructions For Tools<br />
9 WEAR PROPER APPAREL. Do not wear<br />
loose clothing, gloves, neckties, rings,<br />
bracelets, or other jewelry which may get<br />
caught in moving parts. Non-slip footwear<br />
is recommended. Wear protective hair<br />
covering to contain long hair.<br />
10. ALWAYS USE SAFETY GLASSES. Also<br />
use face or dust mask if cutting operation is<br />
dusty. Everyday eyeglasses only have<br />
impact resistant lenses, they are NOT safety<br />
glasses.<br />
11. SECURE WORK. Use clamps or a vise to<br />
hold work when practical. It’s safer than<br />
using your hand and frees both hands to<br />
operate tool.<br />
12. DON’T OVERREACH. Keep proper footing<br />
and balance at all times.<br />
13. MAINTAIN TOOLS WITH CARE. Keep<br />
tools sharp and clean for best and safest<br />
performance. Follow instructions for lubricating<br />
and changing accessories.<br />
14. DISCONNECT TOOLS before servicing<br />
and changing accessories, such as blades,<br />
bits, cutters, and the like.<br />
15. USE RECOMMENDED ACCESSORIES.<br />
Consult the owner’s manual for recommended<br />
accessories. The use of improper<br />
accessories may cause risk of injury.<br />
16. CHECK DAMAGED PARTS. Before further<br />
use of the tool, a guard or other part that is<br />
damaged should be carefully checked to<br />
determine that it will operate properly and<br />
perform its intended function. Check for<br />
alignment of moving parts, binding of moving<br />
parts, breakage of parts, mounting, and<br />
any other conditions that may affect its operation.<br />
A guard or other part that is damaged<br />
should be properly repaired or replaced.<br />
Operating this equipment has the potential<br />
for flying debris to cause eye injury. Always<br />
wear safety glasses or goggles when operating<br />
equipment. Everyday glasses or reading<br />
glasses only have impact resistant lenses,<br />
they are not safety glasses. Be certain<br />
the safety glasses you wear meet the<br />
appropriate standards of the American<br />
National Standards Institute (ANSI).<br />
As with all tools, there is danger associated<br />
with the Model G4011 30" Sheet Metal<br />
Machine. Accidents are frequently caused<br />
by lack of familiarity or failure to pay attention.<br />
Use this tool with respect and caution<br />
to lessen the possibility of operator injury.<br />
If normal safety precautions are overlooked<br />
or ignored serious personal injury may<br />
occur.<br />
-2- G4011 30" Sheet Metal Machine
SECTION 2: GENERAL INFORMATION<br />
We are proud to offer the <strong>Grizzly</strong> Model G4011<br />
30" Sheet Metal Machine. The Model G4011 is<br />
part of a growing <strong>Grizzly</strong> family of fine <strong>metal</strong>working<br />
<strong>machine</strong>ry. When used according to the<br />
guidelines set forth in this manual, you can<br />
expect years of trouble-free, enjoyable operation<br />
and proof of <strong>Grizzly</strong>’s commitment to customer<br />
satisfaction.<br />
The Model G4011 is designed to provide the ability<br />
to shear, bend and roll <strong>metal</strong> stock up to 30"<br />
wide and thickness of 22 gauge (approximately<br />
.036''). The <strong>machine</strong> comes with die set sizes of<br />
1", 2", 3", 6", 8", 10" and wire forming grooves of<br />
1<br />
⁄8", 3 ⁄16", 1 ⁄4".<br />
We are also pleased to provide this manual with<br />
the Model G4011. It was written to guide you<br />
through assembly, review safety considerations,<br />
and cover general operating procedures. It represents<br />
our effort to produce the best documentation<br />
possible. If you have any comments regarding<br />
this manual, please write to us at the address<br />
below:<br />
<strong>Grizzly</strong> <strong>Industrial</strong>, <strong>Inc</strong>.<br />
C<br />
/O Technical Documentation<br />
P.O. Box 2069<br />
Bellingham, WA 98227-2069<br />
Most important, we stand behind our <strong>machine</strong>s. If<br />
you have any service questions or parts<br />
requests, please call or write us at the location<br />
listed below.<br />
<strong>Grizzly</strong> <strong>Industrial</strong>, <strong>Inc</strong>.<br />
1203 Lycoming Circle<br />
Muncy, PA 17756<br />
Phone: (570) 326-3806<br />
Fax: (800) 438-5901<br />
E-Mail: grizzlytech@aol.com<br />
Web Site: http://www.grizzlyindustrial.com<br />
The specifications, drawings, and photographs<br />
illustrated in this manual represent the Model<br />
G4011 as supplied when the manual was prepared.<br />
However, owing to <strong>Grizzly</strong>’s policy of continuous<br />
improvement, changes may be made at<br />
any time with no obligation on the part of <strong>Grizzly</strong>.<br />
Whenever possible, though, we send manual<br />
updates to all owners of a particular tool or<br />
<strong>machine</strong>. Should you receive one, we urge you to<br />
insert the new information with the old and keep it<br />
for reference.<br />
To operate this, or any tool, safely and efficiently,<br />
it is essential to become as familiar<br />
with its characteristics as possible. The<br />
time you invest before you begin to use<br />
your Model G4011 will be time well spent.<br />
DO NOT operate this <strong>machine</strong> until you are<br />
completely familiar with the contents of<br />
this manual. Make sure you read and<br />
understand all of the safety procedures. If<br />
you do not understand something, DO<br />
NOT operate the <strong>machine</strong>.<br />
G4011 30" Sheet Metal Machine<br />
-3-
Unpacking<br />
This <strong>machine</strong> is shipped from the manufacturer in<br />
a carefully packed carton. If you discover the<br />
<strong>machine</strong> is damaged after you’ve signed for delivery,<br />
and the truck and driver are gone, you will<br />
need to file a freight claim with the carrier. Save<br />
the containers and all packing materials for possible<br />
inspection by the carrier or its agent.<br />
Without the packing materials, filing a freight<br />
claim can be difficult. If you need assistance<br />
determining whether you need to file a freight<br />
claim, or with the procedure to file one, please<br />
contact our Customer Service.<br />
This <strong>machine</strong> should be mounted to a<br />
stand or workbench with the appropriate<br />
fasteners before using. Forming <strong>metal</strong> will<br />
require exerting force through the handle<br />
mechanism. If not securely fastened, the<br />
<strong>machine</strong> could topple and cause injury.<br />
Piece Inventory<br />
After all the parts have been removed from the<br />
cartons, you should have:<br />
The G4011 is a heavy <strong>machine</strong> (355 lbs.<br />
shipping weight). DO NOT over-exert yourself<br />
while unpacking or moving your<br />
<strong>machine</strong> – get assistance. In the event that<br />
your <strong>machine</strong> must be moved up or down a<br />
flight of stairs, be sure that the stairs are<br />
capable of supporting the combined weight<br />
of people and the <strong>machine</strong>. Serious personal<br />
injury may occur.<br />
When you are completely satisfied with the condition<br />
of your shipment, you should carefully<br />
unpack the box.<br />
When unpacking, there are two bolts which are<br />
used to secure the <strong>machine</strong> to its shipping crate.<br />
Remove these bolts and save them for use when<br />
mounting the <strong>machine</strong> to your workbench.<br />
For safe and accurate operation, this <strong>machine</strong><br />
must be secured firmly to a solid surface!<br />
• Sheet Metal Machine w/ Handle<br />
• Accessory Items<br />
-Back Gauge Assembly, <strong>Inc</strong>luding<br />
2 Pieces of Rods and a Stop with<br />
Micro Adjusting Nuts<br />
-Allen ® Wrench 5mm<br />
-Allen ® Wrench 6mm<br />
-Allen ® Wrench 8mm<br />
-Allen ® Wrench 10mm<br />
NOTICE<br />
A full parts list and breakdown can be found<br />
toward the end of this manual. For easier<br />
assembly, or to identify missing parts,<br />
please refer to the detailed illustration at the<br />
end of the manual. Reference numbers<br />
called out in the following operations<br />
descriptions refer to the numbers on this<br />
drawing.<br />
-4- G4011 30" Sheet Metal Machine
SECTION 3 : OPERATIONS<br />
Handle Adjustment<br />
Shearing<br />
The handle is shipped mounted to the right side of<br />
the <strong>machine</strong>. If left hand operation is required, the<br />
handle can be moved to the opposite side of the<br />
<strong>machine</strong>:<br />
1. Remove one of the handles.<br />
2. Loosen the handle adjustment knob and<br />
slide the handle arm out of the slot.<br />
3. Slide the handle arm into the opposite side<br />
and tighten the handle adjustment knob.<br />
4. Reattach the handle.<br />
5. The handle arm can be positioned for the<br />
desired torque. The longer the handle arm,<br />
the greater amount of torque can be applied.<br />
For precision shearing from 2'' to 10'' lengthwise,<br />
first attach the back measurement assembly to<br />
the receiver holes in the back of the crossbeam:<br />
1. To adjust the position of the back measurement<br />
assembly, first loosen the two knobs.<br />
2. Move the assembly forward and back using<br />
the handwheel. When the assembly is at the<br />
desired position, tighten the knobs to lock it<br />
into position.<br />
3. If a precise 90˚ angle is desired, attach the<br />
guide to the left side of the cutting table using<br />
the two Allen ® screws.<br />
4. Using the handle assembly, raise the upper<br />
cutting die to the highest position. Slide the<br />
workpiece in between the braking die and the<br />
work surface.<br />
5. Rotate the handle assembly to shear the<br />
workpiece at the desired location.<br />
Operating this equipment has the potential<br />
to cause flying debris which may cause eye<br />
injury. Always wear safety glasses or goggles<br />
when operating equipment. Everyday<br />
glasses or reading glasses only have<br />
impact resistant lenses, they are not safety<br />
glasses. Be certain the safety glasses you<br />
wear meet the appropriate standards of the<br />
American National Standards Institute<br />
(ANSI).<br />
During shearing operations, there are two conditions<br />
which may cause uneven cuts:<br />
1. Shear Bow. There is a tensioning adjustment<br />
on the shear plate which can create a bow<br />
necessary to cut certain materials. Adjust the<br />
tension on the bolt attached to the shear<br />
frame adjustment bar. Tightening the bolt will<br />
cause the ends of the shear to bow out, loosening<br />
the bolt will cause them bow in.<br />
G4011 30" Sheet Metal Machine<br />
-5-
2. Shear Alignment. The two shearing bars<br />
may need to be aligned with each other<br />
across their entire length. Lower the shear<br />
assembly all the way so the two shears are<br />
even with each other. If one side or the other<br />
does not meet, the cutting table needs to be<br />
realigned. Loosen the bolts that hold the<br />
table, then tighten or loosen the adjustment<br />
screws on the front underside until the cutting<br />
table is properly aligned. Tighten the<br />
holding bolts and double check the alignment.<br />
Tips for shearing:<br />
• When shearing, the work should be squared<br />
against the squaring guide. The holdown<br />
should be adjusted approximately 1 ⁄4" above<br />
the table when the shear blade is in the “up”<br />
position. As you move the blade downward,<br />
the holdown should immediately rest against<br />
the workpiece and hold it in place.<br />
• Do not reach around the <strong>machine</strong> to grab the<br />
cut-off piece. A large cut-off piece should be<br />
allowed to drop on a special table that is designated<br />
to catch cut-off pieces that are larger<br />
than the workbench.<br />
• To prevent distortion when notching, “snap”<br />
the handle quickly to pierce the workpiece.<br />
The maximum notch that can be cut at one<br />
time is 3 ⁄4". By progressing in 5 ⁄8" steps, a<br />
deeper notch can be cut.<br />
• To adjust the lower shear blade, loosen the<br />
screw at the end of each table. Underneath<br />
the table, there are two adjustment screws on<br />
the left and right side. By adjusting these<br />
screws in or out, the lower blade can be<br />
brought in contact with the upper shear so a<br />
fine cut can be made.<br />
• Have the shear blades sharpened by a professional.<br />
This will lead to accurate and quality<br />
results.<br />
• The shear blades are interchangeable. The<br />
upper shear mount has a 5˚ relief angle, so<br />
the upper blade does not exactly match the<br />
lower blade when installed correctly.<br />
All <strong>metal</strong> parts after shearing will have a<br />
sharp edge on them. The sharp edge may<br />
cause cuts or lacerations when handled.<br />
Please examine the edges of all cut <strong>metal</strong><br />
parts and file or sand the edge to remove<br />
the edge before handling.<br />
Pressing<br />
Slide the plate brackets on the press plate<br />
assembly into the receiver holes of the upper cutting<br />
die. Make sure the press plate is facing<br />
down.<br />
Place the workpiece so that it is centered under<br />
the press plate. Rotate the handle with sufficient<br />
force to achieve the degree of pressing desired.<br />
-6- G4011 30" Sheet Metal Machine
Braking<br />
Rolling<br />
For precision braking from 2'' to 10'' lengthwise,<br />
first attach the back measurement assembly to<br />
the receiver holes in the back of the crossbeam:<br />
1. To adjust the position of the back measurement<br />
assembly, first loosen the two knobs.<br />
2. Move the assembly forward and back using<br />
the handwheel. When it is at the desired<br />
position, tighten the knobs to lock it into position.<br />
3. Using the handle assembly, raise the cross<br />
beam up to its highest position.<br />
4. Insert the workpiece in between the upper<br />
and lower braking dies.<br />
5. Rotate the handle assembly, using the<br />
appropriate amount of force to achieve the<br />
desired bending angle.<br />
6. To bend only certain portions of your workpiece,<br />
simply loosen the bolts that hold the<br />
upper braking die brackets in place and add<br />
or remove the dies as required. For small<br />
increments, use the fractional dies included<br />
with the <strong>machine</strong>. You should notch the<br />
material appropriately before bending to<br />
achieve the good results. This means you<br />
will have to make a cut between the portion<br />
of the material to be bent and the portion you<br />
wish to remain straight.<br />
The upper braking dies may become uneven.<br />
This is best handled with a wooden gauge block<br />
that is the full length of the table and is the same<br />
height all the way across. Raise the crossbeam<br />
all the way and slide the block underneath the<br />
dies. Loosen the bolts that hold the upper die<br />
bracket in place and allow the dies to drop slightly<br />
until they contact the block. Tighten the upper<br />
bracket bolts.<br />
In order to do rolling operations, move the cover<br />
back and out of the way.<br />
1. Drop the rear roll bar by loosening the adjustment<br />
knobs.<br />
2. Insert just the leading edge of the workpiece<br />
between the upper and the lower roll bars,<br />
and tighten the roll bar gap adjustment keys<br />
until the roll bars are barely snug against the<br />
workpiece.<br />
3. Advance the adjustment knobs as much as<br />
desired depending upon the tightness of the<br />
roll to be accomplished. The tighter the roll,<br />
the more the knobs should be advanced.<br />
4. Rotate the handle assembly until the proper<br />
roll has been achieved. The material will feed<br />
itself through the rollers as the handle<br />
assembly is cranked.<br />
Wire rolling is accomplished in the same manner,<br />
except the proper groove in the upper roll bar<br />
must be utilized depending upon the wire gauge<br />
being rolled.<br />
Lubrication<br />
Grease the crank arms as necessary using a<br />
grease gun on the installed grease fittings. Do not<br />
over-grease.<br />
A light coating of oil on the area where the upper<br />
arm slides will also assure ease of movement.<br />
G4011 30" Sheet Metal Machine<br />
-7-
SECTION 4: CLOSURE<br />
The following pages contain parts diagrams and<br />
reference number list and Warranty/Return information<br />
for your Model G4011 30" Sheet Metal<br />
Machine.<br />
If you need parts or help in assembling your<br />
<strong>machine</strong>, or if you need operational information,<br />
we encourage you to call our Service<br />
Department. Our trained service technicians will<br />
be glad to help you.<br />
If you have comments dealing specifically with<br />
this manual, please write to our Bellingham,<br />
Washington location using the address in Section<br />
2: General Information. The specifications, drawings,<br />
and photographs illustrated in this manual<br />
represent the Model G4011 as supplied when the<br />
manual was prepared. However, due to <strong>Grizzly</strong>’s<br />
policy of continuous improvement, changes may<br />
be made at any time with no obligation on the part<br />
of <strong>Grizzly</strong>. Whenever possible, though, we send<br />
manual updates to all owners of a particular tool<br />
or <strong>machine</strong>. Should you receive one, add the new<br />
information to this manual and keep it for reference.<br />
We have included some important safety measures<br />
that are essential to this <strong>machine</strong>’s operation.<br />
While most safety measures are generally<br />
universal, <strong>Grizzly</strong> reminds you that each workshop<br />
is different and safety rules should be considered<br />
as they apply to your specific situation.<br />
We recommend you keep a copy of our current<br />
catalog for complete information regarding<br />
<strong>Grizzly</strong>'s warranty and return policy. If you need<br />
additional technical information relating to this<br />
<strong>machine</strong>, or if you need general assistance or<br />
replacement parts, please contact the Service<br />
Department listed in Section 2: General<br />
Information.<br />
Additional information sources are necessary to<br />
realize the full potential of this <strong>machine</strong>. Trade<br />
journals, woodworking magazines, and your local<br />
library are good places to start.<br />
The Model G4011 was specifically<br />
designed for <strong>metal</strong> working. do not modify<br />
and/or use this MACHINE for any other purpose.<br />
Modifications or improper use of this<br />
tool will void the warranty. If you are confused<br />
about any aspect of this <strong>machine</strong>, DO<br />
NOT use it until you have answered all your<br />
questions. Serious personal injury may<br />
occur.<br />
-8- G4011 30" Sheet Metal Machine
G4011 30" Sheet Metal Machine<br />
-9-
REF PART # DESCRIPTION<br />
1 P4011001 LEFT WALL<br />
2 P4011002 WORK BENCH<br />
3 P4011003 CROSSBEAM<br />
4 P4011004 CRANK ARM<br />
5 P4011005 RIGHT WALL<br />
6 P4011006 REAR FRAME<br />
7 P4011007 COVER<br />
8 P4011008 PRESS PLATE BRACKET<br />
9 P4011009 SPRING<br />
10 P4011010 PRESSING PLATE<br />
11 P4011011 MOVING CUTTER PLATE<br />
12-1 P4011012-1 UPPER BREAKING DIE 10"<br />
12-2 P4011012-2 UPPER BREAKING DIE 8"<br />
12-3 P4011012-3 UPPER BREAKING DIE 6"<br />
12-4 P4011012-4 UPPER BREAKING DIE 3"<br />
12-5 P4011012-5 UPPER BREAKING DIE 2"<br />
12-6 P4011012-6 UPPER BREAKING DIE 1"<br />
13 P4011013 DIE CLAMPING PLATE<br />
14 PB15M HEX BOLT M8-1.25 X 40<br />
15 P4011015 ARM ROLLING WHEEL<br />
16 P4011016 POSITIONER<br />
17 P4011017 ADJUSTABLE BOLT<br />
18 P4011018 HANDLE ARM<br />
19 P4011019 THREADED ROD<br />
20 P4011020 POSITIONING PIECE<br />
21 P4011021 POSITIONING PLATE<br />
22 P4011022 SUPPORTING PLATE<br />
23 P4011023 CUTTER<br />
24 P4011024 BACK PRESSING ROLL<br />
25 P4011025 LOCK SCREW<br />
27 P4011027 ADJUSTABLE BOLT<br />
28 P4011028 BUSHING<br />
29 P4011029 PRESS COVER<br />
REF PART # DESCRIPTION<br />
30 P4011030 GEAR<br />
31 P4011031 LOWER PRESSING ROLL<br />
32 P4011032 UPPER PRESSING ROLL<br />
33 P4011033 PROTECTING COVER<br />
34 P4011034 ROTATION SHAFT<br />
35 P4011035 ECCENTRIC SHAFT<br />
38 PK07M KEY 6 X 6 X 20<br />
39 PSB01M CAP SCREW M6-1.0 X 16<br />
40 P4011040 CAP SCREW M6-1.0 X 8<br />
41 P4011041 HEX BOLT M6-1.0 X 44<br />
43 P4011043 KNOB<br />
44 P4011044 CAP SCREW M6-1.0 X 8<br />
45 PB15M HEX BOLT M8-1.25 X 40<br />
46 PW01M FLAT WASHER 8MM<br />
47 PB15M HEX BOLT M8-1.25 X 40<br />
48 PB19M HEX BOLT M8-1.25 X 24<br />
49 PW01M FLAT WASHER 8MM<br />
50 PN03M HEX NUT M8-1.25<br />
51 P4011051 HEX BOLT M10-1.5 X 16<br />
52 PSB13M CAP SCREW M8-1.25 X 30<br />
53 P4011053 CAP SCREW M6-1.0 X 24<br />
54 PSB11M CAP SCREW M8-1.25 X 16<br />
55 PW01M FLAT WASHER 8MM<br />
56 P4011056 HEX BOLT M6-1.0 X 45<br />
57 PSB04M CAP SCREW M6-1.0 X 10<br />
58 PSB04M CAP SCREW M6-1.0 X 10<br />
59 PSB04M CAP SCREW M6-1.0 X 10<br />
60 PSB14M CAP SCREW M8-1.25 X 20<br />
73 P4011064 HANDLE ADJUST KNOB<br />
85 P4011085 PIN<br />
86 P4011086 GREASE FITTING 5 ⁄16"X 1 ⁄4"<br />
89 PN02M HEX NUT 10MM<br />
-10- G4011 30" Sheet Metal Machine
WARRANTY AND RETURNS<br />
<strong>Grizzly</strong> <strong>Industrial</strong>, <strong>Inc</strong>. warrants every product it sells for a period of 1 year to the original purchaser from<br />
the date of purchase. This warranty does not apply to defects due directly or indirectly to misuse, abuse,<br />
negligence, accidents, repairs or alterations or lack of maintenance. This is <strong>Grizzly</strong>’s sole written warranty<br />
and any and all warranties that may be implied by law, including any merchantability or fitness, for any particular<br />
purpose, are hereby limited to the duration of this written warranty. We do not warrant or represent<br />
that the merchandise complies with the provisions of any law or acts unless the manufacturer so warrants.<br />
In no event shall <strong>Grizzly</strong>’s liability under this warranty exceed the purchase price paid for the product and<br />
any legal actions brought against <strong>Grizzly</strong> shall be tried in the State of Washington, County of Whatcom.<br />
We shall in no event be liable for death, injuries to persons or property or for incidental, contingent, special,<br />
or consequential damages arising from the use of our products.<br />
To take advantage of this warranty, contact us by mail or phone and give us all the details. We will then<br />
issue you a “Return Number,’’ which must be clearly posted on the outside as well as the inside of the carton.<br />
We will not accept any item back without this number. Proof of purchase must accompany the merchandise.<br />
The manufacturers reserve the right to change specifications at any time because they constantly strive to<br />
achieve better quality equipment. We make every effort to ensure that our products meet high quality and<br />
durability standards and we hope you never need to use this warranty.<br />
Please feel free to write or call us if you have any questions about the <strong>machine</strong> or the manual.<br />
Thank you again for your business and continued support. We hope to serve you again soon.
WARRANTY CARD<br />
NAME_______________________________________________ PHONE NUMBER___________________<br />
STREET________________________________________________________________________________<br />
CITY_______________________________STATE_________ZIP ___________________________________<br />
MODEL# ____________________ INVOICE#_________________ SERIAL#_________________<br />
The following information is given on a voluntary basis. This information will be used for marketing purposes to help<br />
<strong>Grizzly</strong> develop better products. Your name will be included in our mailing list only. It will not be sold to other companies.<br />
of course, all information is strictly confidential.<br />
1. How did you find out about us<br />
__Advertisement __Friend __Website<br />
__Catalog __Card deck __Other____________________<br />
2. Do you think your <strong>machine</strong> represents good value __YES __NO<br />
3. Would you allow us to use your name as a reference for <strong>Grizzly</strong> customers in your area __YES __NO<br />
(Note: Your name will be used a maximum of three times.)<br />
4. To which of the following publications do you subscribe Check all that apply.<br />
__Home Shop Machinist __Rifle Magazine Other ________________<br />
__Projects in Metal<br />
__Hand Loader Magazine<br />
__Modeltec<br />
__Precision Shooter<br />
__Live Steam<br />
__RC Modeler<br />
__Shotgun News<br />
__Model Airplane News<br />
CUT ALONG DOTTED LINE<br />
5. What is your annual household income (optional)<br />
__$20,000-$30,000 __$50,001-$60,000 __$80,000-$90,000<br />
__$30,001-$40,000 __$60,001-$70,000 __+$90,000<br />
__$40,001-$50,000 __$70,001-$80,000<br />
6. To which age group do you belong<br />
__20-30 __41-50__61-70<br />
__31-40 __51-60__+70<br />
7. Which of the following <strong>machine</strong>s or accessories do you own Check all that apply.<br />
__Engine Lathe __Abrasive Cutoff __Sheet Metal Machine<br />
__Band Saw (Metal) __Arc Welder __Other _____________________________<br />
__Band Saw (Wood) __Oxy/Ac. Outfit<br />
__Milling Machine __Air Compressor<br />
__Bench Grinder __Drill Press<br />
8. How many of the <strong>machine</strong>s you checked in Question 7 are <strong>Grizzly</strong> <strong>machine</strong>s ______________________<br />
9. Which of the following tooling and accessories do you own Check all that apply.<br />
__Milling Vises __Collet Closer __Digital Readout<br />
__Indexing Head __Taper Attachment __Tool Post Grinder<br />
__Rotary Table __Boring Head __Other _________________________________________<br />
10. In the space below, list three tools you would like <strong>Grizzly</strong> to carry.<br />
11. Of all the mail order <strong>metal</strong>working company’s you have purchased from, how do you rate <strong>Grizzly</strong> in terms of overall<br />
customer satisfaction<br />
__The best __Above average __Average<br />
__Below average __The worst<br />
12. Comments_______________________________________________________________________________<br />
_____________________________________________________________________________________________
FOLD ALONG DOTTED LINE<br />
Place<br />
Stamp<br />
Here<br />
GRIZZLY INDUSTRIAL, INC.<br />
P.O. BOX 2069<br />
BELLINGHAM, WA 98227-2069<br />
FOLD ALONG DOTTED LINE<br />
Send a <strong>Grizzly</strong> Catalog to a friend:<br />
Name_______________________________<br />
Street_______________________________<br />
City______________State______Zip______<br />
TAPE ALONG EDGES--PLEASE DO NOT STAPLE
Buy Direct and Save with <strong>Grizzly</strong> ® – Trusted, Proven and a Great Value!<br />
Visit Our Website Today And Discover Why<br />
<strong>Grizzly</strong> ® Is The Industry Leader!<br />
• SECURE ORDERING<br />
• ORDERS SHIPPED WITHIN 24 HOURS<br />
• E-MAIL RESPONSE WITHIN ONE HOUR<br />
-OR-<br />
Call Today For A FREE<br />
Full Color Catalog


