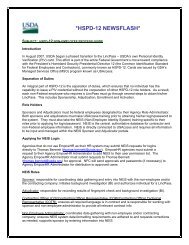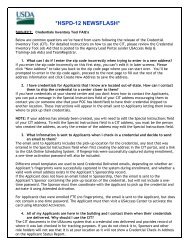
USAccess System- - USDA HSPD-12 Information
USAccess System- - USDA HSPD-12 Information
USAccess System- - USDA HSPD-12 Information

You also want an ePaper? Increase the reach of your titles
YUMPU automatically turns print PDFs into web optimized ePapers that Google loves.
<strong>USAccess</strong> <strong>System</strong>-<br />
Registrar<br />
Help Guide<br />
Prepared for<br />
United States Department of Agriculture<br />
Office of Security<br />
300 7th Street SW, Washington DC 20024<br />
Version 1.0<br />
December <strong>12</strong>, 2007
<strong>USAccess</strong> <strong>System</strong> Registrar<br />
In the <strong>USAccess</strong> system, the Registrar’s tasks are to manage enrollment appointments and<br />
perform the enrollment data capture tasks.<br />
This guide is divided into three parts: Managing Enrollment Appointments, Enrollment<br />
Procedures, and Enrollment Troubleshooting. The following sections contain <strong>USAccess</strong> screen<br />
shots and step-by-step instructions to assist the Adjudicator in performing their duties.<br />
Part I: Managing Enrollment Appointments<br />
A. Enrollment Station Layout<br />
B. Logging In<br />
C. Managing Appointments<br />
D. Cancelling Appointments<br />
E. Greeting Applicants<br />
F. About ID Source Documents<br />
Part II: Enrollment Procedures<br />
A. Verifying Biographical Data<br />
B. Scanning ID Source Documents<br />
C. Capturing Applicant Photo<br />
D. Capturing and Verifying Fingerprints<br />
E. Saving the Enrollment Record<br />
Part III: Enrollment Troubleshooting<br />
A. Invalid Identity Documents<br />
B. Photo Optimization<br />
C. Missing Fingerprints<br />
Contacts are also listed on the last page should you require assistance.<br />
Note: You will first insert your PIV Credential into a card reader to access the system; you will be<br />
prompted to enter your Personal Identification Number (PIN).<br />
Make sure you do not remove your credential during the Enrollment process.<br />
When you have completed your Registrar activities or if you must leave your workstation, logout<br />
of the application and remove your PIV Credential from the card reader.<br />
2
Part I: Managing Enrollment Appointments<br />
A. Enrollment Station Layout<br />
Your enrollment station may resemble this schematic depending on the agency and location.<br />
All stations will have the same equipment:<br />
- Registration Workstation (Computer, Keyboard, Mouse, and LCD Display)<br />
- ID card scanner<br />
- Flatbed scanner<br />
- Combination fingerprint/Smart Card reader<br />
- Camera<br />
- 10 print capture device<br />
- Photo backdrop<br />
3
B. Logging In<br />
You will need to log into to two different systems to perform all your Registrar duties. The first is<br />
the <strong>USAccess</strong> system where you will perform the Enrollments and the second is the GSA Online<br />
Scheduling <strong>System</strong> where you will manage your Enrollment appointments.<br />
Step 1: When you arrive in the morning, unlock the Credentialing Center.<br />
Step 2: Turn on the Registration workstation.<br />
Step 3: Insert your PIV Credential into the Smart Card reader; the <strong>USAccess</strong> authentication<br />
screen will appear.<br />
Step 4: Type your PIN in the PIN field and then click the “>>” button to log in.<br />
4
Step 5: You have been successfully logged in to <strong>USAccess</strong> when you see the above box appear.<br />
Step 6: Click the Close button.<br />
5
#1<br />
#2<br />
Step 7: The Enrollee Search page displays.<br />
Step 8: Open a new web browser window and select the GSA Online Scheduling <strong>System</strong> link<br />
from your browser favorites.<br />
Step 9: Type in your user name in the Username field and then your password in the Password<br />
field (#1).<br />
Step 10: Click the Sign In link (#2).<br />
6
C. Manage Enrollment Appointments<br />
#1<br />
#2<br />
#3<br />
Step 1: Choose a state from the Location Group drop-down list (#1).<br />
Step 2: The Location drop-down list choices will filter based on the state selected in Step 1 and<br />
will list Credential Center locations within the state selected. Choose your center from the list<br />
(#2).<br />
Step 3: Click the Next button to submit your selection (#3).<br />
Note: Choosing “All Locations” will display all available location choices in the Location<br />
drop-down list.<br />
7
The Make Appointments – Appointment Options page displays:<br />
Step 4: Click on the Manage Appointments tab.<br />
The day’s appointments are listed in table below the current date.<br />
Step 5: Greet the Applicant when they arrive and then check them in by clicking the In button on<br />
their appointment record. It will turn green when clicked.<br />
Step 6: Perform the enrollment (see Part II for details) and then check them out when finished by<br />
clicking the Out button. It too will turn green when clicked.<br />
Note: Metrics are collected to determine the efficiency of the registration process. An ideal<br />
appointment should take about 15 minutes on average.<br />
Be sure to answer any questions from the Applicant even it takes a little extra time.<br />
8
If you check in the wrong Applicant, just click on the In button to toggle it off.<br />
Note: Use your own judgment when working with Applicants that arrive late. Attempt to fit<br />
them in if possible; you may need to take people out of turn.<br />
9
D. Cancelling Appointments<br />
Step 1: Wait until the end of the day to cancel appointments for Applicants that did not show up.<br />
Click the Cancel link in the Action column on the Applicant record.<br />
Step 2: Click the OK button on the confirmation screen to confirm the cancellation.<br />
Step 3: You will be returned to the Manage Appointments – Daily View – Appointments page.<br />
10
Be sure to log out when you are done with your activities by clicking on the Sight Out link.<br />
11
E. Greeting Applicants<br />
When Applicants arrive at the Credentialing Center, take a moment to greet them and let them<br />
know you are aware of their presence.<br />
When you are ready to enroll them, ask to see the 2 forms of ID documents they brought. If the<br />
Applicant does not bring documents or they do not have the correct ones, politely advise them<br />
that the enrollment cannot proceed without 2 forms of acceptable ID and that they should return<br />
with 2 forms of acceptable ID after rescheduling their appointment.<br />
Note: Things to keep in mind with the ID documents:<br />
- They should be consistent with the I-9 standards<br />
- At least one ID must be a government issued photo ID<br />
- An Applicant’s name must match on both forms of ID and names must be spelled the<br />
same<br />
- It is acceptable to have one document spell out the middle name and the other to have<br />
only the middle initial<br />
<strong>12</strong>
F. About Source Identity Documents<br />
1. Never accept hand written, reproduced or photocopies of IDs; including Birth Certificates. Only<br />
genuine, original and unaltered ID source documents should be accepted.<br />
2. Do not accept any expired documents with the exception of expired passports.<br />
3. There is no uniform standard for Birth Certificates. Only original or certified copies should be<br />
accepted; certified copies often have raised/embossed seals.<br />
4. The Applicant’s name in <strong>USAccess</strong> must exactly match the ID source document.<br />
5. If you have reason to believe an ID is fraudulent or questionable, accept it and continue with<br />
the enrollment. You will be able to flag it and a Security Officer will investigate the document at<br />
later date.<br />
13
Part II: Enrollment Procedures<br />
A. Verifying Biographical Data<br />
Step 1: Log into to both the <strong>USAccess</strong> <strong>System</strong> and GSA Scheduling <strong>System</strong> as detailed in Part I,<br />
Section B. You are now on the Applicant Search screen.<br />
Step 2: Type in the Applicant’s last name in the Last Name field.<br />
Step 3: Click the Search button.<br />
Step 4: When the results display, click on the Applicant you want to enroll.<br />
Step 5: Click on the Update Enrollee button.<br />
14
The Biographic Data page displays:<br />
Step 6: Ask the Applicant to verify the information on the screen.<br />
Note: If any of the data is incorrect, the Applicant must notify the Sponsor. Only the Sponsor<br />
can update the information.<br />
Step 7: If all the information is correct, insert the Applicant’s driver’s license or military ID into the<br />
AssureTec i-Dentify card scanner.<br />
Note: Place the card on the edge of scanner and slowly slide it in. The scanner will pull the<br />
card in; do not force the card into the scanner. The scanner will slide the card out when<br />
scanning has been completed.<br />
15
The Data Difference Report will display:<br />
The Sponsor Data is in the left column, while the Scanned Data is in the right column. Checked<br />
boxes indicate data elements that will be used for the Applicant’s record.<br />
You can check fields on the Scanned Data side to include in the Applicant’s record.<br />
Step 8: Check the box next to the data element to include.<br />
Step 9: Click the associated drop-down list and select a value<br />
16
Step 10: Repeat Step 8 and 9 with the other desired data elements.<br />
Step 11: Click the OK button when finished.<br />
Step <strong>12</strong>: The data has been updated on the Biographic Data page.<br />
17
Step 14: Click the Next button.<br />
18
B. Scanning Identity (ID) Source Documents<br />
Step 1: The Applicant’s drivers license has already been scanned; click the Scan button to scan<br />
the second identity document after placing it in the scanner.<br />
19
Step 2: When the “Select Device” dialog appears, accept the default and then click the OK<br />
button.<br />
Note: Documents like birth certificates and passports must be scanned on the flatbed scanner.<br />
20
When the scanner is finished scanning the document, the scanner control and preview dialog box<br />
will display.<br />
Step 3: Because the document being scanned is black text on white paper, click the Black and<br />
White Picture or Text button.<br />
Step 4: Click the Preview button before scanning in case it needs to be repositioned or resized.<br />
21
Step 5: Adjust the document on the scanner to capture a better picture if necessary.<br />
Step 6: When ready, click the Scan button.<br />
22
#1 #2<br />
#5<br />
#3<br />
#4<br />
Step 7: When finished scanning, the document appears in the Document 2 window and you will<br />
now fill in the document information.<br />
Note: If any issues are encountered with the document scanning, stop here and go to Part III,<br />
Section A: Invalid Scan of Identity Documents to flag the issue; otherwise continue to Step 8.<br />
Step 8: MANDATORY: Select a title from the Title drop-down list; in this case choose “Birth<br />
Certificate”. (#1)<br />
Step 9: Select the appropriate item from the Issuing Authority drop-down list. (#2)<br />
Step 10: If applicable, select the appropriate state or province from the State/Province list. (#3)<br />
Step 11: MANDATORY: Look for a document ID number on the document and type it in the<br />
Number field. (#4)<br />
Step <strong>12</strong>: Select an date for the Expiration Date. (#5)<br />
23
Occasionally, you will have to scan a third document. The only time ID docs with different names<br />
can be accepted is when an official linking document such as a marriage certificate, certified copy<br />
of birth certificate or court record can be provided linking the two names. The linking doc must<br />
have both the former and current legal names on it and must be valid and not expired. Follow the<br />
same scanning procedures again.<br />
Step 13: When scanning of all documents is complete, click the Next button.<br />
24
C. Capturing Applicant’s Photograph<br />
Step 1: You will now capture the Applicant’s photo:<br />
• Make sure the chair is in the proper position and the blue screen is directly behind the<br />
Applicant<br />
• The Applicant should sit up straight and face the camera squarely.<br />
• Have the Applicant maintain a neutral expression while the photo is taken.<br />
Step 2: Click the Capture button to take the picture.<br />
Step 3: When the Select Device dialog appears, keep the default camera and then click the OK<br />
button.<br />
25
Step 4: When the Get Pictures dialog displays, click the Take Picture button.<br />
Step 5: Select the photo, then click the Get Picture button.<br />
26
Step 6: After the image is captured, click the Next button.<br />
NOTE: If the photo needs to be manually optimized after several attempts at capturing the photo,<br />
skip ahead to Part III, Section B to perform a manual optimization of the Applicant’s photo.<br />
27
D. Capturing Applicant’s Fingerprints<br />
You will now capture the Applicant’s fingerprints using the fingerprint scanner and the Ten Print<br />
Capture page. Fingerprints can be captured in any order. Each fingerprint is scored for quality;<br />
scores in red are unsatisfactory and must be<br />
recaptured.<br />
The glass plate on the scanner is covered with a<br />
silicone membrane. Do not use any liquids or<br />
cleaning solvents on the membrane. You will be<br />
supplied with adhesive cleaner sheets.<br />
The Applicant may sit or stand for the capture.<br />
Coach the Applicant as you go through the<br />
capture process.<br />
Review the Fingerprint Acquisition Step/Action chart.<br />
28
i. Fingerprint Quality Scores<br />
As each fingerprint is captured, the system inserts a value assessing the quality of the capture.<br />
The score is located in the upper right corner of each fingerprint in the Fingerprint Selection and<br />
Segmented Fingerprints sections of the Fingerprint Capture screen. Scores above 40 will be in<br />
green text. Scores below 40 will be in red text.<br />
These values are based on the NFIQ (National Institute of<br />
Standards and Technology [NIST] Fingerprint Image Quality)<br />
scoring system. The NFIQ value determines if the fingerprint is of<br />
high enough quality to be used for template generation and<br />
matching.<br />
The NFIQ scale ranges from 1 to 5, with 1 being the best quality.<br />
The <strong>USAccess</strong> application numbers have been normalized per<br />
FIPS 201 requirements to fit on a 100-point scale.<br />
FIPS 201 requires all government agencies to use NFIQ to assess<br />
the quality of fingerprints for PIV credentials. Higher scores<br />
indicate a higher likelihood that the samples come from the same<br />
individual.<br />
Recapture fingerprints with a score of 40 and below.<br />
29
ii. Capturing Fingerprints<br />
#1<br />
#2<br />
Step 1: The page displays the Fingerprint Capture Window (#1) where fingerprints are<br />
displayed as they are captured and the Fingerprint Selection Area (#2) to designate the<br />
fingerprints to be captured.<br />
Step 2: Starting with the right thumb roll, have the Applicant roll their right thumb across the<br />
fingerprint scanner.<br />
30
#2<br />
#1<br />
Step 3: The fingerprint will be displayed in the Fingerprint Capture window as it is being<br />
captured (#1).<br />
Step 4: When captured, it will appear in the appropriate box in the Fingerprint Selection area<br />
(#2).<br />
Step 5: Note the green quality score of 100. If it were below 40, it would be red.<br />
Step 6: Continue capturing fingerprints until all the prints have been captured.<br />
Note: You will collect 10 individual rolled fingerprints and 10 slap fingerprints (4 left + 1 left thumb<br />
and 4 right + 1 right thumb).<br />
31
Step 7: Click the Next button after all the fingerprints have been captured.<br />
NOTE: If some fingerprints could not be captured, you will skip ahead to the Missing Fingerprint<br />
troubleshooting procedure in Part III, Section C.<br />
32
The system will select 2 primary fingerprints to include on the LincPass. When prompted, have<br />
the Applicant place the appropriate finger on the small single print scanner to perform the<br />
verification. The screen will show that the fingerprint is verified.<br />
Step 8: Click the Verify button<br />
Step 9: Have the Applicant place the indicated finger on the scanner and scan the fingerprint<br />
Step 10: The screen will display that the fingerprint have been verified<br />
Step 11: Repeat steps 8-10 with the secondary finger<br />
Step <strong>12</strong>: After both fingerprints have been verified, click the Next button.<br />
33
E. Saving the Enrollment Record<br />
Step 1: The Registration Status appears and indicates that all steps have been completed.<br />
Step 2: The Registrar will now save the record by clicking the Save button.<br />
Step 3: The record is encrypted and send to the Identity Mgmt <strong>System</strong><br />
Note: The Registrar must save the record here or all data will be lost. The Registrar cannot go<br />
back and edit the record later either.<br />
34
Step 4: You must now digitally sign the Enrollment record by typing in your PIN when prompted.<br />
Step 5: Click the OK button when finished and the record is now complete<br />
Step 6: Remember to log out when finished with your work.<br />
35
Part III: Enrollment Troubleshooting<br />
A. Invalid Scan of Identity Documents<br />
This procedure demonstrates what to do when a primary identity document fails to be scanned<br />
properly. In this example, the Applicant’s driver’s license was scanned and an image of it is<br />
available but the machine readable data on the license could not be read.<br />
The Registrar will mark the document as requiring more validation after scanning it in during<br />
Enrollment. The Registrar should continue on with the Enrollment process from Part II, Section B<br />
after completing the steps in this section. The Security Officer will receive a notice that more<br />
validation is required after the Enrollment record has been saved.<br />
Step 1: The document in question is highlighted by the FAILED indicator below the picture of the<br />
document.<br />
Step 2: Click the More Validation Required checkbox.<br />
36
The document needing more information is highlighted with “More Validation Required”. Because<br />
the data could not be read from the driver’s license when scanned the information fields have to<br />
be manually typed in. The Title and Number field are required fields.<br />
Step 3: Click on the Title drop-down list and select “Driver’s License”.<br />
Step 4: Enter the Driver License number into the License field.<br />
Step 5: Click the Next button.<br />
Document validation is now complete and the Security Officer will receive notice that there is a<br />
document for them to review. You may now go back and scan additional documents (Part II,<br />
Section B) or move on to capturing the Applicant’s photo (Part II, Section C).<br />
37
B. Applicant Photo Optimization<br />
This procedure demonstrates how to optimize the Applicant’s photo taken during Enrollment.<br />
Manual photo optimization can be used to correct minor size and orientation problems with the<br />
photo. Always try recapturing the photo several times before manually optimizing.<br />
This example begins at the point that you first take the Applicant’s picture (Part II, Section C,<br />
Step 4). The picture is not acceptable because the Applicant is not lined up with the blue<br />
background and is not looking straight at the camera.<br />
Step 1: Click on the picture to select it (if not already selected), then click the Delete button.<br />
38
Step 2: Click the Yes button to confirm that you want to delete this picture.<br />
Step 3: Reposition the Applicant and take the picture again.<br />
Step 4: This picture might work, so click the Get Picture button.<br />
39
Step 5: After the Acquiring Data screen displays, the captured photo will display.<br />
Manual optimization is performed by clicking on the image to place two crosshairs on it. The<br />
crosshairs are taken by the system to define the desired horizontal distance between the two<br />
eyes and the horizontal alignment of the eyes and head. The system them remaps the original<br />
image to the optimized image that will be used for identity purposes. This scales and rotates the<br />
head and can be repeated until desired results are achieved.<br />
Step 6: Click near the eye on your left (note the crosshair marker).<br />
Step 7: Click near the eye on your right (not the crosshair marker).<br />
40
Step 8: Click the Optimize Manually button.<br />
Step 9: The optimized image displays. It’s very slightly off-center, but of more interest is that it’s<br />
scaled too large, with the top of the head clipped off. The proportions of the optimized image do<br />
not match the reference silhouette.<br />
41
Step 10: Try optimizing again by repositioning the cross-hairs and clicking the Optimize<br />
Manually button again.<br />
NOTE: If it takes several tries to optimize the photo, try retaking the photo again.<br />
Step 11: The optimized image now looks satisfactory as the proportions and alignment of the<br />
image now match the reference silhouette.<br />
Step <strong>12</strong>: Click the Capture button to complete the photo capture step, then move on to<br />
fingerprint capture (Part II, Section D).<br />
42
C. Missing Fingerprints<br />
This section demonstrates the procedures the Registrar follows during the fingerprinting process<br />
when the Applicant is missing a finger or is completely unable to furnish any fingerprints. When<br />
an Applicant is missing a finger or fingers, the Registrar needs to verify which fingers are missing<br />
and can’t be provided. In cases of no fingerprints available to be taken, the Registrar skips the<br />
fingerprinting process but must provide a reason for doing so. The Registrar will use these<br />
procedures after attempting to capture all the fingerprints as detailed in Part II, Section D, step 7.<br />
i. Missing a Primary Finger<br />
Step 1: Capture all the fingerprints as detailed in Part II, Section D. In this example, the<br />
Applicant is missing various fingers, so skip those fingers.<br />
Step 2: The system determines that some fingerprints are missing (as shown by the missing<br />
prints in the “Segmented Right Fingerprints” area of the capture window) and displays the<br />
Missing Finger Detected window.<br />
43
Step 3: The window will ask you to select the existing fingers from what it thinks is missing.<br />
Check the boxes for the right pinky, ring, and middle fingers and then click the OK button.<br />
44
#1<br />
#2<br />
Step 4: The system accepts your resolution; note the blank boxes where the right index finger<br />
should be captured (#1 and #2). Click the Next button.<br />
45
The system will now select the primary and secondary fingerprints from the available fingers and<br />
asks the Applicant to verify these prints.<br />
Step 5: The system selects the left index finger as the primary.<br />
Step 6: Then it selects the right thumb as the secondary.<br />
46
Step 7: Click on the Verify button next to the primary fingerprint. The system then displays a<br />
confirmation message.<br />
Step 8: Click on the Verify button next to the secondary fingerprint. The system then displays a<br />
confirmation message.<br />
Step 9: Click the Next button.<br />
47
ii. No Fingers Available for Fingerprinting<br />
Step 1: If no fingers are available, skip the fingerprint capture and immediately click the Next<br />
button.<br />
48
#1<br />
Step 2: You will now provide a reason for not capturing the fingerprints. Select a choice from the<br />
Reason drop-down list (#1).<br />
Step 3: Type in any additional comments into the Comments box (#2).<br />
Step 4: Click the Next button.<br />
#2<br />
49
Step 5: The checklist screen appears showing that all steps have been completed.<br />
Step 6: Click the Save button.<br />
Step 7: When prompted, type in your PIN and then click the OK button to save the record. The<br />
fingerprinting as well as the entire enrollment process is now complete.<br />
50
Contacts for Assistance:<br />
Questions regarding the Business Process and Policies-<br />
• Website- http://hspd<strong>12</strong>.usda.gov/<br />
• Email- <strong>HSPD</strong><strong>12</strong>@ftc.usda.gov<br />
• <strong>HSPD</strong>-<strong>12</strong> LincPass Support Line 703-245-7888<br />
Questions regarding the <strong>USAccess</strong> <strong>System</strong>-<br />
• Website- www.FedIDCard.gov<br />
• Email-Usaccess.helpdesk@eds.com<br />
• <strong>USAccess</strong> Help Desk 866-493-8391<br />
51