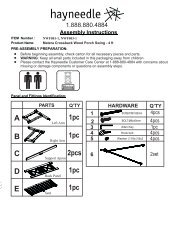
Brahma User Manual - Hayneedle
Brahma User Manual - Hayneedle
Brahma User Manual - Hayneedle

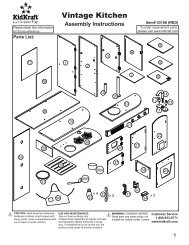
You also want an ePaper? Increase the reach of your titles
YUMPU automatically turns print PDFs into web optimized ePapers that Google loves.
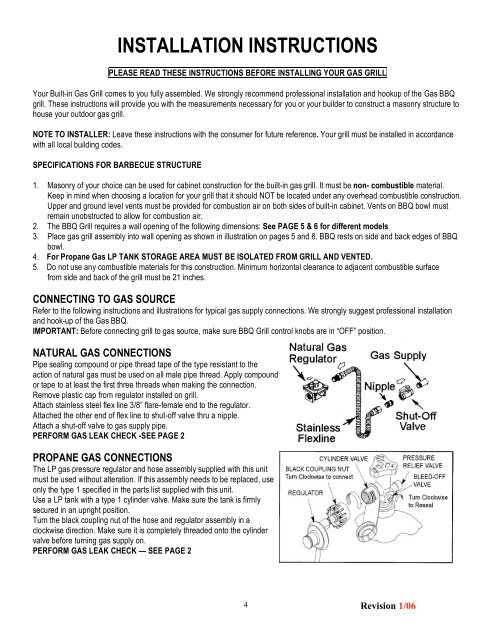
INSTALLATION INSTRUCTIONS<br />
PLEASE READ THESE INSTRUCTIONS BEFORE INSTALLING YOUR GAS GRILL<br />
Your Built-in Gas Grill comes to you fully assembled. We strongly recommend professional installation and hookup of the Gas BBQ<br />
grill. These instructions will provide you with the measurements necessary for you or your builder to construct a masonry structure to<br />
house your outdoor gas grill.<br />
NOTE TO INSTALLER: Leave these instructions with the consumer for future reference. Your grill must be installed in accordance<br />
with all local building codes.<br />
SPECIFICATIONS FOR BARBECUE STRUCTURE<br />
1. Masonry of your choice can be used for cabinet construction for the built-in gas grill. It must be non- combustible material.<br />
Keep in mind when choosing a location for your grill that it should NOT be located under any overhead combustible construction.<br />
Upper and ground level vents must be provided for combustion air on both sides of built-in cabinet. Vents on BBQ bowl must<br />
remain unobstructed to allow for combustion air.<br />
2. The BBQ Grill requires a wall opening of the following dimensions: See PAGE 5 & 6 for different models<br />
3. Place gas grill assembly into wall opening as shown in illustration on pages 5 and 6. BBQ rests on side and back edges of BBQ<br />
bowl.<br />
4. For Propane Gas LP TANK STORAGE AREA MUST BE ISOLATED FROM GRILL AND VENTED.<br />
5. Do not use any combustible materials for this construction. Minimum horizontal clearance to adjacent combustible surface<br />
from side and back of the grill must be 21 inches.<br />
CONNECTING TO GAS SOURCE<br />
Refer to the following instructions and illustrations for typical gas supply connections. We strongly suggest professional installation<br />
and hook-up of the Gas BBQ.<br />
IMPORTANT: Before connecting grill to gas source, make sure BBQ Grill control knobs are in “OFF” position.<br />
NATURAL GAS CONNECTIONS<br />
Pipe sealing compound or pipe thread tape of the type resistant to the<br />
action of natural gas must be used on all male pipe thread. Apply compound<br />
or tape to at least the first three threads when making the connection.<br />
Remove plastic cap from regulator installed on grill.<br />
Attach stainless steel flex line 3/8” flare-female end to the regulator.<br />
Attached the other end of flex line to shut-off valve thru a nipple.<br />
Attach a shut-off valve to gas supply pipe.<br />
PERFORM GAS LEAK CHECK -SEE PAGE 2<br />
PROPANE GAS CONNECTIONS<br />
The LP gas pressure regulator and hose assembly supplied with this unit<br />
must be used without alteration. If this assembly needs to be replaced, use<br />
only the type 1 specified in the parts list supplied with this unit.<br />
Use a LP tank with a type 1 cylinder valve. Make sure the tank is firmly<br />
secured in an upright position.<br />
Turn the black coupling nut of the hose and regulator assembly in a<br />
clockwise direction. Make sure it is completely threaded onto the cylinder<br />
valve before turning gas supply on.<br />
PERFORM GAS LEAK CHECK — SEE PAGE 2<br />
4<br />
Revision 1/06