
Create successful ePaper yourself
Turn your PDF publications into a flip-book with our unique Google optimized e-Paper software.
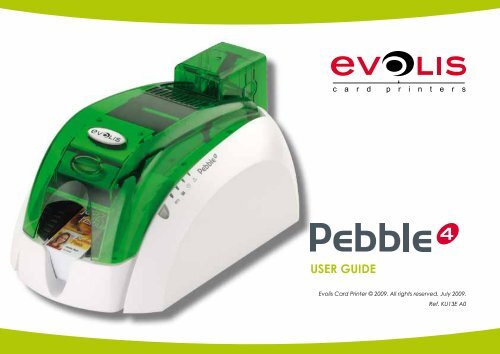
USER GUIDE<br />
Evolis Card Printer © 2009. All rights reserved. July 2009.<br />
Ref. KU13E A0
Copyright<br />
Evolis Card Printer © July 2009. All rights reserved.<br />
Copyright notice<br />
<strong>User</strong>s must observe the copyright regulations applicable in their country. This manual must not be photocopied, translated, reproduced<br />
or transmitted, in whole or in part, for any reason and by any electronic or mechanical means whatsoever without the express written<br />
consent of the Evolis Card Printer company.<br />
All the information contained in this document is subject to change without prior notice.<br />
Evolis Card Printer cannot be held liable for any errors that may be found in this manual, or for any loss or damage arising accidentally or<br />
as a result of dissemination or use of this manual.<br />
Trademarks<br />
Warranty<br />
is a trademark of Evolis Card Printer. All other trademarks belong to their respective holders.<br />
Refer to the warranty notice supplied with your printer for warranty terms and conditions and limitations.<br />
Environmental information – recycling of end-of-life products<br />
The manufacture of the equipment that you have purchased required the extraction and use of natural resources. It may contain<br />
materials that are hazardous to health and the environment.<br />
To prevent the dispersal of such materials into our environment and reduce the pressure on our natural resources, we recommend that<br />
you use existing collection systems. These systems will appropriately re-use or recycle most of the materials in your end-of-life equipment.<br />
The crossed-out dustbin symbol on your device is a reminder to use these systems.<br />
If you need further information on collection, re-use and recycling systems, contact your local or regional waste management body.<br />
Do not hesitate to contact us to find out more by visiting our website at www.evolis.com or by emailing the following address:<br />
info@evolis.com.<br />
1
About your new printer<br />
Thank you for choosing an Evolis printer.<br />
Using your new printer, you will be able to create a wide variety of high-quality cards and badges which can be printed in various<br />
thicknesses, colours and styles. This printer uses consumables and accessories available from Evolis. For further details, visit our website at<br />
www.evolis.com.<br />
Warranty registration<br />
Please register on line at www.evolis.com to receive our special offers and general information.<br />
Once on the website, click on Drivers and Support and fill in all the fields, giving in particular the model and serial number found on your<br />
printer.<br />
Getting started<br />
The purpose of this user guide is to guide you, step by step, through your printer and how it works. Take some time to read it in order to<br />
better understand your printer and its features, and to save time during installation and use.<br />
As with all Evolis products, a great deal of care has been taken over this manual. Should you find an error, however, please let us know by<br />
emailing us at info@evolis.com.<br />
Contents<br />
The bookmarks found top left of your screen can be used to navigate between the various sections in this user guide.<br />
Icons<br />
The following icons are used in this manual to highlight important information:<br />
Information providing further details or depth about certain points in the main text.<br />
Indicates that failing to take the recommended action is liable to damage your printer.<br />
This symbol indicates that a video showing the procedure is available on the www.evolis.com website.<br />
2
1<br />
Getting started<br />
1-1 Unpacking<br />
Your printer is supplied with several accessories that we ask you to look at closely.<br />
This list may vary depending on your location.<br />
The printer is shipped in special packaging designed to prevent any damage in transit. If you notice any visible damage, do not hesitate<br />
to contact the shipper and immediately inform your Evolis dealer, who will tell you the procedure to follow.<br />
Evolis takes great care over the quality of its packaging and we ask that you keep this packaging somewhere clean and dry.<br />
You will be asked for the full original packaging (outer box, inner wedges and protective bags) in the event that<br />
the printer is returned. If the printer is returned without its original packaging and components are damaged in<br />
transit, these components will no longer be covered by the warranty. You will be charged for new packaging<br />
for shipping the printer back to you.<br />
Accessories supplied with your printer:<br />
l Power supply unit - VP ELECTRONIQUE or SWITCHBOX Type F10723-A or FDF0503-A.<br />
l Mains power cable.<br />
l USB cable.<br />
l Installation and documentation CD-ROM.<br />
l Starter cleaning kit.<br />
l Quick installation guide.<br />
l Warranty notice.<br />
l Compliance statement documentation.<br />
If any of these components is missing, please contact your Evolis dealer.<br />
Use only the power supply unit supplied with your Evolis printer.<br />
VP ELECTRONIQUE or SWITCHBOX Type F10723-A or Type EA10723.<br />
Use only the USB cable supplied with your Evolis printer.<br />
The Evolis printer must be placed in a dry location, protected from dust and draughts but well-ventilated. Take<br />
care to keep your printer on a flat, sturdy surface able to bear its weight.<br />
3
1<br />
1-2 Description of the printer and its functions<br />
Control<br />
button<br />
No cards<br />
Cover<br />
open<br />
End of<br />
ribbon<br />
Cleaning<br />
A - Output hopper<br />
B - Cover opening button<br />
C - Card input feeder<br />
D - Control panel<br />
E - Carrying handle<br />
F - Manual card feed (option)<br />
G - DB-9 connector (option)<br />
H - Power cable socket<br />
I - USB socket (std)<br />
J - Ethernet socket (option)<br />
4
1<br />
K - Cleaning roller<br />
L - Card thickness adjustment gauge<br />
M - Thermal print head<br />
N - Serial number label<br />
O - Magnetic encoder (option)<br />
5
1<br />
1-3 Installation<br />
1-3a CONNECTING THE PRINTER<br />
ä Connection to the power supply<br />
The printer must be connected to a properly protected and earthed electrical installation.<br />
FI: Laite on liitettävä suojamaadoitus koskettimilla varustettuun pistorasiaan.<br />
NO: Apparatet må tilkoples jordet stikkontakt.<br />
SE: Apparaten skall anslutas till jordat uttag.<br />
Ê Connect the power cable to the power supply unit, then plug the power<br />
cable connector into the printer.<br />
Ë Next, plug the end of the power cable into an earthed power socket.<br />
Ì The printer is powered on, and the printer’s control panel lights up,<br />
indicating that the printer is working properly. If the control panel does<br />
not light, then either installation has not been carried out correctly or the<br />
printer is not working properly. Check the installation.<br />
Before attempting any maintenance, ensure that the power cable is always unplugged. For your personal safety,<br />
ensure that the cable and power supply unit remain easy to access, especially in the event of an emergency.<br />
To save energy, the printer will automatically switch itself to standby mode after 10 minutes of inactivity.<br />
ä Connecting the USB cable<br />
Under no circumstances should you connect the USB data cable before installation of the printer driver is<br />
complete.<br />
Refer to the section on printer driver installation for further details, and follow the instructions carefully.<br />
6
1<br />
1-3b RIBBONS<br />
Evolis original ribbons optimise your printer’s operation and avoid causing damage to it. The use of ribbons from other suppliers is liable to<br />
damage your printer and voids the manufacturer’s warranty for the printer.<br />
For optimum print quality, Evolis recommends that the printer is fully cleaned every time the ribbon is changed. See the Servicing and<br />
Maintenance section of this manual.<br />
ä Fitting the ribbon<br />
Ensure that the appropriate ribbon type is selected in the print driver.<br />
Ê Open the cover.<br />
Ë Insert the ribbon as shown.<br />
Ì Close the cover and press until a click is heard.<br />
Ê Ë Ì<br />
7
1<br />
1-3c CARDS<br />
For optimum quality, the cards used must be ISO 7810 certified.<br />
Use only the card types recommended by Evolis.<br />
Do not touch the printable surface of the cards in order to preserve print quality.<br />
Do not use cards that have been damaged, folded, embossed or dropped on the floor.<br />
Keep your cards protected from dust.<br />
ä Loading the cards<br />
Ê Remove the card feeder.<br />
Ë Turn the feeder over and insert the cards. Ensure the cards are positioned as illustrated in the diagram.<br />
Ì Put the feeder back into the printer and press until a click is heard.<br />
Ê Ë Ì<br />
8
1<br />
ä Removing printed cards<br />
Once the print cycle is complete, cards are delivered into the output hopper found on the left of the device. This output hopper is<br />
designed to collect the printed and/or encoded cards. The printer is equipped with an output hopper with a capacity of 50 x 0.76 mm<br />
cards.<br />
9
1<br />
ä Adjusting card thickness<br />
The printer is equipped with a manual card thickness adjustment mechanism which can be reached either through the card feeder or<br />
through the inside of the printing unit when the cover is open. The printer accepts cards between 0.25 mm and 1 mm thick. The factory<br />
setting for card thickness is 0.76 mm.<br />
Adjusting card thickness through the feeder cage:<br />
Ê Remove the card feeder from the printer as shown.<br />
Ë Adjust the thickness of the cards used by moving the lever from right to left to the desired card thickness.<br />
Ì Put the feeder back into the printer by pressing on the upper section of the feeder until it clicks.<br />
Ê Ë Ì<br />
10
1<br />
Adjusting card thickness from inside of the printer:<br />
Ê Open the printer cover by pressing on the opening lever, then tilt the cover up.<br />
Ë If necessary, remove any ribbon inside the printer. Then adjust the thickness of the cards used by moving the lever from<br />
right to left to the desired card thickness.<br />
Ì Replace the ribbon in the printer, then close the cover.<br />
Ê Ë Ì<br />
11
1<br />
ä Inserting cards manually<br />
The printer may optionally be equipped with a manual feeder for inserting cards individually.<br />
The manual feeder option needs to be configured via the printer driver’s Properties, under the “Graphics” tab.<br />
Choose “Manual feed” from the “Card management - input” menu and select the desired output method from the menu.<br />
The manual card feeder is installed as follows:<br />
Ê Remove the card feeder from the printer as shown.<br />
Ë Using the lever, set the card thickness to the MAX position.<br />
Ì Place the manual card feeder in the printer as shown. Then press on the upper section of the feeder until it clicks.<br />
Í Insert the cards, as indicated.<br />
Ì<br />
Ê<br />
Ë<br />
Í<br />
12
2<br />
Printing<br />
2-1 Installing the print driver<br />
Configuration of the printer and its driver is a very important step and requires very special care. In fact, inappropriate settings are a<br />
factor having a negative impact on the quality of card customisation. It is therefore essential to proceed in stages, changing settings only<br />
when you are completely sure. Evolis offers the option to revert to the factory settings at any time if the adjustments made do not give<br />
the expected results.<br />
Your printer is delivered with a CD containing the print drivers for Windows and Macintosh platforms.<br />
To install a print driver, insert the CD into your computer and select the print driver menu. A program will guide you through the entire<br />
installation process.<br />
Do not connect your USB cable to your computer until prompted to do so by the installation program.<br />
For the connection procedure, see the section on Connecting the Printer.<br />
Follow the installation procedure scrupulously. Some versions of Windows and Macintosh require the user to<br />
have administrator rights to install the driver.<br />
13
2<br />
2-2 Managing the print settings<br />
Before using your printer, it is essential to check and/or change the default print driver settings:<br />
l Ribbon type<br />
l Card type<br />
l Card finish or treatment<br />
l …<br />
You will find more detailed information about the cards recommended by Evolis in the ‘Evolis Genuine Product’<br />
list of consumables.<br />
Pay attention to the settings defined under the print driver Properties and do not hesitate to contact your Evolis<br />
dealer for any advice and assistance needed before making any changes.<br />
These print settings are accessible:<br />
l From the Start button found bottom-left on the Windows task bar, select Printers and faxes.<br />
l Select your printer and double click.<br />
l From the Printer menu, select Properties.<br />
l The first properties configuration screen for the equipment then appears.<br />
l The main tabs used to define the settings are “Graphics” and “Tools”.<br />
14
2<br />
ä “Graphics” tab<br />
l Ribbon or card types<br />
l Front/back printing<br />
l Choice of methods for feeding and collecting cards<br />
l Card orientation, portrait or landscape<br />
l Number of copies<br />
ä “Tools” tab<br />
l Setting and testing magnetic encoding options<br />
l Test card printing<br />
l Cleaning the printer<br />
l Dialogue interface with the printer.<br />
We recommend that you print a test card when first using the printer, and keep it. This card records information<br />
such as the model and serial number which you could be asked to provide if you call technical support.<br />
15
2<br />
2-3 Printing a card<br />
A large number of Windows applications allow documents to be printed (for example the tools in Microsoft’s Office suite, i.e. MS-Word,<br />
MS-Access, Ms-Excel, MS-PowerPoint).<br />
To gain familiarity with the layout of a card and configuring its formatting and printing, we suggest the following example.<br />
ä In Microsoft ® Word<br />
After having set the Evolis printer as the default:<br />
l Start the MS-Word application<br />
l Click on the File in the menu bar, then on Page Setup<br />
l The Paper tab has a Paper Size option, select CR80 Card<br />
l In the Margins tab, set all margins to ‘0’, then in the Orientation section, select Landscape.<br />
l Close the window by clicking OK.<br />
Your Word window should now look like this:<br />
You are ready to customise your card by adding the various items that go to make<br />
up a card:<br />
l Logo and Illustration<br />
l Identification photo<br />
l Fixed and variable text<br />
l Bar code, etc.<br />
Once ready, click on File and then on Print.<br />
16
2<br />
2-4 Connecting to a network (Ethernet)<br />
All Evolis printers have the benefit of a TCP/IP network connection mechanism. This feature is available as standard or as an option,<br />
depending on the model in the range.<br />
Out of the box, the printer comes configured in DHCP mode (Dynamic Host Configuration Protocol), which means that its IP address is<br />
supplied by the network. In addition to these basic settings, the network administrator has the option of configuring the printer differently<br />
in order to comply with the constraints imposed by the corporate LAN:<br />
l Printer connected in a subnet, in DHCP<br />
l Printer connected within a subnet with fixed IP address, with WINS resolution<br />
l Printer connected within a subnet with fixed IP address, without WINS resolution<br />
The printer may be identified on the network in two ways:<br />
l By its hostname (NETBIOS)<br />
l By its IP address.<br />
The user-definable settings are:<br />
l The printer’s IP address<br />
l Subnet mask<br />
l Gateway<br />
l WINS server.<br />
Changing the printer’s basic settings, without prior knowledge of the layout of the LAN in question or without<br />
genuine technical knowledge may result in a malfunction of the printer, and may even extend to a more<br />
widespread failure of all or part of the LAN. Contact your System and Network Administrator before connecting<br />
to or changing the settings for your local area network.<br />
For further details, refer to the ‘Configuration of Evolis printers on a TCP/IP (Ethernet) LAN’ manual.<br />
17
3<br />
Maintenance<br />
3-1 General warranty information<br />
Your Evolis printer has been designed to give you long service and needs only minimal regular maintenance. Please comply with the<br />
instructions given below to ensure that it runs satisfactorily.<br />
Keep your warranty cover!<br />
The manufacturer’s warranty is subject to strict adherence to the routine servicing and maintenance instructions,<br />
and in particular the printer cleaning cycles.<br />
Any failure to follow the maintenance and servicing procedures described in this section voids the print head warranty.<br />
Evolis declines any liability where there has been a failure to carry out required maintenance on the printer.<br />
The print head is a wearing part and an extremely sensitive printer component. Its useful life can be seriously curtailed by the presence of<br />
dust, liquids or solids in the printer’s immediate environment, on the print head or on the cards. <strong>User</strong>s must take all necessary precautions<br />
to insert only clean cards, free of dust deposits or foreign bodies, into the machine.<br />
The frequency and quality of cleaning are decisive factors enabling users to extend the print head’s useful life and to ensure excellent<br />
print quality. Particular care must therefore be taken with cleaning. <strong>User</strong>s must comply with the servicing and maintenance instructions<br />
as fully described in this section.<br />
In addition, the use of Evolis brand ribbons (Evolis Genuine Ribbons) also ensures that your equipment operates properly. Use of ribbons<br />
not approved by Evolis may as a consequence affect the quality and reliability of print jobs, produce low quality printed output and even<br />
affect the printer’s operation. The manufacturer’s warranty does not cover physical damage or quality problems caused by using non-<br />
Evolis approved ribbons.<br />
Evolis provides replacement parts and consumables that you can refer to within this user guide or by visiting the website at www.evolis.<br />
com.<br />
18
3<br />
3-2 Routine printer cleaning<br />
The print head warranty is directly linked to routine cleaning of your printer.<br />
If you do not carry out this cleaning at the required times, the print head warranty will cease to be valid.<br />
Recommended cleaning cycle: whenever the ribbon is changed<br />
Mandatory cleaning cycle: when the cleaning warning is triggered<br />
Servicing accessory: cleaning card<br />
Your printer is fitted with a cleaning warning system which is triggered after a certain number of cards have<br />
been inserted, depending on the model of printer that you have (see table below).<br />
You should proceed with the routine cleaning of your printer as soon as the warning is triggered.<br />
If you continue to run the printer despite the warning and if the warning light starts to flash, the print head warranty<br />
will be automatically voided owing to a failure to comply with your contractual maintenance obligations.<br />
Printer<br />
Cleaning required after:<br />
(warning light steady)<br />
Number of cards remaining<br />
before warranty voided<br />
(warning light steady)<br />
Warranty invalid after:<br />
(warning light flashing)<br />
Tattoo2 400 cards 100 cards 500 cards<br />
Tattoo RW 400 cards 100 cards 500 cards<br />
<strong>Pebble</strong>4 1000 cards 200 cards 1200 cards<br />
Dualys3 1000 cards 200 cards 1200 cards<br />
Securion 800 cards 200 cards 1000 cards<br />
Quantum 900 cards 700 cards 1600 cards<br />
So for example for a Tattoo2 printer, if you insert 50 cards after the cleaning warning is triggered, you have only 50 more cards before<br />
cleaning the printer and keeping your warranty valid.<br />
19
3<br />
Follow the procedure below:<br />
Repeatedly running the cleaning card through the printer cleans the feed rollers, the cleaning rollers and the print head.<br />
Ê Remove the card feeder from the printer as shown.<br />
Ë sing the lever, set the card thickness to the MAX position.<br />
Ì Remove any cards found in the feeder.<br />
Í Insert the cleaning card into the feeder as indicated.<br />
Ê<br />
Ë<br />
Ì<br />
Í<br />
20
3<br />
Î Put the feeder back into the printer, then press on the upper section of the feeder until it clicks.<br />
Ï Open the cover.<br />
Ð Remove the ribbon as shown on the diagram.<br />
Ñ Close the cover and check it has clicked shut.<br />
Ò Hold down the control button on the control panel for one second. Cleaning starts.<br />
Ó The used cleaning card is ejected into the output hopper.<br />
Î Ï Ð<br />
Ñ Ò Ó<br />
Wait for 2 minutes after cleaning before using your printer.<br />
21
3<br />
3-3 Servicing the cleaning roller(s)<br />
In addition to routine printer cleaning, we suggest that you clean the cleaning roller(s) using the special wipes available from Evolis.<br />
The cleaning roller(s) remove(s) any dust or particles from the cards before printing.<br />
Recommended cleaning cycle: whenever the ribbon is changed<br />
Servicing accessory: cleaning wipe<br />
Follow the procedure below:<br />
Ê Open the cover and remove any ribbon.<br />
Ë Remove the cleaning roller.<br />
Ì Rub the wipe gently over the surface of the roller.<br />
Í When it has dried, replace the cleaning roller in the printer.<br />
Ê<br />
Ë<br />
Ì<br />
Í<br />
Wait for 2 minutes after cleaning before using your printer.<br />
22
3<br />
3-4 Servicing the print head<br />
Recommended cleaning cycle: whenever the ribbon is changed<br />
Servicing accessory: Special cotton bud impregnated with isopropyl alcohol.<br />
The print head is cleaned in the course of the printer’s routine servicing procedure (see previously).<br />
However, to maintain the original print quality and to absorb surplus ink on the print head, we recommend that you regularly clean the<br />
print head (whenever the ribbon is changed) using the cotton buds supplied by Evolis.<br />
You must also protect the print head and its components from any discharge of static electricity.<br />
Unplug the printer from its power supply before cleaning the print head.<br />
Follow the cleaning cycles scrupulously.<br />
Avoid any contact between the print head and any metal or sharp objects.<br />
Avoid touching the print head directly with your fingers, as this could affect print quality or permanently damage<br />
the print head.<br />
23
3<br />
Follow the procedure below:<br />
Ê Take an Evolis cotton bud and press the middle of the tube until the end of the cotton bud is impregnated with alcohol.<br />
Ë Open the cover and find the print head.<br />
Ì Gently rub the cotton bud from left to right along the print head for a few seconds.<br />
Í Close the cover.<br />
Ê<br />
Ë<br />
Ì<br />
Í<br />
Wait for 2 minutes after cleaning before using your printer.<br />
24
4<br />
Help<br />
This section gives a number of suggestions allowing problems that may arise when using your printer to be pinpointed. If you do not<br />
manage to solve your problem, this section also explains how to contact Evolis technical support.<br />
4-1 Warnings and diagnosis<br />
Although the Evolis printer was designed to work independently, keeping user involvement to a minimum, it may nonetheless prove useful<br />
to gain some familiarity with the main warnings.<br />
4-1a CONTROL PANEL WARNINGS<br />
See section 1 - Description of the printer and its functions for further details about the control panel<br />
OFF STEADY LIGHT FLASHING<br />
PRINTER READY<br />
l The printer is ready to receive data.<br />
PROCESSING<br />
l The printer is receiving data.<br />
25
4<br />
RIBBON<br />
l No ribbon in the printer.<br />
l End of ribbon.<br />
l The ribbon is not correctly fitted.<br />
l The ribbon is torn.<br />
Check the condition of the ribbon in the printer. If you have a<br />
print job in progress, this restarts with a new card.<br />
CARDS<br />
l The card feeder is incorrectly installed.<br />
l No cards in the card feeder.<br />
l The cards are not flat.<br />
l The cards are stuck together.<br />
Press the control button for one second – the process will<br />
restart.<br />
WAITING FOR A<br />
CARD<br />
l The printer is waiting for a card to be inserted.<br />
The printer has the Manual card feeder option, insert a card<br />
into the printer. Refer to section 1 “Getting started”.<br />
PRINTER COVER<br />
OPEN<br />
l The printer cover is open.<br />
Close the cover – the printer will restart.<br />
CLEANING<br />
(after 1,000 cards<br />
have been inserted)<br />
l The printer must be cleaned.<br />
See section 3 - Maintenance<br />
26
4<br />
CLEANING<br />
(after 1,200 cards<br />
have been inserted)<br />
l It is imperative that the printer is cleaned.<br />
See section 3 - Maintenance<br />
OUTPUT HOPPER<br />
POSITION<br />
l The output hopper is midway between open and closed.<br />
Open or close the output hopper. The current job will restart.<br />
MECHANICAL<br />
PROBLEM<br />
l Card jammed in the printer.<br />
l Mechanical component fault.<br />
Press the control button for one second. If the problem persists,<br />
contact your Evolis dealer for assistance.<br />
MAGNETIC<br />
ENCODING ERROR<br />
l The magnetic strip is facing the wrong direction in the feeder.<br />
l The encoding type is incorrectly configured (HiCo or LoCo).<br />
l The encoded data does not comply with ISO 7811 standards<br />
or with the settings predefined in the print driver properties.<br />
Refer to Appendix C of this manual for further information.<br />
Press the control button for one second. The printer will restart<br />
the magnetic encoding cycle with a new card. If the problem<br />
persists, call your Evolis dealer for assistance.<br />
COOLING MODE<br />
l The cooling system has been activated.<br />
The printer pauses for a few seconds and restarts once it has<br />
returned to its normal operating temperature.<br />
27
4<br />
4-2 Diagnosis help<br />
In this section, you will find all the information you need to carry out a few simple checks that you may be asked to run by your Evolis dealer<br />
to help you as effectively as possible.<br />
4-2a PRINTING A TEST CARD<br />
We recommend that you print a test card to ensure that your printer is working properly. This card shows various technical details for future<br />
reference. You may be asked for these by your dealer.<br />
A test card:<br />
ä Printing a test card<br />
Ê Wait for any current print jobs to finish.<br />
Ë Check that there is a ribbon and card in the printer.<br />
Ì Press the control button for three seconds. All the warning lights go out.<br />
Í Press and hold down the control button again.<br />
Î The control button light comes on.<br />
Ï Release the control button once the light flashes.<br />
Ð The test card is printed in a few seconds (in colour if a colour ribbon is fitted in the printer, or monochrome if the ribbon<br />
is monochrome).<br />
Ñ The printed card is ejected into the output hopper.<br />
ä Information about the test card<br />
l Confirms the print quality in colour or black and white<br />
l Confirms proper ribbon synchronisation<br />
l Displays the printer model<br />
l Displays the printer’s serial number.<br />
28
4<br />
4-2b IDENTIFYING INSTALLED SOFTWARE VERSIONS<br />
As previously shown, you can easily identify the version of the software embedded in your printer (firmware number) by means of the test<br />
card.<br />
You can also identify the version of the print driver installed as follows:<br />
Ê From the Start button found bottom-left on the Windows task bar, select Printers and faxes.<br />
Ë Select your printer and double click.<br />
Ì From the Printer menu, select Properties.<br />
Í Go to the Graphics tab and then click About.<br />
29
4<br />
4-3 Troubleshooting<br />
Do not attempt to use tools or other items to repair your printer in the event of problems, in case major damage<br />
is caused.<br />
4-3a Printing problems<br />
ä Nothing prints<br />
Ê Check the print driver<br />
Check that there is a print driver for your printer in the Windows configuration.<br />
Check that the printer is selected as the default printer.<br />
Ë Check the printer’s power supply<br />
Check that the power cable is correctly connected to the printer and to a working electrical socket.<br />
Check that the printer is on and that the control button is lit.<br />
Make sure you are using the power supply unit supplied with the printer.<br />
Ì Check the USB cable<br />
Check that the USB cable is connecting the printer to your computer.<br />
Í Check the ribbon<br />
Check that the ribbon is fitted correctly and that the cover is closed.<br />
Î Check the cards<br />
Check that there are cards in the card feeder.<br />
Check that no cards are jammed in the printer.<br />
Ï Print a test card<br />
See elsewhere in this section for the procedure to be followed.<br />
ä Blank card ejected<br />
Ê Check the ribbon<br />
Check that the ribbon is not finished or damaged. Replace it or re-install it if necessary.<br />
Ë The print head may be damaged<br />
Print a test card.<br />
If the test card does not print, contact an Evolis dealer for technical support or visit the website at www.evolis.com.<br />
30
4<br />
Small blemishes on the card<br />
ä Poor print quality<br />
l The card surface may be dirty.<br />
Check that your cards are perfectly clean.<br />
Use new cards.<br />
l Cleaning rollers or print head clogged.<br />
Clean the cleaning rollers and print head.<br />
Horizontal white lines<br />
l The ribbon is not correctly fitted.<br />
Check that the ribbon is correctly positioned in the printer.<br />
Check that there are no wrinkles on the ribbon surface.<br />
l Print head dirty or damaged.<br />
Clean or replace the print head.<br />
Blurred image<br />
l The ribbon is not correctly fitted.<br />
Check that the ribbon is correctly positioned in the printer.<br />
l Poor ribbon synchronisation.<br />
Open and close the printer cover to synchronise the ribbon.<br />
l Dirty printer or cleaning rollers.<br />
l Use of incompatible cards.<br />
Check that the cards used match the specifications.<br />
We recommend that you obtain your cards from an Evolis dealer.<br />
Use of cards obtained elsewhere is liable to adversely affect print quality and/or damage the print head.<br />
31
4<br />
ä Partial or incorrect printing<br />
Ê Check the print settings<br />
Check that no area of the card design to be printed is outside the print margins.<br />
Check the document orientation (portrait or landscape) in the print driver configuration.<br />
Ë Check the interface cable<br />
If irregular characters are printed, check that you are in fact using the USB cable supplied with your printer.<br />
Check the connection between the computer and the printer.<br />
Try using another cable of the same type.<br />
Ì Check that the printer is clean<br />
Clean the printer, especially the cleaning rollers.<br />
See the maintenance section.<br />
Í Check that the cards are clean<br />
Store your cards protected from dust.<br />
Î Check the ribbon<br />
Check that the ribbon is fitted correctly.<br />
Check that the ribbon spools freely.<br />
Ï Check the print head<br />
Should horizontal straight lines appear on printed cards, it is likely that the print head is dirty or damaged.<br />
See the section on maintenance and troubleshooting. If the problem persists, contact an Evolis dealer or visit the<br />
website at www.evolis.com.<br />
32
4<br />
4-3b FREEING JAMMED CARDS<br />
Control panel displays<br />
MECHANICAL<br />
PROBLEM<br />
l Print jobs are interrupted.<br />
Do not turn your printer off, as this cancels pending print jobs in the printer’s memory.<br />
Remove the card as follows:<br />
Ê Open the printer cover and remove the ribbon.<br />
Ë Press the control button to turn the card transport rollers. If the card is still stuck inside the printer, slide it manually towards<br />
the printer output. If there is more than one card, always push the top one first.<br />
Ì Replace the ribbon, then close the printer cover.<br />
Í Press the control button on the control panel for one second.<br />
To prevent card jams:<br />
Ê Check that the card thickness gauge is correctly adjusted.<br />
Ë Check that the thickness of the cards used matches the specifications set out in Appendix A “Technical specifications”<br />
in this manual.<br />
Ì Check that the cards are flat. Keep them in a horizontal position.<br />
Í Check that the cards are not stuck together. Shuffle the cards before loading them.<br />
33
4<br />
4-3c REPLACING THE CLEANING ROLLERS<br />
Should your cleaning roller start to work less effectively despite regular maintenance, it is advisable to replace it in order to avoid dirt<br />
accumulating on the print head, resulting in permanent damage (See section 3 – Maintenance).<br />
The cleaning roller is available as a consumable from your Evolis dealer.<br />
Roller replacement procedure:<br />
Ê Open the printer cover.<br />
Ë Remove the ribbon if any then locate the cleaning roller and release it from its housing.<br />
Ì Fit the new roller in the printer, ensuring that it is correctly positioned in the housing.<br />
Í Replace the ribbon and then close the printer cover.<br />
Ê<br />
Ë<br />
Ì<br />
Í<br />
34
4<br />
4-3d REPLACING THE PRINT HEAD<br />
The print head is a sensitive component of your equipment. It determines the print quality, and regular servicing along with an immediate<br />
environment free from dust or other particles ensure a lengthy useful life. Nonetheless, the print head may sometimes need to be<br />
replaced. Evolis has designed a unique device enabling users to undertake such replacement with no tools needed, simply by following<br />
the instructions very carefully.<br />
Before doing anything else, please contact your Evolis dealer in order to check the advisability of replacing the print head. The dealer will<br />
supply a new print head if need be.<br />
Evolis has set up a scheme for exchanging defective print heads during the printer’s warranty period. Your<br />
equipment is eligible under the scheme if:<br />
l You use only Evolis consumables (ribbons and maintenance products).<br />
l You have followed the cleaning and servicing cycles scrupulously.<br />
l You are working in a dust-free environment complying with the technical specifications.<br />
l You are using flat cards, with no rough patches which could damage the print head surface.<br />
35
4<br />
To exchange the print head, please proceed as follows:<br />
Before changing the print head, please unplug the power cable.<br />
ä Step 1 - Removing the defective print head<br />
Ê Open the printer cover.<br />
Ë Locate the print head.<br />
Ì Press on the metal part found at the bottom as shown on the diagram, in order to free the lugs from the holding fork,<br />
then remove the lugs from their slots.<br />
Í Tilt the head carefully and disconnect the connector linked to the cable without using force on the mechanism.<br />
Ê Ë Ì Í<br />
36
4<br />
ä Step 2 - Installing the new print head<br />
Ê Note the code shown on the white label stuck on the print head. You will be asked for this code in Step 3.<br />
Ë Pick up the new print head and turn it towards you, with the white connector visible.<br />
Ì Connect the cable into its socket, making sure it is the right way round. Do not use any force, as this part is relatively<br />
fragile.<br />
Í Turn the head so that the logo is visible (be careful), the connector can no longer be seen.<br />
Î Insert the head vertically between the two guides so that the fork lugs are held within the slot.<br />
Ï The head is back in position.<br />
Ð Close the cover. The print head is now fitted.<br />
Ê<br />
Ë Ì Í<br />
Î Ï Ð<br />
37
4<br />
ä Step 3 - Configuring the new print head<br />
Ê Power up the printer and check that it is properly connected to a computer on which the printer’s print driver is installed.<br />
Ë Under the print driver’s Properties, click on the “Tools” tab.<br />
Ì In the “Printer dialogue” section, enter the following command: Pkn;x<br />
where x = the print head kit code number that you noted in Step 2.<br />
For example, if the print head kit number is 179-004-00048, the command to be entered is: Pkn;179-004-00048<br />
If the print head kit number is not entered correctly, printer malfunctions may occur and the warranty may be<br />
voided.<br />
ä Step 4 - Cleaning the printer<br />
On your printer’s control panel, the “CLEANING” light is lit:<br />
Cleaning is absolutely necessary after changing the print head. No print jobs can be run until the cleaning<br />
operation has finished.<br />
Refer to section 3 – Maintenance to carry out cleaning.<br />
Also service the cleaning roller and then replace the cards and ribbon.<br />
Once cleaning has been carried out, your printer is once again ready to customise your cards.<br />
38
4<br />
4-3e UPDATING THE FIRMWARE (under Windows)<br />
Updating the firmware is a simple operation but one which, if not properly completed, can result in your printer breaking down.<br />
Before any update, please contact your Evolis dealer who will be able to guide you on the advisability or otherwise of carrying out an<br />
upgrade. In general, such updates are only required in the event of problem or malfunction that has been clearly identified by your Evolis<br />
dealer.<br />
Updates can be downloaded from the website at www.evolis.com :<br />
Ê Select your printer model, then click on the Print drivers and Firmware link.<br />
Ë Then click on the file for the corresponding Firmware.<br />
Ì Accept the download then save the file in a directory on your hard drive. The firmware is stored compressed as a zip<br />
file, which you will need to extract.<br />
Í Then double-click on the file in the directory in order to run the firmware installation program<br />
Î When prompted by the program, click on the Download button to run the job. The firmware download is in progress.<br />
Ï After about thirty seconds, the firmware has transferred to the printer and the operation is complete.<br />
Ð If the printer is not showing a ‘READY’ status, this means that the update has not been carried out correctly or, possibly,<br />
that the printer is not working properly. Check the connection cables and run a new update.<br />
The update is complete, and your equipment is ready to customise your cards.<br />
Never interrupt the transfer between computer and printer during the download phase (powering off the printer<br />
or computer, unplugging a cable). This would result in a complete inability to restart the printer. Should such an<br />
incident occur, please contact your Evolis dealer, who will replace your printer’s processing board.<br />
39
4<br />
4-3f UPDATING THE PRINT DRIVER<br />
Updating the print driver is a task that is required in order to fix malfunctions or gain the benefit of new options.<br />
Before any update, please contact your Evolis dealer who will be able to guide you on the advisability or<br />
otherwise of carrying out an upgrade.<br />
Updates can be downloaded from the website at www.evolis.com :<br />
Ê Select your printer model, then click on the Print drivers and Firmware link.<br />
Ë Then click on the file for the corresponding print driver.<br />
Ì Accept the download then save the file in a directory on your hard drive. The firmware is stored compressed as a zip<br />
file, which you will need to extract.<br />
Í Then double-click on the setup.exe file that you have just downloaded in order to run the installation program.<br />
For more details about the procedure, please see the Installing the print driver section.<br />
40
4<br />
4-4 Technical support<br />
If you are having difficulties in configuring and using your printer, read this manual carefully.<br />
If you do not manage to solve your problem, you can obtain further information and help from the Evolis partner network.<br />
4-4a EVOLIS PARTNER NETWORK<br />
For any unresolved technical problem, contact an Evolis dealer. If you do not know any Evolis dealers, visit the www.evolis.com website<br />
and send us your question. Evolis will pass on the contact details of your nearest Evolis dealer. When calling an Evolis dealer, you do need<br />
to be close to your computer and ready to provide the following information:<br />
Ê Your printer model and serial number<br />
Ë The configuration and operating system that you are using<br />
Ì A description of the incident that has occurred<br />
Í A description of the steps that you have taken to resolve the problem.<br />
In addition, to enable you to find answers to your questions 24/7, the www.evolis.com website includes a number of aspects related to<br />
day-to-day use of your printer.<br />
4-4b FINDING INFORMATION ON WWW.EVOLIS.COM<br />
If you need additional technical help, you will find a great deal of information on using and troubleshooting Evolis printers under the Drivers<br />
and Support section on the Evolis website at www.evolis.com..<br />
This section offers downloads of the latest versions of firmware, print drivers and user manuals, videos about using and maintaining Evolis<br />
printers, and an FAQ* section giving answers to the most frequently asked questions.<br />
*<br />
FAQ : Frequently Asked Questions<br />
41
A<br />
Appendix A<br />
A1 - Technical specifications<br />
This section presents your printer’s technical printing properties.<br />
ä General technical features<br />
l Colour printing module<br />
l 300 dpi print head (11.8 dots/mm)<br />
l USB connection<br />
l Ethernet TCP/IP connection as an option<br />
l 16 MB RAM allowing two colour cards (front and back) to be stored<br />
l Detachable 100 card input feeder (0.76 mm or 30 mil)<br />
l 50 card output hopper (0.76 mm – 30 mil)<br />
l 1 button and 4 LED control panel<br />
l Choice of colours: Ocean Blue, Flame Red or Jungle Green.<br />
ä Printing modes<br />
l Colour sublimation and monochrome thermal transfer<br />
l Advanced colour management system for top-quality photographs<br />
l Edge-to-edge printing<br />
l Integrated ribbon saving for monochrome printing<br />
ä Performance<br />
Performance depends essential on the card design and print settings<br />
l Colour 1 side (YMCKO), 150 cards/hour<br />
l Monochrome 1 side, up to 1,000 cards/hour 1<br />
ä Platforms supported:<br />
l WindowsTM XP, 2003 and Vista, 32 & 64 bits<br />
l Macintosh TM OS X v10.2, 10.3 and 10.4<br />
l Linux<br />
42
A<br />
ä Software supplied<br />
l eMedia Card Designer for designing and printing badges :<br />
• Compatible with WindowsTM 2003, XP and Vista<br />
• Connects to Microsoft Excel databases<br />
ä Ribbon types<br />
l 2-panel KO monochrome black ribbon – 500 cards/roll<br />
l 5-panel YMCKO colour ribbon – 200 cards/roll<br />
l half-panel YMCKO colour ribbon – 400 cards/roll<br />
l Monochrome ribbons – up to 1,000 cards/roll: available in black, red, green, blue, white, gold and silver<br />
l Special ribbons: hologram clear overlay – 350 cards/roll, scratch-off ink – up to 1,000 cards/roll<br />
ä Options<br />
l Encoding options (can be combined)<br />
• ISO 7811 HiCo/LoCo or JIS2 magnetic strip encoder<br />
• Smartcard contact station - ISO 7816-2<br />
• Smartcard encoder and contact station – PC/SC, EMV 2000-1<br />
• Contactless card encoder - ISO 14443A, B, ISO 15693, Mifare, DesFire, HID iCLASS<br />
• Other specific encoders on request<br />
l 100-card additional feeder<br />
l Manual card input feeder<br />
ä Warranty<br />
For best results and to lengthen the useful life of your printer, use original Evolis Genuine Product consumables.<br />
l Printer and print head: 3-year warranty2, unlimited number of print runs<br />
Card types: PVC and composite PVC cards, PET, ABS1 and special clear overlaid cards1<br />
Card format: ISO CR-80 - ISO 7810 (53.98 mm x 85.60 mm - 3.375» x 2.125»)<br />
Card thickness: From 0.25 mm (10 mil) to 1 mm (40 mil) - Double-sided printing recommended from 0.50 mm (20 mil)<br />
Card feeder capacity: 100 cards (0.76 mm-30 mil), 300 cards (0.25mm-10 mil)<br />
Output hopper capacity: 50 cards (0.76 mm-30 mil), 150 cards (0.25mm-10 mil)<br />
Dimensions: Height: 192 mm (7.55”) - Length: 396 mm (15.59”) - Width: 235 mm (9.25”)<br />
Weight: 5.9 Kg (13 lbs)<br />
Connections: USD port (cable supplied). Ethernet TCP/IP port as an option.<br />
43
A<br />
Power supply: Power supply unit: 110-230 volts AC, 1.8 A, 60-50 Hertz - Printer: 24 volts DC, 3 A<br />
Environment:<br />
- Min/max operating temperature: 15° / 30°C (59° / 86° F)<br />
- Humidity: 20% to 65% without condensation<br />
- Min/max storage temperature: -5° / +70°C (23° / 158° F)<br />
- Storage humidity: from 20% to 70% without condensation<br />
- Operating ventilation: air cooled.<br />
1<br />
Under specific conditions<br />
2<br />
Warranty subject to strict compliance with specific usage and maintenance conditions and the use of Evolis consumables<br />
44
B<br />
Appendix B<br />
B1 - Compliance statements<br />
In this section, you will find the certifications for your Evolis printer.<br />
Compliance statements<br />
As regards Safety and Electromagnetic Compatibility<br />
Manufacturer name:<br />
Evolis Card Printer<br />
Manufacturer address:<br />
14, avenue de la Fontaine<br />
Z.I. Angers Beaucouzé<br />
49070 Beaucouzé, France<br />
Equipment name :<br />
<strong>Pebble</strong>4<br />
Year of manufacture : 2007<br />
I, the undersigned,<br />
Monsieur Serge Olivier,<br />
hereby declare that the equipment named above, used and installed in<br />
accordance with the notice, complies with the essential requirements of<br />
Directives 2006/95/EC and 2004/108/EC by application of the following<br />
standards:<br />
EN 60950-1 of 2001<br />
EN 55022 Class B of 1998: A1 (2000), A2 (2003)<br />
EN 55024 of 1998: A1 (2001), A2 (2003)<br />
EN 61000-3-2 of 2000<br />
EN 61000-3-3 of 2000 +A1 of 2001<br />
Full name: Serge Olivier<br />
Position: Technical director<br />
Date : mars 2007<br />
Signature :<br />
EUROPE - Norway Only: This product is designed for IT power system<br />
with phase-to-phase voltage 230V. Earth grounding is via the polarized,<br />
3-wire power cord.<br />
FI: “Laite on liitettävä suojamaadoitus koskettimilla varustettuun<br />
pistorasiaan”<br />
SE: “Apparaten skall anslutas till jordat uttag”<br />
NO: “Apparatet må tilkoples jordet stikkontakt”<br />
FCC Federal Communications Commission notice<br />
Radio frequency interference in the United States<br />
<strong>Pebble</strong> 4 models comply with the following specification: FCC Part<br />
15, Subpart A, Section 15.107(a) and Section 15.109(a) Class B Digital<br />
device.<br />
Additional information:<br />
This equipment has been tested and found to comply with the limits for a Class B digital<br />
device, pursuant to part 15 of the FCC Rules. These limits are designed to provide reasonable<br />
protection against harmful interference in a residential installation. This equipment generates,<br />
uses and can radiate radio frequency energy and, if not installed and used in accordance<br />
with the instructions, may cause harmful interference to radio communications. However,<br />
there is no guarantee that interference will not occur in a particular installation. If this<br />
equipment does cause harmful interference to radio or television reception, which can be<br />
determined by turning the equipment off and on, the user is encouraged to try the following<br />
measures:<br />
- Reorient or relocate the receiving antenna.<br />
- Increase the distance between the equipment and the radio or television.<br />
- Connect the equipment to a circuit other than that to which the receiver is connected.<br />
- Consult the supplier or an experienced radio/TV technician.<br />
Use of a shielded twisted pair cable is necessary to comply with the restrictions laid down by<br />
part 15 of the FCC Rules for Class B digital devices.<br />
Pursuant to Part 15.21 of the FCC Rules, any changes or modifications made to this equipment<br />
without the express, written consent of Evolis Card Printer may cause harmful interference<br />
and void the FCC authorisation to operate this equipment.<br />
Japanese radio frequency interference (VCCI)<br />
This equipment is Class B information technology equipment<br />
based on the rules laid down by the Voluntary Control Council For<br />
Interference by Information Technology Equipment (VCCI). Its use in<br />
or close to a residential area may cause radio interference, in which<br />
case, you must take appropriate steps.<br />
45
C<br />
Appendix C<br />
C1 - Encoding options<br />
Some models of Evolis printers are equipped with encoding systems which are used to customise magnetic strips, and contact and<br />
contactless smartcards.<br />
Depending on the model, it is possible to install up to three types of encoder in the printer (magnetic strip, contact and contactless<br />
smartcards).<br />
C1a - MAGNETIC STRIP ENCODING<br />
A printer fitted with a magnetic encoder works in exactly the same way as a basic card printer. The Evolis encoder encodes the magnetic<br />
strips in a single pass then runs a data check.<br />
Configurable as high coercivity (HiCo) or low coercivity (LoCo) by a simple click in the Windows print driver, Evolis magnetic encoders are<br />
however shipped with a default setting of high coercivity (HiCo), unless otherwise requested when placing the order.<br />
ä Location of the magnetic encoder<br />
The magnetic encoder is a module fitted in the factory. The read-write head is located under the path<br />
taken by the cards and after the print head. The encoding sequence for a card is always carried out<br />
before the printing.<br />
Use only magnetic strip cards that comply with ISO 7810 and ISO 7811 standards.<br />
The magnetic strip must be moulded into the card to work properly.<br />
Never use cards with a glued-on magnetic strip.<br />
46
C<br />
ä Card positioning<br />
Magnetic strip cards must be placed in the card feeder so that the magnetic strip is facing upwards as shown below:<br />
Ê Remove the card feeder from the printer as shown.<br />
Ë Lower the spring system as shown and insert a maximum of 100 x 0.76 mm magnetic cards<br />
Ì Put the feeder back into the printer, then press on the upper section of the feeder until it clicks.<br />
Ê Ë Ì<br />
47
C<br />
ä Configuring the Windows print driver<br />
When first installing the Windows print driver, the magnetic encoder functions need to be configured. The magnetic encoder functions<br />
are found in the print driver’s Tools dialogue box by clicking on the Encoding Settings button.<br />
ä “Magnetic Encoder” dialogue box<br />
The Magnetic Encoder dialog box opens when the Encoding Settings button<br />
is selected.<br />
Track settings is used to select the desired ISO standard for each magnetic strip.<br />
See the table in this Appendix for information regarding ISO 7811 standards.<br />
Coercivity sets the magnetic encoding to high (HiCo) or low (LoCo) coercivity.<br />
A magnetic strip that is encoded in high coercivity is more resistant to external<br />
disturbance than a magnetic strip encoded using low coercivity.<br />
Direct encoding is used to directly encode one or more magnetic strips from<br />
this window simply by selecting them and entering the data to be encoded.<br />
Click on the “Send” button (previously “execute encoding”) to run the<br />
encoding cycle.<br />
Automatic extraction is used to encode magnetic strip cards from applications<br />
under Windows (such as Word for example). A text field enclosed within “|”<br />
and “|” characters (or some other character which the user can define) will<br />
be interpreted as an encoding command by print driver.<br />
ä Cleaning the magnetic encoder<br />
The magnetic encoder head requires regular maintenance in order to ensure the integrity of the data encoded onto cards.<br />
Cleaning of the magnetic encoder is carried out when the printer runs a cleaning sequence with impregnated cards (see the “Maintenance”<br />
section of this manual for further information).<br />
Repeatedly running the cleaning card through the printer cleans the card feed rollers, the cleaning rollers, the print head and the<br />
magnetic encoder read-write head.<br />
If, in between two routine printer cleaning runs (every 1000 cards inserted), the read-write process fails with more than one card, it is<br />
recommended to run a printer cleaning sequence manually (please see the “Maintenance” section of this manual for the procedure to<br />
follow).<br />
48
C<br />
ä SO 7811 magnetic encoding standards<br />
Track number Separator Density Character set Number of characters<br />
Track 1 ^ 210 ppp 1 Alphanumeric<br />
(ASCII 20-95) 2 79 3<br />
Track 2 = 75 ppp 1 Numeric<br />
(ASCII 48-62) 2 40 3<br />
Track 3 = 210 ppp 1 Numeric<br />
(ASCII 78-62) 2 107 3<br />
1<br />
bits per inch<br />
2<br />
Except for the “” character<br />
3<br />
Including the Start, Stop and LRC characters which are automatically handled by the magnetic encoder<br />
49
C<br />
C1b - CONTACT SMARTCARD ENCODING<br />
A printer fitted with a smartcard contact station works in exactly the same way as a basic card printer. The Evolis smartcard contact<br />
station is used to program chips to ISO 7816-2 standards.<br />
ä Contact station location<br />
The contact station is a module fitted in the factory. It is located over the path taken by the cards and before the print head. To make<br />
contact with the station, the smartcard is positioned underneath it and is pushed mechanically upwards. The programming sequence for<br />
a smartcard is always carried out before the printing.<br />
Use only smartcards compliant with the ISO 7816-2 standard.<br />
Never print over the chip.<br />
50
C<br />
ä Card positioning<br />
Smartcards must be placed in the card feeder so that the chip is facing downwards as shown below:<br />
Ê Remove the card feeder from the printer as shown.<br />
Ë Lower the spring system as shown and insert a maximum of 100 x 0.76 mm magnetic cards (chip down).<br />
Ì Put the feeder back into the printer, then press on the upper section of the feeder until it clicks.<br />
Ê Ë Ì<br />
51
C<br />
ä Contact station interface<br />
Printers with a smartcard contact station are fitted with a female DB-9 connector which is<br />
found on the back of a printer. This connector, directly connected to the contact station<br />
inside the printer, is also connected to an external coupler to program the chip.<br />
DB-9 connector<br />
USB or parallel port<br />
External coupler<br />
USB, serial, etc. port<br />
DB-9 connector pins<br />
Smartcard contact points<br />
1 C1 (V c.c.)<br />
2 C2 (reset)<br />
3 C3 (clock)<br />
4 C4 (reserved)<br />
5 C5 (ground)<br />
6 C6 (Vpp)<br />
7 C7 (I/O)<br />
8 C8 (reserved)<br />
9 C9 (ground when the chip is switched with the contact station)<br />
A sequence of commands must be sent via the printer’s interface to insert a card into the printer then position it under the station and<br />
establish contact.<br />
52
C<br />
ä The command sequence is as follows:<br />
Sending the SIS sequence :<br />
l A card is moved from the feeder to the contact station, and stops underneath it.<br />
l The card is pushed upwards to make contact with the station.<br />
l The printer connects the contact station to the DB-9 connector.<br />
l The chip is programmed via the computer’s serial interface and the external coupler.<br />
Refer to the Evolis printer Programming <strong>Guide</strong> for further details on programming smartcards.<br />
The Evolis product catalogue has printers equipped with a chip contact station and a built-in encoder. Depending on the model, these<br />
encoders connect to the PC via an RS-232 interface (DB-9 socket) or a USB interface.<br />
53
C<br />
C1c - CONTACTLESS SMARTCARD ENCODING<br />
Evolis printers may be equipped with an encoding device for contactless smartcards (RFID). This consists of an encoding module and<br />
sometimes a detachable antenna.<br />
Integration of such a module must be carried out by specialist. The Evolis product catalogue has printers equipped with a built-in encoder<br />
for contactless chips.<br />
Depending on the model, these encoders connect to the PC via an RS-232 interface (DB-9 socket) or a USB interface.<br />
There is a very wide variety of contactless cards, and each card has specific technical properties associated with an equally specific type<br />
of encoder. See your Evolis dealer for further information.<br />
ä Location of the antenna (or the encoder including an antenna)<br />
By means of a specific command, the card is positioned close to the antenna such that the card lies within its radio range.<br />
Reading data from or writing data to the card can then start.<br />
The programming sequence for a smartcard is always carried out before the printing.<br />
ä Card positioning<br />
On the face of it, there are no restrictions on card positioning when programming in contactless mode.<br />
However, the miniaturisation of components is bringing about the emergence of cards fitted with mini-antennae.<br />
In this situation, please see your card supplier for further information about where such mini-antennae are located within the card, so as<br />
to present the card as close as possible to the encoder’s antenna. Doing so will ensure optimum encoding of the cards.<br />
54
C<br />
ä Computer connection<br />
If your encoder is supplied with an USB interface, it will either be connected to the printer’s internal USB Hub, or equipped with a USB cable<br />
to connect to your computer directly.<br />
in the first case, your printer’s USB cable is used to drive firstly the printer and secondly the encoder from the computer.<br />
If your encoder is supplied with an RS-232 interface, it needs to be connected to the computer via a serial cable. This cable plugs into the<br />
printer’s female DB-9 socket, and into a COM port on the computer.<br />
DB-9 connector pins<br />
RS-232 signals (serial)<br />
1 Not used<br />
2 RxD<br />
3 TxD<br />
4 Not used<br />
5 Not used<br />
6 Not used<br />
7 RTS<br />
8 CTS<br />
9 Not used<br />
A sequence of commands must be sent via the printer’s interface to insert a card in the printer then position it close to the antenna to<br />
establish radio communication between the card and the encoder.<br />
The command sequence is as follows:<br />
Sending the SIC sequence:<br />
l A card is moved from the feeder towards the antenna and is positioned nearby.<br />
l The chip is programmed via the computer’s serial (or USB) interface connecting the built-in encoder and the computer.<br />
Refer to the Evolis printer Programming <strong>Guide</strong> for further details on programming contactless smartcards.<br />
55
D<br />
Appendix D<br />
D1 - Consumables and accessories<br />
Evolis offers a full range of consumables and accessories specially designed to work with its printers. Tested and approved by Evolis’ R&D<br />
and Quality departments, these consumables and accessories provide optimum print quality and reliability.<br />
ä Ribbons<br />
Ref.<br />
Description<br />
Tattoo RW<br />
Tattoo2<br />
<strong>Pebble</strong>4<br />
Dualys3<br />
Securion<br />
Quantum2<br />
Rubans Monochromes<br />
R3012 KO (black and clear overlay) 500 cards/roll<br />
R2211 Black Up to 600 cards/roll<br />
R2212 Blue Up to 600 cards/roll<br />
R2213 Red Up to 600 cards/roll<br />
R2214 Green Up to 600 cards/roll<br />
R2215 White Up to 500 cards/roll<br />
R2216 Gold Up to 500 cards/roll<br />
R2217 Silver Up to 500 cards/roll<br />
R2011 Black Up to 1000 cards/roll<br />
R2012 Blue Up to 1000 cards/roll<br />
R2013 Red Up to 1000 cards/roll<br />
R2014 Green Up to 1000 cards/roll<br />
R2015 White Up to 1000 cards/roll<br />
R2016 Gold Up to 1000 cards/roll<br />
R2017 Silver Up to 1000 cards/roll<br />
R2131 Black Up to 3000 cards/roll<br />
56
D<br />
Ref.<br />
Description<br />
Tattoo RW<br />
Tattoo2<br />
<strong>Pebble</strong>4<br />
Dualys3<br />
Securion<br />
Quantum2<br />
Colour ribbons<br />
R3011 YMCKO 200 cards/roll<br />
R3013 ½ YMCKO 400 cards/roll<br />
R3314 YMCKOK 200 cards/roll<br />
R3411 YMCKO 100 cards/roll<br />
R3511 YMCKO 500 cards/roll<br />
R3514 YMCKOK 500 cards/roll<br />
Special ribbons<br />
R2218 Scratch-off ink Up to 600 cards/roll<br />
R2219 BlackWAX* Up to 600 cards/roll<br />
R2018 Scratch-off ink Up to 1000 cards/roll<br />
R2019 BlackWAX* Up to 1000 cards/roll<br />
R4001 Optoseal © hologram ribbon 350 cards/roll<br />
* for printing on ABS, special overlay and paper<br />
57
D<br />
Ref.<br />
ä Cards<br />
Description<br />
Tattoo RW<br />
Tattoo2<br />
<strong>Pebble</strong>4<br />
Dualys3<br />
Securion<br />
Quantum2<br />
Plastic cards<br />
C1001 Blank PVC cards, Premium, 0.76 mm 500 cards/box<br />
C1003 Blank PVC cards, Premium, with HiCo mag strip - 0.76 mm 500 cards/box<br />
C1004 Blank PVC cards, Premium, with LoCo mag strip - 0.76 mm 500 cards/box<br />
C4001 Blank PVC cards, Standard, 0.76 mm 500 cards/box<br />
C4002 Blank PVC cards, Standard, 0.50 mm 500 cards/box<br />
C4003 Blank PVC cards, Standard, with HiCo mag strip - 0.76 mm 500 cards/box<br />
C4004 Blank PVC cards, Standard, with LoCo mag strip - 0.76 mm 500 cards/box<br />
Paper cards<br />
C2001 Blank paper cards, 0.30 mm* 500 cards/box<br />
RW cards<br />
C5101 Blank RW PVC cards in blue, 0.76 mm 100 cards/box<br />
C5103 Blank RW PVC cards, in blue with HiCo mag strip - 0.76 mm 100 cards/box<br />
C5201 Blank RW PVC cards in blue, 0.76 mm 100 cards/box<br />
C5203 Blank RW PVC cards, in blue with HiCo mag strip - 0.76 mm 100 cards/box<br />
*use the BlackWAX ribbon for printing on paper cards<br />
58
D<br />
Ref.<br />
ä Software and accessories<br />
Description<br />
Tattoo RW<br />
Tattoo2<br />
<strong>Pebble</strong>4<br />
Dualys3<br />
Securion<br />
Quantum2<br />
Software<br />
L8001 eMedia Card Designer software, Pro Edition, unrestricted version, all database types<br />
L8002 eMedia Card Designer software, Standard Edition, unrestricted version, Excel database connection<br />
Maintenance kits<br />
A5011<br />
A5002<br />
A5003<br />
A5004<br />
A5070<br />
UltraClean cleaning kit (for full printer cleaning)<br />
5 pre-impregnated cards, 5 cotton buds, 1 box of 40 pre-impregnated wipes<br />
PrinterClean cleaning kit (for cleaning the card feed rollers)<br />
50 isopropyl alcohol impregnated cards, delivered in individual sachetsl<br />
HeadClean cleaning kit (for cleaning the print head)<br />
25 cotton buds with foam ends and reservoir with isopropyl alcohol (IPA)<br />
DustClean cleaning kit (for cleaning roller servicing)<br />
1 dispensing box of 40 pre-impregnated, anti-static, cleaning wipes<br />
LamClean cleaning kit (for cleaning the laminating unit)<br />
10 double-sided adhesive cards<br />
59
D<br />
Ref.<br />
Description<br />
Tattoo RW<br />
Tattoo2<br />
<strong>Pebble</strong>4<br />
Dualys3<br />
Securion<br />
Quantum2<br />
Printer accessories<br />
S2304BB<br />
Extra card feeder for 100 cards (brilliant blue)<br />
S2304FR Extra card feeder for 100 cards (flame red)<br />
S5304OC Extra card feeder for 100 cards (ocean blue)<br />
S5304FR Extra card feeder for 100 cards (flame red)<br />
S5304JG Extra card feeder for 100 cards (jungle green)<br />
S5305OC Manual card feeder (ocean blue)<br />
S5305FR Manual card feeder (flame red)<br />
S5305JG Manual card feeder (jungle green)<br />
A5310 Carrying case – delivered in a cardboard box<br />
A5309 Carrying case – delivered in a cardboard box<br />
A5306 Carrying bag – delivered in a cardboard box<br />
A5017 1.80m USB cable<br />
A5008 Power supply unit<br />
A7004 Power supply unit<br />
A5009 220V power cable - Europe<br />
A5010 110V power cable - US<br />
A5019 220V power cable - UK<br />
60