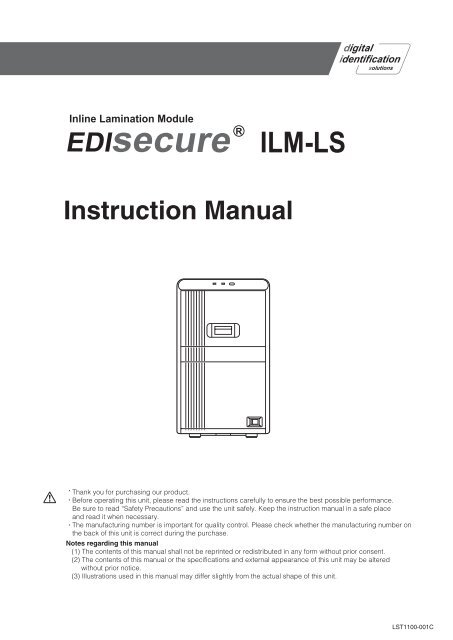
EDIsecureR Instruction Manual - Intraproc GmbH
EDIsecureR Instruction Manual - Intraproc GmbH
EDIsecureR Instruction Manual - Intraproc GmbH
- No tags were found...
Create successful ePaper yourself
Turn your PDF publications into a flip-book with our unique Google optimized e-Paper software.
Before UseCharacteristics of this UnitContentsThis laminator attaches a protective layer to a single sideof the printed card through infrared communication withthe card printer.A hologram that helps to enhance the security level of thecard can be formed on the protective layer.This laminator can be made to operate in conjunction withthe card printer unit through infrared communication.It is built in with a function for adjusting the lengthwiseposition of the laminate film, which enables easyadjustment of the patch in the front-back direction.Before UseCharacteristics of this Unit.................................................2Contents............................................................................2Before Use.........................................................................3About this <strong>Manual</strong>..............................................................6Precautions During Use.....................................................6Name and Functions of Parts............................................7Internal Mechanism Diagram.............................................9Specifications...................................................................10Accessories/Products Sold Separately............................10SetupInstallation and Connection.............................................11Setting Laminate Film......................................................12Operating the LaminatorOperation Panel...............................................................14Initializing.........................................................................17Turning On the Power......................................................17Turning Off the Power......................................................18Firmware Update.............................................................18ReplacementLaminate Film..................................................................19MaintenanceCard Feed Roller/Heating Roller......................................21Fan Filter..........................................................................24Film Cassette...................................................................25Interior of Laminator........................................................26TroubleshootingCard Jam.........................................................................28Film is Entangled.............................................................30Misaligned Patch Position................................................31Card Warpage.................................................................32List of Error Codes...........................................................33In case of disposalIn case of disposal this unit, take care for compliancewith the local law and regulations in your country.
Before UseRead through the following carefully before operating to ensure proper use of this laminator.After reading, store this manual at a place that can be easily retrieved when necessary.Information for USAFor a Class A digital device or peripheral, the instructions furnished the user shall include the following or similarstatement, placed in a prominent location in the text of the manual:Note: This equipment has been tested and found to comply with the limits for a Class A digital device, pursuant topart 15 of the FCC Rules. These limits are designed to provide reasonable protection against harmfulinterference when the equipment is operated in a commercial environment. This equipment generates, uses, andcan radiate radio frequency energy and, if not installed and used in accordance with the instruction manual, maycause harmful interference to radio communications. Operation of this equipment in a residential area is likely tocause harmful interference in which case the user will be required to correct the interference at his own expense.Information for CanadaThis Class A digital apparatus complies with Canadian ICES-003.Cet appareil numérique de la classe A est conforme à la norme NMB-003du Canada.Caution: Changes or modifications not approved by party responsible for compliance could void user's authorityto operate the equipment.Information for CanadaOperation is subject to the following two conditions:(1) this device may not cause interference, and (2) this device must accept any interference, includinginterference that may cause undesired operation of the device.Information for EUMachine noiseSound power level: less than 70dB(A) according to DIN45635 part 19 (EN27779).The measurements are to be made according to DIN45635 part 2019 or EN27779, respectively.
Before UseSafety Precautions
Before UseAbout this <strong>Manual</strong>Symbols Used in this <strong>Manual</strong>Cautions : States precautions to be taken during operation.MemoA: States restrictions on the functions or use of thisequipment. for reference purposes.: Indicates the page numbers or items to refer to.Contents of this <strong>Manual</strong>The copyright of this manual belongs to our company.Reprint and duplicate of this manual in part or full withoutthe prior consent of our company is strictly prohibited.Designs, specifications, or other details described in thismanual may be modified for improvement without priornotice.Precautions During UsePlease read through all the following items beforeusing the laminator.Laminator InstallationWhen you are not printing cards, it is recommendedthat you turn off the power, and use a cover that is largeenough to cover up the card printer and laminator units.Avoid installing at the following locations as doing so mayhave adverse effects on this unit. Carpeted room.Places with a busy flow of people.Places where paper (corrugated boards, etc.) is handled orstored.Places near photocopiers.Places exposed to direct sunlight or near a heating equipment(such as a stove).Inclined or unstable surfaces.Places exposed directly to cold air, such as near an airconditioneroutlet, or places subject to high temperatures.During installation, make sure that there is sufficient spacearound the laminator. (Allow a clearance of at least 20cm between the sides of the laminator and the wall. Allowa clearance of at least 10 cm between the rear of thelaminator and the wall.)Observe the following when installing or moving thelaminator. Make sure to turn off the power before moving the laminator.Carry the laminator at the bottom of the two sides (handle) toprevent your hands or fingers from being caught under the unit.The filter cover is detachable for replacing the fan filter. Whenyou are moving the laminator, do not hold it at the filter cover.Films Handling proceduresPay attention to the following points when handling films. Do not touch the film surface with your hand. Doing somay result in poor adhesion. Foreign objects attached to the surface of the filmmay result in poor adhesion. Load the film in a cleanenvironment. If the film is left unattended for a prolonged period of timewith the laminator in the [Ready] state, the heat from theheater may cause the film to change color. When this unitis not in use, turn off the power, or switch it to the cardprinter’s “Power-saving mode”. When replacing films with one that has been storedunder a low temperature, store it at the operating ambienttemperature of the laminator for at least one hour beforeusing. Otherwise, condensation may occur, causing pooradhesion or malfunction. Storage environment Temperature: 5°C to 25°C Relative humidity: 50 % and below Storage locationDo not store in the following locations. Places exposed to direct sunlight. Places with a high temperature and humidity. Places near organic solvents or diazo copiers. Storage periodUse it as soon as possible after opening.Cards Compliant cardsCompliant with ISO 7810 ID-1For details on the handling and storage procedures of cards,refer to the manual of the card printer.Cautions:Reimbursement will not be done for poor adhesion or cardwarpage. For more information about the card, pleaseconsult our authorized dealers and evaluate the settings.
Name and Functions ofPartsFrontABRearACDEFOPTIONINLETBCDA LED display (red) Blinks or lights up in red, and combines with the B LEDdisplay (blue) to indicate the status of the laminator.(A page 15 “Laminator Status, LED Display and CardPrinter’s Operation Panel Display”)B LED display (blue) Blinks or lights up in blue, and combines with the A LEDdisplay (red) to indicate the status of the laminator.(A page 15 “Laminator Status, LED Display and CardPrinter’s Operation Panel Display”)C Operation button Pressing this button when the laminate film is loaded willreset the laminator settings. When no film cassette is loaded, pressing the button fortwo seconds or longer starts the cleaning operation. (Thecleaning operation does not start if the heating roller is stillhot.)D Sliding knob Opens/closes the laminator door.E Laminator door Closing the door when the laminate film is loaded willreset the laminator settings. This door can be locked by operating in conjunction withthe card printer unit through the security lock function.F Power switch Turns the power on/off.A Exhaust fan Discharges heat accumulated inside the laminator unit.B Air suction fan opening Air inlet of the internal cooling fan.C Security slot An anti-theft device that supports Kensington locks can beattached.D AC inlet For connecting the power cord.
Before UseRightWhen Laminator Door is OpenAABCDA Card feed port Feeds the printed card from the card printer that isconnected to the laminator.B Infrared window Sends or receives data via infrared communication byconnecting with the card printer.C Filter cover Remove when you want to exchange the filter. When moving the laminator, do not carry it at the filtercover.D Handle Hold this area when moving the laminator.LeftABCDEA Dummy cover Remove this when a card jam occurs.B Jog dials insertion slot For discharging the card during a card jam by attachingthe jog dial supplied with the card printer to the card feedroller and turning it.C Film cassette For attaching the laminate film.D Cassette button Press the buttons to remove the film cassette.E Jog dial attachment slot Enables attachment of a supplied jog dial to the cardprinter.Film CassetteABABCA Card outlet Discharges the cards.B Card stacker attachment slot For attaching the card stacker supplied with the card printer.DC Filter cover Remove when you want to exchange the filter. When moving the laminator, do not carry it at the filtercover.D Handle Hold this area when moving the laminator.DCA Guide shaft Provides guide to the position for attaching the film cassette.B Film Guides When attaching the laminate film, unwind it along theshafts.C Bobbin holder For securing the take-up side of the laminate film.D Bobbin holder (patch position adjustmentmechanism attached) For securing the supply side of the laminate film. It can also be used to adjust the patch position in the frontback direction.
Internal MechanismDiagramONMLKABCDEFGJI HABCDEFGHCard laminate position sensorInlet sensorCard feeder unitCard feed motorLaminate film position sensorLaminate film supply motorSupply side laminate filmLaminate heater pressure mechanismI Laminate pressure motorJ Interlock switchK Take-up side laminate filmL Laminate film take-up motorM Card discharge sensorN Security lock solenoidO Heater back roller
Before UseSpecificationsAccessories/Products SoldSeparatelyMain SpecificationsItemRecording systemTransfer timeOperatingenvironmentconditionsStorageenvironmentconditionsPower supplyCurrentconsumptionMassDC heat roller systemDescriptionApprox. 21 sec. to 36 sec. (Time varies according to thesetting.)Temperature: 15°C to 30°CHumidity: 35 % to 70 % (no condensation)Temperature: 15°C to 28°CHumidity: 35 % to 60 % (no condensation)Temperature: -15°C to 55°CHumidity: 20 % to 80 %Temperature: 5°C to 25°CHumidity 50 % and belowAC 100 V - 120 V, 50 Hz/60 HzAC 220 V - 240 V, 50 Hz/60 Hz3.5 A (100 V system)1.6 A (200 V system)Approx. 8.5 kgDimensions 210 mm × 360 mm × 330 mm (W x H x D)Outline Dimensional Drawing Front View210AccessoriesPlease check to ensure that the laminator accessories are inplace when unpacking the product package.Power Cord (2 m) x 2North America Type<strong>Instruction</strong> <strong>Manual</strong> x 1Unit Connection Adapter x 1Europe Type360Cleaning Card x 1 Side View330316Bobbin x 1Products Sold SeparatelyTo purchase these items, please consult our authorizeddealers.0.6 mil patch film1 mil patch filmOverlay filmCleaning KitCleaning Cards10* The specifications and appearance of this product maybe modified for improvement without prior notice.
SetupInstallation and ConnectionCard Printer Connection1 Fit the card printer to the supplied unit connectionadapterInstallation LocationVentilation holes for the cooling fan are located at the rearof the laminator as well as the side and rear of the cardprinter.Allow a clearance of at least 20 cm between the sides ofthe laminator and the wall.2 Fit the laminator to the supplied unit connectionadapterAllow a clearance of at least 10 cm between the rear ofthe laminator and the wall.Card PrinterConnectionDo not place any object on the laminator.Cautions:Do not hold the rear filter cover when installing or movingthe laminator. The filter cover may be damaged ordetached from the laminator, causing the laminator to falloff and resulting in injuries.Make sure that you connect the units on a flat and firmsurface.Insert the unit connection adapter firmly into the cardprinter connection. Cards cannot be fed if there is adifference in level.After installation, if you need to remove the laminator fromthe card printer, turn off the power of the card printer.11
OPTIONSetupCard Stacker1 Hook the tab of the card stacker that is suppliedwith the card printer to the card stacker attachmentslotBCDA Card outletAB Card stacker attachment slotC TabD Card stackerPower Cord Connection1 Insert the power cord (supplied) to the AC inlet atthe rear of the laminatorSetting Laminate FilmAttaches a patch film or overlay film on the film cassette.Cautions:If the security lock of the card printer is on, deactivate it.After work is complete, activate the security lock again.For details on locking/unlocking the security lock, refer tothe manual of the card printer.Stand the film cassette on a flat surface. Avoid doing soon a floor as dust attached to the film may cause pooradhesion or malfunction.A film cassette that has laminate film attached on it isheavy. Hold the film cassette with both hands to avoiddropping when working with it.Make sure that the laminate film is attached in the rightdirection. Otherwise, film detection error may occur.A film detection error occurs if the attached laminate filmdoes not coincide with the [Film Type] setting.1 Open the laminator door2 Plug the power cord (supplied) into an outlet2 Press and hold down the cassette button, and pullout the film cassetteINLET INLETCautions:Make sure that the power outlet is grounded and used asa dedicated power source for the laminator. Make surethat the power cord is inserted directly into the outlet, anddo not share with other devices.Memo:Make use of an AVR (automatic voltage regulator)to prevent any fluctuation in voltage. Alternatively, anuninterruptible power supply is recommended in casemomentary power outage occurs.12
3 Attach the tip of the new laminate film to the bobbinA Place the new laminate film and the take-up bobbin sideby side on a clean and flat platform.B Attach the tip of the new laminate film to the take-up bobbinusing the fixing tape.C Wind the film twice around the take-up side.Use the fixing tape after peeling offthe adhesive label of the laminatefilm.Cautions:Attach the laminate film to the take-up bobbin such thatthey are parallel to each other.Otherwise, it may result in poor adhesion or cause filmdetection errors.4 Install the new laminate film on the film cassette Install while referring to the indication on the label ofthe cassette.5 Remove any slack in the laminate film6 Insert the film cassette all the way in along theguide rail until a “click” sound is heard, and closethe laminator doorA Insert the supply side of the film into the bobbin holders(patch position adjustment mechanism attached).B Unwind the laminate film along the film guides, and insertthe take-up side into the bobbin holders.Cautions: Make sure to insert the film cassette all the way in untila “click” sound is heard. Failure to do so may result indefective patch or card jam.13
Operating the LaminatorOperation PanelThe status display of the laminator is displayed on the operation panel of the card printer as well as the status monitor of thecomputer that is connected to the card printer.The status is indicated on the laminator unit using a combination of solid and blinking LED displays in red and blue colors. Card printer operation panel Laminator operation panelR e a d yR e a d yResetMenuABCDABCA Printer status display Displays the status of the card printer.B Laminator status display Displays the status of the laminator when the displaymode of the card printer is set to [Laminator State].(A page 15 “Setting Procedures for Laminator StatusDisplay”)C Status icon display A laminator icon is displayed once the card printerrecognizes the laminator.D Operation button For selecting a button function displayed on the operationpanel.A LED display (red) Indicates an error when only the red light is lit or blinking.B LED display (blue) Indicates that the laminator is functioning normally whenonly the blue light is lit or blinking.C Operation button Pressing this button when the film is loaded will reset thelaminator settings. When no film cassette is loaded, pressing the button fortwo seconds or longer starts the cleaning operation. (Thecleaning operation does not start if the heating roller is stillhot.)(A page 21 “Card Feed Roller/Heating Roller”)14
Laminator Status, LED Display and Card Printer’s Operation Panel DisplayInitializingLaminator StatusLED display(red)LED display(blue)Card PrinterOperation PanelDisplayInitializing..Initializing in progressDescriptionPreheatingPreheating..Adjusts the heating roller to the presettemperatureOffBlinkingLow temperature standby mode (Slow) Standby In HR Control modePower-saving modeSleeping..Low power consumption standby mode.Operates in conjunction with the card printersettings.Ready Off On Ready Ready for laminating operations.Laminating Off Blinking (Fast) Laminating.. Laminating in progressError modeBlinking(Slow)OffError messageBlinking (Fast) Off Error messageErrors that does not require reboot of thepower, such as insufficient film, film error,cassette not loaded, and card jams.(A page 33 “List of Error Codes”)Errors that require reboot of the power(A page 33 “List of Error Codes”)Roller cleaning in progressBlinking(Slow)Blinking(Slow)Cleaning..Awaiting insertion of the cleaning card, orcleaning is in progress. Returns to the originalstate if a cleaning card is not inserted after aspecific time interval.Download mode On On Download Awaiting download data, or process has endedDownloadingBlinking (Fast) Blinking (Fast) Downloading..Downloading data.Memo: The blinking speed is faster than thatwhen laminating is in progress.Setting Procedures for Laminator Status DisplayYou can display the laminator status on the operation panel of the card printer.1 Press IEnter the setting mode.R e a d yTo t a lReset* Menu * *4 Press GA [Mode] message appears.>>D i s p l a y >ExitEnterNext2 Press J to set to [Setting]Pressing it each time displays the next setting item.>C l e a n i n g >Exit Enter Next5 Press FEnter the settings change mode.>>>M o d eExitC o u n t e rChange Next3 Press GA [Display] message appears.>S e t t i n g >Exit Enter Next6 Press A and select [Laminator State]7 Press B to confirm the settingPressing B confirms the setting and returns youto the previous screen.8 Press H to exit the setting modePressing it each time displays the setting item of thenext higher level.15
Operating the LaminatorChecking the Laminator SettingsSettings can be viewed on the card printer’s operationpanel.Settings can be changed on the status monitor of thecomputer that is connected to the card printer.1 Press IEnter the setting mode.R e a d yR e a d yResetMenu2 Press J to set to [Laminator]Pressing it each time displays the next setting item.>C l e a n i n g >ExitEnterNext3 Press GA [Mode] message appears.Pressing J each time displays the next settingitem and its current setting.>L a m i n a t o r >ExitEnterNext4 After checking is complete press H to exitthe setting modePressing it each time displays the setting item of thenext higher level. SettingsLaminatorMode: Laminate, PassSet to [Laminate] to perform laminating.Set to [Pass] if you do not want to laminate.Cassette: None, BottomThe load status for the film cassette appears.Film-T:Feature is unavailable on this unit.Film-B: Patch, OverlayFor selecting the film to be used.Film-T Pos:Feature is unavailable on this unit.Film-B Pos:-7, -6, -5, -4, -3, -2, -1, 0, 1, 2, 3, 4, 5, 6, 7For setting the patch position for the moving direction.HR-T Temp:Feature is unavailable on this unit.HR-B Temp:90 degC to 180 degC (in increments of 5 degC)Set the temperature for the heating roller.(The temperature may be 185 degC or higherdepending on the firmware version of the card printer.However, in this case, the temperature for the heatingroller remains at 180 degC.)Speed: 3.0 mm/s to 12.0 mm/s(in increments of 0.5 mm/s)For setting the card feed speed during lamination.Cooling Time: 0sec, 5sec, 7sec, 10sec, 15sec, 20sec,30secFor setting the standby time for cooling down the cardimmediately before lamination starts.HR Control: Off, OnFor setting the low temperature standby mode. Thissetting works simultaneously with the card printersetting. For setting whether to standby the laminator bylowering the heating roller temperature if cards are notprinted for 30 minutes or longer.This is always set to [On] automatically when overlayfilm is selected.(Regardless of the setting, turn off the heating rollerand standby the laminator if you will not be performingcard printing for a long time.)CountDisplays the number of laminations performed after thelast roller cleaning. This number is reset to 0 each timeroller cleaning is performed. Factory SettingsItemFactory SettingsModeFilm-BLaminatePatchFilm-B Pos 0HR-B TempSpeedCooling Time140 degC12.0 mm/s0secCount 016
InitializingTurning On the PowerPerforming the operations below will reset the laminatorsettings. Thereafter, when the heating roller is adjustedto the preset temperature, a [Ready] message will bedisplayed and laminating can be performed.1 Check to ensure that the card printer and laminatorare properly connected2 Turn on the power of the laminatorTurning On the PowerTurning on the power when the laminate film is loaded willreset the laminator settings.Closing the Laminator DoorClosing the laminator door when the laminate film isloaded will reset the laminator settings.Loading a patch film will forward the laminate film by oneimage and reset the laminator settings.3 Turn on the power of the card printerPressing the Operation ButtonPressing the operation button when the laminate film isloaded will reset the laminator settings.Loading a patch film will forward the laminate film by oneimage and reset the laminator settings.Cautions:Turn on the power for the laminator first. If the power forthe card printer is turned on first, the card printer may notrecognize the laminator.Do not interrupt the laminator when laminating is inprogress. Doing so may cause cards to adhere to theinterior of the laminator, thus causing it to malfunction.Make sure to observe the following. Do not open the laminator door Do not turn off the power Do not unplug the power cordCheck the laminator settings before printing.17
Operating the LaminatorTurning Off the Power3 Press IEnter the setting mode.R e a d yD o w n l o a dResetMenu1 Turn off the power of the card printer4 Press J to set to [Download]Pressing the [Next] button each time displays the nextscreen.>C l e a n i n g >ExitEnterNext2 Turn off the power of the laminator5 Press GA [Download Ready] message appears, indicating thatthe card printer is ready to download data from thecomputer.>D o w n l o a d >ExitEnterNext>D o w n l o a dExitR e a d y6 Data download from the computer starts A [Downloading.] message appears. Turn on the power again only after both LED displays ofthe laminator have been turned off.Firmware Update Setting the laminator and card printer to download modeenables you to update the firmware for the laminator byusing a PC through card printer connection.1 Press and hold down the operation button, and turnon the power at the same time Both the LED displays are lit.D o w n l o a d i n g . .K e e p P o w e r O nCautions:It takes time to download the data.Do not turn off the power during data download from thecomputer. Doing so may damage the laminator firmwareand cause malfunction.A [Download Ready] message appears when datadownload from the computer is complete.>D o w n l o a dExitR e a d y7 Press H when [Download Ready] is displayed8 Turn off the power for the card printer when [PleasePower Off] is displayed9 Turn off the power of the laminatorThe firmware is updated after the power is turned on again.2 Turn on the power of the card printer18 When download fails and the laminatorcannot start up Update the firmware again.
ReplacementLaminate Film3 Press and hold down the cassette button, and pullout the film cassetteCautions:If the security lock of the card printer is on, deactivate it.After work is complete, activate the security lock again.For details on locking/unlocking the security lock, refer tothe manual of the card printer.Stand the film cassette on a flat surface. Avoid doing soon a floor as dust attached to the film may cause pooradhesion or malfunction.A film cassette that has laminate film attached on it isheavy. Hold the film cassette with both hands to avoiddropping when working with it.Make sure that the laminate film is attached in the rightdirection. Otherwise, film detection error may occur.A film detection error occurs if the attached laminate filmdoes not coincide with the [Film Type] setting.1 Open the laminator door4 Remove the laminate film from the film cassette5 Attach the tip of the new laminate film to the bobbinA Place the new laminate film and the take-up bobbin sideby side on a clean and flat platform.B Attach the tip of the new laminate film to the take-up bobbinusing the fixing tape.Use the fixing tape after peeling offthe adhesive label of the laminatefilm.2 Remove any slack in the laminate film Turn the knob on the film cassette in the directionindicated by the arrow.Cautions:Attach the laminate film to the take-up bobbin such thatthey are parallel to each other.Otherwise, it may result in poor adhesion or cause filmdetection errors.19
Replacement6 Install the new laminate film on the film cassette Install while referring to the indication on the label ofthe cassette.8 Insert the film cassette all the way in along theguide rail until a “click” sound is heard, and closethe laminator doorA Insert the supply side of the film into the bobbin holder(patch position adjustment mechanism attached).B Unwind the laminate film along the film guides, and insertthe take-up side into the bobbin holder.Cautions:Make sure to insert the film cassette all the way in untila “click” sound is heard. Failure to do so may result indefective patch or card jam. When the laminate film runs out duringcontinuous card printingA [Retransfer] message is displayed on the card printerand the unit remains in the standby state until thelaminator switches to the Ready mode.A Wind the film twice around the take-up side.7 Remove any slack in the laminate filmCard printing resumes automatically after exchanging thelaminate film with a new one.As the card is still left inside the card printer, check toensure that the operation of the card printer has come to acomplete stop, followed by turning off the power.Open the printer door, and remove the retransfer filmcassette. Align the film side of the unused portion with thearrow indicated on the cassette label.Restore the retransfer film cassette to the original position,close the printer door, and turn on the power of the cardprinter. Reset starts, and the card is discharged from thecard printer.20
MaintenanceFilm residue and dust may cause lamination defects ifthey are accumulated inside the laminator. Clean all partsregularly.2 Press and hold down the cassette button, and pullout the film cassetteCautions:After cleaning is complete, check to ensure that alldismantled parts are restored to their original positions.Failure to restore the parts may result in malfunction of thelaminator. Request for routine servicing In order to prevent printing errors and malfunctions fromoccurring in advance, please request for routine servicingby the servicing personnel. For details on servicing, pleaseconsult our authorized dealers.Card Feed Roller/HeatingRollerCards may jam easily if the card feed roller is dirty.Clean the roller after laminating about 1,000 cards.Cautions:If the security lock of the card printer is on, deactivate it.After work is complete, activate the security lock again.For details on locking/unlocking the security lock, refer tothe manual of the card printer.Stand the film cassette on a flat surface. Avoid doing soon a floor as dust attached to the film may cause pooradhesion or malfunction.A film cassette that has laminate film attached on it isheavy. Hold the film cassette with both hands to avoiddropping when working with it.Each cleaning card can only be used once. Reusing adirty card may dirty the roller or cause the laminator tomalfunction. For details on the cleaning card, pleaseconsult our authorized dealers.Cleaning cannot be performed while the heating roller isstill hot. Turn off the power, and perform cleaning after ithas cooled down.3 Close the laminator door, and turn on the power ofthe laminatorThe LED display (red) starts blinking.4 Remove the retransfer film cassette (left) from thecard printer, close the printer door, and remove thecard hopper5 Turn on the power of the card printer, and set it tothe card feed roller/heating roller cleaning modeFor details on cleaning of the card printer’s card feedroller/heating roller, refer to the manual of the cardprinter.6 Peel off the backing paper from the cleaning card(sold separately) Cleaning the laminator together with thecard printer1 Open the laminator door21
Maintenance7 Insert the cleaning card (sold separately) into thecard cleaner Cleaning the laminator alone1 Open the laminator doorThe cleaning card is discharged from the card outlet ofthe laminator.2 Press and hold down the cassette button, and pullout the film cassette8 Reverse the adhesive face of the cleaning card,and insert it into the card printer againThe cleaning card is discharged from the card outlet ofthe laminator.9 Open the laminator door10 Insert the film cassette all the way in along theguide rail until a “click” sound is heard, and closethe laminator door3 Close the laminator door, and turn on the power ofthe laminator The LED display (red) starts blinking.4 Press the operation button for two seconds orlongerThe cleaning process starts.Cautions:Make sure to insert the film cassette all the way in untila “click” sound is heard. Failure to do so may result indefective patch or card jam.Cautions:The cleaning operation does not start if the heating rolleris still hot. Turn off the power, and perform cleaning afterthe heating roller has cooled down completely.22
5 Peel off the backing paper from the cleaning card(sold separately)9 Insert the film cassette all the way in along theguide rail until a “click” sound is heard, and closethe laminator door6 Insert the cleaning card (sold separately) into thecard outlet of the laminatorThe card is drawn in by the roller. Cleaning startsautomatically, and is discharged from the card outlet.Cautions: Make sure to insert the film cassette all the way in untila “click” sound is heard. Failure to do so may result indefective patch or card jam.7 Press the operation button again for two secondsor longer, reverse the adhesive face of the cleaningcard, and insert it into the card outlet The cleaning card is discharged from the card outlet ofthe laminator.8 Open the laminator door23
OPTIONOPTIONMaintenanceFan Filter4 Set the fan filterCautions:Start work after ensuring that the power has been turnedoff.Replace the fan filter with a new one after using it forabout one year. For details on its replacement, pleaseconsult our authorized dealers.5 Set the filter cover1 Remove the filter cover at the back of the laminatorINLETINLET2 Remove the fan filter3 Remove any dirt that is attached to the fan filterusing a vacuum cleanerCautions:Hold down the fan filter to avoid it from been sucked intothe vacuum cleaner.24
Film Cassette3 Press and hold down the cassette button, and pullout the film cassetteDue to the characteristics of the patch film, residues at theback of the laminate film may be attached to the film guideof the film cassette. Residues on the adhesive face of thelaminate film may result in poor adhesion. When replacingthe laminate film, check to ensure that no residues areattached to the film guides.Cautions:If the security lock of the card printer is on, deactivate it.After work is complete, activate the security lock again.For details on locking/unlocking the security lock, refer tothe manual of the card printer.Stand the film cassette on a flat surface. Avoid doing soon a floor as dust attached to the film may cause pooradhesion or malfunction.A film cassette that has laminate film attached on it isheavy. Hold the film cassette with both hands to avoiddropping when working with it.4 Remove the laminate film from the film cassette5 Apply alcohol to a rag that does not produce linteasily (such as a cleaning wipe)6 Wipe the four film guidesFilm Guides1 Open the laminator door2 Remove any slack in the laminate film Turn the knob on the film cassette in the directionindicated by the arrow.Cautions:Perform cleaning at a location away from the laminator sothat residues do not enter the unit.7 Install the laminate film on the film cassette8 Remove any slack in the laminate film9 Insert the film cassette all the way in along theguide rail until a “click” sound is heard, and closethe laminator doorCautions:Make sure to insert the film cassette all the way in untila “click” sound is heard. Failure to do so may result indefective patch or card jam.25
MaintenanceInterior of Laminator3 Remove any slack in the laminate film Turn the knob on the film cassette in the directionindicated by the arrow.Dirt during card feed or burrs caused by friction betweenthe bobbin holder and bobbin may adhere to the card orfilm, causing lamination defects as a result.Cautions:Start work after ensuring that the power has been turnedoff.If the security lock of the card printer is on, deactivate it.After work is complete, activate the security lock again.For details on locking/unlocking the security lock, refer tothe manual of the card printer.Stand the film cassette on a flat surface. Avoid doing soon a floor as dust attached to the film may cause pooradhesion or malfunction.A film cassette that has laminate film attached on it isheavy. Hold the film cassette with both hands to avoiddropping when working with it.4 Press and hold down the cassette button, and pullout the film cassette1 Open the laminator door2 Remove the dummy cover Press down the top of the triangle mark to remove thedummy cover.5 Apply alcohol to a cotton swab (large), and use it towipe the bobbin holder (x2)(Cotton swab and alcohol: sold separately)Bobbin holder26
6 Apply alcohol to a cotton swab (large), and use it towipe the guide rail (x2) at the back9 Remove any slack in the laminate filmCautions:Do not touch the sensor and other parts inside thelaminator. Doing so may cause the unit to malfunction.10 Insert the film cassette all the way in along theguide rail until a “click” sound is heard, and closethe laminator door7 Apply alcohol to a cotton swab (small), and use itto wipe the guide rail (x2) in frontCautions: Make sure to insert the film cassette all the way in untila “click” sound is heard. Failure to do so may result indefective patch or card jam.8 Install the dummy cover27
TroubleshootingCard Jam3 Remove the dummy cover Press down the top of the triangle mark to remove thedummy cover.Use the jog dial to remove the card. Make use of the jogdials that are supplied with the card printer.Cautions:If the security lock of the card printer is on, deactivate it.After work is complete, activate the security lock again.For details on locking/unlocking the security lock, refer tothe manual of the card printer.Stand the film cassette on a flat surface. Avoid doing soon a floor as dust attached to the film may cause pooradhesion or malfunction.A film cassette that has laminate film attached on it isheavy. Hold the film cassette with both hands to avoiddropping when working with it.4 Remove any slack in the laminate film1 Check the position of the jammed card You can identify the position from the operation paneldisplay of the card printer or the status monitor of thecomputer that is connected to the card printer. In the case of [Jam (In)], the card is automaticallydischarged when the laminator is reset. If the card isnot discharged automatically, remove them by followingthe steps below. Do not reset the laminator in cases of [Jam (Middle)]and [Jam (Out)]. Remove them by following the stepsbelow.2 Open the laminator door5 Press and hold down the cassette button, and pullout the film cassetteCautions:The cassette may be difficult to pull out if the card isattached onto the laminate film. In this situation, pull outthe cassette slowly to avoid dropping the laminate filmfrom the film cassette while taking note of any slack on thefilm.6 Remove the jog dial from the card printer28
7 Attach the jog dial to the jog dial insertion slot11 Remove any slack in the laminate filmIf the film is entangled, refer to (A page 30 “Film isEntangled”).8 Turn the jog dial in the anti-clockwise direction12 Insert the film cassette all the way in along theguide rail until a “click” sound is heard, and closethe laminator doorThe card is discharged from the card outlet.Cautions:Make sure to insert the film cassette all the way in untila “click” sound is heard. Failure to do so may result indefective patch or card jam.9 Restore the jog dial to its original position10 Install the dummy cover29
TroubleshootingFilm is Entangled3 Remove any slack in the laminate filmWhen the film cassette is taken out and the film isentangled due to the laminate film been peeled off fromthe film cassette or card jams, use the methods below tountangle and reattach the film.Cautions:If the security lock of the card printer is on, deactivate it.After work is complete, activate the security lock again.For details on locking/unlocking the security lock, refer tothe manual of the card printer.Stand the film cassette on a flat surface. Avoid doing soon a floor as dust attached to the film may cause pooradhesion or malfunction.A film cassette that has laminate film attached on it isheavy. Hold the film cassette with both hands to avoiddropping when working with it.4 Insert the film cassette all the way in along theguide rail until a “click” sound is heard, and closethe laminator door If the laminate film is not damaged1 Install the new laminate film to the film cassette Install while referring to the indication on the label ofthe cassette. If the laminate film is damaged1 Cut away the damaged portion using a pair ofscissors2 Turn the take-up side using your hand to take upthe used portion of the film2 Insert the supply side of the film into the bobbinholder (patch position adjustment mechanismattached), and the take-up side into the bobbinholder30
-13 Attach the unused portion at the supply side to theother end at the take-up side using an adhesivetape, while making sure that the joint surface is evenMisaligned Patch PositionThe patch position may vary slightly with respect to thecard depending on the type of film used and the differentmethods used during the manufacturing process. If thepatch position is not properly aligned, adjust it accordingly.4 Turn the take-up side using your hand until thebroken portion can no longer be seen If patch position is displaced to the left/right You can adjust the settingon the status monitor of theLeftRight computer that is connected tothe card printer.Cautions:Setting the patch position to a position beyond the edge ofthe card may result in card jams. Make sure to adjust thepatch position nearer to the center of the card.5 Remove any slack in the laminate film6 Insert the film cassette all the way in along theguide rail until a “click” sound is heard, and closethe laminator door If patch position is displaced to the front/backBack Turning the patch positionadjustment mechanism of thefilm cassette enables you toadjust the patch position to thefront or back by 0.25 mm. The maximum displacement ofthe patch position adjustmentmechanism is ±1 mm from thestandard position. Adjust the scale in the +direction to move the patchFrontposition to the back. Adjust the scale in the -direction to move the patchposition to the front.-0.50+0.5+1Cautions: Make sure to insert the film cassette all the way in untila “click” sound is heard. Failure to do so may result indefective patch or card jam.Cautions:Apply the above procedures if there is significantmisalignment in the patch position.Do not rotate the patch position adjustment mechanismover ±1 mm. Doing so may damage it.31
TroubleshootingCard WarpageDuring laminating, heating by the heating roller may cause warpage in cards with a low heat resistance, such as PVC ones. If card is significantly warped Lowering the temperature or increasing the speed helps to reduce the heat load on the card, thus causing less warpage. Alterthe temperature and speed gradually while making sure that the adhesiveness is not affected. Settings can be changed on the status monitor of the computer that is connected to the card printer.Laminating Condition SettingsCautions:If cards with low heat resistance are used, applying a large heat load at once causes the card to deform significantly, and thismay in turn cause card jam inside the laminator unit. Alter the temperature and speed gradually.Reimbursement will not be done for poor adhesion or card warpage. For more information about the card, please consult ourauthorized dealers and evaluate the settings. Setting example for double-sided printing (Heat-resistant PET-G card)Double-sided printing and single-sided laminationLaminatorILM-LSCard PrinterXID8300Film 1mil 0.6mil OverlayAmbient Condition Temperature 15 °C ~ 28 °C 15 °C ~ 30 °C 15 °C ~ 30 °CRetransferSettingsHumidity 35 % ~ 60 % 35 % ~ 70 % 35 % ~ 70 %Temperature 170 °C 155 °C 125 °CSpeed 5.0 mm/s 12.0 mm/s 5.0 mm/sCooling Time0 secTemperature Level +2 +2 +2Speed (Front) 0 0 0Speed (Back) +2 +2 +2Bend Remedy Temperature Level Off Off Off Setting example for single-sided printing (Heat-resistant PET-G card)Single-sided printing and single-sided laminationLaminatorILM-LSCard PrinterXID8300Film 1mil 0.6mil OverlayAmbient Condition Temperature 15 °C ~ 28 °C 15 °C ~ 30 °C 15 °C ~ 30 °CRetransferSettingsHumidity 35 % ~ 60 % 35 % ~ 70 % 35 % ~ 70 %Temperature 170 °C 160 °C 130 °CSpeed 10.0 mm/s 12.0 mm/s 5.0 mm/sCooling Time0 secTemperature Level +2 +2 +2Speed (Front) 0 0 0Speed (Back) +2 +2 +2Bend Remedy Temperature Level Off Off Off32
List of Error Codes LED displays and error codes The error codes are displayed on the operation panel of the card printer as well as the status monitor of the computer that isconnected to the card printer.LEDdisplay(red)LEDdisplay(blue)Error Code Error Content ActionsJam(In) 50Card jam near the card feed port. Check to ensure that the laminator is properlyconnected to the card printer. ( A Page 11 “CardPrinter Connection”) Remove the jammed card. ( A Page 28 “Card Jam”)Jam (Middle) 51Jam(Out) 52Card jam near the heating roller.Card jam near the card outlet. The temperature of the heating roller may be toohigh, or the card transfer speed may be too slow. Fordetails on the optimal settings, please consult ourauthorized dealers. Remove the jammed card. ( A Page 28 “Card Jam”)Blinking(Slow)Light offFilm-B RunOut 54Film-B Search 56The laminate film has run out.The laminate film cannot bedetected. Replace the laminate film with a new one.(A page 19 “Laminate Film”) Check to ensure that the laminate film is correctlyset. Check to ensure that the type of laminate film in useand the settings are appropriate.Film-B Search 58The laminate film cannot bedetected. Check to ensure that the laminate film is correctlyset.Door Open 59 The laminator door is open. Close the laminator door.No Cassette 5A Film cassette is not inserted. Insert the film cassette.33
TroubleshootingLEDdisplay(red)LEDdisplay(blue)Error Code Error Content ActionsThermostat 60The thermostat is faulty.HR-B Overheat 62Heating roller temperature error.(temperature is too high)Overheat-B 64Heater-B 66Internal temperature error.(temperature is too high)The heater is faulty. Turn off the power and turn it on again. If the sameproblem occurs, consult our authorized dealers orservicing personnel.Thermistor-B 68The heating roller thermistor isfaulty.Blinking(Fast)Light offCam-B 6COvercool 6DHeating roller pressing operationerror.Internal temperature error.(temperature is too low)The operating ambient temperature is too low. Usethe laminator within the prescribed range. Whenstarting up the laminator in a low temperatureenvironment, the temperature of the interior mayremain low even though the surrounding temperaturehas gone up. Turn on the power again after waitingfor about one hour.Supply ENC-B 6FWind ENC-B 71Supply side motor encoder (rotationdetection) error.Take-up side motor encoder(rotation detection) error. Turn off the power and turn it on again. If the sameproblem occurs, consult our authorized dealers orservicing personnel.Other Error 7DOther errors- - COM ErrorA communication error has occurredbetween the card printer and thelaminator.The power of the laminator is off.Or, there was an misalignmentin the positions of the laminatorand the card printer and thuscommunication cannot take place. Turn on the power for the laminator. Or fit thelaminator and card printer to the unit connectionadapter properly. Error during continuous card printing If an error occurs on the laminator unit during continuous card printing, a [Retransfer] message is displayed on the card printerand the unit remains in the standby state until the laminator switches to the Ready mode after recovering from the error. For details on the methods of error recovery, refer to the “List of Error Codes”.Cautions:Do not turn off the power of the card printer or open the printer door until the [Retransfer] message appears on the card printerand its operation comes to a complete stop. Recover the error on the laminator. Card printing resumes automatically when recovery is complete and after the laminatorswitches to the Ready mode.Cautions:Card printing will not resume if the power of the card printer is turned off or when the printer door is opened. Recover the error on the laminator. As the card is still left inside the card printer, check to ensure that the operation of the card printer has come to a completestop, followed by turning off the power.Open the printer door, and remove the retransfer film cassette. Align the film side of the unused portion with the arrowindicated on the cassette label.Restore the retransfer film cassette to the original position, close the printer door, and turn on the power of the card printer.Reset starts, and the card is discharged from the card printer.34
Digital Identification Solutions AGTeckstrasse 5273734 EsslingenGermanyPhone: + 49 711 341 689 - 0Fax: + 49 711 341 689 - 550Email: support@digital-identification.comDigital Identification Solutions Pte. Ltd.#03-01 Hiangkie Industrial Building IV27 Woodlands Industrial Park E1Singapore 757718Phone: + 65 6352 8364Fax: + 65 6352 8365Email: support@sg.digital-identification.comDigital Identification Solutions (Branch)Unit E-20, Dubai Airport Free ZoneP.O. Box 5 46 68Dubai, United Arab EmiratesPhone: + 971 4 299 4146Fax: + 971 4 299 4147Email: support@uae.digital-identification.comDigital Identification Solutions (Beijing) Co. Ltd.Lonsdale Center C207, No. 5 Wanhong RoadChaoyang District, Beijing, 1 00015P.R. ChinaPhone: + 86 10 6437 4376Fax: + 86 10 6433 1278Email: support@cn.digital-identification.comDigital Identification Solutions S. de R.L. de C.V.Parque Industrial Benito JuárezAcceso II, No. 5, Bodega No. 1Querétaro, Qro, C.P. 76130MéxicoPhone: + 52 442 2171 768 - 0Fax: + 52 442 2171 768 - 10Email: support@mx.digital-identification.comDigital Identification Solutions LLC111 Kiowa LanePiedmont, SC 29673United States of AmericaPhone: + 1 864 272 1199Fax: + 1 770 234 5798Email: support@us.digital-identification.comvps ID Systems <strong>GmbH</strong>Carl-Zeiss-Strasse 276275 EttlingenGermanyPhone: + 49 7243 5488 - 0Fax: + 49 7243 5488 - 11Email: info@vps.dewww.digital-identification.comCopyright 2010 Digital Identification Solutions Group. All rights reserved. Information in this document is subject to change without prior notice.IDExpert® and EDIsecure® are registered trademarks of Digital Identification Solutions AG. All other trademarks, tradenames, service names are trademarks or registered trademarks oftheir respective owners.LST1100-001C


