GX65 Owner's Manual - Beltronics
GX65 Owner's Manual - Beltronics
GX65 Owner's Manual - Beltronics

You also want an ePaper? Increase the reach of your titles
YUMPU automatically turns print PDFs into web optimized ePapers that Google loves.
Owner’s <strong>Manual</strong><br />
BELTRONICS<br />
5442 West Chester Road<br />
West Chester OH 45069-2950<br />
800.341.2288<br />
www.beltronics.com<br />
©2008 <strong>Beltronics</strong> Inc.<br />
Manufactured and Printed in Canada<br />
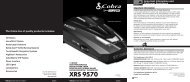
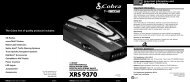
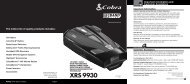
BELTRONICS Pro <strong>GX65</strong><br />
Features, specifications and prices subject to change without notice.<br />
R A D A R / L A S E R / S A F E T Y C A M E R A / D E T E C T O R
Congratulations<br />
You’ve just purchased the most sophisticated<br />
radar and laser detector in the world—the<br />
BELTRONICS Pro <strong>GX65</strong>.<br />
The <strong>GX65</strong> delivers the best long-range<br />
warning on all radar bands including X, K,<br />
Superwide Ka, Ku and instant-on POP.<br />
Multiple front and rear laser sensors provide<br />
360 degree laser protection, including the<br />
widest field of view.<br />
For the ultimate in Laser protection, the<br />
BELTRONICS Pro <strong>GX65</strong> can also be used in<br />
conjunction with our Laser Shifter product.<br />
Visit our website at beltronics.com or call us<br />
toll-free at 800.341.2288 for more details.<br />
The BELTRONICS Pro <strong>GX65</strong>’s GPSpowered<br />
technology provides permanent<br />
relief from false alarms including automatic<br />
door openers, motion sensors and other<br />
radar-based sensors. And, it comes preloaded<br />
with thousands of red light and fixed<br />
position speed camera locations throughout<br />
North America. Data for additional countries<br />
are also available. Call or visit our web site<br />
for details.<br />
In addition, the Pro <strong>GX65</strong> introduces<br />
the following state-of-the-art performance<br />
and features:<br />
• New web-ready access allows you to<br />
update your safety camera data and<br />
other software through our website.<br />
• Revolutionary AutoScan mode<br />
provides real-time radar performance<br />
based on vehicle speed, plus Highway<br />
and AutoNoX settings.<br />
• SpeedCheck feature provides an<br />
instant view of your vehicle’s speed<br />
during an alert.<br />
• Mark Location feature allows you to<br />
instantly “Mark” known speed traps,<br />
cameras and other places of interest.<br />
• Easy-to-use Programming allows you<br />
to customize up to 8 features.<br />
• Ultra-bright alphanumeric display<br />
with 280 LEDs.<br />
• Exclusive Threat Display tracks<br />
multiple radar signals and their<br />
relative signal strength.<br />
• Exclusive Tech Display provides<br />
actual numeric frequency for any<br />
radar signal.<br />
• Selectable radar and laser bands (on/<br />
off) allow you to customize which<br />
bands are monitored.<br />
• Selectable Markers (on/off) allow you<br />
to customize which Markers are<br />
monitored.<br />
• Includes exclusive SmartPlug for easy<br />
access to Mute and AlertLock features.<br />
If you’ve used a radar detector before, a<br />
review of the Quick Reference Guide on<br />
pages 4 and 5, and the Programming<br />
information on pages 14-18 will briefly<br />
explain the new features. If this is your first<br />
detector, please read the manual in detail to<br />
get the most out of your BELTRONICS’<br />
revolutionary performance and innovative<br />
features.<br />
Please drive safely.<br />
Remove card along perforations <br />
Quick Reference Card<br />
Remove card along perforations <br />
BELTRONICS Pro <strong>GX65</strong> Quick Reference Card<br />
There are 8 user-selectable options so you<br />
can customize your Pro <strong>GX65</strong> for your own<br />
Programming.<br />
The buttons labeled “MRK” and “BRT”<br />
are also used to enter the Programming<br />
Mode, REVIEW your current Programming<br />
settings, and to CHANGE any settings as<br />
desired. The words “PGM,” “MRK” and “BRT”<br />
are located on the top of the detector.<br />
How to use EZ-Programming<br />
1 To enter Programming, press and<br />
hold the “MRK” and “BRT” buttons<br />
down for 2 seconds. The unit will beep<br />
twice, and display the word Program.<br />
2 Then press the “BRT” button to<br />
review the categories. You can either<br />
tap the button to change categories, or<br />
simply hold the button down to scroll<br />
through the categories.<br />
3 Press the “MRK” button to change<br />
any setting. You can either tap the<br />
button to change from setting to setting,<br />
or hold the button down to scroll through<br />
all the options.<br />
4 To exit Programming, simply wait 8<br />
seconds without pressing any button,<br />
or press the power button. The unit will<br />
display Complete, beep and return to<br />
normal operation.<br />
An example:<br />
Here is how you would turn <strong>GX65</strong>’s<br />
AutoMute feature off:<br />
1 Enter Programming by holding both<br />
the “MRK” and “BRT” buttons down for 2<br />
seconds. <strong>GX65</strong> will beep and display<br />
Program.<br />
2 Then hold the “BRT” button down.<br />
The <strong>GX65</strong> will scroll through the categories,<br />
starting with Pilot (Pilot), then<br />
SpeedCheck (spdck), then Signal Strength<br />
Meter (Meter), then AutoMute (aMute).<br />
3 Release the “BRT ” button when the<br />
<strong>GX65</strong> displays the AutoMute item.<br />
Since the factory setting is for AutoMute to<br />
be on, <strong>GX65</strong>will display aMute ON.<br />
Note: If you accidentally don’t release the<br />
“MRK” button in time, and the <strong>GX65</strong> goes to<br />
the next category, simply hold the “MRK”<br />
button down again, the <strong>GX65</strong> will scroll<br />
through all of the categories. Once you’re<br />
back to your desired category, release the<br />
“MRK” button.<br />
4 Press the MRK ” button to change from<br />
aMute ON to aMute OFF.<br />
5 To exit Programming, simply wait 8<br />
seconds without pressing any buttons, or<br />
press the power button. The <strong>GX65</strong> will<br />
display Complete, beep and return to<br />
normal operation.<br />
1<br />
Restoring the Factory Default Settings<br />
To restore your <strong>GX65</strong> to its original<br />
factory settings, press and hold the<br />
“SEN” and “BRT” buttons while turning<br />
the power on. A Reset message will<br />
be displayed, accompanied by an<br />
audible alert, acknowledging the reset.<br />
Programming Details
Quick Reference Card<br />
Table of Contents<br />
BELTRONICS Pro <strong>GX65</strong> Quick Reference Card<br />
Press the BRT button to go<br />
from one category<br />
to the next<br />
PILOT LIGHT<br />
(Power-on indication)<br />
SPEEDCHECK<br />
SIGNAL STRENGTH METER<br />
AUTOMUTE<br />
* Factory Default Settings<br />
Remove card along perforations <br />
UNITS<br />
VOICE<br />
BANDS<br />
MARKERS<br />
Pilot HWY<br />
Pilot H<br />
Pilot V<br />
Pilot SPD<br />
Spdck ON<br />
Spdck OFF<br />
Meter STD<br />
Meter THT<br />
Meter TEC<br />
aMute ON<br />
aMute OFF<br />
Units ENG<br />
Units MET<br />
Voice ON<br />
Voice OFF<br />
Bands DFT<br />
Bands MOD<br />
Press the MRK button<br />
to change your setting<br />
within a category<br />
* Full word: Highway or AutoScan<br />
Letter: H or A or ANX<br />
Vehicle voltage<br />
Vehicle speed<br />
* Displays current speed during alert<br />
SpeedCheck feature off<br />
* Standard signal strength meter<br />
Threat Display mode<br />
Tech Display mode<br />
* Automatically reduces audio in alert<br />
AutoMute feature is off<br />
* Speed/distance in English units<br />
Speed/distance in Metric units<br />
* Voice announcements on<br />
Voice announcements off<br />
* Default settings<br />
Bands have been modified<br />
Turn bands on/off by<br />
pressing the mute button<br />
X ON or OFF (default is on)<br />
Ku ON or OFF (default is off)<br />
K ON or OFF (default is on)<br />
Ka ON or OFF (default is on)<br />
POP ON or OFF (default is off)<br />
SWS ON or OFF (default is off)<br />
LSR ON or OFF (default is on)<br />
Marks DFT<br />
Marks MOD<br />
rCam ON or OFF (default is on)<br />
sCam ON or OFF (default is on)<br />
sTrap ON or OFF (default is on)<br />
Other ON or OFF (default is on)<br />
Remove card along perforations <br />
2<br />
Quick Reference Guide 4-5<br />
Installation 6-7<br />
• Power Connection 6<br />
• Mounting Location 6<br />
• Windshield Mount 7<br />
Controls and Features 8-13<br />
• Power 8<br />
• Volume Control 8<br />
• Power-on Indication 8<br />
• Mute 8<br />
• AutoMute 8<br />
• AlertLock / GPS Filter 8<br />
• GPS Signal Indicator 9<br />
• Sensitivity (SEN) 9<br />
• Brightness (BRT) 9<br />
• Mark Location (MRK) 10<br />
• Audible Alerts 11<br />
• SmartPlug 11<br />
• Speed Check 12<br />
• Signal Strength Meter 12<br />
• Threat Display 12<br />
• Tech Display 13<br />
• Clearing the Database 13<br />
3<br />
Preferences 14-18<br />
• How to use Programming 14<br />
• Example of Programming 14<br />
• Overview of Programming 15<br />
• Details of Programming 16-18<br />
Technical Details 19-26<br />
• Specifications 19<br />
• Interpreting Alerts 20-21<br />
• How Radar Works 22<br />
• How POP Works 22<br />
• How Laser Works 23<br />
• How Red Light Cameras Work 23<br />
• How Speed Cameras Work 24<br />
• How SWS Works 24-25<br />
• How GPS Works 26<br />
Service 27-33<br />
• Service 27<br />
• Troubleshooting 28-29<br />
• Accessories 30<br />
• Warranty 33
Quick Reference Guide<br />
To begin using your <strong>GX65</strong>, just<br />
follow these simple steps:<br />
1 Plug the small end of the power cord<br />
into the side jack of the detector, and<br />
plug the large end of the power cord<br />
into your car’s accessory socket.<br />
2 Mount your <strong>GX65</strong> on the windshield<br />
using the supplied windshield mount.<br />
3 Press the power button, located on<br />
the top case.<br />
Adjust the volume level by pressing and<br />
holding the “VOL•MUTE” button, also<br />
located on the top case.<br />
Please read the manual to fully understand<br />
<strong>GX65</strong>’s operation and features.<br />
Programming<br />
<strong>GX65</strong> is ready to go, just plug it in and turn<br />
it on. But you can also easily change 8<br />
features for your preferences. Pages 14-18<br />
Mount Slot<br />
Insert the <strong>GX65</strong>’s adjustable Windshield<br />
mount into this slot. Page 7<br />
EasyMount Button<br />
Press the button, and slide the Windshield<br />
Mount into one of its four locking<br />
positions. Page 7<br />
USB Data Port<br />
This allows you to update your database,<br />
(red light and fixed position speed cameras)<br />
and other software from our website.<br />
AlertLock/GPS Filter<br />
Switches AlertLock feature (stored<br />
locations) on or off. Page 8<br />
Power Button<br />
Press this button to turn <strong>GX65</strong> on or off.<br />
Page 8<br />
Sensitivity Button<br />
Switches between Highway, AutoScan<br />
and AutoNoX settings. In general, we<br />
recommend the AutoScan mode. Page 9<br />
Volume Adjustment<br />
Increases or decreases the alert volume.<br />
Radar Antenna and Laser Lens<br />
The rear panel of your <strong>GX65</strong> should have a<br />
clear view of the road ahead. For best<br />
performance, do not mount it directly<br />
behind windshield wipers or<br />
tinted areas. Page 6<br />
Alphanumeric Display<br />
The <strong>GX65</strong>’s display will show Highway,<br />
AutoScan or AutoNoX as its power-on<br />
indication. If you prefer, you can choose<br />
other power-on indications.<br />
Page 16-17<br />
During an alert, the display will<br />
indicate radar band and a precise bargraph<br />
of signal strength. Page 12<br />
NOTE: In the Dark Mode the<br />
display will not light during an alert.<br />
Rear Laser Port<br />
Receives laser signals from behind the<br />
vehicle.<br />
Earphone Jack<br />
Accepts standard 3.5mm mono earphone.<br />
Power Jack<br />
Plug the SmartPlug into this connector.<br />
Page 6<br />
Mark Location<br />
Press to mark a specific location (e.g.<br />
speed trap, etc.). Page 10<br />
Brightness Button<br />
Press to adjust the display brightness.<br />
There are three brightness settings, plus<br />
Dark Mode.<br />
In the Dark Mode, the <strong>GX65</strong>’s display<br />
will remain dark and only the audio will<br />
alert you. Page 10<br />
GPS Signal Indicator<br />
The GPS icon indicates reception of GPS<br />
satellite signals and confirms AlertLock<br />
signal rejection. Page 9<br />
Mute Button<br />
Briefly press this button (next to the<br />
display) to silence the audio for a specific<br />
alert. (The audio will alert you to the next<br />
encounter.) Page 8<br />
4 5
Installation Windshield Mount<br />
Power Connection<br />
To power the <strong>GX65</strong>, plug the small end of<br />
the SmartPlug, (telephone-type connector)<br />
into the modular jack on the <strong>GX65</strong>’s right<br />
side, and plug the lighter plug adapter into<br />
your vehicle’s lighter socket or accessory<br />
socket.<br />
The <strong>GX65</strong> operates on 12 volts DC<br />
negative ground only. The lighter plug<br />
provided is a standard size and will work<br />
in most vehicles. However, some vehicles<br />
may require our optional sleeve to ensure<br />
a snug fit. If so, simply call or visit our<br />
website.<br />
NOTE: depending on your vehicle,<br />
the lighter socket power may either be<br />
continuously on, or it may be switched<br />
on and off with your ignition switch.<br />
Optional power cords<br />
Call or visit our website for our optional<br />
Direct-wire cords.<br />
Mounting Location<br />
WARNING: BELTRONICS cannot<br />
anticipate the many ways the <strong>GX65</strong><br />
can be mounted. It is important that<br />
you mount the <strong>GX65</strong> where it will not<br />
impair your view or present a hazard<br />
in case of an accident.<br />
Where to mount <strong>GX65</strong><br />
For optimum detection performance, we<br />
recommend the following:<br />
• Using the supplied windshield mount,<br />
mount your <strong>GX65</strong> level and high enough<br />
on your front windshield to provide a clear<br />
view of the road ahead. For optimum rear<br />
detection, center the detector between<br />
the driver and passenger.<br />
• Mount the <strong>GX65</strong> away from windshield<br />
wipers, other solid objects, and heavily<br />
tinted areas that might obstruct the radar<br />
antenna or laser lens.<br />
NOTE: In order for the <strong>GX65</strong>’s GPS<br />
based features to work properly, the<br />
top case must have a clear view of the<br />
sky.<br />
Windshield Mount<br />
The <strong>GX65</strong>’s windshield bracket is designed<br />
for unobtrusive and hassle-free mounting.<br />
1 Depress the adjustment button on the<br />
top of the <strong>GX65</strong> (by the word<br />
BELTRONICS) and slide the bracket into<br />
the slot until it is locked into the position<br />
which best fits the angle of your<br />
windshield (there are four settings<br />
available). For extremely horizontal or<br />
extremely sloped windshields, the bracket<br />
can also be bent to the correct angle.<br />
However, we suggest that you do not do<br />
this when the bracket is connected to the<br />
detector.<br />
To ensure that the suction cups<br />
adhere to the windshield firmly, be sure to<br />
keep both your windshield and the<br />
suction cups clean.<br />
2 To adjust the <strong>GX65</strong> on your<br />
windshield, use the EasyMount adjustment<br />
button located on the top of the <strong>GX65</strong>, and<br />
slide <strong>GX65</strong> forward or backward to obtain<br />
a level horizontal position.<br />
Level mounting<br />
When installed and adjusted properly,<br />
the back top edge of the <strong>GX65</strong> should rest<br />
solidly against your windshield.<br />
Facing Down<br />
Facing Up<br />
User’s Tip<br />
You can leave the bracket in place on your<br />
windshield, and easily remove the <strong>GX65</strong><br />
by pressing the adjustment button and<br />
sliding it off the mount. Again, be sure to<br />
position the bracket where it won’t<br />
present a hazard in the event of an<br />
accident.<br />
6 7
Controls and Features<br />
Power<br />
To turn the <strong>GX65</strong> on or off, press the<br />
power button on the top case. When you<br />
turn the <strong>GX65</strong> on, it will provide a double<br />
beep tone, acknowledging it’s ready.<br />
Volume Control (VOL)<br />
To increase or decrease the audio volume,<br />
press and hold the VOL•MUTE button<br />
located on the top case. A sample alert<br />
tone will be generated, along with a<br />
corresponding bar-graph on the display.<br />
Once you have reached your desired<br />
volume level, simply release the button.<br />
This level will be stored in memory.<br />
Power-on Indication<br />
After the <strong>GX65</strong>’s start-up sequence is<br />
complete, the display will show the full<br />
word: Highway, AutoScan or AutoNoX to<br />
indicate which sensitivity mode it is in.<br />
If you prefer, you can select alternate<br />
power-on indicators. See the<br />
Programming section for details.<br />
Mute<br />
The Mute button, located on the <strong>GX65</strong>’s<br />
top panel and SmartPlug, allows you to<br />
silence the audio alert during a radar<br />
encounter. To mute the audio for a specific<br />
signal, briefly press the Mute button. After<br />
that radar encounter has passed, the mute<br />
will automatically reset and the audio will<br />
alert you to the next encounter.<br />
AutoMute<br />
Your <strong>GX65</strong>’s has our patented AutoMute<br />
feature. After the <strong>GX65</strong> alerts you to a<br />
radar encounter at the volume you have<br />
selected, the AutoMute feature will<br />
automatically reduce the volume to a lower<br />
level. This keeps you informed without the<br />
annoyance of a continuous full-volume<br />
alert.<br />
If you prefer, you can turn the<br />
AutoMute feature off. See the Programming<br />
section for details.<br />
AlertLock/GPS Filter<br />
The “GPS” filter button turns the <strong>GX65</strong>’s<br />
GPS-powered AlertLock feature on and off.<br />
(default is on)<br />
To lockout a false alert, press the mute<br />
button (on the top case or on the<br />
SmartPlug) three (3) times during the alert.<br />
Pressing the mute button the first time<br />
will silence the audio. Pressing it a second<br />
time will generate a prompt on the display<br />
that will read: “Lockout” Press it a third<br />
time to confirm that you want to lock this<br />
signal out by location and frequency. A<br />
“Stored” message will be displayed.<br />
Once a signal has been stored, the<br />
detector will reject this signal the next<br />
time you approach this area. You will see<br />
confirmation of this by the GPS indicator<br />
spinning clockwise on the display, which<br />
confirms that the signal is being rejected.<br />
To unlock a signal that has already<br />
been stored, simply press and hold the<br />
mute button while the GPS indicator is<br />
spinning. The display will read: “Unlock”<br />
Press the mute button again to unlock it<br />
from memory.<br />
GPS Signal Indicator<br />
The GPS signal indicator provides a visual<br />
indication that the <strong>GX65</strong> is receiving<br />
satellite data.<br />
NOTE: Satellite reception is<br />
required to get the most out of your<br />
<strong>GX65</strong>. To receive satellite data, the top<br />
of the detector must have a clear view<br />
of the sky. See Mounting Location for<br />
more details.<br />
The GPS indicator will flash on and off<br />
until it receives satellite data. Once<br />
received, the icon will stop flashing and<br />
remain on the display.<br />
The GPS indicator also provides a<br />
visual acknowledgement that the detector<br />
is rejecting a signal that has been stored in<br />
memory using the AlertLock feature.<br />
Once a false alarm has been stored, the<br />
GPS indicator will rotate clockwise,<br />
indicating that it is rejecting that signal.<br />
Sensitivity Switch (SEN)<br />
The “SEN” button selects the <strong>GX65</strong>’s<br />
sensitivity mode. We recommend the<br />
AutoScan mode for most driving.<br />
In the AutoScan mode, the <strong>GX65</strong><br />
provides real-time radar performance<br />
based on your vehicle speed. As your<br />
vehicle speed increases, the radar<br />
sensitivity (X and K-band) is set to<br />
maximum range. As the vehicle speed<br />
decreases, the radar sensitivity (X and K-<br />
band only) is minimized to further reduce<br />
unwanted false alarms. Full sensitivity is<br />
maintained on all other bands.<br />
You can also select conventional<br />
Highway and AutoNoX modes. Highway<br />
mode provides maximum sensitivity on all<br />
bands. AutoNoX is the same as AutoScan<br />
mode with X-band turned off.<br />
Brightness (BRT)<br />
The <strong>GX65</strong>’s BRT button selects the<br />
brightness of its display and keypad. There<br />
are five settings: Minimum (BRT MIN),<br />
Medium (BRT MED), Maximum (BRT<br />
MAX), Auto (BRT AUTO) and Full Dark<br />
(BRT DARK).<br />
Brightness (BRT AUTO) (default)<br />
In this setting, the display and keypad<br />
brightness will automatically adjust based<br />
on the ambient light in the vehicle.<br />
8<br />
9
Controls and Features<br />
BRT Dark (Full Dark Mode)<br />
When you select the Dark mode with the<br />
BRT switch, the display will not show any<br />
visual alerts, (i.e. display or ) when the<br />
<strong>GX65</strong> detects signals. Only the audible<br />
alert will tell you of detected signals.<br />
In this mode, visual alerts can be seen<br />
on the SmartPlug in addition to the audio<br />
alerts on the detector.<br />
Mark Location (MRK)<br />
The “MRK” button allows you to mark a<br />
specific location and label it for future<br />
reference. Once marked, the <strong>GX65</strong> will<br />
provide an alert with an arrow indicating<br />
the direction of the location when you<br />
reach this area again. This can be<br />
extremely useful when there are known<br />
speed traps or camera locations that you<br />
would like to remember.<br />
To mark a particular location, press<br />
the “MRK” button. The display will read:<br />
“Mark” Press the “MRK button again to<br />
assign a label to it. There are four (4)<br />
labels: Red Light, Speed Camera, Speed<br />
Trap and Other.<br />
To scroll through the labels, simply<br />
press the Mute button until you reach the<br />
desired label. Once you’ve selected the<br />
label, press the “MRK” button again to<br />
confirm.<br />
Once marked and assigned a label, the<br />
<strong>GX65</strong> will provide the following alert<br />
distances:<br />
• Red Light Cameras = 250' or 10 seconds<br />
• Speed Cameras = 250' or 10 seconds<br />
• Speed Traps = .5 mile below 55 mph<br />
or 1 mile above 55 mph<br />
• Other = .5 mile below 55 mph<br />
or 1 mile above 55 mph<br />
NOTE: When a location is marked the<br />
first time, you must travel at least one<br />
mile away from it before it will alert<br />
you to it.<br />
To unmark a location, simply press<br />
the “MRK” button when you are<br />
receiving a “marked location” alert. The<br />
display will read “Unmark” Press the<br />
“MRK” again to confirm. The display will<br />
read: “Unmarked.”<br />
Audible Alerts<br />
For Radar signals:<br />
When you encounter radar, a distinct<br />
audible alert will sound and occur faster,<br />
(Geiger-counter-like) as the signal gets<br />
stronger. This allows you to judge the<br />
distance from the signal source without<br />
taking your eyes from the road.<br />
NOTE: If your vehicle is moving<br />
less than 20 mph and you encounter a<br />
radar or laser signal, only a doubletone<br />
(specific to the type of signal) is<br />
used. However, the <strong>GX65</strong>’s meter will<br />
keep you informed of the signal<br />
strength until it has passed or until<br />
you reach a speed above 20 mph.<br />
Each band has a distinct tone for easy<br />
identification:<br />
• X-band = chirp tone<br />
• K-band = buzzing tone<br />
• Ka-band = double-chirp tone<br />
• Ku-band = high pitched buzzing<br />
• POP = same as Ka-band<br />
For Laser and POP signals:<br />
Since laser and POP signals are a<br />
possible threat no matter how weak, the<br />
<strong>GX65</strong> will provide a solid audio alert for<br />
these signals.<br />
SmartPlug<br />
The <strong>GX65</strong>’s power jack uses a telephonetype<br />
connector. This 4-conductor<br />
connector only works with the coiled<br />
SmartPlug (included), or the optional<br />
Direct-wire SmartPlug.<br />
The coiled SmartPlug is a special<br />
power cord that has a power-on indicator<br />
(which only lights up when the <strong>GX65</strong> is<br />
turned on), a bright alert light that warns<br />
of radar or laser, and a convenient mute<br />
button right on the plug. It’s perfect for<br />
any car where reaching the detector’s<br />
mute button on the windshield is a stretch.<br />
For discreet night driving, you can put the<br />
<strong>GX65</strong> in the Dark mode and use the<br />
SmartPlug for your visual alerts. Other<br />
drivers won’t know you have a detector.<br />
An optional Direct-wire SmartPlug is<br />
also available. This version includes a<br />
small display module which can be wired<br />
directly into your electrical system. This<br />
allows the <strong>GX65</strong> to turn on and off with<br />
the ignition when connected to a<br />
switched power source.<br />
For more information or to order, visit<br />
our website at beltronics.com or call us<br />
toll-free at 800.341.2288.<br />
10 11
Controls and Features<br />
Speed Check<br />
The <strong>GX65</strong> ‘s Speed Check feature provides<br />
a visual indication of your vehicle speed<br />
during the first few seconds of an alert.<br />
This allows you to instantly check your<br />
speed without looking at your<br />
speedometer. Speed Check is displayed<br />
regardless of your meter setting.<br />
NOTE: When traveling 15 mph or<br />
less, your speed will not be displayed.<br />
If you prefer, you can turn the Speed<br />
Check feature off. See Programming<br />
for details.<br />
Signal Strength Meter<br />
The <strong>GX65</strong>’s display provides an intuitive<br />
ultra-bright display of signal strength and<br />
text messages. The <strong>GX65</strong>’s standard bargraph<br />
meter provides information on a<br />
single radar signal. If there are multiple<br />
signals present, the <strong>GX65</strong>’s internal<br />
computer will determine which one is the<br />
most important threat to display.<br />
When the <strong>GX65</strong> detects radar, it<br />
displays the band (X, K, Ka, or Ku), and a<br />
precise bar-graph of the signal strength.<br />
When a laser signal is detected, the display<br />
will read “LASER.”<br />
NOTE: If you are operating <strong>GX65</strong><br />
in the Dark mode, the display will not<br />
light when a signal is detected—only<br />
the audio and the flashing alert lamp<br />
on the SmartPlug.<br />
Threat Display<br />
The <strong>GX65</strong>’s Threat Display option is an<br />
advanced display for experienced detector<br />
users. Please use the <strong>GX65</strong> for a few weeks<br />
to get familiar with its other features<br />
before using Threat Display.<br />
To use the Threat Display instead of<br />
the bar graph signal strength meter, you<br />
must select “THT” in the <strong>GX65</strong>’s<br />
Programming (see pages 14-17).<br />
The <strong>GX65</strong>’s Threat Display tracks<br />
detailed information on multiple radar<br />
signals and their signal strength.<br />
Threat Display can help you spot a<br />
change in your normal driving<br />
environment; for example, a traffic radar<br />
unit being operated in an area where<br />
there are normally other signals present.<br />
The Threat Display is actually a<br />
miniature spectrum analyzer. It shows<br />
what band each signal is on and its relative<br />
signal strength.<br />
Ka9 K2 X1<br />
Above is the Threat Display display if the<br />
<strong>GX65</strong> was detecting a strong Ka-band, a<br />
weak K-band, and a weak X-band signal.<br />
As you can see, there are numeric<br />
values indicating the signal strength for<br />
each band.<br />
A few more examples will help you<br />
better see how the Threat Display works.<br />
K9 X1<br />
Here Threat Display shows a strong<br />
K-band signal, and a weak X-band<br />
signal.<br />
Ka1 X9<br />
Here Threat Display shows a weak<br />
Ka-band signal, and a strong X-band<br />
signal.<br />
Threat Display Details<br />
The band designators (X, K, Ka) will<br />
stay on the display for a few seconds after<br />
the signal has passed. This allows you to<br />
see what the unit detected, even on very<br />
brief signals.<br />
Tech Display<br />
The <strong>GX65</strong>’s Tech Display option is also for<br />
the experienced detector user. In this<br />
mode, the <strong>GX65</strong> will display the actual<br />
numeric frequency of the radar signal<br />
being received.<br />
K 24.150<br />
Here Tech Display shows one K-band<br />
signal at 24.150 gigahertz.<br />
NOTE: Even long-time detector<br />
users will require some amount of<br />
time to get familiar with this new level<br />
of information about detected signals.<br />
Clearing The Database<br />
At some point you may want to clear all of<br />
the data in the <strong>GX65</strong>’s database. This<br />
includes everything in the database<br />
including all markers and your AlertLock<br />
locations. In order to do this, simply press<br />
and hold the “SEN”, “BRT” and “MUTE”<br />
buttons while powering the <strong>GX65</strong> on.<br />
Once the “Erase” message appears,<br />
confirm by pressing the GPS button.<br />
12 13
How to use Programming Overview of Programming<br />
There are 8 user-selectable Programming<br />
options so you can customize your <strong>GX65</strong><br />
for your specific driving needs. The<br />
buttons labeled “MRK” and “BRT” are<br />
also used to enter Programming, REVIEW<br />
your current settings, and to CHANGE any<br />
settings as desired. The word PGM is<br />
located on the top of the detector, and is<br />
highlighted in colored graphics. Pages 16-<br />
18 explain each option in more detail.<br />
How to use Programming<br />
1 To enter Programming, press and<br />
hold the “MRK” and “BRT” buttons down<br />
for 2 seconds. The unit will beep and<br />
display the word Program.<br />
2 Then press the “BRT” button to<br />
review the current settings. You can either<br />
tap the button to change from item to item,<br />
or hold the button to scroll through the<br />
items.<br />
3 Press the “MRK” button to change<br />
any setting. You can either tap the button<br />
to change from setting to setting, or hold<br />
the button to scroll through all the options.<br />
4 To exit Programming, simply wait 8<br />
seconds without pressing any button, or<br />
press the power button. The unit will<br />
display Complete, beep and return to<br />
normal operation.<br />
An example<br />
Here is how you would turn <strong>GX65</strong>’s<br />
AutoMute feature off.<br />
1 Enter Programming by holding both<br />
the “MRK” and “BRT” buttons down for 2<br />
seconds. The <strong>GX65</strong> will beep and display<br />
Program.<br />
2 Hold the “BRT” button down. <strong>GX65</strong><br />
will scroll through the categories, starting<br />
with Pilot Light (Pilot), then SpeedCheck<br />
(spdck), Signal strength meter (Meter),<br />
and then AutoMute (aMute).<br />
3 Release the “BRT” button when the<br />
<strong>GX65</strong> shows the AutoMute item. Since the<br />
factory setting is for AutoMute to be on, the<br />
<strong>GX65</strong> will display aMute ON.<br />
If you accidentally don’t release the “BRT”<br />
button in time, and the <strong>GX65</strong> goes to the next<br />
category, simply hold the “BRT” button down<br />
again and the <strong>GX65</strong> will scroll through the<br />
categories.<br />
4 Press the “MRK” button to change from<br />
aMute ON to aMute OFF.<br />
5 To complete choosing your<br />
Programming, simply wait 8 seconds<br />
without pressing any buttons, or press the<br />
power button. The <strong>GX65</strong> will display<br />
Complete, beep and return to normal<br />
operation.<br />
Press the BRT button<br />
to go from one category<br />
to the next<br />
PILOT LIGHT<br />
(Power-on indication)<br />
SPEEDCHECK<br />
SIGNAL STRENGTH METER<br />
AUTOMUTE<br />
UNITS<br />
VOICE<br />
BANDS<br />
* Restoring the Factory Default Settings<br />
To restore your <strong>GX65</strong> to its<br />
original factory settings, press<br />
and hold the “SEN” and “BRT”<br />
buttons while turning the power<br />
on. A Reset message will be<br />
displayed, accompanied by an<br />
audible alert, acknowledging<br />
the reset.<br />
MARKERS<br />
Pilot HWY<br />
Pilot H<br />
Pilot V<br />
Pilot SPD<br />
Spdck ON<br />
Spdck OFF<br />
Meter STD<br />
Meter THT<br />
Meter TEC<br />
aMute ON<br />
aMute OFF<br />
Units ENG<br />
Units MET<br />
Voice ON<br />
Voice OFF<br />
Bands DFT<br />
Bands MOD<br />
Press the MRK button<br />
to change your setting<br />
within a category<br />
* Full word: Highway or AutoScan<br />
Letter: H or A or C or ANX<br />
Vehicle voltage<br />
Vehicle speed<br />
* Displays current speed during alert<br />
SpeedCheck feature off<br />
* Standard signal strength meter<br />
Threat Display mode<br />
Tech Display mode<br />
* Automatically reduces audio during alert<br />
AutoMute feature is off<br />
* Speed/distance in English units<br />
Speed/distance in Metric units<br />
* Voice announcements on<br />
Voice announcements off<br />
* Default settings<br />
Bands have been modified<br />
Turn bands on/off by<br />
pressing the Mute button<br />
X ON or OFF (default is on)<br />
Ku ON or OFF (default is off)<br />
K ON or OFF (default is on)<br />
Ka ON or OFF (default is on)<br />
POP ON or OFF (default is off)<br />
SWS ON or OFF (default is off)<br />
LSR ON or OFF (default is on)<br />
Marks DFT<br />
Marks MOD<br />
rCam ON or OFF (default is on)<br />
sCam ON or OFF (default is on)<br />
sTrap ON or OFF (default is on)<br />
Othr ON or OFF (default is on)<br />
14 15
Details of Programming<br />
Pilot Light (Power-on indication)<br />
PilotHWY (Full word)<br />
In this setting the <strong>GX65</strong> will display<br />
“Highway,” “AutoScan,” or “AutoNoX” as its<br />
power-on indication. (factory default)<br />
Pilot H (Letter)<br />
In this setting, the <strong>GX65</strong> will display “H”<br />
for Highway, “A” for AutoScan and “ANX”<br />
for AutoNoX.<br />
Pilot V (Vehicle voltage)<br />
In this setting, the <strong>GX65</strong> will continually<br />
display “H” for Highway, “A” for AutoScan<br />
and “ANX” for AutoNoX plus the vehicle’s<br />
battery voltage.<br />
NOTE: If the vehicle’s voltage<br />
drops below 10.5 volts, a low voltage<br />
warning is displayed, followed by an<br />
audible alert. A high voltage warning<br />
is also given if the voltage goes above<br />
16.5 volts. The high-voltage warning is<br />
also followed by an audible alert.<br />
Pilot SPD (Vehicle speed)<br />
In this setting, the <strong>GX65</strong> will continually<br />
display “H” for Highway, “A” for AutoScan<br />
and “ANX” for AutoNoX plus the vehicle<br />
speed.<br />
Speed Check<br />
Spdck ON (Speed Check on)<br />
In this setting, your vehicle’s speed will be<br />
displayed for a few seconds during an alert.<br />
After a few seconds, the <strong>GX65</strong> will display<br />
the meter type you have selected, (e.g. bargraph,<br />
Threat Display or Tech Display.<br />
(factory default)<br />
SpdckOFF (Speed Check off)<br />
In this setting, the <strong>GX65</strong> will display the<br />
meter type you have selected.<br />
Signal Strength Meter<br />
MeterSTD (Standard meter)<br />
In this setting, the meter displays the band<br />
of the received signal, and a bar graph<br />
shows the relative signal strength. (factory<br />
default)<br />
MeterTHT (Threat Display)<br />
In this setting, the meter simultaneously<br />
tracks multiple radar signals. It can display<br />
mulitple radar signals and their signal<br />
strength at the same time.<br />
NOTE: The Threat Display feature<br />
is explained in more detail on pages<br />
12-13.<br />
NOTE: Ku band is displayed as an<br />
X-band signal.<br />
NOTE: If a Marker and a real<br />
threat are encountered at the same<br />
time, the display will alternate<br />
between the meter and type of marker<br />
being reported.<br />
MeterTEC (Tech Display meter)<br />
In this setting, the meter displays the<br />
actual numeric frequency of the radar<br />
signal received.<br />
NOTE: The Tech Display feature is<br />
explained in more detail on page 13.<br />
AutoMute<br />
aMute ON (AutoMute on)<br />
In this setting, the <strong>GX65</strong>’s audio alerts will<br />
initially be at the volume you set, but after<br />
a few seconds the <strong>GX65</strong> will automatically<br />
reduce the volume level to keep you<br />
informed, but at a lower audio level.<br />
(factory default)<br />
aMuteOFF (AutoMute off)<br />
In this setting, the <strong>GX65</strong>’s audio alerts will<br />
remain at the volume you set for the<br />
duration of the radar encounter.<br />
Units<br />
Units ENG (Speed measured in<br />
miles per hour)<br />
In this setting, all speed related features<br />
are displayed in miles per hour (MPH).<br />
(factory default)<br />
Units MET (Speed measured in<br />
kilometers per hour)<br />
In this setting, all speed related features<br />
are displayed in kilometers per hour<br />
(KPH).<br />
16 17
Details of Programming<br />
Specifications<br />
Voice Announcements<br />
VoiceON (Voice announcements on)<br />
In this setting, all alerts and instructions<br />
are communicated using a voice<br />
announcement. (factory default)<br />
VoiceOFF (Voice announcements off)<br />
With voice off, normal tones will be used<br />
for alerts.<br />
Bands<br />
BandsDFT<br />
In this setting all radar and laser<br />
frequencies, (with the exception of POP<br />
mode and Ku-band) are monitored. This is<br />
the factory setting, and it is recommended<br />
that you use the <strong>GX65</strong> in this mode.<br />
BandsMOD<br />
In this setting, the <strong>GX65</strong> will warn you<br />
with an audible alert, and associated text<br />
message stating which band has been<br />
modified (i.e. “X OFF”). This warning is<br />
displayed during the start up sequence.<br />
WARNING: Only modify bands if<br />
you are absolutely certain that<br />
there are no traffic radar units<br />
using that specific band in your<br />
area.<br />
Markers<br />
MarksDFT<br />
In this setting, all makers in the database<br />
will be reported as you approach them.<br />
This is the factory setting and it is<br />
recommended that you use the <strong>GX65</strong> in<br />
this mode.<br />
MarksMOD<br />
In this setting, only the selected Markers<br />
will be reported.<br />
NOTE: The <strong>GX65</strong> has plenty of<br />
built in memory to store thousands of<br />
locations. In the rare case that the<br />
database would become 80% full, a<br />
message will appear at start up to let<br />
you know you’re reaching its limit.<br />
Features and Specifications<br />
Operating Bands<br />
• X-band 10.525 GHz ±25 MHz<br />
• K-band 24.150 GHz ±100 MHz<br />
• Ka-band 34.700 GHz ±1300 MHz<br />
• Ku-band 13.450 GHz ±25 MHz (Europe)<br />
• Laser 904nm, 33 MHz bandwidth<br />
Radar Receiver / Detector Type<br />
• Superheterodyne, Varactor-Tuned VCO<br />
• Scanning Frequency Discriminator<br />
• Digital Signal Processing (DSP)<br />
GPS Revceiver<br />
• SiRFstar III<br />
Laser Detection<br />
• Quantum Limited Video Receiver<br />
• Multiple Laser Sensor Diodes<br />
Display Type<br />
• 280 LED Alphanumeric<br />
• Bar Graph, SpeedCheck, Threat Display,<br />
or Tech Display<br />
• 5-Levels of Brightness Control, including<br />
Full Dark Mode<br />
Power Requirement<br />
• 12VDC, Negative Ground<br />
• SmartPlug (included)<br />
Programming<br />
• Power-On Indication<br />
• SpeedCheck<br />
• Signal Strength Meter<br />
• AutoMute<br />
• Units<br />
• Voice Alerts<br />
• Radar / Laser Bands<br />
• Markers<br />
Sensitivity Control<br />
• AutoScan, Highway and AutoNoX<br />
Auto Calibration Circuitry<br />
VG2 Immunity<br />
Dimensions (Inches)<br />
• 1.40" H x 2.90" W x 5.35" L<br />
Patented Technology<br />
BELTRONICS is covered by one or more of<br />
the following patents:<br />
U.S. Patents<br />
7,098,844 6,836,238 6,779,765 6,693,578<br />
6,670,905 6,614,385 6,587,068 6,400,305<br />
6,249,218 6,127,962 6,069,580 5,668,554<br />
5,600,132 5,587,916 5,559,508 5,446,923<br />
5,402,087 5,365,055 5,347,120 5,305,007<br />
5,206,500 5,164,729 5,134,406 5,111,207<br />
5,079,553 5,049,885 5,049,884 4,961,074<br />
4,954,828 4,952,937 4,952,936 4,939,521<br />
4,896,855 4,887,753 4,862,175 4,750,215<br />
4,686,499 4,631,542 4,630,054 4,625,210<br />
4,613,989 4,604,529 4,583,057 4,581,769<br />
4,571,593 4,313,216 D314,178 D313,365<br />
D310,167 D308,837 D296,771 D288,418<br />
D253,752<br />
Canadian Patents<br />
2,337,077 2,330,964 1,295,715 1,295,714<br />
1,187,602 1,187,586<br />
European Patents<br />
1,145,030 1,090,456<br />
Other patents pending.<br />
18 19
Interpreting Alerts<br />
Although the <strong>GX65</strong> has a comprehensive<br />
warning system and this handbook is as<br />
complete as we can make it, only<br />
experience will teach you what to expect<br />
from your <strong>GX65</strong> and how to interpret<br />
what it tells you. The specific type of radar<br />
being used, the type of transmission<br />
Alert<br />
The <strong>GX65</strong> begins to sound slowly, then the<br />
rate of alert increases until the alert becomes<br />
a solid tone. The Signal Meter ramps<br />
accordingly.<br />
The <strong>GX65</strong> emits short alerts for a few<br />
seconds and then falls silent only to briefly<br />
alert and fall silent again.<br />
The <strong>GX65</strong> suddenly sounds a continuous<br />
tone for the appropriate band received. All<br />
segments in the Signal Strength Meter are lit.<br />
A brief laser alert.<br />
The <strong>GX65</strong> receives weak signals. These<br />
signals may be a little stronger as you<br />
pass large, roadside objects. The signals<br />
increase in frequency.<br />
(continuous or instant-on) and the location<br />
of the radar source affect the radar alerts<br />
you receive.<br />
The following examples will give you<br />
an introduction to understanding the<br />
<strong>GX65</strong>’s warning system for radar and laser<br />
alerts.<br />
Explanation<br />
You are approaching a continuous radar<br />
source aimed in your direction.<br />
An instant-on radar source is being used<br />
ahead of you and out of your view.<br />
An instant-on radar source or laser source is<br />
being used nearby. This kind of alert<br />
requires immediate attention!<br />
Laser is being used in the area. Because laser<br />
is inherently difficult to detect, any laser<br />
alert may indicate a source very close by.<br />
A moving patrol car with continuous radar is<br />
overtaking you from behind. Because these<br />
signals are reflected (reflections are<br />
increased by large objects), they may or may<br />
not eventually melt into a solid point even<br />
when the patrol car is directly behind you.<br />
Alert<br />
The <strong>GX65</strong> alerts intermittently. Rate and<br />
strength of alerts may be consistent or vary<br />
wildly.<br />
The <strong>GX65</strong> alerts intermittently. Rate and<br />
strength of signal increases with each alert.<br />
The <strong>GX65</strong> gives an X-band alert<br />
intermittently.<br />
Explanation<br />
A patrol car is travelling in front of you with<br />
a radar source aimed forward. Because<br />
signals are sometimes reflected off of large<br />
objects and sometimes not, the alerts may<br />
seem inconsistent.<br />
A patrol car is approaching from the other<br />
direction, sampling traffic with instant-on<br />
radar. Such alerts should be taken seriously.<br />
You are driving through an area populated<br />
with radar motion sensors (door openers,<br />
burglar alarms, etc.). Since these<br />
transmitters are usually contained inside<br />
buildings or aimed toward OR away from<br />
you, they are typically not as strong or<br />
lasting as a real radar encounter.<br />
CAUTION: Since the characteristics<br />
of these alerts may be similar to<br />
some of the preceding examples,<br />
over-confidence in an unfamiliar<br />
area can be dangerous. Likewise, if<br />
an alert in a commonly traveled<br />
area is suddenly stronger or on a<br />
different band than usual, speed<br />
radar may be set up nearby.<br />
The <strong>GX65</strong> alerts slowly for awhile and then<br />
abruptly jumps to a strong alert.<br />
You are approaching a radar unit concealed<br />
by a hill or an obstructed curve.<br />
20 21
Radar POP Laser Red Light Cameras<br />
How Radar Works<br />
Traffic radar, which consists of<br />
microwaves, travels in straight lines and is<br />
easily reflected by objects such as cars,<br />
trucks, even guardrails and overpasses.<br />
Radar works by directing its microwave<br />
beam down the road. As your vehicle<br />
travels into range, the microwave beam<br />
bounces off your car, and the radar<br />
antenna looks for the reflections.<br />
Using the Doppler Principle, the radar<br />
equipment then calculates your speed by<br />
comparing the frequency of the reflection<br />
of your car to the original frequency of the<br />
beam sent out.<br />
Traffic radar has limitations, the most<br />
significant of these being that it typically<br />
can monitor only one target at a time. If<br />
there is more than one vehicle within<br />
range, it is up to the radar operator to<br />
decide which target is producing the<br />
strongest reflection. Since the strength of<br />
the reflection is affected by both the size<br />
of the vehicle and its proximity to the<br />
antenna, it is difficult for the radar<br />
operator to determine if the signal is from<br />
a sports car nearby or a semi-truck several<br />
hundred feet away.<br />
Radar range also depends on the<br />
power of the radar equipment itself.<br />
The strength of the radar unit’s beam<br />
diminishes with distance. The farther the<br />
radar has to travel, the less energy it has<br />
for speed detection.<br />
Because intrusion alarms and motion<br />
sensors often operate on the same<br />
frequency as X, and K-band radar, your<br />
<strong>GX65</strong> will occasionally receive non-police<br />
radar signals. Since these X-Band<br />
transmitters are usually contained inside<br />
of a building, or aimed toward the ground,<br />
they will generally produce much weaker<br />
readings than will a true radar encounter.<br />
As you become familiar with the sources<br />
of these pseudo alarms in your daily<br />
driving, they will serve as confirmation<br />
that your <strong>GX65</strong>’s radar detection abilities<br />
are fully operational.<br />
How “POP” Works<br />
“POP” mode is a relatively new feature for<br />
radar gun manufacturers. It works by<br />
transmitting an extremely short burst,<br />
within the allocated band, to identify<br />
speeding vehicles in traffic. Once the<br />
target is identified, or “POPPED,” the gun<br />
is then turned to its normal operating<br />
mode to provide a vehicle tracking history,<br />
(required by law).<br />
NOTE: According to the operator’s<br />
manual from the radar gun manufacturer,<br />
tickets should not be issued in<br />
POP mode.<br />
How Laser (Lidar) Works<br />
Laser speed detection is actually LIDAR<br />
(Light Detection and Ranging). LIDAR<br />
guns project a beam of invisible infrared<br />
light. The signal is a series of very short<br />
infrared light energy pulses which move<br />
in a straight line, reflecting off your car<br />
and returning to the gun. LIDAR uses<br />
these light pulses to measure the distance<br />
to a vehicle. Speed is then calculated by<br />
measuring how quickly these pulses are<br />
reflected given the known speed of light.<br />
LIDAR (or laser) is a newer technology<br />
and is not as widespread as conventional<br />
radar, therefore, you may not encounter<br />
laser on a daily basis. And unlike radar<br />
detection, laser detection is not prone to<br />
false alarms. Because LIDAR transmits a<br />
much narrower beam than does radar, it is<br />
much more accurate in its ability to<br />
distinguish between targets and is also<br />
more difficult to detect. AS A RESULT,<br />
EVEN THE BRIEFEST LASER ALERT<br />
SHOULD BE TAKEN SERIOUSLY.<br />
There are limitations to LIDAR<br />
equipment. LIDAR is much more sensitive<br />
to weather conditions than RADAR, and a<br />
LIDAR gun’s range will be decreased by<br />
anything affecting visibility such as rain,<br />
fog, or smoke. A LIDAR gun cannot<br />
operate through glass and it must be<br />
stationary in order to get an accurate<br />
reading. Because LIDAR must have a clear<br />
line of sight and is subject to cosine error<br />
(an inaccuracy which increases as the<br />
angle between the gun and the vehicle<br />
increases) police typically use LIDAR<br />
equipment parallel to the road or from an<br />
overpass. LIDAR can be used day or night.<br />
How Red Light Cameras Work<br />
Red-light cameras use three basic things:<br />
1) a camera, 2) a way to trigger the camera,<br />
and 3) a computer.<br />
An intersection may have more than<br />
one camera to monitor traffic from<br />
multiple directions. The trigger is typically<br />
a series of wires buried just beneath the<br />
surface of the road. These wires are<br />
separated by a pre-set distance in order to<br />
create a magnetic field or induction loop.<br />
Once a vehicle is in the intersection, the<br />
loop or circuit becomes closed and alerts<br />
the computer to take a picture.<br />
In some states, tickets are issued to<br />
the car’s owner, no matter who’s actually<br />
driving. In this case, the red-light camera<br />
only needs to photograph the vehicle’s<br />
rear license plate. In other states, the<br />
actual driver is responsible for paying the<br />
ticket. In this case, the system needs a<br />
second camera in front of the<br />
car, in order to get a shot of<br />
the driver’s face.<br />
22 23
Speed Cameras<br />
How Speed Cameras Work<br />
There are several types of fixed position<br />
speed cameras used, including radar, laser,<br />
induction loop and photo-based.<br />
Radar and laser based cameras are<br />
typically mounted near the road and<br />
transmit a short range signal across the<br />
lanes monitored. Since this signal is<br />
transmitted across the road instead of<br />
down the road like many handheld<br />
systems, detecting them in time is critical.<br />
Another technology used is an<br />
inductive loop system. This type of system<br />
utilizes wire buried just beneath the<br />
surface of the road to trigger a computer<br />
which calculates speed between the two<br />
points.<br />
Photo-based systems take two sets of<br />
pictures of all passing vehicles between<br />
two separate fixed locations. Both sets of<br />
photographs are date and time stamped,<br />
which enables the system to calculate<br />
average speed between the two locations.<br />
Fixed speed cameras can also be set<br />
up to monitor one to four lanes of traffic in<br />
the same direction. To achieve this, a<br />
sensor is installed in each lane and a wide<br />
angle camera lens is used to photograph<br />
the vehicle which is speeding.<br />
SWS<br />
How SWS Works<br />
Safety Warning System, or SWS, uses a<br />
modified K-band radar signal. The SWS<br />
safety radar system has 64 possible<br />
messages (60 currently allocated). The<br />
SWS messages your <strong>GX65</strong> can display are<br />
listed on the facing page.<br />
From the factory, your <strong>GX65</strong> is<br />
programmed with SWS decoding OFF. If<br />
you wish to detect this system, use the<br />
Programming feature to turn the <strong>GX65</strong>’s<br />
SWS decoding ON. If SWS is used in your<br />
area, your <strong>GX65</strong> will display the safety<br />
messages associated with the signal.<br />
NOTE: Some of the safety<br />
messages have been condensed, so<br />
that each message can be displayed<br />
on one or two screens on the <strong>GX65</strong>’s<br />
eight-character display.<br />
Since Safety radar technology is<br />
relatively new, and the number of<br />
transmitters in operation is not yet<br />
widespread, you will not receive Safety<br />
signals on a daily basis. Do not be<br />
surprised if you encounter emergency<br />
vehicles, road hazards and railroad<br />
crossings that are unequipped with these<br />
transmitters. As Safety transmitters<br />
become more prevalent (the number of<br />
operating transmitters is growing every<br />
day), these Safety radar signals will<br />
become more common.<br />
SWS Text Messages<br />
Highway Construction or Maintenance<br />
1 Work Zone Ahead<br />
2 Road Closed Ahead/Follow Detour<br />
3 Bridge Closed Ahead/Follow Detour<br />
4 Highway Work Crews Ahead<br />
5 Utility Work Crews Ahead<br />
6 All Traffic Follow Detour Ahead<br />
7 All Trucks Follow Detour Ahead<br />
8 All Traffic Exit Ahead<br />
9 Right Lane Closed Ahead<br />
10 Center Lane Closed Ahead<br />
11 Left Lane Closed Ahead<br />
12 For future use<br />
Highway Hazard Zone Advisory<br />
13 Stationary Police Vehicle Ahead<br />
14 Train Approaching/At Crossing<br />
15 Low Overpass Ahead<br />
16 Drawbridge Up<br />
17 Observe Drawbridge Weight Limit<br />
18 Rock Slide Area Ahead<br />
19 School Zone Ahead<br />
20 Road Narrows Ahead<br />
21 Sharp Curve Ahead<br />
22 Pedestrian Crossing Ahead<br />
23 Deer/Moose Crossing<br />
24 Blind/Deaf Child Area<br />
25 Steep Grade Ahead/Truck Use Low Gear<br />
26 Accident Ahead<br />
27 Poor Road Surface Ahead<br />
28 School Bus Loading/Unloading<br />
29 No Passing Zone<br />
30 Dangerous Intersection Ahead<br />
31 Stationary Emergency Vehicle Ahead<br />
32 For future use<br />
Weather Related Hazards<br />
33 High Wind Ahead<br />
34 Severe Weather Ahead<br />
35 Heavy Fog Ahead<br />
36 High Water/Flooding Ahead<br />
37 Ice On Bridge Ahead<br />
38 Ice On Road Ahead<br />
39 Blowing Dust Ahead<br />
40 Blowing Sand Ahead<br />
41 Blinding Snow Whiteout Ahead<br />
42 For future use<br />
Travel Information/Convenience<br />
43 Rest Area Ahead<br />
44 Rest Area With Service Ahead<br />
45 24 Hour Fuel Service Ahead<br />
46 Inspection Station Open<br />
47 Inspection Station Closed<br />
48 Reduced Speed Area Ahead<br />
49 Speed Limit Enforced<br />
50 Hazardous Materials Exit Ahead<br />
51 Congestion Ahead/Expect Delay<br />
52 Expect 10 Minute Delay<br />
53 Expect 20 Minute Delay<br />
54 Expect 30 Minute Delay<br />
55 Expect 1 Hour Delay<br />
56 Traffic Alert/Tune AM Radio<br />
57 Pay Toll Ahead<br />
58 Trucks Exit Right<br />
59 Trucks Exit Left<br />
60 For future use<br />
Fast/Slow Moving Vehicles<br />
61 Emergency Vehicle In Transit<br />
62 Police In Pursuit<br />
63 Oversize Vehicle In Transit<br />
64 Slow Moving Vehicle<br />
24 25
GPS Updates<br />
Service<br />
How GPS Works<br />
The Global<br />
Positioning System<br />
(GPS) is made up of<br />
twenty four orbiting<br />
satellites and was<br />
developed by the U.S. military. There are<br />
at least four satellites visible at any given<br />
time every day.<br />
A GPS receiver is designed to locate<br />
and receive data from four of these<br />
satellites. This data includes the distance<br />
to your location from each of the satellites.<br />
Once the distance from each satellite is<br />
known, the receiver can calculate and<br />
pinpoint your exact location.<br />
Software Updates<br />
The <strong>GX65</strong>’s red light and speed camera<br />
database is easily updated using our<br />
exclusive detector software tools found on<br />
our web site. Firmware, or the operating<br />
software for the detector, can also be<br />
updated using these tools.<br />
In order to have access to these<br />
updates, you must register your <strong>GX65</strong> at<br />
www.beltronics.com. Once registered,<br />
you will receive email notifications that<br />
updates are now<br />
available for your<br />
database or firmware.<br />
The <strong>GX65</strong> will<br />
need to be powered up<br />
to use the software<br />
tools. If you have a<br />
laptop computer,<br />
you can take it<br />
out to the vehicle<br />
to download the updates. If not, you will<br />
need to purchase a 12-volt adapter. These<br />
can be found at your local electronics<br />
retailer or our website under accessories.<br />
Service Procedure<br />
If your <strong>GX65</strong> ever needs service, please<br />
follow these simple steps:<br />
1 Check the troubleshooting section of<br />
this manual. It may have a solution to your<br />
problem.<br />
2 Call us at 800.341.2288. We may be<br />
able to solve your problem over the phone.<br />
If the problem requires that you send your<br />
<strong>GX65</strong> to the factory for repair, we will<br />
provide you with a Service Order Number,<br />
which must be included on the outside of<br />
your shipping box.<br />
Enclose the following information with<br />
your <strong>GX65</strong>:<br />
• Your Service Order Number<br />
• A copy of your sales receipt<br />
• Your name and return address<br />
• Your daytime telephone number<br />
• A description of the problem you are<br />
experiencing<br />
Out Of Warranty Repairs<br />
For out of warranty repairs, include<br />
prepayment in the amount you were<br />
quoted by the <strong>Beltronics</strong> Customer Service<br />
Representative. If the detector has been<br />
damaged, abused or modified, the repair<br />
cost will be calculated on a parts and labor<br />
basis. If it exceeds the basic repair charge,<br />
you will be contacted with a quotation.<br />
If the additional payment is not received<br />
within 30 days (or if you notify us that you<br />
choose not to have your <strong>GX65</strong> repaired<br />
at the price quoted), your <strong>GX65</strong> will be<br />
returned, without repair. Payment can be<br />
made by check, money order, or credit card.<br />
Ship <strong>GX65</strong> and SmartPlug to:<br />
BELTRONICS<br />
Customer Service Department<br />
Service Order Number ______________<br />
5442 West Chester Road<br />
West Chester OH 45069<br />
For your own protection, we recommend<br />
that you ship your <strong>GX65</strong> postpaid and<br />
insured. Insist on a proof of delivery, and<br />
keep the receipt until the return of your<br />
<strong>GX65</strong>.<br />
26 27
Troubleshooting<br />
Problem<br />
Solution<br />
Problem<br />
Solution<br />
The <strong>GX65</strong> beeps briefly at the same<br />
location every day, but no radar<br />
source is in sight.<br />
• An X-band motion sensor or intrusion alarm is located<br />
within range of your route. Use the AlertLock feature to<br />
filter this signal out.<br />
The <strong>GX65</strong> will not turn on.<br />
• Check that vehicle ignition is ON.<br />
• Check that vehicle lighter socket is functional.<br />
• Try the <strong>GX65</strong> in another vehicle.<br />
The <strong>GX65</strong> does not seem sensitive<br />
to radar or laser.<br />
The <strong>GX65</strong> did not alert when a<br />
police car was in view.<br />
• Make sure that windshield wipers do not block the <strong>GX65</strong>’s<br />
radar antenna and that the laser lens is not behind tinted<br />
areas.<br />
• Determine if your vehicle has an Instaclear ® ,<br />
ElectriClear ® or solar reflective windshield which may<br />
deflect radar or laser signals.<br />
• The <strong>GX65</strong> may be in City Mode.<br />
• VASCAR (Visual Average Speed Computer and Recorder),<br />
a stopwatch method of speed detection, may be in use.<br />
• Officer may not have radar or laser unit turned on.<br />
GPS indicator will not stop flashing.<br />
AlertLock lock filter does not seem<br />
to be working.<br />
At first detect, numbers come up on<br />
the display.<br />
Explanation of Displays<br />
• The <strong>GX65</strong> does not have a clear view of the sky.<br />
Reposition it or try it in another vehicle.<br />
• Check to make sure the GPS button is on.<br />
• SpeedCheck feature is on. You can turn it<br />
off in Programming.<br />
The <strong>GX65</strong>’s display is not working.<br />
The <strong>GX65</strong>’s audible alerts are less<br />
loud after the first few alerts.<br />
The <strong>GX65</strong> bounces or sags on<br />
windshield.<br />
The <strong>GX65</strong>’s power-on sequence<br />
reoccurs while you are driving.<br />
Your 14-year old son has changed<br />
all 8 of the Programming options.<br />
The <strong>GX65</strong> feels very warm.<br />
• Press the BRT button to deactivate Dark Mode.<br />
• The <strong>GX65</strong> is in AutoMute Mode. See page 9 for details.<br />
• The <strong>GX65</strong> is not making contact with the windshield to<br />
provide stability. While holding down the <strong>GX65</strong>’s<br />
EasyMount button, slide the <strong>GX65</strong> further back toward the<br />
windshield so that the back top edge makes firm contact.<br />
• A loose power connection or dirty lighter socket can<br />
cause the <strong>GX65</strong> to be briefly disconnected.<br />
• You can return all of the user Preferences to the factory<br />
defaults settings by holding down the “SEN” and “BRT”<br />
buttons while you turn the <strong>GX65</strong> on.<br />
• It is normal for the <strong>GX65</strong> to feel warm.<br />
No display<br />
The <strong>GX65</strong> is in Dark mode. Press the BRT button to change the brightness.<br />
(page 10)<br />
PilotHWY One of the many Preferences. (pages 14-18)<br />
Ka1 X9, The <strong>GX65</strong> has been set to Threat Display Mode in Programming.<br />
or K9 X1, (pages 12-13)<br />
or Ka9 K2 X1, etc.<br />
Reset<br />
Power<br />
The <strong>GX65</strong> needs to cycle power. Unplug it from power socket and restart.<br />
28 29
Accessories<br />
Accessories<br />
Visit our website for our complete line of<br />
accessories at beltronics.com<br />
30<br />
BELTRONICS<br />
Extended Service Plan<br />
<strong>Beltronics</strong> offers an optional extended<br />
service plan. Contact <strong>Beltronics</strong> for details<br />
at 800.341.2288.<br />
FCC NOTE: Modifications not expressly<br />
approved by the manufacturer could<br />
void the user’s FCC granted authority to<br />
operate the equipment.<br />
Register<br />
online:<br />
@<br />
www.<br />
beltronics<br />
.com<br />
31<br />
Remove card along perforations <br />
PRODUCT REGISTRATION CARD<br />
If you purchased your detector directly from BELTRONICS, you do not need to fill this out.<br />
If you did not purchase your detector directly from BELTRONICS, please fill out this section and return to us,<br />
or register online at our web address: www.beltronics.com.<br />
1. First Name___________________ Middle Initial____ Last Name___________________________<br />
Address______________________________________________________________________<br />
City_______________________________________ State_____________ ZIP_____________<br />
Phone Number (In case we have a question)_____________________________________________<br />
2. Product Purchased PRO <strong>GX65</strong> Serial Number_______________________<br />
3. Place of Purchase__________________________________ Date_________ Price____________<br />
4. Primary reason for purchasing this BELTRONICS product____________________________________<br />
____________________________________________________________________________<br />
____________________________________________________________________________
Warranty<br />
ATTN CUSTOMER SERVICE<br />
BELTRONICS INC<br />
5442 WEST CHESTER RD<br />
WEST CHESTER OH 45069-9789<br />
Remove card along perforations <br />
BELTRONICS<br />
One Year Limited Warranty<br />
What this warranty covers:<br />
BELTRONICS warrants your Product<br />
against all defects in materials and<br />
workmanship.<br />
For how long: One (1) year from the date<br />
of the original purchase.<br />
What we will do: BELTRONICS, at our<br />
discretion, will either repair or replace your<br />
Product free of charge.<br />
What we will not do: BELTRONICS will<br />
not pay shipping charges that you incur for<br />
sending your product to us.<br />
What you must do to maintain this<br />
warranty: Show original proof of<br />
purchase from an authorized BELTRONICS<br />
dealer.<br />
Warranty Exclusions: Warranty does not<br />
apply to your product under any of the<br />
following conditions: 1. The serial number<br />
has been removed or modified. 2. Your<br />
product has been subjected to misuse or<br />
damage (including water damage, physical<br />
abuse, and/or improper installation). 3. Your<br />
product has been modified in any way. 4.<br />
Your receipt or proof-of-purchase is from a<br />
non-authorized dealer or internet auction<br />
site including E-bay, U-bid, or other nonauthorized<br />
resellers.<br />
To obtain service: 1. Contact<br />
BELTRONICS (800.341.2288) to obtain a<br />
Return Authorization number. 2. Properly<br />
pack your product and include: your<br />
name, complete return address, written<br />
description of the problem with your<br />
product, daytime telephone number, and<br />
a copy of the original purchase receipt. 3.<br />
Label the outside of the package clearly<br />
with your Return Authorization number.<br />
Ship the product pre-paid (insured, for your<br />
protection) to: <strong>Beltronics</strong> Inc, 5442 West<br />
Chester Rd., West Chester, OH 45069.<br />
LIMITATION OF WARRANTY: EXCEPT AS<br />
EXPRESSLY PROVIDED HEREIN, YOU ARE<br />
ACQUIRING THE PRODUCT “AS<br />
IS” AND “WHERE IS,” WITHOUT<br />
REPRESENTATION OR WARRANTY.<br />
BELTRONICS SPECIFICALLY DISCLAIMS<br />
ANY REPRESENTATION OR WARRANTY<br />
INCLUDING, BUT NOT LIMITED TO<br />
THOSE CONCERNING THE MERCHANT-<br />
ABILITY AND SUITABILITY OF THE<br />
PRODUCT FOR A PARTICULAR PURPOSE.<br />
BELTRONICS SHALL NOT BE LIABLE<br />
FOR CONSEQUENTIAL, SPECIAL OR<br />
INCIDENTAL DAMAGES INCLUDING,<br />
WITHOUT LIMITATION, DAMAGES<br />
ARISING OUT OF THE USE, MISUSE OR<br />
MOUNTING OF THE PRODUCT.<br />
The above limitations or exclusions shall be<br />
limited to the extent they violate the laws<br />
of any particular state. BELTRONICS is not<br />
responsible for products lost in shipment<br />
between the owner and our service center.<br />
Other legal rights: This Warranty gives<br />
you specific rights. You may have other<br />
legal rights, which vary, from state to state.<br />
32<br />
33