8W-01 WIRING DIAGRAM INFORMATION
8W-01 WIRING DIAGRAM INFORMATION
8W-01 WIRING DIAGRAM INFORMATION

Create successful ePaper yourself
Turn your PDF publications into a flip-book with our unique Google optimized e-Paper software.
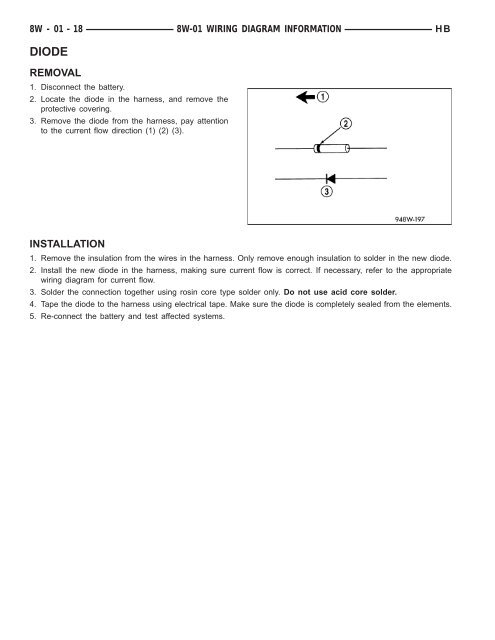
<strong>8W</strong> - <strong>01</strong> - 18 <strong>8W</strong>-<strong>01</strong> <strong>WIRING</strong> <strong>DIAGRAM</strong> <strong>INFORMATION</strong> HB<br />
DIODE<br />
REMOVAL<br />
1. Disconnect the battery.<br />
2. Locate the diode in the harness, and remove the<br />
protective covering.<br />
3. Remove the diode from the harness, pay attention<br />
to the current flow direction (1) (2) (3).<br />
INSTALLATION<br />
1. Remove the insulation from the wires in the harness. Only remove enough insulation to solder in the new diode.<br />
2. Install the new diode in the harness, making sure current flow is correct. If necessary, refer to the appropriate<br />
wiring diagram for current flow.<br />
3. Solder the connection together using rosin core type solder only. Do not use acid core solder.<br />
4. Tape the diode to the harness using electrical tape. Make sure the diode is completely sealed from the elements.<br />
5. Re-connect the battery and test affected systems.