8W-01 WIRING DIAGRAM INFORMATION
8W-01 WIRING DIAGRAM INFORMATION
8W-01 WIRING DIAGRAM INFORMATION

You also want an ePaper? Increase the reach of your titles
YUMPU automatically turns print PDFs into web optimized ePapers that Google loves.
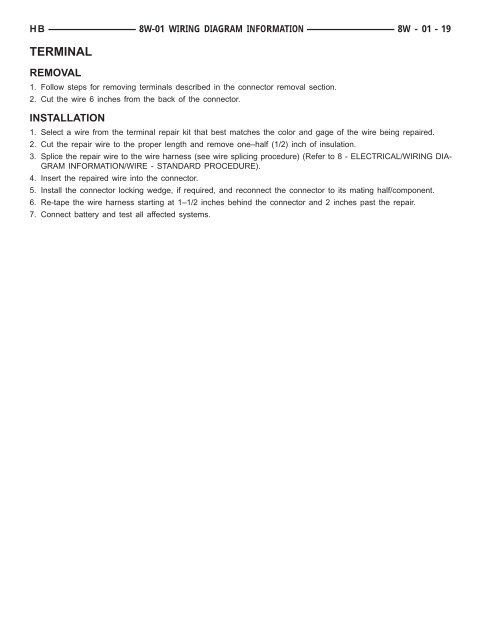
HB <strong>8W</strong>-<strong>01</strong> <strong>WIRING</strong> <strong>DIAGRAM</strong> <strong>INFORMATION</strong> <strong>8W</strong> - <strong>01</strong> - 19<br />
TERMINAL<br />
REMOVAL<br />
1. Follow steps for removing terminals described in the connector removal section.<br />
2. Cut the wire 6 inches from the back of the connector.<br />
INSTALLATION<br />
1. Select a wire from the terminal repair kit that best matches the color and gage of the wire being repaired.<br />
2. Cut the repair wire to the proper length and remove one–half (1/2) inch of insulation.<br />
3. Splice the repair wire to the wire harness (see wire splicing procedure) (Refer to 8 - ELECTRICAL/<strong>WIRING</strong> DIA-<br />
GRAM <strong>INFORMATION</strong>/WIRE - STANDARD PROCEDURE).<br />
4. Insert the repaired wire into the connector.<br />
5. Install the connector locking wedge, if required, and reconnect the connector to its mating half/component.<br />
6. Re-tape the wire harness starting at 1–1/2 inches behind the connector and 2 inches past the repair.<br />
7. Connect battery and test all affected systems.