Geometric Transformations Using: Miras Graphing Calculator
Geometric Transformations Using: Miras Graphing Calculator
Geometric Transformations Using: Miras Graphing Calculator

You also want an ePaper? Increase the reach of your titles
YUMPU automatically turns print PDFs into web optimized ePapers that Google loves.
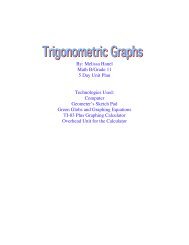
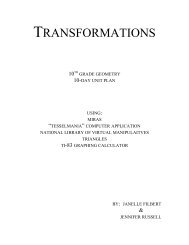
<strong>Geometric</strong><br />
<strong>Transformations</strong><br />
Math Grade 8<br />
5 Day Unit Plan<br />
<strong>Using</strong>:<br />
<strong>Miras</strong><br />
<strong>Graphing</strong> <strong>Calculator</strong><br />
“Tesselmania” Computer Application<br />
David Fiden<br />
December 1, 2001
Unit Objectives<br />
Students will:<br />
• Be able to describe what geometric translations and reflections are<br />
• Be able to perform geometric translations and reflections<br />
• Know that translations and reflections are both types of geometric transformations<br />
• Be able to identify the pre-image and image in a geometric transformation<br />
• Be able to identify the line of reflection in a geometric reflection<br />
• Know that in a reflection and in a translation, the pre-image and image are congruent<br />
• Know that in a reflection, the pre-image and image have reversed orientation<br />
• Know that in a translation, the pre-image and image have the same orientation, i.e. not reversed<br />
• Be able to describe what reflection symmetry is<br />
• Be able to identify a figure with reflection symmetry<br />
• Be able to identify a line of symmetry in a figure<br />
• Be able to describe what a tessellation is<br />
• Be able to describe what a fundamental region is<br />
• Be able to create a tessellation<br />
• Be able to design a transformation to be performed by a fellow student<br />
• Be able to perform a transformation designed by a fellow student<br />
1
Adherence to Current Pedagogy<br />
NYS Core Curriculum Adherent Ideas for Math Grades 7-8<br />
• 2A: Understand, represent, and use numbers in a variety of equivalent forms (integer, fraction,<br />
decimal, percent, exponential, expanded, and scientific notation).<br />
• 3A: Add, subtract, multiply, and divide fractions, decimals, and integers.<br />
• 4A: Identify and construct two-dimensional and three-dimensional shapes.<br />
• 4C: Use the coordinate plane to explore geometric ideas.<br />
• 4H: Investigate both two- and three-dimensional transformations.<br />
• 4I: Use appropriate tools to construct and verify geometric relationships.<br />
• 7A: Recognize, describe, and generalize a wide variety of patterns and functions.<br />
• 7H: Explore relationships involving points, lines, angles, and planes.<br />
Principles and Standards for School Mathematics Adherent Standards for Grades 6-8<br />
• Understand numbers, ways of representing numbers, relationships among numbers, and number<br />
systems<br />
• Use mathematical models to represent and understand quantitative relationships<br />
• Analyze characteristics and properties of two- and three-dimensional geometric shapes and develop<br />
mathematical arguments about geometric relationships<br />
• Specify locations and describe spatial relationships using coordinate geometry and other<br />
representational systems<br />
• Apply transformations and use symmetry to analyze mathematical situations<br />
• Use visualization, spatial reasoning, and geometric modeling to solve problems<br />
• Make and investigate mathematical conjectures<br />
• Organize and consolidate their mathematical thinking through communication<br />
• Communicate their mathematical thinking coherently and clearly to peers, teachers, and others<br />
2
Resources<br />
Mathematics Resource Guide with Core Curriculum. The State Education Department:The<br />
University of the State of New York, 1999.<br />
Principles & Standards for School Mathematics. Reston, VA: The National Council of Teachers<br />
of Mathematics, Inc, 2000.<br />
Usiskin, Z., Feldman, C.H., Davis, S., Mallo, S., Sanders, G., Witonski, D., Flanders, D.,<br />
Polonsky, L., Porter, S., Viktora, S.S. Transition Mathematics. Illinois: Scott Foresman and Company,<br />
1995.<br />
3
Materials and Equipment Needed<br />
1. One class set of straightedges<br />
2. One class set of TI-83+ graphing calculators<br />
3. One TI-83+ graphing calculator with overhead view screen output jack<br />
4. One graphing calculator overhead view screen<br />
5. One overhead projector<br />
6. One overhead screen<br />
7. Graph paper<br />
8. One class set of <strong>Miras</strong><br />
9. One medium-sized wall mirror<br />
10. One class set of scissors<br />
11. One class set of index cards<br />
12. White paper<br />
13. Tape<br />
14. One class set of colored markers<br />
15. “Tesselmania” computer application<br />
16. One overhead projection unit for computer video output<br />
17. One large Television monitor (optional to the projection unit)<br />
4
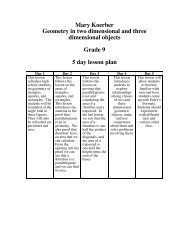
Unit Overview<br />
1) Lesson 1: Translations<br />
a) The students draw a triangle on graph paper to review coordinate graphing.<br />
b) The teacher introduces relevant terms: translation, pre-image, image, and congruent.<br />
c) The students, led by example from the teacher, perform translations on their graphing calculator.<br />
d) The teacher leads a discussion on translations with the students.<br />
2) Lesson 2: Reflections<br />
a) The students investigate what happens to objects when viewed through a mirror.<br />
b) The teacher introduces relevant terms: reflection, and line of reflection (mirror).<br />
c) The students use miras to reflect their names on a piece of paper.<br />
d) The students use miras to do a reflection of a raccoon face.<br />
e) The teacher leads a discussion on reflections with the students.<br />
3) Lesson 3: Reflection Symmetry<br />
a) The teacher introduces relevant terms: reflection symmetry, line of symmetry, and symmetric.<br />
b) The students investigate the reflection symmetry in a rhombus using miras.<br />
c) In pairs or triples, the students investigate the lines of symmetry in various shapes using miras.<br />
d) The teacher leads a discussion on reflection symmetry and how it relates to reflections.<br />
4) Lesson 4: Tessellations<br />
a) The students watch a slideshow of animated tessellations in the “Tesselmania” software<br />
application.<br />
b) The teacher introduces relevant terms: tessellation, and fundamental region.<br />
c) The students create a tessellation of a dog, led by the teacher through example.<br />
d) The students use their dog fundamental region to fill a plane (piece of paper).<br />
5) Lesson 5: Creating & Performing <strong>Transformations</strong><br />
a) In the form of an assessment, the students design (using the template provided) a transformation to<br />
be performed by another student.<br />
b) The students then give their transformation to another student to perform.<br />
5
NOTES<br />
• This unit plan uses the textbook entitled, Transition Mathematics (see Resources section of this<br />
document).<br />
• The unit is centered around lessons 8-5, 8-6, 8-7, and 8-8 from this textbook.<br />
• Unless noted otherwise, any references to pages in the textbook will refer to this textbook.<br />
6
Assignment:<br />
7<br />
Math Grade 8: <strong>Geometric</strong> <strong>Transformations</strong> Day 1 (Translations)<br />
Objectives, students will:<br />
• Be able to describe what a geometric translation is<br />
• Be able to perform a geometric translation<br />
• Be able to identify the pre-image and image of a translation<br />
• Know that the pre-image and image of a translation are congruent<br />
Opening Activity:<br />
The teacher asks the students about polygons and coordinates in order to get them thinking about<br />
geometry:<br />
1. What is a polygon An enclosed figure with any number of sides.<br />
2. A polygon is made up of points. How do we describe a point, or coordinate By an x-value<br />
and a y-value.<br />
To practice plotting points, the students will graph the following points on their graph paper and<br />
connect the points, using a straightedge, to make a triangle:<br />
A (2, 2)<br />
B (6, 2)<br />
C (7, 5)<br />
3. The three-sided polygon we created is called what A triangle.<br />
Developmental Activity:<br />
The teacher introduces the definition of a translation (slide) and discusses with the students its<br />
implications on polygons.<br />
Translation: adding (or subtracting) the same number to (from ) the coordinates of a figure<br />
In the process, the teacher uses the terms pre-image, image and congruent.<br />
Pre-image: the figure before the translation<br />
Image: the figure after the translation<br />
Congruent: having the same size and shape<br />
It may be helpful for some students to make a table and perform the translation arithmetically<br />
before showing the translation geometrically. Subsequently, the teacher will lead the students in<br />
graphing the triangle from above on their calculator using the overhead view screen and projector<br />
to show the entire class. Then, using their calculators, the students perform the translations:<br />
(x,y) -> (x + 2, y + 4)<br />
(x,y) -> (x - 10, y - 8)<br />
(see Teacher’s Notes below)<br />
Closing Activity:<br />
The teacher presents various translations to the students (see diagrams on teacher’s page 436 and<br />
437) asks the students to describe the translation.<br />
Questions:<br />
1. Is the bottom of a figure still the bottom of a figure after a translation Yes.<br />
2. Are the pre-image and image congruent Yes.<br />
3. If we began with the letter M, could we make a letter W using a translation No.<br />
Equipment:<br />
• A straightedge, one sheet of graph paper, and a TI-83+ graphing calculator will be provided to<br />
each student.<br />
• One TI-83+ graphing calculator with overhead view screen output jack<br />
• One graphing calculator overhead view screen<br />
• One overhead projector<br />
• One overhead screen
Read pp. 435 – 436 in textbook<br />
Questions pp. 437 – 438: 1-5,11,12,14 (answers are provided in the teacher’s edition of the<br />
textbook).<br />
Teacher’s Notes:<br />
TI-83 entry sequence for graphing the triangle A (2, 2) B (6, 2) C (7, 5):<br />
STAT<br />
Edit<br />
In L1 put the following numbers 2 6 7 2<br />
In L2 put the following numbers 2 2 5 2<br />
2 nd<br />
STAT PLOT<br />
1<br />
Turn Plot1 On<br />
Select the second Type (Line Graph)<br />
Xlist:L1<br />
Ylist:L2<br />
Mark: .<br />
ZOOM 6<br />
GRAPH<br />
8
9<br />
TI-83 entry sequence for graphing the translation (x,y) -> (x + 2, y + 4):<br />
STAT<br />
Edit<br />
Position cursor over L3 and type L1 + 2<br />
ENTER<br />
Position cursor over L4 and type L2 + 4<br />
ENTER<br />
2 nd<br />
STAT PLOT<br />
2<br />
Turn Plot2 On<br />
Select the second Type (Line Graph)<br />
Xlist:L3<br />
Ylist:L4<br />
Mark: .<br />
GRAPH
10<br />
TI-83 entry sequence for graphing the translation (x,y) -> (x - 10, y - 8)<br />
STAT<br />
Edit<br />
Position cursor over L5 and type L1 – 10<br />
ENTER<br />
Position cursor over L6 and type L2 – 8<br />
ENTER<br />
2 nd<br />
STAT PLOT<br />
3<br />
Turn Plot3 On<br />
Select the second Type (Line Graph)<br />
Xlist:L5<br />
Ylist:L6<br />
Mark: .<br />
GRAPH
Assignment:<br />
11<br />
Math Grade 8: <strong>Geometric</strong> <strong>Transformations</strong> Day 2 (Reflections)<br />
Objectives, students will:<br />
• Be able to describe what a reflection is<br />
• Be able to perform a geometric reflection<br />
• Be able to identify the pre-image and image of a reflection<br />
• Be able to identify the line of reflection in a reflection<br />
• Know that the pre-image and image of a reflection are reversed, but congruent<br />
• Know that translations and reflections are both types of transformations<br />
Opening Activity:<br />
• The teacher reviews translations by asking the students to orally answer the assigned<br />
questions from Day 1.<br />
• The teacher introduces the term reflection as what happens to one’s image when looked at in a<br />
mirror. One student carries a medium-sized wall mirror around the room so that each student<br />
may look into the mirror and observe the results. The teacher prompts the students to describe<br />
what happens to one’s face when looked at in a mirror. In addition, students should hold up,<br />
say, a textbook to observe what happens to the textbook. The students spend some time<br />
investigating what happens to an object when they are viewed in a mirror.<br />
Developmental Activity:<br />
The teacher introduces the relevant terms:<br />
Reflection (flip): the transformation that takes place when using a mirror<br />
Line of reflection: the mirror over which the reflection takes place<br />
Transformation: either a translation or reflection, so far (dilations and rotations are other types of<br />
transformations that will not be discussed in this unit).<br />
Each student is provided a mira and a blank sheet of paper. The teacher has the students write<br />
their name on the piece of paper. The teacher then demonstrates how to use the mira to “see” the<br />
reflection of one’s name. Students then reflect their name on the sheet of paper using the mira.<br />
Once completed, the teacher introduces the face reflection sheet and (see Teacher’s Notes), then<br />
explains that their task is to reflect half of the raccoon face to make a complete raccoon face using<br />
a mira (i.e. line of reflection is the y-axis). The teacher will provide support to the students as<br />
needed while the students work on this task. The rubric is provided to each student so that they<br />
will be informed of the type of assessment that will be used for this task. The teacher should talk<br />
with the students about the rubric before the task is complete. Students include the rubric with<br />
their face reflection at completion time.<br />
Closing Activity:<br />
Questions:<br />
1. Are the pre-image and image congruent Yes.<br />
2. How are the pre-image and image different in a reflection They are reversed.<br />
3. Is the left of a figure still the left of a figure after a reflection It depends on the reflection. If<br />
it is a horizontal reflection, left will still be left.<br />
4. When will the left of a figure still be the left of a figure after a reflection When the line of<br />
reflection is a horizontal line.<br />
5. If we began with the letter M, could we make a letter W using a reflection Yes.<br />
6. How Put the mirror, or line of reflection, as a horizontal line below the letter M.<br />
Equipment:<br />
• A medium-sized wall mirror for the class will be used with each student.<br />
• A mira will be provided to each student.
Read pp. 440- 442 in textbook<br />
Questions pp. 442 – 444: 1-6, 15-18 (Answers are provided in the teacher’s edition of the<br />
textbook)<br />
Teacher’s Notes:<br />
The following pages include:<br />
1. The rubric and worksheet to distribute to the students for the face reflection.<br />
2. The answers and sample student work for the worksheet.<br />
3. The raccoon face reflection worksheet.<br />
12
Student Name __________________<br />
Date _____________<br />
Grading Rubric for Face Reflection<br />
Grading Rubric<br />
Student Task Earned Points Possible Points<br />
Appropriate reflection of face across line of reflection 20<br />
Five points labeled on pre-image 10<br />
Finding the coordinates of points from pre-image 15<br />
Five corresponding points labeled on the image 13<br />
Finding the coordinates of points from image 15<br />
Label line of reflection 7<br />
Follow-up problem #1 10<br />
Follow-up problem #2 10<br />
Student Total 100<br />
Points from pre-image<br />
Point x-value y-value<br />
A<br />
B<br />
C<br />
D<br />
E<br />
Student Work<br />
Points from image<br />
Point x-value y-value<br />
A’<br />
B’<br />
C’<br />
D’<br />
E’<br />
1. Describe how the reflection changed the x and y values of the corresponding reflected points (e.g. How<br />
did A’ change from A).<br />
2. Is it possible to make the same transformation using a translation (i.e. Can you make the face look right<br />
using a translation instead of a reflection) Why or why not<br />
13
KEY<br />
Student Name __________________<br />
Date _____________<br />
Grading Rubric for Face Reflection<br />
Grading Rubric<br />
Student Task Earned Points Possible Points<br />
Appropriate reflection of face across line of reflection 20<br />
Five points labeled on pre-image 10<br />
Finding the coordinates of points from pre-image 15<br />
Five corresponding points labeled on the image 13<br />
Finding the coordinates of points from image 15<br />
Label line of reflection 7<br />
Follow-up problem #1 10<br />
Follow-up problem #2 10<br />
Student Total 100<br />
Points from pre-image<br />
Point x-value y-value<br />
A 1 12<br />
B 3 5<br />
C 3 -9<br />
D 10 -11<br />
E 11 12<br />
Student Work<br />
Points from image<br />
Point x-value y-value<br />
A’ -1 12<br />
B’ -3 5<br />
C’ -3 -9<br />
D’ -10 -11<br />
E’ -11 12<br />
The points from the pre-image will vary among the students, but the x-values should all be positive. The y-<br />
values from the image will be the same as the y-values from the pre-image. The x-values will be the same<br />
integral value, except the sign will be reversed, i.e. they will be negative.<br />
1. Describe how the reflection changed the x and y values of the corresponding reflected points (e.g. How<br />
did A’ change from A).<br />
The y-values remained the same. The x-values reversed sign, i.e. became negative.<br />
2. Is it possible to make the same transformation using a translation (i.e. Can you make the face look right<br />
using a translation instead of a reflection) Why or why not<br />
No. A translation will never reverse an image like a reflection does, so the face will never look like a<br />
real face, but simply two half-faces.<br />
14
Math Grade 8: <strong>Geometric</strong> <strong>Transformations</strong> Day 3 (Reflection Symmetry)<br />
Objectives, students will:<br />
• Be able to describe what reflection symmetry is<br />
• Be able to identify a figure with reflection symmetry<br />
• Be able to identify a line of symmetry in a figure<br />
Opening Activity:<br />
• The teacher reviews reflections by asking the students to orally answer the assigned questions<br />
from Day 2.<br />
• The teacher discusses the face reflection:<br />
1. Is the raccoon face the same on both sides Yes, but reversed.<br />
2. Where is the line of reflection A vertical line down the middle.<br />
Developmental Activity:<br />
Reflection Symmetry: when both sides of a figure match with reverse orientation<br />
Both sides of the raccoon face match, so it has reflection symmetry. The teacher asks the<br />
students how they know that both sides of the raccoon face match. Since the students reflected it<br />
themselves, the teacher should be sure that the students are convinced that reflecting causes both<br />
sides to match. Since both sides match, we say that the left side is symmetric to the right side and<br />
vice versa. The students are provided with a mira and the Reflection Symmetry worksheet. The<br />
students use a mira to test for reflection symmetry in rhombus PQRS on their worksheet. First<br />
they test for symmetry on line PR then line SQ. These lines provide the two lines of symmetry in<br />
the rhombus. The teacher explains to the students that in order to test for reflection symmetry in a<br />
figure, they place a mira somewhere on the figure. If the reflection in the mira of one side of the<br />
figure matches exactly with the other side of the figure, then the figure has reflection symmetry<br />
and the line of reflection is exactly where the mira is placed. The teacher then allows the students<br />
to try to find other lines of symmetry in the rhombus. There are no more lines of symmetry in a<br />
rhombus. Once the students are convinced of this, the teacher discusses the two following<br />
example figures on the worksheet and their lines of symmetry.<br />
For the last activity of the worksheet, students are to draw all the lines of symmetry on<br />
the six figures provided. Allow students to work on this activity in pairs or triples. The teacher<br />
may want to ask the students to name those six figures.<br />
Closing Activity:<br />
Questions:<br />
1. How is a reflection different than reflection symmetry Answer will vary, but the important<br />
idea is to stress that a reflection is a transformation involving moving (flipping) a figure.<br />
However, reflection symmetry is a property of a figure and requires no movement implicitly,<br />
but reflections can be used to test for reflection symmetry.<br />
2. What is the maximum number of lines of symmetry a figure may have Infinitely many, e.g.<br />
a circle.<br />
3. What is the minimum number of lines of symmetry a figure may have Zero, e.g. scalene<br />
triangle.<br />
Equipment:<br />
• A mira will be provided to each student.<br />
Assignment:<br />
Read pp. 446 in textbook<br />
Questions pp. 448 – 449: 1-5, 13-15 (Answers are provided in the teacher’s edition of the<br />
textbook)<br />
Teacher’s Notes:<br />
The following pages include:<br />
1. Reflection Symmetry worksheet<br />
15
15<br />
2. Reflection Symmetry worksheet answers
Name: ___________________<br />
Date: _________________<br />
Reflection Symmetry<br />
Use a mira to answer the following questions about rhombus PQRS:<br />
1. Is PR a line of symmetry ______<br />
2. Is SQ a line of symmetry ______<br />
3. Are there any more lines of symmetry ______<br />
S<br />
P<br />
R<br />
Q<br />
Examples of lines of symmetry in a(n):<br />
Oval Rectangle<br />
You may use a mira to verify these lines of symmetry.<br />
Use a mira to determine and then draw in all the lines of symmetry in the following figures:<br />
15
Name: ___________________<br />
Date: _________________<br />
Reflection Symmetry<br />
Use a mira to answer the following questions about rhombus PQRS:<br />
1. Is PR a line of symmetry __yes____<br />
2. Is SQ a line of symmetry __ yes ____<br />
3. Are there any more lines of symmetry __ no ____<br />
S<br />
P<br />
R<br />
Q<br />
Examples of lines of symmetry in a(n):<br />
Oval Rectangle<br />
You may use a mira to verify these lines of symmetry.<br />
Use a mira to determine and then draw in all the lines of symmetry in the following figures:<br />
No lines of symmetry<br />
No lines of symmetry<br />
15
Math Grade 8: <strong>Geometric</strong> <strong>Transformations</strong> Day 4 (Tessellations)<br />
Objectives, students will:<br />
• Be able to describe what a tessellation is<br />
• Be able to describe what a fundamental region is<br />
• Be able to create a tessellation<br />
Opening Activity:<br />
• The teacher reviews reflection symmetry by asking the students to orally answer the assigned<br />
questions from Day 3.<br />
• The teacher asks the students to describe translations and reflections are as they will be<br />
important in the tessellation slideshow.<br />
Developmental Activity:<br />
The teacher defines tessellation for the students:<br />
Tessellation: tiling of a region with a shape, e.g. the tiles in a bathroom, the tiled floor of a<br />
bathroom is a good example of a tessellation.<br />
To demonstrate tessellations, the teacher runs the “Tesselmania” application software on<br />
the computer with either the computer projected onto on overhead screen or the computer video<br />
output patched into a large television screen. Tesselmania should be run in slideshow mode,<br />
showing animated examples of tessellations with ambient music. While the tessellation<br />
animations are progressing the teacher asks students what type of transformation is happening at<br />
any given point of the slideshow. Some of the tessellations involve rotations, which are not<br />
covered in this unit, but most students realize this without additional instruction. If they do not, it<br />
is not important that they recognize rotations, as they are not covered in this unit.<br />
Once interest level of the students toward the slideshow has waned, the teacher hands out<br />
the equipment (straightedge, index card, scissors, tape, white paper, and markers) to each student.<br />
The teacher leads the process to create a dog tessellation (see p. 453 in textbook) using a blank<br />
index card (rectangle). The teacher demonstrates each step while the students follow along using<br />
their own equipment. Once the students have assembled their dog, the teacher explains that this is<br />
the fundamental region. (In the experience of the author, it proved too difficult for students to<br />
create their own fundamental regions. For this reason, it was chosen to have the entire class create<br />
the dog tessellation. A teacher may wish to allow students to create their own fundamental region<br />
in order to provide for more creativity and spark more interest).<br />
Fundamental Region: the tile that is used in a tessellation, e.g. the dog<br />
Now the students are free to decorate their fundamental region with markers provided.<br />
Following that, the students are to take their fundamental region and fill up the piece of white<br />
paper with it. They may use different colored markers to trace each dog a different color as they<br />
fill up their paper to create a colorful tessellation. The teacher may demonstrate the filling up and<br />
tracing on his own paper as needed. This is an excellent opportunity to involve the students in<br />
noting the dog must be translated, or possibly reflected, in order to fill up a region.<br />
The teacher may desire to have the students hand in their tessellations for assessment.<br />
The Transformation Concepts worksheet is to be given as homework. This could optionally be<br />
used as an in-class individual assessment to encompass the concepts of the unit.<br />
Closing Activity:<br />
Questions:<br />
1. What shape did we start with to make the dog Rectangle.<br />
2. Does every rectangle tessellate a region Yes.<br />
3. Does every shape tessellate a region No.<br />
4. Which ones do not A circle, a pentagon.<br />
Equipment:<br />
• A straightedge, an index card, a pair of scissors, a piece of white paper, tape, and colored<br />
markers will be provided to each student.<br />
• “Tesselmania” computer application<br />
15
• An overhead projection unit for computer video output<br />
• An overhead screen<br />
• A large Television monitor (optional to the projection unit)<br />
Assignment:<br />
Read pp. 452 in textbook<br />
Transformation Concepts worksheet<br />
Teacher’s Notes:<br />
The following pages include:<br />
1. Transformation Concepts worksheet<br />
2. Transformation Concepts worksheet answers<br />
15
Name __________________<br />
Date _____________<br />
Transformation Concepts<br />
Match the following words with their appropriate definitions.<br />
1. Tessellation _____ a. The figure before a transformation<br />
2. Transformation _____ b. Consists of an x and y value<br />
3. Reflection _____ c. The tile used in a tessellation<br />
4. Fundamental Region _____ d. Sliding a figure<br />
5. Pre-image _____ e. Flipping a figure<br />
6. Coordinate _____ f. Tiling a region<br />
7. Image _____ g. A translation or reflection<br />
8. Translation _____ h. The figure after a transformation<br />
The figure below is a (circle one): a. Translation b. Reflection<br />
Label the following in the figure below:<br />
(Note: The large dotted arrow indicates the direction of the transformation, i.e. the top is<br />
first, then the bottom.)<br />
Line of reflection<br />
Image<br />
Pre-image<br />
A<br />
B<br />
B’<br />
C<br />
C’<br />
A’<br />
15
Name __________________ KEY Date _____________<br />
Transformation Concepts<br />
Match the following words with their appropriate definitions.<br />
1. Tessellation __f___ a. The figure before a transformation<br />
2. Transformation __g___ b. Consists of an x and y value<br />
3. Reflection __e___ c. The tile used in a tessellation<br />
4. Fundamental Region __c___ d. Sliding a figure<br />
5. Pre-image __a___ e. Flipping a figure<br />
6. Coordinate __b___ f. Tiling a region<br />
7. Image __h___ g. A translation or reflection<br />
8. Translation __d___ h. The figure after a transformation<br />
The figure below is a (circle one): a. Translation b. Reflection<br />
Label the following in the figure below:<br />
(Note: The large dotted arrow indicates the direction of the transformation, i.e. the top is<br />
first, then the bottom.)<br />
Line of reflection<br />
Image<br />
Pre-image<br />
A<br />
PRE-IMAGE<br />
B<br />
C<br />
Line of reflection<br />
B’<br />
C’<br />
IMAGE<br />
A’<br />
15
Math Grade 8: <strong>Geometric</strong> <strong>Transformations</strong> Day 5 (Creating & Performing <strong>Transformations</strong>)<br />
Objectives, students will:<br />
• Be able to design a transformation to be done by a fellow student<br />
• Be able to perform a transformation designed by a fellow student<br />
Opening Activity:<br />
• If the Transformation Concepts worksheet was given as homework, the teacher should discuss<br />
this worksheet with the students. If it was not given as homework, it could be used as<br />
additional assessment in this lesson.<br />
• To prepare the students for the assessment, the teacher asks the following questions:<br />
1. What are the two types of transformations that we learned about in this unit Translations<br />
and reflections<br />
2. Can you tell me what happens in each one of those transformations In a translation, the<br />
figure is slid in some direction. In a reflection, the figure is flipped over a line of<br />
reflection (mirror).<br />
3. What are the pre-image and images of a transformation The pre-image is what the<br />
figure looks like before the transformation, the image comes after.<br />
4. If I want to translate a figure, what additional information do I need I need to know the<br />
direction to slide the figure and how far to slide it.<br />
5. If I want to reflect a figure, what additional information do I need I need to know the<br />
line of reflection.<br />
Developmental Activity:<br />
The assessment for this unit will have students get into pairs. About half of the time will<br />
be devoted to students designing a transformation, while the other half will be spent on the<br />
students performing a transformation. During the first half, each student will work on the student<br />
1 part of the assessment. During the second half, they will work on the student 2 part. Therefore,<br />
each sheet will contain work from two different students (the two students in the pair).<br />
For student 1 part, students will first design a transformation of their choice, using the<br />
template worksheet provided below. They may choose either a translation or a reflection, and may<br />
choose any polygon with 5 or fewer points. They must also write a description of their<br />
transformation so that their partner will have enough information to perform their transformation.<br />
Once the students are finished designing a transformation, they exchange their papers<br />
with the other student in their pair. Now students work on the student 2 part of the assessment,<br />
performing the given transformation that their partners just designed.<br />
Each assessment worksheet will contain half of a student’s work, so a rubric is provided<br />
for scoring each individual student’s performance on the transformations.<br />
Closing Activity:<br />
Teacher assessment:<br />
The students will anonymously write down on a sheet of paper three things they learned about<br />
transformations. Also, students will write down one thing they liked and one thing they disliked<br />
about the unit. The teacher can use these comments to adjust this unit in the future.<br />
Equipment:<br />
• A straightedge will be provided to each student.<br />
Teacher’s Notes:<br />
The following pages include:<br />
1. The assessment worksheet.<br />
2. The assessment worksheet sample answers. The students are free to choose any shape and<br />
transformation they desire (within the scope of this course). While individual results may<br />
vary, one possibility of student work is provided.<br />
3. The assessment rubric.<br />
15
Student 1 _______________________<br />
Student 2 _______________________<br />
<strong>Transformations</strong><br />
Student 1 directions:<br />
1. Label the x-axis and the y-axis.<br />
2. Choose and draw your polygon on the graph provided.<br />
3. Label the points of your polygon, example A, B, C, …<br />
4. Write the coordinates of the points of your polygon in the table provided below.<br />
5. Choose and write the name of the transformation that Student 2 is to perform.<br />
6. Choose and write a description of the transformation that Student 2 is to perform.<br />
Label x y<br />
Transformation Name:_____________________<br />
Description:_____________________________<br />
_______________________________________<br />
_______________________________________<br />
Student 2 directions:<br />
1. Label the x-axis and the y-axis.<br />
2. Write the coordinates of the points of the transformed polygon in the table provided below.<br />
3. Draw your transformed polygon on the graph provided.<br />
4. Label the points of the transformed polygon on the graph provided, example A’, B’, C’, …<br />
5. Label the pre-image and image (you will have to look back to the first graph)<br />
Label x y<br />
15
Student 1 _______________________ SAMPLE Student 2 _______________________<br />
<strong>Transformations</strong><br />
Student 1 directions:<br />
1. Label the x-axis and the y-axis.<br />
2. Choose and draw your polygon on the graph provided.<br />
3. Label the points of your polygon, example A, B, C, …<br />
4. Write the coordinates of the points of your polygon in the table provided below.<br />
5. Choose and write the name of the transformation that Student 2 is to perform.<br />
6. Choose and write a description of the transformation that Student 2 is to perform.<br />
Label x y<br />
A 0 0<br />
C<br />
B 3 1<br />
C 1 3<br />
PRE-IMAGE<br />
B<br />
x-axis<br />
A<br />
Transformation Name: Reflection<br />
Description: Reflect triangle ABC over the x-axis<br />
Student 2 directions:<br />
1. Label the x-axis and the y-axis.<br />
2. Write the coordinates of the points of the transformed polygon in the table provided below.<br />
3. Draw your transformed polygon on the graph provided.<br />
4. Label the points of the transformed polygon on the graph provided, example A’, B’, C’, …<br />
5. Label the pre-image and image (you will have to look back to the first graph)<br />
Label x y<br />
A’ 0 0<br />
B’ 3 -1<br />
C’ 1 -3<br />
x-axis<br />
IMAGE<br />
A’<br />
B’<br />
C’<br />
15
Name: _________________________<br />
<strong>Transformations</strong> Rubric<br />
Section Earned Points Possible Points<br />
Label pre-image axes 5<br />
Draw pre-image polygon 10<br />
Label points of pre-image polygon 5<br />
Write coordinates of pre-image polygon 10<br />
Write type of transformation 5<br />
Write description of transformation 10<br />
Label image axes 5<br />
Write coordinates of image polygon 20<br />
Draw image polygon 15<br />
Label points of image polygon 5<br />
Label pre-image and image 10<br />
Student Total 100<br />
15