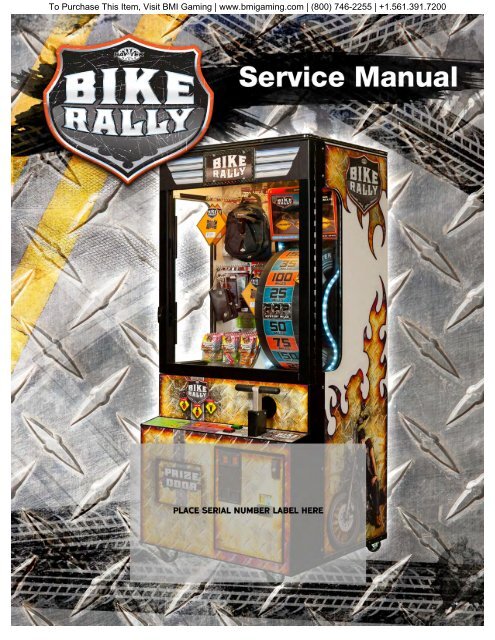
Service Manual - Bike Rally - BMI Gaming
Service Manual - Bike Rally - BMI Gaming
Service Manual - Bike Rally - BMI Gaming

Create successful ePaper yourself
Turn your PDF publications into a flip-book with our unique Google optimized e-Paper software.
To Purchase This Item, Visit <strong>BMI</strong> <strong>Gaming</strong> | www.bmigaming.com | (800) 746-2255 | +1.561.391.7200
To Purchase This Item, Visit <strong>BMI</strong> <strong>Gaming</strong> | www.bmigaming.com | (800) 746-2255 | +1.561.391.7200<br />
TABLE OF CONTENTS<br />
FACTORY CONTACT INFORMATION 2<br />
TABLE OF CONTENTS 3<br />
INTRODUCTION 4<br />
INSPECTION 4<br />
SPECIFICATIONS 5<br />
SAFETY PRECAUTIONS 5<br />
HOW TO PLAY 7<br />
HOW TO CHOOSE A PRIZE 8<br />
QUICK SET UP GUIDE 9<br />
DETAILED OPERATIONS / MAIN MENU 10<br />
STASTICS / AUDIT SYSTEM MENU 11<br />
HISTORY MENU 12<br />
DIAGNOSTICS MENU 12<br />
SET UP MENU 13<br />
SET UP / PAYOUT MENU 14<br />
FACTORY SETTINGS MENU 15<br />
PRIZE COST & MILEAGE GUIDELINE 16<br />
TROUBLE SHOOTING GUIDE 17-22<br />
POWER SUPPLY DIAGNOSTICS 23<br />
HOW TO: REMOVE THE WHEEL 24-25<br />
HOW TO: ADJUST WHEEL SENSOR 26<br />
HOW TO: SET BRAKE TENSION 27<br />
HOW TO: CLEAN GAME 27<br />
COMPONENT AND CABLE MAPPING 28<br />
WIRING DIAGRAMS 29<br />
MAINTENANCE LOG 30<br />
TECHNICAL SUPPORT 31<br />
WARRANTY 32<br />
BIKE RALLY PARTS LIST 33-34<br />
FIELD PERFORMANCE WORKSHEET 35<br />
3
To Purchase This Item, Visit <strong>BMI</strong> <strong>Gaming</strong> | www.bmigaming.com | (800) 746-2255 | +1.561.391.7200<br />
WELCOME TO: <strong>Bike</strong> <strong>Rally</strong><br />
Congratulations on your <strong>Bike</strong> <strong>Rally</strong> purchase!<br />
We hope you find <strong>Bike</strong> <strong>Rally</strong> offers value to your clientele, as well as your<br />
organization. Beyond the simplistic proven game play, <strong>Bike</strong> <strong>Rally</strong> was designed to<br />
house the most extensive audit system ever released by the Bay Tek Games factory.<br />
When used to its fullest capabilities, your operations will possess finite details to help<br />
track your player’s tendencies, prize preferences, and pertinent game<br />
performance details. We’ve made all this available to you at the push of a button in<br />
efforts to help your operations reach the expected return goals for this great game.<br />
We hope you take a few moments to read through this manual, and encourage you to<br />
contact the factory with any further questions you may have .<br />
Thank you in advance for your <strong>Bike</strong> <strong>Rally</strong> purchase and we wish you great success!<br />
Your Friends at Bay Tek Games<br />
GAME INSPECTION<br />
Inspect the game for any damaged, loose, or missing parts. If damage is found,<br />
please contact your freight carrier first. Then, contact Bay Tek Games<br />
<strong>Service</strong> Department at 920.822.3951 or e-mail them at<br />
service@baytekgames.com for further assistance.<br />
4
To Purchase This Item, Visit <strong>BMI</strong> <strong>Gaming</strong> | www.bmigaming.com | (800) 746-2255 | +1.561.391.7200<br />
SPECIFICATIONS<br />
WEIGHT<br />
WEIGHT<br />
525 LBS.<br />
POWER REQUIREMENTS<br />
SHIP WEIGHT<br />
565 LBS.<br />
INPUT VOLTAGE RANGE 100 to 120 VAC or 220 to 240 VAC<br />
WIDTH<br />
DIMENSIONS<br />
35 IN.<br />
INPUT FREQUENCY RANGE 50 HZ to 60 HZ<br />
DEPTH 32 IN.<br />
HEIGHT 78.5 IN.<br />
OPERATING TEMPERATURE<br />
80 - 100 Degrees Fahrenheit<br />
26.7 - 37.8 Degrees Celcius<br />
MAX START UP<br />
CURRENT<br />
1.5 AMPS @ 115 VAC<br />
0.75 AMPS @ 230 VAC<br />
OPERATING<br />
CURRENT<br />
0.7 AMPS @ 115 VAC<br />
.35 AMPS @ 230 VAC<br />
SAFETY PRECAUTIONS<br />
DANGER<br />
DO NOT perform repairs or maintenance on this game with the power ON.<br />
Unplug the unit from the wall outlet or shut off the power at the power<br />
strip located inside the game cabinet.<br />
WARNING<br />
Use of flammable substances can cause severe burns or serious injury. Always<br />
use NON-FLAMMABLE solvents for cleaning.<br />
DO NOT use gasoline, kerosene, or thinners.<br />
CAUTION<br />
Lifting heavy objects can cause back, neck, or other injuries. Be sure adequate<br />
lifting and moving devices are available when unloading, unpacking,<br />
and moving this game.<br />
ATTENTION<br />
Be sure the electrical power matches the game requirements. See the serial<br />
number decal located on the back of the game cabinet. Always plug game<br />
into a grounded circuit. If the supply cord is damaged, it must be replaced<br />
by a special cord or assembly available from the manufacturer or its service<br />
5
To Purchase This Item, Visit <strong>BMI</strong> <strong>Gaming</strong> | www.bmigaming.com | (800) 746-2255 | +1.561.391.7200<br />
HOW TO PLAY: <strong>Bike</strong> <strong>Rally</strong><br />
Jump In! This <strong>Bike</strong> <strong>Rally</strong> takes players<br />
through three American cities with<br />
rich motorcycle histories: Laconia,<br />
Milwaukee, & Sturgis.<br />
Prizes are offered at each of the three<br />
levels for players that spin enough<br />
miles! Step up and spin the wheel by<br />
simply pulling the handle up and giving<br />
it a big push down. When the<br />
wheel stops, players are awarded<br />
mileage shown on the wheel.<br />
Taking up to three spins each<br />
level, players must spin 250 miles<br />
to reach Chicago, where they select<br />
a small prize or Continue on to<br />
Denver, where they need to spin at<br />
least 475 miles to win a medium<br />
prize or Continue on to Hollywood,<br />
just 500 miles away to win the<br />
large prize!<br />
Note: Miles start at zero at each<br />
level.<br />
Actual factory default shown<br />
Players must spin the wheel fast<br />
enough to count as a "GOOD<br />
SPIN."<br />
For added excitement, three<br />
“MYSTERY MILE” targets have<br />
been added to the wheel, surprising<br />
players with mileage ranging from<br />
100 - 300 miles each time!<br />
6
To Purchase This Item, Visit <strong>BMI</strong> <strong>Gaming</strong> | www.bmigaming.com | (800) 746-2255 | +1.561.391.7200<br />
HOW TO CHOOSE A PRIZE: <strong>Bike</strong> <strong>Rally</strong><br />
Players love Road<br />
Trip for its simplicity<br />
PLUS excitement<br />
builds with better prizes<br />
offerings at each of the<br />
three levels.<br />
LARGE PRIZE<br />
MEDIUM PRIZE<br />
SMALL PRIZE<br />
When a player reaches level 1, they must<br />
choose [Continue] to play on to the next level or<br />
[Select] a small prize and end their game.<br />
*Capsule or Small Spindles 1-4*<br />
Important! The player does not win any prize if they choose<br />
[Continue] & fail to get enough miles to reach the next prize level.<br />
When a player reaches level 2, they must<br />
choose [Continue] to play on to the third & final<br />
level or [Select] a medium prize and end their<br />
game. *Medium Spindles 1 & 2*<br />
Important! The player does not win any prize if they choose<br />
[Continue] & fail to get enough miles to reach the next prize level.<br />
Congratulations! When a player has made it to<br />
level 3, Hollywood, they have completed their<br />
road trip and Won The Large Prize!!!<br />
*Large prize spindle 1 & 2*<br />
Use [Select Prize]<br />
button to toggle back<br />
& forth between prize<br />
spindles. Then press<br />
[Continue] button to<br />
take your prize.<br />
7
To Purchase This Item, Visit <strong>BMI</strong> <strong>Gaming</strong> | www.bmigaming.com | (800) 746-2255 | +1.561.391.7200<br />
QUICK SET UP GUIDE<br />
A: GET STARTED<br />
1. Complete warranty card (inside cashbox)<br />
2. Plug in and boot up game.<br />
B: YOUR GAME IS PRE-SET WITH THE FOLLOWING<br />
With the factory defaults pre-set, all<br />
you need to do is load $0.25 small,<br />
$10.00 medium, and $150 large<br />
prizes, and you are location ready for<br />
a target payout of 25%!<br />
Because <strong>Bike</strong> <strong>Rally</strong> is a skill-based game, Bay<br />
Tek highly recommends operating your game a<br />
minimum of 4-6 weeks at the factory setting before<br />
making alterations to the extensively field<br />
tested settings!!<br />
*Actual factory default Game Set Up screen<br />
C: LOAD PRIZES<br />
1. Refer to PRIZE DETAILS sheet inside game and / or manual.<br />
D: CLEAR CUMULATIVE STATISTICS<br />
If this game was in operations at a prior location, the factory recommends clearing the<br />
Cumulative Statistics by pressing the [SELECT PRIZE] button for 30 seconds.<br />
IMPORTANT! Should you decide to deviate<br />
from the factory settings shown above, additional<br />
information MUST be entered into the game to<br />
achieve your desired performance!!<br />
Refer to Prize Cost & Mileage Guideline in your manual.<br />
Congratulations! You’re Ready To Go!<br />
8
To Purchase This Item, Visit <strong>BMI</strong> <strong>Gaming</strong> | www.bmigaming.com | (800) 746-2255 | +1.561.391.7200<br />
1. Access Main Menu by pressing<br />
[MENU BUTTON] inside cabinet by<br />
counters (shown below) and holding<br />
button down for 3 seconds.<br />
DETAILED OPERATIONS<br />
MAIN MENU<br />
2. Press [SELECT PRIZE] button on<br />
control panel & scroll to Main Menu.<br />
Press [CONTINUE] to enter MAIN<br />
MENU.<br />
Access The Following Sub Menus From The Main Menu [Above]<br />
GAME STATISTICS:<br />
Detailed report displaying complete game performance. Total<br />
games played, quantity of prizes dispensed, payout details,<br />
and much more.<br />
RESET CREDITS:<br />
Quick way to reset or clear existing credits on the machine.<br />
GAME HISTORY:<br />
Itemized log [displaying date and time] of each action item<br />
performed on the game.<br />
DIAGNOSTICS:<br />
Used to trouble shoot prize spindle motors, sensors, wheel<br />
position, and brake status.<br />
GAME SET UP:<br />
This information MUST be entered at time of game set up for<br />
expected performance.<br />
FACTORY SETTINGS:<br />
General game functions including: volume, counters, model,<br />
and lighting preferences.<br />
9
To Purchase This Item, Visit <strong>BMI</strong> <strong>Gaming</strong> | www.bmigaming.com | (800) 746-2255 | +1.561.391.7200<br />
GAME STATISTICS MENU<br />
CURRENT STATISTICS<br />
Current Statistics is a detailed report<br />
showing total game performance since<br />
“stats” were last cleared. Hold down<br />
[select prize] button for 3 seconds to<br />
clear statistics.<br />
CUMULATIVE STATISTICS<br />
Cumulative Statistics is a high level<br />
summary of game performance since<br />
time of install.<br />
Tip: This data does NOT clear when<br />
Current Statistics are cleared.<br />
STATISTICS / AUDIT TERMS TO KNOW<br />
Games Played: Total number of plays.<br />
Coin Pulses: Advances 1 digit per coin in.<br />
DBA Pulses: Advances 4 digits per dollar in.<br />
Current Payout:<br />
Payout % since Statistics were last cleared.<br />
Game Loses:<br />
Quantity of players that did not select a prize.<br />
Small Prizes Won: Prizes won at level one.<br />
Medium Prizes Won: Prizes won at level two.<br />
Large prizes Won: Prizes won at level three.<br />
Prize Dispense Failures:<br />
When a player chooses an empty spindle twice, it will count<br />
as a prize failure. The game may also be empty, or a player<br />
has chose not to collect a prize.<br />
Spindle 1 thru 8 prize dispenses:<br />
Provides quantity of prizes dispensed from each<br />
spindle. A great way to determine what prizes are<br />
working well for your clientele.<br />
Total Continues:<br />
Tracks how many players have chosen to forfeit a prize to<br />
continue playing to next level.<br />
Small Continues:<br />
Quantity of players that reached level one and chose to forfeit<br />
their small prize to continue to the medium level.<br />
Prize Dispense Retries:<br />
If a prize has not fallen through the prize sensors<br />
in allotted time, the game commands the<br />
spindle to RETRY” or “turn again” until a prize<br />
has been sensed. If a prize has not dropped, the<br />
player is give an opportunity to select a prize<br />
from a different spindle at the same prize level.<br />
Medium Continues:<br />
Quantity of player that reached level two and chose to forfeit<br />
the medium prize to continue to the large level.<br />
10
To Purchase This Item, Visit <strong>BMI</strong> <strong>Gaming</strong> | www.bmigaming.com | (800) 746-2255 | +1.561.391.7200<br />
GAME HISTORY MENU<br />
“Press Continue Button To Exit, Press<br />
Select Button To Go Up”.<br />
Game History provides a running log of<br />
each action performed on the game.<br />
History will provide details such as:<br />
Game was powered on, large prize was<br />
won, player chose a prize from spindle 1,<br />
plum tilt bob was activated, warning was<br />
set, error occurred, etc.<br />
TIP: This log can be used to verify a<br />
player's winning claim. Time & Date must<br />
be correct for log to provide accurate<br />
data.<br />
GAME DIAGNOSTICS MENU<br />
FORCE MOTOR ON<br />
1. All spindles OFF<br />
2. Test each spindle independently<br />
3. Press [Continue] to advance to next<br />
spindle.<br />
PRIZE SENSOR TEST<br />
1. OFF: Game is in play mode<br />
2. RUNNING: Activates motor for spindle 1<br />
and/or capsule dispenser until game senses<br />
a prize has fallen through the prize sensor.<br />
Repeats until you turn motor off.<br />
BRAKE STATUS<br />
A simple algorithm is used to determine the wheel<br />
coast time. The diagnostic screen will report one<br />
of the four commands showing brake status:<br />
UNKNOWN OK LOOSEN TIGHTEN<br />
Wheel has<br />
not been<br />
spun .<br />
No<br />
adjustments<br />
necessary<br />
Brake needs<br />
to be<br />
loosened.<br />
Brake<br />
needs to be<br />
tightened.<br />
After making adjustments, spin wheel again for new<br />
report. Repeat until status reads: BRAKE OK..<br />
Game software = A.A<br />
Wheel Position<br />
Aux software = B.B<br />
x y z<br />
There are<br />
[24] targets<br />
on the<br />
wheel. [x]<br />
represents<br />
the arrow is<br />
pointing to<br />
target [x]<br />
DIAGNOSTICS INFORMATION<br />
Mileage<br />
value the<br />
arrow is<br />
pointing to.<br />
[0] Indicates<br />
sensor<br />
is positioned<br />
within the<br />
target area.<br />
[1] Sensor is<br />
positioned on<br />
the line between<br />
targets<br />
11
To Purchase This Item, Visit <strong>BMI</strong> <strong>Gaming</strong> | www.bmigaming.com | (800) 746-2255 | +1.561.391.7200<br />
GAME SET UP MENU<br />
Follow Step 1 thru 5: Make a selection for each item below from the<br />
Game Set Up Menu *at time of set up only<br />
3. DESIRED PAYOUT %<br />
Please See Step 3 [Payout Selection] on following page and<br />
make your desired payout % selection.<br />
4. PRIZE COSTS SETTINGS<br />
SMALL MEDIUM LARGE<br />
1. CREDITS<br />
PER GAME<br />
0<br />
1<br />
1 Card Swipe<br />
2<br />
3<br />
4<br />
4+ 6 plays for $5<br />
5<br />
6<br />
7<br />
8<br />
8+ 3 plays for $5<br />
9<br />
10<br />
12<br />
20<br />
Actual factory default shown above<br />
NOTICE! Should you decide to deviate from the<br />
factory settings shown above, additional information<br />
MUST be entered into the game to<br />
achieve your desired performance.<br />
DEFAULT<br />
2. PRICE PER<br />
PLAY<br />
$0.25<br />
$0.50<br />
$0.75<br />
$1.00 DEFAULT<br />
$1.25<br />
$1.50<br />
$1.75<br />
$2.00<br />
$2.25<br />
$2.50<br />
$2.75<br />
$3.00<br />
$3.25<br />
$3.50<br />
$3.75<br />
$4.00<br />
$4.25<br />
$4.50<br />
$4.75<br />
$5.00<br />
$5.25<br />
$5.50<br />
$5.75<br />
$6.00<br />
12<br />
$0.15 $5.00 $15.00<br />
$0.20 $8.00 $25.00<br />
$0.25 $10.00 $50.00<br />
$0.50 $15.00 $75.00<br />
$1.00 $20.00 $100.00<br />
$2.00 $25.00 $150.00<br />
IMPORTANT! Enter your ACTUAL<br />
prize cost! Inflating this number will<br />
cause your payout statistics to be incorrect!<br />
The game uses actual data to<br />
calculate mystery miles!<br />
$50.00 $200.00<br />
$250.00<br />
$300.00<br />
$350.00<br />
$400.00<br />
Actual factory default costs are highlighted in yellow<br />
5. SET TIME AND DATE<br />
*Entering time and date ensures the history log is accu-<br />
1. Set Month<br />
2. Set Day<br />
3. Set Year<br />
4. Set Hour<br />
5. Set Minute<br />
Exit Menu
To Purchase This Item, Visit <strong>BMI</strong> <strong>Gaming</strong> | www.bmigaming.com | (800) 746-2255 | +1.561.391.7200<br />
GAME SET UP MENU cont’d<br />
Two key factors work in tandem to control prize payout:<br />
Mystery Miles & Miles Needed To Each Prize Level<br />
PAYOUT % and MYSTERY MILES<br />
Mystery Miles: Your game has three mystery mile targets<br />
on the wheel. The amount of mystery miles a player is<br />
awarded is determined by the following three factors:<br />
overall revenue taken in, prize dollars out (using ACTUAL<br />
prize cost) and your desired payout %.<br />
Higher mystery miles are dispersed to the player when your payout is lower than desired,<br />
while Lower mystery miles are dispersed to the player when your payout is<br />
higher than desired. Important! Mystery Mile targets ALWAYS output mileage ranging<br />
from 100 to 300 miles, and cannot be manipulated in any way to determine a players<br />
outcome.<br />
STEP 3: (continued from p. 15) Make Desired Payout Selection<br />
The factory default is pre-set with a<br />
desired payout of 25%. Follow these<br />
three steps below to adjust your desired<br />
payout % upward or downward:<br />
ACTUAL GAME SET UP MENU BELOW<br />
Step 1: Enter Set Up Menu<br />
Step 2: Select Desired Payout<br />
Step 3: Adjust payout percent up or<br />
down accordingly.<br />
DESIRED PAYOUT % RANGE OPTIONS<br />
20 25 30 35 40 45 50<br />
Actual factory default shown above<br />
Important! Road Trip is a game of skill and therefore prize payout may vary depending<br />
on the skill level of the player! Progress should be evaluated over a period<br />
of time before making weighted game adjustments!<br />
13
To Purchase This Item, Visit <strong>BMI</strong> <strong>Gaming</strong> | www.bmigaming.com | (800) 746-2255 | +1.561.391.7200<br />
FACTORY SETTINGS MENU<br />
BEGIN BY FOLLOWING STEPS 1 THRU 6<br />
Make a selection for each item below from the Factory Settings Menu.<br />
STEP 1: MAKE VOLUME SELECTIONS<br />
GAME VOLUME:<br />
Projects sound when game is coined up.<br />
ATTRACT VOLUME:<br />
Projects sound when game is idle to get<br />
player's attention.<br />
Tip: If location is low traffic during the day and wants the volume lower, make adjustments to the attract volume, but leave the game volume alone.<br />
STEP 2: MAKE LIGHTING SELECTIONS<br />
ATTRACT LIGHTING ON: LED lights blink for attention. (factory default)<br />
ATTRACT LIGHTING OFF: LED lights softly transition between colors. Recommended for bar or club locations.<br />
STEP 3: MAKE MECHANICAL COUNTERS SELECTION<br />
COUNT GAMES: Advances mechanical counter one digit per game. (factory default)<br />
COUNT CREDITS: Advances mechanical counter one digit per coin/credit<br />
STEP 4: MAKE MILEAGE PATTERN SELECTION FOR EACH PRIZE LEVEL<br />
MILEAGE DESCRIPTION: Players must accumulate enough miles in three spins or<br />
less to get to each prize level. When mileage is increased between cities, the game<br />
becomes more difficult, while less miles (distance) between cities makes the game<br />
easier. The mileage instruction decal is located below the wheel inside the cabinet.<br />
ACTUAL FACTORY SET UP MENU<br />
Actual factory default mileage pattern<br />
IMPORTANT! If you make a change to your Mileage Pattern<br />
Selection - You MUST also change the mileage decal located<br />
below the wheel inside the game cabi-<br />
See prize table reference guide on next page!<br />
STEP 5: MAKE WINNER EVERY TIME SELECTION<br />
DISABLED: When Winner Every Time is disabled, players MUST accumulate the specified amount<br />
of miles (or more) to be eligible to claim a small prize. (factory default)<br />
ENABLED: When Winner Every Time is Enabled, players have ability to claim a small prize even<br />
when they have not accumulated the specified amount of miles to the small prize level (Chicago)<br />
STEP 6: MAKE SPINDLE OR CAPSULE SELECTION<br />
SPINDLES: Spindle games are equipped with (4) small prize spindles (2) medium prize spindles<br />
and (2) large prize spindles. (factory default)<br />
14<br />
Actual factory default shown above<br />
CAPSULES; Capsule games are equipped with (1) capsule hopper (2) medium prize spindles and<br />
(2) large prize spindles.
To Purchase This Item, Visit <strong>BMI</strong> <strong>Gaming</strong> | www.bmigaming.com | (800) 746-2255 | +1.561.391.7200<br />
PRIZE COST & MILEAGE GUIDELINE<br />
FOLLOW 4 STEPS: DETERMINE PRIZE COSTS & MAKE MILEAGE SELECTIONS<br />
1. Identify the ACTUAL cost of your SMALL, MEDIUM, & LARGE prizes.<br />
2. Next - Enter Factory Settings Menu and scroll down to Mileage Patterns.<br />
3. Next - Locate software patterns that match your prize cost for each prize level.<br />
Example A: If your small prizes cost $0.50, you should select Mileage Pattern 2 because $0.50<br />
is shown under the Mileage Pattern 2 column.<br />
Example B: If your medium prizes cost $20, you should select Mileage Pattern 4 because $20 is<br />
shown under the Mileage Pattern 4 column. Factory default mileage patterns are highlighted in<br />
yellow.<br />
4. Lastly - Locate replacement mile decals inside the cashbox. Make sure the appropriate mileage<br />
stickers are placed on each prize level to instruct the player how many miles they need to spin to<br />
win each level.<br />
MILEAGE REFERENCE GUIDE<br />
SMALL PRIZE (LACONIA)<br />
PATTERN 1 2 3 4 5<br />
$0.15<br />
$0.15<br />
$0.15 $0.50 $2.00<br />
COST<br />
$0.20<br />
$0.20<br />
$0.20 $0.75<br />
$0.25<br />
$0.25<br />
$0.25 $1.00<br />
MILES<br />
175<br />
MILES<br />
200<br />
MILES<br />
250<br />
MILES<br />
300<br />
MILES<br />
350<br />
MILES<br />
MEDIUM PRIZE (MILWAUKEE)<br />
PATTERN 1 2 3 4 5<br />
$5.00 $5.00 $8.00 $10.00 $25.00<br />
COST<br />
$15.00 $30.00<br />
$20.00 $50.00<br />
MILES<br />
350<br />
MILES<br />
400<br />
MILES<br />
450<br />
MILES<br />
475<br />
MILES<br />
500<br />
MILES<br />
LARGE PRIZE (STURGIS)<br />
PATTERN 1 2 3 4 5 6<br />
$15.00 $75.00 $200.00 $250.00 $350.00 $400.00<br />
COST<br />
$25.00 $100.00 $300.00 $500.00<br />
$50.00 $150.00 $550.00<br />
$600.00<br />
MILES<br />
450<br />
MILES<br />
500<br />
MILES<br />
525<br />
MILES<br />
550<br />
MILES<br />
575<br />
MILES<br />
600<br />
MILES<br />
15
To Purchase This Item, Visit <strong>BMI</strong> <strong>Gaming</strong> | www.bmigaming.com | (800) 746-2255 | +1.561.391.7200<br />
TROUBLE SHOOTING GUIDE<br />
Troubleshooting Strategy<br />
Use common sense and a systematic method of troubleshooting to determine the exact problem, probable cause and<br />
remedy. Use the process of elimination to find the faulty component. Always check for the simple and obvious causes<br />
first such as unplugged, loose or broken wires and bad sensors, bent, pinched, stuck or jammed components.<br />
Troubleshooting Chart<br />
Problem Probable Cause Remedy<br />
No power to the game.<br />
No lights on at all.<br />
AC Light and Bill Acceptor<br />
on.<br />
But everything else off.<br />
Unplugged.<br />
Circuit breaker tripped.<br />
Power strip faulty.<br />
Faulty cable/power supply.<br />
Unplugged.<br />
Rocker Switch.<br />
Check wall outlet.<br />
Reset power strip breaker switch or building<br />
circuit breaker.<br />
Change plug position, replace if needed.<br />
See Power Supply diagnostic below.<br />
Ensure plug is seated in<br />
Power Supply<br />
Make sure rocker is set ON.<br />
(Power Supply not ON)<br />
Check for Green Light on motherboard.<br />
If Green light is OFF – Replace Power<br />
Supply. (AAPS1005)<br />
If Green light is ON :<br />
Touch 2 red pins on motherboard together<br />
to start fan. Game will boot up and play normally.<br />
If fan does not turn – Replace motherboard.<br />
If fan is turning and monitor is blank, go to<br />
Monitor Troubleshooting.<br />
Dollar Bill Acceptor not<br />
functioning.<br />
Ensure bill acceptor has correct<br />
voltage.<br />
Dirt or debris in acceptor<br />
slot.<br />
Ensure acceptor dipswitch is<br />
set to “always enable”<br />
Pinched, broken, or disconnected<br />
wiring.<br />
Bill acceptor problem.<br />
16<br />
Acceptor should cycle stacker at game<br />
power up. If not, check cable connections.<br />
Caution Bill Acceptor may be<br />
110 Volts AC or 12 Volts Dc<br />
Clean with bill reader cleaning card.<br />
(A5CC9000)<br />
There are dips on side of acceptor. Set to<br />
“always enable” (not harness enable)<br />
Check wiring from bill acceptor<br />
to I/O board.<br />
Repair or replace wiring harness.<br />
Refer to troubleshooting section of dollar bill<br />
acceptor manual included with this<br />
game or the diagnostics label of the<br />
back of the unit.
To Purchase This Item, Visit <strong>BMI</strong> <strong>Gaming</strong> | www.bmigaming.com | (800) 746-2255 | +1.561.391.7200<br />
TROUBLE SHOOTING GUIDE<br />
No<br />
Audio<br />
Volume too low.<br />
Loose wire.<br />
Increase the volume by pressing<br />
Menu button, scroll to volume slider<br />
Bar and adjust.<br />
Check audio cable connections<br />
from main board to I/O board to speakers.<br />
AACE44<br />
Faulty I/O Board<br />
Faulty motherboard<br />
A5CEAU01<br />
c. Replace I/O Board. (AACB4400)<br />
d. Replace Motherboard. (AAMB6)<br />
AACE881<br />
1<br />
Small 12 Volt power<br />
connector unplugged<br />
on motherboard.<br />
Monitor<br />
not working.<br />
Power<br />
down,<br />
wait 10<br />
seconds<br />
and power<br />
up again.<br />
Monitor says<br />
“NO SIGNAL”<br />
for 5 seconds<br />
after power-up.<br />
Then dark.<br />
Monitor has<br />
nothing at all on<br />
power up.<br />
Monitor VGA cable<br />
unplugged.<br />
Large power<br />
connector unplugged<br />
on motherboard<br />
Faulty or loose RAM<br />
Faulty power supply - Check for 12 Volts and green LED on motherboard.<br />
Check for fan spinning on power supply.<br />
Faulty motherboard - Replace faulty board. (AAMB6)<br />
Power cable unplugged from<br />
monitor.<br />
Faulty monitor.<br />
Ensure power is plugged into back of<br />
monitor, down to power strip.<br />
Replace monitor. (A5CBDI030)<br />
Error on screen<br />
at power up.<br />
Re-Boot game<br />
to see if problem<br />
still exists.<br />
Display stops at "No bootable device<br />
-- insert boot disk and<br />
press any key"<br />
Display shows “Kernel panic –<br />
unable to mount root”<br />
Flash drive unplugged from board or<br />
faulty.<br />
Re-seat and apply power to game<br />
Replace main program.<br />
(A5FHD001)<br />
Faulty or loose RAM<br />
17
To Purchase This Item, Visit <strong>BMI</strong> <strong>Gaming</strong> | www.bmigaming.com | (800) 746-2255 | +1.561.391.7200<br />
TROUBLE SHOOTING GUIDE<br />
Monitor problems.<br />
Blurry Monitor<br />
Too bright, or dim.<br />
Position off.<br />
Adjustment buttons are on bottom edge of monitor.<br />
Lift plexi from bottom of monitor.<br />
b. Press “Auto”<br />
c. Use menu buttons to access monitor<br />
adjustments.<br />
Game plays but some of<br />
the functions do not work.<br />
Game does not coin up.<br />
Tilt Alarm<br />
always going<br />
off.<br />
Tilt Alarm never activates.<br />
Alarm should sound when<br />
game is shaken.<br />
Note: Game play is NOT<br />
affected.<br />
None of inputs work. No coin up,<br />
no test buttons, display may<br />
say door open.<br />
Display is OK, but does not show<br />
some screens. No volume<br />
Game freezes, locks up.<br />
One of coin switches jammed, or<br />
held down.<br />
Short in coin door harness.<br />
I/O Serial cable unplugged from I/<br />
O board to motherboard<br />
I/O board faulty.<br />
Tilt Plumb Bob touching bottom<br />
ring.<br />
Bottom ring bent or crooked.<br />
Wire short.<br />
I/O board faulty.<br />
Tilt Plumb Bob mechanical problem.<br />
Alarm does not activate until<br />
game is really rocked.<br />
Pinched, broken, or disconnected<br />
wiring.<br />
I/O board faulty.<br />
I/O Serial cable unplugged from I/O<br />
board to motherboard<br />
Flash drive loose, or faulty.<br />
Faulty RAM, or motherboard.<br />
If one coin switch is “closed” the other<br />
one will not work either.<br />
Unplug white molex from door, and<br />
jump between white and black wires<br />
to simulate coin-up.<br />
Ensure serial cable is tight and connected.<br />
Replace I/O board. (AACB4400)<br />
Loosen Plumb Bob and adjust until<br />
metal is not contacting ring.<br />
Adjust ring until straight and true.<br />
Check wiring from tilt to I/O board.<br />
Repair or replace wiring harness.<br />
Replace I/O board. (AACB4400)<br />
Adjust Plum Bob so that alarm activates<br />
when it touches bottom ring.<br />
Adjust Plum Bob higher on support.<br />
Check wiring from tilt to I/O board.<br />
Repair or replace wiring harness.<br />
Replace I/O board. (AACB4400)<br />
18
To Purchase This Item, Visit <strong>BMI</strong> <strong>Gaming</strong> | www.bmigaming.com | (800) 746-2255 | +1.561.391.7200<br />
TROUBLE SHOOTING GUIDE<br />
Spin meter never<br />
increases.<br />
Encoder sensor dirty or<br />
faulty.<br />
Clean sensor and replace if needed.<br />
(AACB4401)<br />
Scoring<br />
Issues<br />
Encoder sensor<br />
not seeing wheel<br />
spin.<br />
Sensor is being interfered<br />
with.<br />
Pinched, broken, or disconnected<br />
wiring.<br />
I/O board faulty.<br />
Remove game from direct sunlight,<br />
move game to area away from<br />
Neon lights or bright fluorescent<br />
lights.<br />
Inspect wiring and replace cable if<br />
needed.<br />
Replace I/O board. (AACB4400)<br />
Game says you won even<br />
though wheel is still spinning.<br />
Wheel values arrow pointer<br />
and monitor are off slightly.<br />
Brake Assembly tension set to<br />
strong.<br />
There is an adjustment on the<br />
wheel encoder sensor to calibrate<br />
the monitor change to<br />
where the arrow is pointing.<br />
Refer to<br />
“How to Set Brake Tension”<br />
Refer to<br />
“How to adjust wheel sensor”<br />
Game is giving wrong<br />
values.<br />
Enter Diagnostic Menu and<br />
watch “Wheel Position” as<br />
you spin the wheel downward.<br />
Wheel Position does not change<br />
as you spin the wheel down.<br />
Wheel Position does change as<br />
you spin the wheel down.<br />
Wheel Position goes to 24, then<br />
resets to 0 and continues up<br />
again.<br />
Encoder sensor unplugged, dirty or<br />
faulty.<br />
Clean and replace if needed. (AACB4401)<br />
Inspect wiring, replace I/O board<br />
(AACB4400)<br />
Encoder sensor out of adjustment.<br />
Refer to<br />
“How to adjust wheel sensor”<br />
Remove game from direct<br />
sunlight, move game to<br />
area away from Neon lights<br />
or bright fluorescent lights.<br />
Wheel Position does change as<br />
you spin the wheel down.<br />
Wheel Position increments constantly<br />
upwards up past 100.<br />
Home Position sensor<br />
unplugged, dirty or faulty.<br />
Clean and replace if needed.<br />
(AABD5010)<br />
Inspect wiring,<br />
replace I/O board (AACB4400)<br />
19
To Purchase This Item, Visit <strong>BMI</strong> <strong>Gaming</strong> | www.bmigaming.com | (800) 746-2255 | +1.561.391.7200<br />
Wheel not spinning<br />
when player moves<br />
handle.<br />
TROUBLE SHOOTING GUIDE<br />
No 12 Volts on connector at coin<br />
up.<br />
Inspect cable from Solenoid to I/O board.<br />
(J28) Main cable part # AACB4400<br />
Replace I/O board. (AACB4400)<br />
Check for 12 Volts DC at<br />
coin up on connector.<br />
12 Volts present at connector, but<br />
solenoid still doesn’t engage.<br />
If 12 Volts present at connector, but solenoid<br />
still doesn’t engage.<br />
Wheel will have to be removed to further<br />
inspect or replace.<br />
Refer to “How to Remove Wheel”<br />
Solenoid always stays<br />
on.<br />
Players can spin wheel<br />
without inserting money.<br />
Players will win a lot!<br />
Jammed Solenoid or Springs<br />
Pinched Cable.<br />
Check for 12 Volts DC on cable<br />
to solenoid when game is in<br />
normal<br />
Inspect solenoid. Ensure it operates<br />
smoothly.<br />
Press in on silver bar. It is spring loaded<br />
and<br />
will spring back after release.<br />
Inspect cable for smashed wire. May also<br />
have to replace I/O Board.<br />
If 12 Volts present, Replace I/O board.<br />
(AACB4400)<br />
If no 12 Volts and solenoid is still engaged –<br />
Wheel will have to be removed to further<br />
inspect or replace.<br />
Refer to “How to Remove Wheel”<br />
Meters do not work.<br />
Sensor Blocked Left<br />
Error<br />
Prize meter should click as prize<br />
drops through chute sensors.<br />
Game meter should click as<br />
game starts.<br />
I/O board faulty.<br />
Prize chute blocked.<br />
Prize chute sensors dirty.<br />
Pinched, broken, or disconnected<br />
wiring.<br />
Prize chute sensors faulty.<br />
20<br />
Watch as prize drops.<br />
Replace counters (AACO1000)<br />
Watch as next game starts.<br />
Replace counters (AACO1000)<br />
Replace I/O board. (AACB4400)<br />
Make certain nothing is in jammed in prize<br />
chute. Check prize dimensions.<br />
Blow air through holes in wood prize chute.<br />
Prize chute can be removed to clean<br />
sensors.<br />
Check wiring from sensor to sensor.<br />
(AACE4406)<br />
Check wiring from sensor to I/O Board.<br />
(AACE4405)<br />
Replace both prize chute sensors.<br />
(AACB4402)
To Purchase This Item, Visit <strong>BMI</strong> <strong>Gaming</strong> | www.bmigaming.com | (800) 746-2255 | +1.561.391.7200<br />
TROUBLE SHOOTING GUIDE<br />
Game does not drop<br />
prize.<br />
“It didn’t give me a<br />
prize”<br />
Player chooses to continue.<br />
Player “mistaken”<br />
If the player continues to try to win higher<br />
prize – you give up the lower prize.<br />
Enter game history menu to prove a disputed<br />
win. It has a time stamp with what<br />
the game has done.<br />
Enter Statistics Menu and look at Prize Dispenser<br />
Failures and Prizes Dispensed<br />
Refer to instruction manual for detailed explanation.<br />
Symptom: Game is about to dispense a prize, but<br />
spindle doesn’t turn and game moves on<br />
thinking it dropped a prize.<br />
Prize chute sensors dirty.<br />
Clean or replace faulty sensors.<br />
(AACB4402)<br />
21
To Purchase This Item, Visit <strong>BMI</strong> <strong>Gaming</strong> | www.bmigaming.com | (800) 746-2255 | +1.561.391.7200<br />
POWER SUPPLY DIAGNOSTICS<br />
Power Supply Diagnostics:<br />
Check power cable to game.<br />
Check connections on power socket on bottom rear of game (A)<br />
Check connection to power supply (B).<br />
Ensure Power Supply switch is set to 115V (C)<br />
(Some power supplies may not have this)<br />
Ensure Power switch is on (D).<br />
Ensure fan is turning.<br />
A<br />
B<br />
C<br />
Verify power to motherboard:<br />
Check for 12 Volts DC between black and yellow wires.<br />
D<br />
1.) Ensure fan is turning.<br />
2.) Green LED should be ON<br />
Note: The location of this connector<br />
may vary depending on<br />
which version motherboard is in<br />
game.<br />
.<br />
Mother Board – Part # AAMB6<br />
SERIAL PORT<br />
TO MOTHER-<br />
BOARD<br />
MONITOR CA-<br />
SPEAKER LINE<br />
22
To Purchase This Item, Visit <strong>BMI</strong> <strong>Gaming</strong> | www.bmigaming.com | (800) 746-2255 | +1.561.391.7200<br />
HOW TO: Remove Wheel<br />
Solenoid replacement requires the wheel to be removed from game.<br />
It is important to troubleshoot the game first to determine if the problem actually is a faulty<br />
Step 2:<br />
1. Remove 4 bolts securing wood<br />
frame to game cabinet.<br />
2. Remove 2 bolts on pointer in<br />
front of wheel. Allow pointer to<br />
dangle next to wheel.<br />
Caution: If arrow is still mounted<br />
to game as the wheel is removed,<br />
the sensor may be damaged.<br />
STEP 1:<br />
1. Unplug connector to solenoid.<br />
2. Press Menu button in front of game.<br />
3. Measure voltage across red and black wires.<br />
It should be 12 Volts DC<br />
4. If meter reads 0 Volts DC with the solenoid<br />
unplugged, the problem is the I/O AUX board<br />
or wires.<br />
5. If meter reads 12 Volts DC - then plug in solenoid<br />
connector,<br />
6. Check wires to solenoid, look for a cut wire.<br />
If the wires pass this test, then continue to re<br />
move wheel and replace solenoid.<br />
Step 3:<br />
1. Unplug connector near bottom of<br />
wheel.<br />
Step 4:<br />
Remove pin at bottom of<br />
arm<br />
Step 5:<br />
Slowly remove from cabinet<br />
and lay on bench. Lay on side<br />
so arm is toward top of unit.<br />
23
To Purchase This Item, Visit <strong>BMI</strong> <strong>Gaming</strong> | www.bmigaming.com | (800) 746-2255 | +1.561.391.7200<br />
HOW TO: Remove Wheel<br />
Step 6<br />
Remove set screw and remove<br />
wheel to access wheel<br />
home position sensor.<br />
Step 7<br />
There is a calibration tab on<br />
the side of the wheel. The<br />
posts are 1 3/8 inches tall<br />
Step 8<br />
The sensor that reads home<br />
position of wheel is mounted<br />
to bottom wood piece.<br />
[AABD5010]<br />
Step 9<br />
To re-assemble wheel: Reverse<br />
steps, making sure: wheel bearing<br />
is on straight and tight. Arm is<br />
positioned in gap.<br />
Step 10<br />
When re-installing top wood,<br />
Position brake assy. To follow<br />
curve on wheel. Ensure<br />
wood slides.<br />
Step 11<br />
Secure top wood and ensure<br />
the following fit properly.<br />
The 4 screws attach to<br />
wheel bearing.<br />
Slide wood under<br />
plexi for<br />
attraction<br />
lighting<br />
Re-install wheel assy. Into<br />
cabinet.<br />
NOTE: Make sure solenoid<br />
assy. Is swung toward rear<br />
of machine when installing<br />
pin on bottom of arm.<br />
24
To Purchase This Item, Visit <strong>BMI</strong> <strong>Gaming</strong> | www.bmigaming.com | (800) 746-2255 | +1.561.391.7200<br />
HOW TO: Adjust Wheel Sensor<br />
Wheel sensor is located behind the arrow<br />
on wheel.<br />
It “reads” the notch in the side of the<br />
wheel to tell the game when the panel<br />
has changed.<br />
Back View<br />
Sensor (AACB4401)<br />
To Test:<br />
Enter menu and go to Diagnostics Menu.<br />
Spin Wheel slowly downward, and watch<br />
monitor’s wheel position readout.<br />
The wheel position value should change as<br />
soon as next panel crosses arrow point.<br />
To Adjust:<br />
Turn Phillips head screw to move sensor.<br />
Continue spinning wheel slowly downward,<br />
and watch monitor’s wheel position<br />
readout; adjusting screw until panel<br />
changes at arrow.<br />
25
To Purchase This Item, Visit <strong>BMI</strong> <strong>Gaming</strong> | www.bmigaming.com | (800) 746-2255 | +1.561.391.7200<br />
HOW TO: Set Brake Tension<br />
To Test:<br />
Enter menu and go to Diagnostics Menu.<br />
Use plunger handle to give the wheel a<br />
good spin, Let the wheel coast to a stop<br />
like a normal game play.<br />
If brake is set correctly, screen will show:<br />
Brake Status = Brake OK<br />
If Brake Status shows Loosen Brake<br />
or Tighten Brake, adjust brake assembly.<br />
To Adjust:<br />
To loosen brake:<br />
Loosen top nut and move 1/4 inch up.<br />
The threaded rod will drop as top nut<br />
moves up. Spin bottom nut up tight to<br />
bracket. Tighten both nuts.<br />
To tighten brake:<br />
Loosen bottom nut and move 1/4 inch<br />
down. Lift up the threaded rod and spin<br />
nut down tight to bracket.<br />
Tighten both nuts.<br />
Re-test to verify:<br />
Brake Status = Brake OK<br />
HOW TO: Clean Game<br />
Use a mild soap solution and a clean lint free cloth to wipe down game.<br />
Do NOT use any cleaning solvents on the game’s graphics!<br />
26
To Purchase This Item, Visit <strong>BMI</strong> <strong>Gaming</strong> | www.bmigaming.com | (800) 746-2255 | +1.561.391.7200<br />
COMPONENT & CABLE MAPPING<br />
AUX I/O<br />
BAORD<br />
[AACB4400]<br />
27
To Purchase This Item, Visit <strong>BMI</strong> <strong>Gaming</strong> | www.bmigaming.com | (800) 746-2255 | +1.561.391.7200<br />
WIRING DIAGRAMS<br />
PUPUSH BUTTON WIRING<br />
Select Button<br />
Wiring Diagram<br />
Continue Button<br />
Wiring Diagram<br />
Red W/ Green<br />
Stripe<br />
Green<br />
Blue W/ Red<br />
Stripe<br />
Green W/<br />
Black Stripe<br />
Blue W/ White Stripe<br />
Orange W/ Black Stripe<br />
White W/ Black Stripe<br />
Red W/ Black Stripe<br />
MOTHER BOARD WIRING [AAMB6]<br />
SPEAKER LINE OUT<br />
USB DRIVE<br />
SOFTWARE<br />
MONITOR CABLE<br />
SERIAL PORT TO<br />
MOTHERBOARD<br />
28
To Purchase This Item, Visit <strong>BMI</strong> <strong>Gaming</strong> | www.bmigaming.com | (800) 746-2255 | +1.561.391.7200<br />
MAINTENANCE LOG<br />
If you need to make repairs or order replacement parts it is a good idea to keep a log.<br />
Below is a chart you can use to track repairs and maintenance.<br />
DATE MAINTENANCE PERFORMED PARTS ORDERED INITIALS<br />
29
To Purchase This Item, Visit <strong>BMI</strong> <strong>Gaming</strong> | www.bmigaming.com | (800) 746-2255 | +1.561.391.7200<br />
TECHNICAL SUPPORT<br />
Excellent customer service is very important to Bay Tek Games! We know that keeping your games<br />
in great operating condition is important to your business. When you need us, we are here to help.<br />
You can call us fro free technical assistance, and you can count on us to have parts on-hand to support<br />
your game. When you do need us, it’s important that you know what to expect. We offer options<br />
that fit your needs.<br />
Electronics / Circuit Boards - Repair Options<br />
Repair & Return – If you have Circuit Board issues with your Bay Tek game, you can send the<br />
board to us and we’ll repair it right away. Most items sent to us are repaired and returned to you<br />
within two days. This option is your best value as we offer this fast turn-around service at the most<br />
reasonable price.<br />
Advance Replacement – If you have Circuit Board issues with your Bay Tek game, but you don’t<br />
have time to send in your board in for repair, give us a call and ask for an Advance Replacement.<br />
We’ll send you a replacement board that same day (pending availability). When you get your new<br />
board, just repackage the defective board in the same box and send it back to us. We make it easy<br />
by including a UPS Return Shipping label for you to put on the box (not available for international<br />
shipments). This is your best option when you need to get you game up and running as quickly as<br />
possible!<br />
Spare Parts – Take matters into your own hands and purchase new spare Circuit Boards for your<br />
Bay Tek games. Many of our games share the same main-board electronics. This means you can<br />
buy one set of spare electronics to support many of your Bay Tek games. Spare boards allow you<br />
to get your game up and running the quickest and provide you a valuable troubleshooting option.<br />
Call our technicians to get recommendations for what you should keep on hand for spare parts!<br />
Technical Support:<br />
“You” are the best tool for troubleshooting! Your abilities to understand the game and your skills to<br />
repair the game are invaluable to us! If you need help, you know you can call us. It’s not easy to<br />
diagnose a game remotely by phone, but our technicians do a great job. They’ll need your help to<br />
perform some troubleshooting steps and convey to them exactly what’s happening with your game.<br />
Returns, Credits, & Fees:<br />
NOTICE! ALL ITEMS being sent to Bay Tek Games for repair or return, etc. require prior Return<br />
Authorization! Bay Tek Games will provide a Product Return Form with an authorizing Ticket Number<br />
for each item to be returned. Please be certain to include this document with all shipments!<br />
Late Fees and Non-Return Fees - Advance Replacement and Warranty Replacement items require<br />
the defective items to be returned by Bay Tek games promptly to avoid Late Fees. We would expect<br />
items to be returned with 10 working days. Late fees are invoiced monthly. Late fees are nonrefundable<br />
under any circumstance! Any item not returned within 90 days will be invoiced in full as a<br />
replacement part!<br />
Bench Fees - Bench fees will apply for each electronic item returned to Bay Tek Games (this includes<br />
unused Advance Replacement items). This charge covers our cost to inspect, evaluate and<br />
retest each item. Please note that returned items that do not pas sour tests will be charged accordingly<br />
as replacement items or advance replacements.<br />
Restocking Fees - Unused items returned for credit will be credited minus a restocking fee. Items<br />
must be returned with in 30 days of purchase in order to qualify for any credit amount. No shipping<br />
charges will be credited.<br />
30
To Purchase This Item, Visit <strong>BMI</strong> <strong>Gaming</strong> | www.bmigaming.com | (800) 746-2255 | +1.561.391.7200<br />
WARRANTY<br />
Bay Tek Games warrants to the original purchaser that all game components will be<br />
free of defects in workmanship and materials for a period of 6 months from the date<br />
of purchase. Hint:Register your new game for an extra 3 months on your warranty<br />
(Find registration card in the cashbox)<br />
Bay Tek Games will, without charge, repair or replace at it's option defective component<br />
parts upon notification to the parts/service department.<br />
Warranty replacement part(s) will be shipped immediately, via ground service, along<br />
with a Product Return Form for the return of defective part(s).<br />
Defective part(s) must be shipped back to Bay Tek Games unless otherwise instructed.<br />
Items not returned to Bay Tek Games will be invoiced as replacement<br />
parts.<br />
This warranty does not apply in the event of any misuse or abuse to the product, or<br />
as a result of any unauthorized repairs or alterations. The warranty does not<br />
apply if any serial number decal is altered, defaced, or removed from it's original<br />
position.<br />
ATTENTION<br />
In order to maintain the safety & other compliance certifications of<br />
the game, ONLY approved parts may be used. For approved parts,<br />
refer to the parts list in this manual.<br />
Should you need your game serviced, determine the serial number from the decal<br />
placed on the front of this manual, or locate it on the back of the game. Then contact<br />
our <strong>Service</strong> Department at: 920.822.3951 or e-mail: service@baytekgames.com<br />
NON-WARRANTY<br />
Should you need your game serviced, determine the serial number on the front page<br />
of this manual, or by locating the decal on the back of the game cabinet, and contact<br />
our <strong>Service</strong> Department at: 920.822.3951 or sevice@baytekgames.com<br />
Options and estimated charges will be provided to you for your approval.<br />
Please remember that any items being sent to Bay Tek Games must include prior return<br />
authorization from our Parts & <strong>Service</strong> Department. This approval will include a<br />
Product Return Form which is required to be included with any incoming shipments.<br />
Repaired part(s) will be shipped back using the same method in which they were received.<br />
Repairs are warranted for 30 days from the date of return shipment.<br />
31
To Purchase This Item, Visit <strong>BMI</strong> <strong>Gaming</strong> | www.bmigaming.com | (800) 746-2255 | +1.561.391.7200<br />
PART<br />
NUMBER<br />
A5CB2050<br />
A5SP1050<br />
A5CO4400<br />
A5FI9010<br />
A5FR4400<br />
A5HA1001<br />
A5LK1001<br />
A5BURU075<br />
A5DSPZ010<br />
A5PL9097<br />
A5SLSX001<br />
A5SP5021<br />
A5TI1001<br />
A5PBAC001<br />
A5PBAC002<br />
W5HG1065<br />
AACE4400<br />
AACE4401<br />
AACE4402<br />
Cash Box<br />
Speaker<br />
<strong>Bike</strong> <strong>Rally</strong> PARTS LIST<br />
Handle Grips<br />
Inline Filter<br />
DESCRIPTION<br />
License Plate Frame<br />
T Handle (No Lock)<br />
Lock for T Handle<br />
Rubber Handle Stop<br />
Long Prize Dispense Spindle<br />
Blanking Plate (Replaces Bill Acceptor)<br />
Shaft Collar<br />
Compression Spring for Solenoid<br />
Plumb Bob Tilt<br />
Red "Select Prize" Button<br />
Green "Continue" Button<br />
Single Bend Hinge<br />
Main Cable<br />
Prize Chute Bottom Wheel Lights<br />
Wheel Cables<br />
AACE4403 Wheel Chase light Cable (2 Per) .<br />
AACE4404<br />
AACE4405<br />
AACE4406<br />
AACE4408<br />
AACE4409<br />
AACE1614<br />
AACE1710<br />
AACE8802<br />
AACE8822<br />
Top Board Chase light Cable<br />
Prize Chute Cable<br />
Prize Chute Jumper Cable<br />
Solenoid & Cable Assembly<br />
DBA Cable<br />
Interface Cable<br />
Door Ground Cable<br />
Outlet Strip Cable<br />
AACBL4A-DOOR Door Cable<br />
AAJP9090<br />
AAPB2700<br />
AALIHL110<br />
AACH4400-P50<br />
A5ME4400-BLK<br />
A5ME4400-WHT<br />
A5ME4401-BLK<br />
Fluorescent Light Power Cable<br />
Bill Acceptor Cable<br />
Push Button Assembly<br />
Light Holder<br />
Pack of 50 Gift Card Holders<br />
Metal Front Frame (Black)<br />
Metal Front Frame (White)<br />
Metal Top Front Door (Black)<br />
32<br />
PART<br />
NUMBER<br />
A5ME4402-BLK<br />
A5ME4403-BLK<br />
A5ME4404-BLK<br />
A5ME4405-BLK<br />
A5ME4406-BLK<br />
A5ME4407-BLK<br />
A5ME4408-BLK<br />
A5ME4409-BLK<br />
A5ME4410-BLK<br />
A5ME4414-BLK<br />
A5ME4415<br />
A5ME4416-BLK<br />
A5ME4417-BLK<br />
A5ME4418-BLK<br />
A5ME4420-BLK<br />
A5ME4421-BLK<br />
A5ME4422-BLK<br />
A5ME4424-BLK<br />
A5ME4429-BLK<br />
A5ME4430-BLK<br />
A5ME4431-BLK<br />
A5OU1000<br />
A5LI0001<br />
A5TU4400<br />
AAPS1005<br />
AASO4010<br />
A5CBDI025<br />
AACB4400<br />
AACB4401<br />
AACB4402<br />
AACB4403<br />
AAMB6<br />
DESCRIPTION<br />
Metal Lock Arm (Black)<br />
Metal Lock Link (Black)<br />
Metal Side Guard (Black)<br />
Metal Pivot Lock (Black)<br />
Metal Bottom Front Door (Black)<br />
Metal Prize Door (Black)<br />
Metal Security Door (Black)<br />
Metal Prize Door Connector (Black)<br />
Metal Side Prize Return (Black)<br />
Metal Handle Guide (Black)<br />
Metal T-Handle<br />
Metal Rocker Arm (Black)<br />
Metal Pivot Link (Black)<br />
Metal Wheel Link (Black)<br />
Metal Pivot Link Bracket (Black)<br />
Metal Sensor Bracket (Black)<br />
Metal Mounting Bracket (Black)<br />
Metal Wheel Bearing (Black)<br />
Metal Wheel Spin Bracket (Black)<br />
Metal Slip Clutch Bracket (Black)<br />
Metal Handle Bumper Bracket (Black)<br />
Outlet Strip<br />
120Volt Fluorescent Light<br />
Clear Tubing for Light<br />
Power Supply<br />
Solenoid Assembly<br />
CIRCUIT BOARDS / MONITORS<br />
16" LCD Monitor<br />
Door Interface Board<br />
Encoder Sensor With Cable<br />
Prize Detector Sensor<br />
Reflector Sensor<br />
Main Board<br />
SEE NEXT PAGE FOR<br />
REPLACEMENT DECALS...
To Purchase This Item, Visit <strong>BMI</strong> <strong>Gaming</strong> | www.bmigaming.com | (800) 746-2255 | +1.561.391.7200<br />
<strong>Bike</strong> <strong>Rally</strong> PARTS LIST<br />
PART<br />
NUMBER<br />
A5DE0044<br />
A5DE4700<br />
A5DE4701<br />
A5DE4702<br />
A5DE4703<br />
A5DE4704<br />
A5DE4705<br />
A5DE4706<br />
A5DE4707<br />
A5DE4708<br />
A5DE4709<br />
A5DE4710<br />
A5DE4711<br />
A5DE4712<br />
A5DE4713<br />
A5DE4714<br />
A5DE4715<br />
A5DE4717<br />
A5DE4718<br />
A5DE4719<br />
A5DE4720<br />
A5DE4721<br />
A5DE4722<br />
A5DE4723<br />
A5DE4724<br />
DESCRIPTION<br />
DECALS & ACRYLICS<br />
“Remove Arrow “ Wheel Decal<br />
Left Side Top Decal<br />
Left Side Bottom Decal<br />
Backlit License Plate Decal<br />
Right Side Bottom Decal<br />
Right Side Top Decal<br />
Pointer Decal<br />
Cabinet Front Decal<br />
Decal, Seam, <strong>Bike</strong> <strong>Rally</strong><br />
Decal, Front Speaker<br />
Prize Door Decal<br />
Mileage Per Level Decal<br />
Decal, Wheel Side, Left<br />
Small Prize Decal (Capsule)<br />
Decal, Marquee, <strong>Bike</strong> <strong>Rally</strong><br />
Decal, Wheel Side, Right<br />
Decal, Control Panel<br />
Decal, Monitor Cover<br />
Decal, Wheel Front<br />
Decal, Diamond Plate Value<br />
Decal, Holo, Pink<br />
Decal, Mileage, Price Sheet<br />
Decal, Large/Med. Spindle<br />
Decal, Large Prize Spindle<br />
Decal, Small/Med. Price Spindle<br />
33
To Purchase This Item, Visit <strong>BMI</strong> <strong>Gaming</strong> | www.bmigaming.com | (800) 746-2255 | +1.561.391.7200<br />
FIELD WORKSHEET NAME<br />
SOFTWARE READINGS MECHANICAL METER READINGS<br />
TOTAL GAMES PLAYED PREVIOUS GAME METER PREVIOUS PRIZE METER<br />
CURRENT PAYOUT % GAME METER PRIZE METER<br />
TOTAL GAMES LOST GROSS REVENUE PRIZES OUT<br />
TOTAL CONTINUES NET REVENUE PAYOUT %<br />
PRIZE DISP. RETRIES QUANTITY OF PRIZES DISPENSED LIST PRIZES ADDED<br />
QUAN-<br />
TITY<br />
PRIZE DISP. FAILURES SPINDLE 1<br />
AVERAGE TIME PER GAME SPINDLE 2<br />
MADE IT TO LEVEL 1 (CHICAGO) SPINDLE 3<br />
DID NOT MAKE IT TO LEVEL 1 (CHICAGO) SPINDLE 4<br />
SMALL PRIZE WON (TOOK SMALL PRIZE) SPINDLE 5<br />
SMALL CONTINUE (GAVE UP SMALL)) SPINDLE 6<br />
MADE IT TO LEVEL 2 (DENVER) SPINDLE 7<br />
DID NOT MAKE IT TO LEVEL 2 (DENVER) SPINDLE 8<br />
MEDIUM PRIZE WON (TOOK MEDIUM PRIZE) GAME PLAY - MILEAGE<br />
MEDIUM CONTINE (GAVE UP MEDIUM) CHICAGO<br />
CLEARED STATISTICS (CHECK<br />
BOX)<br />
MADE IT TO LEVEL 3 DENVER COLLECTED CASH (CHECK BOX)<br />
DID NOT MAKE IT TO LEVEL 3 (HOLLYWOOD) HOLLYWOOD<br />
LARGE PRIZE WON (TOOK LARGE PRIZE)<br />
LARGE PRIZE CONTINUE<br />
CUMULATIVE TOTAL SUMMARY: OF SOFTWARE ADDITIONS / CHANGES / UPDATES / ETC.<br />
CUMULATIVE GAMES<br />
CUMULATIVE LOSES<br />
TOTAL SMALL PRIZES WON<br />
TOTAL MEDIUM PRIZES WON<br />
USE THIS WORKSHEET TO TRACK DETAILED GAME PERFORMANCE & FAX TO BAY TEK<br />
GAMES AT 920.822.8936 OR EMAIL TO HMEIDL@BAYTEKGAMES.COM. WE WILL GLADLY<br />
HELP EVALUATE YOUR PERFORMANCE & MAKE RECOMMENDATIONS WE HAVE<br />
LEARNED IN TESTING.<br />
TOTAL LARGE PRIZES WON<br />
34
To Purchase This Item, Visit <strong>BMI</strong> <strong>Gaming</strong> | www.bmigaming.com | (800) 746-2255 | +1.561.391.7200<br />
35
To Purchase This Item, Visit <strong>BMI</strong> <strong>Gaming</strong> | www.bmigaming.com | (800) 746-2255 | +1.561.391.7200<br />
36