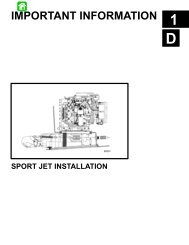
SPORT JET INSTALLATION
SPORT JET INSTALLATION
SPORT JET INSTALLATION

Create successful ePaper yourself
Turn your PDF publications into a flip-book with our unique Google optimized e-Paper software.
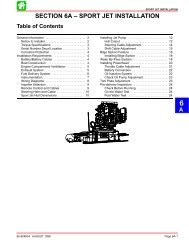
4. Shift remote control to forward.<br />
5. Position reverse gate (a) with cupped edge at or<br />
slightly above rudder I.D. (b).<br />
a<br />
7. Adjust shift cable bracket (c) so that reverse gate<br />
touches forward stop but does not pre-load shift<br />
cable. Torque bracket screws (d) to 50 lb. in. (5.6<br />
N·m). Bend locking tabs against flats of screw<br />
head.<br />
c<br />
b<br />
d<br />
a - Reverse Gate Cupped Edge<br />
b - Rudder I.D.<br />
6. Loosen forward stop screw (a) and rotate forward<br />
stop (located on port side of nozzle) clockwise until<br />
it just contacts reverse gate (b). Torque forward<br />
stop screw to 120 lb. in. (14 N·m).<br />
IMPORTANT: Inspect position of reverse gate in<br />
forward gear, reverse gate must not interfere with<br />
water flow coming out of rudder.<br />
8. Shift remote control to reverse.<br />
9. Loosen reverse stop screw (e) and rotate stop (located<br />
on starboard side of nozzle) clockwise until<br />
it just contacts reverse gate. Torque screw to 120<br />
lb. in. (14 N·m).<br />
b<br />
a<br />
IMPORTANT: Forward stop must be correctly adjusted<br />
so that reverse gate does not interfere with<br />
water flow coming out of rudder.<br />
IMPORTANT: Check that upper edge of reverse<br />
gate does not interfere with steering arm attaching<br />
screws throughout steering range when<br />
reverse gate is in the forward position.<br />
e<br />
90-831996R1 JUNE 1996 <strong>SPORT</strong> <strong>JET</strong> <strong>INSTALLATION</strong><br />
6-13