09/2011 Wrap dress - BurdaStyle.com
09/2011 Wrap dress - BurdaStyle.com
09/2011 Wrap dress - BurdaStyle.com

You also want an ePaper? Increase the reach of your titles
YUMPU automatically turns print PDFs into web optimized ePapers that Google loves.
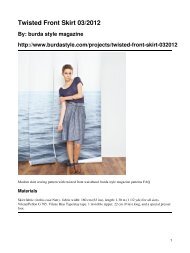
<strong>09</strong>/<strong>2011</strong> <strong>Wrap</strong> <strong>dress</strong><br />
By: burda style magazine<br />
http://www.burdastyle.<strong>com</strong>/projects/<strong>09</strong><strong>2011</strong>-wrap-<strong>dress</strong><br />
<strong>Wrap</strong> <strong>dress</strong> burda style magazine patterns FAQ<br />
1
Materials<br />
Crpe chiffon<br />
Step 1 — Preparation<br />
Paper cut for ANSI A (German DIN A4) prints:<br />
This pattern is printed on 8.5″ × 11″ sheets of plain paper. Do not scale or center pages before printing. Wait<br />
until all sheets are printed out before beginning to tape them together. Do not cut out pattern pieces yet—<br />
Arrange the sheets on a large, hard, flat surface so that they fit together, matching up like numbers and letters<br />
(i.e. 6A to 6A). To tape pattern together, fold under the margin of one piece (6A) and tape right against the<br />
line of it’s matching number/letter (6A).<br />
burda style magazine pattern do not have seam allowance included.<br />
Seam and hem allowances to be added: Seams and edges 1.5 cm (5/8 in).<br />
see example here: http://www.burdastyle.<strong>com</strong>/projects/07<strong>2011</strong>-jumpsuit/instructions/1<br />
Step 2 — Cutting out<br />
2
Crpe chiffon:<br />
1front 4x<br />
2back, on a fold 2x<br />
3front waistband piece, on a fold 1x<br />
4front draped piece, on a fold 1x<br />
5back waistband piece, on a fold 1x<br />
6back draped piece, on a fold 1x<br />
7front skirt panel 4x<br />
8back skirt panel, on a fold 1x<br />
9left sleeve 1x<br />
a) bias binding strip for lower sleeve edge, 32 â— 33 â— 34 â—35 â— 36 cm (123/4 â— 13 â—<br />
131/2 ◠133/4 ◠141/4 ins) long, 3.5 cm (11/2 ins) wide (incl. allow¬ances),<br />
b) shoulder scarf, cut on ¬bias, 90 cm (36 ins) long, 40 cm (16 ins) wide, fin¬ished width 20 cm (8 ins).<br />
Lining:<br />
3front waistband, on a fold 2x<br />
5back waistband, on a fold 2x<br />
8front skirt lining, on a fold 1x<br />
8back skirt lining, on a fold 1x<br />
Interfacing (G 785): See pattern layout. Iron Vilene Bias Tape/stay tape to wrong side of neck edge and<br />
armhole edges of inside ¬pieces.<br />
3
Step 3 — Shoulders<br />
Gather the shoulder seam edges of front and back pieces to a width of 5 cm (2 ins). Stitch the shoulder seams,<br />
catching a strip of fabric, in length of shoulder seam, on back shoulder edges. Press seams open but do not<br />
press gathering flat.<br />
Step 4 — Neck and armhole<br />
Lay the inner and outer front and back pieces each right sides facing. Stitch the neck edges together. On right<br />
piece, stitch the armhole edges together. Trim the seam allowances. Turn inside pieces over the seam<br />
allowances and stitch as far as possible, next to the seams. Turn right side out and press neck and armhole<br />
edges. Stitch the right side seam on the inner and outer piece as continuous seam. Baste the edges of left side<br />
seam, the left armhole edge and the lower front and back edges together, without turning in<br />
Step 5 — Waistband<br />
Lay the front and back waistband pieces on the respective interfaced lining pieces, with the wrong side facing<br />
the right side, and baste. Gather the front and back draped pieces on the side edges and baste to the respective<br />
waistband pieces. Also baste upper and lower edge of draped ¬pieces in place. Stitch the right side seam of<br />
the waistband.<br />
Step 6 — Bodice<br />
Gather lower edge of bodice between asterisks as follows: to 14 â— 15 â— 16 â— 17 â— 18 cm (51/2<br />
â— 6 â— 63/8 â— 63/4 â— 7 ins) on front, to 11 cm (43/8 ins) wide from centre front, and to 26 â—<br />
28 â— 30 â— 32 â— 34 cm (101/4 â— 111/8 â— 12 â— 123/4 â— 131/2 ins) on back. Lay right<br />
front on left front, with wrong side facing right side, matching centre fronts. Baste lower edges together.<br />
Stitch bodice to upper edge of waistband. Press seam allowances onto waistband, not pressing draped folds<br />
flat.<br />
Step 7 — Skirt<br />
Press the hem allowance of the back skirt panel to the inside, turn in, and baste. Lay two front skirt panels<br />
each right sides facing and stitch lower edges together. Trim the seam allowances. Lay the back skirt panel<br />
between both right front skirt panels. Pin the side seam edges together and stitch. Trim the seam allowances.<br />
Pull the back skirt panel out and turn the front skirt panels right side out. Press the side seam and the lower<br />
edge. Lay the back skirt panel between both left front skirt panels and pin the side seam edges together below<br />
the slit mark. Stitch, beginning 10 cm (4 ins) below the slit mark and leaving remainder of the edge open.<br />
Clip the seam allowances at beginning of seam. Pull back skirt panel out again, turn front skirt panels right<br />
sid out, and press. Baste upper edges together. Also baste side edges of left front skirt panel together.<br />
Step 8 — Pleats<br />
Fold the pleats in the front skirt panels in direction of arrows and baste. Gather the upper edge of the skirt<br />
panels between the asterisks: front skirt panels to 13.5 â— 14.5 â— 15.5 â— 16.5 â— 17.5 cm (53/8<br />
â— 53/4 â— 61/4 â— 61/2 â— 7 ins) wide, from centre front to 7.5 cm (3 ins), and back skirt panel to<br />
25 â— 27 â— 29 â— 31 â— 33 cm (10 â— 103/4 â— 111/2 â— 121/4 â— 13 ins). Lay the right<br />
front skirt panel on the left front skirt panel, with wrong side facing right side, matching centre fronts. Baste<br />
4
upper edges together. Stitch the skirt piece to the waistband. Press the seam allowances onto the waistband.<br />
Step 9 — Zip<br />
Sew the invisible zip to left side edges, between slit marks. Leave top ends of zip tapes loose. Stitch left side<br />
seam from upper edge to zip. On skirt, stitch remaining open seam closed, to zip.<br />
Step 10 — Sleeve<br />
Stitch the sleeve seam. Gather lower edge of sleeve between the asterisks to a width of 24 â— 24 â— 23<br />
â— 23 â— 23 cm (91/2 â— 91/2 â— 91/8 â— 91/8 â— 91/8 ins). Stitch the ends of binding strip<br />
together to match the sleeve edge. Fold the binding strip in half lengthwise and press, right fabric side facing<br />
out. Pin the folded bind¬ing strip to right side of lower edge of sleeve, so that the fold edge lies on the<br />
garment piece, 1.2 cm (1/2 in) past marked seam line. Stitch the binding strip in place, along the marked<br />
seam line. Trim the seam allowances to 5 mm (3/16 in) wide. Fold the binding strip over the seam allowance<br />
to the inside and baste over joining seam. Work from right side to edgestitch binding in place.<br />
Step 11 — Sleeve caps<br />
Gather the sleeve caps between asterisks. Set in the sleeves.<br />
Step 12 — Scarf<br />
Fold the shoulder scarf piece length¬wise, right side facing in. Stitch the lengthwise edges together. Press<br />
the seam allowances open. Turn the shoulder scarf right side out. Press the scarf so that the seam lies centred<br />
along the back. Mark the middle of the shoulder scarf. Stitch the ends together. Lay the seam under the<br />
middle of the shoulder scarf and baste in place. Gather the shoulder scarf to 6 cm (23/8 ins) long, on each<br />
side of centre. Knot gathering threads and hide threads on back of scarf. Pin middle of scarf over the right<br />
shoulder seam, with scarf extending past armhole edge. Stitch scarf in place along seam.<br />
Step 13 — Lining<br />
Stitch side seams of skirt lining, leaving opening for zip. Turn in hem allowance and stitch. Stitch right side<br />
seam of waistband lining (as mirror image of outer waistband). Stitch waistband lining to skirt lining. Pin<br />
upper edge of waistband lining to upper waistband joining seam of <strong>dress</strong>, right sides facing â— lining<br />
points up. Stitch lining close to seam, as far as possible. Turn lining to inside. Sew remaining open edges to<br />
seam and to zip tapes, by hand.<br />
<strong>09</strong>/<strong>2011</strong> <strong>Wrap</strong> <strong>dress</strong><br />
5