

SXVF-H16 handbook.pdf - Starlight Xpress
SXVF-H16 handbook.pdf - Starlight Xpress
SXVF-H16 handbook.pdf - Starlight Xpress

You also want an ePaper? Increase the reach of your titles
YUMPU automatically turns print PDFs into web optimized ePapers that Google loves.
Handbook for the <strong>SXVF</strong>-<strong>H16</strong> Issue 1 August 2006<br />
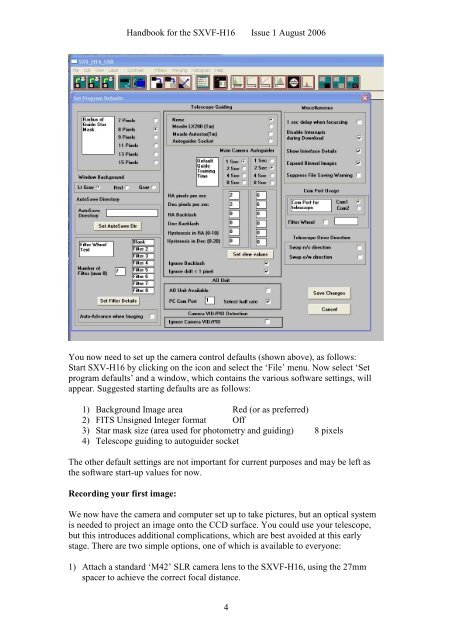
You now need to set up the camera control defaults (shown above), as follows:<br />
Start SXV-<strong>H16</strong> by clicking on the icon and select the ‘File’ menu. Now select ‘Set<br />
program defaults’ and a window, which contains the various software settings, will<br />
appear. Suggested starting defaults are as follows:<br />
1) Background Image area Red (or as preferred)<br />
2) FITS Unsigned Integer format Off<br />
3) Star mask size (area used for photometry and guiding) 8 pixels<br />
4) Telescope guiding to autoguider socket<br />
The other default settings are not important for current purposes and may be left as<br />
the software start-up values for now.<br />
Recording your first image:<br />
We now have the camera and computer set up to take pictures, but an optical system<br />
is needed to project an image onto the CCD surface. You could use your telescope,<br />
but this introduces additional complications, which are best avoided at this early<br />
stage. There are two simple options, one of which is available to everyone:<br />
1) Attach a standard ‘M42’ SLR camera lens to the <strong>SXVF</strong>-<strong>H16</strong>, using the 27mm<br />
spacer to achieve the correct focal distance.<br />
4


