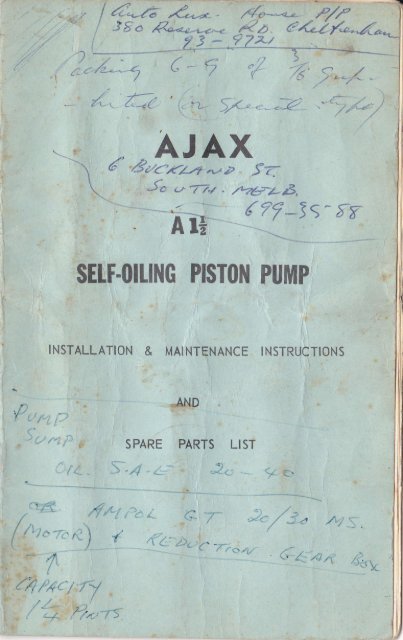
Ajax A1-1/2 Piston Pump Installation and Maintenance Manual
Ajax A1-1/2 Piston Pump Installation and Maintenance Manual
Ajax A1-1/2 Piston Pump Installation and Maintenance Manual

Create successful ePaper yourself
Turn your PDF publications into a flip-book with our unique Google optimized e-Paper software.
../...<br />
t" ,,7 I d.-A ,4.-* - 4/6.*,-o-- ,p/f<br />
," 3S o p.-o.--u...-- /z c;,{*-i /.o*d,<br />
^ i<br />
7"_:. "- -ZZ, _--e4_::*___"<br />
) *;:"* . ,' /., )<br />
)/'.:<br />
,l ul"A*-,'("'f Ii G ,,*,2.<br />
AJAX(>*<br />
\ 6 (/at
I<br />
<strong>Ajax</strong> <strong>Pump</strong>s Australia - Location<br />
Page I ofl<br />
AIl,i PUMP INSTALLATION<br />
Locatign / Company History<br />
INSTRUCTIONS<br />
S the 25th of January 2OO7 the mpahy name ofilclally changed frcm KSB AJax tumps Ry Ltd to reB Australla fty Ltd.<br />
reB Alax pumps Pty Ltd tn tustralta has been seilhg ausralla <strong>and</strong> the australian lndusry for mll owr seventy years. w6 employ<br />
Uff ti sales, manuiaCudng, sgtn€edng <strong>and</strong> admlnGtr.don adlvlues thrcughout &stralla <strong>and</strong> Nw Zeal<strong>and</strong>. We have lhe @Fclty<br />
to est, macirhe <strong>and</strong> asserible iumphg equlpment for lo@l <strong>and</strong> expft mark$ whlle ale supPlylng dher 69 oP€ratlons ln the<br />
&la Paclflc reglon,<br />
The ForE€ manufadudng faclllty was also mwed to TotEnham.<br />
LOCATION:<br />
Manufatuing was moved b *ate of the aft premlses ln ToBenham. Melbournc.<br />
l(SB Aax wrs formed bdnghg togdher KSB, me of the rcrld's large* <strong>Pump</strong> <strong>and</strong> valve manufadureB <strong>and</strong> AJax P!mF, the<br />
Australlan oper.tlon.<br />
*b*'dumeiruirirrhA fti ro*o co,rpuov, q(iil"ii"t:establilh;i d::igbil rt":'-r':i d :,<br />
ffiO&iinne iii lp'i*ttr, Quensl<strong>and</strong>, thia dant rpddld rn sMqdble €s9€ pumPs.<br />
ne Alax<br />
pumps Foundry was opened at Kyneton tn rural Vdorla. The bundry had a Gpacity in exces of one hundred tonnes per<br />
month ln a varlety of ferrous <strong>and</strong> mn-ferrcus meEls.<br />
4!x tump Works was esbllshed atTofrenham, vldorln,<br />
l(SB was sbbltshed tn 1871 when thEe Gemans, Johannes Kleln, Fieddch Schanzlln, <strong>and</strong> August Becker declded to Gbblish a<br />
@;pany ln Frankdthal, ermany, KSB <strong>and</strong> has grcm ow the past 13O yeaE to become a world leader ln the manufadure of<br />
pumpa tnd valves.<br />
lnstoll the <strong>Pump</strong> os neor fhe source of supply<br />
Never exceed the recommended distonce qnd<br />
the lowest level of fhe source of supply.<br />
should be chosen for ihe inefollotion of o<br />
Unit. Allow sufficient spqce oround fhe<br />
rcpoirs to be corried out when necEssory.<br />
os possible.<br />
height from<br />
A dry ploce<br />
mofor-driven<br />
<strong>Pump</strong> for<br />
The verticol height from the <strong>Pump</strong> level to the lowEst<br />
woter level should not exceed l5 ft. to 20 ft. ond the<br />
suction pipe should be kept os short os possible. ll<br />
the suction lift is neor the moximum, or fhe suction line is<br />
o long one, obfoin our recommendotion before instolling.<br />
FOUNDATION:<br />
This should bc sufficiently substontiol to support the pump<br />
ond prevent movcmeni"<br />
PIPE SUPPORT:<br />
All piping, should be supported indcpendenfly neor the pump.<br />
Pipes must register with the <strong>Pump</strong> connecions without<br />
being stroined into position.<br />
SUCTION PIPE:<br />
The suction pipe, in porticulor, must be kept oir tight,<br />
os even o smol I leok moy impoir the operotion of the <strong>Pump</strong>.<br />
The pipe should never be smoller thqn the <strong>Pump</strong> connecfion<br />
ond moy, with odvontoge, be o size lorger. Avoid obrupt<br />
t//www.ksb.oom.auAooation/history.htnl<br />
t6t03t20Q8
2<br />
chonges in pipe diometers. The suction line must be os<br />
shori ond direct os possible. Avoid shorp turns, use bends<br />
rother fhon elbows. When loying the line, o uniform grode<br />
should be mointoined, rising towords the <strong>Pump</strong> the whole<br />
woy.<br />
When instolling for outomotic operotion by Floot Switch cnd<br />
fhe woter level is below the <strong>Pump</strong>, obtoin on instollotion<br />
sketch from us, os speciol fittings ore required<br />
FOOTVALVE:<br />
Where the woter level is below the <strong>Pump</strong>, o Footvolve or<br />
Check Volve should be used. The lotter is only used with<br />
Speor Points. The Volve should hove on oreo ot leost one<br />
ond o holf times thof of ihe suction pipe. The sfroiner<br />
should hove o cleor oreo three io four times thot of ihe suction<br />
pipe.<br />
r<br />
STARTING:<br />
3<br />
For the initiol sfort it is necessory to prime the <strong>Pump</strong>. This<br />
con be done by removing the plug on the <strong>Pump</strong> body iusf over<br />
fhe top of the suction pipe connection ond filling the whole<br />
of the suction pipe with woter lt sometimes becomes necessory<br />
to ol so remove the top cover of the <strong>Pump</strong> ond fi ll wiih woter.<br />
This is removed by undoing the one bolt on the top.<br />
VALVES:<br />
Volves moy be inspected by removing fhe volve covers for<br />
the suction volves ond the oir chomber for the delivery volves.<br />
The volves con be removed from the <strong>Pump</strong> by unscrewing the<br />
volve sfem with o screwdriver. Volves should not be disturbod<br />
unless trouble is suspected, ond if the rubbers ore disturbed<br />
they should be removed from the <strong>Pump</strong> ond rubbed ogoinst o<br />
piece of emery poper supported on o flot surfoce until they<br />
ore perfectly flot. lf excessively pitted, the rubbers moy be<br />
reversed ond the other side used; or reploced i{ necessory.<br />
DELIVERY PIPE:<br />
The size of the delivery pipe should be selected so fhot the<br />
friction heod is not excessive. lf delivery pipe is too smoll<br />
frictionol heod is very greotly increosed, consequently more<br />
power is reguired to drive the <strong>Pump</strong>. 'Avoid<br />
shorp furns'<br />
use bends rother ihon elbows. lt is odvisoble for del ivery<br />
piping to ri se ol lthe woy to the point of dischorge'<br />
Unions or flonges should be used fo connect the piping to<br />
the pump, so thot the pipes con be disconnected, if necessory,<br />
without disturbing the whole instollotion'<br />
A relief Volve must be fitted to delivery line neor <strong>Pump</strong> if<br />
ony Gote Volves or Tops ore in it to guord ogoinst domoge<br />
to the pumps or motor in the event of the outlet being closed<br />
whilst the pump is oPeroting.<br />
PLUNGER LEATHERS:<br />
Will possibly need replocing obout every eighieen months or<br />
so. By removing the Cylinder Heod (held down by rwo bolts)<br />
the Plunger con then be unscrewed by meons of the slot in<br />
the centre of the Plunger Assembly. When removed from the<br />
<strong>Pump</strong>, the Plunger con hen be token oporf ond new leofhers<br />
fitted.<br />
Moke sure thot fhey ore well oiled ond soft ond thot the<br />
Cylinder Liner is not excessively scored. Turn the <strong>Pump</strong><br />
by hond to bring the Plunger well forword in the Cylinder.<br />
lf the <strong>Pump</strong> hos been stonding for some time the Plunger<br />
Leothers moy become hord ond dry. This will greotly impoir<br />
.,re oporotion of the <strong>Pump</strong>. The leothers should be removed<br />
from the <strong>Pump</strong> ond sooked in coslrqr or neoisfoot oil,<br />
or, if this not ovoiloble, woter, for some hours. They<br />
should then be worked with the fingers until soft, ond repfoced<br />
in the <strong>Pump</strong>.
I<br />
@P,<br />
4<br />
This should be iust right enough to permit o slow drip from<br />
the glond when the <strong>Pump</strong> is operoting. lf the glond is too<br />
rightl the <strong>Pump</strong> will use excgssive power ond fie plunger<br />
rod will weor roPidlY.<br />
When oll the odiustment hos been token up, the Glond Nut<br />
should be unscrewed ond withdrown, thence the smoll ferrule'<br />
The old pocking should be scroped out with o noil or piece<br />
of wire qnd new pocking (6" - 9" ol 3/16" grophited Volve<br />
f*ist) wropped oround ih" Plung"t Rod ond pressed into the<br />
Glond.<br />
Aftcr the Glond Nut hos been tightened il compressgs the<br />
po"ting ond usuolly I or 2 more turns of pocking con then be<br />
fitted.<br />
ir<br />
i<br />
,<br />
i<br />
SPEED:<br />
200 r.p.m.<br />
LUBRICATION:<br />
Provided thot the sump is kept filled with oil, lubricotion is<br />
guite outomotic. Oil level in the sump when the <strong>Pump</strong> is<br />
sfotionory should never foll below the bottom of the filler<br />
plug hole.<br />
The Filling Plug con be found on the bock of the Cronkcose,<br />
while o dioin plug is underneoth for periodicol replocement<br />
of the oil.<br />
sufficienr sAE 20-40 Engine oil should be odded to fill the<br />
cronkcose to fhe fi ller plug level. core should be tokcn thqt<br />
the sump is reolly full, os sometimes o smol I bubble qcrossthe<br />
Ltto, of the fil'ler hole gives the impression thqt it is full<br />
when such is not the cose. About every six months the sump<br />
should be droined ond refilled with new oil.<br />
I<br />
I<br />
f
\ '\ \v{/<br />
>a<br />
\v, -'.,ti,<br />
@<br />
\\\@r<br />
Jaa/e<br />
Fu // Jtzel
i<br />
I<br />
t<br />
I<br />
i<br />
5<br />
EMERGENCY HINTS<br />
i<br />
I<br />
ffi<br />
.61f<br />
].IO WATER DELIVERED:<br />
Check suction line fittings for blockoge or leoks. Check<br />
Plunger- Leothers ond Volves for excessive weor. Sucfion<br />
lift moy be excessive.<br />
UNEVEN FLOW:<br />
Check Plunger Leother for weor; see thot the surfoce of the<br />
leother is not scored. Check Volves, if foce of rubber is<br />
worn oi deformed, rub volve foce ogoinst emery cloth supported<br />
on o flot surfoce until foce is perfectly flot. Check lhct volvc<br />
springs
6<br />
GLAND LEAKS EXCESSIVELY:<br />
Tighten glond, repock if necessory.<br />
Check plunger rod for weor.<br />
Part No.<br />
l.<br />
7<br />
LIST OF AIZ PIST()}| PUTP PARTS:<br />
N ame<br />
Base<br />
2.<br />
ilotor Plate<br />
3.<br />
Short Bearing<br />
lr in doubt obout ony<br />
or phone ond we sholl<br />
to odvise you.<br />
point, write<br />
be pleoscd<br />
4.<br />
E<br />
0.<br />
Long Bearing<br />
Eccentric<br />
Crank Case<br />
1.<br />
Pulley ttheel<br />
8.<br />
Connect i ng Rod<br />
g.<br />
Va lve H $s ing<br />
10.<br />
ll.<br />
Va I ve Hous i ng Cove r<br />
Ya I ve Cove r Cl amP<br />
12.<br />
Ya I ve Cove r<br />
13.<br />
Cyl inder Head<br />
14.<br />
G l<strong>and</strong> l{u t<br />
15.<br />
10.<br />
Gl <strong>and</strong> Sl eeve<br />
,<br />
, "'..,I1r,<br />
Bucket Bolt<br />
17.<br />
Pi ston Plate<br />
18.<br />
Bucket llut<br />
lg.<br />
Ya I ve 0i sc.<br />
20.<br />
Plug for Short Bearings<br />
21,<br />
Ya lve Stem<br />
22.<br />
C rosshead
I<br />
i<br />
l<br />
i<br />
Part No.<br />
B.<br />
Name<br />
ffiTL."<br />
23.<br />
Pi ston I{ashers<br />
24.<br />
Gl<strong>and</strong> Plate<br />
25.<br />
Cyl inder Liner<br />
I<br />
21.<br />
Valve Seat<br />
28.<br />
lllain Shaf t<br />
29.<br />
Gudgeon P i n<br />
30.<br />
Pivot Pin<br />
31.<br />
Pi ston Rod<br />
33.<br />
Comp ress i on Sn r i ng<br />
4&<br />
34.<br />
35.<br />
Va I ve Rubber<br />
Leather Bucket<br />
Centre Plate<br />
Gasket Gl<strong>and</strong> Plate<br />
0asket Cylinder Head<br />
0asket Crank Case<br />
Priming plug N', B.S.p.<br />
Gasket Valve Housing Cover<br />
0i I LeveI plug \" B.S.p.<br />
0 ra i n P lug, t/g' B. S. p.<br />
Gasket Valve Cover<br />
Baf f le I{asher<br />
*********
'"/ lf-f .'<br />
I<br />
r' , '-/ ,T:<br />
'::r<br />
:-L I<br />
)t\<br />
\ .",<br />
'-<br />
\_r<br />
.'.....< \.<br />
r,t<br />
j*<br />
( -