Instr Manual: E2M28 and E2M30 Rotary Vacuum Pumps - en
Instr Manual: E2M28 and E2M30 Rotary Vacuum Pumps - en
Instr Manual: E2M28 and E2M30 Rotary Vacuum Pumps - en

Create successful ePaper yourself
Turn your PDF publications into a flip-book with our unique Google optimized e-Paper software.
A373–10–880 Issue K Original<br />
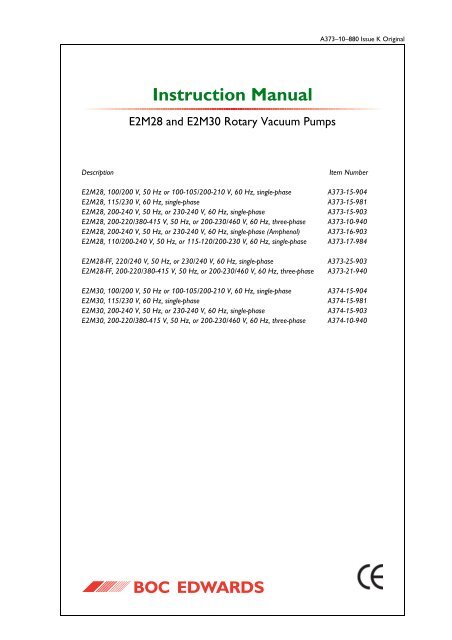
<strong>Instr</strong>uction <strong>Manual</strong><br />
<strong>E2M28</strong> <strong>and</strong> <strong>E2M30</strong> <strong>Rotary</strong> <strong>Vacuum</strong> <strong>Pumps</strong><br />
Description<br />
<strong>E2M28</strong>, 100/200 V, 50 Hz or 100-105/200-210 V, 60 Hz, single-phase<br />
<strong>E2M28</strong>, 115/230 V, 60 Hz, single-phase<br />
<strong>E2M28</strong>, 200-240 V, 50 Hz, or 230-240 V, 60 Hz, single-phase<br />
<strong>E2M28</strong>, 200-220/380-415 V, 50 Hz, or 200-230/460 V, 60 Hz, three-phase<br />
<strong>E2M28</strong>, 200-240 V, 50 Hz, or 230-240 V, 60 Hz, single-phase (Amph<strong>en</strong>ol)<br />
<strong>E2M28</strong>, 110/200-240 V, 50 Hz, or 115-120/200-230 V, 60 Hz, single-phase<br />
<strong>E2M28</strong>-FF, 220/240 V, 50 Hz, or 230/240 V, 60 Hz, single-phase<br />
<strong>E2M28</strong>-FF, 200-220/380-415 V, 50 Hz, or 200-230/460 V, 60 Hz, three-phase<br />
<strong>E2M30</strong>, 100/200 V, 50 Hz or 100-105/200-210 V, 60 Hz, single-phase<br />
<strong>E2M30</strong>, 115/230 V, 60 Hz, single-phase<br />
<strong>E2M30</strong>, 200-240 V, 50 Hz, or 230-240 V, 60 Hz, single-phase<br />
<strong>E2M30</strong>, 200-220/380-415 V, 50 Hz, or 200-230/460 V, 60 Hz, three-phase<br />
Item Number<br />
A373-15-904<br />
A373-15-981<br />
A373-15-903<br />
A373-10-940<br />
A373-16-903<br />
A373-17-984<br />
A373-25-903<br />
A373-21-940<br />
A374-15-904<br />
A374-15-981<br />
A374-15-903<br />
A374-10-940
Declaration of Conformity<br />
W€,<br />
BOC Edwards,<br />
Manor Royal,<br />
Crawley,<br />
West Sussex RH10 2LW, UK<br />
declare under our sole responsibility that the product(s)<br />
<strong>E2M28</strong> <strong>and</strong> <strong>E2M30</strong> <strong>Rotary</strong> <strong>Vacuum</strong> <strong>Pumps</strong><br />
A373-10-940 A373-15-981 A374-t0-940 A373-15-903<br />
A373-2r-940 A374-15-903 A373-15-904 A373-25-903<br />
A374-15-904 A373-16-903 A374-15-981 4373-L7-9U<br />
to which this declaration relates is in conformity with the following st<strong>and</strong>ard(s)<br />
or other normative docum<strong>en</strong>t(s)<br />
EN ISO 12100-2: 2003 Safety of Machinery - Basic Concepts, G<strong>en</strong>eral Principles for Design.<br />
EN 61010-1: 2001 Safety Requirem<strong>en</strong>ts for Electrical Equipm<strong>en</strong>t for Measurem<strong>en</strong>t, Control,<br />
<strong>and</strong> Laboratory Use.x<br />
EN 1012-2: 1997 Compressors <strong>and</strong> <strong>Vacuum</strong> <strong>Pumps</strong> - Safety Requirem<strong>en</strong>ts, Part:<br />
<strong>Vacuum</strong> <strong>Pumps</strong>.<br />
IEC 34 Parts 1, 5, 8i, 11x: 1991 C<strong>en</strong>tral Requirem<strong>en</strong>ts for Rotating Electrical Machines.<br />
C22.2 No 77: t998 # Motors with Inher<strong>en</strong>t Overheating Protection.<br />
C22.2 No 100: 1992 # Motors <strong>and</strong> G<strong>en</strong>erators.<br />
C22.2 No 1010.1: t992 # Safety Requirem<strong>en</strong>ts for Electrical Equipm<strong>en</strong>t for Measurem<strong>en</strong>t Control<br />
<strong>and</strong> Laboratory Use, Part 1: G<strong>en</strong>eral Requirem<strong>en</strong>ts.<br />
UL 61010A: 2002 # Electrical Equipm<strong>en</strong>t for Laboratory Use, Part 1: G<strong>en</strong>eral Requirem<strong>en</strong>ts.<br />
UL 1004: 1994 #<br />
Electric Motors.<br />
EN 13463-1: 2001 Non Electrical Equipm<strong>en</strong>t for Pot<strong>en</strong>tially Explosive Atmospheres.<br />
t<br />
x<br />
3-phase pumps only.<br />
l-phase pumps only.<br />
# l-phase pumps only.<br />
The pumps comply with EN 61010-1 wh<strong>en</strong> installed<br />
accordance<br />
with the instruction manual supplied with the pumps.<br />
Canadian St<strong>and</strong>ards Authority <strong>and</strong> Underwriters Laboratory.<br />
following the provisions of<br />
731023/EEC<br />
89/336iEEC<br />
98137/EC<br />
g4lglEc<br />
Low Voltage Directive.<br />
Electromagnetic Compatibility Directive.<br />
Machinery Safety Directive.<br />
Equipm<strong>en</strong>t for use in Pot<strong>en</strong>tially Explosive Atmospheres<br />
(ATEX Directive) (Category 3GD) Internal Atmospheres Only.<br />
JD.U"A-:<br />
Dr, J, D. Watson, Director of Technology,<br />
<strong>Vacuum</strong> Equipm<strong>en</strong>t <strong>and</strong> Exhaust Managem<strong>en</strong>t Product Divisions<br />
3 Dgc.<strong>en</strong>gvr oo\t e\ontbilFl^<br />
Date <strong>and</strong> Place<br />
This product has be<strong>en</strong> manufactured under a quality sysfem registered to lSO9001<br />
<<br />
u-<br />
@<br />
o<br />
c<br />
4<br />
I<br />
^AW BOC EDWARDS
<strong>E2M28</strong> <strong>and</strong> <strong>E2M30</strong> <strong>Rotary</strong> <strong>Vacuum</strong> <strong>Pumps</strong><br />
CONTENTS<br />
Section<br />
Page<br />
PAGE<br />
i<br />
1 INTRODUCTION 1<br />
1.1 Scope <strong>and</strong> definitions 1<br />
1.2 ATEX directive implications 2<br />
1.3 Description 4<br />
1.4 Gas-ballast 4<br />
2 TECHNICAL DATA 5<br />
2.1 Operating <strong>and</strong> storage conditions 5<br />
2.2 Performance 5<br />
2.3 Mechanical data 6<br />
2.4 Lubrication data 6<br />
2.5 Electrical data 6<br />
3 INSTALLATION 11<br />
3.1 Safety 11<br />
3.2 System design 12<br />
3.3 Unpack <strong>and</strong> inspect 12<br />
3.4 Locate the pump 13<br />
3.5 Fill the pump with oil 13<br />
3.6 Electrical installation: single-phase motors 14<br />
3.6.1 Introduction 14<br />
3.6.2 St<strong>and</strong>ard single-phase motors 15<br />
3.6.3 Amph<strong>en</strong>ol version single-phase motors 15<br />
3.6.4 110/200-240 V 50 Hz or 115-120/200-230 V 60 Hz single-phase motors 15<br />
3.7 Electrical installation: three-phase motors 19<br />
3.7.1 Connect the electrical supply to the motor 19<br />
3.7.2 Check the direction of rotation 20<br />
3.8 Connect the pump inlet 20<br />
3.9 Connect the pump outlet 22<br />
3.10 Gas-ballast inlet connection 22<br />
3.11 Leak test the system 22<br />
4 OPERATION 23<br />
4.1 ATEX directive implications 23<br />
4.1.1 Introduction 23<br />
4.1.2 Flammable/pyrophoric materials 23<br />
4.1.3 Gas purges 24<br />
4.2 Gas-ballast control 24<br />
4.3 Start-up 25<br />
4.4 To achieve ultimate vacuum 25<br />
4.5 To pump cond<strong>en</strong>sable vapours 26<br />
4.6 To decontaminate the oil 26<br />
4.7 Unatt<strong>en</strong>ded operation 26<br />
4.8 Shut-down 27<br />
Ipsitech 8207(D)–05<br />
Issue K i Jul 05
<strong>E2M28</strong> <strong>and</strong> <strong>E2M30</strong> <strong>Rotary</strong> <strong>Vacuum</strong> <strong>Pumps</strong><br />
Section<br />
Page<br />
PAGE<br />
ii<br />
5 MAINTENANCE 29<br />
5.1 Safety information 29<br />
5.2 Maint<strong>en</strong>ance plan 29<br />
5.3 Check the oil-level 30<br />
5.4 Replace the oil 30<br />
5.5 Inspect <strong>and</strong> clean the inlet-filter 31<br />
5.6 Clean the gas-ballast filter 32<br />
5.7 Clean the motor fan-cover <strong>and</strong> <strong>en</strong>closure 33<br />
5.8 Clean <strong>and</strong> overhaul the pump 33<br />
5.9 Fit new blades 33<br />
5.10 Test the motor condition 33<br />
5.11 Fault finding 33<br />
5.11.1 Introduction 33<br />
5.11.2 The pump has failed to start 33<br />
5.11.3 The pump fail to achieve specified performance (failure to reach ultimate vacuum) 34<br />
5.11.4 The pump is noisy 34<br />
5.11.5 The pump surface temperature is above 100 o C 34<br />
5.11.6 The vacuum is not maintained after the pump is switched off 35<br />
5.11.7 The pumping speed is poor 35<br />
5.11.8 There is an external oil leak 35<br />
6 STORAGE AND DISPOSAL 37<br />
6.1 Storage 37<br />
6.2 Disposal 37<br />
7 SERVICE, SPARES AND ACCESSORIES 39<br />
7.1 Introduction 39<br />
7.2 Service 39<br />
7.3 Spares 39<br />
7.4 Accessories 40<br />
7.4.1 Introduction 40<br />
7.4.2 Inlet Catchpot 40<br />
7.4.3 Inlet Dust Filter 40<br />
7.4.4 Inlet Desiccant Trap 40<br />
7.4.5 Inlet Chemical Trap 40<br />
7.4.6 Outlet Mist Filter 40<br />
7.4.7 Sol<strong>en</strong>oid Operated Pipeline Valve 42<br />
7.4.8 Foreline Trap 42<br />
7.4.9 Vibration Isolators 42<br />
7.4.10 Oil Drain Ext<strong>en</strong>sion 42<br />
7.4.11 Pump Inlet Adaptor 42<br />
7.4.12 Flexible Bellows 42<br />
7.4.13 Pump Outlet Adaptor 42<br />
7.4.14 Gas Ballast Banjo/Elbow Assembly 42<br />
7.4.15 Gas Ballast Valve 42<br />
RETURN OF BOC EDWARDS EQUIPMENT<br />
Issue K ii Jul 05
ILLUSTRATIONS<br />
Figure<br />
<strong>E2M28</strong> <strong>and</strong> <strong>E2M30</strong> <strong>Rotary</strong> <strong>Vacuum</strong> <strong>Pumps</strong><br />
Page<br />
PAGE<br />
iii<br />
1 The <strong>E2M28</strong>/<strong>E2M30</strong> pump 3<br />
2 Dim<strong>en</strong>sions (mm): key 8<br />
3 Electrical supply connection: single-phase motors: 220-240 V 50 Hz <strong>and</strong><br />
230-240 V 60 Hz 16<br />
4 Electrical supply connection: single-phase motors: 100 V 50 Hz, 100-105 V 60 Hz<br />
<strong>and</strong> 115 V 60 Hz 16<br />
5 Electrical supply connection, single-phase motors: 200 V 50 Hz, 200-210 V 60 H<br />
<strong>and</strong> 230 V 60 Hz 17<br />
6 Electrical supply connection, single-phase motors with Amph<strong>en</strong>ol connector:<br />
220-240 V 50 Hz <strong>and</strong> 230-240 V 60 Hz 17<br />
7 Motor voltage selection: single-phase motors, 110/200-240 V 50 Hz <strong>and</strong><br />
115-120/200-240 V 60 Hz 18<br />
8 Electrical supply connection, three-phase motors: 200-220 V 50 Hz <strong>and</strong><br />
200-230 V 60 Hz 21<br />
9 Electrical supply connection, three-phase motors: 380-415 V 50 Hz <strong>and</strong> 460 V 60 Hz 21<br />
10 Remove/replace the inlet filter 31<br />
11 Remove/replace the gas-ballast filter 32<br />
12 Accessories 41<br />
TABLES<br />
Table<br />
Page<br />
1 Operating <strong>and</strong> storage conditions 5<br />
2 Performance data 5<br />
3 Mechanical data 6<br />
4 Lubrication data 6<br />
5 Electrical data: three-phase motors 7<br />
6 Electrical data: single-phase motors 7<br />
7 Checklist of items 12<br />
8 Motor connection details 14<br />
9 Maint<strong>en</strong>ance plan 30<br />
10 Spares Item Numbers 39<br />
11 Accessory Item Numbers 40<br />
Associated publications<br />
Publication title<br />
<strong>Vacuum</strong> pump <strong>and</strong> vacuum system safety<br />
Vibration isolators<br />
EMF3, EMF10 <strong>and</strong> EMF20 oil mist filters<br />
Publication Number<br />
P300-20-000<br />
A248-01-880<br />
A462-26-880<br />
Issue K iii Jul 05
<strong>E2M28</strong> <strong>and</strong> <strong>E2M30</strong> <strong>Rotary</strong> <strong>Vacuum</strong> <strong>Pumps</strong><br />
PAGE<br />
iv<br />
This page int<strong>en</strong>tionally blank.<br />
Issue K iv Jul 05
1 INTRODUCTION<br />
<strong>E2M28</strong> <strong>and</strong> <strong>E2M30</strong> <strong>Rotary</strong> <strong>Vacuum</strong> <strong>Pumps</strong><br />
1.1 Scope <strong>and</strong> definitions<br />
PAGE<br />
1<br />
This manual provides installation, operation <strong>and</strong> maint<strong>en</strong>ance instructions for the BOC Edwards <strong>E2M28</strong><br />
<strong>and</strong> <strong>E2M30</strong> rotary vacuum pumps. You must use the pump as specified in this manual.<br />
Read this manual before you install <strong>and</strong> operate the pump. Important safety information is highlighted as<br />
WARNING <strong>and</strong> CAUTION instructions; you must obey these instructions. The use of WARNINGS <strong>and</strong><br />
CAUTIONS is defined below.<br />
WARNING<br />
Warnings are giv<strong>en</strong> where failure to observe the instruction could result in injury or death<br />
to people.<br />
INTRODUCTION<br />
CAUTION<br />
Cautions are giv<strong>en</strong> where failure to observe the instruction could result in damage to the equipm<strong>en</strong>t,<br />
associated equipm<strong>en</strong>t <strong>and</strong> process.<br />
The units used throughout this manual conform to the SI international system of units of measurem<strong>en</strong>t.<br />
The following warning labels are on the pump:<br />
Warning – refer to accompanying docum<strong>en</strong>tation.<br />
Warning – risk of electric shock.<br />
Warning – hot surfaces.<br />
Warning - do not block the pump outlet.<br />
Issue K 1 Jul 05
<strong>E2M28</strong> <strong>and</strong> <strong>E2M30</strong> <strong>Rotary</strong> <strong>Vacuum</strong> <strong>Pumps</strong><br />
1.2 ATEX directive implications<br />
PAGE<br />
2<br />
INTRODUCTION<br />
• This equipm<strong>en</strong>t is designed to meet the requirem<strong>en</strong>ts of Group II Category 3 equipm<strong>en</strong>t in<br />
accordance with Directive 94/9/EC of the European Parliam<strong>en</strong>t <strong>and</strong> the Council of 23rd March 1994<br />
on the approximation of the laws of the Member States concerning equipm<strong>en</strong>t <strong>and</strong> protective<br />
systems int<strong>en</strong>ded for use in pot<strong>en</strong>tially explosive atmospheres. (The ATEX Directive)<br />
The ATEX Category 3 applies in respect of pot<strong>en</strong>tial ignition sources internal to the equipm<strong>en</strong>t. An<br />
ATEX Category has not be<strong>en</strong> assigned in respect of pot<strong>en</strong>tial ignition sources on the outside of the<br />
equipm<strong>en</strong>t as the equipm<strong>en</strong>t has not be<strong>en</strong> designed for use where there is an external pot<strong>en</strong>tially<br />
explosive atmosphere.<br />
There is no pot<strong>en</strong>tial source of ignition within the pump during normal operation but there may be<br />
pot<strong>en</strong>tial sources of ignition under conditions of predictable <strong>and</strong> rare malfunction as defined in the<br />
Directive. Accordingly, although the pump is designed to pump flammable materials <strong>and</strong> mixtures,<br />
operating procedures should <strong>en</strong>sure that under all normal <strong>and</strong> reasonably predictable conditions,<br />
these materials <strong>and</strong> mixtures are not within explosive limits. Category 3 is considered appropriate<br />
for the avoidance of ignition in the case of a rare malfunction which allows flammable materials or<br />
mixtures to pass through the pump while within their explosive limits.<br />
• Wh<strong>en</strong> flammable or pyrophoric materials are pres<strong>en</strong>t within the equipm<strong>en</strong>t you must:<br />
• Not allow air to <strong>en</strong>ter the equipm<strong>en</strong>t.<br />
• Ensure that the system is leak tight.<br />
• Use an inert gas purge (for example, a nitrog<strong>en</strong> purge) to dilute any flammable gases or<br />
vapours <strong>en</strong>tering the pump inlet, <strong>and</strong>/or use an inert gas purge to reduce the conc<strong>en</strong>tration<br />
of flammable gases or vapours in the pump <strong>and</strong> in the exhaust pipeline to less than one quarter<br />
of the gases' published lower explosive limits (LEL).<br />
• For further information, please contact BOC Edwards: refer to the Addresses page at the <strong>en</strong>d of<br />
this manual for details of your nearest BOC Edwards company.<br />
Issue K 2 Jul 05
<strong>E2M28</strong> <strong>and</strong> <strong>E2M30</strong> <strong>Rotary</strong> <strong>Vacuum</strong> <strong>Pumps</strong><br />
PAGE<br />
3<br />
INTRODUCTION<br />
1. Oil filler<br />
2. Outlet nozzle<br />
3. Gas-ballast control<br />
4. Gas-ballast inlet<br />
5. C<strong>en</strong>tring-ring <strong>and</strong> ‘O’ ring (supplied)<br />
6. Inlet-port (adaptor flange)<br />
7. Cable-gl<strong>and</strong>/Amph<strong>en</strong>ol connector position<br />
8. Motor terminal box<br />
9. On/Off switch<br />
10. Baseplate<br />
11. Oil drain-plug (gravity drain)<br />
12. Oil sight-glass<br />
13. Pump id<strong>en</strong>tification label<br />
Notes: A pump with a single-phase motor is shown in this figure.<br />
The motor shown in this figure is not repres<strong>en</strong>tative of the motor used on the <strong>E2M28</strong><br />
(Amph<strong>en</strong>ol) pump with Item Number A373-17-984. On this pump, items 7 <strong>and</strong> 9 are<br />
transposed, with Item 7 being an IEC60320 16-20 Amp socket.<br />
Figure 1 – The <strong>E2M28</strong>/<strong>E2M30</strong> pump<br />
Issue K 3 Jul 05
<strong>E2M28</strong> <strong>and</strong> <strong>E2M30</strong> <strong>Rotary</strong> <strong>Vacuum</strong> <strong>Pumps</strong><br />
1.3 Description<br />
PAGE<br />
4<br />
The BOC Edwards <strong>E2M28</strong> <strong>and</strong> <strong>E2M30</strong> pumps are shown in Figure 1. Refer to Figure 1 for item numbers<br />
in brackets in the following descriptions.<br />
INTRODUCTION<br />
The <strong>E2M28</strong> <strong>and</strong> <strong>E2M30</strong> pumps are two-stage, direct drive, sliding vane pumps. The pump is oil-sealed <strong>and</strong><br />
designed for reliable, long-term operation in both laboratory <strong>and</strong> industrial <strong>en</strong>vironm<strong>en</strong>ts. The pump is<br />
a free-st<strong>and</strong>ing unit. The drive is provided through a flexible coupling by a single-phase or three-phase<br />
(four pole) motor.<br />
The motors are totally <strong>en</strong>closed <strong>and</strong> are cooled by the motor-cooling fan which directs air along the<br />
motor fins.<br />
The single-phase motors have a thermal overload device. Wh<strong>en</strong> the motor is too hot, the thermal<br />
overload device switches off the pump. The thermal overload device has an automatic reset; wh<strong>en</strong> the<br />
motor cools down, the device resets <strong>and</strong> the motor will restart. The single phase motors have an on/off<br />
switch.<br />
An oil pressure system lubricates the pump shaft bearing surfaces <strong>and</strong> rotor sealing faces. The pump has<br />
an oil distribution valve which prev<strong>en</strong>ts discharge of oil to the pump interior (suckback) after the pump<br />
stops. The pumping chambers are air-tight, so this arrangem<strong>en</strong>t prev<strong>en</strong>ts air suckback unless the gasballast<br />
valve is op<strong>en</strong>. For protection in this case, refer to Section 1.4.<br />
You can inspect the level <strong>and</strong> condition of oil in the oil box reservoir through the oil sight-glass (12). An<br />
oil filler-plug (1) is fitted to the top of the oil box. The pump has an oil drain-plug (11) to allow gravity<br />
oil drain.<br />
The pump has an inlet-port (6), outlet nozzle (2) <strong>and</strong> gas-ballast control (3). The pump is mounted on an<br />
aluminium alloy baseplate (10) on rubber pads. Details of suitable vibration isolators <strong>and</strong> other<br />
recomm<strong>en</strong>ded accessories are giv<strong>en</strong> in Section 7.4.<br />
1.4 Gas-ballast<br />
To pump high vapour loads, gas-ballast is delivered into the pump to prev<strong>en</strong>t cond<strong>en</strong>sation of the vapour<br />
carried by the pumped gases.<br />
Air (or another gas) can be introduced into the low vacuum stage through the gas-ballast control. The<br />
gas-ballast control is a multi-turn valve which you can adjust, as required, betwe<strong>en</strong> closed <strong>and</strong> fully op<strong>en</strong>.<br />
Issue K 4 Jul 05
2 TECHNICAL DATA<br />
<strong>E2M28</strong> <strong>and</strong> <strong>E2M30</strong> <strong>Rotary</strong> <strong>Vacuum</strong> <strong>Pumps</strong><br />
2.1 Operating <strong>and</strong> storage conditions<br />
PAGE<br />
5<br />
Note:<br />
To comply with CSA st<strong>and</strong>ards, the pump must be installed <strong>and</strong> used indoors, <strong>and</strong> within the operating<br />
conditions specified in Table 1 below.<br />
Ambi<strong>en</strong>t temperature range (operation)<br />
13 to 40 o C<br />
Ambi<strong>en</strong>t temperature range (storage)<br />
-30 to 70 o C<br />
Normal surface temperature of the pump-body * 45 to 65 o C<br />
Maximum humidity (operation)<br />
90% RH<br />
Maximum altitude (operation)<br />
2000 m<br />
Pollution degree 2<br />
Installation category<br />
II<br />
Noise level at 1 metre<br />
57 dB(A) (at 50 Hz)<br />
* At ultimate vacuum, with ambi<strong>en</strong>t temperature of 20 o C.<br />
TECHNICAL DATA<br />
Table 1 – Operating <strong>and</strong> storage conditions<br />
2.2 Performance<br />
Note:<br />
Where total pressures are shown in Table 2 below, measurem<strong>en</strong>ts were tak<strong>en</strong> using an untrapped total<br />
pressure capacitance diaphragm gauge on a header, as specified by Pneurop st<strong>and</strong>ards.<br />
Maximum displacem<strong>en</strong>t <strong>E2M28</strong> <strong>E2M30</strong><br />
50 Hz electrical supply 32.2 m 3 h -1 19 cfm<br />
60 Hz electrical supply 38.9 m 3 h -1 23 cfm<br />
Maximum pumping speed - Pneurop<br />
50 Hz electrical supply 27.5 m 3 h -1 16.2 cfm<br />
60 Hz electrical supply 33.0 m 3 h -1 19.4 cfm<br />
Motor rotational speed<br />
50 Hz electrical supply 1440 r min -1 1440 r min -1<br />
60 Hz electrical supply 1720 r min -1 1720 r min -1<br />
Ultimate vacuum<br />
without gas-ballast (partial pressure)<br />
without gas-ballast (total pressure)<br />
1 x 10 -4 mbar<br />
1 x 10 -2 Pa<br />
1 x 10 -3 mbar<br />
1 x 10 -1 Pa<br />
7 x 10 -5 torr<br />
7 x 10 -4 torr<br />
with full gas-ballast (partial pressure)<br />
2 x 10 -1 mbar<br />
2 x 10 1 Pa<br />
1.5 x 10 -1 torr<br />
Maximum water vapour inlet pressure<br />
30 mbar<br />
3 x 10 3 Pa<br />
22.5 torr<br />
Maximum water vapour pumping rate 0.7 kg h -1 0.7 kg h -1<br />
Maximum permitted outlet pressure<br />
(for full pump throughout)<br />
0.5 bar gauge<br />
1.5 bar absolute<br />
1.5 x 10 5 Pa<br />
Table 2 – Performance data<br />
0.5 bar gauge<br />
1.5 bar absolute<br />
1.5 x 10 5 Pa<br />
Issue K 5 Jul 05
<strong>E2M28</strong> <strong>and</strong> <strong>E2M30</strong> <strong>Rotary</strong> <strong>Vacuum</strong> <strong>Pumps</strong><br />
2.3 Mechanical data<br />
PAGE<br />
6<br />
TECHNICAL DATA<br />
Approximate pump mass<br />
44 kg<br />
Dim<strong>en</strong>sions See Figure 2<br />
Degree of protection<br />
Single-phase motors<br />
Three-phase motors<br />
Pump inlet port<br />
Pump outlet port<br />
2.4 Lubrication data<br />
IP44<br />
IP54<br />
NW25 (the flange can be removed from the 1 inch BSP<br />
threaded hole)<br />
15 mm external diameter nozzle (the nozzle can be<br />
removed from the 3 / 4 inch BSP threaded hole)<br />
Table 3 – Mechanical data<br />
Note:<br />
A BOC Edwards Material Safety Data Sheet for the oil specified below is available on request.<br />
Recomm<strong>en</strong>ded oil * Ultragrade 19<br />
Maximum oil capacity<br />
1.32 litres<br />
* To operate the pump wh<strong>en</strong> the ambi<strong>en</strong>t temperature is outside the range specified in Section 2.1, or<br />
to optimise pump performance wh<strong>en</strong> you process cond<strong>en</strong>sible vapours, you may need a differ<strong>en</strong>t oil.<br />
Table 4 – Lubrication data<br />
2.5 Electrical data<br />
Refer to Tables 5 <strong>and</strong> 6. The motor start-up curr<strong>en</strong>t is drawn for less than one second, so you must use<br />
slow-blow fuses to prev<strong>en</strong>t unnecessary fuse failure wh<strong>en</strong> the pump starts. Fuses should be to EN60269<br />
Section 2.2. For conformance with CSA st<strong>and</strong>ards only CSA certified fuses are to be used. If you use the<br />
pump at temperatures lower than 13 ºC, the start-up curr<strong>en</strong>t will be drawn for longer; this may cause<br />
the motor thermal overload device to op<strong>en</strong>.<br />
Issue K 6 Jul 05
<strong>E2M28</strong> <strong>and</strong> <strong>E2M30</strong> <strong>Rotary</strong> <strong>Vacuum</strong> <strong>Pumps</strong><br />
Pump Item Number<br />
Voltage<br />
(V)<br />
Frequ<strong>en</strong>cy<br />
(Hz)<br />
Full load<br />
curr<strong>en</strong>t<br />
(A)<br />
Start<br />
curr<strong>en</strong>t<br />
(A)<br />
Maximum<br />
fuse<br />
rating (A)<br />
PAGE<br />
7<br />
200-220<br />
380-415<br />
A373-10-940, A374-10-940<br />
200-230<br />
460<br />
Motor output rating (continuous)<br />
50 Hz operation<br />
60 Hz operation<br />
50<br />
50<br />
60<br />
60<br />
0.75 kW<br />
0.90 kW<br />
3.8<br />
2.3<br />
3.9<br />
2.3<br />
Table 5 – Electrical data: three-phase motors<br />
22.8<br />
14.3<br />
22.0<br />
14.6<br />
16<br />
10<br />
16<br />
10<br />
TECHNICAL DATA<br />
Pump Item Number<br />
Voltage<br />
(V)<br />
Frequ<strong>en</strong>cy<br />
(Hz)<br />
Full load<br />
curr<strong>en</strong>t<br />
(A)<br />
Start<br />
curr<strong>en</strong>t<br />
(A)<br />
Maximum<br />
fuse<br />
rating (A)<br />
A373-15-903, A373-16-903,<br />
A374-15-903<br />
220-240<br />
230-240<br />
50<br />
60<br />
4.8<br />
5.0<br />
33<br />
33<br />
15<br />
15<br />
A373-15-981, A374-15-981<br />
115<br />
230<br />
60<br />
60<br />
11.0<br />
5.5<br />
71<br />
36<br />
40<br />
20<br />
A373-15-904, A374-15-904<br />
100<br />
100-105<br />
200<br />
200-210<br />
50<br />
60<br />
50<br />
60<br />
12.0<br />
12.0<br />
6.5<br />
5.5<br />
80<br />
80<br />
40<br />
40<br />
30<br />
30<br />
20<br />
20<br />
A373-17-984<br />
110<br />
115-120<br />
200-240<br />
200-230<br />
50<br />
60<br />
50<br />
60<br />
12.0<br />
12.0<br />
6.0<br />
6.5<br />
36<br />
50<br />
27<br />
32<br />
30<br />
30<br />
15<br />
15<br />
Motor output rating (continuous)<br />
50 Hz operation<br />
60 Hz operation<br />
0.75 kW<br />
0.90 kW<br />
Table 6 – Electrical data: single-phase motors<br />
Issue K 7 Jul 05
<strong>E2M28</strong> <strong>and</strong> <strong>E2M30</strong> <strong>Rotary</strong> <strong>Vacuum</strong> <strong>Pumps</strong><br />
PAGE<br />
8<br />
TECHNICAL DATA<br />
Pump Item Number<br />
Dim<strong>en</strong>sion (mm)<br />
Single-phase motors A B<br />
A373-15-903, A373-16-903, A374-15-903 - 251<br />
A373-15-981, A374-15-981 598 251<br />
A373-15-904, A374-15-904 598 251<br />
A373-17-984 - 251<br />
Three-phase motors<br />
A373-10-940, A374-10-940 - 217<br />
1. Top view of pump with single-phase motor<br />
2. Side view of pump with single-phase motor<br />
3. Side view of pump with three-phase motor<br />
4. Front view of pump with single-phase motor<br />
Figure 2 – Dim<strong>en</strong>sions (mm): key<br />
Issue K 8 Jul 05
<strong>E2M28</strong> <strong>and</strong> <strong>E2M30</strong> <strong>Rotary</strong> <strong>Vacuum</strong> <strong>Pumps</strong><br />
PAGE<br />
9<br />
TECHNICAL DATA<br />
Figure 2 – Dim<strong>en</strong>sions (mm)<br />
Issue K 9 Jul 05
<strong>E2M28</strong> <strong>and</strong> <strong>E2M30</strong> <strong>Rotary</strong> <strong>Vacuum</strong> <strong>Pumps</strong><br />
PAGE<br />
10<br />
This page int<strong>en</strong>tionally blank.<br />
Issue K 10 Jul 05
3 INSTALLATION<br />
<strong>E2M28</strong> <strong>and</strong> <strong>E2M30</strong> <strong>Rotary</strong> <strong>Vacuum</strong> <strong>Pumps</strong><br />
3.1 Safety<br />
PAGE<br />
11<br />
WARNING<br />
If you use a hydrocarbon oil in this pump, you must not use the pump to process oxyg<strong>en</strong><br />
in conc<strong>en</strong>trations greater than 25% in volume. If you do, there is a risk of fire or explosion<br />
in the oil-box of the pump.<br />
WARNING<br />
You must not use the <strong>E2M28</strong> or <strong>E2M30</strong> pump to pump hazardous substances.<br />
INSTALLATION<br />
WARNING<br />
Obey the safety instructions listed below <strong>and</strong> take note of appropriate precautions. If you<br />
do not, you can cause injury to people <strong>and</strong> damage to equipm<strong>en</strong>t.<br />
• A suitably trained <strong>and</strong> supervised technician must install the pump.<br />
• Wear the appropriate safety-clothing wh<strong>en</strong> you come into contact with contaminated compon<strong>en</strong>ts.<br />
• V<strong>en</strong>t <strong>and</strong> purge your vacuum system before you start installation work.<br />
• Ensure that the installation technician is familiar with the safety procedures which relate to the<br />
pump-oil <strong>and</strong> the products processed by the pumping system. Take suitable precautions to avoid<br />
the inhalation of oil mist <strong>and</strong> excessive skin contact with pump -oil, as prolonged exposure can be<br />
harmful.<br />
• Disconnect the other compon<strong>en</strong>ts in the pumping system from the electrical supply so that they<br />
cannot be operated accid<strong>en</strong>tally.<br />
• Safely route any electrical supply cables so that they cannot accid<strong>en</strong>tally trip people.<br />
• You must <strong>en</strong>sure that the <strong>E2M28</strong> or <strong>E2M30</strong> pump is suitable for your application. If you have any<br />
doubts as to the suitability of the pump for your application, refer to the BOC Edwards guidelines<br />
on vacuum pump <strong>and</strong> vacuum system safety (see the Associated Publication at the <strong>en</strong>d of the<br />
cont<strong>en</strong>ts list at the front of this manual).<br />
Issue K 11 Jul 05
<strong>E2M28</strong> <strong>and</strong> <strong>E2M30</strong> <strong>Rotary</strong> <strong>Vacuum</strong> <strong>Pumps</strong><br />
3.2 System design<br />
PAGE<br />
12<br />
INSTALLATION<br />
Consider the following points wh<strong>en</strong> you design your pumping system:<br />
• Use a suitable inlet-valve to isolate the pump from your vacuum system if you need to allow the<br />
pump to warm up before you pump cond<strong>en</strong>sable vapours, or if you need to maintain vacuum wh<strong>en</strong><br />
the pump is switched off.<br />
• Avoid high levels of heat input to the pump from the process gases, otherwise the pump may<br />
overheat <strong>and</strong> seize, <strong>and</strong> cause the motor thermal overload device to op<strong>en</strong>.<br />
• If you use the pump in a high ambi<strong>en</strong>t temperature <strong>and</strong> have a high gas throughput, the temperature<br />
of the pump-body may exceed 70 o C <strong>and</strong> you must fit suitable guards to prev<strong>en</strong>t contact with hot<br />
surfaces.<br />
• Make sure that the exhaust pipeline cannot become blocked. If you have an outlet-isolation valve,<br />
make sure that you cannot operate the pump with the valve closed.<br />
• Provide for a purge of inert gas wh<strong>en</strong> you shut down the pumping system, to dilute dangerous gases<br />
to safe conc<strong>en</strong>trations. A suitable gas-ballast control valve for introduction of purge gas into the<br />
pump is available as an accessory (see Section 7.4.15).<br />
3.3 Unpack <strong>and</strong> inspect<br />
1. Remove all packing materials <strong>and</strong> protective covers <strong>and</strong> check the pump. If the pump is damaged,<br />
notify your supplier <strong>and</strong> the carrier in writing within three days; state the Item Number of the pump<br />
together with your order number <strong>and</strong> your supplier's invoice number. Retain all packing materials<br />
for inspection. Do not use the pump if it is damaged.<br />
2. Check that your package contains the items listed in Table 7. If any of these items are missing, notify<br />
your supplier within 3 days.<br />
If the pump is not to be used immediately, replace the protective covers. Store the pump in suitable<br />
conditions, as described in Section 6.1.<br />
Quantity Description Check (!)<br />
1 <strong>E2M28</strong> or <strong>E2M30</strong> rotary vacuum pump !<br />
(1) Fitting pack containing the following:<br />
1 NW25 c<strong>en</strong>tring-ring !<br />
1 ‘O’ ring for c<strong>en</strong>tring-ring !<br />
1 Receptacle connectors * !<br />
* Various sizes: supplied with single-phase motors except for pumps with<br />
Item Numbers A373-16-903 <strong>and</strong> A373-17-984.<br />
Table 7 – Checklist of items<br />
Issue K 12 Jul 05
<strong>E2M28</strong> <strong>and</strong> <strong>E2M30</strong> <strong>Rotary</strong> <strong>Vacuum</strong> <strong>Pumps</strong><br />
3.4 Locate the pump<br />
WARNING<br />
Use suitable lifting equipm<strong>en</strong>t to move the pump. If you do not, you can injure yourself<br />
or damage the pump. Refer to Section 2.3 for the mass of the pump.<br />
The pump can be either free-st<strong>and</strong>ing on its baseplate, or be fixed by bolts through the four fixing holes<br />
in the baseplate, or be used with vibration isolators. For the locations of the fixing holes in the baseplate,<br />
refer to Figure 2.<br />
Provide a firm, level platform for the pump. Locate the pump so that the oil-level sight-glass is visible <strong>and</strong><br />
the oil filler-plug, oil drain-plugs <strong>and</strong> gas -ballast control are accessible.<br />
If your pump will be located inside an <strong>en</strong>closure, make sure that there is adequate v<strong>en</strong>tilation at both<br />
<strong>en</strong>ds of the pump, so that the ambi<strong>en</strong>t temperature around the pump does not exceed 40 o C. There must<br />
be a minimum space of 25 mm betwe<strong>en</strong> the pump <strong>and</strong> the <strong>en</strong>closure walls.<br />
PAGE<br />
13<br />
INSTALLATION<br />
3.5 Fill the pump with oil<br />
Fill the pump with oil as described below. Refer to Figure 1 for the item numbers in brackets.<br />
1. Remove the oil filler-plug (1).<br />
2. Pour oil into the pump until the oil-level reaches the MAX mark on the bezel at the top of the oil<br />
sight-glass (12). If the oil-level goes above the MAX mark, remove the oil drain-plug (11) <strong>and</strong> drain<br />
the excess oil from the pump.<br />
3. After a few minutes, recheck the oil-level. If the oil-level is now below the MAX mark, pour more<br />
oil into the pump.<br />
4. Refit the oil filler-plug. Tight<strong>en</strong> the plug firmly by h<strong>and</strong>. Do not overtight<strong>en</strong>.<br />
Issue K 13 Jul 05
<strong>E2M28</strong> <strong>and</strong> <strong>E2M30</strong> <strong>Rotary</strong> <strong>Vacuum</strong> <strong>Pumps</strong><br />
3.6 Electrical installation: single-phase motors<br />
PAGE<br />
14<br />
INSTALLATION<br />
3.6.1 Introduction<br />
WARNING<br />
Ensure that the electrical installation of the pump conforms with your local <strong>and</strong> national<br />
safety requirem<strong>en</strong>ts. It must be connected to a suitably fused <strong>and</strong> protected electrical<br />
supply <strong>and</strong> a suitable earth (ground) point.<br />
CAUTION<br />
Ensure that the motor is correctly configured for your electrical supply voltage <strong>and</strong> frequ<strong>en</strong>cy. If you<br />
do not, you can damage the motor.<br />
Note:<br />
The pump will restart automatically wh<strong>en</strong> the electrical supply is restored after an interruption <strong>and</strong> wh<strong>en</strong><br />
the pump cools after it has overheated. If you do not want the pump to restart automatically, use electrical<br />
control equipm<strong>en</strong>t which must be reset manually.<br />
Ensure that your electrical supply voltage corresponds with the voltage specified on the motor data plate.<br />
Table 5 gives the recomm<strong>en</strong>ded fuse rating, <strong>and</strong> Table 8 specifies the Figure which id<strong>en</strong>tifies the correct<br />
electrical supply connection details.<br />
The diameter of the outer sheath of the electrical supply cable must be within the range 7 to 10.5 mm.<br />
The cable must conform in size <strong>and</strong> colour coding with your local <strong>and</strong> national electrical installation<br />
regulations. The temperature rating of the cable must be 70 o C or greater.<br />
Pump Item Number<br />
Voltage<br />
(V)<br />
Frequ<strong>en</strong>cy<br />
(Hz)<br />
Connection details:<br />
refer to Figure<br />
A373-16-903 (all) 50/60 6<br />
A373-15-903, A374-15-903 (all) 50/60 3<br />
A373-15-981, A374-15-981 115<br />
230<br />
A373-15-904, A374-15-904 100<br />
100-105<br />
200<br />
200-210<br />
A373-17-984 (all) 50/60 7<br />
60<br />
60<br />
50<br />
60<br />
50<br />
60<br />
Table 8 – Motor connection details<br />
4<br />
5<br />
4<br />
4<br />
5<br />
5<br />
Issue K 14 Jul 05
<strong>E2M28</strong> <strong>and</strong> <strong>E2M30</strong> <strong>Rotary</strong> <strong>Vacuum</strong> <strong>Pumps</strong><br />
3.6.2 St<strong>and</strong>ard single-phase motors<br />
1. Remove the cover from the motor terminal box (Figure 1, item 8).<br />
2. Remove the cable-gl<strong>and</strong> from the inside of the terminal-box <strong>and</strong> fit the cable-gl<strong>and</strong> to the cable<br />
leadthrough hole in the side of the terminal-box.<br />
3. Pass the electrical supply cable through the gl<strong>and</strong>.<br />
4. Remove the receptacle connectors from the fitting pack.<br />
5. Fit a ring connector to the earth (ground) wire.<br />
6. Select the correct size of receptacle connectors for your cable wires:<br />
• Use the red connectors for wire sizes 0.75 to 1.5 mm 2 .<br />
• Use the blue connectors for wire sizes 1. 5 to 2.5 mm 2 .<br />
7. Attach the appropriate connector to the live <strong>and</strong> neutral wires.<br />
8. Connect the electrical supply cable to the appropriate terminals as shown in Figures 3 to 5. You<br />
must tight<strong>en</strong> the earth (ground) terminal connection to a torque of 2.13 to 2.87 Nm.<br />
9. Tight<strong>en</strong> the dome shaped nut on the cable-gl<strong>and</strong> until the outer sheath of the cable is firmly gripped.<br />
Do not overtight<strong>en</strong>.<br />
10. Check that the cable connections are correct, th<strong>en</strong> refit the cover on the motor terminal-box.<br />
PAGE<br />
15<br />
INSTALLATION<br />
3.6.3 Amph<strong>en</strong>ol version single-phase motors<br />
Wh<strong>en</strong> you select the mating half of the amph<strong>en</strong>ol connector, please <strong>en</strong>sure that it is compatible.<br />
For conformance with CSA st<strong>and</strong>ards, only CSA certified connectors are to be used; the protective earth<br />
(ground) connection is required to make first <strong>and</strong> break last with respect to the other connections.<br />
Connect the electrical supply cable to the appropriate pins as shown in Figure 6.<br />
3.6.4 110/200-240 V 50 Hz or 115-120/200-230 V 60 Hz single-phase motors<br />
The motor is designed for a single-phase electrical supply <strong>and</strong> is suitable for 50 Hz <strong>and</strong> 60 Hz operation.<br />
The motor can be manually switched betwe<strong>en</strong> nominal supply voltages of 110-120 V <strong>and</strong> 200-240 V.<br />
Use the following procedure to check that the voltage selector switch is correctly positioned for your<br />
electrical supply voltage:<br />
1. Refer to Figure 7. Undo the three screws securing the terminal box cover (1) <strong>and</strong> remove the<br />
cover.<br />
2. Check the position of the voltage selector switch (6). If the switch is in the correct position,<br />
continue at Step 3. If the voltage selector switch (6) is in the wrong position, press the switch to<br />
select the alternative position.<br />
3. Refit the terminal box cover <strong>and</strong> secure with the three screws.<br />
Wh<strong>en</strong> you select the mating half of the connector, please <strong>en</strong>sure that it is compatible (IEC60320 C19<br />
female). For compliance with CSA st<strong>and</strong>ards, only CSA certified connectors are to be used.<br />
Issue K 15 Jul 05
<strong>E2M28</strong> <strong>and</strong> <strong>E2M30</strong> <strong>Rotary</strong> <strong>Vacuum</strong> <strong>Pumps</strong><br />
PAGE<br />
16<br />
INSTALLATION<br />
Figure 3 – Electrical supply connection: single-phase motors: 220-240 V 50 Hz <strong>and</strong> 230-240 V 60 Hz<br />
Wire colour codes:<br />
BN<br />
GY<br />
OR<br />
Brown<br />
Grey<br />
Orange<br />
VT<br />
WH<br />
Violet<br />
White<br />
Figure 4 – Electrical supply connection: single-phase motors: 100 V 50 Hz, 100-105 V 60 Hz <strong>and</strong> 115 V 60 Hz<br />
Issue K 16 Jul 05
<strong>E2M28</strong> <strong>and</strong> <strong>E2M30</strong> <strong>Rotary</strong> <strong>Vacuum</strong> <strong>Pumps</strong><br />
PAGE<br />
17<br />
INSTALLATION<br />
Wire colour codes:<br />
BN<br />
GY<br />
OR<br />
Brown<br />
Grey<br />
Orange<br />
VT<br />
WH<br />
Violet<br />
White<br />
Figure 5 – Electrical supply connection, single-phase motors: 200 V 50 Hz, 200-210 V 60 Hz <strong>and</strong> 230 V 60 Hz<br />
Pin codes:<br />
1 Live<br />
2 Neutral<br />
3 Not used<br />
Earth (ground)<br />
Figure 6 – Electrical supply connection, single-phase motors with Amph<strong>en</strong>ol connector:<br />
220-240 V 50 Hz <strong>and</strong> 230-240 V 60 Hz<br />
Issue K 17 Jul 05
<strong>E2M28</strong> <strong>and</strong> <strong>E2M30</strong> <strong>Rotary</strong> <strong>Vacuum</strong> <strong>Pumps</strong><br />
PAGE<br />
18<br />
INSTALLATION<br />
A<br />
B<br />
Top view of motor<br />
Internal view of top of motor<br />
1. Terminal box cover<br />
2. Electrical inlet socket<br />
3. On/Off switch<br />
4. Position 'I' (on)<br />
5. Position 'O' (off)<br />
6. Voltage selector switch<br />
7. Position 'II' (high voltage setting 200 – 240 V)<br />
8. Position 'I' (low voltage setting 110 – 120 V)<br />
Figure 7 – Motor voltage selection: single-phase motors, 110/200-240 V 50 Hz <strong>and</strong> 115-120/200-240 V 60 Hz<br />
Issue K 18 Jul 05
<strong>E2M28</strong> <strong>and</strong> <strong>E2M30</strong> <strong>Rotary</strong> <strong>Vacuum</strong> <strong>Pumps</strong><br />
3.7 Electrical installation: three-phase motors<br />
3.7.1 Connect the electrical supply to the motor<br />
PAGE<br />
19<br />
WARNING<br />
Ensure that the electrical installation of the pump conforms with your local <strong>and</strong> national<br />
safety requirem<strong>en</strong>ts. It must be connected to a suitably fused <strong>and</strong> protected electrical<br />
supply <strong>and</strong> a suitable earth (ground) point.<br />
CAUTION<br />
Ensure that the motor is correctly configured for your electrical supply voltage <strong>and</strong> frequ<strong>en</strong>cy. If you<br />
do not, you can damage the motor.<br />
INSTALLATION<br />
Note:<br />
The pump will restart automatically wh<strong>en</strong> the electrical supply is restored after an interruption. If you do<br />
not want the pump to restart automatically, use electrical control equipm<strong>en</strong>t which must be reset<br />
manually.<br />
We recomm<strong>en</strong>d that you connect the electrical supply to the motor through a starter or circuit breaker<br />
which has thermal over-curr<strong>en</strong>t protection which can be adjusted to suit the full load curr<strong>en</strong>t ratings<br />
shown in Table 5. The fuse ratings in Table 5 are provided for guidance only. The supplier of your thermal<br />
overcurr<strong>en</strong>t protection device may specify differ<strong>en</strong>t values to <strong>en</strong>sure correct operation of the fuse <strong>and</strong><br />
the overcurr<strong>en</strong>t protection device. Ensure that the fuse you use is suitable for the starting curr<strong>en</strong>ts giv<strong>en</strong><br />
in Table 5. Refer to Figure 8 or 9 as appropriate for the correct electrical supply connection diagram for<br />
your motor.<br />
The diameter of the outer sheath of the electrical cable must be in the range 10-14 mm. The cable must<br />
conform in size <strong>and</strong> colour coding with your local <strong>and</strong> national electrical installation regulations. The<br />
temperature rating of the cable must be 70 o C or greater.<br />
1. Remove the cover from the motor terminal-box.<br />
2. Remove the cable-gl<strong>and</strong> from the inside of the terminal-box <strong>and</strong> fit the cable-gl<strong>and</strong> to the cable<br />
leadthrough hole in the side of the terminal-box.<br />
3. Refer to the electrical supply connection diagram for your pump, (Figure 8 or 9). Make sure that<br />
the metal links are connected as shown; if they are not, move the links to the positions shown.<br />
4. Pass the electrical supply cable through the cable-gl<strong>and</strong> <strong>and</strong> connect to the appropriate terminals,<br />
as shown in Figures 8 <strong>and</strong> 9. You must tight<strong>en</strong> the earth (ground) terminal connection to a torque<br />
of 2.13 to 2.87 Nm.<br />
5. Tight<strong>en</strong> the cable gl<strong>and</strong> until the outer sheath of the cable is firmly gripped. Do not overtight<strong>en</strong>.<br />
6. Ensure that the gasket seal for the terminal box cover is correctly positioned, th<strong>en</strong> refit the cover<br />
to the terminal-box <strong>and</strong> secure with the screws.<br />
Issue K 19 Jul 05
<strong>E2M28</strong> <strong>and</strong> <strong>E2M30</strong> <strong>Rotary</strong> <strong>Vacuum</strong> <strong>Pumps</strong><br />
3.7.2 Check the direction of rotation<br />
PAGE<br />
20<br />
INSTALLATION<br />
CAUTION<br />
Ensure that the motor rotates in the correct direction. If it does not, the pump <strong>and</strong> your vacuum<br />
system can become pressurized wh<strong>en</strong> you operate the pump.<br />
1. With the pump inlet still unconnected, watch the motor cooling-fan through the motor fan-cover,<br />
switch-on the electrical supply to the motor for a few seconds, th<strong>en</strong> switch off the electrical supply<br />
again.<br />
2. Check that the motor cooling-fan rotates in the correct direction shown by the arrow on the<br />
motor mounting plate. If the direction of rotation is incorrect:<br />
• Switch off the electrical supply immediately.<br />
• Isolate the pump from the electrical supply.<br />
• Remove the terminal-box cover <strong>and</strong> swap wires L1 <strong>and</strong> L3: see Figures 8 <strong>and</strong> 9.<br />
• Refit the cover to the terminal-box.<br />
3.8 Connect the pump inlet<br />
Take note of the following information wh<strong>en</strong> you connect the pump to your vacuum system. Refer to<br />
Section 7.4 for details of the accessories m<strong>en</strong>tioned below.<br />
• For optimum pumping speeds, <strong>en</strong>sure that the pipeline connected to the inlet-port is as short as<br />
possible <strong>and</strong> has an internal diameter not less than the inlet-port diameter.<br />
• Support the vacuum pipelines to prev<strong>en</strong>t loading of the coupling-joints.<br />
• If necessary, incorporate flexible bellows in your system pipelines to reduce the transmission of<br />
vibration <strong>and</strong> to prev<strong>en</strong>t loading of coupling-joints. If you use flexible bellows, you must <strong>en</strong>sure that<br />
you use bellows which have a maximum pressure rating which is greater than the highest pressure<br />
that can be g<strong>en</strong>erated in your system. We recomm<strong>en</strong>d that you use BOC Edwards flexible bellows.<br />
• Use a suitable inlet catchpot if you pump cond<strong>en</strong>sable vapours or if you use the pump for very dusty<br />
applications.<br />
• Ensure that sealing surfaces are clean <strong>and</strong> scratch-free.<br />
Connect your vacuum system to the inlet-port (Figure 1, item 6). To make this connection, you can:<br />
• Connect to the NW25 flange supplied: use the NW25 c<strong>en</strong>tring-ring <strong>and</strong> 'O' ring supplied.<br />
• Remove the NW25 flange <strong>and</strong> connect to the 1 inch BSP threaded hole.<br />
• Use an NW25 to 28 mm bore tube adaptor available as an optional accessory, see Section 7.4.11.<br />
Issue K 20 Jul 05
<strong>E2M28</strong> <strong>and</strong> <strong>E2M30</strong> <strong>Rotary</strong> <strong>Vacuum</strong> <strong>Pumps</strong><br />
PAGE<br />
21<br />
INSTALLATION<br />
Figure 8 – Electrical supply connection, three-phase motors: 200-220 V 50 Hz <strong>and</strong> 200-230 V 60 Hz<br />
Figure 9 – Electrical supply connection, three-phase motors: 380-415 V 50 Hz <strong>and</strong> 460 V 60 Hz<br />
Issue K 21 Jul 05
<strong>E2M28</strong> <strong>and</strong> <strong>E2M30</strong> <strong>Rotary</strong> <strong>Vacuum</strong> <strong>Pumps</strong><br />
3.9 Connect the pump outlet<br />
PAGE<br />
22<br />
INSTALLATION<br />
WARNING<br />
Connect the pump outlet to a suitable treatm<strong>en</strong>t plant to prev<strong>en</strong>t the discharge of<br />
dangerous gases <strong>and</strong> vapours to the surrounding atmosphere.<br />
WARNING<br />
Use a catchpot to prev<strong>en</strong>t the drainage of contaminated cond<strong>en</strong>sate back into the pump.<br />
The exhaust system must be configured so that the maximum pressure at the pump outlet does not<br />
exceed 0.5 bar gauge (1.5 bar absolute, 1.5 x 10 5 Pa) at full pump throughput.<br />
We recomm<strong>en</strong>d that you fit an oil mist filter to the pump outlet in the following circumstances:<br />
• If you use the pump with the gas-ballast control op<strong>en</strong>.<br />
• If you operate the pump with an inlet pressure greater than 10 mbar for ext<strong>en</strong>ded periods.<br />
• If you frequ<strong>en</strong>tly pump down from atmospheric pressure.<br />
The mist filter will trap the oil exhausted from the pump: you can reuse the oil if it is not contaminated.<br />
To connect the pump to your outlet accessories or to your exhaust treatm<strong>en</strong>t plant, you can:<br />
• Connect 15 mm internal diameter vacuum or plastic hose to the outlet nozzle (Figure 1, item 2).<br />
• Remove the outlet nozzle <strong>and</strong> connect to the 3 / 4 inch BSP threaded hole.<br />
• Remove the outlet nozzle <strong>and</strong> replace it with an NW25 flange adaptor (available as an optional<br />
accessory, see Section 7.4.13) <strong>and</strong> th<strong>en</strong> connect to the NW25 flange.<br />
3.10 Gas-ballast inlet connection<br />
The position of the gas-ballast inlet is shown in Figure 1 (item 4). The gas-ballast inlet has several filters<br />
(shown in Figure 11) to trap any dust <strong>and</strong> debris if you use air as the gas-ballast supply.<br />
If you want to use a differ<strong>en</strong>t gas for the gas-ballast supply, or if you want to connect a valve to the gasballast<br />
inlet:<br />
1. Remove the filters (as described in Section 5.6).<br />
2. Connect your gas supply or valve to the 1 / 4 inch BSP threaded hole.<br />
3.11 Leak test the system<br />
Leak-test the system <strong>and</strong> seal any leaks found after you have installed the pump, to prev<strong>en</strong>t leakage of<br />
substances out of the system <strong>and</strong> leakage of air into the system.<br />
Issue K 22 Jul 05
4 OPERATION<br />
<strong>E2M28</strong> <strong>and</strong> <strong>E2M30</strong> <strong>Rotary</strong> <strong>Vacuum</strong> <strong>Pumps</strong><br />
WARNING<br />
PAGE<br />
23<br />
Do not expose any part of your body to vacuum. If you do, you may be injured.<br />
4.1 ATEX directive implications<br />
4.1.1 Introduction<br />
This equipm<strong>en</strong>t is designed to meet the requirem<strong>en</strong>ts of Group II Category 3 equipm<strong>en</strong>t in accordance<br />
with Directive 94/9/EC of the European Parliam<strong>en</strong>t <strong>and</strong> the Council of 23rd March 1994 on the<br />
approximation of the laws of the Member States concerning equipm<strong>en</strong>t <strong>and</strong> protective systems int<strong>en</strong>ded<br />
for use in pot<strong>en</strong>tially explosive atmospheres. (The ATEX Directive)<br />
OPERATION<br />
The ATEX Category 3 applies in respect of pot<strong>en</strong>tial ignition sources internal to the equipm<strong>en</strong>t. An<br />
ATEX Category has not be<strong>en</strong> assigned in respect of pot<strong>en</strong>tial ignition sources on the outside of the<br />
equipm<strong>en</strong>t as the equipm<strong>en</strong>t has not be<strong>en</strong> designed for use where there is an external pot<strong>en</strong>tially<br />
explosive atmosphere.<br />
There is no pot<strong>en</strong>tial source of ignition within the pump during normal operation but there may be<br />
pot<strong>en</strong>tial sources of ignition under conditions of predictable <strong>and</strong> rare malfunction as defined in the<br />
Directive. Accordingly, although the pump is designed to pump flammable materials <strong>and</strong> mixtures,<br />
operating procedures should <strong>en</strong>sure that under all normal <strong>and</strong> reasonably predictable conditions, these<br />
materials <strong>and</strong> mixtures are not within explosive limits. Category 3 is considered appropriate for the<br />
avoidance of ignition in the case of a rare malfunction which allows flammable materials or mixtures to<br />
pass through the pump whilst within their explosive limits.<br />
4.1.2 Flammable/pyrophoric materials<br />
WARNING<br />
You must obey the instructions <strong>and</strong> take note of the precautions giv<strong>en</strong> below, to <strong>en</strong>sure<br />
that pumped gases do not <strong>en</strong>ter their flammable ranges.<br />
Wh<strong>en</strong> flammable or pyrophoric materials are pres<strong>en</strong>t within the equipm<strong>en</strong>t you must:<br />
• Not allow air to <strong>en</strong>ter the equipm<strong>en</strong>t.<br />
• Ensure that the system is leak tight.<br />
• Use an inert gas purge (for example, a nitrog<strong>en</strong> purge) to dilute any flammable gases or vapours<br />
<strong>en</strong>tering the pump inlet, <strong>and</strong>/or use an inert gas purge to reduce the conc<strong>en</strong>tration of flammable<br />
gases or vapours in the pump <strong>and</strong> in the exhaust pipeline to less than one quarter of the gases'<br />
published lower explosive limits (LEL).<br />
• Use an inert gas purge into the pump gas ballast connection to prev<strong>en</strong>t the cond<strong>en</strong>sation of<br />
flammable vapours within the pump mechanism <strong>and</strong> exhaust pipeline.<br />
Issue K 23 Jul 05
<strong>E2M28</strong> <strong>and</strong> <strong>E2M30</strong> <strong>Rotary</strong> <strong>Vacuum</strong> <strong>Pumps</strong><br />
4.1.3 Gas purges<br />
PAGE<br />
24<br />
OPERATION<br />
WARNING<br />
If you use inert gas purges to dilute dangerous gases to a safe level, <strong>en</strong>sure that the pump<br />
is shut down if an inert gas supply fails.<br />
WARNING<br />
You must obey the instructions <strong>and</strong> take note of the precautions giv<strong>en</strong> below, to <strong>en</strong>sure<br />
that pumped gases do not <strong>en</strong>ter their flammable ranges.<br />
Switch on the inert gas purge to remove air from the pump <strong>and</strong> the exhaust pipeline before the process<br />
starts. Switch off the purge flow at the <strong>en</strong>d of the process only after any remaining flammable gases or<br />
vapours have be<strong>en</strong> purged from the pump <strong>and</strong> exhaust pipeline.<br />
If liquids that produce flammable vapours could be pres<strong>en</strong>t in the pump foreline, th<strong>en</strong> the inert gas purge<br />
to the pump should be left on all the time this liquid is pres<strong>en</strong>t. Flammable liquids could be pres<strong>en</strong>t in the<br />
foreline as a result of cond<strong>en</strong>sation, or may be carried over from the process.<br />
Wh<strong>en</strong> you calculate the flow rate of inert gas required for dilution, consider the maximum flow rate for<br />
the flammable gases/vapours that could occur. For example, if a mass flow controller is used to supply<br />
flammable gases to the process, you should assume a flow rate for flammable gases that could arise if the<br />
mass flow controller is fully op<strong>en</strong>.<br />
Continually measure the inert gas purge flow rate: if the flow rate falls below that required, you must<br />
stop the flow of flammable gases or vapours into the pump.<br />
Note:<br />
We recomm<strong>en</strong>d that you obtain <strong>and</strong> read the <strong>Vacuum</strong> Pump <strong>and</strong> <strong>Vacuum</strong> System Safety manual<br />
(publication number P300-20-000), available from BOC Edwards or your supplier.<br />
4.2 Gas-ballast control<br />
Use the gas-ballast control (Figure 1, item 3) to change the flow of gas-ballast into the low vacuum stage<br />
of the pump, <strong>and</strong> to provide an additional oil-feed to the pump mechanism.<br />
Use the gas-ballast control closed:<br />
• To achieve ultimate vacuum.<br />
• To pump dry gases.<br />
Turn the gas-ballast control six turns anti-clockwise to op<strong>en</strong> it fully. Use the gas-ballast control op<strong>en</strong>:<br />
• To pump high conc<strong>en</strong>trations of cond<strong>en</strong>sable vapour.<br />
• To decontaminate the oil.<br />
Wh<strong>en</strong> you operate the pump with the gas-ballast control op<strong>en</strong>, there will be an increased rate of oil loss<br />
from the pump. Ideally, a mist filter <strong>and</strong> oil return kit should be used on clean applications.<br />
Issue K 24 Jul 05
<strong>E2M28</strong> <strong>and</strong> <strong>E2M30</strong> <strong>Rotary</strong> <strong>Vacuum</strong> <strong>Pumps</strong><br />
4.3 Start-up<br />
WARNING<br />
Do not block the pump outlet or allow the outlet pressure to rise above 1.5 bar absolute.<br />
If you do, the oil box may fracture <strong>and</strong> may cause injury to people nearby.<br />
If the oil is contaminated, or if the pump temperature is below 13 o C, or if the electrical supply voltage<br />
is more than 10% below the lowest voltage specified for the pump, the pump may operate at a reduced<br />
speed for a few minutes. On single-phase pumps, if the pump continues to operate at reduced speed, the<br />
motor thermal overload device will op<strong>en</strong> <strong>and</strong> stop the pump. Wh<strong>en</strong> the motor has cooled, the thermal<br />
overload device will reset automatically <strong>and</strong> the pump will restart.<br />
PAGE<br />
25<br />
OPERATION<br />
1. Check that the pump oil-level is betwe<strong>en</strong> the MAX <strong>and</strong> MIN marks on the bezel of the oil-level<br />
sight-glass; if it is not, refer to Section 5.3.<br />
2. Turn the gas-ballast control to the required position (refer to Section 4.2).<br />
3. Switch on the electrical supply to the pump.<br />
4. Check that the oil-level in the sight-glass drops slightly (by 3 to 5 mm) after start-up. This shows<br />
that the pump has primed with oil.<br />
5. If the pump fails to prime, operate the pump with the inlet op<strong>en</strong> to atmosphere for approximately<br />
30 seconds. Th<strong>en</strong> isolate the inlet <strong>and</strong> check that the oil-level drops by 3 to 5 mm.<br />
6. If you want to achieve ultimate vacuum, to pump cond<strong>en</strong>sable vapours or to decontaminate the<br />
pump oil, refer to the procedures in Sections 4.4, 4.5 <strong>and</strong> 4.6 respectively. Otherwise, op<strong>en</strong> the<br />
vacuum system isolation-valve.<br />
4.4 To achieve ultimate vacuum<br />
If the pump does not achieve the performance specified in Section 2.2, make sure that this is not due to<br />
your system design before you contact your supplier or BOC Edwards for advice, In particular, the<br />
vapour pressure of all materials used in your vacuum system (including pump oil, see below) must be<br />
much lower than the specified ultimate vacuum of the pump.<br />
Refer to Section 5.11.3 for a list of possible causes for failure to achieve the specified performance; note<br />
however that the most common causes are:<br />
• Your pressure measurem<strong>en</strong>t technique or gauge head is unsuitable or the gauge head is faulty.<br />
• You have used an oil other than the recomm<strong>en</strong>ded oil, <strong>and</strong> the vapour pressure of the oil is higher<br />
than the specified ultimate vacuum of the pump.<br />
Use the following procedure to achieve ultimate vacuum:<br />
1. Isolate the pump from your vacuum system.<br />
2. Turn the gas-ballast control fully anti-clockwise (fully op<strong>en</strong>) <strong>and</strong> operate the pump for at least<br />
1 hour (or overnight) to thoroughly purge the oil of contaminants.<br />
3. Close the gas-ballast control.<br />
4. Op<strong>en</strong> the vacuum system isolation-valve <strong>and</strong> pump down to ultimate vacuum.<br />
Issue K 25 Jul 05
<strong>E2M28</strong> <strong>and</strong> <strong>E2M30</strong> <strong>Rotary</strong> <strong>Vacuum</strong> <strong>Pumps</strong><br />
4.5 To pump cond<strong>en</strong>sable vapours<br />
PAGE<br />
26<br />
Use gas-ballast (op<strong>en</strong> the gas-ballast control) wh<strong>en</strong> there is a high proportion of cond<strong>en</strong>sable vapours in<br />
the process gases:<br />
OPERATION<br />
1. Close the vacuum system isolation-valve.<br />
2. Turn the gas-ballast control anti-clockwise to fully op<strong>en</strong> <strong>and</strong> operate the pump for 30 minutes to<br />
warm the oil; this will help to prev<strong>en</strong>t vapour cond<strong>en</strong>sation in the pump.<br />
3. Op<strong>en</strong> the vacuum system isolation-valve <strong>and</strong> continue to operate the pump with the gas-ballast<br />
control op<strong>en</strong>.<br />
After you have pumped cond<strong>en</strong>sable vapours, you can (if necessary) decontaminate the oil; use the<br />
procedure in Section 4.6.<br />
4.6 To decontaminate the oil<br />
The oil in the pump should be clear, if the oil is cloudy or discoloured, it is contaminated with process<br />
vapours.<br />
1. Look at the condition of the oil in the oil sight-glass (Figure 1, item 12). If the oil is cloudy or<br />
discoloured, continue with the procedure at Step 2 below.<br />
2. Close the vacuum system isolation-valve.<br />
3. Turn the gas-ballast control fully anti-clockwise.<br />
4. Operate the pump until the oil is clear.<br />
4.7 Unatt<strong>en</strong>ded operation<br />
The pump is designed for unatt<strong>en</strong>ded operation under the normal operating conditions specified in<br />
Section 2.1. However, we recomm<strong>en</strong>d that you check the pump at a regular interval of not more than<br />
14 days; check the pump more frequ<strong>en</strong>tly if you pump high volumes of gas or if you operate the pump<br />
with the gas-ballast control op<strong>en</strong>.<br />
Single-phase motors are cooled by internal fans. These motors have a thermal overload device. Wh<strong>en</strong><br />
the motor is too hot, the thermal overload device switches off the pump. The thermal overload device<br />
has an automatic reset; wh<strong>en</strong> the motor cools down, the device resets <strong>and</strong> the motor will restart.<br />
Wh<strong>en</strong> you check the pump, make sure that the pump is not going through a repetitive cycle of thermal<br />
overload failures <strong>and</strong> automatic resets. If necessary reduce the thermal load from the pumped gases, to<br />
prev<strong>en</strong>t overheating of the pump.<br />
Issue K 26 Jul 05
<strong>E2M28</strong> <strong>and</strong> <strong>E2M30</strong> <strong>Rotary</strong> <strong>Vacuum</strong> <strong>Pumps</strong><br />
4.8 Shut-down<br />
Note:<br />
If the gas-ballast control is op<strong>en</strong> <strong>and</strong> the motor is switched off for any reason, the pump drive shaft may<br />
rotate in the reverse direction, causing a system pressure rise. To prev<strong>en</strong>t this, use a gas-ballast control<br />
valve (refer to Section 7.4.15).<br />
PAGE<br />
27<br />
We recomm<strong>en</strong>d, as described in the procedure below, that you decontaminate the oil before you shut<br />
down the pump; this will prev<strong>en</strong>t damage to the pump by the contaminates in the oil.<br />
1. Refer to Section 4.6 <strong>and</strong> decontaminate the oil, as required.<br />
2. Close the vacuum system isolation-valve (if not already closed).<br />
3. Close gas-ballast (that is, turn the gas-ballast control clockwise).<br />
4. Switch off the electrical supply to the pump.<br />
OPERATION<br />
Issue K 27 Jul 05
<strong>E2M28</strong> <strong>and</strong> <strong>E2M30</strong> <strong>Rotary</strong> <strong>Vacuum</strong> <strong>Pumps</strong><br />
PAGE<br />
28<br />
This page int<strong>en</strong>tionally blank.<br />
Issue K 28 Jul 05
5 MAINTENANCE<br />
<strong>E2M28</strong> <strong>and</strong> <strong>E2M30</strong> <strong>Rotary</strong> <strong>Vacuum</strong> <strong>Pumps</strong><br />
5.1 Safety information<br />
PAGE<br />
29<br />
WARNING<br />
Obey the safety instructions giv<strong>en</strong> below <strong>and</strong> take note of appropriate precautions. If you<br />
do not, you can cause injury to people <strong>and</strong> damage to equipm<strong>en</strong>t.<br />
• A suitably trained <strong>and</strong> supervised technician must maintain the pump.<br />
• Ensure that the maint<strong>en</strong>ance technician is familiar with the safety procedures which relate to the<br />
pump-oil <strong>and</strong> the products processed by the pumping-system.<br />
• Allow the pump to cool to a safe temperature before you start maint<strong>en</strong>ance work.<br />
• Isolate the pump <strong>and</strong> other compon<strong>en</strong>ts in the pumping system from the electrical supply so that<br />
they can not be operated accid<strong>en</strong>tally.<br />
• After maint<strong>en</strong>ance is completed, recheck the pump rotation direction if the electrical supply has<br />
be<strong>en</strong> disconnected.<br />
• Do not reuse 'O' rings <strong>and</strong> seals if they are damaged.<br />
• The pump <strong>and</strong> its oil will be contaminated with the process chemicals that have be<strong>en</strong> pumped during<br />
operation. Ensure that the pump is decontaminated before maint<strong>en</strong>ance <strong>and</strong> that you take adequate<br />
precautions to protect people from the effects of dangerous substances if contamination has<br />
occurred.<br />
• Leak-test the system after maint<strong>en</strong>ance work is complete if you have connected or disconnected<br />
any vacuum or exhaust joints; seal any leaks found.<br />
• Do not touch or inhale the thermal breakdown products of fluorinated materials which may be<br />
pres<strong>en</strong>t if the pump has be<strong>en</strong> heated to 260 o C <strong>and</strong> above. These breakdown products are very<br />
dangerous. Fluorinated materials in the pump may include oils, greases <strong>and</strong> seals. The pump may<br />
have overheated if it was misused, if it malfunctioned or if it was in a fire. BOC Edwards Material<br />
Safety Data sheets for fluorinated materials used in the pump are available on request: contact your<br />
supplier or BOC Edwards.<br />
MAINTENANCE<br />
5.2 Maint<strong>en</strong>ance plan<br />
The plan shown in Table 9 details the routine maint<strong>en</strong>ance operations necessary to maintain the pump<br />
in normal use. <strong>Instr</strong>uctions for each operation are giv<strong>en</strong> in the section shown.<br />
More frequ<strong>en</strong>t maint<strong>en</strong>ance may be required if the pump is used to process corrosive or abrasive gases<br />
<strong>and</strong> vapours; in these circumstances, we recomm<strong>en</strong>d that you replace the pump seals every year. If<br />
necessary, adjust the maint<strong>en</strong>ance plan according to your experi<strong>en</strong>ce.<br />
Wh<strong>en</strong> you maintain the pump, use BOC Edwards spares <strong>and</strong> maint<strong>en</strong>ance kits; these contain all of the<br />
compon<strong>en</strong>ts necessary to complete maint<strong>en</strong>ance operations successfully. The Item Numbers of the<br />
spares <strong>and</strong> kits are giv<strong>en</strong> in Section 7.3.<br />
Examine the condition of any external accessories, filters or traps (if fitted) wh<strong>en</strong> you maintain the pump.<br />
Refer to the instructions supplied with these accessories for the necessary maint<strong>en</strong>ance procedures.<br />
Issue K 29 Jul 05
<strong>E2M28</strong> <strong>and</strong> <strong>E2M30</strong> <strong>Rotary</strong> <strong>Vacuum</strong> <strong>Pumps</strong><br />
PAGE<br />
30<br />
MAINTENANCE<br />
Operation Frequ<strong>en</strong>cy Refer to<br />
Section<br />
Check the oil level As required; at least monthly 5.3<br />
Replace the oil Every 3000 hours of operation 5.4<br />
Inspect <strong>and</strong> clean the inlet filter Every oil change 5.5<br />
Clean or replace the gas-ballast filter Yearly 5.6<br />
Clean the motor fan-cover <strong>and</strong> <strong>en</strong>closure Yearly 5.7<br />
Clean <strong>and</strong> overhaul the pump Every 15000 hours of operation 5.8<br />
Fit new blades Every 30000 hours of operation 5.9<br />
Test the motor condition Every 15000 hours of operation 5.10<br />
Table 9 – Maint<strong>en</strong>ance plan<br />
5.3 Check the oil-level<br />
Note:<br />
If required, you can check the oil-level while the pump is operating , however you must switch off the pump<br />
<strong>and</strong> isolate the pump <strong>and</strong> other compon<strong>en</strong>ts in the pumping system from the electrical supply before you<br />
pour oil into the pump.<br />
Refer to Figure 1 for the items in brackets.<br />
1. Check that the oil-level in the oil sight-glass (12) is betwe<strong>en</strong> the MAX <strong>and</strong> MIN level marks on the<br />
bezel of the oil sight-glass.<br />
2. If the oil-level is near to or below the MIN level mark, remove the oil filler-plug (1) <strong>and</strong> pour more<br />
oil into the reservoir until the oil reaches the MAX level mark. If the oil-level goes above the MAX<br />
mark, remove the oil drain-plug (11) <strong>and</strong> drain the excess oil from the pump. Refit the oil drainplug.<br />
Refit the oil filler-plug.<br />
3. If the oil is contaminated, drain <strong>and</strong> refill the pump with clean oil as described in Section 5.4.<br />
5.4 Replace the oil<br />
Refer to Figure 1 for the items in brackets.<br />
1. Operate the pump for approximately t<strong>en</strong> minutes to warm the oil, th<strong>en</strong> switch off the pump. (This<br />
lowers the viscosity of the oil <strong>and</strong> allows the oil to be drained from the pump more easily).<br />
2. Isolate the pump from your electrical supply <strong>and</strong> disconnect it from your vacuum system.<br />
3. Remove the oil filler-plug (1).<br />
4. Place a suitable block under the pump-motor to tilt the pump <strong>and</strong> place a suitable container under<br />
the oil drain-plug (gravity drain) (11). Remove the oil drain-plug <strong>and</strong> allow the oil to drain into the<br />
container.<br />
5. If the oil is dirty or contaminated:<br />
• Refit the oil drain-plug <strong>and</strong> pour clean oil into the pump.<br />
• Reconnect the pump to the electrical supply <strong>and</strong> operate the pump for about 5 to 10 minutes.<br />
• Disconnect the pump from the electrical supply, remove the oil drain-plug <strong>and</strong> allow the oil<br />
to drain out of the pump.<br />
• Repeat this step until the oil reservoir is clean.<br />
Issue K 30 Jul 05
<strong>E2M28</strong> <strong>and</strong> <strong>E2M30</strong> <strong>Rotary</strong> <strong>Vacuum</strong> <strong>Pumps</strong><br />
6. Refit the oil drain-plug, remove the block <strong>and</strong> reconnect the pump to your vacuum system.<br />
7. Fill a suitable container with clean oil <strong>and</strong> pour the oil into the filler hole until the oil-level reaches<br />
the MAX level mark on the bezel of the oil sight-glass (12).<br />
8. Allow a few minutes for the oil to drain into the pump. If necessary, add more oil. Refit the oil fillerplug.<br />
5.5 Inspect <strong>and</strong> clean the inlet-filter<br />
Refer to Figure 10.<br />
1. Unscrew the inlet adaptor (1) <strong>and</strong> remove the 'O' ring (2), circlip (3) <strong>and</strong> inlet-filter (4).<br />
2. Wash the filter in a suitable cleaning solution. Allow the filter to dry.<br />
3. Refit the inlet-filter (4), circlip (3), 'O' ring (2) <strong>and</strong> inlet adaptor (1).<br />
PAGE<br />
31<br />
MAINTENANCE<br />
1. Inlet adaptor<br />
2. 'O' ring<br />
3. Circlip<br />
4. Inlet-filter<br />
Figure 10 – Remove/replace the inlet filter<br />
Issue K 31 Jul 05
<strong>E2M28</strong> <strong>and</strong> <strong>E2M30</strong> <strong>Rotary</strong> <strong>Vacuum</strong> <strong>Pumps</strong><br />
5.6 Clean the gas-ballast filter<br />
PAGE<br />
32<br />
Note:<br />
You may have removed the gas-ballast filter to connect a gas supply or valve to the gas-ballast inlet.<br />
Refer to Figure 11.<br />
MAINTENANCE<br />
1. Remove the retainer circlip (3).<br />
2. Remove the protective wire mesh (2) <strong>and</strong> filter elem<strong>en</strong>ts (1).<br />
3. Wash the wire mesh <strong>and</strong> filter in a suitable cleaning solution. Allow the wire mesh <strong>and</strong> filter to dry<br />
before replacing them in the pump.<br />
4. Refit the wire mesh (2) <strong>and</strong> filter elem<strong>en</strong>t (1) in the adaptor plate housing <strong>and</strong> retain with the<br />
retainer circlip (3).<br />
1. Filter elem<strong>en</strong>t<br />
2. Wire mesh<br />
3. Retainer circlip<br />
Figure 11 – Remove/replace the gas-ballast filter<br />
Issue K 32 Jul 05
<strong>E2M28</strong> <strong>and</strong> <strong>E2M30</strong> <strong>Rotary</strong> <strong>Vacuum</strong> <strong>Pumps</strong><br />
5.7 Clean the motor fan-cover <strong>and</strong> <strong>en</strong>closure<br />
If the motor fan-cover <strong>and</strong> <strong>en</strong>closure are not kept clean, the air-flow over the motor can be restricted<br />
<strong>and</strong> the pump may overheat.<br />
PAGE<br />
33<br />
1. Switch off the pump <strong>and</strong> disconnect it from the electrical supply.<br />
2. Use a dry cloth <strong>and</strong> a brush to remove dirt <strong>and</strong> deposits from the fan-cover <strong>and</strong> <strong>en</strong>closure.<br />
5.8 Clean <strong>and</strong> overhaul the pump<br />
Clean <strong>and</strong> overhaul the pump as described in the instructions supplied with the clean <strong>and</strong> overhaul kit<br />
(see Section 7.3).<br />
5.9 Fit new blades<br />
Fit new blades to the pump as described in the instructions supplied with the blade kit (see Section 7.3).<br />
MAINTENANCE<br />
5.10 Test the motor condition<br />
Test the earth (ground) continuity <strong>and</strong> the insulation resistance of the pump-motor, in accordance with<br />
local regulations for periodic testing of electrical equipm<strong>en</strong>t. We recomm<strong>en</strong>d that:<br />
• The earth (ground) continuity is less than 0.1 Ω.<br />
• Insulation resistance is greater than 10 MΩ.<br />
If the motor fails these tests, you must replace the motor.<br />
5.11 Fault finding<br />
5.11.1 Introduction<br />
A list of fault conditions <strong>and</strong> their possible causes is provided in the following sections to assist you in<br />
basic fault-finding. If you are unable to rectify a fault wh<strong>en</strong> you use this guide, call your supplier or your<br />
nearest BOC Edwards Service C<strong>en</strong>tre for advice.<br />
5.11.2 The pump has failed to start<br />
• The electrical supply fuse has failed.<br />
• The motor is incorrectly wired.<br />
• The operating voltage does not match that of the motor.<br />
• The exhaust filter or exhaust line is blocked.<br />
• The oil temperature is below 13 o C.<br />
• The oil is too viscous.<br />
• The oil is contaminated.<br />
• The pump is seized after long storage, or has be<strong>en</strong> left to st<strong>and</strong> after pumping contaminants.<br />
• The motor is faulty.<br />
Issue K 33 Jul 05
<strong>E2M28</strong> <strong>and</strong> <strong>E2M30</strong> <strong>Rotary</strong> <strong>Vacuum</strong> <strong>Pumps</strong><br />
5.11.3 The pump fail to achieve specified performance (failure to reach ultimate vacuum)<br />
PAGE<br />
34<br />
MAINTENANCE<br />
• Your measuring technique or gauge is unsuitable.<br />
• There is a leak in the external vacuum system.<br />
• The gas-ballast control is op<strong>en</strong>.<br />
• The oil level is too low.<br />
• You have filled the pump with the wrong type of oil.<br />
• The oil is contaminated.<br />
• The pump has not primed.<br />
• The vacuum fittings are dirty.<br />
• The inlet-filter is blocked.<br />
• The pump has not warmed up.<br />
• The motor shaft rotates in the wrong direction (three phase motors only).<br />
5.11.4 The pump is noisy<br />
• The motor fan-cover is damaged.<br />
• The coupling <strong>and</strong> fan assembly are poorly adjusted.<br />
• The motor coupling is loose.<br />
• The motor bearings are worn.<br />
• The oil is contaminated with solid particles.<br />
• One of the pump blades is sticking.<br />
5.11.5 The pump surface temperature is above 100 o C<br />
• The ambi<strong>en</strong>t temperature is too high.<br />
• The cooling-air supply is insuffici<strong>en</strong>t or is too hot.<br />
• The cooling-air supply is blocked.<br />
• The electrical supply voltage is too high.<br />
• The exhaust filter or exhaust line is blocked.<br />
• The oil level is too low.<br />
• The pump is filled with the wrong type of oil.<br />
• The oil is contaminated.<br />
• The process gas is too hot, or the throughput is too high.<br />
Issue K 34 Jul 05
<strong>E2M28</strong> <strong>and</strong> <strong>E2M30</strong> <strong>Rotary</strong> <strong>Vacuum</strong> <strong>Pumps</strong><br />
5.11.6 The vacuum is not maintained after the pump is switched off<br />
• The gas-ballast control is op<strong>en</strong>.<br />
• 'O' ring(s) are damaged or missing.<br />
• The shaft seals have deteriorated.<br />
5.11.7 The pumping speed is poor<br />
• The connecting pipelines are too small in diameter.<br />
• The connecting pipelines are too long.<br />
• The inlet-filter is blocked.<br />
5.11.8 There is an external oil leak<br />
PAGE<br />
35<br />
MAINTENANCE<br />
• The oil pump shaft seal is worn or damaged.<br />
• The oil box gasket has deteriorated.<br />
• There is an oil leak from gas-ballast control.<br />
• There is an oil-leak from the drain-plug.<br />
Issue K 35 Jul 05
<strong>E2M28</strong> <strong>and</strong> <strong>E2M30</strong> <strong>Rotary</strong> <strong>Vacuum</strong> <strong>Pumps</strong><br />
PAGE<br />
36<br />
This page int<strong>en</strong>tionally blank.<br />
Issue K 36 Jul 05
<strong>E2M28</strong> <strong>and</strong> <strong>E2M30</strong> <strong>Rotary</strong> <strong>Vacuum</strong> <strong>Pumps</strong><br />
6 STORAGE AND DISPOSAL<br />
6.1 Storage<br />
PAGE<br />
37<br />
Note:<br />
If you will store a new pump in conditions of high humidity, remove the pump from its cardboard packaging<br />
box; dispose of the box (refer to Section 6.2).<br />
Use the following procedure to store the pump:<br />
CAUTION<br />
Observe the storage temperature limits stated in Section 2.1. Storage below these limits will<br />
perman<strong>en</strong>tly damage the pump seals.<br />
1. Shut-down the pump as described in Section 4.8.<br />
2. Disconnect the pump from the electrical supply.<br />
3. Purge your vacuum system <strong>and</strong> the pump with dry nitrog<strong>en</strong> <strong>and</strong> disconnect the pump from your<br />
vacuum system.<br />
4. Replace the oil as described in Section 5.4.<br />
5. Place <strong>and</strong> secure protective covers over the inlet <strong>and</strong> outlet-ports.<br />
6. Store the pump in cool, dry conditions until required for use.<br />
STORAGE AND DISPOSAL<br />
Wh<strong>en</strong> required, prepare <strong>and</strong> install the pump as described in Section 3. If the pump has be<strong>en</strong> stored for<br />
more than a year, you must clean <strong>and</strong> overhaul the pump before you install it, as described in the<br />
instructions supplied with the clean <strong>and</strong> overhaul kit.<br />
6.2 Disposal<br />
Dispose of the pump, the oil <strong>and</strong> any compon<strong>en</strong>ts removed from the pump safely in accordance with all<br />
local <strong>and</strong> national safety <strong>and</strong> <strong>en</strong>vironm<strong>en</strong>tal requirem<strong>en</strong>ts.<br />
Take particular care with the following:<br />
• Compon<strong>en</strong>ts which have come into contact with the pump fluid.<br />
• Compon<strong>en</strong>ts which have be<strong>en</strong> contaminated with dangerous process substances.<br />
Do not incinerate fluoroelastomer seals <strong>and</strong> ‘O’ rings.<br />
Issue K 37 Jul 05
<strong>E2M28</strong> <strong>and</strong> <strong>E2M30</strong> <strong>Rotary</strong> <strong>Vacuum</strong> <strong>Pumps</strong><br />
PAGE<br />
38<br />
This page int<strong>en</strong>tionally blank.<br />
Issue K 38 Jul 05
<strong>E2M28</strong> <strong>and</strong> <strong>E2M30</strong> <strong>Rotary</strong> <strong>Vacuum</strong> <strong>Pumps</strong><br />
7 SERVICE, SPARES AND ACCESSORIES<br />
7.1 Introduction<br />
PAGE<br />
39<br />
BOC Edwards products, spares <strong>and</strong> accessories are available from BOC Edwards companies in Belgium,<br />
Brazil, China, France, Germany, Israel, Italy, Japan, Korea, Singapore, United Kingdom, U.S.A <strong>and</strong> a<br />
world-wide network of distributors. The majority of these c<strong>en</strong>tres employ Service Engineers who have<br />
undergone compreh<strong>en</strong>sive BOC Edwards training courses.<br />
Order spare parts <strong>and</strong> accessories from your nearest BOC Edwards company or distributor. Wh<strong>en</strong> you<br />
order, state for each part required:<br />
• Model <strong>and</strong> Item Number of your equipm<strong>en</strong>t<br />
• Serial number<br />
• Item Number <strong>and</strong> description of part.<br />
7.2 Service<br />
BOC Edwards products are supported by a world-wide network of BOC Edwards Service C<strong>en</strong>tres. Each<br />
Service C<strong>en</strong>tre offers a wide range of options including: equipm<strong>en</strong>t decontamination; service exchange;<br />
repair; rebuild <strong>and</strong> testing to factory specifications. Equipm<strong>en</strong>t which has be<strong>en</strong> serviced, repaired or<br />
rebuilt is returned with a full warranty.<br />
Your local Service C<strong>en</strong>tre can also provide BOC Edwards <strong>en</strong>gineers to support on-site maint<strong>en</strong>ance,<br />
service or repair of your equipm<strong>en</strong>t.<br />
For more information about service options, contact your nearest Service C<strong>en</strong>tre or other<br />
BOC Edwards company.<br />
SERVICE, SPARES AND ACCESSORIES<br />
7.3 Spares<br />
The maint<strong>en</strong>ance kits listed in Table 10 contain all of the parts you will need to maintain your pump. The<br />
maint<strong>en</strong>ance kits also include instructions for the use of the kits.<br />
Use the Clean <strong>and</strong> Overhaul Kit for routine maint<strong>en</strong>ance operations. Use the Blade Kit together with<br />
the Clean <strong>and</strong> Overhaul Kit wh<strong>en</strong> you must r<strong>en</strong>ew the blade assembly in the rotary pump.<br />
Spare<br />
Clean <strong>and</strong> Overhaul Kit<br />
Blade Kit<br />
Ultragrade 19 Oil (4 litres)<br />
Capacitor Kit, 100/200 V, 1-phase motor<br />
Item Number<br />
A373-01-131<br />
A373-01-135<br />
H110-25-013<br />
A505-91-800<br />
Table 10 – Spares Item Numbers<br />
Issue K 39 Jul 05
<strong>E2M28</strong> <strong>and</strong> <strong>E2M30</strong> <strong>Rotary</strong> <strong>Vacuum</strong> <strong>Pumps</strong><br />
7.4 Accessories<br />
PAGE<br />
40<br />
7.4.1 Introduction<br />
A range of accessories is available for the <strong>E2M28</strong> <strong>and</strong> <strong>E2M30</strong> pumps, as shown in Figure 12.<br />
SERVICE, SPARES AND ACCESSORIES<br />
The accessories are briefly described in the following sections. Refer to Table 11 for the Item Numbers<br />
of these accessories.<br />
Accessory<br />
ITO20K Inlet Catchpot<br />
ITF20K Inlet Dust Filter<br />
ITD20K Inlet Desiccant Trap<br />
ITC20K Inlet Chemical Trap<br />
EMF30 Outlet Mist Filter<br />
PV25EK Valve: 200/240 V, 1-phase, 50/60 Hz<br />
PV25EK Valve: 110/127 V, 1-phase, 50/60 Hz<br />
FL20K Foreline Trap<br />
Vibration Isolators (pack of four)<br />
ODE 1 / 4 Oil Drain Ext<strong>en</strong>sion<br />
Pump Inlet Adaptor<br />
Flexible Bellows<br />
Pump Outlet Adaptor<br />
Gas Ballast Banjo Elbow Assembly<br />
Gas Ballast Valve: 110 V, 50/60 Hz<br />
Gas Ballast Valve: 240 V, 50/60 Hz<br />
Item Number<br />
A441-10-000<br />
A442-15-000<br />
A445-10-000<br />
A444-10-000<br />
A462-33-000<br />
C413-01-000<br />
C413-03-000<br />
A133-05-000<br />
A248-01-412<br />
A505-03-000<br />
C105-20-201<br />
C105-11-670<br />
C105-01-414<br />
A500-06-003<br />
A500-06-984<br />
A500-06-930<br />
Table 11 – Accessory Item Numbers<br />
7.4.2 Inlet Catchpot<br />
The Inlet Catchpot traps any liquid droplets <strong>and</strong> prev<strong>en</strong>ts their <strong>en</strong>try into the pump.<br />
7.4.3 Inlet Dust Filter<br />
The Inlet Dust Filter protects the pump against abrasive dust.<br />
7.4.4 Inlet Desiccant Trap<br />
Use a Desiccant Trap wh<strong>en</strong> you pump limited quantities of water vapour at high pumping speeds to a low<br />
vapour pressure.<br />
7.4.5 Inlet Chemical Trap<br />
The Inlet Chemical Trap protects the pump against chemically active gases.<br />
7.4.6 Outlet Mist Filter<br />
The Outlet Mist Filter separates <strong>and</strong> traps oil droplets in the pump outlet to prev<strong>en</strong>t oil mist discharge.<br />
The Mist Filter is supplied with an adaptor to connect it to the pump outlet.<br />
Issue K 40 Jul 05
<strong>E2M28</strong> <strong>and</strong> <strong>E2M30</strong> <strong>Rotary</strong> <strong>Vacuum</strong> <strong>Pumps</strong><br />
PAGE<br />
41<br />
SERVICE, SPARES AND ACCESSORIES<br />
1. Inlet Catchpot<br />
2. Inlet Dust Filter<br />
3. Inlet Desiccant Trap<br />
4. Inlet Chemical Trap<br />
5. Gas Ballast Valve<br />
6. Banjo/Elbow Assembly<br />
7. Sol<strong>en</strong>oid operated pipeline valve<br />
8. Foreline Trap<br />
9. Outlet Mist Filter<br />
10. NW25 Adaptor<br />
11. Vibration Isolators<br />
12. Oil Drain Ext<strong>en</strong>sion<br />
Figure 12 – Accessories<br />
Issue K 41 Jul 05
<strong>E2M28</strong> <strong>and</strong> <strong>E2M30</strong> <strong>Rotary</strong> <strong>Vacuum</strong> <strong>Pumps</strong><br />
7.4.7 Sol<strong>en</strong>oid Operated Pipeline Valve<br />
PAGE<br />
42<br />
Fit the Pipeline Valve betwe<strong>en</strong> your vacuum system <strong>and</strong> the pump inlet to provide additional system<br />
protection wh<strong>en</strong> the pump is switched off.<br />
7.4.8 Foreline Trap<br />
SERVICE, SPARES AND ACCESSORIES<br />
Use a Foreline Trap on a clean pumping system to prev<strong>en</strong>t back-migration of rotary pump oil vapour into<br />
your vacuum system.<br />
7.4.9 Vibration Isolators<br />
The Vibration Isolators reduce transmission vibration <strong>and</strong> noise wh<strong>en</strong> the pump is floor or frame<br />
mounted <strong>and</strong> help to reduce strain wh<strong>en</strong> the mounting area is unev<strong>en</strong>.<br />
7.4.10 Oil Drain Ext<strong>en</strong>sion<br />
Fit the Oil Drain Ext<strong>en</strong>sion betwe<strong>en</strong> the oil drain port on the pump <strong>and</strong> the oil drain-plug to make the<br />
drainage of oil from the pump easier.<br />
7.4.11 Pump Inlet Adaptor<br />
This is an NW25 to 28 mm bore tube adaptor, supplied with connection hardware. Attach this adaptor<br />
to the NW25 pump-inlet to connect 28 mm bore plastic or rubber tube.<br />
7.4.12 Flexible Bellows<br />
Use Flexible Bellows to connect the pump-inlet to your vacuum system. We recomm<strong>en</strong>d that you use<br />
bellows wh<strong>en</strong> you use Vibration Isolators.<br />
7.4.13 Pump Outlet Adaptor<br />
This is a 3 / 4 inch BSP to NW25 adaptor. Use this adaptor wh<strong>en</strong> you remove the hose adaptor supplied<br />
fitted to the pump outlet to adapt the 3 / 4 inch BSP thread to NW25 pump inlet.<br />
7.4.14 Gas Ballast Banjo/Elbow Assembly<br />
Use this 3 / 4 inch BSP assembly wh<strong>en</strong> a remote ballast supply, or gas ballast valve, is fitted.<br />
7.4.15 Gas Ballast Valve<br />
Use this to control the gas-ballast remotely. You will also need the Gas Ballast Banjo/Elbow Assembly<br />
(see Section 7.4.14) wh<strong>en</strong> you fit this accessory.<br />
Issue K 42 Jul 05
Return of BOC Edwards Equipm<strong>en</strong>t - Procedure<br />
Form HS1<br />
P900-70-000 Issue K<br />
INTRODUCTION<br />
Before returning your equipm<strong>en</strong>t, you must warn BOC Edwards if substances you used (<strong>and</strong> produced)<br />
in the equipm<strong>en</strong>t can be hazardous. This information is fundam<strong>en</strong>tal to the safety of our Service C<strong>en</strong>tre<br />
employees <strong>and</strong> will determine the procedures employed to service your equipm<strong>en</strong>t.<br />
Complete the Declaration (HS2) <strong>and</strong> s<strong>en</strong>d it to BOC Edwards before you dispatch the<br />
equipm<strong>en</strong>t. It is important to note that this declaration is for BOC Edwards internal use only, <strong>and</strong><br />
has no relationship to local, national or international transportation safety or <strong>en</strong>vironm<strong>en</strong>tal<br />
requirem<strong>en</strong>ts. As the person offering the equipm<strong>en</strong>t for shipm<strong>en</strong>t, it is your responsibility to <strong>en</strong>sure<br />
compliance with applicable laws.<br />
GUIDELINES<br />
• Equipm<strong>en</strong>t is 'uncontaminated' if it has not be<strong>en</strong> used, or if it has only be<strong>en</strong> used with substances<br />
that are not hazardous. Your equipm<strong>en</strong>t is 'contaminated' if it has be<strong>en</strong> used with any substances<br />
classified as hazardous under EU Directive 67/548/EEC (as am<strong>en</strong>ded) or OSHA Occupational Safety<br />
(29 CFR 1910).<br />
• If your equipm<strong>en</strong>t has be<strong>en</strong> used with radioactive substances, biological or infectious ag<strong>en</strong>ts,<br />
mercury, polychlorinated biph<strong>en</strong>yls (PCB’s), dioxins or sodium azide, you must decontaminate it<br />
before you return it to BOC Edwards. You must s<strong>en</strong>d indep<strong>en</strong>d<strong>en</strong>t proof of decontamination (for<br />
example a certificate of analysis) to BOC Edwards with the Declaration (HS2). Phone BOC<br />
Edwards for advice.<br />
• If your equipm<strong>en</strong>t is contaminated, you must either:<br />
• Remove all traces of contamination (to the satisfaction of laws governing the transportation of<br />
dangerous/hazardous substances).<br />
• Or, properly classify the hazard, mark, manifest <strong>and</strong> ship the equipm<strong>en</strong>t in accordance with<br />
applicable laws governing the shipm<strong>en</strong>t of hazardous materials.<br />
Note: Some contaminated equipm<strong>en</strong>t may not be suitable for airfreight.<br />
PROCEDURE<br />
1. Contact BOC Edwards <strong>and</strong> obtain a Return Authorisation Number for your equipm<strong>en</strong>t.<br />
2. Complete the Return of BOC Edwards Equipm<strong>en</strong>t - Declaration (HS2).<br />
3. If the equipm<strong>en</strong>t is contaminated, you must contact your transporter to <strong>en</strong>sure that you properly<br />
classify the hazard, mark, manifest <strong>and</strong> ship the equipm<strong>en</strong>t, in accordance with applicable laws<br />
governing the shipm<strong>en</strong>t of contaminated/hazardous materials. As the person offering the equipm<strong>en</strong>t<br />
for shipm<strong>en</strong>t, it is your responsibility to <strong>en</strong>sure compliance with applicable law. Note: Equipm<strong>en</strong>t<br />
contaminated with some hazardous materials, such as semiconductor by-products,<br />
may not be suitable for airfreight - contact your transporter for advice.<br />
4. Remove all traces of hazardous gases: pass an inert gas through the equipm<strong>en</strong>t <strong>and</strong> any accessories<br />
that will be returned to BOC Edwards. Where possible, drain all fluids <strong>and</strong> lubricants from the<br />
equipm<strong>en</strong>t <strong>and</strong> its accessories.<br />
5. Seal up all of the equipm<strong>en</strong>t's inlets <strong>and</strong> outlets (including those where accessories were attached)<br />
with blanking flanges or, for uncontaminated product, with heavy gauge tape.<br />
6. Seal equipm<strong>en</strong>t in a thick polyth<strong>en</strong>e/polyethyl<strong>en</strong>e bag or sheet.<br />
7. If the equipm<strong>en</strong>t is large, strap the equipm<strong>en</strong>t <strong>and</strong> its accessories to a wood<strong>en</strong> pallet. If the<br />
equipm<strong>en</strong>t is too small to be strapped to a pallet, pack it in a suitable strong box.<br />
8. Fax or post a copy of the Declaration (HS2) to BOC Edwards. The Declaration must arrive before<br />
the equipm<strong>en</strong>t.<br />
9. Give a copy of the Declaration (HS2) to the transporter. You must tell your transporter if the<br />
equipm<strong>en</strong>t is contaminated.<br />
10. Seal the original Declaration in a suitable <strong>en</strong>velope: attach the <strong>en</strong>velope securely to the outside of<br />
the equipm<strong>en</strong>t package, in a clear weatherproof bag.<br />
WRITE YOUR RETURN AUTHORISATION NUMBER CLEARLY ON THE<br />
OUTSIDE OF THE ENVELOPE OR ON THE OUTSIDE OF THE EQUIPMENT<br />
PACKAGE.
Form HS2<br />
Return of BOC Edwards Equipm<strong>en</strong>t - Declaration<br />
Return Authorisation Number:<br />
You must:<br />
• Know about all of the substances which have be<strong>en</strong> used <strong>and</strong> produced in the equipm<strong>en</strong>t before you complete this Declaration<br />
• Read the Return of BOC Edwards Equipm<strong>en</strong>t - Procedure (HS1) before you complete this Declaration<br />
• Contact BOC Edwards to obtain a Return Authorisation Number <strong>and</strong> to obtain advice if you have any questions<br />
• S<strong>en</strong>d this form to BOC Edwards before you return your equipm<strong>en</strong>t<br />
Equipm<strong>en</strong>t/System Name_________________________<br />
Part Number _________________________________<br />
Serial Number_________________________________<br />
Has the equipm<strong>en</strong>t be<strong>en</strong> used, tested or operated <br />
YES R Go to Section 2 NO R Go to Section 4<br />
IF APPLICABLE:<br />
Tool Refer<strong>en</strong>ce Number_________________<br />
Process ______________________________<br />
Failure Date___________________________<br />
Serial Number of<br />
Replacem<strong>en</strong>t Equipm<strong>en</strong>t_________________<br />
SECTION 2: SUBSTANCES IN CONTACT WITH THE EQUIPMENT<br />
Are any substances used or produced in the equipm<strong>en</strong>t:<br />
• Radioactive, biological or infectious ag<strong>en</strong>ts, mercury,<br />
poly chlorinated biph<strong>en</strong>yls (PCBs), dioxins<br />
or sodium azide (if YES, see Note 1) YES R NO R<br />
• Hazardous to human<br />
health <strong>and</strong> safety<br />
SECTION 1: EQUIPMENT<br />
YES R NO R<br />
Note 1 : BOC Edwards will not accept delivery of any<br />
equipm<strong>en</strong>t that is contaminated with radioactive substances,<br />
biological/infectious ag<strong>en</strong>ts, mercury, PCB’s, dioxins or<br />
sodium azide, unless you:<br />
• Decontaminate the equipm<strong>en</strong>t<br />
• Provide proof of decontamination<br />
YOU MUST CONTACT BOC EDWARDS FOR ADVICE<br />
BEFORE YOU RETURN SUCH EQUIPMENT<br />
SECTION 3: LIST OF SUBSTANCES IN CONTACT WITH THE EQUIPMENT<br />
Substance name<br />
Chemical<br />
Symbol<br />
Precautions required (for example,<br />
use protective gloves, etc.)<br />
Action required after a spill,<br />
leak or exposure<br />
SECTION 4: RETURN INFORMATION<br />
Reason for return <strong>and</strong> symptoms of malfunction _________________________________________________<br />
_________________________________________________________________________________<br />
If you have a warranty claim:<br />
• who did you buy the equipm<strong>en</strong>t from _____________________________<br />
• give the supplier’s invoice number_________________________________<br />
SECTION 5: DECLARATION<br />
Print your name:_________________________________Print your job title:_________________________<br />
Print your organisation:____________________________________________________________________<br />
Print your address:_______________________________________________________________________<br />
_______________________________________________________________________<br />
Telephone number: ___________________________Date of equipm<strong>en</strong>t delivery: ______________<br />
I have made reasonable <strong>en</strong>quiry <strong>and</strong> I have supplied accurate information in this<br />
Declaration. I have not withheld any information, <strong>and</strong> I have followed the Return of<br />
BOC Edwards Equipm<strong>en</strong>t - Procedure (HS1).<br />
Signed: _____________________________________Date______________<br />
Note: Please print out this<br />
form, sign it <strong>and</strong> return the<br />
signed form as hard copy.<br />
P900-71-000 Issue K
This page int<strong>en</strong>tionally blank.
P800-80-000 Issue J 01A09-010<br />
UNITED KINGDOM<br />
CORPORATE HEADQUARTERS<br />
BOC EDWARDS<br />
Manor Royal<br />
Crawley<br />
West Sussex<br />
RH10 9LW<br />
Tel +(44) 1293 528844<br />
Fax +(44) 1293 533453<br />
BOC EDWARDS<br />
Wingates Industrial Estate<br />
Great Bank Road<br />
Westhoughton, Bolton<br />
Lancashire<br />
BL5 3SL<br />
Tel +(44) 1942 652652<br />
Fax +(44) 1942 652651<br />
AMERICA (USA)<br />
USA HEADQUARTERS<br />
BOC EDWARDS<br />
One Edwards Park<br />
301 Ballardvale Street<br />
Wilmington, MA 01887<br />
Tel +(1) 978 658 5410<br />
Toll free (USA only) 1 800 848 9800<br />
Fax +(1) 978 658 7969<br />
3901 Burton Drive<br />
Santa Clara, CA 95054<br />
Tel +(1) 408 496 1177<br />
Fax +(1) 408 496 1188<br />
1810 West Drake Drive<br />
Suite 101<br />
Tempe, AZ 85283<br />
Tel +(1) 602 777 7007<br />
Fax +(1) 602 777 2244<br />
11701 Stonehollow Drive<br />
Suite 100<br />
Austin, TX 78758<br />
Tel +(1) 512 491 6622<br />
Fax +(1) 512 491 0629<br />
3501 Isl<strong>and</strong> Av<strong>en</strong>ue<br />
Philadelphia, PA 19153<br />
Tel +(1) 215 365 8653<br />
Fax +(1) 978 753 6846<br />
BELGIUM<br />
BOC EDWARDS<br />
Berg<strong>en</strong>seste<strong>en</strong>weg 709<br />
B1600 Sint-Pieters-Leeuw<br />
Brussels<br />
Tel +(32) 2 363 0030<br />
Fax +(32) 2 363 0064<br />
BRAZIL<br />
BOC DO BRASIL LTDA<br />
DIVISÃO EDWARDS ALTO VACO<br />
Rua Bernado Wrona 222<br />
02710 São Paulo-SP<br />
Tel +(55) 11 3952 5000<br />
Fax +(55) 11 3965 2766<br />
CANADA<br />
BOC EDWARDS<br />
5975 Falbourne Street<br />
Mississauga, Ontario L5R3W6<br />
Canada<br />
Tel +(1) 905 501 2558<br />
Fax +(1) 905 501 1632<br />
12055 Cote de Liesse<br />
Dorval, Quebec H9P1B4<br />
Canada<br />
Tel +(1) 514 631 3501<br />
Fax +(1) 514 631 3502<br />
CHINA<br />
BOC TRADING<br />
(SHANGHAI) CO. LTD.<br />
23 Fu Te Road (N)<br />
Wai Gao Qiao Free Trade Zone<br />
Pudong<br />
Shanghai, 200131<br />
PRC China<br />
Tel +(86 21) 5866 9618<br />
Fax +(86 21) 5866 9993<br />
FRANCE<br />
BOC EDWARDS<br />
125 Av<strong>en</strong>ue Louis Roche<br />
92238 G<strong>en</strong>nevilliers, Cedex<br />
Paris<br />
Tel +(33) 1 47 98 24 01<br />
Fax +(33) 1 47 98 44 54<br />
GERMANY<br />
BOC EDWARDS<br />
Ammerthalstraße 36<br />
85551 Kirchheim<br />
Munich<br />
Tel +(49) 89 99 19 18 0<br />
Fax +(49) 89 99 19 18 99<br />
HONG KONG S.A.R.<br />
BOC EDWARDS (ASIA)<br />
12 Chun Yat Street<br />
Tseung Kwan O Industrial Estate<br />
Tseung Kwan O, Kowloon<br />
Hong Kong S.A.R.<br />
Tel +(852) 2372 2640<br />
Fax +(852) 2796 9095<br />
INDIA<br />
BOC EDWARDS<br />
DIVIN. OF BOC INDIA LIMITED<br />
203 Surya Kiran Building<br />
19 Kasturba G<strong>and</strong>hi Marg<br />
New Delhi - 110 001<br />
India<br />
Tel +(91) 11 851 0065<br />
Fax +(91) 11 851 0245<br />
ISRAEL<br />
EDWARDS ISRAEL VACUUM LTD.<br />
5 Habarzel Blvd<br />
Gat 2000 Industrial Zone<br />
Qiryat Gat 82000<br />
Tel +(972) 8 681 0633<br />
Fax +(972) 8 681 0640<br />
ITALY<br />
BOC EDWARDS<br />
Via Carpaccio 35<br />
20090 Trezzano sul Naviglio<br />
Milan<br />
Tel +(39) 02 48 4471<br />
Fax +(39) 02 48 401638<br />
JAPAN<br />
HEADQUARTERS<br />
BOC EDWARDS<br />
Shuwa Shiba Park Building A-3F<br />
2-4-1 Shibako<strong>en</strong> Minato-ku<br />
Tokyo, 105-0011<br />
Tel +(81) (0) 3 5470 6530<br />
Fax +(81) (0) 3 5470 6521<br />
KOREA<br />
HEADQUARTERS<br />
SONGWON EDWARDS LTD.<br />
5th FL. Daewoo Engineering Bldg.<br />
Soonae-dong<br />
Bundang-gu, Sungnam City<br />
Kyungki-do, Korea<br />
Tel +(82) 31 716 7070<br />
Fax +(82) 31 738 1001-3<br />
FACTORY & GV<br />
SONGWON EDWARDS LTD.<br />
625-7 Upsong-dong<br />
Chunan City<br />
Chungchong Nam-do<br />
Korea<br />
Tel +(82) 41 621 7070<br />
Fax +(82) 41 621 7700<br />
SINGAPORE<br />
BOC EDWARDS (ASIA)<br />
42 Loyang Drive<br />
Loyang Industrial Estate<br />
Singapore 508962<br />
Tel +(65) 6546 8408<br />
Fax +(65) 6546 8407<br />
TAIWAN, R.O.C.<br />
EDWARDS TECHNOLOGIES<br />
LIMITED<br />
No. 434 Chung hua Road<br />
Touf<strong>en</strong> Town, Miaoli County<br />
Taiwan ROC<br />
Tel +(886) 37 611422<br />
Fax +(886) 37 611401<br />
PLEASE CONTACT ANY OF THESE COMPANIES FOR DETAILS OF OTHER SALES AND<br />
SERVICE CENTRES IN YOUR AREA.<br />
BOC Edwards is part of BOC Limited. BOC Edwards <strong>and</strong> the stripe symbol are trade marks of The BOC Group.<br />
© BOC Edwards 2003<br />
Produced by Technical Publicity Techpublicity@edwards.boc.com<br />
http://www.bocedwards.com<br />
info@bocedwards.com