PDF Manual - Plugin Alliance
PDF Manual - Plugin Alliance
PDF Manual - Plugin Alliance

You also want an ePaper? Increase the reach of your titles
YUMPU automatically turns print PDFs into web optimized ePapers that Google loves.
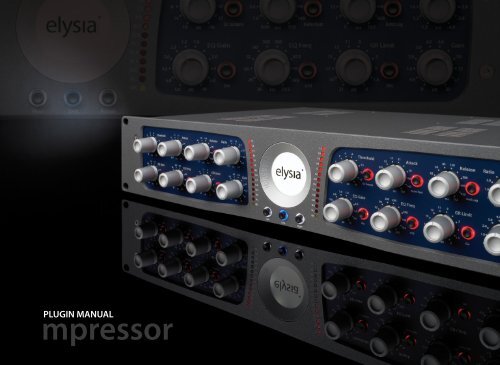
PLUGIN MANUAL<br />
mpressor
Welcome!<br />
introduction<br />
ACTIVATION<br />
Details about the activation process can be<br />
found in the <strong>Plugin</strong> <strong>Alliance</strong> Activation <strong>Manual</strong>,<br />
which has been installed on your computer in<br />
the same folder as this <strong>PDF</strong>. You can also find<br />
this info online:<br />
www.plugin-alliance.com/activation<br />
SYSTEM REQUIREMENTS<br />
Please check all information on this topic here:<br />
www.plugin-alliance.com/compatibility<br />
SOFTWARE VERSION<br />
A click on the elysia logo will reveal the actual<br />
version of the plugin you have installed and the<br />
people behind the project.<br />
FIRST OF ALL...<br />
...thank you very much for using the mpressor<br />
plugin!<br />
The ‘virtual’ mpressor is the as-close-as-it-canget<br />
emulation of our famous creative compressor.<br />
Its all discrete circuitry and its special<br />
character have been translated into software in<br />
every painstaking detail....<br />
The result is an outstanding universal compressor<br />
as well as a dynamics effect machine which<br />
will significantly enhance the potentials of your<br />
host software.<br />
The plugin has all the great functions of the<br />
hardware which can be combined in many ways.<br />
Whatever you are looking for – a high grade<br />
sum compressor, a flexible tool for single instruments<br />
or an inspiring dynamics effect processor:<br />
the mpressor delivers.<br />
Enjoy it!<br />
manual version 1.1.0<br />
introduction - welcome!<br />
2
Specials<br />
introduction<br />
TRUE EMULATION<br />
How has the hardware mpressor been<br />
‘translated’ into software code? Actually<br />
the plugin is the result of a pretty<br />
long and complicated development process...<br />
The following provides just the basic idea:<br />
Transferring a complex analog hardware into<br />
digital code is not exactly trivial, especially if the<br />
model is a completely discrete design like the<br />
mpressor.<br />
The first important task in a project like this is to<br />
fragment the electronic circuitry into separate<br />
functional blocks. These blocks are translated<br />
into software step by step after which they will<br />
be reunited to become a functional plugin.<br />
This first result is measured very accurately and<br />
then compared to the hardware, which leads to<br />
an extensive and very detailed matching process.<br />
The work on the graphical user interface<br />
(photography, retouching, rendering) takes<br />
place at the same time.<br />
The final stage is the calibration of the behavior<br />
of all the controllers in order to give the<br />
software the ‘feel’ of the real thing. Finally, the<br />
finished code is ported to different plugin interfaces<br />
(RTAS/VST/AU/TDM) and packed into<br />
installation routines.<br />
OVERSAMPLING<br />
The mpressor plugin benefits from<br />
higher sample rates in two ways: In<br />
the first place, it can react to changes<br />
in the source signal faster, which is especially<br />
important if a short attack time is set.<br />
Secondly, the generated virtual control voltage<br />
and therefore the compression behavior of the<br />
plugin becomes more precise because there are<br />
more measuring points available.<br />
The mpressor plugin employs the oversampling<br />
technique in order to enjoy these advantages<br />
even if lower sample rates are used. This means<br />
that the basic sample rate of a project is multiplied<br />
by a certain factor inside the plugin without<br />
the need to set the complete project to a<br />
higher frequency.<br />
This method consumes a certain amount of CPU<br />
power, but the acoustic result speaks for itself.<br />
The mpressor plugin uses oversampling according<br />
to the following rules:<br />
• Project sample rate lower than 50 kHz:<br />
4x oversampling<br />
• Project sample rate lower than 100 kHz:<br />
2x oversampling<br />
• Project sample rate higher than 100 kHz:<br />
No oversampling<br />
MOUSEWHEEL SUPPORT<br />
You do not necessarily have to click<br />
and drag the controllers of the mpressor.<br />
Instead, try making your settings<br />
with the alternative mousewheel control without<br />
clicking on the specific controller first!<br />
The following shortcuts provide some further<br />
comfort:<br />
Fine mode<br />
VST<br />
AU<br />
RTAS/TDM<br />
Shift + mouse wheel<br />
Shift + mouse wheel<br />
Ctrl/Cmd + mouse wheel<br />
Standard position<br />
VST Ctrl/Cmd + mouse click<br />
AU<br />
Alt + mouse click<br />
RTAS/TDM Alt + mouse click<br />
Linear/Circular mode<br />
VST Alt<br />
introduction - specials<br />
3
Overview<br />
controls<br />
Floor: switches the emulation of the mpressor’s<br />
analog noise floor on and off.<br />
Link: left and right channel can be linked on<br />
a stereo track.<br />
Active: sets the plugin from bypass to active<br />
status.<br />
GRL: indicates activity of the Gain Reduction<br />
Limiter.<br />
Meter: displays the amount of gain reduction<br />
in dB.<br />
Threshold: If the input level exceeds this<br />
value, the compression process will start.<br />
SC Extern: If this function is active, a signal<br />
that is fed into the corresponding buss will<br />
control the compression process.<br />
Attack: the transient response of the compressor.<br />
It determines the time the mpressor<br />
takes to react to a peak.<br />
Auto Fast: a semi-automation. This function<br />
shortens the attack time automatically on<br />
fast and loud signal impulses.<br />
Release: the return phase of the compressor.<br />
It controls the period of time that the<br />
compressor takes to return back to unity<br />
gain after 6 dB of gain reduction.<br />
Anti Log: an alternative characteristic of the<br />
release curve. Switches from a linear to an<br />
antilogarithmic progression.<br />
Ratio: the relation between the input level<br />
and the output level. As a specialty of the<br />
mpressor, even negative ratios can be set<br />
here.<br />
controls - overview<br />
4
Overview<br />
controls<br />
EQ Gain: the characteristic of the Niveau Filter.<br />
Between the mid and fully counter-clockwise<br />
position, bass is boosted and treble is<br />
cut (vice versa in the other direction).<br />
On: activates the Niveau Filter. In the signal<br />
path, this special EQ is placed after the compressor<br />
part, thus it will not influence the behavior<br />
of this section.<br />
EQ Freq: the center frequency of the Niveau<br />
Filter. Around this reference point, the bass is<br />
boosted and treble is cut or vice versa.<br />
x10: shifts the frequency range of the Niveau<br />
Filter. The printed values from 26 Hz to 2.2<br />
kHz are multiplied by 10 to 260 Hz and 22<br />
kHz.<br />
GR Limit: limits the virtual control voltage.<br />
This innovative limiter is not placed in the<br />
audio path as usual, but in the control algorithm<br />
of the compressor.<br />
On: activates the Gain Reduction Limiter.<br />
Gain: the ‘make up gain‘. In the mpressor,<br />
amplification already takes place in the input<br />
stage, thus the whole plugin can be driven<br />
harder on purpose.<br />
controls - overview<br />
5
Threshold<br />
controls<br />
The threshold determines the operating point<br />
of the compressor. If the input level exceeds the<br />
value set with this controller, the compression<br />
process will start.<br />
The settings of threshold and ratio should always<br />
be considered as a couple: If a high ratio is<br />
applied, the threshold will usually be in the lower<br />
range in order not to produce an overdone<br />
amount of gain reduction.<br />
However, if lower ratio settings are chosen, the<br />
threshold will be turned more clockwise as a<br />
general rule.<br />
The complete control range covers a total of 34<br />
dB, offering the complete variety from very sensitive<br />
processing up to the most extreme effect<br />
settings.<br />
The figure to the right shows a number of different<br />
threshold points of the mpressor.<br />
dB<br />
Several threshold settings at a fixed ratio<br />
dB<br />
controls - threshold<br />
6
Sidechain<br />
controls<br />
If the SC Extern button is active, compression<br />
will not be controlled by the actual input signals<br />
anymore, but by different audio signals which<br />
are fed into a specially assigned buss.<br />
Note: Your host software must support this<br />
functionality! If no buss is assigned to the sidechain<br />
of the mpressor plug-in, activating the<br />
SC Extern button will not produce the desired<br />
results.<br />
If a duplicate of the input signal is processed<br />
with an equalizer and then fed into the sidechain<br />
input, for example, the result will be<br />
frequency dependent compression. Another<br />
example is to send the bass drum of a drum<br />
sequencer into the sidechain input in order to<br />
achieve nice groovy compression that is pumping<br />
in time with the music.<br />
The external sidechain is coupled with a fixed<br />
high pass filter that has its cut-off frequency at<br />
80 Hz with a slew rate of 6 dB per octave.<br />
This reduces the influence of the low frequencies<br />
in the sidechain on overall compression by<br />
a certain amount in order to keep the effect as<br />
balanced as possible.<br />
SC buss assignment in Pro Tools<br />
SC buss assignment in Cubase (VST 3)<br />
SC buss assignment in Logic<br />
controls - sidechain<br />
7
Sidechain<br />
controls<br />
On the previous page you have learned that<br />
many host programs feature a built-in support<br />
for the mpressor’s external sidechain functionality.<br />
If you are using Pro Tools or Logic, all you have<br />
to do is activate the SC Extern switch on the<br />
mpressor plugin and assign a bus to it in the<br />
corresponding drop down window.<br />
Since the introduction of VST 3, using the sidechain<br />
function with Cubase and Nuendo (version<br />
4 or higher) is equally easy.<br />
Remember the different locations for the VST 3<br />
and VST 2 versions of the mpressor:<br />
Cubase/Nuendo (VST 3)<br />
Dynamics u ///mpressor<br />
Cubase/Nuendo (VST 2)<br />
elysia u elysia mpressor / elysia mpressor sc<br />
But why is there also an elysia mpressor sc variant?<br />
If you are using a VST based host that does<br />
not support VST 3, you cannot address the sidechain<br />
input directly from the interface of the<br />
plugin.<br />
This is where the elysia mpressor sc comes into<br />
play. It has 4 inputs (audio L+R plus sidechain<br />
L+R). Unfortunately, every host is a little bit different<br />
in how to do adress these 4 inputs . Please<br />
understand that we cannot describe all the different<br />
approaches here. An Internet search<br />
“host name” + “sidechain” will quickly bring you<br />
the desired info, however.<br />
If your host does not support sidechaining at<br />
all, just use the normal mpressor plugin without<br />
the sc extension.<br />
controls - sidechain<br />
8
Attack<br />
controls<br />
The attack time parameter is a very crucial factor<br />
for the control behavior of a compressor.<br />
Choosing the right setting is very important,<br />
but depending on the dynamic progress of the<br />
source material this can be a difficult task.<br />
If a very short time is chosen, the compressor<br />
will be able to catch the short peaks, but on the<br />
other hand the sustaining signal will also be<br />
processed, which might result in audible distortion.<br />
Longer attack settings reduce distortion<br />
significantly, but then the compressor is too<br />
slow for fast impulses.<br />
This is where the Auto Fast function comes into<br />
play. If you engage this mode, the attack time<br />
will be shortened automatically on fast and<br />
loud signal impulses. The compressor reduces<br />
the signal quickly and prevents it from slipping<br />
through.<br />
Then the attack time directly and automatically<br />
returns to its original setting. This way the compressor<br />
can be very fast, but only if it is really<br />
needed. The attack parameter is influenced on<br />
short and loud impulses only; in all other cases<br />
the controller setting is given priority.<br />
dB<br />
Standard attack (dark) and Auto Fast (light)<br />
sec<br />
controls - attack<br />
9
Release<br />
controls<br />
The release parameter, on the other hand, has<br />
a strong influence on the character of the compression<br />
being obvious or unobtrusive to the<br />
ear. As a general rule, linear or logarithmic release<br />
curves will be employed if a discreet performance<br />
of the compressor is required.<br />
It is characteristic of a logarithmic release that<br />
the time constant shortens when the gain reduction<br />
raises. The advantage of this is that<br />
short and loud peaks (e.g. drums) have a fast<br />
release time, while the remaining material is<br />
processed with a slower release time.<br />
But if intentionally striking and creative compression<br />
as well as producing new and interesting<br />
sounds are the sought-after goals, it<br />
definitely makes sense to turn the established<br />
approach upside down. For this reason, you can<br />
switch the release curve of the mpressor from<br />
linear to antilogarithmic.<br />
Compared to a logarithmic release curve, the effect<br />
of the Anti Log option behaves just the other<br />
way round: If the threshold point is passed,<br />
the release time will no longer be shortened at<br />
first. If the input signal starts to decline, however,<br />
the release time will become faster.<br />
dB<br />
sec<br />
Standard linear release (dark) and Anti Log (light)<br />
controls - release<br />
10
Ratio<br />
controls<br />
The mpressor is a typical hard knee compressor,<br />
which is easy to see in the diagram to the right.<br />
Compression directly starts with the full ratio<br />
in the very moment the input signal passes the<br />
threshold point.<br />
Compared to a soft knee characteristic, this kind<br />
of compression is more on the noticeable and<br />
audible side.<br />
The mpressor also features negative ratios – but<br />
what exactly does this mean? At a negative ratio,<br />
the characteristic curve bends and returns<br />
back down after crossing the threshold.<br />
The louder the input signal becomes with a<br />
setting like this, the lower the output level becomes<br />
– perfect for groovy compression effects.<br />
To get a grip on the extreme ‘destruction’ this<br />
can cause, engaging the Gain Reduction Limiter<br />
is just the right idea.<br />
This special capability of the mpressor might<br />
seem a little hard to understand in theory. Just<br />
give it a try with some drum samples and you<br />
will understand what this is all about...<br />
dB<br />
dB<br />
Different ratio settings including negative values<br />
controls - ratio<br />
11
Niveau filter<br />
controls<br />
This filter is specialized in changing the overall<br />
sonic character of a track with ease.<br />
Its main function is to change the proportions<br />
between high and low frequencies. The principle<br />
is similar to a pair of scales: Dependent on<br />
the gain setting around a variable center frequency,<br />
the high frequencies are boosted and<br />
the low frequencies are cut (or vice versa).<br />
The characteristics of the filter change in the<br />
extreme positions of the EQ Gain controller: the<br />
full counter-clockwise setting will produce a<br />
low pass filter (full clockwise = high pass).<br />
dB<br />
Hz<br />
EQ Gain settings between 0 and Hi position @ 500 Hz<br />
dB<br />
Hz<br />
EQ Gain settings between 0 and Lo position @ 1.5 kHz<br />
controls - niveau filter<br />
12
Gain reduction limiter<br />
controls<br />
A specialty of the mpressor plugin is the Gain<br />
Reduction Limiter. This limiter is not placed in<br />
the audio path where you would expect it, but<br />
in the control path of compressor instead.<br />
The effect: No matter how high the input level<br />
or your threshold and ratio settings become –<br />
the amount of gain reduction will never exceed<br />
the value which is set with the GRL controller.<br />
Loud parts in an arrangement can keep their<br />
dynamics, and special effects like ducking or<br />
upward compression can be achieved by only<br />
reducing the quieter signal parts.<br />
dB<br />
Compression progress at different GRL settings<br />
sec<br />
dB<br />
Input to output ratio at different GRL settings<br />
dB<br />
controls - gain reduction limiter<br />
13
Gain<br />
controls<br />
The gain controller is used to make up the difference<br />
in level between the original and the<br />
compressed signal. As you might already have<br />
expected, there is something special about this<br />
‘standard’ controller on the mpressor, too:<br />
The higher the amount of gain it is, the more<br />
harmonics are produced. In the mpressor, this<br />
function is located directly in the input stage,<br />
therefore the added harmonics will be processed<br />
by the complete compressor algorithm.<br />
The diagram to the right shows the saturation<br />
behavior of the mpressor plugin at increasing<br />
amplitudes. It clearly shows how the original<br />
sine form is shaped with an additional edge reminding<br />
of a square wave form. This produces a<br />
rich sound by generating additional harmonics.<br />
If you want your signal to stay clean, you should<br />
take care not to use lots of make up gain, but<br />
use a simple gain plugin from your host software<br />
directly after the mpressor instead.<br />
However, if added harmonics are just what you<br />
are looking for, apply a good amount of make<br />
up gain with the mpressor and use a following<br />
gain plugin to reduce the overall level.<br />
V<br />
sec<br />
Saturation characteristics at several amplitudes<br />
controls - gain<br />
14
FLOOR | LINK | active<br />
controls<br />
FLOOR<br />
This button switches the emulation of the<br />
mpressor’s analog noise floor at -96 dBFS on<br />
and off.<br />
LINK<br />
In link mode, the mpressor uses the information<br />
of both the left and the right channel to<br />
generate one combined ‘virtual control voltage’<br />
which is then applied to both channels (a true<br />
stereo compressor in this case).<br />
If the link mode is not active, imagine the<br />
mpressor plugin as a dual mono compressor<br />
that generates separate ‘virtual control voltages’<br />
for left and right channel with the same controller<br />
settings.<br />
But why would this make any sense? The answer<br />
is that by running a stereo compressor in<br />
unlinked mode you might benefit from a more<br />
vivid feeling of your track. This is because both<br />
channels are compressed differently from each<br />
other (as a result of different signals in the left<br />
and right channel).<br />
MONO<br />
On a mono channel, the link function is obviously<br />
not available. The link button is semitransparent<br />
in this case to indicate it is not available.<br />
ACTIVE<br />
There is no big secret behind this button: It<br />
switches the mpressor into the signal path<br />
(white control light on) or bypasses the plugin<br />
(light off).<br />
By the way: On a hardware mpressor, the gain<br />
reduction meter stays active even if the unit is<br />
in bypass mode. The software version does not<br />
have this feature because of technical reasons.<br />
controls - floor | link | active<br />
15
Standard compression<br />
settings<br />
* *<br />
Because of the well-balanced adjustment of its<br />
parameters, the mpressor is suited perfectly for<br />
many applications in everyday studio business.<br />
The settings shown in the above figure provide<br />
a good starting position for ‘normal’ compression<br />
jobs like vocals, choirs, guitars, drums, keyboards<br />
and so on.<br />
Moderate ratios from 1:2 to 1:5 and release<br />
times around 300 ms make a good basis for further<br />
parameter variations. The threshold controller<br />
is used to adjust the desired amount of<br />
gain reduction.<br />
Keep in mind that the mpressor is a hard knee<br />
design. This means that if you are looking for<br />
subtle compression, you will need to use moderate<br />
settings to get there.<br />
Depending on the source material, the EQ section<br />
can be used in addition with great benefit.<br />
It definitely pays off to spend some time on<br />
getting to know this interesting feature of the<br />
mpressor and what it can do for your sound.<br />
The Gain Reduction Limiters offer completely<br />
new possibilities, too, and therefore should be<br />
given a try soon by all means.<br />
Realize that the mpressor gives you an ample<br />
range of possible settings, which like the super<br />
fast attack times or the negative ratios can lead<br />
to very extreme compression results.<br />
While this can be very cool in lots of cases, it<br />
might not always be what you are actually looking<br />
for. With the mpressor, you get what you set.<br />
Take some time to find out which settings work<br />
best for you.<br />
*<br />
You will need to adapt all suggested settings<br />
to your actual source material. This is especially<br />
important for the threshold and ratio controls!<br />
settings - standard compression<br />
16
Big drums<br />
settings<br />
In this case, a complete drum mix is processed<br />
with the mpressor. The intensity of audible transients<br />
is determined by the attack time. If this<br />
parameter is very short, only the first milliseconds<br />
of the signal will be emphasized, whereas<br />
longer settings will come closer to its original<br />
structure.<br />
The release controller can now be used to adjust<br />
the loudness. Shorter settings will produce<br />
louder signals, while longer settings can influence<br />
the groove of a track in a nice way.<br />
If high ratios are applied, this effect will become<br />
more and more extreme. You can use the Gain<br />
Reduction Limiter to use such settings without<br />
producing too wild results in order to get very<br />
energetic drums.<br />
Drums like these are very punchy, with beautiful<br />
attacks that can really shine in a mix. An increased<br />
amount of ambience is generated on<br />
top of it, resulting in a loud and massive sound.<br />
We have received lots of good feedback from<br />
our hardware mpressor customers, and one<br />
comment is mentioned time and again: “The<br />
mpressor is killer on drums!”<br />
If you ask us, this pretty much nails it. Make sure<br />
to give it a good try with some drums you really<br />
like - this is not only about compression, it<br />
is about ambience, transients, sonic structure,<br />
too...<br />
So many attributes you can influence with the<br />
mpressor plugin... just go ahead!<br />
settings - big drums<br />
17
Smashed drums<br />
settings<br />
If the drums are supposed to sound extremely<br />
compressed and loud, this setting can be used<br />
to limit almost the entire signal in a way where<br />
nearly no dynamics remains.<br />
The Auto Fast function for the attack parameter<br />
makes sure that the mpressor works fast<br />
but without distortion, and fast release times of<br />
about 50 ms are responsible for the loudness.<br />
The ratio controller is set to 1:10 which makes<br />
the mpressor act like a kind of fast brickwall<br />
limiter. The drums now sound as if they had<br />
been recorded with a focus on the room microphones:<br />
few transients, lots of ambience and<br />
long sustaining toms and cymbals.<br />
Just play with this a little and find out that you<br />
can use the mpressor almost as a reverb processor.<br />
Do not be afraid of extreme sounds! You can<br />
always keep things under control by doing the<br />
following:<br />
Route the compressed signal to a separate buss<br />
and then mix it with the unprocessed original,<br />
and the result will be the typical parallel compression<br />
which is very popular for this kind of<br />
application.<br />
Remember that setting high amounts of makeup<br />
gain also adds harmonics which can contribute<br />
to a powerful sound.<br />
If you are processing a stereo track, just try deactivating<br />
the Link button. The result will be<br />
that the left and right channel will not be compressed<br />
exactly the same anymore, which can<br />
breath some new life into a heavily compressed<br />
track.<br />
settings - smashed drums<br />
18
Reverse sounds<br />
settings<br />
This is so cool! Because the mpressor also features<br />
negative ratios, you can perfectly use it to<br />
create weird and really way-out effects:<br />
Signals sound like if they were played backwards<br />
and become louder in their progression.<br />
Very loud input signals are reduced by large<br />
amounts which creates the reverse effect.<br />
The Auto Fast function for the attack parameter<br />
is used to perform the control process fast and<br />
without distortion. The position of the release<br />
controller determines the character the sound<br />
will get louder with.<br />
The Anti Log mode should also been given a try<br />
on top of this, as it will even increase the intensity<br />
of the reverse effect.<br />
A good balance of the threshold, release and ratio<br />
parameters is very important for this effect.<br />
A setting like this can easily produce an amount<br />
of gain reduction which exceeds the 20 dB mark<br />
frequently, therefore adequate settings of the<br />
gain controller have to be made for compensation.<br />
Again, the mpressor shows that it is not only a<br />
dynamics tool, but a powerful effects processor<br />
at the same time. Try the suggested settings<br />
with some percussive material like drums or a<br />
slap bass guitar - did you expect it could sound<br />
this different?<br />
The mpressor plug-in is perfect for mangling<br />
samples! Just add some modulation, distortion<br />
and delays to taste ;-)<br />
settings - reverse sounds<br />
19
Transient enhancer<br />
settings<br />
A special task is to emphasize the transients at<br />
the beginning of a tone, chord and so on. The<br />
Gain Reduction Limiter is of special importance<br />
in this scenario. The chosen parameters result<br />
in a rather strong amount of compression with<br />
fast release times and negative ratios.<br />
Without the limiter, the signal would be compressed<br />
way too much; 10 to 15 dB of gain<br />
reduction would occur quite regularly in this<br />
case. But here the limiter reduces the maximum<br />
amount of gain reduction to 6 dB.<br />
If now the gain controller is set to 6 dB, the signal<br />
will be boosted by 6 dB at its beginning and<br />
will then be held at 0 dB during its further progress.<br />
If for example an organ is processed this way,<br />
it will sound tighter as its transients receive an<br />
accentuation. And no matter if a single note or a<br />
full chord is played – the output level will always<br />
stay the same, so that the result does not sound<br />
like typical compression.<br />
This example shows that the mpressor can have<br />
a strong influence on the complete envelope<br />
of a signal. Take some time to find out how the<br />
specific parameters relate and you will be able<br />
to use the mpressor not only as a compressor,<br />
but as a creative envelope shaping tool, too!<br />
And once you got your envelope right, do not<br />
forget to check if the Niveau Filter can give an<br />
additional kick to the processed signal...<br />
settings - transient enhancer<br />
20
Groove Ducking<br />
settings<br />
The external sidechain can be used to achieve<br />
specific groovy effects. In fact you have heard<br />
this effect on many productions with eventually<br />
not even being aware of it (although sometimes<br />
it is really hard not to notice it ;-)<br />
In this example the sidechain is triggered by a<br />
rhythmical signal like a 4 beat bass drum. The<br />
audio path could carry any desired sounds<br />
which are then reduced with every bass drum<br />
beat and as a result will groove in sync with the<br />
beat.<br />
The release parameter is of special importance<br />
here, as you can use it to adapt the timing of the<br />
effect to the tempo of the song. Kick in the Anti<br />
Log mode for some interesting variations!<br />
If, for example, a 16 beat Hi Hat is processed in<br />
this way, it will benefit from a nice vivid groove<br />
it will now be moving in.<br />
Bass sounds can be given a stronger accentuation,<br />
as the so called ducking effect creates<br />
more space in the mix and the focus is shifted<br />
more onto the 4 beat bass drum.<br />
If the mpressor is inserted into a subgroup of<br />
your host software, you will also be able to trigger<br />
an arrangement of various instruments etc.<br />
via the external sidechain.<br />
The creative options are almost infinite. Compression<br />
can be exactly on time or totally<br />
against it, which can of course be varied on the<br />
fly. Single instruments can be given more space<br />
in a mix according to its rhythm. All of a sudden,<br />
static sounds become vivid and sound really interesting!<br />
settings - groove ducking<br />
21
Negative gating<br />
settings<br />
An interesting variant of the groove ducking<br />
technique is negative gating which is based on<br />
faster release times and the use of the Anti Log<br />
mode. Higher ratios are also very typical for this<br />
process.<br />
If you feed a bass drum into the external sidechain<br />
as a trigger signal, for example, the compressor<br />
will reduce the audio signal by a significant<br />
amount, resulting in gain reduction values<br />
of 30 and 40 dB caused by the negative ratio.<br />
After the trigger signal has gone, the gain reduction<br />
value is kept constant by the Anti Log<br />
function for a short moment, after which it<br />
snaps back very fast.<br />
This special envelope makes the effect almost<br />
sound like a gate – but with the difference that<br />
the signal is made quieter instead of being totally<br />
muted.<br />
If you want the effect to be as stable as possible,<br />
please take care that the trigger signals have<br />
constant attacks and levels.<br />
Of course you would not want to use extreme<br />
effects like this for a standard compression scenario,<br />
but if you are looking for some extraordinary<br />
rhythmical effects, the negative gating<br />
procedure might just be what you have been<br />
looking for.<br />
settings - negative gating<br />
22
Ducking FX<br />
settings<br />
Using the mpressor in combination with effect<br />
units like reverb, delay or chorus processors creates<br />
fascinating results.<br />
The important part in this case is that compression<br />
is applied after the signal has passed the<br />
effects processor. The external sidechain, however,<br />
is fed with the original dry signal that is<br />
also fed into the input of the FX unit.<br />
If a drum track is processed with a reverb, for<br />
example, the reverberation can be compressed<br />
extremely strong so that it will almost vanish in<br />
very loud parts at first.<br />
It sounds different than only compressing the<br />
reverberation without using the external sidechain,<br />
because now the spatial part depends on<br />
the dynamics of the original signal.<br />
An electric piano which is processed with chorus<br />
and delay effects can benefit from this<br />
technique, too, as the chorus/delay effect will<br />
become more and more prominent while the<br />
played note decreases in volume.<br />
It is important that all effect units only send<br />
the pure effect signal (100 % wet) which is then<br />
mixed to the dry signal on a parallel track.<br />
If you are not 100 % sure what this is all about,<br />
just think about it as a volume automation of<br />
the effects buss - but this time not done by a<br />
fader, but by an automated rhythmical process<br />
controlled by the mpressor according to the values<br />
you have set.<br />
Just give it a try - it’s so much fun!<br />
settings - ducking fx<br />
23
Distorted compression<br />
settings<br />
By using very fast time constants, the mpressor<br />
can also be abused to create special distortion<br />
sounds. To do so, set the attack controller to its<br />
minimum of 0.01 ms and the release time also<br />
to its fastest value of 5.0 ms.<br />
Now the compressor becomes so fast that it<br />
compresses and twists almost every single<br />
wave form separately! The result sounds similar<br />
to a distortion unit, but without the usual drawback<br />
that the noise floor of the input signal is<br />
amplified.<br />
Remember that a high makeup gain setting will<br />
increase the amount of total harmonic distortion<br />
(THD) which can be used to push this effect<br />
even further.<br />
If this causes too much output gain for the<br />
following stages, just add a simple gain plugin<br />
from your host software directly after the<br />
mpressor to get it right.<br />
Now you can also use the Niveau Filter to shape<br />
the distortion sound you have just generated.<br />
If the filter is used in its low pass position, for<br />
example, everything will start to sound in a<br />
wonderful LoFi style. Especially bass and drums<br />
are ideal instruments for being processed in this<br />
way.<br />
These characteristic sounds can be the perfect<br />
twist for Ambient Music, Trip Hop and all styles<br />
of electronic music in general.<br />
settings - distorted compression<br />
24
Delay loops<br />
settings<br />
Delay and compressor in a loop – does that<br />
make any sense at all? Absolutely, because this<br />
combination is a truly rich source for lots of crazy<br />
sounds!<br />
To create them, assign an AUX buss (let’s say<br />
AUX 1) to the input of the mpressor. Send the<br />
output of the mpressor to the input of a following<br />
delay, which has to be set to 100 % wet, so<br />
that its output carries only the processed signal.<br />
The output of this delay is what you will listen<br />
to, but at the same time you send the output of<br />
the delay to AUX 1, too!<br />
Now send a signal from any source into AUX 1. If<br />
the gain controller of the compressor is set in a<br />
way that the delay sound becomes louder with<br />
every repetition, it will finally fall into a feedback<br />
loop which is kept steady by the compressor.<br />
If the Niveau Filter is used in addition to bend<br />
the frequency response, very noisy, pumping<br />
and breathing sounds that keep changing continuously<br />
will be the result.<br />
Very short delay times between 5 and 30 ms can<br />
even generate oscillating sounds that instantly<br />
remind of synthesizers. Turning the Niveau Filter<br />
controllers during this process results in a<br />
shift of the frequency response with each repetition<br />
of the delay.<br />
If you are familiar with feedback loops, you will<br />
not have a hard time setting this up. If it feels<br />
difficult at first, though, never surrender: it takes<br />
some experiments at the beginning to get it<br />
right.<br />
Make sure to check the demo sounds both for<br />
the mpressor hardware and the plugin on our<br />
website in order to get an idea how this will<br />
sound and what you can do with it.<br />
settings - delay loops<br />
25
Frequency compression<br />
settings<br />
The external sidechain also makes it possible to<br />
apply frequency dependent compression. This<br />
means that the compressor selectively reacts<br />
stronger or weaker to certain frequencies.<br />
One of the most typical applications of this<br />
technique is de-essing: The input signal is duplicated<br />
to a separate buss before the mpressor<br />
and then fed into an equalizer that raises the “S”<br />
sounds and lowers all other frequency areas.<br />
This processed signal is then send into the external<br />
sidechain input of the mpressor which<br />
will only react to strong “S” sounds as a result.<br />
Depending on the settings of the external EQ,<br />
it is also possible to use combinations of normal<br />
compression and de-essing. This can be<br />
achieved by only boosting the frequencies of<br />
the “S” sounds without cutting anything else.<br />
Another variant is to only lower the bass area<br />
on the external EQ so that these frequencies<br />
will not dominate the compression process so<br />
much anymore, which will result in an increase<br />
of overall loudness.<br />
Especially if you process a complete mix that<br />
has lots of energy and strong impulses in the<br />
low frequencies, you might face the problem<br />
that the mix starts to pump, because all signals<br />
are compressed according to the trigger of the<br />
dominant bass.<br />
If this is not what you are looking for, set up a<br />
frequency dependent compression scenario<br />
like this one to solve your problem.<br />
settings - frequency compression<br />
26
Mix buss<br />
settings<br />
The mpressor also proves of great value when<br />
used as a high class mix buss compressor, especially<br />
when it comes to the more vehement<br />
genres like rock and electronic music.<br />
We even have some clients who are using the<br />
hardware for mastering applications. If you are<br />
aiming to do so, though, always keep in mind<br />
that the mpressor is a hard knee design and that<br />
applying lots of gain also increases THD.<br />
If you want to achieve gentle results, gentle and<br />
careful settings are the inevitable basis to get<br />
there.<br />
If you use the mpressor plugin straight on from<br />
the beginning of a mix, it is very likely that you<br />
will automatically adapt your mixing to the<br />
sound this produces.<br />
The proportions between the levels of the separate<br />
tracks will be attuned perfectly to the active<br />
compressor. This kind of mixing especially<br />
makes sense if the complete basic sound is supposed<br />
to sounds different from the ‘standards’<br />
of other productions.<br />
If you want a complete song to sound very<br />
groovy and pumping, for example, just mix the<br />
drums louder as usual so that they dominate<br />
the compression process. All other instruments<br />
which are quieter in the mix now groove in conformity<br />
with the drums and become very vivid<br />
thereby.<br />
From here on, feel free to experiment with the<br />
mpressor plugin in any way that comes to your<br />
mind. There are lots of options and interesting<br />
sounds to be discovered. We wish you lots of<br />
fun finding them!<br />
settings - mix buss<br />
27
Contact<br />
information<br />
If you have any question or need individual advice,<br />
please feel free to contact us directly. It is<br />
our pleasure to take care about your requests.<br />
You can reach us by phone between 10:00 am<br />
and 6:00 pm MEZ (09:00 am and 5:00 pm UTC/<br />
GMT) and via email any time.<br />
elysia GmbH<br />
Ringstraße 82<br />
41334 Nettetal<br />
Germany<br />
Tel: +49 2157 126040<br />
Fax: +49 2157 126312<br />
info@elysia.com<br />
www.elysia.com<br />
General Managers:<br />
Ruben Tilgner & Dominik Klaßen<br />
Register court:<br />
Krefeld, Germany<br />
Registration number:<br />
HRB 10987<br />
VAT ID:<br />
DE247353545<br />
The information in this document is subject to<br />
change without further notice and shall not<br />
be deemed as an obligation or warranty of any<br />
kind by the manufacturer. No warranties, express<br />
or implied, are made with regard to the<br />
quality, suitability or accuracy of this document.<br />
The manufacturer reserves the right to change<br />
the contents of this document and/or the associated<br />
products at any time without the provision<br />
of prior notice. The manufacturer shall not<br />
be held liable for damages of any kind arising<br />
from the use, or the inability to use this product<br />
or its documentation.<br />
The information in this document is subject to<br />
copyright. All rights, technical changes and errata<br />
are reserved. No part of this manual may<br />
be reproduced or transmitted in any form or for<br />
any purpose without the explicitly written permission<br />
of the copyright holders.<br />
elysia and mpressor are registered trademarks<br />
of elysia GmbH. Other product and brand<br />
names contained in this document are used<br />
for identification purposes only. All registered<br />
trademarks, product designations or brand<br />
names used in this document are the property<br />
of their respective owners.<br />
WEEE ID:<br />
DE94572736<br />
information - contact<br />
28
MORE?<br />
elysia.com