Xanbus System Installation Guide - Xantrex
Xanbus System Installation Guide - Xantrex
Xanbus System Installation Guide - Xantrex

Create successful ePaper yourself
Turn your PDF publications into a flip-book with our unique Google optimized e-Paper software.
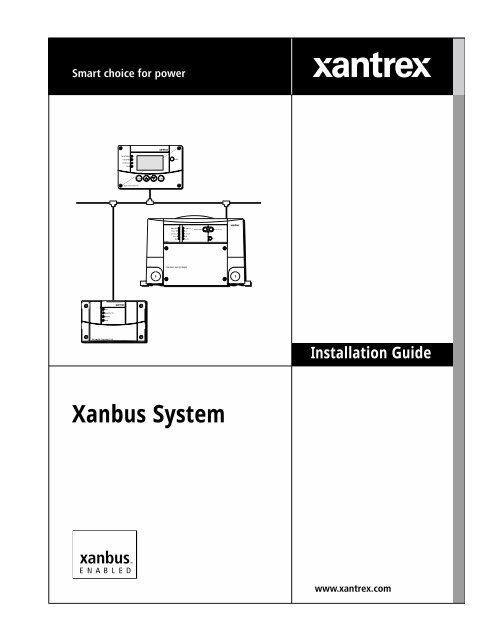
<strong>Xanbus</strong> <strong>System</strong><br />
<strong>Installation</strong> <strong>Guide</strong>
<strong>Xanbus</strong> <strong>System</strong><br />
<strong>Installation</strong> <strong>Guide</strong>
About <strong>Xantrex</strong><br />
<strong>Xantrex</strong> Technology Inc. is a world-leading supplier of advanced power electronics and controls with products from<br />
50 watt mobile units to one MW utility-scale systems for wind, solar, batteries, fuel cells, microturbines, and backup<br />
power applications in both grid-connected and stand-alone systems. <strong>Xantrex</strong> products include inverters, battery<br />
chargers, programmable power supplies, and variable speed drives that convert, supply, control, clean, and distribute<br />
electrical power.<br />
Trademarks<br />
<strong>Xantrex</strong> and <strong>Xanbus</strong> are registered trademarks of <strong>Xantrex</strong> International.<br />
Other trademarks, registered trademarks, and product names are the property of their respective owners and are used<br />
herein for identification purposes only.<br />
Notice of Copyright<br />
<strong>Xanbus</strong> <strong>System</strong> <strong>Installation</strong> <strong>Guide</strong> © June 2004 <strong>Xantrex</strong> International. All rights reserved.<br />
Disclaimer<br />
UNLESS SPECIFICALLY AGREED TO IN WRITING, XANTREX TECHNOLOGY INC. (“XANTREX”)<br />
(a) MAKES NO WARRANTY AS TO THE ACCURACY, SUFFICIENCY OR SUITABILITY OF ANY<br />
TECHNICAL OR OTHER INFORMATION PROVIDED IN ITS MANUALS OR OTHER DOCUMENTATION.<br />
(b) ASSUMES NO RESPONSIBILITY OR LIABILITY FOR LOSS OR DAMAGE, WHETHER DIRECT,<br />
INDIRECT, CONSEQUENTIAL OR INCIDENTAL, WHICH MIGHT ARISE OUT OF THE USE OF SUCH<br />
INFORMATION. THE USE OF ANY SUCH INFORMATION WILL BE ENTIRELY AT THE USER’S RISK.<br />
Date and Revision<br />
June 2004 Revision A<br />
Part Number<br />
975-0136-01-01<br />
Contact Information<br />
Telephone: 1 800 670 0707 (toll free North America)<br />
1 360 925 5097 (direct)<br />
Fax: 1 800 994 7828 (toll free North America)<br />
1 360 925 5143 (direct)<br />
Email: customerservice@xantrex.com<br />
Web: www.xantrex.com
About This <strong>Guide</strong><br />
Purpose<br />
The purpose of this <strong>Guide</strong> is to provide explanations and procedures for<br />
planning and installing a <strong>Xanbus</strong> <strong>System</strong>.<br />
Scope<br />
The <strong>Guide</strong> provides planning and setup information and guidelines for<br />
installing the network.<br />
Audience<br />
The <strong>Guide</strong> is intended for anyone who needs to plan for a network and/or<br />
install a <strong>Xanbus</strong> <strong>System</strong>.<br />
975-0136-01-01 iii
About This <strong>Guide</strong><br />
Conventions Used<br />
The following conventions are used in this guide.<br />
WARNING<br />
Warnings identify conditions or practices that could result in personal injury or<br />
loss of life<br />
CAUTION<br />
Cautions identify conditions or practices that could result in damage to the unit or<br />
other equipment.<br />
Related Information<br />
Important: These notes describe things that are important for you to know,<br />
but are not as serious as a caution or warning.<br />
Information about additional <strong>Xanbus</strong>-enabled products is available at<br />
www.xantrex.com.<br />
In order to complete network installation, you will also need to refer to<br />
the <strong>Installation</strong>, Operation, or Owner’s <strong>Guide</strong> for the <strong>Xanbus</strong>-enabled<br />
products you’ve purchased.<br />
Contact Information<br />
Telephone:<br />
Fax:<br />
Email:<br />
Web:<br />
1 800 670 0707 (toll free North America)<br />
1 360 925 5097 (direct)<br />
1 800 994 7828 (toll free North America)<br />
1 360 925 5143 (direct)<br />
customerservice@xantrex.com<br />
www.xantrex.com<br />
iv 975-0136-01-01
Contents<br />
<strong>Installation</strong><br />
<strong>Xanbus</strong>-enabled Devices- - - - - - - - - - - - - - - - - - - - - - - - - - - - - - - - - - - - - - - - - - - - - - - - - - - -2<br />
RS2000 Sine Wave Inverter/Charger - - - - - - - - - - - - - - - - - - - - - - - - - - - - - - - - - - - - - - - - -2<br />
<strong>System</strong> Control Panel - - - - - - - - - - - - - - - - - - - - - - - - - - - - - - - - - - - - - - - - - - - - - - - - - - -2<br />
The <strong>Xanbus</strong> <strong>System</strong> - - - - - - - - - - - - - - - - - - - - - - - - - - - - - - - - - - - - - - - - - - - - - - - - - - - - - - -3<br />
Purchasing <strong>System</strong> Accessories- - - - - - - - - - - - - - - - - - - - - - - - - - - - - - - - - - - - - - - - - - - - -4<br />
Purchasing Network Components - - - - - - - - - - - - - - - - - - - - - - - - - - - - - - - - - - - - - - - - - - -4<br />
Planning the Network- - - - - - - - - - - - - - - - - - - - - - - - - - - - - - - - - - - - - - - - - - - - - - - - - - - - - -5<br />
Network Layouts - - - - - - - - - - - - - - - - - - - - - - - - - - - - - - - - - - - - - - - - - - - - - - - - - - - - - -5<br />
Multi-Drop Backbone Layout - - - - - - - - - - - - - - - - - - - - - - - - - - - - - - - - - - - - - - - - - - -5<br />
Daisy Chain Layout - - - - - - - - - - - - - - - - - - - - - - - - - - - - - - - - - - - - - - - - - - - - - - - - -6<br />
Network Connectors, Terminators, and Cables - - - - - - - - - - - - - - - - - - - - - - - - - - - - - - - - - -7<br />
Cabling Requirements - - - - - - - - - - - - - - - - - - - - - - - - - - - - - - - - - - - - - - - - - - - - - - - -8<br />
Connector Requirements - - - - - - - - - - - - - - - - - - - - - - - - - - - - - - - - - - - - - - - - - - - - - -9<br />
Network Power Supply - - - - - - - - - - - - - - - - - - - - - - - - - - - - - - - - - - - - - - - - - - - - - - - - - -9<br />
Network Size - - - - - - - - - - - - - - - - - - - - - - - - - - - - - - - - - - - - - - - - - - - - - - - - - - - - - - - - 10<br />
Installing the Network - - - - - - - - - - - - - - - - - - - - - - - - - - - - - - - - - - - - - - - - - - - - - - - - - - - - 11<br />
Before You Begin the <strong>Installation</strong> - - - - - - - - - - - - - - - - - - - - - - - - - - - - - - - - - - - - - - - - - - 11<br />
<strong>Installation</strong> Tools and Materials- - - - - - - - - - - - - - - - - - - - - - - - - - - - - - - - - - - - - - - - - - - - 11<br />
<strong>Guide</strong>lines for Routing the Network Cables- - - - - - - - - - - - - - - - - - - - - - - - - - - - - - - - - - - - 12<br />
Mounting a Network Connector - - - - - - - - - - - - - - - - - - - - - - - - - - - - - - - - - - - - - - - - - - - 13<br />
Installing <strong>Xanbus</strong>-enabled Devices - - - - - - - - - - - - - - - - - - - - - - - - - - - - - - - - - - - - - - - - - 13<br />
Connecting Your <strong>Xanbus</strong> <strong>System</strong> - - - - - - - - - - - - - - - - - - - - - - - - - - - - - - - - - - - - - - - - - - 14<br />
Completing the Multi-Drop Backbone Layout - - - - - - - - - - - - - - - - - - - - - - - - - - - - - - - 14<br />
Completing the Daisy Chain Layout - - - - - - - - - - - - - - - - - - - - - - - - - - - - - - - - - - - - - 15<br />
Putting the <strong>System</strong> in Safe Mode - - - - - - - - - - - - - - - - - - - - - - - - - - - - - - - - - - - - - - - - - - - 16<br />
Testing Your <strong>Installation</strong> - - - - - - - - - - - - - - - - - - - - - - - - - - - - - - - - - - - - - - - - - - - - - - - - - - 18<br />
Verifying Power is Available - - - - - - - - - - - - - - - - - - - - - - - - - - - - - - - - - - - - - - - - - - - - - 18<br />
Verifying Network Communications - - - - - - - - - - - - - - - - - - - - - - - - - - - - - - - - - - - - - - - - 18<br />
<strong>System</strong> Modes - - - - - - - - - - - - - - - - - - - - - - - - - - - - - - - - - - - - - - - - - - - - - - - - - - - - - - - - - 20<br />
Operate mode - - - - - - - - - - - - - - - - - - - - - - - - - - - - - - - - - - - - - - - - - - - - - - - - - - - - - - - - 21<br />
Safe Mode - - - - - - - - - - - - - - - - - - - - - - - - - - - - - - - - - - - - - - - - - - - - - - - - - - - - - - - - - - 21<br />
Power Save mode - - - - - - - - - - - - - - - - - - - - - - - - - - - - - - - - - - - - - - - - - - - - - - - - - - - - - 21<br />
Hibernate mode - - - - - - - - - - - - - - - - - - - - - - - - - - - - - - - - - - - - - - - - - - - - - - - - - - - - - - 22<br />
975-0136-01-01 v
Figures<br />
Figure 1 Example of Multi-Drop Backbone - - - - - - - - - - - - - - - - - - - - - - - - - - - - - - - - - - - - - - -3<br />
Figure 2 Multi-Drop Backbone Layout - - - - - - - - - - - - - - - - - - - - - - - - - - - - - - - - - - - - - - - - - -5<br />
Figure 3 Daisy Chain Layout- - - - - - - - - - - - - - - - - - - - - - - - - - - - - - - - - - - - - - - - - - - - - - - - -6<br />
Figure 4 3-Way Network Connector (sample configuration)- - - - - - - - - - - - - - - - - - - - - - - - - - - -7<br />
Figure 5 Network Terminators- - - - - - - - - - - - - - - - - - - - - - - - - - - - - - - - - - - - - - - - - - - - - - - -8<br />
Figure 6 RJ45 Connector - - - - - - - - - - - - - - - - - - - - - - - - - - - - - - - - - - - - - - - - - - - - - - - - - - -9<br />
Figure 7 Recommended Mounting Orientation for Network Connector - - - - - - - - - - - - - - - - - - - 13<br />
Figure 8 Options for Completing a Multi-Drop Backbone Layout - - - - - - - - - - - - - - - - - - - - - - - 14<br />
Figure 9 Completing a Daisy-Chain Layout - - - - - - - - - - - - - - - - - - - - - - - - - - - - - - - - - - - - - - 15<br />
Figure 10 Select Device Menu- - - - - - - - - - - - - - - - - - - - - - - - - - - - - - - - - - - - - - - - - - - - - - - - 16<br />
Figure 11 <strong>System</strong> Settings Menu - - - - - - - - - - - - - - - - - - - - - - - - - - - - - - - - - - - - - - - - - - - - - - 16<br />
Figure 12 Safe Mode - - - - - - - - - - - - - - - - - - - - - - - - - - - - - - - - - - - - - - - - - - - - - - - - - - - - - - 17<br />
Figure 13 <strong>System</strong> Home Screen- - - - - - - - - - - - - - - - - - - - - - - - - - - - - - - - - - - - - - - - - - - - - - - 18<br />
Figure 14 <strong>System</strong> Settings: View Device Info - - - - - - - - - - - - - - - - - - - - - - - - - - - - - - - - - - - - - 19<br />
Figure 15 Device Information Screen (RS2000 used for example)- - - - - - - - - - - - - - - - - - - - - - - - 19<br />
Figure 16 <strong>System</strong> Control Panel - - - - - - - - - - - - - - - - - - - - - - - - - - - - - - - - - - - - - - - - - - - - - - 20<br />
Figure 17 Operate Mode- - - - - - - - - - - - - - - - - - - - - - - - - - - - - - - - - - - - - - - - - - - - - - - - - - - - 21<br />
Figure 18 Entering Power Save Mode- - - - - - - - - - - - - - - - - - - - - - - - - - - - - - - - - - - - - - - - - - - 22<br />
Figure 19 Hibernate Mode - - - - - - - - - - - - - - - - - - - - - - - - - - - - - - - - - - - - - - - - - - - - - - - - - - 22<br />
:<br />
CAUTION: Equipment damage<br />
Connect the <strong>Xanbus</strong> <strong>System</strong> only to <strong>Xanbus</strong> compatible devices.<br />
Although the cabling and connectors used in this network system are the same as<br />
Ethernet connectors, this network is not an Ethernet system. Equipment<br />
damage may result from attempting to connect these two different systems.<br />
975-0136-01-01 vii
viii
<strong>Installation</strong><br />
The <strong>Installation</strong> <strong>Guide</strong> provides detailed information for<br />
planning and installing a <strong>Xanbus</strong> <strong>System</strong>.
<strong>Installation</strong><br />
<strong>Xanbus</strong>-enabled Devices<br />
The <strong>Xanbus</strong>-enabled designation means that this product works on a<br />
<strong>Xanbus</strong> network. <strong>Xanbus</strong>-enabled products are:<br />
• Easy to use. The <strong>Xanbus</strong> network simplifies operation and automates<br />
routine tasks.<br />
• Reliable. Software control eliminates errors due to analog signalling.<br />
• Accurate. Digital information is less susceptible to interference and<br />
line loss.<br />
• Upgradeable. Firmware upgrades mean your purchase will remain up<br />
to date.<br />
More <strong>Xanbus</strong>-enabled devices will become available in the future.<br />
RS2000 Sine Wave Inverter/Charger<br />
<strong>System</strong> Control Panel<br />
The RS2000 Sine Wave Inverter/Charger is a convenient combination of<br />
an inverter, multistage battery charger, and transfer switch in one<br />
electronic device. It is also the device that typically powers the <strong>Xanbus</strong><br />
system. For complete information, see the RS2000 Sine Wave Inverter/<br />
Charger Operation <strong>Guide</strong> and RS2000 Sine Wave Inverter/Charger<br />
<strong>Installation</strong> <strong>Guide</strong>.<br />
The <strong>System</strong> Control Panel provides configuration and monitoring<br />
capability for <strong>Xanbus</strong>-enabled devices. For complete information, see the<br />
user guide for your interface panel.<br />
For detailed instructions and a complete list of <strong>Xanbus</strong>-enabled devices,<br />
visit the website at www.xantrex.com.<br />
2 975-0136-01-01
The <strong>Xanbus</strong> <strong>System</strong><br />
What is a network?<br />
Components of a<br />
network<br />
<strong>Installation</strong><br />
A network is a collection of devices that perform individual functions, but<br />
also communicate and interact with the other devices. The <strong>Xanbus</strong><br />
<strong>System</strong> provides a robust, integrated product solution which simplifies<br />
and automates the installation, configuration, control, monitoring, and<br />
integration of devices that deliver and distribute AC or DC power.<br />
Components of a network include the devices such as an inverter/charger,<br />
a control panel, and an automatic generator start. These devices are<br />
integrated into a network using cables, network connectors, and<br />
terminators. An example of a power network is shown in Figure 1.<br />
3-way network<br />
connector<br />
Interface panel<br />
Network<br />
cable<br />
<strong>Xanbus</strong>-enabled inverter/charger<br />
Automatic Generator Start<br />
Figure 1 Example of Multi-Drop Backbone<br />
Network<br />
configurations<br />
The network can be installed in one of two configurations: as a multi-drop<br />
backbone (see Figure 1 and Figure 2) or as a daisy chain (see Figure 3).<br />
975-0136-01-01 3
<strong>Installation</strong><br />
Purchasing <strong>System</strong> Accessories<br />
Purchasing Network Components<br />
<strong>System</strong> accessories are available from any authorized <strong>Xantrex</strong> dealer or at<br />
www.xantrex.com. Table 1 provides a partial list of system accessories.<br />
When ordering, please provide the part number of the accessory to the<br />
dealer.<br />
Table 1 <strong>System</strong> Accessories<br />
Accessory Dimensions H x W x D Part number<br />
<strong>System</strong> Control Panel (SCP)<br />
Automatic Generator Starter<br />
(AGS)<br />
4.0 × 6 × 1.60 inches<br />
(101 × 152 × 41 mm)<br />
3.8 × 5.8 × 1.5 inches<br />
(97 × 147 × 38 mm)<br />
809-0910<br />
809-0915<br />
Consult with your local system designer to determine what network<br />
components will be needed for your specific installation. Table 2 provides<br />
a partial list of network components and part numbers. Pre-made cables<br />
are available in standard lengths from 3 feet to 75 feet.<br />
For the most up-to-date list, call your dealer. Call your dealer or visit<br />
www.xantrex.com to purchase cables and other network components.<br />
Table 2 Network Components and Part Numbers<br />
Network Component<br />
Part Number<br />
Network termination — Male (2 per pack) 809-0901<br />
Network termination — Female (2 per pack) 809-0905<br />
3-way network connector 809-0903<br />
Network cable 3 ft. (0.9 m) 809-0935<br />
Network cable 5 feet (1.5 m) 809-0936<br />
Network cable 7 feet (2.0 m) 809-0937<br />
Network cable 10 feet (3.0 m) 809-0938<br />
Network cable 14 feet (4.3 m) 809-0939<br />
Network cable 25 feet (7.6 m) 809-0940<br />
Network cable 50 feet (15.2 m) 809-0941<br />
Network cable 75 feet (22.9 m) 809-0942<br />
4 975-0136-01-01
Planning the Network<br />
<strong>Installation</strong><br />
This section provides information on the following topics:<br />
• two types of network layouts and the advantages and disadvantages<br />
of each layout<br />
• network components<br />
• network connectors and/or terminators<br />
• cable and connector requirements of each layout<br />
• network power supply and network size<br />
See “Installing the Network” on page 11 for instructions on routing and<br />
layout.<br />
Network Layouts<br />
<strong>Xanbus</strong>-enabled devices can be connected in one of two <strong>Xanbus</strong> <strong>System</strong><br />
layouts: the multi-drop backbone or the daisy chain. Each network layout<br />
has advantages and disadvantages, depending on the application and/or<br />
environment. It is up to you or your system designer to decide which<br />
layout is best for your installation.<br />
Multi-Drop Backbone Layout<br />
Important: Do not mix the two types of network layouts. Mixed<br />
configurations are not supported by <strong>Xantrex</strong>.<br />
In a multi-drop backbone layout, each <strong>Xanbus</strong>-enabled device on the<br />
network is connected by a drop cable to the network bus or backbone with<br />
a network connector, as shown in Figure 2.<br />
<strong>Xanbus</strong>-enabled<br />
Device 1<br />
<strong>Xanbus</strong>-enabled<br />
Device 2<br />
Network<br />
backbone cable<br />
Network<br />
connector<br />
Drop cable<br />
Terminator<br />
<strong>Xanbus</strong>-enabled<br />
Device 3<br />
Terminator<br />
Figure 2 Multi-Drop Backbone Layout<br />
975-0136-01-01 5
<strong>Installation</strong><br />
Terminators<br />
Advantages<br />
Disadvantage<br />
Terminators are required at both ends of the multi-drop backbone cable,<br />
as shown in Figure 2. Therefore, the <strong>Xanbus</strong>-enabled devices do not<br />
require their own termination. With only one terminator, the signal quality<br />
is degraded and performance on the network is reduced. Permanent<br />
configuration with only one terminator is not supported by <strong>Xantrex</strong>.<br />
If cables are placed at the end of the network (as in Figure 2), female<br />
terminators are required. Otherwise, male terminators can be inserted<br />
directly into the open jack of each network connector at the end of the<br />
network.<br />
The multi-drop backbone layout is reliable and robust and is<br />
recommended for OEM installations.<br />
In this layout, <strong>Xanbus</strong>-enabled devices can be removed or replaced while<br />
still keeping the network operating.<br />
The main disadvantage of this layout is cost. The network connectors are<br />
more expensive than in a daisy chain layout (which uses no network<br />
connectors), and each device in this layout requires its own network<br />
connector.<br />
Daisy Chain Layout<br />
In a daisy chain layout, each device on the network is linked with separate<br />
lengths of cable, as shown in Figure 3. This layout does not require<br />
network connectors.<br />
<strong>Xanbus</strong>-enabled<br />
Device 1<br />
<strong>Xanbus</strong>-enabled<br />
Device 2<br />
<strong>Xanbus</strong>-enabled<br />
Device 3<br />
Terminator<br />
Terminator<br />
Figure 3 Daisy Chain Layout<br />
Terminators<br />
Advantage<br />
As in the multi-drop backbone layout, two terminators are required to<br />
ensure the communication signal quality on the network. The <strong>Xanbus</strong>enabled<br />
devices at each end of the chain must have a male terminator<br />
inserted into their open network ports, as shown in Figure 3.<br />
The advantage of this layout is that it is less expensive to install because<br />
network connectors are not required.<br />
6 975-0136-01-01
Disadvantage<br />
<strong>Installation</strong><br />
The disadvantage of the daisy chain layout is that <strong>Xanbus</strong>-enabled<br />
devices cannot be removed from the network without interrupting the<br />
network. To make the network function after removing a device, you must<br />
connect the <strong>Xanbus</strong>-enabled devices on either side of the missing device<br />
to each other or replace the device.<br />
Network Connectors, Terminators, and Cables<br />
CAUTION: Equipment Damage<br />
Connect only to other <strong>Xanbus</strong>-compatible devices.<br />
Although the cabling and connectors used in this network system are the same as<br />
ethernet connectors, this network is not an ethernet system. Equipment<br />
damage may result from attempting to connect <strong>Xanbus</strong> to different systems.<br />
3-way network<br />
connector<br />
Network connectors, terminators, and cables are used to build your<br />
<strong>Xanbus</strong> network.<br />
The 3-way connector houses three RJ45 jacks that provide a device<br />
connection point on a multi-drop layout. All three jacks are wired<br />
identically and can accept either network cables or terminators. One jack<br />
is available for connecting to a <strong>Xanbus</strong>-enabled device. The remaining<br />
jacks are reserved for connection to two other network connectors, a<br />
terminated network cable, or a male terminator.<br />
The network connector is mounted to a bulkhead or a wall, as shown in<br />
Figure 4.<br />
To network connector<br />
or teminator<br />
To device<br />
To network connector<br />
Figure 4 3-Way Network Connector (sample configuration)<br />
975-0136-01-01 7
<strong>Installation</strong><br />
Terminators<br />
Terminators are required at both ends of the network to ensure the<br />
communication signal quality on the network. The terminators are female<br />
and male. See Figure 5.<br />
The terminator requirements are different for each layout. See Figure 8<br />
and Figure 9.<br />
Female terminator<br />
Male terminator<br />
Cabling Requirements<br />
Figure 5 Network Terminators<br />
CAUTION: Equipment damage<br />
Do not use crossover cable in a <strong>Xanbus</strong> <strong>System</strong>.<br />
Cabling<br />
The network uses Category 5 (CAT 5) cable, a standard cable available<br />
from <strong>Xantrex</strong> or any computer supply store. The cable consists of eight<br />
conductors in four twisted pairs with an RJ45 modular connector wired to<br />
the T568A standard. Table 3 contains the arrangements of wire colors to<br />
pin numbers for the T568A standard.<br />
Table 3 T568A Standard Wiring<br />
Pin Number Conductor Name CAT 5 Cable Insulation Color<br />
1 NET_S White/Green<br />
2 NET_S Green<br />
3 NET_C White/Orange<br />
4 CAN_L Blue<br />
5 CAN_H White/Blue<br />
6 NET_C Orange<br />
7 NET_S White/Brown<br />
8 NET_C Brown<br />
8 975-0136-01-01
Connector Requirements<br />
<strong>Installation</strong><br />
Different types of connectors are required to install the <strong>Xanbus</strong>-enabled<br />
devices on the network cable.<br />
RJ45 connector The network cable uses modular RJ45 connectors, as shown in Figure 6.<br />
The connector is suitable for cost-sensitive applications and is easily<br />
installed by an end user. The RJ45 connector should be a modular plug, 8-<br />
position, 8-contact for round, stranded, unshielded cable.<br />
Network Power Supply<br />
Figure 6 RJ45 Connector<br />
In a <strong>Xanbus</strong> <strong>System</strong>, the power sources must provide sufficient power for<br />
all of the <strong>Xanbus</strong>-enabled devices.<br />
Power supply<br />
Important: All networks, regardless of type, require a device that powers the<br />
network. Typically, this is your inverter/charger.<br />
The network must have at least one device with a power supply to run the<br />
network. The total network current supplied by all the power-sourcing<br />
devices must be greater than or equal to the total current drawn by the<br />
power consuming devices.<br />
For example, in a system with an inverter/charger, an interface panel and<br />
an Automatic Generator Start, the inverter/charger is a power-sourcing<br />
device capable of providing 800 mA at 15 VDC while the two other<br />
devices each consume a maximum of 200 mA for a total maximum<br />
consumption of 400 mA. In this example, the network is properly<br />
configured from a power perspective because the power source is capable<br />
of providing more current than is needed: 800 mA ≥ 400 mA.<br />
Note: See your <strong>Xanbus</strong> device guides to determine how much power each<br />
device consumes or supplies.<br />
975-0136-01-01 9
<strong>Installation</strong><br />
Network Size<br />
Table 4 summarizes the network size in terms of distances and cable<br />
lengths.<br />
Table 4 Minimum and Maximum Cable Length<br />
Cable Length Minimum Maximum<br />
Backbone or daisy chain 4 inches (10 cm) 130 feet (40 meters)<br />
Total backbone length or daisy chain 4 inches (10 cm) 130 feet (40 meters)<br />
Drop cable on backbone 4 inches (10 cm) 10 feet (6 meters)<br />
10 975-0136-01-01
Installing the Network<br />
<strong>Installation</strong><br />
Before You Begin the <strong>Installation</strong><br />
<strong>Installation</strong> Tools and Materials<br />
Important: Do not mix the two types of network layouts. Mixed<br />
configurations are not supported by <strong>Xantrex</strong>.<br />
Important: Installing and replacing <strong>Xanbus</strong>-enabled devices in an existing<br />
system must be performed with the <strong>Xanbus</strong> <strong>System</strong> in Safe mode. See “Putting<br />
the <strong>System</strong> in Safe Mode” on page 16.<br />
• Read the entire section before installing the network. It’s important to<br />
plan your installation from beginning to end.<br />
• Assemble all the tools and materials you require for the installation.<br />
Tools<br />
You will need the following tools to install the network cables.<br />
❐ Phillips screwdriver, appropriately sized<br />
❐<br />
Drill and 1/8" bit<br />
Materials<br />
You will need the following materials to complete your installation.<br />
❐ CAT 5 cables (available from <strong>Xantrex</strong> or computer supply stores)<br />
❐<br />
❐<br />
❐<br />
Network connectors, if installing multi-drop backbone layout<br />
# 6 screws, 2 per each network connector installed<br />
Terminators<br />
975-0136-01-01 11
<strong>Installation</strong><br />
<strong>Guide</strong>lines for Routing the Network Cables<br />
:<br />
WARNING: Shock hazard<br />
Do not route the network cables in the same conduit or panel as the AC and DC<br />
power cabling.<br />
To ensure maximum performance of your network, follow these<br />
guidelines when routing the network cables. Route the cables before<br />
installing <strong>Xanbus</strong>-enabled devices.<br />
• Route the cables away from sharp edges that might damage the<br />
insulation. Avoid sharp bends in the cable—no less than a 4-inch<br />
radius.<br />
• Allow for some slack in the cable tension. Cable tension should not<br />
exceed 25 lbs.<br />
• Keep the alignment of wire pairs inside the sheath as straight as<br />
possible.<br />
• Allow separation between data and power cables (data cables should<br />
only cross a power cable at right angles).<br />
• Do not staple the cable with metal cable staples. Use the appropriate<br />
hardware fasteners to avoid damage to the cable.<br />
• Apply cable ties loosely.<br />
• Support horizontal cables using J hooks or cable trays.<br />
12 975-0136-01-01
Mounting a Network Connector<br />
<strong>Installation</strong><br />
To mount a network connector:<br />
1. Select an appropriate location with the connector in the recommended<br />
mounting orientation, as shown in Figure 7.<br />
Installing <strong>Xanbus</strong>-enabled Devices<br />
Figure 7 Recommended Mounting Orientation for Network Connector<br />
2. Mark the position of the mounting screws.<br />
3. Pilot drill the two mounting holes.<br />
4. Fasten the network connector to the mounting surface with two #6<br />
screws.<br />
If you are installing a <strong>Xanbus</strong>-enabled device on an existing <strong>Xanbus</strong><br />
<strong>System</strong>, see “Putting the <strong>System</strong> in Safe Mode” on page 16.<br />
Important: Mount cables and network connectors in a dry location.<br />
To install the <strong>Xanbus</strong>-enabled devices:<br />
1. Determine and prepare the location for each device. Refer to the<br />
installation procedure in the appropriate guide. See “Related<br />
Information” on page iv.<br />
2. Measure and determine the required cable length, taking into<br />
consideration the routing and strain relief requirements.<br />
Do not exceed the total recommended cable length of 130 feet (40<br />
meters).<br />
3. Mount the devices according to the installation procedure in the<br />
appropriate guide.<br />
4. Connect to the network.<br />
975-0136-01-01 13
<strong>Installation</strong><br />
Connecting Your <strong>Xanbus</strong> <strong>System</strong><br />
Use an appropriate length of network cable to connect each device and 3-<br />
way network connector (if used). See Figure 2 on page 1–5 and Figure 3<br />
on page 1–6.<br />
CAUTION: Equipment Damage<br />
Connect only to other <strong>Xanbus</strong> compatible devices.<br />
Although the cabling and connectors used in this network system are the same as<br />
ethernet connectors, this network is not an ethernet system. Equipment<br />
damage may result from attempting to connect <strong>Xanbus</strong> to different systems.<br />
Completing the Multi-Drop Backbone Layout<br />
To complete the multi-drop backbone layout:<br />
◆ Attach a female terminator to the backbone cable at each end of the<br />
network<br />
Or<br />
◆ Insert a male terminator into the open jack of the network connector<br />
at each end of the network (see Figure 8).<br />
Attach female terminator to<br />
end of backbone cable.<br />
Insert male terminator into<br />
open jack of connector.<br />
To device<br />
To previous<br />
connector<br />
Figure 8 Options for Completing a Multi-Drop Backbone Layout<br />
14 975-0136-01-01
Completing the Daisy Chain Layout<br />
To complete the daisy chain layout:<br />
◆<br />
<strong>Installation</strong><br />
Insert male terminators into the open network ports of the <strong>Xanbus</strong>enabled<br />
devices at each end of the network. See Figure 9.<br />
Figure 9 Completing a Daisy-Chain Layout<br />
CAUTION: Unpredictable device behavior<br />
After connecting the <strong>Xanbus</strong>-enabled devices and terminating the network, do<br />
not plug terminators or other cables into any remaining open network ports on<br />
any <strong>Xanbus</strong>-enabled devices.<br />
Do not connect one end of the network to the other to make a ring.<br />
975-0136-01-01 15
<strong>Installation</strong><br />
Putting the <strong>System</strong> in Safe Mode<br />
CAUTION: Unpredictable device behavior<br />
Before removing or installing a device on an existing <strong>Xanbus</strong> <strong>System</strong>, you must<br />
put the system into Safe mode from the <strong>System</strong> Control Panel.<br />
In Safe mode, all <strong>Xanbus</strong>-enabled devices remain powered and continue<br />
to communicate, and all device outputs are disabled.<br />
To enter Safe mode:<br />
1. On the Select Device menu, use the down arrow button to highlight<br />
<strong>System</strong>, as shown in Figure 10.<br />
The cursor on the right of the screen indicates where you are in the<br />
menu.<br />
Figure 10 Select Device Menu<br />
2. Press Enter.<br />
The <strong>System</strong> Settings menu appears.<br />
Figure 11 <strong>System</strong> Settings Menu<br />
3. On the <strong>System</strong> Settings menu, with Desired Mode highlighted, as<br />
shown in Figure 11, press Enter.<br />
4. Use the down arrow button to scroll through the other modes to select<br />
Safe mode, as shown in Figure 12.<br />
16 975-0136-01-01
<strong>Installation</strong><br />
For more information on the different system modes (Operate, Power<br />
Save, and Hibernate), see “<strong>System</strong> Modes” on page 20.<br />
Figure 12 Safe Mode<br />
5. Press Enter.<br />
You are now in Safe mode.<br />
6. Press Exit twice to return to the <strong>System</strong> Home screen.<br />
To exit Safe mode:<br />
1. On the <strong>System</strong> settings menu, with Desired Mode highlighted, press<br />
Enter.<br />
2. Use the down arrow button to select your desired system mode.<br />
3. Press Enter.<br />
975-0136-01-01 17
<strong>Installation</strong><br />
Testing Your <strong>Installation</strong><br />
Verifying Power is Available<br />
After you have installed the <strong>Xanbus</strong> <strong>System</strong>, you should confirm that<br />
your installation is operating correctly.<br />
Each <strong>Xanbus</strong>-enabled device has an indicator light or display screen that<br />
confirms that it is receiving power. See the <strong>Installation</strong> or Owner’s <strong>Guide</strong><br />
for each <strong>Xanbus</strong>-enabled device for information on verifying network<br />
power.<br />
Verifying Network Communications<br />
You can confirm that a <strong>Xanbus</strong>-enabled device is properly installed and<br />
communicating on the network by viewing its firmware revision number.<br />
The firmware revision number is available on the <strong>System</strong> Control Panel<br />
Device Information screen.<br />
To view the firmware version for a device:<br />
1. On the <strong>System</strong> Home screen, press Enter<br />
You can identify the <strong>System</strong> Home screen by the down-pointing<br />
“menu” arrow on the bottom left corner of the screen. See Figure 13.<br />
menu<br />
Figure 13 <strong>System</strong> Home Screen<br />
2. On the Select Device menu, use the down arrow button to highlight<br />
<strong>System</strong>.<br />
3. Press Enter.<br />
4. On the <strong>System</strong> Settings menu, use the down arrow button to highlight<br />
View Device Info, as shown in Figure 14.<br />
18 975-0136-01-01
<strong>Installation</strong><br />
Figure 14 <strong>System</strong> Settings: View Device Info<br />
5. Press Enter.<br />
6. To view the Device Information screen for each device, press the<br />
down arrow button.<br />
442-0110-01-01<br />
809-2000<br />
1.00.00<br />
Figure 15 Device Information Screen (RS2000 used for example)<br />
7. To return to the <strong>System</strong> Settings menu, press Exit.<br />
975-0136-01-01 19
<strong>Installation</strong><br />
<strong>System</strong> Modes<br />
This section provides a brief overview of the four different system modes.<br />
See the <strong>System</strong> Control Panel Owner’s <strong>Guide</strong> for complete information.<br />
The system modes described in this section affect the performance and<br />
behavior of all <strong>Xanbus</strong>-enabled devices on the <strong>Xanbus</strong> <strong>System</strong>.<br />
You can change system modes using the <strong>System</strong> Settings menu on the<br />
<strong>System</strong> Control Panel.<br />
You can also use the red <strong>System</strong> button on the <strong>System</strong> Control Panel to<br />
put the <strong>System</strong> Control Panel and all other <strong>Xanbus</strong>-enabled devices into<br />
Power Save mode only, as shown in Figure 16.<br />
red<br />
<strong>System</strong><br />
button<br />
Figure 16 <strong>System</strong> Control Panel<br />
<strong>System</strong> modes are changed using the <strong>System</strong> Settings menu. The four<br />
system modes are:<br />
• Operate<br />
• Safe<br />
• Power Save<br />
• Hibernate<br />
20 975-0136-01-01
Operate mode<br />
Characteristics<br />
<strong>Installation</strong><br />
In Operate mode, all communications are enabled on the <strong>Xanbus</strong> <strong>System</strong>.<br />
All power conversion functions are enabled. Each device is monitoring<br />
and communicating its input.<br />
The default mode of any <strong>Xanbus</strong>-enabled device is Operate mode.<br />
Whenever any device on the <strong>Xanbus</strong> <strong>System</strong> is powered on or reset, it<br />
will be in Operate Mode, as shown in Figure 17.<br />
Safe Mode<br />
Figure 17 Operate Mode<br />
Power Save mode<br />
See “Putting the <strong>System</strong> in Safe Mode” on page 16 for more information.<br />
Characteristics<br />
When to use<br />
Power Save mode minimizes power drawn by the <strong>Xanbus</strong>-enabled<br />
devices. Power Save mode stops all communication on the network,<br />
putting the system to “sleep” until it receives a command to “wake up”<br />
again.<br />
Use Power Save mode during periods when your power needs are<br />
minimal—while you are driving, for example. Putting the system in<br />
Power Save mode will help preserve the charge in your batteries during<br />
periods of minimal power usage.<br />
Entering and exiting Power Save mode also serves as a reset command for<br />
the system.<br />
To enter or exit Power Save mode:<br />
◆ Press and hold the red <strong>System</strong> button on the <strong>System</strong> Control Panel for<br />
at least one second.<br />
When the system enters Power Save mode, the screen on the <strong>System</strong><br />
Control Panel goes blank and the backlight turns off.<br />
You can also enter Power Save mode on the <strong>System</strong> Settings menu by<br />
selecting Desired Mode, scrolling to PowerSave as shown in Figure 18,<br />
and pressing Enter.<br />
975-0136-01-01 21
<strong>Installation</strong><br />
Figure 18 Entering Power Save Mode<br />
Returning to<br />
Operate mode<br />
If an inverter/charger supplies power to the network, you can bring the<br />
system out of Power Save mode by applying AC input (with utility power<br />
or generator power) or by pressing the Reset button on the inverter/<br />
charger.<br />
Hibernate mode<br />
Characteristics<br />
When to use<br />
Hibernate mode removes power from all <strong>Xanbus</strong>-enabled devices on the<br />
<strong>Xanbus</strong> <strong>System</strong>. All operations are suspended until power is restored to<br />
the network.<br />
Important: To prevent any system activity, put the <strong>Xanbus</strong> system into<br />
Hibernate mode when leaving your system unattended for extended periods of<br />
time.<br />
If there are active faults in the system, you cannot put the system into<br />
Hibernate mode. Clear any active faults, correct the condition that caused<br />
the fault, then put the system into Hibernate mode, as shown in Figure 19.<br />
Operate<br />
Figure 19 Hibernate Mode<br />
22 975-0136-01-01
Restoring power<br />
<strong>Installation</strong><br />
Once in Hibernate mode, the system cannot return to Operate mode by<br />
itself. You must restore power to the network manually.<br />
If an inverter/charger supplies power to the network, you can bring the<br />
system out of Hibernate mode by applying qualified AC input power with<br />
utility power or generator power.<br />
For more information on the behavior of specific <strong>Xanbus</strong>-enabled<br />
devices, refer to Operation <strong>Guide</strong> or Owner’s <strong>Guide</strong> for each device.<br />
975-0136-01-01 23
<strong>Xantrex</strong> Technology Inc.<br />
1 800 670 0707 Tel toll free NA<br />
1 360 925 5097 Tel direct<br />
1 800 994 7828 Fax toll free NA<br />
1 360 925 5143 Fax direct<br />
customerservice@xantrex.com<br />
www.xantrex.com<br />
975-0136-01-01