Exporting Test from EZ Test Online and Importing into Blackboard ...
Exporting Test from EZ Test Online and Importing into Blackboard ...
Exporting Test from EZ Test Online and Importing into Blackboard ...

Create successful ePaper yourself
Turn your PDF publications into a flip-book with our unique Google optimized e-Paper software.
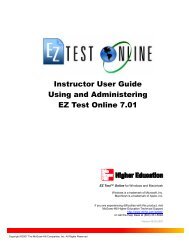
<strong>Exporting</strong> <strong>Test</strong> <strong>from</strong> <strong>EZ</strong> <strong>Test</strong> <strong>Online</strong> <strong>and</strong> <strong>Importing</strong> <strong>into</strong><br />
<strong>Blackboard</strong> Learn version 9<br />
<strong>EZ</strong> <strong>Test</strong> <strong>Online</strong> Export<br />
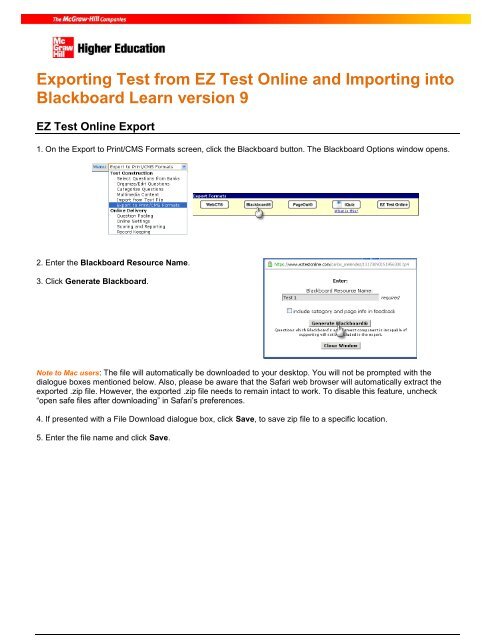
1. On the Export to Print/CMS Formats screen, click the <strong>Blackboard</strong> button. The <strong>Blackboard</strong> Options window opens.<br />
2. Enter the <strong>Blackboard</strong> Resource Name.<br />
3. Click Generate <strong>Blackboard</strong>.<br />
Note to Mac users: The file will automatically be downloaded to your desktop. You will not be prompted with the<br />
dialogue boxes mentioned below. Also, please be aware that the Safari web browser will automatically extract the<br />
exported .zip file. However, the exported .zip file needs to remain intact to work. To disable this feature, uncheck<br />
“open safe files after downloading” in Safari’s preferences.<br />
4. If presented with a File Download dialogue box, click Save, to save zip file to a specific location.<br />
5. Enter the file name <strong>and</strong> click Save.
<strong>Blackboard</strong> Pool Import<br />
Once you have exported the <strong>Blackboard</strong> file <strong>from</strong> <strong>EZ</strong> <strong>Test</strong> <strong>Online</strong> . . .<br />
1. Log <strong>into</strong> your <strong>Blackboard</strong> account.<br />
2. Click on the course you want to add the exported <strong>EZ</strong> <strong>Test</strong> <strong>Online</strong> file to.<br />
3. Click <strong>Test</strong>s, Surveys, <strong>and</strong> Pools <strong>from</strong> Course<br />
Tools.<br />
4. Click Pools.<br />
5. Click Import Pool <strong>and</strong> click the Browse My Computer button to locate the <strong>Blackboard</strong> ZIP file you exported <strong>from</strong><br />
<strong>EZ</strong> <strong>Test</strong> <strong>Online</strong>.<br />
6. Click Submit to upload the file to <strong>Blackboard</strong>. You will see a confirmation screen indicating The package has been<br />
processed. Then click OK.
<strong>Blackboard</strong> <strong>Test</strong> Creation<br />
1. Click <strong>Test</strong>s, Surveys, <strong>and</strong> Pools <strong>from</strong> Course<br />
Tools.<br />
2. Click <strong>Test</strong>s.<br />
3. Click Build <strong>Test</strong>.<br />
4. Enter a name, description, instructions <strong>and</strong> click Submit.<br />
5. Click Find Questions <strong>from</strong> the Reuse Questions drop-down list.
6. In the Find Questions window, make sure the only options Checked under Browse Criteria is the name of the pool<br />
you have imported under Pools <strong>and</strong> the name of the test you have created under <strong>Test</strong>s.<br />
7. Scroll down in the Find Questions window, <strong>and</strong> Click Show All.<br />
8. Scroll up in the Find Questions window, <strong>and</strong> Check the select all questions option as shown or check the box next<br />
to each question you want to add to your <strong>Blackboard</strong> test. Also, make sure the Source Type option is selected to have<br />
the questions organized by the order of the Pool. Verify that Copy selected questions is selected <strong>and</strong> Click Submit.<br />
9. Your selected questions will appear on the <strong>Test</strong> Canvas screen. Modify any point values if needed by changing the<br />
default point value for all the questions selected.<br />
10. Click OK.
Add <strong>Test</strong> to <strong>Blackboard</strong> Content Area<br />
1. Select a Content Area, such as Assignments, <strong>and</strong> make sure Edit Mode is ON.<br />
2. In the Create Assessment drop-down menu select <strong>Test</strong>.<br />
3. Select your <strong>Test</strong> in the Add <strong>Test</strong> section <strong>and</strong> click Submit.<br />
After a <strong>Test</strong> is added to a Content Area, the <strong>Test</strong> Options page appears. This page includes information about the<br />
<strong>Test</strong>, including instructions, availability, feedback, <strong>and</strong> presentation.