EZ Test 6.2 Quick Start Guide.pdf - MHHE.com
EZ Test 6.2 Quick Start Guide.pdf - MHHE.com
EZ Test 6.2 Quick Start Guide.pdf - MHHE.com
Create successful ePaper yourself
Turn your PDF publications into a flip-book with our unique Google optimized e-Paper software.
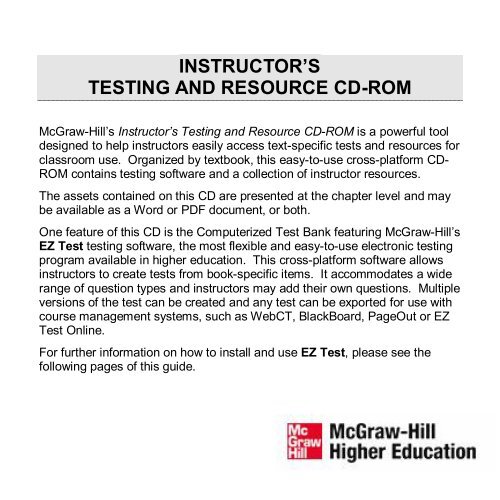
INSTRUCTOR’S<br />
TESTING AND RESOURCE CDROM<br />
McGrawHill’s Instructor’s <strong>Test</strong>ing and Resource CDROM is a powerful tool<br />
designed to help instructors easily access textspecific tests and resources for<br />
classroom use. Organized by textbook, this easytouse crossplatform CD<br />
ROM contains testing software and a collection of instructor resources.<br />
The assets contained on this CD are presented at the chapter level and may<br />
be available as a Word or PDF document, or both.<br />
One feature of this CD is the Computerized <strong>Test</strong> Bank featuring McGrawHill’s<br />
<strong>EZ</strong> <strong>Test</strong> testing software, the most flexible and easytouse electronic testing<br />
program available in higher education. This crossplatform software allows<br />
instructors to create tests from bookspecific items. It ac<strong>com</strong>modates a wide<br />
range of question types and instructors may add their own questions. Multiple<br />
versions of the test can be created and any test can be exported for use with<br />
course management systems, such as WebCT, BlackBoard, PageOut or <strong>EZ</strong><br />
<strong>Test</strong> Online.<br />
For further information on how to install and use <strong>EZ</strong> <strong>Test</strong>, please see the<br />
following pages of this guide.
System Requirements<br />
Windows<br />
Windows 2000 or better<br />
Minimum 256 MB main memory; 512 MB<br />
re<strong>com</strong>mended<br />
100 MB or better free hard disk space<br />
Microsoft Word 2000 or better<br />
Mac OS X<br />
Mac OS X 10.3.9 or better<br />
Minimum 256 MB main memory; 512 MB<br />
re<strong>com</strong>mended<br />
100 MB or better free hard disk space<br />
Microsoft Word X or better<br />
Safari 1.3 or better<br />
<strong>Start</strong>ing the Program<br />
If the CD doesn’t launch automatically:<br />
Windows<br />
1. Click on the <strong>Start</strong> button on the<br />
taskbar. Scroll down and select<br />
Run.<br />
Mac OS X<br />
1. Doubleclick on the file named<br />
<strong>Start</strong>_Here on the CD.<br />
2. Type the letter of your CDROM<br />
drive followed by :\<strong>Start</strong>_Here.exe<br />
For example, if your CDROM drive<br />
is named D, you would type<br />
D:\<strong>Start</strong>_Here.exe<br />
3. Click OK or press [Enter].<br />
2
A guide to help you quickly build your first test<br />
<strong>EZ</strong> TEST FOR WINDOWS and MACINTOSH<br />
3
1. Install and Launch <strong>EZ</strong> <strong>Test</strong> ..........................................................4<br />
2. Create Your New <strong>Test</strong> – <strong>Start</strong> to Finish .......................................7<br />
3. Edit and Author Questions ........................................................15<br />
4. <strong>EZ</strong> <strong>Test</strong> Navigation .....................................................................19<br />
5. <strong>EZ</strong> <strong>Test</strong> Help ...............................................................................21<br />
Install and Launch <strong>EZ</strong> <strong>Test</strong><br />
Install the program . . . . . . . . . . . . . . . . . . . . . . . . . . . . . . . . . . . . . . . . . . . . . . . . .<br />
1. Insert the <strong>EZ</strong> <strong>Test</strong> CD into your <strong>com</strong>puter's CD drive.<br />
Windows<br />
2. Click Windows’ <strong>Start</strong> button, and<br />
then select the Run option.<br />
3. Click Browse. Select your CD<br />
drive from the Look in dropdown<br />
list.<br />
4. Select Install<strong>EZ</strong>.exe, then click<br />
Open to begin installation.<br />
5. Follow the steps on the screen.<br />
When the installation is<br />
<strong>com</strong>pleted, the program will<br />
create a desktop icon to start<br />
the <strong>EZ</strong> <strong>Test</strong> application.<br />
2. Open the CD.<br />
Mac OS X<br />
3. Click <strong>EZ</strong> <strong>Test</strong>.pkg to begin<br />
installation.<br />
4. Follow the steps on the screen.<br />
When the installation is<br />
<strong>com</strong>pleted, the program will<br />
install <strong>EZ</strong> <strong>Test</strong> in your<br />
Applications folder.<br />
4
Install and Launch <strong>EZ</strong> <strong>Test</strong><br />
Launch the program . . . . . . . . . . . . . . . . . . . . . . . . . . . . . . . . . . . . . . . . . . . . . . . .<br />
Windows<br />
1. Click the <strong>EZ</strong> <strong>Test</strong> icon. It is<br />
located on your Desktop and<br />
labeled, <strong>Start</strong> <strong>EZ</strong> <strong>Test</strong> <strong>6.2</strong>.<br />
Mac OS X<br />
1. Click the file, <strong>Start</strong> <strong>EZ</strong> <strong>Test</strong>.<br />
It is located in the<br />
/Applications/<strong>EZ</strong> <strong>Test</strong> folder.<br />
2. Create a unique user name and password. When <strong>EZ</strong> <strong>Test</strong> opens the<br />
first time, you will need to create a user name and password.<br />
· Read the instructions on screen.<br />
· Enter OK and click Continue.<br />
· Enter your username and click Continue.<br />
· Enter your password and click Continue.<br />
· Record your user name and password in a safe place.<br />
· Enter OK and click Save & <strong>Start</strong> <strong>EZ</strong> <strong>Test</strong>.<br />
Application Control Bar<br />
When <strong>EZ</strong> <strong>Test</strong> opens, a browser and application control bar appear.<br />
· The control bar must remain<br />
open during use, but you can<br />
minimize it.<br />
· If you accidentally close your<br />
browser, use the control bar<br />
to quickly restart <strong>EZ</strong> <strong>Test</strong>.<br />
Minimize button<br />
5
Install and Launch <strong>EZ</strong> <strong>Test</strong><br />
<strong>EZ</strong> <strong>Test</strong> Resource Center . . . . . . . . . . . . . . . . . . . . . . . . . . . . . . . . . . . . . . . . . . .<br />
Once launched, the Resource Center window provides quick links to the<br />
program itself, as well as the McGraw Hill web site, help index, user manual,<br />
tutorials, and frequently asked questions.<br />
To start using <strong>EZ</strong> <strong>Test</strong>, click the <strong>EZ</strong> <strong>Test</strong> Home link.<br />
· Click on the underlined text to go directly to the resource.<br />
· You will need to download Adobe Acrobat in order to open the User<br />
Manual or FAQ’s. To do so, click on the underlined text, download.<br />
· You can minimize or close the window while you work in <strong>EZ</strong> <strong>Test</strong>.<br />
6
Create Your New <strong>Test</strong> – <strong>Start</strong> to Finish<br />
Name the test . . . . . . . . . . . . . . . . . . . . . . . . . . . . . . . . . . . . . . . . . . . . . . . . . . . . . . .<br />
1. To create a new test, click on the New <strong>Test</strong> button.<br />
2. Enter a descriptive name for your test. Click Create.<br />
Set your preferences . . . . . . . . . . . . . . . . . . . . . . . . . . . . . . . . . . . . . . . . . . . . . . .<br />
1. Choose your screen layout.<br />
Click the icon in the top<br />
navigation bar to select the<br />
layout.<br />
Horizontal icon<br />
Vertical icon<br />
You can view the source<br />
questions and your selected<br />
test questions in a horizontal<br />
(top/bottom) or vertical<br />
(side/side) layout.<br />
2. Choose your question view.<br />
Click the show full<br />
question box in the upper<br />
right to show the question<br />
with its answers, pictures,<br />
formulae, and embedded<br />
<strong>com</strong>putations.<br />
Click the box again to show only the question stem.<br />
Show full question box<br />
7
Create Your New <strong>Test</strong> – <strong>Start</strong> to Finish<br />
Select questions from a test bank . . . . . . . . . . . . . . . . . . . . . . . . . . . . . . . . . .<br />
1. Click <strong>Test</strong> Banks to view the questions supplied by the publisher.<br />
2. Click on the book title to open the test bank.<br />
3. To view the chapter questions, click the chapter title.<br />
4. To view the available questions, click the Open button next to the folder<br />
icon. The available questions for selection appear in the source frame.<br />
Source<br />
frame<br />
<strong>Test</strong><br />
frame<br />
5. To add a question, click Select next to the left of the question. The<br />
selection appears in the test frame.<br />
6. Continue adding questions until you have the number you need. Click<br />
Close to return to see other question types you may want.<br />
8
Create Your New <strong>Test</strong> – <strong>Start</strong> to Finish<br />
Organizing and editing questions . . . . . . . . . . . . . . . . . . . . . . . . . . . . . . . . . .<br />
Once you’ve added your questions, use the icons in the test frame to reorder,<br />
edit, preview, and delete test questions.<br />
Moves the question to the first position in the list.<br />
Moves the question up one position in the list.<br />
Moves the question to arbitrary position in the list.<br />
Moves the question down one position in the list.<br />
Moves the question to the last position in the list.<br />
Deletes the question from this test.<br />
Creates a copy of the test question.<br />
Previews the selected question in a new window.<br />
Edits or formats the selected question.<br />
9
Create Your New <strong>Test</strong> – <strong>Start</strong> to Finish<br />
Add instructions . . . . . . . . . . . . . . . . . . . . . . . . . . . . . . . . . . . . . . . . . . . . . . . . . . . .<br />
1. Click the Edit Instructions or <strong>Test</strong> Title icon at the top of the test frame.<br />
The <strong>Test</strong> Editing screen appears.<br />
2. Enter or edit the student instructions for the entire test in the Instructions<br />
box.<br />
3. Click Save Changes.<br />
Change the title (optional) . . . . . . . . . . . . . . . . . . . . . . . . . . . . . . . . . . . . . . . . . .<br />
1. From the <strong>Test</strong> Editing screen, edit the test name in the Title box.<br />
2. Click Save Changes.<br />
NOTE: Font changes made in the boxes on this screen apply only to the text in<br />
these boxes (and override for this text only the test’s default selection). To<br />
change the global font, go to the Publishing Options screen by clicking on the<br />
Format/Print button, and then make your selections from the dropdown list.<br />
10
Create Your New <strong>Test</strong> – <strong>Start</strong> to Finish<br />
Preview your test . . . . . . . . . . . . . . . . . . . . . . . . . . . . . . . . . . . . . . . . . . . . . . . . . . .<br />
1. Click the Format/Print button.<br />
2. The Publishing Options screen opens. Click Preview.<br />
The test and answer key open in a new window. When you are finished<br />
reviewing the test, click the Close box in the upper right.<br />
NOTE: Windows users running the Opera browser (included with <strong>EZ</strong> <strong>Test</strong> 6.1 Win)<br />
can print tests that are paginated properly from within <strong>EZ</strong> <strong>Test</strong> using the PRINT<br />
button in the Preview window.<br />
11
Create Your New <strong>Test</strong> – <strong>Start</strong> to Finish<br />
Save your test as a Word document . . . . . . . . . . . . . . . . . . . . . . . . . . . . . . .<br />
Note to Mac users: The file will automatically be downloaded to your desktop. You<br />
will not be prompted with the dialogue boxes mentioned below.<br />
1. On the Publishing Options screen, click Save as MS Word.<br />
2. Click Save.<br />
3. In the Save As dialog box, enter the file name and click Save.<br />
4. Optionally, check the box next to<br />
"add table formatting" if you want the<br />
test to be output with extra tables to<br />
indent the test numbers, questions<br />
and answers. The Word document<br />
will be more difficult to edit your due<br />
to the nested tables used when this option is selected.<br />
Save your test as a PDF document . . . . . . . . . . . . . . . . . . . . . . . . . . . . . . .<br />
1. Click Save as PDF.<br />
2. When prompted, click Save.<br />
3. In the Save As dialog box, enter the file name and click Save.<br />
12
Create Your New <strong>Test</strong> – <strong>Start</strong> to Finish<br />
Print your test . . . . . . . . . . . . . . . . . . . . . . . . . . . . . . . . . . . . . . . . . . . . . . . . . . . . . .<br />
1. First save your test.<br />
2. Open the saved test and use the <strong>com</strong>mands in the MS Word or Adobe<br />
Acrobat application to print.<br />
NOTE: Windows users running the Opera browser (included with <strong>EZ</strong> <strong>Test</strong><br />
Windows) can print tests that are paginated properly from within <strong>EZ</strong> <strong>Test</strong> using the<br />
PRINT button when viewing a Preview of the test. However, you have more control<br />
of the formatting and pagination in the saved MS Word file.<br />
The Adobe Acrobat file “locks” the formatting, so the document is ready for<br />
printing. You cannot make any changes to the formatting or pagination.<br />
Print question type labels (optional) . . . . . . . . . . . . . . . . . . . . . . . . . . . . . . .<br />
You may choose to add labels above the question types. For instance, you<br />
can print Multiple Choice Questions above that question type on the test.<br />
1. From the Publishing Options screen, click the Labels box.<br />
· To remove the labels, click the box again to remove the check.<br />
· See the User Manual for <strong>com</strong>plete instructions on using this feature.<br />
Print a condensed answer key (optional) . . . . . . . . . . . . . . . . . . . . . . . . . .<br />
You can print a shorter key with the test question number and correct answer.<br />
1. On the Publishing Options screen, click the dropdown arrow next to Key.<br />
2. Select with ONLY answers from the list.<br />
· To print the full answer key, click the dropdown arrow again and<br />
select with questions and answers. Select none if you do not want<br />
the answer key to be printed.<br />
13
Create Your New <strong>Test</strong> – <strong>Start</strong> to Finish<br />
Create multiple versions . . . . . . . . . . . . . . . . . . . . . . . . . . . . . . . . . . . . . . . . . . .<br />
These steps are performed from the Publishing Options screen.<br />
1. Select scramble question by type from the dropdown menu shown<br />
below.<br />
2. Under the Scrambled Output Order, click on the dropdown menu next<br />
to the numbered position and select the order for the question types to<br />
appear on the test.<br />
3. To scramble all the multiple choice question distractors, check the box<br />
next to scramble ALL multiple choice distractors.<br />
4. Next, select the number of versions of the scrambled test you wish to<br />
create using the Versions to create drop down select box.<br />
5. Save your test(s) as either MS Word or PDF.<br />
14
Edit and Author Questions<br />
Edit your questions . . . . . . . . . . . . . . . . . . . . . . . . . . . . . . . . . . . . . . . . . . . . . . . . .<br />
1. To edit an individual question, click the Edit question icon next to<br />
the question.<br />
NOTE: If you enter changes in the source frame, the edits are permanently applied<br />
to your source questions (i.e., your test bank or previously saved test). If you enter<br />
changes in the test frame, the edits are applied only to the selected question in this<br />
specific test.<br />
The question editing screen opens for the question type selected.<br />
2. When you have finished editing the question, click any of the active<br />
navigation buttons at the top of the screen to save your work except for<br />
the Revert button. The Revert button will undo your recent changes to<br />
revert the question to its original state.<br />
15
Edit and Author Questions<br />
Author a new question . . . . . . . . . . . . . . . . . . . . . . . . . . . . . . . . . . . . . . . . . . . . .<br />
There are two methods to create a new question. Both methods allow you to<br />
author new questions. However, one is only available while you are in the<br />
Question Editing mode. The first method is the Questions Menu Method. The<br />
second method is the Question Editing Mode Method and is only available<br />
while you are editing questions.<br />
Method 1 Questions Menu Method<br />
1. From the Questions menu, select New.<br />
The Choose New Question Type screen appears.<br />
2. Select the type of question you want to author from the menu list. The<br />
question editing screen opens for the question type selected. This new<br />
question is inserted as the last question in your test.<br />
See the User Manual for question type details.<br />
16
Edit and Author Questions<br />
Author a new question continued. . . . . . . . . . . . . . . . . . . . . . . . . . . . . . . . . .<br />
3. Complete the new question fields in the Rich Text editor. To save this<br />
question, click any of the active navigation buttons at the top of the<br />
screen except for the Revert button. The Revert button will reset the<br />
question to an empty new question.<br />
· To return to the list of questions in your test, click the List button.<br />
Method 2 Question Edit Mode Method<br />
The second method is only available while you are editing/authoring a<br />
question. This method makes it easy to add a new question without having to<br />
leave the question editing screen.<br />
1. While in the Question Edit Mode,<br />
select a question type from the New<br />
drop down list on the right side of the<br />
question editing navigation bar.<br />
2. Click New.<br />
3. The current question will be saved<br />
and a new blank question of the type<br />
you selected will appear. This new<br />
question will be inserted into the test<br />
directly after the previous question<br />
you were editing.<br />
17
Edit and Author Questions<br />
Author a new question continued. . . . . . . . . . . . . . . . . . . . . . . . . . . . . . . . . .<br />
4. Complete the new question fields in the Rich Text editor. To save this<br />
question, click any of the active navigation buttons at the top of the<br />
screen except for the Revert button. The Revert button will reset the<br />
question to an empty new question.<br />
· To return to the list of questions in your test, click the List button.<br />
· While editing a question, Method 1 Questions Menu Method of creating<br />
a new question to author will not be available. You will be prompted to<br />
use the Question Editing navigation bar method instead.<br />
18
<strong>EZ</strong> <strong>Test</strong> Navigation<br />
<strong>Test</strong>s and Questions menus . . . . . . . . . . . . . . . . . . . . . . . . . . . . . . . . . . . . . . .<br />
These menus are located on the upper left of each screen.<br />
<strong>Test</strong>s menu This menu contains test management activities.<br />
· <strong>EZ</strong> <strong>Test</strong> Home opens a page listing existing tests<br />
· New <strong>Test</strong> opens a page so you can build a new test<br />
· <strong>EZ</strong> <strong>Test</strong> Import allows you to bring someone else’s test that<br />
has been exported as a .zip file into the application so you<br />
can use it or edit it yourself. See User Manual for details<br />
· Build <strong>Test</strong> Banks bundles your tests into banks, so you can<br />
create a new test bank or add your test to an existing bank<br />
· Exit leaves the application<br />
Question menu This menu lists question creation activities.<br />
· New creates a new question (13 types)<br />
· Select adds questions from a test bank or your previously<br />
saved tests<br />
· Import brings in questions from a text file<br />
· List returns to the list of questions selected in the current test<br />
· Sort reorders the sequence of the questions<br />
· Categorize applies a category type to a question<br />
· Multimedia manages graphics, audio files and formulae<br />
allowing you to add, preview or delete<br />
· Title/Instructions opens Title/Instructions edit screen<br />
· Format/Print opens the Publishing Options screen<br />
19
<strong>EZ</strong> <strong>Test</strong> Navigation<br />
<strong>Test</strong> Management icons<br />
Use the icons on the <strong>Test</strong> Management screen to manage your saved tests.<br />
Create a .zip file that you can share with others.<br />
Delete a test permanently from the list of saved tests.<br />
Create a copy of a saved test. You can permanently apply the<br />
changes, or create a new version.<br />
Open the Publishing Options screen for the test.<br />
Edit this test to apply formatting and wording changes.<br />
Bread crumbs<br />
Some screens provide "bread crumbs" or hot links that allow you to quickly<br />
navigate between screens. This listing shows progression through screens.<br />
Each screen is separated by the > arrow.<br />
To move to any screen in the list, click<br />
on the underlined screen title.<br />
Bread crumbs<br />
20
<strong>EZ</strong> <strong>Test</strong> Help<br />
Screen sensitive help . . . . . . . . . . . . . . . . . . . . . . . . . . . . . . . . . . . . . . . . . . . . . . .<br />
To access help within <strong>EZ</strong> <strong>Test</strong>, click on the Help icon in the upper<br />
right corner of the screen.<br />
This level of help provides you with procedures to <strong>com</strong>plete the tasks on that<br />
particular screen.<br />
Field sensitive help . . . . . . . . . . . . . . . . . . . . . . . . . . . . . . . . . . . . . . . . . . . . . . . . .<br />
Hot links provide explanations to help<br />
you enter correctly the information<br />
required in the text box.<br />
If the field name is underlined in blue,<br />
click the hot link for more information.<br />
User <strong>Guide</strong> help . . . . . . . . . . . . . . . . . . . . . . . . . . . . . . . . . . . . . . . . . . . . . . . . . . . .<br />
You can access this guide from anywhere within <strong>EZ</strong> <strong>Test</strong> by clicking on the<br />
Help icon, then the Topics button.<br />
21
<strong>EZ</strong> TEST FOR WINDOWS AND MACINTOSH<br />
<strong>Quick</strong> Index<br />
Here’s a listing of directions contained in this guide.<br />
Add instructions, 10<br />
Author a new question, 16<br />
Change the title, 10<br />
Control bar, 5<br />
Create multiple versions, 14<br />
Edit your questions, 15<br />
Help, 21<br />
Icons, 20<br />
Install the program, 4<br />
Launch the program, 5<br />
Menus, 19<br />
Name the test, 7<br />
Organizing and editing questions, 9<br />
Preview your test, 11<br />
Printing, 13<br />
Resource Center, 6<br />
Save your test, 12, 14<br />
Select questions, 8<br />
Set your preferences, 7<br />
System Requirements, 2<br />
. . . . . . . . . . . . . . . . . . . . . . . . . . . . . . . . . . . . . . . . . . . . . . . . . . . . . . . . . . . . . . . . . . . . . .<br />
<strong>EZ</strong> <strong>Test</strong> for Windows and Macintosh<br />
Copyright © 2007, The McGrawHill Companies Inc. All rights reserved.<br />
Windows is a trademark of Microsoft, Inc./Macintosh is a trademark of Apple Computer, Inc.<br />
22<br />
If you are experiencing difficulties with<br />
this product, visit McGrawHill Higher<br />
Education Technical Support<br />
http://www.mhhe.<strong>com</strong>/support<br />
You can also call the Help Desk at<br />
(800) 3315094.<br />
Version 0<strong>6.2</strong>5.07


