Arduous rules - Victory Point Games
Arduous rules - Victory Point Games
Arduous rules - Victory Point Games

You also want an ePaper? Increase the reach of your titles
YUMPU automatically turns print PDFs into web optimized ePapers that Google loves.
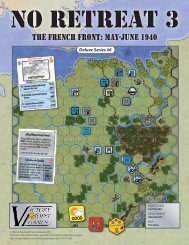
The <strong>Arduous</strong><br />
Beginning<br />
The Attack of Army Group<br />
Center: June – August, 1941<br />
Table of Contents<br />
[1.0] INTRODUCTION.......................1<br />
[2.0] GENERAL COURSE OF PLAY..1<br />
[3.0] GAME EQUIPMENT.................1<br />
[4.0] SEQUENCE OF PLAY ...............2<br />
[5.0] HOW TO WIN ..........................2<br />
[6.0] SETTING UP THE GAME .........2<br />
[7.0] ZONES OF CONTROL ..............2<br />
[8.0] STACKING ...............................3<br />
[9.0] MOVEMENT ............................3<br />
[10.0] COMBAT................................4<br />
[11.0] REINFORCEMENTS ...............6<br />
[12.0] REPLACEMENTS ...................6<br />
[12.0] GAME BALANCE ...................6<br />
[14.0] DESIGNER’S NOTES..............6<br />
[0.0] USING THESE RULES<br />
New gaming terms, when they are initially<br />
defined, appear in dark red lettering for<br />
quick referencing.<br />
The instructions for this game are organized<br />
into major “Rules” sections as shown in<br />
large green CAPS font, and represented by<br />
the number to the left of the decimal point<br />
(e.g., rule 4.0 is the fourth rule). These <strong>rules</strong><br />
generally explain the game’s components,<br />
procedures for play, the game’s core<br />
systems and mechanics, how to set it up,<br />
and how to win.<br />
With each Rule, there can be “Cases” that<br />
further explain a rule’s general concept or<br />
basic procedure. Cases might also restrict<br />
the application of a rule by denoting<br />
exceptions to it. Cases (and Subcases) are<br />
an extension of a Rule shown in the way<br />
that they are numbered. For example, Rule<br />
4.1 is the first Case of the fourth Rule; and<br />
Rule 4.1.2 is the second Subcase of the first<br />
Case of the fourth Rule.<br />
Important information is in red text.<br />
References to examples of a Rule or Case are<br />
in blue text and this font.<br />
Text in shaded boxes, like this, provides<br />
the voice of the game’s designer, who is<br />
addressing you to explain an idea or<br />
concept that is not, itself, a Rule or a Case.<br />
The <strong>Arduous</strong> Beginning Game Rules v1.0 1<br />
[1.0] INTRODUCTION<br />
Operation Barbarossa was the code name<br />
for the German Army’s surprise attack<br />
against the Soviet Union in the late spring<br />
of 1941. Although the offensive covered a<br />
broad front and was the largest military<br />
operation in history, the critical sector was<br />
in the center, where the German’s Army<br />
Group Center fought against the Soviet<br />
Western Front along the road to Moscow.<br />
The first several weeks of that struggle are<br />
the subject of The <strong>Arduous</strong> Beginning.<br />
The <strong>Arduous</strong> Beginning is played on a map<br />
of the former Soviet Union where the battle<br />
was fought. It uses playing pieces that<br />
represent the actual military units that<br />
participated in this campaign. Each player<br />
represents a General commanding an Army<br />
Group of troops (for the Germans) or a<br />
Front of Soviet Armies. The individual<br />
German ground units represent Corps (from<br />
the Latin word “Corpus,” meaning body) of<br />
approximately 25,000 soldiers. The Soviet<br />
ground units are Armies of approximately<br />
60,000 men each or Corps of half or less of<br />
that strength.<br />
[2.0] GENERAL COURSE<br />
OF PLAY<br />
The <strong>Arduous</strong> Beginning is a two-player<br />
game: one player assumes the role of the<br />
Germans (the German Wehrmacht) and the<br />
other player assumes the role of the Soviets<br />
(the Red Army). Each player moves his<br />
units and executes attacks on enemy units<br />
in turn, attempting to fulfill the game’s<br />
<strong>Victory</strong> Conditions.<br />
To move from one space to another, each<br />
unit expends a portion of its Movement<br />
Allowance. Combat is resolved through<br />
Battles by comparing the total Strength<br />
<strong>Point</strong>s of adjacent opposing units and<br />
expressing the comparison as a simplified<br />
probability ratio (“odds”). A die is rolled<br />
and the outcome indicated on the Combat<br />
Results Table (CRT) is then applied to the<br />
units involved.<br />
[3.0] GAME EQUIPMENT<br />
Parts Inventory<br />
● 1 11” x 17” map<br />
● 1 set of 40 5/8” square game pieces<br />
● 1 Player Aid mat<br />
● 1 Rules booklet<br />
Not included is one 6-sided die needed for<br />
resolving battles.<br />
[3.1] The Game Map: The map portrays<br />
the area along and to the east of the Soviet<br />
1941 frontier where the German Army<br />
made its fateful drive to destroy the Red<br />
Army and open the road to Moscow. A<br />
hexagonal grid is superimposed on the<br />
terrain features on the map. These<br />
hexagonal spaces (we call them “hexes”)<br />
define units’ positions just like the squares<br />
of a chessboard. The map also shows<br />
important terrain such as forests, cities,<br />
swamps, rivers, etc.<br />
Explanations of the various terrain features<br />
are found on the Terrain Effects Chart<br />
(TEC) on the Player Aid mat.<br />
[3.2] Game Charts & Tables: Various<br />
game aids are provided for the players in<br />
order to simplify and illustrate certain game<br />
functions. These include the Combat<br />
Results Table (CRT), the Terrain Effects<br />
Chart (TEC), and the Turn Record<br />
Track. They are explained where presented<br />
in the appropriate <strong>rules</strong> section.<br />
[3.3] The Playing Pieces: The playing<br />
pieces represent actual military units that<br />
fought in this campaign. The numbers and<br />
symbols on the playing pieces represent the<br />
strength and type of unit simulated by that<br />
particular playing piece. The playing pieces<br />
are referred to in these <strong>rules</strong> as “units.”<br />
Sample Ground Units<br />
The German player controls the German<br />
(field gray) units. The Soviet player<br />
controls the other (red/brown) units.<br />
Type<br />
(Panzer)<br />
Front<br />
Combat Strength<br />
(for both Attack<br />
and Defense)<br />
Front<br />
Type<br />
(Mechanized)<br />
“Untried” Combat<br />
Strength<br />
Unit Type Symbols<br />
Back<br />
Size<br />
(corps)<br />
ID (46 th )<br />
Movement Allowance<br />
(white print = can<br />
always move twice)<br />
Back<br />
Size<br />
(corps)<br />
Attack Defense<br />
Strength Strength<br />
ID (25 th )<br />
Infantry Soviet German<br />
Mechanized Panz<br />
er<br />
Infantry: composed primarily of Infantry<br />
divisions<br />
“Tank:” Soviet Mechanized (or “Mech”)<br />
and German Panzer: composed of<br />
primarily armored and motorized<br />
© 2009 Frank Chadwick and <strong>Victory</strong> <strong>Point</strong> <strong>Games</strong>
The <strong>Arduous</strong> Beginning Game Rules v1.0 2<br />
Infantry divisions. Collectively, these<br />
unit types are referred to as “Tank.”<br />
Unit Size Symbols<br />
XXX<br />
Corps<br />
XXXX<br />
Army<br />
Combat Strength measures a unit’s value<br />
when attacking and defending in a Battle as<br />
expressed in Strength <strong>Point</strong>s; higher<br />
numbers are stronger. Soviet Mechanized<br />
units have a separate Combat Strength that<br />
they use when attacking (an “Attack<br />
Strength”) and defending (a “Defense<br />
Strength”).<br />
Movement Allowance determines how far<br />
the unit can move at each opportunity as<br />
expressed in Movement <strong>Point</strong>s.<br />
Unit Size affects stacking (i.e., having<br />
more than one unit in a hex).<br />
Unit ID (identification) is included purely<br />
for historical interest and has no effect on<br />
game play.<br />
All ground units have two sides: most<br />
ground combat units have a full-strength<br />
(front, two-step) side and a reducedstrength<br />
(back, one-step) side (in a<br />
different shade of color for easy recognition<br />
during play) that is half the Combat<br />
Strength of its full-strength side (rounded<br />
down). Soviet Mechanized units and the<br />
Brest Garrison unit have only a reducedstrength<br />
(one-step) side.<br />
Air Support Markers<br />
The German player has markers to indicate<br />
his use of air support in attacks. These are<br />
not ground units; they are placed (not<br />
moved) and stack (temporarily) for “free.”<br />
Number of Column Shifts<br />
when supporting an attack<br />
ID (FK II)<br />
The six-sided die (H), which players must<br />
provide, is used only with the Combat<br />
Results Table to determine the result of<br />
attacks. The die has nothing to do with the<br />
movement of units.<br />
[4.0] SEQUENCE OF PLAY<br />
Game Length: There are seven Game<br />
Turns in The <strong>Arduous</strong> Beginning.<br />
Time Scale: Each Game Turn represents<br />
approximately seven or eight days.<br />
How the Turns Work: Each turn is<br />
divided into nine parts or “Phases” that are<br />
performed in the exact order listed below.<br />
All actions in one Phase must be finished<br />
before the next Phase can begin.<br />
The first four Phases comprise the German<br />
“Player Turn;” the next four comprise the<br />
Soviet Player Turn.<br />
Procedure<br />
German Player Turn<br />
1. German Build-Up Phase. The Germans<br />
receive replacements.<br />
2. German Movement Phase. All German<br />
units can move.<br />
3. German Combat Phase. All German<br />
units can attack.<br />
4. German Special Movement Phase. All<br />
German Panzer and Reserve units (only)<br />
can move again.<br />
Soviet Player Turn<br />
5. Soviet Build-Up Phase. The Soviets<br />
receive replacements and reinforcements.<br />
6. Soviet Special Movement Phase. All<br />
Soviet Mechanized and Reserve units<br />
(only) can move (and Reserve units can<br />
use Soviet Rail Movement).<br />
7. Soviet Combat Phase. All Soviet units<br />
can attack.<br />
8. Soviet Movement Phase. All Soviet<br />
units can move. Those that moved in<br />
Phase 6 can move again.<br />
Administrative<br />
9. Housekeeping Phase. Advance the<br />
Game Turn marker or, if the last turn was<br />
played, stop and determine the winner.<br />
[5.0] HOW TO WIN<br />
The German player wins by<br />
controlling all 12 city hexes on<br />
the map at the end of the Game<br />
Turn 7. The Soviet player wins<br />
if the Germans only control 10<br />
or fewer cities. If the Germans control 11<br />
cities (i.e., all but one), the game is a draw.<br />
A player “controls” a city if one of his<br />
units was the last one to pass through or<br />
occupy that hex. The Soviets control all<br />
cities at the beginning of the game.<br />
The Germans must “sweep the table” by<br />
mid-August to have a good chance of<br />
winning the war against the Soviet Union in<br />
1941. Failing this, the German offensive is<br />
likely to become bogged down, as it<br />
historically did, and continue into winter.<br />
[6.0] SETTING UP THE GAME<br />
Procedure<br />
1. Place the Game Turn marker<br />
on the 1 box of the Game Turn<br />
Track. Turn all ten Soviet<br />
Mechanized Corps to their untried side<br />
(the side with a question<br />
mark for strength) and mix<br />
them thoroughly so neither<br />
player knows their strength.<br />
2. Place full-strength Soviet armies and<br />
untried Soviet Mechanized Corps on the<br />
map (as shown there with tiny symbols):<br />
Minsk: 1 Infantry Army, 1 Mechanized<br />
Corps<br />
Baranovichi: 1 Mechanized Corps<br />
Velikie-Luki: 1 Infantry Army<br />
Gomel: 1 Infantry Army, 1 Mechanized<br />
Corps<br />
Brest: Its (3-4) Garrison Infantry<br />
Corps<br />
3. Place three (3) Soviet Infantry<br />
armies and four (4) Soviet Mechanized<br />
Corps in the seven front line hexes with<br />
red stars (), one unit per hex.<br />
Important: Armies may not be placed in<br />
hexes adjacent to another Army.<br />
4. The remaining Soviet units (four armies<br />
and three Mechanized Corps) are placed<br />
as indicated on the Game Turn Track to<br />
arrive as reinforcements (11.0).<br />
5. The German then sets up two fullstrength<br />
German units on each hex<br />
containing a black cross (!).<br />
6. The German player commences the first<br />
Game Turn with the German Combat<br />
Phase (skipping the German Build-Up<br />
and Movement Phases*). The game then<br />
proceeds according to the Sequence of<br />
Play (Rule 4.0) until the last Game Turn<br />
is completed. Note the special German<br />
First Turn Surprise Attack Rule (9.5).<br />
*Since all German units begin at full<br />
strength, and are physically placed in their<br />
starting positions, the German player needs<br />
neither Replacements nor Regular<br />
Movement on Game Turn 1.<br />
[7.0] ZONES OF CONTROL<br />
General Rule<br />
Each unit has a Zone<br />
of Control (“ZOC”)<br />
that consists of the<br />
six hexes surrounding<br />
it (see diagram),<br />
including hexes<br />
occupied by enemy<br />
units. Enemy Zones<br />
of Control have important effects on<br />
movement, combat, and replacements.<br />
[7.1] Movement Effect: A unit entering an<br />
enemy Zone of Control (“EZOC”) must<br />
immediately end its movement for that<br />
© 2009 Frank Chadwick and <strong>Victory</strong> <strong>Point</strong> <strong>Games</strong>
The <strong>Arduous</strong> Beginning Game Rules v1.0 3<br />
Movement Phase (as per Case 9.1.2). Units<br />
may freely leave EZOCs without penalty.<br />
This means that a unit can move directly<br />
from one hex in an EZOC directly into<br />
another hex in an EZOC, immediately ceasing<br />
its moving for that Movement Phase.<br />
[7.2] Combat Effect: Units that must<br />
retreat through EZOC hexes lose one step<br />
of strength (see Rule 10.0 Combat). Units<br />
forced to end their retreat in an EZOC are<br />
eliminated (see Case 10.6).<br />
[7.3] Effect on Replacements: Zones of<br />
Control also affect how a path can be traced<br />
to allow for Replacements (see Case 12.2).<br />
[8.0] STACKING<br />
General Rule<br />
More than one unit can remain in a hex.<br />
[8.1] Stacking Limit: A maximum of two<br />
friendly units can be stacked together in a<br />
hex at the end of each Phase or at the end<br />
of a Retreat (10.6).<br />
Exception: No more than one<br />
Soviet Army (reduced- or fullstrength)<br />
can be in a hex at the<br />
end of a Phase (they’re big).<br />
Thus, one Soviet Army and one Soviet<br />
Corps, or two Soviet Corps units can stack<br />
together.<br />
[8.2] Overstacking Penalty: At the end of<br />
each Phase, units found in violation of the<br />
above Stacking Limit are removed from the<br />
map by their owning player.<br />
[10.2] Stacking Effects on Combat: All<br />
units in the defending hex must be attacked<br />
together; their combat strength totaled.<br />
Important: Only one unit may attack<br />
through each hexside. That is, while more<br />
than one unit may occupy the same hex,<br />
only one can attack across each hexside.<br />
[10.3] “Stack Free” Markers: Markers<br />
(e.g., German air support) are placed in<br />
hexes for informational purposes only and<br />
thus stack (temporarily) for “free.”<br />
[9.0] MOVEMENT<br />
General Rule<br />
Units can be moved during each of their<br />
owner’s Movement Phases (i.e., Phases 2<br />
and 4 for the German Player; Phases 6 and<br />
8 for the Soviet Player). Movement works<br />
essentially the same way in each Phase.<br />
Procedure<br />
Each unit has a Movement Allowance<br />
(expressed in terms of Movement <strong>Point</strong>s)<br />
representing the distance in hexes it can<br />
move in each eligible Movement Phase,<br />
subject to Terrain Effects (as listed on the<br />
Player Aid mat).<br />
During a friendly Movement Phase, that<br />
player may move any or all of his eligible<br />
units. Units move one at a time, from hex to<br />
hex, in any direction or combination of<br />
directions desired, spending Movement<br />
<strong>Point</strong>s as they transit the map, and stopping<br />
when those Movement <strong>Point</strong>s are gone, or<br />
an EZOC is entered (7.0), or the owning<br />
player simply desires to cease moving it.<br />
Restrictions<br />
[9.1] Enemy Units: The following<br />
movement restrictions apply:<br />
[9.1.1] Enemy Units: A unit can never<br />
enter a hex containing an enemy unit.<br />
[9.1.2] EZOCs: A unit entering an<br />
Enemy Zone of Control must immediately<br />
end its movement for that Movement<br />
Phase. There is no penalty or effect for<br />
leaving an enemy Zone of Control during<br />
a Movement Phase. A unit can move<br />
directly from one EZOC to another.<br />
[9.2] Stacking: A unit can enter a hex<br />
containing other friendly units, but there<br />
can only be two friendly units in a hex at<br />
the end of each Phase. Exception: No more<br />
than one Soviet Army unit can be in a hex<br />
at the end a of Phase (they’re big; see 8.1)<br />
Special Movement<br />
[9.3] “Road” Movement: A unit moving<br />
along a rail line (i.e.,<br />
moving from one hex to<br />
an adjacent hex<br />
connected by a rail line<br />
between their adjoining<br />
hexside) pays only one<br />
Movement <strong>Point</strong> (1 MP)<br />
to enter that hex,<br />
regardless of the normal<br />
costs to enter it (see the<br />
Terrain Effects Chart).<br />
To benefit from a rail<br />
line, it must cross the<br />
hexside being moved<br />
through<br />
In effect, it is using the rail line as a road<br />
through the rough terrain.<br />
[9.4] Special Movement Phase: Not every<br />
friendly unit can move during a player’s<br />
Special Movement Phase. Friendly Infantry<br />
units in an EZOC cannot move during their<br />
Special Movement Phase.<br />
[9.4.1] Tank Units: German Panzer and<br />
Soviet Mechanized units can always<br />
move during both of their friendly<br />
Movement Phases and expend their<br />
entire Movement Allowance in each.<br />
[9.4.2] “Reserve” Infantry: A friendly<br />
Infantry unit that does not start its<br />
Special Movement Phase in an EZOC<br />
can move during that Movement Phase,<br />
but it may only expend up to half of its<br />
Movement Allowance at that time (but<br />
see Soviet Rail Movement, below).<br />
It can enter an EZOC normally.<br />
[9.4.3] Soviet Rail Movement: Soviet<br />
Infantry units that begin their Special<br />
Movement Phase on a rail line hex and<br />
not in an EZOC can use “Rail<br />
Movement.” That is, they can expend<br />
their entire Movement Allowance<br />
(instead of just half, as above), but only<br />
if their entire Special Movement Phase<br />
movement is conducted along connected<br />
rail hexes.<br />
Soviet Rail / Reserve Movement Example:<br />
A Soviet Infantry Army begins the Soviet<br />
Special Movement Phase not in an EZOC<br />
and on a rail line. It could move up to four<br />
hexes along connected rail line hexes, or<br />
could spend two Movement <strong>Point</strong>s going in<br />
any direction.<br />
[9.5] German Surprise Attack: During the<br />
German Special Movement Phase of the<br />
first Game Turn (only), German units<br />
ignore all terrain movement penalties and<br />
all EZOCs. Thus, all German Infantry units<br />
are considered Reserves and so can move<br />
up to half of their Movement Allowances on<br />
the first Game Turn.<br />
Important: The German Surprise Attack<br />
has no effect during the German Combat<br />
Phase of Game Turn 1.<br />
Movement Example: Here are some different<br />
ways that the German 13th Corps could move.<br />
The numbers in the illustration show how many<br />
Movement <strong>Point</strong>s it has spent from its<br />
Movement Allowance of four (4), which is the<br />
second number along each unit’s bottom, to<br />
enter that hex.<br />
E<br />
4<br />
3<br />
3, 4<br />
D<br />
2<br />
1<br />
3<br />
B<br />
1<br />
4<br />
C<br />
1<br />
B<br />
1 2,3<br />
4<br />
4<br />
A<br />
A<br />
© 2009 Frank Chadwick and <strong>Victory</strong> <strong>Point</strong> <strong>Games</strong>
The <strong>Arduous</strong> Beginning Game Rules v1.0 4<br />
The German 13th Corps can move southward to<br />
either hex A. Note that it pays 2 Movement<br />
<strong>Point</strong>s to enter the Swamp hex. Also note that<br />
there is no additional cost in Movement <strong>Point</strong>s<br />
to cross the river hexsides, as in some other<br />
wargames. River hexsides only affect combat,<br />
not movement in The <strong>Arduous</strong> Beginning.<br />
The German 13th Corps could also enter either<br />
hex B, but must stop immediately because it<br />
has entered the Enemy Zone of Control (EZOC)<br />
exerted by the Soviet 10th Army (Case 9.1.2).<br />
The German 13th Corps can also move to hex C<br />
and stops because it has used up its entire<br />
Movement Allowance for that Movement Phase.<br />
Note that it used Road Movement (9.3) through<br />
the Forest hexes, paying only 1 Movement <strong>Point</strong><br />
each by moving along the rail line.<br />
In moving to hex D or E, the German 13th Corps<br />
has also spent its entire Movement Allowance<br />
for that turn. Note that hex D is a forest hex, and<br />
therefore costs two Movement <strong>Point</strong>s to enter<br />
(as per the Terrain Effects Chart).<br />
[10.0] COMBAT<br />
General Rule<br />
During each Combat Phase (i.e., Phases 3<br />
and 7), all friendly units may attack<br />
adjacent enemy units. Attacking is<br />
completely voluntary; units are never<br />
compelled to attack.<br />
A “Battle” is an attack on one enemyoccupied<br />
hex by any or all of the attacking<br />
player’s units that are adjacent to that<br />
Battle Hex, the die being cast to determine<br />
its outcome.<br />
Procedure<br />
First, the attacking player (or “attacker;”<br />
i.e., the German Player during the German<br />
Combat Phase, and the Soviet during his<br />
Combat Phase) announces all his Battles –<br />
that is, he declares in advance which enemy<br />
units he will attack and which of his own<br />
(friendly) units will attack them.<br />
• Once Per Combat Phase: A single unit<br />
may only attack once per Combat Phase,<br />
and a single enemy unit may only be<br />
attacked once per Combat Phase.<br />
• Battle Commitment: Once all of a<br />
player’s Battles have been announced for<br />
that Combat Phase, the attacking player<br />
can’t change his mind; no additional<br />
Battles can be announced, nor can previously<br />
announced Battles be cancelled.<br />
The Battle Sequence<br />
Battles are resolved one at a time in any<br />
order the attacking player desires. For each<br />
Battle, the following sequence is followed:<br />
1. Total the Combat Strengths of all the<br />
attacking units in that Battle (taking<br />
Swamp terrain effects into account). If an<br />
untried Soviet Mechanized unit is<br />
attacking, it is flipped over to its revealed<br />
side at this time.<br />
2. Divide this total by the Combat Strength<br />
of the defending unit(s), if an untried<br />
Soviet Mechanized unit is defending, it is<br />
flipped over to its revealed side at this<br />
time, dropping any remainder (or<br />
“fractions”) to get one of the odds levels<br />
provided on the Combat Results Table.<br />
For Example: An attacker’s 16 total Strength<br />
<strong>Point</strong>s engage in a Battle against a defending<br />
unit with a strength of 4 – the odds are 4:1 (four<br />
to one); note that 15 attacking 4 is only 3:1.<br />
3. Determine if the combat effects of<br />
terrain and/or air power have shifted<br />
the odds column.<br />
4. Roll the die and consult the Combat<br />
Results Table; cross-index the row of<br />
the number rolled with the odds column<br />
to determine the result.<br />
5. Apply the combat result immediately.<br />
6. Advance After Combat: If there are no<br />
units remaining in the defending hex<br />
(i.e., they have been eliminated or forced<br />
to retreat), one attacking unit may<br />
immediately move into the defender’s<br />
just-vacated hex.<br />
7. Conduct the next Battle if there are<br />
others that were declared at the beginning<br />
of the Combat Phase yet to be resolved.<br />
When all previously announced Battles are<br />
resolved, that Combat Phase is over.<br />
Cases<br />
[10.1] Revealing Untried Soviet Units:<br />
Soviet Mechanized Corps have<br />
two sides: “untried” and<br />
“revealed.” They begin the game<br />
with their untried side up and<br />
neither player should know the strength of<br />
the unit until it is revealed.<br />
[10.1.1] Revelation Timing: Untried<br />
units are revealed in Step 1 of the Battle<br />
Sequence (when attacking) or Step 2<br />
(when defending).<br />
[10.1.2] 0-Strength Units: A<br />
Soviet Mechanized Corps with<br />
an Attack Strength of zero (0)<br />
can participate in an attack<br />
normally. It contributes no strength to the<br />
attack (obviously), but can still be used to<br />
take required the step loss for an AL<br />
result (10.6) and can Advance After<br />
Combat (10.7).<br />
Soviet Mechanized units had a wide variety<br />
of tank holdings, training levels, and<br />
equipment serviceability. Last-minute<br />
problems with ammunition supplies and<br />
key units away for training meant that even<br />
the Soviet High Command (STAVKA)<br />
could not accurately predict how individual<br />
Corps would perform in combat.<br />
[10.2] Stacking Effects on Combat: All<br />
units in the defending hex must be attacked<br />
together; their combat strength totaled.<br />
Important: Only one unit may attack<br />
through each hexside. That is, while more<br />
than one unit may occupy the same hex,<br />
only one can attack across each hexside.<br />
<br />
<br />
Combat Example: It is the opening German<br />
Combat Phase and, along the north end of the<br />
line, the situation is as illustrated above. The<br />
three Panzer Corps are attacking the Soviet<br />
19th Army (the 8-4), and the two German<br />
Infantry Corps (6th and 13th) cannot participate<br />
because only one unit can attack through each<br />
hexside (indicated by the symbol). The<br />
German 53rd Infantry Corps, however, has<br />
another hexside available to attack through, so<br />
an attack is declared for it against the untried<br />
Soviet Mechanized Corps.<br />
[10.3] Long Odds: After Step 2, above, if<br />
the odds are above 6:1, reduce them to 6:1.<br />
After Step 3, above, if the odds are below<br />
1:1, that attack has no effect on either side.<br />
[10.4] Terrain Effects on Combat: As<br />
shown on the Terrain Effects Chart on the<br />
Player Aid sheet:<br />
• If the defending hex is a Forest, Swamp,<br />
or Fortified hex, reduce the odds by one<br />
column, abbreviated “1” (e.g., a 4:1<br />
attack becomes a 3:1, a 3:1 attack<br />
becomes 2:1, and so on).<br />
• If every attacking unit in a Battle is<br />
across a river from the defending hex,<br />
reduce the odds by one level (1).<br />
• If both the above conditions apply,<br />
reduce the odds by a total of two levels<br />
(2).<br />
• If the defender hex is a Swamp, the<br />
Combat Strengths of all attacking Tank<br />
units (i.e., Panzer and Mechanized) are<br />
© 2009 Frank Chadwick and <strong>Victory</strong> <strong>Point</strong> <strong>Games</strong>
The <strong>Arduous</strong> Beginning Game Rules v1.0 5<br />
halved, retaining fractions (e.g., a 3-<br />
strength unit attacks with a strength of<br />
1.5). This is in addition to the odds<br />
column shift!<br />
[10.5] Air Support: After determining<br />
terrain effects, the attacker may commit a<br />
maximum of one Air Support marker to<br />
that Battle. Place that Air Support marker<br />
on top of the defending hex.<br />
The Air Support marker shifts<br />
the odds column to the right as<br />
indicated on it.<br />
Each Air Support marker can be used only<br />
once per turn and only when attacking.<br />
Combat Example Continued: The Germans<br />
decide to attack the Soviet Mech Corps first,<br />
then the Army, as per the previous illustration.<br />
Versus the Mech Corps, during Step 1 the<br />
strength of the attacking German 53rd Infantry<br />
Corps is 6.<br />
In Step 2, the Mech Corps is<br />
revealed to be the 7th Mech Corps, a<br />
4-2-6 unit. Thus, its Defense Strength<br />
is 2. Dividing 2 into the attack’s<br />
strength of 6 becomes a 3:1 odds attack.<br />
In Step 3, terrain effects are checked, and the<br />
odds column would normally be reduced once<br />
(1) because the attacking unit is across a river<br />
hexside. Thus, the new (reduced) odds column<br />
for this battle is 2:1. Not satisfied with that, the<br />
German Player commits his FK II<br />
(2nd Fliegerkorps) to raise the odds<br />
back up to 3:1. He then rolls the die<br />
and applies the result.<br />
[10.6] Combat Results Explanation:<br />
These outcomes can occur during Step 4 of<br />
a Battle as shown on the Combat Results<br />
Table:<br />
NE (No Effect): Nothing happens.<br />
DR (Defender Retreat): The defending<br />
unit is retreated (i.e., moved) two hexes by<br />
the attacking player as follows:<br />
• Two Hexes: The unit must end up two<br />
hexes away from the defending hex (i.e.,<br />
it cannot zigzag; each hex of retreat must<br />
take that unit a hex further from the<br />
defending hex).<br />
• Avoid EZOCs: If possible, the unit must<br />
avoid entering an Enemy Zone of Control<br />
at any time during a retreat.<br />
• Unavoidable EZOCs: If the unit must<br />
retreat into or through a hex or hexes in<br />
an EZOC, it loses one step. If it is forced<br />
to end its retreat in an EZOC, it is<br />
eliminated.<br />
• Overstacking: The unit also must end its<br />
retreat in a hex that is not in violation of<br />
the stacking limit. If there is no other<br />
retreat choice except to create an<br />
overstacking situation, then the unit must<br />
retreat an additional hex (or hexes)<br />
further until a hex that is not in violation<br />
of the stacking limit (9.2) is reached.<br />
• No Enemy Units: The unit may never<br />
retreat into an enemy-occupied hex.<br />
• Or Else: If there is no retreat path which<br />
satisfies all of these conditions, the unit is<br />
eliminated instead.<br />
DRL (Defender Retreat and Loss): The<br />
defending unit must first take a step loss;<br />
then, if it survives, it must retreat as described<br />
for a DR result (above).<br />
• If a full-strength unit takes a loss, flip it<br />
over to its half-strength side.<br />
• If a half-strength unit takes a loss, it is<br />
eliminated (i.e., removed from the map).<br />
DE (Defender Eliminated): The defending<br />
unit is entirely eliminated whether it is<br />
currently at full-strength or half-strength.<br />
EX (Exchange): First, the defending unit<br />
takes a step loss as described in a DRL.<br />
Then the attacking player must lose at least<br />
the same amount of Attack Strength<br />
<strong>Point</strong>s (these are calculated at full strength<br />
even if the defending hex was a Swamp)<br />
from among the attacking units at that<br />
Battle as the defender just lost in Defense<br />
Strength <strong>Point</strong>s.<br />
• In both cases, if a full-strength unit is<br />
reduced to half-strength, the amount of<br />
the loss is computed as the original<br />
strength minus the reduced Strength.<br />
For Example: a full-strength German panzer<br />
unit with 9 Strength <strong>Point</strong>s takes a loss; it is<br />
flipped to its Reduced-Strength, 4-point side.<br />
That loss is measured as 5 Strength <strong>Point</strong>s.<br />
Finally, if the defending unit survived, it<br />
must retreat as per a DR result.<br />
• Note that if the defending unit is<br />
eliminated because it is unable to retreat,<br />
the attacker does not have to match that<br />
additional enemy strength loss.<br />
AL (Attacker Loss): One attacking unit (of<br />
the attacker’s choice) takes a step loss, as<br />
described in the DRL result (this can be a<br />
0-strength Soviet Mech Corps that was<br />
included in the attack). That unit does not<br />
retreat, however; no attacking units ever<br />
retreat in The <strong>Arduous</strong> Beginning.<br />
[10.7] Advance After Combat: If there are<br />
no units remaining in the defending hex<br />
(i.e., they have been eliminated or forced to<br />
retreat), one attacking unit may<br />
immediately move into the defender’s justvacated<br />
hex. This is not “movement” per se<br />
and expends no Movement <strong>Point</strong>s nor<br />
follows the normal <strong>rules</strong> of Movement (9.0).<br />
Combat Example Continued: During Step 4,<br />
the German Player rolls the die and the result is<br />
a % for an “Exchange.”<br />
In Step 5, the Soviet Mech Corps takes a step<br />
loss (eliminating it), and the attacking German<br />
unit must then eliminate at least two Strength<br />
<strong>Point</strong>s (to equal the two Defense Strength<br />
<strong>Point</strong>s just lost by the defender). He flips the<br />
53rd Infantry Corps over to its reduced (3-4)<br />
side and, having lost three Strength <strong>Point</strong>s, the<br />
German Player’s exchange obligation is fulfilled.<br />
During Step 6, the reduced 53rd Infantry Corps<br />
exercises its option to Advance After Combat<br />
(10.7) and enters the defender’s vacated hex.<br />
This unit’s new position places a threatening<br />
ZOC over the still-to-be-attacked Soviet 19th<br />
Army!<br />
Figure 1 shows the<br />
resolution of the first<br />
attack.<br />
Figure 2 shows the<br />
resolution of the<br />
second attack.<br />
The second attack versus the Soviet 19th Army<br />
commences with Step 1 where the Germans<br />
calculate their Attack Strength at 27 (10 + 9 + 8).<br />
In Step 2 the defender’s strength of 8 is divided<br />
into the attacker’s 27 for a ratio of about 3.45:1<br />
which rounds down to the 3:1 odds column.<br />
In Step 3 it is noted that the odds are reduced<br />
due to the Forest (1), dropping to a 2:1 attack.<br />
The German Player does not commit his last Air<br />
Support unit to this battle.<br />
This is rolled for in Step 4 with a result of @, so<br />
the outcome is a DR.<br />
In Step 5, the German Player retreats the Soviet<br />
unit, but since the first hex it must retreat<br />
through is in an EZOC (being exerted by the<br />
previously advanced German 53rd Infantry<br />
Corps), the Soviet unit is reduced in the<br />
process.<br />
For the second hex of the retreat, the German<br />
Player must choose the hex not in an EZOC (to<br />
the northeast) in preference to the one in an<br />
EZOC (to the southeast, also next to the<br />
German 53rd Corps). Had the southeast hex<br />
been the only retreat hex available, the<br />
retreating Soviet unit would have ended up in an<br />
EZOC and been eliminated!<br />
In Step 6 the German Player decides to<br />
advance the 47th Panzer Corps (9-6) into the<br />
defender’s just-vacated hex.<br />
© 2009 Frank Chadwick and <strong>Victory</strong> <strong>Point</strong> <strong>Games</strong>
The <strong>Arduous</strong> Beginning Game Rules v1.0 6<br />
[11.0] REINFORCEMENTS Replacing a full-strength, two-step unit<br />
from one already eliminated would take two<br />
General Rule<br />
turns (and two total replacement steps; one<br />
received on each of those turns).<br />
Only the Soviet player receives<br />
reinforcements. Soviet Reinforcements<br />
appear on the first three turns of the game<br />
as indicated in the Setup Rule (6.0 #2) and<br />
on the Game Turn Track.<br />
Reinforcement Schedule<br />
Game Turn 1: Two, full-strength Infantry<br />
Armies plus two Mechanized Corps.<br />
Game Turn 2: One full-strength Infantry<br />
Army and one Mechanized Corps.<br />
Game Turn 3: One Infantry Army.<br />
Placement of Reinforcements<br />
These are placed in any hex along the east<br />
(red-bordered) map edge that is not<br />
occupied by German unit, is not in an<br />
EZOC, nor creates an overstacking<br />
situation (9.2).<br />
[12.0] REPLACEMENTS<br />
General Rule<br />
Beginning after the first few Game<br />
Turns, both players receive<br />
Replacements on their respective<br />
Player Turns (i.e., during Phases 1<br />
and 5). The number of<br />
Replacement Steps received each turn is<br />
listed on the Game Turn Record Track.<br />
Each Replacement Step allows that player<br />
to:<br />
1. Place a reduced-strength unit on the map<br />
(i.e., returning one to the map that was<br />
previously eliminated). Soviet Mech<br />
Corps units remain ‘known’ (i.e., with<br />
their ‘tried’ sides face-up) when removed<br />
from the map and can be selected as<br />
Replacements at the Soviet Player’s<br />
discretion, with these exceptions:<br />
Only one Soviet Mechanized Corps<br />
unit per turn can be replaced in this<br />
manner.<br />
The Soviet 6th Mechanized<br />
Corps (with the red colored<br />
symbol box) can never be<br />
replaced once destroyed.<br />
–OR –<br />
2. Flip a reduced-strength unit that is<br />
currently on the map over to its fullstrength<br />
side.<br />
[12.1] One Step at a Time: You cannot<br />
use two replacements during the same<br />
friendly Build-Up Phase to return an<br />
eliminated unit to the map as a newly<br />
rebuilt, full-strength unit.<br />
[12.2] Where Soviet Replacements Can<br />
Appear: Soviet Replacement units being<br />
brought in from off the map are placed in:<br />
Any hex along the east (red-bordered)<br />
map edge that is not occupied by a<br />
German unit, is not in an EZOC, nor<br />
creates an overstacking situation (8.0)<br />
– OR – In any friendly controlled city<br />
that is in communication with the east<br />
edge, is not in an EZOC, nor creates an<br />
overstacking situation (8.0).<br />
On-map, reduced-strength Soviet units, in<br />
order to be restored to full-strength via a<br />
Replacement Step, need only be in<br />
communication with the east edge.<br />
[12.3] Where German Replacements<br />
Appear: Replacements and communications<br />
work similarly for the Germans,<br />
except that they use and trace to the west<br />
(black border) edge of the map.<br />
[12.4] Use ‘Em or Lose ‘Em: If a replacement<br />
step is not used, it cannot be saved for<br />
later turns. It is permanently lost.<br />
Definitions<br />
“Friendly Controlled” Defined: Friendly<br />
controlled means that your units were the<br />
last ones to have entered that city.<br />
All cities are owned by the Soviets at the<br />
beginning of the game.<br />
“In Communication” Defined: In<br />
communication, for the Soviets, means<br />
being able to trace a path from the hex in<br />
question of any length to the east edge of<br />
the map. Excluding the origin hex, this path<br />
cannot enter a hex containing an enemy<br />
unit or an Enemy Zone of Control.<br />
Note that, unlike in some other wargames,<br />
friendly units do not negate the effects of<br />
enemy Zones of Control for any reason.<br />
[13.0] GAME BALANCE<br />
If a handicap is needed for players of<br />
unequal experience, change the <strong>rules</strong> as<br />
follows:<br />
Adjust the number of cities on the map that<br />
the Germans must control at the end of the<br />
last Game Turn by one. Thus, to help the<br />
Soviet Player, make the Germans sweep the<br />
board and capture every city; to help the<br />
Germans, they only need 10 cities (and 9<br />
would be a tie).<br />
To benefit the Soviets, do not give the<br />
Germans any replacements, or do not allow<br />
the German player to use replacements to<br />
rebuild Panzer units.<br />
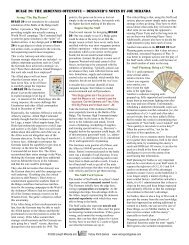
[14.0] DESIGNER’S NOTES<br />
Both the title of this game and its subject<br />
matter were suggested by Marshal A. I.<br />
Yeryomenko’s memoir of the same<br />
name, and which covers this critical<br />
opening period on the Soviet Western<br />
Front. It was a terrible and yet fascinating<br />
span of history, and one that changed the<br />
world profoundly.<br />
Although historians would later point to<br />
battles such as Moscow, Stalingrad, and<br />
Kursk as “turning points” of the war in<br />
the East, the mot important turning point<br />
occurred in July of 1941. Without the<br />
seeming miracle of that month, there<br />
would never have been an opportunity for<br />
those other battles.<br />
The interesting thing is that you can look<br />
and look in history books and never find<br />
July of 1941 listed as any sort of turning<br />
point. Throughout that month, German<br />
tanks continued to drive east, more<br />
Byelorussian cities fell, and the dusty<br />
brown lines of prisoners marching west<br />
grew ever longer.<br />
But in every blitzkrieg campaign before,<br />
this was the point at which the enemy<br />
gave way to confusion and despair. This<br />
was the point at which the retreating<br />
enemy began to give up.<br />
But as July passed, and then turned to<br />
August, the retreating Soviet divisions<br />
did not give up. Grudging retreat gave<br />
way to improvised defense, and then<br />
uncoordinated counterattacks, and then a<br />
series punishing attacks of increasing<br />
violence near and south of Smolensk.<br />
Six weeks of blitzkrieg had been enough<br />
to finish off every other army the<br />
Germans had taken on. The Red Army,<br />
however, was just getting started.<br />
Has there ever been a more dramatic<br />
subject for a game? I can’t think of one.<br />
– Frank Chadwick<br />
GAME CREDITS<br />
Game Design: Frank Chadwick<br />
Rules and Development: Alan Emrich<br />
Art and Graphics: Alan Emrich<br />
Playtesting: Terence Co, David Deitch, Lance<br />
McMillan, Kim Meints, Michael O’Brien, Carl<br />
Paradis<br />
Proofreading: Bill Barrett, Leigh Toms<br />
© 2009 Frank Chadwick and<br />
<strong>Victory</strong> <strong>Point</strong> <strong>Games</strong>