Untitled - Victory Point Games
Untitled - Victory Point Games
Untitled - Victory Point Games

Create successful ePaper yourself
Turn your PDF publications into a flip-book with our unique Google optimized e-Paper software.
Solitaire<br />
Gameplay!<br />
2nd Edition<br />
"Each time I end a<br />
session, I can't wait<br />
to play again. On<br />
top of that, I am<br />
also nervous over<br />
playing it again.<br />
Terrific game!"<br />
- Everett Hathaway<br />
(Board Game Geek)<br />
Now Available!
The Last King of Scotland Standard Game Rules v1.0 1<br />
The African Wars<br />
Standard Game rules<br />
TABLE OF CONTENTS<br />
[0.0] USING THESE RULES ........................ 1<br />
[1.0] INTRODUCTION ................................. 1<br />
[2.0] GAME EQUIPMENT ........................... 1<br />
[3.0] SETTING UP THE GAME .................... 2<br />
[4.0] SEQUENCE OF PLAY .......................... 2<br />
[5.0] INITIATIVE PHASE ............................ 3<br />
[6.0] SUPPLY STEP .................................... 3<br />
[7.0] MOVEMENT STEP ............................. 3<br />
[8.0] ZONES OF CONTROL ......................... 4<br />
[9.0] COMBAT STEP .................................. 5<br />
[10.0] SPECIAL UNIT TYPES ...................... 7<br />
[11.0] HOW TO WIN .................................. 7<br />
[12.0] VARIANT RULES ............................. 7<br />
EXCLUSIVE RULES .............. 8<br />
[0.0] USING THESE RULES<br />
Every game in The African Wars Series<br />
shares these Standard Game Rules. Each game<br />
in the Series also has its own “Exclusive” Rules.<br />
When there is a conflict, the Exclusive Rules<br />
supersede the Standard Rules.<br />
New gaming terms, when initially defined,<br />
appear in dark red lettering for quick<br />
referencing.<br />
The instructions for this game are organized into<br />
major “Rules” sections as shown in large green<br />
CAPS font, and represented by the number to the<br />
left of the decimal point (e.g., Rule 4.0 is the<br />
fourth Rule). These Rules generally explain the<br />
game’s subject matter, its components, the<br />
procedures for play, the game’s core systems,<br />
how to set it up, and how to win.<br />
With each Rule, there can be “Cases” that<br />
further explain a Rule’s general concept or basic<br />
procedure. Cases might also restrict the<br />
application of a Rule by denoting exceptions to<br />
it. Cases (and Subcases) are an extension of a<br />
Rule shown in the way that they are numbered.<br />
For example, Rule 4.1 is the first Case of the<br />
fourth Rule; and Rule 4.1.2 is the second<br />
Subcase of the first Case of the fourth Rule.<br />
Important information is in red text.<br />
References to examples of a Rule or Case are in<br />
blue text and this font.<br />
Text in shaded boxes, like this, provides the<br />
voice of the game’s designer, who is addressing<br />
you to explain an idea or concept that is not,<br />
itself, a Rule or a Case.<br />
[1.0] INTRODUCTION<br />
The modern wars in Africa provide a rich<br />
arena of different and unique gaming<br />
situations beyond WWII in North Africa<br />
(where most wargames have concentrated<br />
their examination of wars in Africa). Some<br />
of these wars were short affairs of a few<br />
months, while others raged for twenty years<br />
or more. Each of these modern African<br />
wars shaped the political and military<br />
future of the continent and they are still<br />
finding their way into today’s headlines.<br />
The African Wars Series provides a<br />
means for understanding these wars that<br />
shaped modern Africa and current world<br />
opinion.<br />
[2.0] GAME EQUIPMENT<br />
The Game Map: The game features a map<br />
showing where the campaign took place.<br />
Superimposed on it is a hexagonal grid to<br />
regulate the placement and movement of<br />
the pieces. Each hex or hexside contains a<br />
certain type of terrain, with various effects<br />
on movement and/or combat as listed on<br />
the game’s Terrain Effects Chart.<br />
Game Scale: Each game in the Series has<br />
its own scales for measuring time, distance<br />
(per hex) and unit aggregation (how many<br />
of what troop types each piece represents)<br />
as stated in the Exclusive Rules section.<br />
The Playing Pieces: The square cardboard<br />
game pieces represent the military<br />
formations that participated. These pieces<br />
are called “units.” The information on the<br />
units is read as shown below:<br />
Combat<br />
Strength<br />
(red =<br />
Heavy<br />
Weapons)<br />
Name Icon<br />
Movement Allowance (red = Special)<br />
Attack<br />
Strength<br />
Defense<br />
Strength<br />
© 2013 Dennis Bishop and <strong>Victory</strong> <strong>Point</strong> <strong>Games</strong>
2 The African Wars Standard Game Rules v1.0<br />
Combat Strength is the relative strength of<br />
a unit when engaging in combat. Some<br />
units have two strengths: the first number is<br />
that unit’s Attack Strength (a 0 value<br />
means that unit cannot attack) and the<br />
second number is that unit’s Defense<br />
Strength. A black number denotes standard<br />
Infantry Weapons (IF), while a red<br />
number denotes Heavy Weapons (HW).<br />
Movement Allowance is the number of<br />
Movement <strong>Point</strong>s that unit can spend to<br />
move in a single Movement Step. A black<br />
number denotes infantry (foot) movement<br />
capability, while a red number denotes<br />
special (Motorized, Armored Infantry,<br />
Armor, or certain types of artillery)<br />
movement capability. These movement<br />
capabilities treat terrain types differently, as<br />
described on the Terrain Effects Chart.<br />
Unit Type designates the dominant troop<br />
type in that formation, as shown by its unit<br />
icon and name. These include Infantry,<br />
Armor, Armored Infantry, Motorized<br />
Infantry, Guerrillas, Camel and Cavalry,<br />
Artillery, Engineer, Air units, etc.<br />
Markers: Certain pieces are not fighting<br />
units, but markers that show the status of<br />
units and denote other important game<br />
information. Some sample markers are<br />
shown below:<br />
Game Charts, Tables, and Tracks: These<br />
are found on the map or the back of this<br />
rules book on the Player Aid:<br />
● The Game Turn Record Track<br />
indicates the current Game Turn.<br />
● The Sequence of Play outlines the<br />
Phases and Steps conducted during each<br />
Player’s turn.<br />
● The Terrain Effects Chart provides<br />
information about the effects of terrain<br />
on movement and combat.<br />
Dice: The game uses six-sided dice to<br />
represent the randomness that affects all<br />
warfare.<br />
[3.0] SETTING UP THE GAME<br />
The players determine which side they will<br />
play. This game’s Exclusive Rules provide<br />
the rest of its set up instructions (see pg.8).<br />
[4.0] SEQUENCE OF PLAY<br />
The game is played over a number of<br />
Game Turns defined in this game’s<br />
Exclusive Rules (see pg.8), each of which<br />
is composed of two Player Phases. During<br />
each Game Turn, the players alternate<br />
maneuvering their units and resolving<br />
combat in the sequence outlined below.<br />
At the conclusion of the last Game Turn,<br />
consult the End Game <strong>Victory</strong> Conditions<br />
(11.2) and determine the winner.<br />
The Game Turn<br />
A Game Turn is divided into an Initiative<br />
Phase, followed by two Player Activation<br />
Phases, according to this sequence:<br />
The Sequence of Play<br />
1. Initiative Determination Phase: Each<br />
player rolls one die to determine<br />
Initiative (5.0) for the player order.<br />
2. First Player Activation Phase:<br />
A. Supply Step: The First Player notes<br />
the Supply status of each of their<br />
units (6.0).<br />
B. Movement Step: The First Player<br />
places any Reinforcements (7.5) and<br />
may then move their units (7.0).<br />
C. Combat Step: The First Player may<br />
attack with their units (9.0).<br />
3. Second Player Activation Phase:<br />
The Second Player conducts Steps A, B<br />
and C, just as the First Player did,<br />
but with their own units.<br />
4. Housekeeping: After both<br />
players have completed their<br />
Activation Phases, that Game<br />
Turn is over. Advance the<br />
Systems Development by Bryan Armor with Alan Emrich
The Last King of Scotland Standard Game Rules v1.0 3<br />
Game Turn marker one space on the<br />
Game Turn Track. If the last Game Turn<br />
was just completed, check this game’s<br />
Exclusive Rules to determine the winner.<br />
[5.0] INITIATIVE PHASE<br />
Procedure<br />
During the Initiative Determination Phase,<br />
each Player rolls one die (shown as “z”).<br />
If there is a tie, reroll until it is broken.<br />
The Player with the highest die roll chooses<br />
who receives the Initiative (i.e., goes first)<br />
for that turn. The Player with the<br />
Initiative is the First Player and conducts<br />
their Activation Phase first.<br />
[6.0] SUPPLY STEP<br />
General Rule<br />
To perform at their maximum capability,<br />
combat units must be in supply. Each<br />
player traces supply for their units (only) as<br />
the first Step of their Activation Phase.<br />
[6.1] Line of Supply: A unit is in supply<br />
when it is on, or within one (1) hex of (i.e.,<br />
adjacent to), a supply source or a road hex<br />
leading to a supply source.<br />
If tracing supply along a road, that road<br />
must connect the friendly supply source to<br />
the tracing unit, uninterrupted by enemy<br />
units or their Zones of Control unless<br />
friendly units occupy those hexes (see 8.0).<br />
This path of connected road hexes is called<br />
a Line of Supply (LOS) and it is traced<br />
from the friendly supply source forward to<br />
the unit.<br />
[6.2] Supply Sources: Each side’s friendly<br />
supply sources are listed in this game’s<br />
Exclusive Rules.<br />
[6.3] Guerrilla Supply: Guerrilla units<br />
are automatically in supply.<br />
[6.4] In Supply Effects: Supplied units<br />
move and fight at their full values.<br />
[6.5] Out of Supply Effects:<br />
Indicate units that cannot trace a<br />
valid Line of Supply by placing<br />
an Out of Supply (OOS) marker<br />
on them. Every unsupplied unit suffers the<br />
following adverse effects:<br />
Its Movement Allowance is halved,<br />
rounded up (7.0).<br />
It cannot voluntarily enter an Enemy<br />
Zone of Control (8.0).<br />
It cannot participate in an attack (9.0).<br />
Its Defense Strength is reduced by one<br />
(i.e., it rolls one fewer die).<br />
Its Zone of Control (8.0) does not block<br />
enemy Lines of Supply, but its physical<br />
presence in a hex still does.<br />
[7.0] MOVEMENT STEP<br />
General Rule<br />
Each unit has a Movement Allowance<br />
(MA) printed on its counter in the lowerright<br />
corner, in either black text (a “leg”<br />
unit) or red text (a special unit). During<br />
your Movement Step, all of your supplied<br />
units can move up to their printed MA.<br />
Your unsupplied units (6.0) can only move<br />
up to half of their MA, rounded up.<br />
Procedure<br />
A unit expends Movement <strong>Point</strong>s (MPs)<br />
from its Movement Allowance for each hex<br />
it enters, per the cost listed on the game’s<br />
Terrain Effects Chart. As a unit moves, it<br />
traces a path, in any direction or combination<br />
of directions, of contiguous hexes<br />
through the map’s hex grid, paying the MP<br />
cost for each hex entered or hexside<br />
crossed. Units pay the Road cost if they are<br />
entering that hex from a hex containing a<br />
connecting Road hex; otherwise, they pay<br />
the cost of the other terrain in the hex.<br />
Restrictions and Prohibitions<br />
[7.1] Terrain Limitations: Units with a<br />
red MA (i.e., Motorized, Mechanized<br />
Infantry, certain Artillery units, and Tank<br />
units) cannot enter Marsh or Forest hexes<br />
unless they do so by using a Road.<br />
Infantry units can cross a non-bridged<br />
River hexside (bridges exist wherever a<br />
Road crosses a River hexside), but only<br />
© 2013 Dennis Bishop and <strong>Victory</strong> <strong>Point</strong> <strong>Games</strong>
4 The African Wars Standard Game Rules v1.0<br />
when stacked with an Engineer<br />
unit. Note that the Engineer unit<br />
needn’t cross that River hexside<br />
itself to allow infantry units<br />
stacked with it to cross. Engineer units can<br />
freely cross River hexsides themselves.<br />
[7.2] Movement <strong>Point</strong> Requirement:<br />
Each unit can expend all, some or none of<br />
its MPs each turn. Unused MPs cannot be<br />
accumulated from turn to turn, nor<br />
transferred from unit to unit.<br />
Units without enough MPs to enter a hex<br />
and/or cross a hexside cannot do so, even if<br />
that means such units cannot move at all<br />
during that Movement Step.<br />
[7.3] Sequential Movement: Each unit, or<br />
stack of units, moves separately, and one<br />
unit’s/stack’s movement must be completed<br />
before the next ones can begin.<br />
[7.4] Stacking: A unit can remain<br />
“stacked” with other friendly units, within<br />
the following limitations:<br />
Friendly units cannot enter a hex<br />
containing an enemy unit, nor can<br />
friendly and enemy units stack together.<br />
No more than three friendly units can be<br />
stacked in any hex at the end of a unit’s<br />
movement.<br />
Air units “stack free” and do not count<br />
against the stacking limit. Any number of<br />
friendly Air units can exist in a hex.<br />
The presence of a Road does not affect<br />
the stacking limit in that hex.<br />
Overstacking: When a hex is overstacked<br />
following a retreat from combat (permitted<br />
only under certain Exclusive Rules), their<br />
owner must immediately eliminate units<br />
from that hex sufficient to bring it back<br />
within the stacking limit. If, at the end of a<br />
Player Turn, you discover units to be in<br />
violation of the stacking limit, their owner<br />
must immediately Retreat any units<br />
necessary out of their overstacked hex to an<br />
adjacent safe hex (see 8.4) to satisfy the<br />
stacking requirement.<br />
[7.5] Reinforcements: Reinforcements for<br />
each player are available on the game turn<br />
noted on the back of their counters. They<br />
are placed on their entry hex for free at the<br />
beginning of their owner’s Movement Step<br />
for that turn and conduct movement and<br />
combat as other units on the map do.<br />
[7.5.1] Reinforcement Supply: Newly<br />
arrived reinforcements are In Supply<br />
(6.0) on the turn they arrive. After that<br />
turn, they determine their supply status<br />
normally.<br />
[7.5.2] Blocking Reinforcements: You<br />
can place reinforcement units on the map<br />
in an EZOC, but the presence of an<br />
enemy unit in their entry hex prevents<br />
the placement of those reinforcements.<br />
If an alternative entry hex is not<br />
available, those blocked reinforcement<br />
units are delayed until a future turn when<br />
a valid entry hex for them is available.<br />
[7.5.3] No Voluntary Delay: Reinforcements<br />
cannot be delayed voluntarily.<br />
[8.0] ZONES OF CONTROL<br />
General Rules<br />
Only supplied ground units with a red<br />
Combat Strength<br />
(Heavy Weapons)<br />
and/or a red<br />
Movement Allowance<br />
(Special) exert a Zone<br />
of Control (ZOC)<br />
into the six hexes<br />
adjacent to the hex<br />
they occupy. Units without a red value do<br />
not exert a ZOC. A ZOC represents that<br />
unit’s influence outside of its immediate<br />
area through firepower and/or maneuverability.<br />
ZOCs do not extend across or into<br />
impassable hexsides or hexes. Thus red<br />
Strength units do not exert their ZOC into<br />
non-road connected Marsh or Forest<br />
hexes.<br />
Reminder: Air, Infantry and unsupplied<br />
units never exert a Zone of Control.<br />
Systems Development by Bryan Armor with Alan Emrich
The Last King of Scotland Standard Game Rules v1.0 5<br />
Cases<br />
[8.1] Stop: Units that enter an Enemy Zone<br />
of Control (EZOC) must immediately cease<br />
their movement, regardless of how many<br />
Movement <strong>Point</strong>s they might have remaining.<br />
The ZOCs of friendly units do not affect the<br />
movement of other friendly units.<br />
A friendly unit can exit an EZOC if it<br />
started its movement in that EZOC and it<br />
does not move from that hex directly into<br />
another hex in an EZOC. You cannot move<br />
your units directly from one hex in an<br />
EZOC into another; they must move into a<br />
hex not in an EZOC first, before entering a<br />
new hex in an EZOC.<br />
Units can always exit EZOCs when<br />
instructed by Combat Results (9.0).<br />
[8.2] Blocking Supply: EZOCs block<br />
friendly Lines of Supply (6.1). However,<br />
for the purposes of tracing a Line of<br />
Supply, an EZOC is negated if there is a<br />
friendly unit in that hex. That is, friendly<br />
units negate EZOCs for the purposes of<br />
tracing Lines of Supply.<br />
[8.3] Attacking: During your Combat<br />
Step, your units in EZOCs are not required<br />
to attack. Further, if any of your units<br />
attack, they are not obligated to attack all<br />
enemy units exerting an EZOC upon them.<br />
[8.4] Retreating: A unit cannot retreat into<br />
an EZOC. If forced to do so, it is eliminated<br />
instead. The presence of a friendly unit<br />
in the hex being retreated into does negate<br />
that EZOC for purposes of retreating.<br />
Note that the stacking restrictions apply<br />
immediately after retreats (see 7.4).<br />
[8.5] Placement: Placing Reinforcement<br />
units is unaffected by EZOCs (see 7.5.2)<br />
[9.0] COMBAT STEP<br />
General Rule<br />
During your Movement Step, your units<br />
that are adjacent to enemy units may<br />
initiate attacks. Attacking is completely<br />
voluntary; an attacking unit can attack any<br />
or all adjacent hexes containing enemy<br />
units at the attacking player’s discretion.<br />
When a unit attacks multiple hexes, that is<br />
considered a single Battle and resolved<br />
with one roll of the dice.<br />
Standing Together: When attacked, all<br />
defending units in a hex are attacked<br />
together using their combined strength.<br />
Fatigue: No unit can attack more than<br />
once per Combat Step (exception: via<br />
Momentum Attacks, see 9.7), and no<br />
defending unit (or hex) can be attacked<br />
more than once per Combat Step (except<br />
for a Momentum Attack, again see 9.7).<br />
The Battle Sequence<br />
For each Battle between units, perform<br />
these Steps in their exact order:<br />
A. The Attacker indicates which units are<br />
attacking and which adjacent defending<br />
hex(es) is (are) being attacked (9.1).<br />
B. The Attacker can conduct Air Strikes, if<br />
eligible (see the Exclusive Rules; this Step<br />
is skipped during Momentum Attacks).<br />
Apply the Defender’s losses immediately.<br />
C. Note the total Red, and the total Black<br />
Combat Strengths for both sides’ units in<br />
this Battle. These totals are how many<br />
dice are rolled by each side to resolve the<br />
Battle (9.2).<br />
D. Apply Terrain & Supply Modifiers to<br />
adjust the number of dice rolled (9.3),<br />
hexsides first, and then the Defender’s<br />
terrain, removing Red dice as a priority.<br />
E. Roll dice for Red Combat Strengths and<br />
Black Combat Strengths separately (or<br />
use two different colored sets of dice).<br />
Red Combat Strength (CS) dice score a<br />
Hit on results of 5 and 6; Black<br />
Combat Strength (CS) dice score a Hit<br />
only on results of 6 (9.4).<br />
F. Apply the combat results inflicted by<br />
these ground units, assigning Hits and<br />
Retreats, if applicable (9.5).<br />
G. If desired and eligible, attacking units<br />
that Advanced After Combat (9.6) can<br />
conduct a Momentum Attack (9.7).<br />
© 2013 Dennis Bishop and <strong>Victory</strong> <strong>Point</strong> <strong>Games</strong>
6 The African Wars Standard Game Rules v1.0<br />
Procedure<br />
[9.1] Declare Attacks: The player<br />
declaring the attack during their Combat<br />
Step is the “Attacker” and the other player<br />
is the “Defender,” regardless of the overall<br />
strategic situation.<br />
The Attacker begins their Combat Step by<br />
declaring all of the Battles they will<br />
initiate that turn (i.e., which units will<br />
attack which enemy units, in which hexes)<br />
before any are resolved. Then, each<br />
individual Battle is resolved, one at a time<br />
(plus Momentum Attack follow-ups; see<br />
9.7), in any order the Attacker desires.<br />
A previously-declared Battle for that turn<br />
cannot be called off after seeing the results<br />
of earlier Battles; it must still be conducted!<br />
[9.2] Resolving Combat: A unit’s Combat<br />
Strength is the number of dice it rolls (die<br />
rolls are shown as this symbol: z) in its<br />
effort to score Hits against enemy units.<br />
Most units have a single Combat Strength,<br />
but some have two: e.g., 0/1, or 1/2. The<br />
first number is its “Attack Strength,”<br />
which is the number of dice it rolls when it<br />
is attacking; the second number is its<br />
“Defense Strength” and is used when that<br />
unit is defending. A ‘0’ Attack Strength<br />
means that unit cannot attack, but it does<br />
still defend using its Defense Strength.<br />
[9.3] Terrain/Supply Effects on Combat:<br />
During Step C of the Battle Sequence, refer<br />
to the Terrain Effects Chart. It explains<br />
how terrain affects the current Battle with a<br />
reduction of the number of dice thrown by<br />
the Attacker. These effects are:<br />
[9.3.1] Defending Across Hexsides:<br />
Certain hexsides (e.g., River hexsides),<br />
when between the hex the Attacking<br />
units occupy and any adjacent hexes<br />
occupied by Defending units in that<br />
Battle, subtract the indicated number of<br />
Attacker’s dice, but only from among<br />
those specific units attacking across the<br />
terrain-affected hexsides at that Battle.<br />
After these dice have been subtracted,<br />
check the terrain in the Defender’s hex.<br />
[9.3.2] Defender’s Terrain: After the<br />
hexside terrain dice are subtracted from<br />
the Attacker’s roll, if the targeted<br />
defending hex terrain benefits the<br />
defense, subtract the indicated number of<br />
dice from the Attacker’s total Red +<br />
Black dice that remain. If the defenders<br />
occupy one or more hexes with more<br />
than one different terrain type, apply the<br />
single terrain benefit that is most<br />
advantageous to the Defender.<br />
[9.3.3] Supply: Unsupplied attacking<br />
units cannot attack. Unsupplied defending<br />
units roll one fewer die (i.e., -1 z).<br />
[9.3.4] Red Dice First: Each subtraction<br />
of dice performed must be from the Red<br />
dice (z) in that group first.<br />
[9.3.5] Restricted Attacks: Units with<br />
Red Movement Allowances (i.e., Tank<br />
and Motorized units) can attack into<br />
Marsh and Forest terrain hexes only if a<br />
Road crosses the hexside between their<br />
hex and the Defender’s target hex.<br />
Example: Four units attack a unit in a Forest<br />
hex as illustrated below:<br />
At first, the dice roll sums look pretty good for<br />
the Attacker with z z z + z z attacking<br />
dice versus z<br />
z defending<br />
dice, but it looks<br />
very different<br />
after checking for<br />
terrain effects!<br />
Checking for<br />
hexside effects first (9.3.1), the two green<br />
units are attacking across a River hexside<br />
(shown by the blue arrow) with z z + z. The<br />
River hexside subtracts two dice from among<br />
all the units conducting cross-hexside attacks at<br />
that Battle, and Red dice are always subtracted<br />
first (9.3.4), so the adjusted strength of the<br />
cross-river Attackers is reduced to z.<br />
Next, the terrain in the Defender’s hex itself is<br />
considered (9.3.2). This is then subtracted from<br />
Systems Development by Bryan Armor with Alan Emrich
The Last King of Scotland Standard Game Rules v1.0 7<br />
what remains of the Attacker’s total dice (in this<br />
case: z + z z). The Defender’s Forest<br />
terrain subtracts 1 more of the Attacker’s dice,<br />
and since there is a Red die still in the attack, it<br />
is removed as a first priority (9.3.4).<br />
Therefore, due to the Defender’s strong<br />
position, the Attacker will roll only z z (which,<br />
as you can see, is the same that the defending<br />
units will be rolling back against the Attacker).<br />
[9.4] Combat Dice: Units with Heavy<br />
Weapons (those with a Red CS) score a<br />
Hit on results of 5 and 6. Units with<br />
Infantry Weapons (those with a Black CS)<br />
score a Hit only on results of 6.<br />
Red CS and Black CS dice are resolved<br />
simultaneously. You may wish to use<br />
different colored dice for each to track<br />
more easily their respective Hits.<br />
[9.5] Assigning Hits: Apply all Hits<br />
“simultaneously.” That is, perform all dice<br />
rolls for both sides before applying both<br />
sides’ losses afterward.<br />
The Attacker selects which Defending unit<br />
takes the first Hit (if the Defender suffers<br />
any Hits). Likewise, the Defender selects<br />
which attacking unit takes the first Hit<br />
inflicted in that Battle. After your opponent<br />
assigns your initial Hit, both players then<br />
assign all additional Hits from that Battle<br />
to their own units as they choose.<br />
Generally, each Hit is applied as a unit<br />
elimination (i.e., that unit is permanently<br />
removed from play). Some units, as<br />
specified in the Exclusive Rules, can<br />
Retreat to satisfy a Hit.<br />
You must apply all Hits unless all units on<br />
that side are eliminated.<br />
[9.6] Advance After Combat: When<br />
defending hexes (only, not attacking hexes)<br />
are vacated through Battle eliminations<br />
and/or Retreats, a number of surviving<br />
attacking units that participated in that<br />
Battle up to the stacking limit (7.4) can<br />
immediately occupy the vacated hex. This<br />
is called Advance After Combat, which is<br />
a “free” post-Battle move without supply or<br />
EZOC restrictions (but terrain restrictions<br />
still apply in that units cannot advance into<br />
prohibited terrain or across prohibited<br />
hexsides).<br />
[9.7] Momentum Attacks: Attacking units<br />
that have just Advanced After Combat (9.6)<br />
have the option to conduct an additional<br />
immediate attack against any enemy units<br />
adjacent to their newly-advanced-into hex.<br />
This option must be exercised before the<br />
next scheduled Battle is resolved, if any.<br />
Exercising this option is called launching a<br />
Momentum Attack, and the Momentum<br />
Battle that ensues is an exception to the<br />
restriction that units can only attack or be<br />
attacked once per turn. Momentum Attacks<br />
can be repeated by units that continue to<br />
Advance After Combat following<br />
Momentum Attack Battles.<br />
Important: Skip Step B in the Battle<br />
Sequence for Momentum Attack Battles.<br />
No further Air Strikes are permitted in<br />
support of those units.<br />
[10.0] SPECIAL UNIT TYPES<br />
No Standard rules; see Exclusive Game Rules.<br />
[11.0] HOW TO WIN<br />
No Standard rules; see Exclusive Game Rules.<br />
[12.0] VARIANT RULES<br />
Each game in The African Wars Series<br />
games has its own Exclusive Rules section<br />
(which follows) explaining the above three<br />
Rules sections.<br />
The African Wars<br />
GAME CREDITS<br />
Game System Design: Dennis Bishop<br />
Documentation and Development: Bryan<br />
Armor with Alan Emrich<br />
Art & Graphic Design: Tim Allen<br />
Playtesting: Wulf Corbett, Ian Wakeham, Keith<br />
Mageau, Norm Stewart, Andy Nicoll, James Nolan,<br />
John Stryker, Duncan Rice, Steve Darell, Gary<br />
Cope, Doug Southwell, Scott Peth<br />
Proofreading: Bill Barrett, Ian Wakeham<br />
© 2013 Dennis Bishop and <strong>Victory</strong> <strong>Point</strong> <strong>Games</strong>
8 The African Wars Exclusive Game Rules v1.0<br />
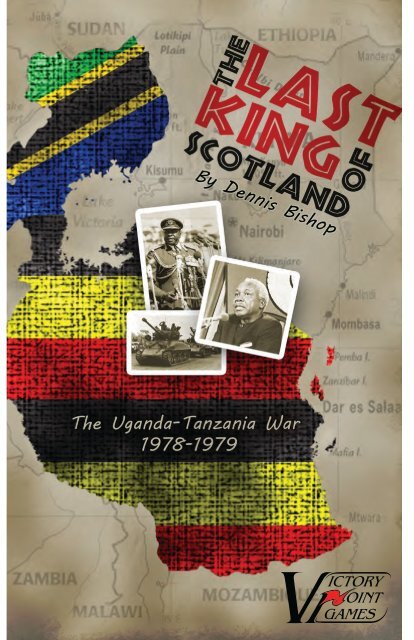
The Last King<br />
of Scotland<br />
The Uganda-Tanzania War of 1978 - 1979<br />
[0.0] EXCLUSIVE RULES<br />
These Exclusive Rules for The Last King<br />
of Scotland, when combined with The<br />
African Wars Series Standard Game<br />
Rules, form the entirety of the rules needed<br />
to play this game.<br />
These Exclusive Rules share the same<br />
numbering sequence as (and are meant to<br />
neatly “overlap”) the Standard Rules.<br />
When there is a conflict, these Exclusive<br />
Rules supersede the Standard Rules.<br />
[1.0] INTRODUCTION<br />
The Last King of Scotland simulates<br />
the Uganda-Tanzania War of 1978 - 1979<br />
that ousted Uganda’s President for Life, Idi<br />
Amin Dada. With a seeming fascination for<br />
all things Scottish, Idi Amin referred to<br />
himself as the “uncrowned king of<br />
Scotland”. When Amin fled Uganda, in a<br />
sense he truly became “The Last King of<br />
Scotland.”<br />
[2.0] GAME EQUIPMENT<br />
Parts Inventory<br />
● 1 11” x 17” paper map<br />
● 1 11” x 17” mounted map (boxed<br />
edition only)<br />
● 85 two-sided game pieces<br />
● 3 Red and 4 Black dice (boxed edition<br />
only)<br />
● 1 Rules booklet<br />
The Game Map: The 11”<br />
x 17” game map portrays<br />
Uganda and northern<br />
Tanzania, where this<br />
campaign took place.<br />
Game Scale: Each map<br />
hex covers 30 miles. Unit<br />
sizes range from platoons<br />
to battalions. Each game<br />
turn is one month of real time.<br />
Opponents: The Ugandan Player controls<br />
Ugandan (black on gray), Libyan (black<br />
on green), and Palestinian Liberation<br />
Army (PLA; green on gray) units.<br />
The Tanzanian Player controls Tanzanian<br />
(black on tan), Mozambique (black on<br />
yellow), and anti-Ugandan Guerrilla<br />
(green on tan) units.<br />
Unit Type designates the dominant troop<br />
type in the formation. These include:<br />
Infantry: soldier silhouettes; black<br />
Movement Allowances<br />
Armor, Armored Infantry, Motorized<br />
Infantry, Artillery: vehicle or artillery<br />
piece silhouette; black or red Combat<br />
Strengths; red Movement<br />
Allowances)<br />
Guerrillas: green soldier<br />
silhouette, “Guerrilla”<br />
designation at the bottom<br />
Engineer: “Engineer”<br />
designation at the bottom<br />
Air units: airplane silhouette; red Combat<br />
Strength (except Mig17); no Movement<br />
Allowance<br />
Dice: The game uses six-sided dice to<br />
represent the randomness that affects all<br />
warfare, but especially this war.<br />
The Ugandan Army was composed of 75%<br />
mercenaries and the Tanzanian Army was<br />
composed of 80% new recruits.<br />
[3.0] SETTING UP THE GAME<br />
Sort the units into their respective sides,<br />
setting aside units with white text (these<br />
are variant units; see 12.0) and then follow<br />
these set up instructions:<br />
[3.1] Ugandan: The Ugandan Player places<br />
the Ugandan units at the starting<br />
locations listed on the back of the<br />
counters. Libyan and other units<br />
come in as reinforcements; place<br />
them on the Game Turn Record Track on<br />
the turns listed on their counter backs.<br />
Systems Development by Bryan Armor with Alan Emrich
The Last King of Scotland Exclusive Game Rules v1.0 9<br />
[3.2] Tanzanian: No units for this side set<br />
up on the map; they all arrive as reinforcements.<br />
Place them on the Game Turn<br />
Record Track on the turns listed on the<br />
backs of their counters.<br />
[5.0] INITIATIVE PHASE<br />
[5.2] First Turn Initiative: The Tanzanians<br />
automatically have the initiative for<br />
the first Game Turn (November, 1978).<br />
[5.3] Tanzanian 1s: If the Tanzanian<br />
Player rolls a 1 during the Initiative<br />
Determination Phase, the Tanzanian<br />
Supply effect occurs (see 6.7).<br />
Example: Both players roll for Initiative, and<br />
both players roll a 1. This invokes the<br />
Tanzanian Supply effect, as per 6.7.<br />
Both players then re-roll for Initiative (to break<br />
the tie, see Standard Rule 5.0). The Tanzanian<br />
Player rolls a 6, while the Ugandan Player<br />
rolls a 4. Thus, the Tanzanians have the<br />
initiative this turn, but 6.7 remains in force,<br />
disallowing any Tanzanian movement!<br />
[6.0] SUPPLY STEP<br />
[6.2] Supply <strong>Point</strong>s:<br />
Uganda: Kampala / Gulu / Nakasongola<br />
Tanzania: Hexes in Tanzania and<br />
Rwanda marked as supply points ()<br />
[6.6] Tanzanian Supplies: Each time that<br />
the Tanzanian Player rolls a 1 during the<br />
Initiative Determination Phase, there is a<br />
breakdown in the Tanzanian supply chain.<br />
Effects: No Tanzanian units can move that<br />
turn (except to Advance After Combat), but<br />
can attack and defend normally. Out of<br />
Supply markers are not required for this<br />
(tracing supply is still performed<br />
separately); all Tanzanian units are simply,<br />
globally incapable of movement in general.<br />
Tanzanian reinforcements do not enter the<br />
map that turn, but must instead wait until<br />
the next turn that the Tanzanian Player does<br />
not roll a 1 during the Initiative Phase.<br />
Due to the distance from the Tanzanian<br />
supply bases to the front, lack of supplies<br />
plagued the Tanzanian offensive<br />
throughout the war.<br />
[7.0] MOVEMENT STEP<br />
Interestingly, Idi Amin wouldn’t allow<br />
Ugandan bridges to be blown; he wanted<br />
them kept intact for his counterattack. This<br />
counterattack never really materialized<br />
except at Lukuya, where it became a mini<br />
Battle of the Bulge that was quickly<br />
contained and eliminated.<br />
Factoid: The Ugandans started the war<br />
with two Bailey Bridges, but never used<br />
them.<br />
[7.4] Stacking: Apply the following<br />
exceptions to the Case that “No more than<br />
three friendly units can be stacked in any<br />
hex at the end of a unit’s movement:”<br />
All Tanzanian units<br />
Brigade IDs<br />
(Infantry, Artillery and<br />
Armor) of the same brigade<br />
can always stack together in a<br />
hex.<br />
All Ugandan units belonging<br />
to the 1st and 2nd Brigades<br />
may always stack with other<br />
units in that same brigade.<br />
The Ugandan’s Libyan<br />
Brigade units can always<br />
stack with each other. These specific<br />
black on green units have their names<br />
underlined.<br />
[7.5] Reinforcements:<br />
[7.5.4] Entry Hexes: Place your newly<br />
arrived reinforcement units at the<br />
beginning of your Movement Step on<br />
their turn of entry, as specified.<br />
Ugandan: As listed on the back of each<br />
reinforcement unit.<br />
Tanzanian: At either<br />
Tanzanian Supply<br />
<strong>Point</strong> hex.<br />
[7.6] Shock of War:<br />
Ugandan-controlled units cannot move<br />
(only, they can still conduct Combat,<br />
© 2013 Dennis Bishop and <strong>Victory</strong> <strong>Point</strong> <strong>Games</strong>
10 The African Wars Exclusive Game Rules v1.0<br />
Advance After Combat, make Momentum<br />
Attacks, etc.) until a Tanzanian unit<br />
occupies or passes through a Town or City<br />
hex in Uganda.<br />
Once this has occurred, all Ugandancontrolled<br />
units are free to move normally<br />
for the rest of the game.<br />
[9.0] COMBAT STEP<br />
[9.5] Assigning Hits: Generally, each Hit<br />
is applied as a unit elimination (i.e., that<br />
unit is permanently removed from play). In<br />
The Last King of Scotland, the<br />
following units, as denoted by a black<br />
outline around their Movement Allowance,<br />
can Retreat to satisfy a Hit:<br />
If either of the Revolutionary Suicide<br />
Force (RSF) units or the Simba unit<br />
receives a Hit, the Ugandan Player can<br />
choose to negate that Hit by Retreating<br />
(8.4) that unit two hexes. It must retreat<br />
away from the enemy unit(s) inflicting that<br />
Hit, and it cannot retreat across prohibited<br />
hexsides or into prohibited hexes (i.e., ones<br />
which it could normally not move through<br />
or into).<br />
Only one such Retreat per unit is allowed<br />
per Battle Sequence, and a second Hit<br />
applied to that unit during the same Battle<br />
Sequence eliminates it.<br />
Example: The Ugandan RSF battalion is<br />
defending against the Tanzanian 207th<br />
Armored unit. The 207th rolls a 5 and a 6,<br />
scoring two Hits. The Ugandan Player chooses<br />
to apply the first Hit as a Retreat, falling back<br />
with this unit two hexes. However, there is a<br />
second Hit to assign, and with no other<br />
Ugandan unit available to absorb it, the RSF<br />
battalion is eliminated.<br />
[10.0] SPECIAL UNIT TYPES<br />
[10.1] Units That Can Retreat:<br />
Per 9.5 above, the Ugandan<br />
Simba and RSF units can negate<br />
Hits against them by retreating.<br />
[10.2] Engineer Units: The Tanzanian 1st<br />
and 20th infantry units have an “Engineer”<br />
designation as shown here. At any Battle in<br />
which they are involved, these units can<br />
negate one Combat Terrain Effect (total,<br />
not each) for any single set of attack or<br />
defense die rolls. This Engineer effect is<br />
applicable up to once per Battle Sequence.<br />
[10.3] Idi Amin: The removal of the Idi<br />
Amin counter creates some special effects.<br />
Once the Tanzanian Player<br />
occupies Kampala with the<br />
UNLA Guerrilla unit, and for as<br />
long as it remains there, the<br />
Ugandan Player rolls a die at the<br />
beginning of each turn following<br />
the occupation of that hex. On a<br />
die roll of 5 or 6, Idi Amin<br />
flees the country and the Idi Amin unit is<br />
removed from play (i.e., eliminated for all<br />
game purposes).<br />
Effect: At the beginning of each Ugandan<br />
Supply Step turn after Idi Amin is<br />
eliminated (for whatever reason), the<br />
Ugandan Player rolls one die and removes<br />
(eliminates) that number of units from the<br />
map. These “fleeing” units can be<br />
Ugandan, Libyan, and/or PLA.<br />
[10.4] Guerrilla Units: The three<br />
Guerrilla units in the game (the PLA,<br />
UNLA, and KM Sperforce units with the<br />
dark green icons) are always in supply for<br />
movement and combat (6.3).<br />
[10.5] Air Units: If you choose to play<br />
with the Air Game variant (12.1), use the<br />
following instructions:<br />
Systems Development by Bryan Armor with Alan Emrich
The Last King of Scotland Exclusive Game Rules v1.0 11<br />
[10.5.1] Air Unit Availability: The<br />
Ugandan Player begins the<br />
game with three Ugandan<br />
Air units.<br />
At the end of each<br />
Tanzanian Movement Step, the<br />
Ugandan Player must eliminate one Air<br />
unit of their choice each time an Airbase<br />
is occupied by a Tanzanian ground unit<br />
for the first time. These Air units never<br />
return to play, even if Ugandan ground<br />
units reoccupy an Airbase hex or the<br />
Tanzanian units subsequently leave it on<br />
a future turn.<br />
Historically, Ugandan aircraft were either<br />
captured intact on the airfield (this<br />
happened at two airfields), or the pilots<br />
deserted and flew their planes to the Sudan.<br />
Ugandan-controlled Libyan Air units are<br />
a different matter. They are always<br />
available so long as one Airbase is<br />
Ugandan controlled. That is, Libyan<br />
aircraft are removed from the game only<br />
at the end of the Tanzanian Movement<br />
Step, when the last Ugandan Airbase has<br />
been conquered.<br />
The Tanzanian Player places all their<br />
aircraft in the Tanzanian People’s<br />
Defense Force (TPDF)<br />
Air Wing box on the map.<br />
The Ugandan Player can<br />
never capture or occupy<br />
this box.<br />
[10.5.2] Air Strikes: During your Battle<br />
Step B, you may call in an Air Strike.<br />
Each of your Air units in play can<br />
participate in only one of the Battles that<br />
you initiate that turn. Your opponent<br />
cannot conduct Air Strikes; only you,<br />
the Attacker, can do that.<br />
Procedure: To perform an Air Strike,<br />
place one or more of your available Air<br />
units in the Defender’s hex during your<br />
Battle Step B. Conduct and resolve their<br />
Combat Dice immediately (as per 9.4),<br />
including the application of any Hits<br />
they inflict (exactly as per 9.5) before<br />
proceeding to Battle Step C. This can<br />
reduce the Defender’s strength prior to<br />
conducting the actual ground combat!<br />
At the end of Battle Step B, return those<br />
Air units used in that Air Strike to the<br />
TPDF box (for the Tanzanians) or any<br />
Ugandan-controlled Airbase hex (for the<br />
Ugandan side).<br />
[10.5.3] Air Unit Limits: There is no<br />
limit to how many air units can conduct<br />
an Air Strike in a single Battle.<br />
Air units cannot participate in<br />
Momentum Attacks (9.7).<br />
You cannot launch an Air Strike<br />
against the TPDF box or an Airbase<br />
hex with only Air units located there.<br />
[10.5.4] TEC Effects on Air Units:<br />
Hexside and hex terrain modifiers do not<br />
apply to Air Strikes.<br />
[10.5.5] Air Units Defending an<br />
Airbase Hex: Ground units attacking a<br />
hex containing only opposing Air units<br />
win an automatic victory in that Battle.<br />
Those defending Air units are destroyed<br />
and the Attacker can Advance After<br />
Combat (9.6), etc. If ground units also<br />
occupy the defending Airbase hex, the<br />
Air units do not contribute to the defense<br />
in any way (i.e., they do not throw dice<br />
nor can they absorb Hits). If the attacking<br />
units Advance After Combat into that<br />
hex, the Air units there are destroyed.<br />
This war was remarkable in that there<br />
was little “dogfighting” during the entire<br />
conflict.<br />
[11.0] HOW TO WIN<br />
[11.1] Decisive <strong>Victory</strong>: The Tanzanian<br />
Player wins an immediate, game-ending<br />
Decisive <strong>Victory</strong> if, at the end of any<br />
Player Phase, the Tanzanian player<br />
occupies Kampala and Arua (regardless of<br />
supply status).<br />
The Ugandan Player wins an immediate,<br />
game-ending Decisive <strong>Victory</strong> if, at the<br />
© 2013 Dennis Bishop and <strong>Victory</strong> <strong>Point</strong> <strong>Games</strong>
12 The African Wars Exclusive Game Rules v1.0<br />
end of any Ugandan Phase, there are no In-<br />
Supply Tanzanian units on the map inside<br />
Uganda.<br />
[11.2] End Game <strong>Victory</strong>: If, at the end<br />
of Game Turn 8 (June 1979), the Ugandan<br />
Player has at least one unit in each of<br />
Kampala and Arua, the Ugandan Player<br />
wins the game.<br />
If, at the end of the Game Turn 8, there are<br />
no Ugandan or Libyan units in Uganda, and<br />
the Tanzanian Player has at least one unit in<br />
each of Kaabong, Tororo, Kampala, and<br />
Arua, the Tanzanian Player wins the game<br />
(the historical outcome).<br />
[11.3] End Game Draw: If neither of the<br />
above End Game <strong>Victory</strong> conditions is met,<br />
the game ends in a Draw.<br />
[12.0] VARIANT RULES<br />
Any or all Optional Rules can be added by<br />
mutual agreement before commencing<br />
play, and in any combination desired.<br />
[12.1] The Air Game: See 10.5 for how to<br />
play using the Air units.<br />
Set Up: The Ugandan Player places the<br />
three Ugandan Air units, one each, in the<br />
hexes containing an Airbase.<br />
The Libyan Air unit (shown<br />
here) is placed on Turn 4 of<br />
the Game Turn Track. Place it<br />
at any Ugandan-controlled<br />
Airbase hex when it arrives.<br />
When the three Tanzanian Air units enter<br />
play on Turn 1, place them in the TPDF<br />
Air Wing Holding box.<br />
[12.1.1] More Libyan Air Support #1:<br />
Substitute the stronger, 2-<br />
Strength Tu-22B unit.<br />
It is possible that Libya<br />
might have sent the entire<br />
1110th Squadron to Libya.<br />
[12.1.2] More Libyan Air Support #2:<br />
Add the Libyan Mirage<br />
5DR Air unit as a Game<br />
Turn 4 reinforcement. Place<br />
it at any Ugandan-controlled Airbase<br />
hex when it arrives.<br />
The Libyan 1011th Squadron was<br />
known to be in Chad in 1979-80. It could<br />
have been sent to reinforce the 1110th<br />
Squadron.<br />
[12.2] Increased Libyan Ground<br />
Reinforcements: If this option is chosen,<br />
the Islamic Legion ground units enter on<br />
Game Turn 4 in any hex on the Ugandan<br />
northern border containing a road that exits<br />
the map to the north.<br />
Gaddafi planned and organized the Islamic<br />
Pan-African Legion in 1978 with the<br />
intention of using it as a Foreign Legion to<br />
send to other countries in conflict. In 1979,<br />
the Legion operated successfully in Chad,<br />
and could have been sent to Uganda to<br />
support Idi Amin.<br />
[12.3] Ugandan Paratroops: If this unit<br />
begins the Ugandan Player’s Movement<br />
Step: A) in supply, B) on an<br />
Airbase hex, and C) not in an<br />
EZOC, the Ugandan Player can<br />
move it that turn by placing it in<br />
any hex in Uganda not occupied by an<br />
opposing unit. It can move no further that<br />
turn after making this “airdrop.”<br />
It remains in supply on that turn, but<br />
afterwards it needs supply normally. After<br />
dropping, until its supply line is re-established,<br />
its Movement Allowance is reduced<br />
to 0 (not just halved for being unsupplied).<br />
The Ugandan 2nd Parachute Battalion<br />
was trained to make combat jumps. In<br />
1979, it could have been inserted by air<br />
anywhere in Uganda.<br />
[12.4] Tanzanian Tanks: To balance the<br />
game, allow the Tanzanian player only two<br />
of their five Tank companies. Mix them<br />
together and randomly choose which two<br />
remain in play, setting the other three aside.<br />
The number of Tanzanian tanks in this<br />
campaign remains a subject of debate.<br />
Systems Development by Bryan Armor with Alan Emrich
The Last King of Scotland Exclusive Game Rules v1.0 13<br />
[12.5] Tanzanian Artillery:<br />
Allow the Tanzanian Artillery<br />
unit to have a range of two hexes.<br />
These hexes do not include the<br />
hex occupied by the Artillery counter.<br />
The Tanzanian artillery continued to be<br />
ineffective due to the lack of use of forward<br />
observers.<br />
[12.6] Ugandan Artillery:<br />
Allow the Ugandan Artillery<br />
unit to have a range of two hexes.<br />
These hexes do not include the<br />
hex occupied by the Artillery counter.<br />
Also, allow the Ugandan Artillery unit a<br />
Special Movement Allowance of 6. This<br />
means the unit has the same restrictions as<br />
Artillery but must pay the road movement<br />
costs (1/2) of an Infantry unit.<br />
The 1st Artillery Battalion became<br />
immobile when its vehicles disappeared<br />
early in the war.<br />
[13.0] HISTORICAL NOTES<br />
Several old TIME and NEWSWEEK<br />
magazines yielded a series of articles on a war<br />
going on in Uganda. Reading these articles, it<br />
didn’t seem like much of a war. Mostly the<br />
triumphant Tanzanian People’s Defense<br />
Force mopped up a rather disorganized and<br />
pathetic Ugandan defense while the villain,<br />
Uganda’s Idi Amin Dada,<br />
having first challenged<br />
Tanzanian President<br />
Nyerere to a boxing match,<br />
later fled to some Arab<br />
nation. However, there was<br />
much more to the story than<br />
the casual reader might<br />
suspect. During the past 34 years, my research<br />
ebbed and flowed, but the advent of the<br />
internet greatly facilitated the research in<br />
disclosing a much different story.<br />
The first choices I made concerned the<br />
game’s map. Uganda is an oddly shaped<br />
country with few paved roads in 1979. Lake<br />
Victoria contributes to this shape. At the time<br />
of the war there were twenty-two barracks<br />
(former British forts) in Uganda which are not<br />
present on the map. There were also more<br />
airports than depicted, but I chose the most<br />
historically important airbases. There are<br />
several other map features that I abstracted to<br />
fit the scale.<br />
The second important choice I made<br />
concerned the combat system. Common<br />
wargame combat resolution systems did not<br />
fit the picture my research revealed. So, I<br />
discarded them in favor of the “fistful of dice”<br />
approach. My reason is that none of the<br />
combatants had troops involved whom they<br />
could completely rely upon. In order to<br />
properly model instances where troops<br />
precipitously fled and later resolutely stood, I<br />
felt that the random results of several dice<br />
created the right feel.<br />
The last important choice I made concerned<br />
the logistic systems of the combatants. The<br />
Ugandan army fell apart as its command<br />
system dissolved, while the Tanzanian Army<br />
completely out-stripped its logistic and<br />
command system. Both of these models<br />
determined the length of the game.<br />
In the end, I hope that this game not only<br />
entertains, but sheds some light on this little<br />
known conflict in an objective way not<br />
previously explored on this subject.<br />
The title of the game comes from the 2006<br />
British drama film based on Giles Foden’s<br />
novel. I have not attempted to vilify, nor<br />
glorify, one side or the other. The deposing of<br />
a “blood-thirsty tyrant” satisfied most<br />
observers in 1979. However, the results of<br />
that small war continue in the headlines today<br />
because the causes for this war have still not<br />
been resolved.<br />
The Last King of Scotland<br />
GAME CREDITS<br />
Game System Design: Dennis Bishop<br />
Documentation and Development: Bryan<br />
Armor with Alan Emrich<br />
Art & Graphic Design: Tim Allen<br />
Playtesting: Wulf Corbett, Ian Wakeham, Keith<br />
Mageau, Norm Stewart, Andy Nicoll, James Nolan,<br />
John Stryker, Duncan Rice, Steve Darell, Gary<br />
Cope, Doug Southwell, Scott Peth<br />
Proofreading: Bill Barrett, Ian Wakeham<br />
© 2013 Dennis Bishop and <strong>Victory</strong> <strong>Point</strong> <strong>Games</strong>
The Last King of Scotland<br />
Reference Sheet<br />
Sequence of Play<br />
1. Initiative Determination Phase: Each<br />
player rolls one die (z) to determine the player order<br />
2. First Player Activation Phase:<br />
A. Supply Step (6.0)<br />
B. Movement Step: Receive Reinforcements<br />
(7.5) and then move units (7.0)<br />
C. Combat Step (9.0)<br />
3. Second Player Activation Phase: The<br />
Second Player conducts Steps A, B and C (above).<br />
4. Housekeeping: Advance the Game Turn<br />
marker one space. If the last Game Turn was just<br />
completed, check to determine the winner.<br />
Out of Supply<br />
Unsupplied units suffer the following adverse effects:<br />
• Movement Allowance is halved,<br />
rounded up (7.0)<br />
• Cannot voluntarily enter<br />
an EZOC (8.0)<br />
• Cannot attack (9.0)<br />
• -1 Defense Strength<br />
• If it has a ZOC (8.0), that ZOC does<br />
not block enemy Lines of Supply.<br />
Out of<br />
Supply<br />
Battle Sequence<br />
The Attacker begins their Combat Step by declaring all of<br />
the Battles they will initiate that turn before resolving any.<br />
A. Attacker indicates which Battle is being resolved (9.1).<br />
B. Attacker conducts Air Strikes, if eligible. Apply the<br />
Defender’s losses immediately.<br />
C. Note the total Red, and the total Black Combat<br />
Strengths (CS) for both sides’ units in this Battle (9.2).<br />
D. Apply Terrain & Supply Modifiers (9.3), hexsides first,<br />
and then the Defender’s terrain, removing Red dice<br />
(z) as a priority.<br />
E. Roll dice for Red CS and Black CS separately:<br />
z = Hits on 5 or 6; z = Hits on 6 only (9.4).<br />
F. Assigning and apply Hits and Retreats (9.5).<br />
G. If desired, attacking units that Advanced After<br />
Combat (9.6) can conduct a Momentum Attack (9.7).<br />
Eligible to Retreat<br />
The following units, as denoted by a black outline around<br />
their Movement Allowance, can Retreat to satisfy a Hit;<br />
Retreating units must Retreat 2 hexes away from Attacker:<br />
1st Bde.<br />
Revolutionary<br />
Suicide Force<br />
2<br />
6<br />
1st Bde.<br />
Revolutionary<br />
Suicide Force<br />
2<br />
6<br />
2nd Bde.<br />
1<br />
Simba6<br />
Idi Amin<br />
0<br />
1<br />
6<br />
The removal of the Idi Amin counter creates some special effects (10.3):<br />
Once the Tanzanian Player occupies Kampala with the UNLA<br />
Guerrilla unit, and for as long as it remains there, the Ugandan<br />
Player rolls a die at the beginning of each turn following the<br />
occupation of that hex. On a die roll of 5 or 6, Idi Amin flees the country<br />
and the Idi Amin unit is removed from play (i.e., eliminated for all game purposes).<br />
Effect: At the beginning of each Ugandan Supply Step turn after Idi Amin is eliminated<br />
(for whatever reason), the Ugandan Player rolls one die and removes (eliminates) that<br />
number of units from the map. These “fleeing” units can be Ugandan, Libyan, and/or PLA.<br />
UNLA<br />
Guerrilla<br />
0<br />
1<br />
4<br />
© 2013 Dennis Bishop and <strong>Victory</strong> <strong>Point</strong> <strong>Games</strong>