1 - Victory Point Games
1 - Victory Point Games
1 - Victory Point Games

You also want an ePaper? Increase the reach of your titles
YUMPU automatically turns print PDFs into web optimized ePapers that Google loves.
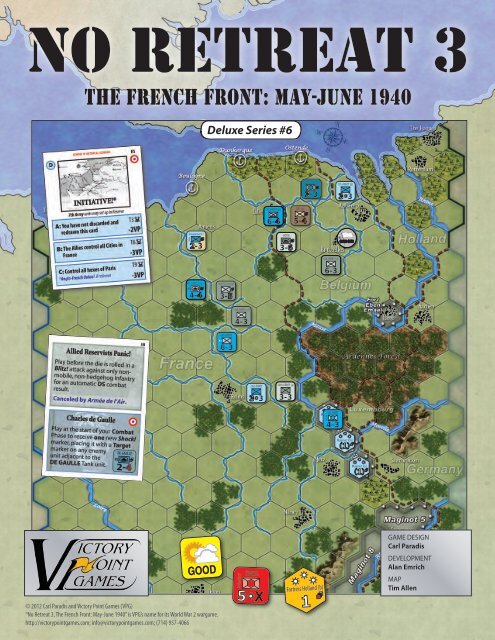
No Retreat 3The French Front: May-June 1940Deluxe Series #6BELGIAN 3+4Belgium3-37th ARMY (b)3 31st ARMY (b)6-4BEF (a)5-4CadreGroupement 12-3HOTH3-6R2Open City6th ARMY (a)6-3DE GAULLE (opt)R34-4WIETERSHEIM3-512th ARMY (a)4-36th ARMYR36-32nd ARMY3 316th ARMY (a)3-33rd ARMYMaginot 3(a)(1)4-3MaginotMaginot 3(b)(1)Maginot 3(c)(1)© 2012 Carl Paradis and <strong>Victory</strong> <strong>Point</strong> <strong>Games</strong> (VPG)“No Retreat 3, The French Front: May-June 1940” is VPG’s name for its World War 2 wargame.http://victorypointgames.com; info@victorypointgames.com; (714) 957-4066GOODFortress Holland (b)SwitzerlandSWISS5 X1GAME DESIGNCarl ParadisDEVELOPMENTAlan EmrichMAPTim Allen
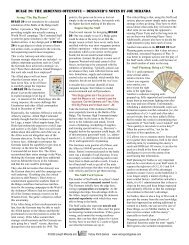
NO RETREAT! 3 THE French Front May-JUNE 1940DESIGNER’S NOTESWelcome to the third game in the NoRetreat! series, simulating the highlycontroversial German invasion ofFrance, May-June 1940. This was themost difficult subject I have tackled ina game design: how to make the gameinteresting, but not “script” thesituation? How to keep it challengingfor both sides and still keep it realistic?This is where the Plan cards conceptevolved. They goad / limit both sidesinto following one of the many actualcampaign plans that were studied bythe Army Staffs. You won’t know youropponent’s goals at the start: maybethere will be no Ardennes sicklemovement, nor an Allied advance intoBelgium. Switzerland could be invadedand Holland left alone, etc. Thehistorical manoeuvre used by theGerman OKW almost neverhappened. The original plan wasmore or less a replay of the WWIattack. It was only because of a seriesof unforeseen circumstances that itwas changed to the risky Guderianplan (the battle maps having fallen intoBelgian hands).So, could France have staved off totaldefeat in 1940? My conclusion is aresounding “Yes!” Again, a rerun ofthe actual WWI campaign could havehappened, and the Wehrmacht haltedat another “Miracle of the Marne.”Historically, it was a very hard foughtcampaign. The French Army wastailored for defense but had the unitsto defeat the Panzer spearheads(most of these would be lost in theDunkirk pocket). When engaged,these forces fought hard and inflictedsignificant casualties on the Germans(who lost 60% of their Panzers, 40% oftheir aircraft and 210,000 soldiers),amounting to as many German lossesas during the first year of OperationBarbarossa (the invasion of the USSRin 1941)! Given a more sensible AlliedOperational strategy, the Nazionslaught could have been slowedand then stopped.The Germans were not ready for along campaign. When the Armisticewas declared in June, their ammunitionreserves were dangerously low(the German’s pre-war ammunitionexpenditure estimates were off bymore than 400%). This campaigncould have been a more even fightthan the historical outcome suggests,and I hope my game demonstratesthat.The CounterblowsWhat do Counterblows represent?We wanted players to have some sayduring their opponent’s turn, and toreward careful management of theirEvent cards. Players need to envisioncounterblows as local spoiling counterattackslaunched in reaction to theenemy offensives. We did not go asfar as to allow an actual attack by thedefender (this is what players shoulddo on their own turns), but it is close.And because those troops are leavingtheir positions to engage the enemy,they lose their defensive terrainbenefits – thus, some risk is involvedin launching a counterblow.Use the counterblow rule to quicklywipe out pockets of surrounded enemyunits, and to allow your units a chanceto advance during your opponent’sturn (if a CA result is rolled, andfollowed up with a successful counterattackof your own). You can also useit to put pressure on unsupportedfortified cities, lowering their defensiveadvantages, or even as a maneuver togain an end-run advance.The Event Cards / Initiative MarkersThe very heart of the game is theEvent card /Initiative marker “engine;”players simply never know whatsurprise their opponent can springupon them with a sneaky card play.Consequently, perfect planning ofmoves or attacks is never entirelypossible. For example, can you affordto temporarily leave a hole in your line,or will your adversary be able to play acard allowing him to move a unit thereduring your own turn, thus creating anunexpected breakthrough?Those cards are an excellent indicatorof the resources a side still has at hisdisposal. If you start your turn with afull hand of cards, many initiativemarkers, and your opponent has none,then things are potentially very goodfor you! The cards and markers youhave in reserve represent energy thatyou can spend: to replace troops, forBlitz! attacks, for counterblows, etc.With a low count, your options arelimited. Sure, a player can still get byholding only a card/marker or two, butthe game’s initiative is probably being© 2012 Carl Paradis and <strong>Victory</strong> <strong>Point</strong> <strong>Games</strong>held by the opponent who is holdingfive or six cards, and a lot of Initiativemarkers!The Combat Result TablesThe Combat Results Tables are a bitunusual. As an attacker, even at lowerodds, you do not suffer many losses(save for the occasional EX result), butyou could get a CA result, thusopening up interesting possibilities. ACA gives your opponent the option ofcounterattacking and possiblyupsetting your position – thus makingit easier for them to charge at youduring their ensuing Player Turn. Oryour opponent might simply “pass” theopportunity to counterattack and opt toplay it safe and stay on the defensive.The Combat Results Tables aretailored to the counterblow feature.Upon study of the four different CRTs,you will notice subtle differencesbetween them that have a substantialimpact on how to play each side. TheBlitz! and Shock! tables are your mainoffensive tools. The Attrition tables canbe very useful for limited advances,local attacks and mopping upsurrounded enemy troops, but youcannot decisively win this campaign byusing such WWI attrition tactics!The <strong>Victory</strong> ConditionsYou must carefully study Rule 12.0,How to Win. Although each scenariohas its own, separate victory conditions,this section of the core rulesexplains how to win the CampaignGame. This is the beating heart of thissimulation. There are many ways towin the Campaign Game, and they areall important.The End of Game <strong>Victory</strong> is straightforwardand works as most traditionalwargamers might expect: capturecities, destroy/evacuate units, and youwin the game. But there are a fewtwists: First, the longer the game lasts,the fewer points the German Playermight score as there is a VP penaltyfor turns 10, 11 and 12. So, theGerman’s goal is to capture Paris assoon as possible, and after scoringenough points, play that Armistice!Event card. Even then, under certaincircumstances, it might be better todelay this, even at the cost of <strong>Victory</strong><strong>Point</strong>s, as there might be good scoringopportunities left, like exiting…(Continued on inside back cover)
2 NO RETREAT 3: THE French Front May-JUNE 1940 v2.4Fortifications (hexagon-shaped) orParatroops (round). A unit’s Designationidentifies it based on that formation’shistorical name or that of its commander.Sample Event CardGerman Event on top (green-gray) Card #French Event on bottom (blue)Events withthese symbolscan only beplayed asEvents whenthey are paidfor with anInitiativemarkerInitiative markersThese round markers are veryimportant. They are used to pay forkey actions such as playing certainEvent cards, replacing losses,putting units in Reserve; or, whenallowed, flipping them to theirBlitz!/Shock! sides for Combat.Players receive them at the start of most turnsby discarding Event cards and they areoccasionally awarded by combat results.Initiative markers are the game’s “money.”They represent Supplies, OperationalLeadership, Support Assets (Artillery andAirplanes), Troop Replacements, etc.[3.0] SETTING UP THE GAMEPlace the map between the players. TheGerman player sits along the east edge andthe French player on the west edge. ThePlayer Aid Mat is placed between themalong the north edge. Each player takeshis/her Combat Results Table sheet.Refer to the Scenarios section of this bookfor set up instructions (also see 14.14).[4.0] SEQUENCE OF PLAYHow the Turns Work: Before playersconduct their respective Player Turns, amutual Housekeeping Phase takes place toorganize things. Each Game Turn consists ofa German player Turn followed by a Frenchplayer Turn. During each player’s turn, severalPhases (e.g., Movement and Combat)are conducted in strict sequence. Each Phasemust be completed before the next begins.My Turn; Your Turn: The player who iscurrently conducting his Player Turn iscalled the Phasing Player. His opponent isknown as the Non-Phasing Player.ProcedureNew Game Turn HousekeepingA. Advance the Game Turn Marker: Advancethe Game Turn marker on the Turn Track. Ifthe 12th turn was just completed, or anArmistice was declared, the game ends andthe winner is determined.B. New Game Turn Events Phase: Any Eventlisted on the Game Turn Track for the newGame Turn (i.e., the box the Game Turnmarker was just moved into) is noted and, ifapplicable, implemented at this time (see 13.4for a complete listing and explanations).C. New Game Turn <strong>Victory</strong> PhaseAutomatic <strong>Victory</strong> is checked (12.2 & 12.3).Sudden Death/Operational Collapse (12.1)and Plan Scoring (12.7.1) are also checked onturns denoted by a Death’s Head (T) symbol.German player Turn1. Card Phase: The Phasing player must discarddown to two (2) cards and then usually drawsfour (4) more cards (see 5.2).2. Supply Check Phase: Place Unsuppliedmarkers on both sides’ units that cannot tracea valid Supply Line at this time.3. Organization Phase: The Phasing playertakes this turn’s allotted Initiative markers,takes Reinforcements, Replacements andEvacuates Units. Both players can also buymore Initiative markers by discarding cards or(Phasing player only) convert them toBlitz!/Shock! markers.4. Movement Phase: The Phasing player canmove his units on the map, including movingone (only) off the map to the Reserve Box.5. Combat Phase: All Voluntary, and then allInvoluntary, Battles are Declared and Resolvedas per the Battle Sequence in any order thePhasing player desires.6. Marker / Unit Removal Phase: Some unitsand markers are removed from the map.7. Mutual Reserve Phase: The Phasing playermay put his unit(s) in the Reserve box back onthe map; then the Non-Phasing player may dothe same with his unit(s) in the Reserve box.French player TurnThe French player becomes the “Phasing Player”and repeats the above seven Phases, in order,that the German player just completed.Exception: The French player declares mostVoluntary Battles during the Organization Phase(see the Player Aid Sheets for the sequencing).[5.0] THE CARDSGeneral RuleYou draw cards, one at a time, from theDraw Pile during your Card Phase. TheDraw Pile is reshuffled when there is onecard left in it (that card is not drawn!) or asinstructed by the play of certain Events.Systems Development by Alan EmrichCards generate game events or are resourcesdiscarded for more Initiative markers. Aftertheir use, cards are placed, face-up, in aDiscard Pile next to the Draw Pile.Note, the 10 Plan cards are not in the regulardeck, and drawn differently (see 12.7).Appropriate TimingEvent cards are played when theircorresponding actions are performed duringthe Sequence of Play (4.0).For Example: You can only play a card that givesyou a free unit upgrade during your ownOrganization Phase, not during your opponent’sCombat Phase.Card play is sequential. That is, cards areresolved in the order that they were playedunless their effects conflict, in which casethe card played last takes precedence.If both players play a card at the same time,the player whose Player Turn it is decidestheir play order; either his own card first, orhis opponent’s.Once is EnoughBecause cards are retrievable from the DiscardPile and thus reusable, this Rule applies:The exact same-named Event cannot occurtwice during a single Player Turn.Cases[5.1] Discard Step: The Card Phase beginsby discarding. You can retain only two (2)cards in your hand before drawing at the startof your turn, so you must discard any excesscards in your hand at this time.[5.2] Draw Step: After discarding (ifnecessary) during the Discard Step (see 5.1),you usually draw four (4) cards from theDraw Pile and add them to your hand. Thefollowing conditions can affect the Frenchplayer’s per turn Draw Rate (DR):-1 French card if the German playercontrols the 3 Ports.-1 French card if a German unit occupiesany number of Paris hexes.+1 French card if the Anglo-FrenchUnion! event is in effect (14.13.2).[5.3] Events: The cards have text in boxes.The Green boxes are Events playable onlyby the German player, while the Blue boxesare Events playable only by the Frenchplayer. Thus, the effect of each card isdifferent depending upon who has it in hishand. Once played, cards are discarded.[5.3.1] Event Effects: Events describetheir exact timing and use on the cardsthemselves. When not specified, you canperform that Event any time.[5.3.2] Event Precedence: When there isa conflict between Event text and theRules, the Event text takes precedence.
NO RETREAT 3: THE French Front: May-JUNE 1940 v2.4 3[5.3.3] Initiative Events: Each event witha German Cross symbol (E) is playableonly if the German player spends oneInitiative marker to do so.Each Event with a French Roundel symbol() is playable only if the French playerspends one Initiative marker to do so.All other Events (i.e., those without thesesymbols) are playable for free.[5.4] Other Card Uses: In addition to theiruse triggering Events, you can spend (i.e.,discard) cards during Organization Phasesto buy additional Initiative markers (see7.1)[6.0] SUPPLYGeneral RuleDuring this Phase, both players check thesupply status of each of their on-map units:first, all of the Phasing Player’s units, andthen the Non-Phasing Player’s units, markingthose that are unsupplied.Cases[6.1] Receiving Regular Supply: A unit isin Regular Supply if it is able to trace avalid Overland Supply Path. You trace aSupply Path from the unit requiring supply,through any number of hexes, to a friendlymap edge. A friendly map edge is the east(dark gray) edge for the Germans, and thewest and south (blue) edges for the Frenchand British.[6.2] Alternative Supply Sources: A unit isalways in supply if it is in a fortified hex inits own country. The Swiss unit is always insupply in Switzerland.Tracing to these alternative supply sourcesdoes not constitute an Overland Supply Path.Note that units in Ports are not automaticallyin supply in this game, but being there doesallow them to receive Improvements (7.2.1).[6.3] Blocking Supply Paths: Enemy unitsalways block a Supply Path. Enemy Zones ofControl (see 8.5) also block Supply Pathsunless there is a friendly unit in that hex.You cannot trace through Neutral countriesnot yet attacked by the German Player.That is, friendly units negate enemy Zones ofControl for the purpose of tracing a SupplyPath.[6.4] Unsupplied Markers: When aunit is Unsupplied during the SupplyPhase, place an Unsupplied markeron it to denote its precarious status.[6.5] Unsupplied Effects: A unit with anUnsupplied marker suffers accordingly: Organization: Reduced-strength units arerestricted in their ability to recover back tofull-strength (see 7.2.2). Movement: Its Movement Allowance isreduced to a maximum of Three (3)Movement <strong>Point</strong>s. Combat: When attacking, it neverreceives an Armor Bonus (10.6.3),cannot conduct Multi-Hex Advance(10.8.1), and suffers a one shift to the left(1) penalty on the Combat ResultsTable. If it is eliminated in combat, it isplaced in the Surrendered Units Box(10.7.1). Scoring: A Maginot line Area isconsidered “Isolated” for <strong>Victory</strong> <strong>Point</strong>purposes if it cannot trace a validOverland Supply Path.Units are not automatically eliminated solelybecause they lack supply.[7.0] ORGANIZATIONProcedureDuring your Organization Phase, performthe following Steps in order:A. Initiative Buy Step: Purchase extraInitiative markers.B. Flip Step: Improve units and (for theGermans only) Initiative markers.C. Placement Step: In order: Reinforce,Replace, and Evacuate units.D. French Attack Step: The Frenchplayer (only) places his white targetmarkers during this Step of his PlayerTurn.A. The Initiative Buy Step[7.1] Buying Initiative markers: BothPlayers may discard any number of Eventcards in their hand to purchase their side’sunused Initiative markers on a 1-for-1 basis:each card exchanged for one marker.Note that you can buy Initiative markersduring your opponent’s Player Turn!B. The Flip Step[7.2] Improving Reduced-Strength Unitsto Full-Strength, and German Initiative toBlitz! Markers:[7.2.1] Improving Units: The Phasingplayer’s square, two-step units (only) thatare currently on the map on their one-step(i.e., reduced-strength) side can beImproved (i.e., flipped over) to their fullstrengthside.[7.2.2] Improvement Restrictions: Youcan only flip a unit that is in RegularSupply (6.1) unless it can trace a SupplyPath to a Friendly Port (see 7.2.4).[7.2.3] Reduced-Strength: When broughtback onto the map as Replacements, twostepunits always return to play showingtheir reduced-strength (one-step) side.[7.2.4] Cost: You must pay two (2)Initiative markers for each Improvement,unless (7.2.2) Port Supply is being used: inthis case, you must pay three (3) markers.Note that it is cheaper to Replace (7.7) aneliminated unit (bringing it back at reducedstrength)than it is to Improve a reducedstrengthunit back up to full-strength.[7.2.5] Penalty (Important): Puta Disorganized marker on anyunit that was just Improved.[7.2.6] Improving Initiative markers:The German player can flip, for free, anynumber of Initiative markers he hasavailable for later play as Blitz! markers.The French player does not have the capabilityto freely flip his Initiative markers;only specific Event cards allow him to flipthem over to Shock! markers.[7.3] One-Step Square Units: Some unitshave only one step, and some cost more toReplace (7.7). Cadre units have one step,but come back for free (see 14.9).[7.4] Paratroop/Fort Units: These nonsquareunits are irreplaceable. Wheneliminated, Paratroops are removed from thegame and Forts are placed in the SurrenderedUnits Box.C. The Placement Step[7.5] Unit Placement: Place Reinforcementand Replacement units in play as follows:• Place German, French and British unitsinto the Reserve Box. Place Neutral units in a friendlycontrolledcity within their country.[7.6] Receiving Reinforcements: Playersreceive units as Reinforcements on the GameTurn indicated by their ReinforcementNumbers (i.e., as placed on the Game TurnTrack during set up). Reinforcement unitsare placed in the Reserve Box.[7.7] Replacement of Destroyed Units: Totake a unit from the Destroyed Units Boxand return it to play (as per 7.5), the owningplayer must pay (discard) one (1) Initiativemarker for each such Replacement received.Note that the one-step Allied Armored Unitscost two (2) markers to replace, as indicatedon their reverse sides.Example: A unit is eliminated on Turn 4. Itsowner replaces it at the first opportunity on Turn5’s Placement Step. It returns to the map on itsone-step side. Raising it back to full-strength (i.e.,two steps) cannot be done until the followingturn’s Flip Step at the earliest, because the FlipStep occurs before the Placement Step. Thesequencing is very strict about this![7.8] Unit Evacuations: You cantry to move one (1) Unsuppliedunit per turn, provided that it is in a© 2012 Carl Paradis and <strong>Victory</strong> <strong>Point</strong> <strong>Games</strong>
4 NO RETREAT 3: THE French Front May-JUNE 1940 v2.4Port and stacked there with the Evacuationmarker (see 14.7), to the Evacuated Box.Only Unsupplied units can be evacuated. The French player must pay one (1)Initiative marker per unit Evacuated. After paying, draw an Event card todetermine the Evacuation’s success (donot resolve the Events on it!) as follows:A: If there’s a German Cross on thecard, the Evacuating unit takes a StepLoss.B: If there’s a French Roundel on thecard, put the unit in the EvacuatedUnits Box.Note that both of these symbols can be on acard, so A and B could both apply. Thus, aone-step unit would be eliminated beforebeing successfully evacuated! You can also evacuate one Unsuppliedunit by using card #24 (Dynamo). In thiscase you do not need to draw, theEvacuation automatically succeeds.D. The French Attack Step[7.9] Target Placement: During this Step ofhis Player-Turn, the French player places hisWhite Target markers according to theBattle Rules (10.1). Note that the Germanplayer places his, much more conveniently,at the start of his own Combat Phase.• The Dark Blue Enhanced French Targetmarker follows the regular rules and isplaced like the German’s, i.e., at the startof the French Combat Phase (14.12).[8.0] MOVEMENTGeneral RuleEach Turn, during your Movement Phase,you may move none, some or all of yournon-fort (i.e., “mobile”) units through anycombination of hexes up to the limit of theirprinted Movement Allowance, paying theappropriate Movement <strong>Point</strong> (MP) cost toenter each hex.Unlike Chess, in No Retreat 3 a player hasthe opportunity to move all his pieces duringhis turn. This gives the player the chance toset up his attacks by Concentrating units, orto enhance his defensive positions throughtheir careful dispersal.You do not get to move your opponent’sunits, and your opponent cannot move piecesduring your turn except as a result of combator through the play of certain Event cards.ProcedureYou move your units one at a time, hex-byhex,in any direction or combination ofdirections that you desire. A unit cancontinue moving until it has either expendedall of its MPs, or it can move no furtherbecause entering another hex would exceedits Movement Allowance, or it movesadjacent to an enemy unit, or you simplydesire to stop moving it.Cases[8.1] Movement Allowance: A unit cannotexceed its Movement Allowance during itsMovement Phase except as permitted bycertain Event cards.You cannot transfer MPs between units, orsave them up and carry them over betweenGame Turns. Disorganized Units: Units undera Disorganized marker have a -2MP penalty to their MovementAllowance.[8.2] Weather Effects: On Bad WeatherGame Turns, all units with aMovement Allowance greater thanfour (>4) have their MovementAllowance reduced to four (4).That is, there is a “speed limit” of fourMovement <strong>Point</strong>s during Bad Weather.[8.3] Terrain Effects: The basic cost toenter a Clear hex is one Movement <strong>Point</strong> (1MP). The cost to enter other hexes can behigher, as listed on the Terrain Effects Chart.When a unit does not have sufficient MPsleft to pay the cost to enter a given hex, itcannot do so. Exception: A unit that has aMovement Allowance greater than zero (0)(i.e., a mobile unit) can always move onehex, regardless of terrain or other costs, butRules regarding Enemy Zones of Control(8.5) and Prohibited hexes and hexsides stillapply.[8.4] Stacking Effects: Friendly units cannever enter hexes containing enemy units.Within the confines of other restrictions(e.g., terrain costs, Zones of Control),friendly units can freely enter and passthrough hexes containing other friendly unitswithout penalty.Stacking occurs when more than onefriendly unit remains in a hex atthe end of any Phase, Step orBattle. Information markers do notcount for stacking.[8.4.1] Unit Size: Smaller unitsand Forts have a black or reddot to the right of their unit typesymbol to indicate that they aresmaller troop sizes counting lessfor stacking.[8.4.2] Stacking Limit: Amaximum of two (2) units canbe stacked at the end of anyPhase, Step or Battle.Only one unit per hex can be anon-dotted unit. Red-dottedunits never count for stackingSystems Development by Alan EmrichNon-dottedunit (oneper hex,maximum)BlackdottedunitReddottedunitand can be added freely to hexes withfriendly units.Thus the maximum you can have stacked ina hex is one non-dotted unit, plus one blackdottedunit; OR two black-dotted units; andto these you can add any number of reddottedunits.[8.4.3] Overstacking Penalty: At the endof every Phase, Step or Battle, place allunits in a hex in excess of the stackinglimit (8.4.2) in the Destroyed Units Box.The owner chooses which units to destroyin each overstacked hex until every hexconforms to the stacking limit.[8.4.4] Allied Nationalities: Allied unitsof different colors cannot voluntarily stackin the same hex. If caused to do so by aretreat after combat, they are not placed inthe Destroyed Units Box right away(unless overstacked, see 8.4.3). However,the Allied player must correct this multinationalstacking situation as soon aspossible. Allied units cannot stack with anOpen City marker.Exceptions:1) Bi-colored Blue/Tan units can be freelystacked with French or British Units.2) A mix of any unitnationalities can be stackedwith the orange Evacuationmarker or in Switzerland.3) Before Game Turn 3, the Allies cannotstack more than one Square unit in ahex, except in Switzerland.[8.5] Zones of Control (ZOCs): The sixhexes on the mapadjacent to a unit arecalled that unit’s Zoneof Control (“ZOC”) asshown here:This Zone of Controlrepresents that areaoutside the hex a unit physically occupiesthat it can control by virtue of its size,mobility, and projection of firepower.ZOCs do not extend into or out of neutralcountries (see 8.10) or into Marshes.Friendly units’ ZOCs do not affect otherfriendly units, but they do restrict enemyunits. Hexes adjacent to enemy units, (i.e., inan Enemy Zone of Control, or EZOC) havethese effects on friendly units:[8.5.1] Stop! : A unit must cease itsmovement for that turn the moment itenters an EZOC, regardless of how manyMPs it might have remaining.
NO RETREAT 3: THE French Front: May-JUNE 1940 v2.4 5[8.5.2] +1 MP to Enter or Exit: It costs aunit one additional (+1) MP to enter ahex in an EZOC.If a unit begins your Movement Phaseadjacent to an enemy unit (i.e., in anEZOC), it costs one additional (+1) MPto exit that hex.[8.5.3] No Infiltration: A unit cannotmove directly from one hex in an EZOCdirectly into another unless the hex it isentering is also occupied by a friendly unit(whereupon the moving unit mustimmediately stop, as per 8.5.1).Otherwise, a unit must first leave anEZOC by way of an uncontrolled hex, andafterward it can continue moving.[8.5.4] Negating EZOCs: In addition toallowing some limited infiltration movement(8.5.3), the presence of a friendlyunit negates an enemy-controlled hex forthe purposes of tracing a Supply Path(6.3) and when Retreating (see 10.7.6).There are also no ZOCs (for any purposes)into Marsh hexes.[8.5.5] Mobile Units: Units with a redMovement Allowance (i.e., mobile units)can Retreat through enemy non-Mobileunits’ ZOCs (only).[8.6] Switzerland: French and Germanunits (only) can enter Switzerland (14.2).There are no hexes, so consider the entirecountry as one huge Mountain terrain hexthat is adjacent to three hexes in both Franceand Germany.It costs a unit its entire Movement Allowance(see 8.3) to enter that Area of the map.Double the regular stacking limit whenapplying it inside Switzerland, and normalZone of Control rules apply to and fromSwitzerland.Example: German units in the 3 German hexesadjacent to Switzerland canall attack it.[8.7] Fortress Areas:There are no separatehexes in these areas, soconsider each of theFortress areas as one (sometimes large) hexthat is adjacent to many hexes on the map(akin to Switzerland, as per 8.6). Normalstacking rules apply inside each of theseareas, and normal Zone of Control rules alsoapply.Fortress Areas that include a City areFortresses for Movement and Combat. TheCity is only considered for <strong>Victory</strong> <strong>Point</strong>scoring purposes.[8.8] Ardennes Area: The large Forest areawith the browntinting behind itis the ArdennesForest (picturedhere).French/Alliedunits cannotvoluntarily enter the Ardennes Forest (theserough/wooded) hexes before Game Turn 6(see 13.4, Event #6).[8.9] Exiting the Map: Your units can exitthe map during your Movement Phase alongGray/Blue map edges at a cost of 1MP plusone (1) Initiative marker per unit exited.• German units (only) can exit along theGerman (Gray) Map Edge. They are thenplaced in the Reserve Box.• Both sides’ units can exit along the French(Blue) Map Edge. They are then placed inthe Southern France Box.Some units in the Southern France Box score<strong>Victory</strong> <strong>Point</strong>s at the end of the game, butonce in this box, they cannot return to themap nor engage in combat there; they are outof play.[8.10] Neutral Countries: Belgium,Holland, Luxembourg, and Switzerlandbegin the game as neutral countries.German units can freely enter any neutralcountry or attack their units. The instant aGerman unit crosses a neutral country’sborder or attacks a neutral country’s units, astate of war exists between that (now former)neutral country and Germany with thesespecific effects:• ZOC rules between those units and acrossthose borders immediately take effect.• That country allies with France and theFrench player commands that country’sunits for the rest of the game.• French and British units can also freelyenter that now-active allied country.• The French player’s units cannot enterthose countries before they are at war withthe Germans, nor attack the units of theseminors while they are neutral.[8.11] Southern France Box: Units canmove and Retreat to the Southern FranceBox (see 8.9 and 10.7.6). Once there,© 2012 Carl Paradis and <strong>Victory</strong> <strong>Point</strong> <strong>Games</strong>however, they cannot leave. No Battles caninvolve the units there, so the units of bothsides in that Box simply co-exist there untilthe end of the game.[9.0] RESERVE MOVEMENTGeneral RuleDuring your Movement Phase, you can Putin Reserve your non-Fort units by placingthem in the Reserve Box. You can relocatethem back onto the map during a subsequentReserve Phase.Cases[9.1] Put in Reserve: Starting on Turn 2,you may take up to one friendly suppliedunit (only!) from the map per MovementPhase and pay one (1) Initiative marker andplace it in the Reserve Box in lieu of anyother movement for that unit that turn.[9.1.1] Reinforcements/Replacements:Units and markers arriving as Reinforcements/Replacementsappear in the ReserveBox during your Organization Phase.These units do not count against your oneunit-per-turn-from-the-maplimit.[9.1.2] Reserve Capacity: Each playercan have a maximum of six (6) units in theReserve Box, plus any Paratroopermarkers.[9.1.3] Exceptions: Belgian, Dutch, Swissand Fortification units are prohibitedfrom being placed in Reserve.The Reserve Box represents Operationalredeployments, rail moves, and actualmovement of reserve troops away fromprying enemy eyes. It also accounts for theunexpected German moves through theArdennes area early in the campaign.[9.2] Release of Reserves: During eachMutual Reserve Phase, both Players (withthe player whose turn it currently is goingfirst) may bring none, any or all of their unitsfrom the Reserve Box back onto the map.(Units in the Reserve Box can remain thereindefinitely.)When thus Released, each such unit must beplaced in:1) A friendly City hex that can trace aRegular Supply Path (even if that City hexis in an EZOC).2) German units can be placed in any Ardenneshex (see 8.8), even in an EZOC,that he can trace a Regular Supply Pathfrom unless the “No Ardennes Surprise”Event text is on his Plan card selectedduring set up (14.14).3) Or any other hex that is within three (3)hexes, maximum (i.e., no more than twointervening hexes), from a friendly Cityor friendly map edge (Gray for theGermans and Blue for the French) that is
6 NO RETREAT 3: THE French Front May-JUNE 1940 v2.4not in an EZOC. You cannot use a cityfor this purpose that was just capturedduring the current Player Turn.[10.0] COMBATGeneral RuleDuring your Combat Phase, each of yourunits might participate in an attack against anadjacent hex containing enemy units. Eachunit has a Combat Strength representing itsbasic power to attack and defend. When aplayer initiates an attack between adjacentunits, it results in a battle (i.e., completingall of the Steps in the Battle Procedure).Throwing the die and consulting theappropriate Player’s Combat Tables, andthen applying the result, is how a givenbattle is resolved.The player who is initiating an attack iscalled the “Attacker” and his opponent iscalled the “Defender” in that battle(regardless of the overall situation).Combat Phase PreparationA Combat Phase begins with the Phasing,and then the Non-Phasing Player, declaringall of the hexes that will be attacked. This isfollowed by each battle’s individualresolution.Exception: the French player declares mostof the French voluntary battles during hisOrganization Phase (see the French playeraid sheet for the exact sequence).For the French player, things are different.When he is the Phasing Player, he mustplace his Target markers on the map duringhis Organization Phase (except for hisspecial Dark Blue Target marker). With thatone exception, this means the French mustmake “prepared” attacks against units thatthey began the turn adjacent to, whereas theGermans can roll up to French units duringthe German Movement Phase and thendeclare their attacks! This represents some ofthe major doctrinal differences between theopposing armies.The French player places Counterblowmarkers normally, however (10.1.2).Cases[10.1] Declaring All Battles: Beforeresolving any Battles, both players mustdeclare all targeted defender’s hexes. ATarget Hex is one containing forces of theNon-Phasing (i.e., the defending) player thatis adjacent to one or more hexes containingforces of the Phasing (i.e., attacking) player.The attacking player places aTarget marker in each TargetHex that he wishes to attack. Hecannot put a Target marker ona hex that already contains aCounterblow marker.TargetmarkerAt the start of the game, the Frenchplayer has only 3 regular (white)Target/Counterblow markers; hereceives the special (dark blue) one when theAnglo-French Union Event occurs. TheGerman player always has 5 gray ones. Thenumber of Target markers is a maximumlimit (a player cannot have moreTargets/Counterblows than his maximumnumber of markers).[10.1.1] Voluntary Attacks Step: ThePhasing player declares all of his desiredattacks first and places his Targetmarkers. All of these are Target Hexes thathe will voluntarily attack that Phase.Restrictions• A unit with a Disorganizedmarker cannot voluntarilyparticipate in an attack.• A unit with a white Combat strengthcannot voluntarily participate in anattack.[10.1.2] Counterblows Step: After thePhasing player (i.e., the attacker) hasdeclared all his voluntary attacks; the Non-Phasing player (the defender) may declareadditional Target Hexes that the Phasingplayer must also attack during his CombatPhase. The Non-Phasing playerplaces his Counterblowmarkers (blue for French/Alliedoccupied hexes and Gray-Greenfor German-occupied hexes) on theseTarget Hexes not already containing aTarget marker.Restrictions• The Non-Phasing player pays one (1)Initiative marker for each such Targethex he so designates with aCounterblow marker.• The Non-Phasing player’s whitestrengthand disorganized units cannotparticipate in a Counterblow, but theydo suffer their results.• Any of the Phasing Player’s adjacentunits can respond to a Counterblow,including Disorganized units and thosewith White-print Combat Strengths.Units in Counterblow Target Hexesreceive no terrain benefits for that Battle(i.e., combat shifts) when attacked by thePhasing player. Note that weather combateffects do apply.Why pay to have your units attacked andforego terrain advantages?Opportunity or desperation; you may haveunsupplied units trying to break out; orwant to draw off units from youropponent’s nearby, carefully plannedattack; or seek out a weak unit in hopes ofSystems Development by Alan Emrichgetting a CA combat result against it andpunishing it.The purpose of a Counterblow is to seizean opportunity to unhinge your opponent’splans or advance your own cunning plan.[10.2] Order of Combat: All declaredbattles are resolved in any order the Phasingplayer (attacker) desires. Each battle must becompletely resolved before commencing thenext battle.Battle Preparation[10.3] Combat Conditions: The followingrules determine which units are eligible forcombat.[10.3.1] Attacker’s Prerogative: ThePhasing Player decides which attackingunits will attack which Target Hexes, inany combination he desires, as long as alldeclared Target Hexes are attacked.[10.3.2] Combining Units in a Battle:Attacking units in one or more hexes maycombine their Combat Strengths andconduct a single battle together.[10.3.3] Adjacency: For an attack to beresolved as a single battle, all of theattacking units must be adjacent to all ofthe Target Hexes. Within that restriction, abattle can involve any number of attackingunits and Target Hexes.[10.3.4] One Battle Per Unit: No unitmay attack more than once per friendlyCombat Phase, and no Target Hex can bethe object of more than one battle perenemy Combat Phase (not includingcounterattack results; see 10.7.2)[10.3.5] Multi-Unit Attacks: Attackingunits in a single hex may attack one ormore Target Hexes in a single battle. Notethat if one or more such units attack, thisdoes not obligate any of the other PhasingPlayer’s units stacked with or adjacent toit to participate.[10.4] Combat Strength Unity: A givenunit’s Combat Strength is unitary; youcannot divide it among multiple battlesduring a single Phase.Units that are stacked together need notparticipate in the same battle when attacking(or counterattacking; 10.7.2).Conversely, all units in a Target Hex mustdefend together.[10.5] The Steps in a Battle: Battles areconducted via this Battle Procedure. Youmust complete these Steps for each attack, inthe exact order listed below:Battle Procedure1. Strength Step: Total the CombatStrengths of: first, the attacking units; andthen the defending units.
NO RETREAT 3: THE French Front: May-JUNE 1940 v2.4 72. Commitment Step: TheAttacker (only) may commit oneBlitz! or Shock! marker to theBattle, but only if enough Mobile unitsare participating in the Attack to permitthis commitment (see 10.6.2).Then, starting with the Attacker, eachplayer may play one Event card that takeseffect during a battle. This occurs beforethe die is rolled. Note that the Defendermakes his card play decision after theAttacker, with full knowledge of theAttacker’s commitment (if any).3. Initial Ratio Step: Divide the attacker’sstrength by the defender’s strength andexpress this as an initial Odds Ratio (seethe Combat Results Tables). Always dropfractions so that the math is “rounded off”in the Defender’s favor.For Example: 12 Strength <strong>Point</strong>s attack 9; theratio is 1.33 to 1, which rounds down for theCombat Results Tables to a simple 1:1 OddsRatio battle. If the Attacker could havemustered 14 vs. 9, the Odds Ratio would haverisen to 3:2. This simple Odds Ratio gives theinitial Odds Column used on the Attacker’sCombat Results Table.4. Final Odds Step: Shift the initial OddsColumn (determined above) left and/orright as called for by the Terrain EffectsChart, weather, Support markers, armor,or Event card(s) in play for that battle. Alleffects are cumulative and only the netOdds Column shift is applied. Thisdetermines the final Odds Column used.5. Attacker Rolls Step. The Attackingplayer rolls a six-sided die and crossindexesits result with the final OddsColumn (determined in Step 4, above) toobtain the Combat Result.6. Apply Result Step. With the CombatResult known, it is now applied. Thismight result in repeating the above Stepsdue to a counterattack, a unit step loss orremoval by either side, or a Retreat –followed by a possible Advance AfterCombat.[10.6] Combat Odds Shifts: Whenadjusting the Final Odds Column (per Step 4,above), the following Subcases apply:[10.6.1] Terrain Effects: The shiftscaused due to terrain effects are basedupon the defender’s hex or if all of theattacking units attack across the hexsideslisted on the Terrain Effects Chart (TEC).If more than one hex is attacked at thesame time, the defender chooses whichsingle defending hex’s terrain will beused.[10.6.2] Support Markers: Whenavailable to a player, a maximum of one(1) German Blitz! or French Shock!marker can be committed to a battle, andonly when that player is the attacker(even in a counterattack situation).Use of these markers allows that player touse his Blitz!/Shock! Combat ResultsTable (otherwise, battles must be resolvedusing the attacker’s Attrition Table).• Support markers can only be committedto a battle if at least half of the attackingunits are Mobile (i.e., have a redMovement Factor) and are in supply.• Support markers do not remain on themap. After their use, they are flippedand returned to the Unused MarkersHolding Box.• Unused Support markers are carriedover from one Game Turn to another.They’re good until used.• When you gain Support markersthrough card Events, you cannot flipInitiative markers that you alreadypossess! You can only gain them bytaking unused markers that are currentlyavailable for purchase.So, contrary to previous No Retreat! games,Blitz! / Shock! markers do not provide abonus column shift to an attack, but insteadallow the use of a different (and moreeffective) Combat Results Table.This represents mobile training, superiordoctrine, tactics and leadership, pluselements of surprise, airpower, logisticalsupport, etc.[10.6.3] Armor Bonus: Whenan attacking force includes anArmor type unit AND it is Panzerattacking infantry-type units or Tankin a Clear or Forest hex, theattacker receives one shift to the right(1).• Armor attacks against units with anArmor, Mechanized Infantry, orHedgehog-Defense Capable units donot receive this bonus.• This bonus applies once for EACHarmor unit taking part in the battle.• This bonus only applies when an armortypeunit is the attacker in a battle,never when it is the defender (but itdoes apply when an armor-type unit isin a counterattack situation).• This bonus does not apply during BadWeather Game Turns.[10.6.4] Odds Limits: Only the net shiftapplies to the final column used on theCombat Results Table.Whenever an initial (before shifting) orfinal (after shifting) Odds Ratio exceeds6:1, it is treated as 6:1. When less than 1:3,an initial Odds Ratio is not shifted andbecomes an automatic CA result, as dofinal Odds Ratios of less than 1:3.For Example: 24 German Strength <strong>Point</strong>sattack an Allied unit worth only 2 Strength<strong>Point</strong>s that is in a City hex. The initial Ratiowould be 24:2, or 12:1, which becomes a 6:1(the maximum column before shifting). That isshifted one to the left (1) for the defender’sterrain and the attack would be resolved on the5:1 Column.[10.7] What the Combat Results Mean:Combat results are listed under eachplayer’s respective Combat Results Tableon their Player Aid Sheets. Below are thedetails for applying those results:BATTLE RESULTS:— = Indecisive Battle: No EffectCA = Counterattack: The defender maylaunch an immediate counterattack. Recomputethe odds; no terrain modifiers.CB = Counterblow: Place a Counterblowmarker on a single Phasing Player’sunits’ attacking hex. These markers arenot removed during that side’s Marker /Unit Removal Phase, but are insteadresolved as usual during the other side’sCombat Phase (i.e., during the next PlayerTurn).* If the Target Hex has a Fort unitin it, this result is No Effect.DW = Defender Withdraws: The DefenderRetreats his units 1 hex. Attacking unitsmay Advance 1 hex (only, no bonuses).If the Target Hex has a Fort unit in it,this result is No Effect.DR = Defender Retreat: Defender Retreatshis units 2 hexes. Attacking units mayAdvance. If the Target Hex has a Fortunit in it, this result is No Effect.DS = Defender Shattered: Defenderretreats his units 3 hexes and they areDisorganized. Attacking units mayAdvance. If the Target Hex has a Fortunit in it, this result is an EX.DD = Defender Destroyed: DefenderRetreats his units 4 hexes, they areDisorganized AND each defending unitloses 1 step. Attacking units mayAdvance. If the Target Hex has a Fortunit in it, this result is 1 Fort Step lossand no Retreats. Attacking units mayAdvance if the hex is completely vacatedafter the step losses are applied.EX = Exchange: Both sides lose 1 step.Neither side Retreats or Advances. Theloss must be from a Mobile unit if theBlitz!/Shock! Table was used.E/= Initiative: The German/Frenchplayer gains one Initiative marker ANDone Battle <strong>Victory</strong> <strong>Point</strong>. If the Target© 2012 Carl Paradis and <strong>Victory</strong> <strong>Point</strong> <strong>Games</strong>
8 NO RETREAT 3: THE French Front May-JUNE 1940 v2.4Hex has a Fort unit in it, this result is NoEffect.*Thus, your Player Turn could begin withsome enemy Counterblow markers alreadyin place, meaning that either:A) You must attack those enemy units ifyour friendly units remain adjacent to themduring your Combat Phase; orB) You will have to move your friendly unitsaway during your Movement Phase to avoidthose battles (at which point theCounterblow marker has no effect).This can be a big decision![10.7.1] Step Losses: Certain results causea step loss to either the defender’s (DD) orboth sides’ units (EX). When these occur,a full-strength, two-step unit is reduced(flipped over) to its reduced-strength, onestepside OR a unit with only one step iseliminated (but see rule 14.9, CadreUnits).• When there is a choice, the owningplayer determines which of his units inthat battle suffer any step loss.Most Eliminated units are placed in theDestroyed Units Box or, if that unit hadan Unsupplied marker on it atthe time of its elimination, it isplaced in the SurrenderedUnits Box instead.• Exception: place German and FrenchCadre units on the Turn Track wheneliminated (see 14.9).[10.7.2] Counterattacks: A CA resultmeans the defender must decide to either:treat that battle’s outcome as No Effectand end it there, OR to conduct animmediate counterattack.If the defender counterattacks, removeany Support marker and discard playedcards for that battle. Go back to Step 1 inthe Battle Procedure and start a brand newbattle, repeating all of the Steps.This new battle must include the exactsame units that participated in the initialBattle, only this time: 1) the Counterattackingplayer is the attacker (and theother player is the defender), and 2) noterrain shift modifiers are applied to thisbattle (although other terrain effects thatnegate armor shifts and multi-hex advancestill apply).• Unengaged Units: It could happen incounterattack battles that some units in ahex are being (counter) attacked, butother units in that hex are not; this isallowed. Only participating units areaffected by any step loss and CAresults; stacked, unengaged units mustsuffer any Retreat results.• A counterattack can lead to anothercounterattack, and so on until someother outcome takes place. Thesecounterattacks, too, are conducted as perthis Rule.[10.7.3] Counterblows (InvoluntaryCounterattacks): A Non-Phasing player’sCounterblow (10.1.2) mandatesthe Phasing player’s involuntarycounterattack in response. This isperformed similarly to a regularcounterattack in that the defender (i.e., theNon-Phasing player) receives no terrainshift modifiers, but:• The Phasing player is the attacker andthe Target Hex is the one denoted by aCounterblow marker (see 10.1.2).• Disorganized and white strength unitscan participate in these Counterblows,but can never Advance After Combat(10.8) if victorious.• Remember that a Counterblow calledfor by the Combat Result Table (CB) isresolved during the next Player Turn.Simply flip the Target marker to itsCounterblow side and place it on oneof the Phasing player’s Attacking hexes(of the Phasing player’s choice, if thereis more than one such hex); even when aCB result occurs during a Counterattack(CA).You need to visualize this:Counterblows placed through discardingInitiative markers during the opponent’sturn are diversions made by the defender toforce the Phasing player to commit somestrength to attack those harassing units.Counterblows placed by a CB combat result(and thus resolved on the following PlayerTurn) are partial advances made by theattacker that forces the opponent to eithercede the hexes adjacent to that Counterblowmarker during the next turn, or to deal withthe threat directly by attacking it.[10.7.4] Forts: When the Target Hexcontains a hexagon-shapedFortified (a.k.a. “Fort”)unit, these outcomes arechanged:• A DR or DW becomes aNo Effect (‘–’).• A DS becomes an EX.• Ignore the Retreat part of a DD resultfor all units in the Target Hex.• No Initiative or VP markers are gainedfrom that battle.• Ignore the Hedgehog Defense rule(10.7.5).[10.7.5] Hedgehog Defense Units: Whenthe Target Hex contains a unit with theSystems Development by Alan EmrichHedgehog Defense symbolbetween its Combat Strengthand Movement Allowance,and no counterblow markers,change the combat result as follows:Hedgehog Defense units (and the unitsstacked with them) suffer the next higherCombat Result listed on the tables whenthey are defending (only). The hierarchyof Combat Results (which get progresssivelybetter for the defender) are: DD DS DR or DW EX CB CA E/. An initial “E/-” stays as is.For Example: A combat result of DS becomes aDR result, which is better for the defender (thanksto their Hedgehog Defenses). A DS becomes aDW on the Attrition Tables (as there is no DRresult on these Combat Results Tables).[10.7.6] Retreats: When required toRetreat, the defender must first move hisunits one to four hexes (depending on thespecific Combat Result) further awayfrom the battle (i.e., they cannot zig-zagso as to end up fewer hexes further away),toward a friendly supply source ifpossible, within the following restrictions:• Units cannot Retreat into hexescontaining an enemy unit, acrossProhibited hexsides or off the map.• Exception: Allied units can Retreat offthe map through a French (blue) mapedge; place these units in the SouthernFrance Box (see 8.11).• Most units cannot Retreat into hexes inan Enemy ZOC unless there is also afriendly unit in that hex (i.e., friendlyunits negate EZOCs for Retreatpurposes.) See the exception below:• Red-Movement Allowance (i.e., mobile)units can Retreat into hexes that areexclusively in Enemy Black-MovementAllowance (i.e., non-mobile) units’ZOCs, but only if they can Retreatwhile moving towards their own linesand Supply sources (i.e., you cannotadvance through enemy lines whileRetreating!).Thus, regular infantry units cannot easilysurround elusive mobile units!• Units can pass through and end theirRetreat stacked with friendly units, butif an overstacking situation occurs at theend of a Retreat, it must be resolved(see 8.4.3).• Retreating expends no Movement<strong>Point</strong>s; you just count hexes.Remember, Forts and units stacked withthem never retreat; they ignore the Retreatpart of DR and DD results.If a unit is prohibited from Retreating, it iseliminated instead (see 10.7.1).
NO RETREAT 3: THE French Front: May-JUNE 1940 v2.4 9[10.8] Advance After Combat: Followingtheir Retreat or removal from their hex afterthe application of a DW, DR, DS, or DDcombat result, if the Target Hex has becomecompletely vacated, then attacking (non-Fort) units may Advance After Combat.This means that those attacking units canmove into the defender’s just-vacated hexand possibly beyond.• Advance After Combat expends noMovement <strong>Point</strong>s, nor do Enemy Zones ofControl affect it in any way; you justcharge forward counting hexes.• A number of surviving attacking units upto the stacking limit (8.4.2) can alwaysadvance into, and remain in, a Defendingunit’s just-vacated hex.• Units cannot advance into hexescontaining an enemy unit, acrossProhibited hexsides or off the map.[10.8.1] Multi-Hex Advance: In a multihexadvance, the first hex advanced intomust be a defending unit’s just-vacatedhex. After a DR or DS combat result,Mobile units, and all units after a DDresult, can advance a second hex withinthe following restrictions for that secondhex of advance:• In Addition to the normal (see 10.8)advance limitations, units cannot make amulti-hex advance during Bad Weather(see 13.1).• French/Allied units cannot do a Multi-Hex advance on a DR or DS combatresult before Turn #8 (see the note onthe Turn Track), but they can always doso on a DD result.• Units can pass through other friendlyunits during this advance. If they endtheir advance stacked with otherfriendly units and overstacking occurs,it must be resolved (see 8.4.3).• Advancing units need not follow thedefending units’ retreat path! Afteroccupying the just-vacated defender’shex, multi-hex advancing units are freeto go to any adjacent hex that is nototherwise prohibited.• Important: Units must cease theirAdvance After Combat immediatelyupon entering a Mountain, ArdennesForest, City, Fortress or Marsh hex.Crossing a Major River or Fortifiedhexside also stops Advance AfterCombat (c.f.: Terrain Effects Chart).This means that if the defender’s justvacatedhex is, for example, a Marsh hex,then no multi-hex Advance After Combatcan take place. Advancing units would haveto stop their advance right there in that hex.[10.8.2] Panzer Advance Bonus: AllGerman Armor-type units whose multihexAdvance after Combat has not beenstopped in its second hex due to the aboveterrain considerations may, during Goodweather turns only, continue on andadvance a third hex.Thus the French/Allies will be limited to aone-hex advance after combat for most of thegame, unless winning an overwhelmingvictory (via a DD result). This simulatestheir slower, deliberate battle doctrine andlow operational initiative.[11.0] MARKER / UNITREMOVAL PHASEGeneral RuleThis Housekeeping Phase is when Unsuppliedunits re-check their supply status, andsome markers are removed from the map.Cases[11.1] Marker Removal: Remove allDisorganized markers on the PhasingPlayer’s units (only); clear off all used Blitz!and Shock! markers on the map, and returnthem all to the Unused Markers HoldingBox. The Phasing Player’s Paratroop unitson the map are also removed from the gameat this time.[11.2] Resupply: All units with Unsuppliedmarkers retrace supply at this time,beginning with the PhasingPlayer’s units and then the NonphasingPlayer’s units.Those that cannot trace a valid Supply Pathduring this Step keep their Unsuppliedmarkers. Those that can now trace a validSupply Path have those markers removed.Thus, unused markers on their Blitz! /Shock! sides can be saved between turns forlater use, just as they can when they are ontheir Initiative side.[12.0] HOW TO WINIt is very important to make a study ofthese methods and procedures for keepingtrack of how well players are doing. Many ofthis simulation’s ‘lessons’ are revealedthrough the victory conditions that motivatewinning gameplay. That is, these <strong>Victory</strong>Conditions quantify the narration of thisgame’s ‘story.’General RuleA Campaign Game (i.e., one played fromthe first game turn with the goal of playingto the last game turn) of No Retreat 3 iswon in two different ways:1) By a French or German Automatic Winduring play, OR2) By an End of Game <strong>Victory</strong>Determination.© 2012 Carl Paradis and <strong>Victory</strong> <strong>Point</strong> <strong>Games</strong>Shorter scenarios have their own <strong>Victory</strong>Conditions listed with their instructions.3) You also check for “operational Collapse”during that phase.Cases[12.1] Operational Collapse Check: Duringthe New Game Turn <strong>Victory</strong> Phase of theSudden Death turns (indicated by a Death’sHead T symbol on the Turn Track; i.e.,Game Turns 3, 6, 9 and 12),unless theAnglo-French Union Event is in effect;( see14.13.2). Players check the <strong>Victory</strong> <strong>Point</strong>Track – the side (or sides) with their picturedsymbol/color for the indicated Game Turn:• If it is French and the VP totalis less than or equal to (≤) thenumber shown by his side’ssymbol for the indicated GameTurn, then the German sidesuffers an “OperationalCollapse” (see 12.1.2).• It is German and the VP total isequal to or greater than (≥)the number shown by his side’ssymbol for the indicated Game Turn, thenthe French side suffers an “OperationalCollapse” (see 12.1.1).If it is a French VP Game Turn (i.e., GameTurns 3, 6 or 9), and the VP total is one tothree higher than the number by the Frenchsymbol for that Game Turn, you may (youcan chose not to do it) advance the BritishAid marker one square right on the BritishAid Track.In this case, the campaign is closefoughtand the British feelconfident enough to commit themselvesfurther to the French Campaign.For Example: It is the <strong>Victory</strong> Phase to start thenew Game Turn 9. Finding the T9 (Turn 9)notation in the German-colored16 box on the VP Track meansthat the French Player wouldsuffer an Operational Collapse ifthere are 16 or more <strong>Victory</strong><strong>Point</strong>s.For Turn 9 (T9), the Frenchplayer finds a French symbol onthe 10 box on the VP Track; thismeans that the German Playerwould suffer an OperationalCollapse if there are 10 or fewer VPs.If at the beginning of Turn 9, AND if the VP countwas 11, 12 or 13 (i.e., one to three higher thanFrench T9 VP value), you would advance theBritish Aid marker on the British Aid Track onesquare.[12.1.1] French Operational Collapse: Inthis case, for the current turn, apply theinstructions below for the French player:
NO RETREAT 3: THE French Front: May-JUNE 1940 v2.4 11*The +1 VP for a Paris City hex capturedby Advance After Combat applies to bothsides. Consequently, the Allies are penalizedthus if they retake such a hex in combat!On-Map/Unit VPs (always counted):+1 VP for each Allied unit that is in theSurrendered Units Box.-1 VP for each German unit that is in theSurrendered Units Box.+1 VP for a German-controlledSwitzerland Area.+1 VP for each German-controlled ORisolated Maginot line Area.+1 VP for each German-controlled Port orNon-Open City hex (see 14.10).End Game VPs (counted only at EndGame):+1 VP for each German Mobile unit inthe Southern France Box.+1 VP for each British unit in theDestroyed Units Box (this includes theFranco-British Reserves unit).-1 VP for each German unit in theDestroyed Units Box.-2 VPs for each British unit in theEvacuated Units Box.+X VPs for Each Successful Plan (see12.7).-X VPs for the End Game VP score onthe Turn Track’s current turn, if any(e.g., for an Armistice Event ending).[12.6] How to Work the VP Markers: Thesquare VP marker always reflects theGame’s current total score; this includesthe value of the round VP marker andexcludes the value of any End Game VPs.For Example: On Turn 5, the French playerretakes one of their lost cities. Since the VPmarker always reflects the Germans’ score, thesquare <strong>Victory</strong> <strong>Point</strong> marker is reduced by one(-1) box to reflect the French’s city recapture. Ineffect, the Germans lost one (-1) VP when theFrench recaptured that city.The round Battle VP marker is used as areminder to reflect the current net score ofCombat and Event-gained VPs (only).The value of that round Battle VP marker isadded to (or subtracted from) the On-Map/Units VPs, and thus their sum isalways reflected by the current value shownfor the square VP marker.[12.7] Secret Plans (also see 14.14): Duringset up, players randomly draw, and keepsecret, one of their Plan cards. The drawncard determines the strategic goals set bytheir Supreme HQ and/or Political Leaders.Each plan has three VP objectives that arechecked for scoring during each SuddenDeath Phase (i.e., on Game Turns 3, 6 and9). Case 14.14 in the Reference section ofthis booklet explains Plan cards’ effects indetail.Scenario set up instructions Card #D = Draw;K = KeepPlan A, Band C goalsSpecialinstructionTurn this condition is checked <strong>Victory</strong> <strong>Point</strong> valuePlans are drawn in the following sequence:A. French Plan Draw Step: The Frenchplayer secretly draws one card, keeping itif it is a labeled with a “K.”If it is labeled with a “D,” he may make aredraw by showing the card to the Germanplayer (to verify the “D” label), putting itback in the deck, reshuffling, then drawingagain. He can do this only once, and mustplay with that second Plan card draw,even if he draws the same Plan cardagain.B. German Intelligence Step: The Germanplayer secretly draws one (1) card fromthe French Deck, looks at it, and removesthat Plan card from the game. He iscertain that is not the French Plan, even ifthe French change plans mid-game!C. German Plan Draw Step: The Germanplayer secretly draws one card, keeping itif it is a labeled with a “K.”If it is labeled with a “D,” he canshow the card to the French playerand either return it to his deck ORremove it from the game (thusgiving the French player some freeintelligence). The German player thenreshuffles his Plan cards and draws again.He can do this only once, and must playwith that second Plan card draw, even if itis a redraw of his first card draw!D. French Intelligence Step: The Frenchplayer secretly draws one (1) card fromthe German Deck, looks at it, and thenremoves it from the game. He is certainthat is not the German Plan, even if theGermans change plans mid-game![12.7.1] Plan Scoring: During eachSudden Death Phase (of Game Turns 3, 6and 9), both players check their respectivePlan cards to see if they have© 2012 Carl Paradis and <strong>Victory</strong> <strong>Point</strong> <strong>Games</strong>accomplished that card’s Plan Objectivefor that particular Sudden Death Turn.• If the condition(s) on that card for thatSudden Death turn are met, that playerplaces, Plan-side down, hiscorresponding lettered Plan marker inthe Secret Plans Box at the top corner ofthe map. It is revealed for VP scoringduring the End Game <strong>Victory</strong> Phase(12.4) only.• If the condition(s) on that card for thatSudden Death turn are not met, thatplayer can either: A) put nomarker in Secret Plans Box (ineffect, admitting failure for hisopponent to see), or B) placein his Dummy (“Plan X”) marker in theSecret Plans Box (to fool his opponent).If and when the game ends in an EndGame <strong>Victory</strong> (12.4), these Plan markersare turned over and compared to thescoring value on their owning player’scurrent Plan card. Those VPs are added to(or subtracted from) the Game’s total evenif they were earned under a previous Plancard that has since been replaced (see12.7.2).Trust: Because you can score Plan VPsunder one Plan and end the game operatingunder another (12.7.2), it is important torealize that it will be impossible to verify ifVPs earned under a previous Plan card arelegitimate. Players will have to be careful,therefore, when gaining their Plan markersand trust their opponent to play a strictlyhonest game.For Example: The French player has card F4(Plan E 1938) as his plan during the End GameScoring. His Plan markers in the Secret PlansBox are A, X and C. The X marker scoresnothing, the A marker scores -6 VPs and the Cscores -3 VPs, for a total of -9 VPs.[12.7.2] Changing Plans: Players canchange their Plan card during play byusing a particular Event card to do so;namely card #22 (OKW Staff) for theGermans and card #16 (GHQReinforcements) for the French.Procedure: When exercising this Eventcard option, shuffle your Current Plan cardtogether with your other, unused Plancards, and draw one. Unlike during set up,there is no redraw allowed – whateverPlan you receive on that card, it becomesyour new Current Plan.Exception: You cannot change plans afterGame Turn 8 (since Turn 9 is the last turnfor scoring).Thus, you could end up with the same Plancard that you had before!
12 NO RETREAT 3: THE French Front May-JUNE 1940 v2.4Note also that you can “bluff” in that you donot have to follow or tell your opponent allof the plan’s instructions if they are notmandatory. For example, on a new Plan carddrawn mid-game, the French player neednot reveal its “+1 Bonus Movement <strong>Point</strong>”on Turn 1.”Reference Section0BRULES EXCEPTIONSHere is a summary of the rules exceptionsaffecting the French player over time:• No attacks on Turn 1.• No stacking units before Turn 3 (8.4.4).• No entering an Ardennes Hex before Turn6 (8.8).• No Multi-Hex Advances after Combatbefore Turn 8 (10.8.1).• Combat Declarations are made in theFrench Organization Phase (only) for theregular (white) Target markers.[13.0] GAME TURN EVENTSWhen conducting a Game Turn’s HousekeepingPhase, Turn Track Events (andother features of interest, including theweather, Support marker availability,Sudden Death turns, etc.) are noted (wherethey have a lasting effect) or applied (whenthe effect is an immediate, one-timeoccurrence).[13.1] Weather: Place the weather markeron its space on the Player Aid Mat to denotethat turn’s weather:Good Weather EffectsThere are no special effects.Bad Weather EffectsAs listed on the Terrain Effects Chart:• All units have a maximumMovement Allowance of four (4)Movement <strong>Point</strong>s.• There are no Armor Bonus shifts (10.6.3)in combat.• Multi-hex Advance After Combat (10.8.1)is prohibited (i.e., units can only advanceinto the defender’s hex).• Shock! / Blitz! markers cannot be used.• You cannot drop Paratroops (14.8).[13.2] Sudden Death (T): At the beginningof this Game Turn (3, 6, 9 and 12), duringthe <strong>Victory</strong> Phase, check for Sudden Death<strong>Victory</strong> (12.1) and Plan Scoring (12.7.1).[13.3] Initiative markers: Both Playersreceive a set number of Initiativemarkers in the OrganizationPhase of their own Player-Turn,as indicated by their symbols onthe Game Turn Track.For Example: On Turn 5, the German playerreceives three Initiative markers and the Frenchplayer receives one Initiative marker.Initiative markers are the game’s currency,allowing players to do important things.They represent supplies, operationalleadership, support assets (vehicles, artillery,airplanes), troop replacements, etc.[13.4] Game Turn Effects: The text in theGame Turn boxes reflect these effects aslisted in chronological order (by Game Turnnumber) below:1 – No Allied Combat: During Game Turn1, the French player cannot initiatecombat or Counterblows,and The Fortification Symbols andHexsides of the Belgian LiegeCity hex have no effect.This reflects German surprise after the long“Phony War” period during the past winter.2 – Reserves Allowed: Beginning on thisturn, and for the rest of the game, bothplayers can add units to the Reserve Box.A maximum of one such unit per turn isallowed, and at a cost of one Initiativemarker per unit.This represents rail movement, operationalreserves and reactive redeployments.3 – Allies Can Stack: The French playercan now stack his square units together(but see 8.4.4).The operational performance of the relativelyinexperienced French and Allied troopsbegan poorly when compared to theexperienced Germans troops who hadrecently won the Polish Campaign.4 – Change Plans: Starting this turn, bothPlayers can change their Plans should theopportunity present itself (12.7.2).5 – Halt Order: The French Haltbefehl!Event card is playable as an Event for therest of the game (14.11).6 – Ardennes: The French player’s unitscan enter the Ardennes hexes for the restof the game.This area was considered impassable by theFrench High Command. Consequently, onlysmall detachments were sent to cover andhold it.7 – Free Regional: Both sides’ Regionalunits can move without restrictionsfor the rest of the game (see 14.1).8 – Allied Advance: The French player’sMobile units can make Multi-hexAdvances after DR and DS combatresults (10.8.1) for the rest of the game.Initial Allied tactics were in the deliberatestyle of a WWI advance – notoriously timidin regard to exploiting success and plaguedby bad unit communication.Systems Development by Alan Emrich9-12 – Game Ends “-x?”: The game willend this turn if an Armistice occurs byplaying card #1’s Event. Immediatelystop the game and compute the EndGame <strong>Victory</strong> (12.4) with the indicatednegative VPs being scored.[14.0] SPECIAL UNITS/RULESTo review and summarize the effects ofsome special units, markers and rules:[14.1] Regional and Fortified Units:Regional Infantry units ( ) have thefollowing movement restrictions until Turn7:• French Regional units cannot move tohexes, in France, that aren’t in or adjacentto Maginot line hexes.• German Regional units cannotmove to hexes that aren’t adjacentto German Frontier hexsides.• Dutch, Belgian and Swiss Regional unitscannot leave their respective homecountries.• If such a move is made involuntarily (e.g.,via a combat or event card), the affectedunit (only) is freed from the restriction.• The Swiss unit cannot Retreat. Changethe Retreat portion of a combat result to anEX result when it involves theSwiss unit (it takes the loss even ifwith Allied units).Fortified units have the following restrictionsat all times:• Fortified units cannot voluntarilyattack (10.1.1), but they can attack inresponse to a Counterblow (10.1.2).• Fortified units do not suffer the effectsof any Retreat outcomes incombat.• Lost steps from Fortified unitsare irreplaceable. Wheneliminated and not in Regular Supply(6.1), place these units in theSurrendered Units Box.[14.2] French Allies: Holland,Belgium and Switzerland becomeFrench Minor Allies if and when anyGerman unit moves into their country orattacks them.• When this happens, the French playercontrols them for the rest of the game.• The Swiss are always in supply. Theothers trace Supply in the same way thatother Allied units do.• The Netherland unit does not benefitfrom the Hedgehog bonus (10.6.3),unless there is an Allied unit inHolland.[14.3] Armor-Type Units: These representlarge tank formations. They are
NO RETREAT 3: THE French Front: May-JUNE 1940 v2.4 13disadvantaged when moving throughdifficult terrain (having higher ArmorMovement costs on the Terrain EffectsChart), but receive the following advantagesin battle:• A one-column shift to the right () whenattacking (or counterattacking) mostinfantry-type units defending in a Clearhex during a Good weather turn (10.6.3).• German Panzers enjoy an additional hexof Advance After Combat on Goodweather turns (10.8.2).• Two of the Allied single-stepTank units cost two Initiativemarkers to replace, as indicatedon their reverse sides.[14.4] Mechanized Infantry: These arebetter-motorized formations withstrong supporting tank and antiarmorcapabilities. They move asinfantry-type units (i.e., paying the OtherMovement costs on the TEC).When defending in combat, the attacker doesnot receive the Armor Attack Bonus (see10.6.3) against them.[14.5] Mobile Units: These units are betterequippedmotorized formations andtrained assault troops. They areidentifiable by their red MovementAllowance.• At least half the attacking units in a battlemust be comprised of Mobile troops inorder to use the Blitz! or Shock! CombatResults Tables (10.6.2).• Only Mobile units can perform a Multi-Hex Advance after Combat (10.8.1).[14.6] Hedgehog Defense Units: Thereverse sides of some Allied andGerman units sport a Hedgehogsymbol between their numbers.• When defending, this unit negates theattacker’s Armor bonus (; 10.6.3).• They (and units stacked with them, but notif with a counterblow marker) suffer alower combat result when defending,unless if stacked with a Fortified unit(10.7.5). The order is: DD DS DRor DW EX CB CA E/. Aninitial “E/” stays as is.These units have learned to resist Blitzkriegtactics. For other units, this representsprepared/fortified positions, such as theSiegfried Line.[14.7] The Evacuation Marker: Thismarker functions as the embarkation point for Allied unitsevacuated from the continent (7.8).It represents a hastily-fortified port perimeterand the determination to hold it.• This marker can only be placed from theReserve Box to a friendly Port hex duringthe Reserve Phase, and vice-versa.• One Unsupplied unit (only) stacked withthe marker can evacuate during the FrenchOrganization Phase each turn.• Event card #24 (Operation Dynamo) alsoallows an Unsupplied unit stacked with itto be evacuated.• The Allied stacking limit is doubled in thathex (only).• All DW and DR (Defender Retreat)combat results become EX (Exchanges).• Units cannot voluntarily attack out of ahex containing the Evacuation marker.• The Axis cannot use the Blitz! CombatTable against that hex.• This marker can absorb one step loss and,if eliminated, it is permanently removedfrom play.[14.8] German Paratroop Markers: Theseunits have no steps. After theirplacement on the map, they areremoved from play during the nextMarker/Unit Removal Phase.For Example: If this marker is placed on the mapduring the French Reserve Phase, it is removedfrom play in the German Marker/Unit RemovalPhase.AirdroppingPlacement: When Airdropped, that markermust “land” in a hex that has no more thanone Allied unit it and is within six hexes of aGerman Frontier hexside.• The Germans can drop more than one in ahex.• They can only be placed on the mapduring good weather. They are placedfrom the Reserve Box at the start of eitherPlayer’s Reserve Movement Phase andcannot move once placed.• You must put all the markers you want toAirdrop on the map before resolving anyof their landings.When dropped, place that marker on themap on either side, then draw TWO Eventcards and choose ONE to apply (do notresolve any Events on it):A- If there’s a German Cross on the card,and there’s a fort unit in the hex, thatfort takes a one (1) Step Loss.BB- If there’s a French Roundel on thecard, flip the Paratroop marker over.C- If neither of those symbols appear onthat card, immediately remove thatParatroop marker from the game.It is possible for there to be two symbols onthe same card; in that case, both A and Bare applied to the same drop.© 2012 Carl Paradis and <strong>Victory</strong> <strong>Point</strong> <strong>Games</strong>Paratrooper Effects: There are two sides tothis marker, each with its own distinct effect:+2MP side: Enemy units enteringthat hex must pay two extra (+2)Movement <strong>Point</strong>s.No TEC Side: Enemy units in this marker’shex receive no defensive hexsideterrain benefits, and friendlyunits do not have to pay hexsideMovement costs when enteringthat hex.Both Sides: If this marker is alone in a hex,that hex is considered captured, as if by asquare German unit.These markers cannot be attacked; they areautomatically removed from play during thenext player’s Marker/Unit Removal Phase.The three Paratroops represent Elite forcesthat the Germans used to great effect againstEben-Emael, in Holland, and commandooperations to capture enemy bridges.Cadre UnitsGerman Kampfgruppe and AlliedGroupement units are collectively called“Cadre” units.[14.9] Cadre Units: Cadre units represent ahodge-podge of stopgap units andArmy remnants, put together as‘scratch’ formations to plug animmediate hole in the line. They are also acore body of veterans around which a regularunit can be reformed.Cadres have only one step and cannotinitiate Voluntary Attacks (10.1.1). They canparticipate in counterattacks and againstCounterblows (10.1.2).[14.9.1] Cadre Reinforcement Arrival:When received as Reinforcement, Cadreunits are not placed in the Reserve Box;they are instead placed in the UCadre UnitsHoldingU box for later placement.[14.9.2] On-Map Placement: Cadre unitsin the UCadre Units Available boxcan be voluntarily placed on themap by their owner in hexeswhere a friendly (non-Cadre) unitwas just eliminated (10.7.1) to fulfill thestep loss requirement of a DD or EXresult. Belgian, Swiss and Holland unitscannot be replaced by Cadre units.[14.9.3] Removal from the Map: Whenremoved from the map for any reason, aCadre unit is placed on the Game TurnTrack to arrive on a future Game Turn as areinforcement, as indicated on the back oftheir counter (e.g., “Back in one turn” or“Back in two turns”).If there is already a friendly Cadre unitscheduled to arrive as a reinforcement onthat same Game Turn, that Cadre unit isplaced instead on the following Game
14 NO RETREAT 3: THE French Front May-JUNE 1940 v2.4Turn box where there is not already aCadre unit scheduled to arrive. That is,each player’s Cadre units arrive at a rateof one per Game Turn, maximum.Note that this means a Cadre does not gointo the Surrendered Units box, nor will itscore the opponent 1 VP.[14.9.4] Replacement Locations: Inaddition to those locations described inRule 7.5, Eliminated and Surrenderedunits that are Replaced as per 7.0 can alsobe placed in a hex where there is a friendlyCadre unit that can trace an overlandSupply Path (6.1) to a friendly map edgeor Port. When so placed, remove thatCadre unit from the map and place it onthe Game Turn track as per Case 14.9.3.In effect, that eliminated unit is “rebuilt”on the front lines around a surviving Cadreformation.[14.10] Open City Markers: This markerrepresents cities that The Allies haveyielded without a fight during thecampaign. Allied units cannot stackwith an Open City marker.• They are added to the Reserve Box duringthe French Reinforcement Phase ofGame Turn 2.• They enter play according to theinstructions of Event card #25.• Cities with an Open City marker do notscore VPs for the German player until anEnd Game <strong>Victory</strong> occurs (12.4).[14.11] Halt Orders Marker: Thismarker represents the “Haltbefehl”plus a few other operational pauses. It goes in the Reserve Box in the FrenchReinforcement Phase of Turn 4. If it is in the Reserve Box, it enters playaccording to the instruction of Event card#17 (Haltbefehl). When played, place thismarker on the Turn track to arrive twoturns later as a regular FrenchReinforcement.The German OKW’s order stopped thePanzer advance right after they reached thesea to regroup and wait for the infantrysupport, allowing the British to evacuate.For Example: It is Turn 6, and the Halt Ordersmarker is in the Reserve Box, thus the Event oncard #17 can be played now. After doing so, theHalt Orders marker is put on Turn 8, to arrive asa reinforcement in the Reserve Box. Note thatafterward, card #17’s Haltbefehl! is useableagain if the French player gets that card back intohis hand![14.12] British Aid Counters/Markers:There are 3 of these, identified by their“BA” reinforcement number. They appearwith an Anglo-French Union (14.13.2).• RAF Marker – This Dark Blue roundShock! marker is usable for free once pergame turn.• Reserves Counter – This unit canstack and attack with both Britishand French units.• Enhanced Target Marker – Thisdark blue Target marker is usedat the start of the French CombatPhase, not at the start of theFrench Movement Phase like theother (white) Target markers (see10.1).[14.13] The British Aid Track: It is used tokeep track of the Support Level the BritishGovernment is willing to give to their FrenchAlly on the continent.[14.13.1] Track Marker: The BritishAid marker denotes the status of this track.It begins the game in the “No Assistance”box.It can advance on the track during aSudden Death <strong>Victory</strong> check (12.1) orwhen the Event card #22 (WinstonChurchill) is played.[14.13.2] Track Events: When theBritish Aid marker is advancedon the track, resolve that box’sevent, as explained below:• No Assistance – Nothing happens.• Aid Pledged – Subtract two (-2) VPsfrom the total Battle <strong>Victory</strong> <strong>Point</strong>s.Flip the British Aid marker over as areminder.• No Evacuation – Remove theEvacuation counter from the game.• Support Sent – The French playerimmediately draws two extra cards.• RAF Fully Committed – The Frenchplayer receives the RAF Shock! marker.• Anglo-French Union – Flipthe Square <strong>Victory</strong> <strong>Point</strong>marker to its Anglo-FrenchUnion side to mark thisEvent. Then… Remove all the Open City markersfrom the game (recalculate map VPs) A French Armistice is no longerpossible when playing Event card #1. A Sudden Death <strong>Victory</strong> (12.1) can nolonger happen. The French player receives the BritishAid counter and markers (14.12). The French player receives one extra(+1) card per turn during his DrawPhase (5.2).This Union Event is a new “Miracle of theMarne” and Allied resolve to fight to thebitter end. “We shall Never Surrender!”3B[14.14] Plan Cards Set-up Instructions:The Plan cards all have special At Start setupinstructions for the game.• Remove in Historical Scenario: Whenplaying the Historical Scenario, removethese cards from play before drawing yourPlan card.• If Redrawn = Anglo-French Union! : Ifthis Card is drawn a second time, the NoEvacuation, RAF Fully Committed andAnglo-French Union Events areimmediately applied (see 14.13.2).Remove the British Aid marker fromplay; you no longer need the British AidTrack.• 7th Army Units in Reserve: The Frenchplayer may set up the two 7th Army unitsin the Reserve Box.• +1 MP for units on Turn 1: Each Frenchand British unit can spend one extra (+1)Movement <strong>Point</strong> on the first Game Turn(only).• No “Ardennes” Surprise: Rule 9.2 (#2)does not apply for the rest of the game(i.e., the German player cannot ReleaseReserves into any Ardennes hexes).• You can invade Switzerland: TheGerman player is allowed to invadeSwitzerland (normally he cannot).• You cannot attack Holland’s units: TheGerman player cannot attack those units,but he can enter Holland, and he can dropparatroops in the same hex as those units.• 5 Mobile Units in Reserve: The Germanplayer must set up five (5) Mobile units inthe Reserve Box.[14.15] Plan Card Goals: Below areexplanations for some of the more specificPlan <strong>Victory</strong> <strong>Point</strong> Goals:• No Regional units have voluntarily leftthe Maginot line: Units eliminated orretreated due to combat (only) are exemptfrom counting toward this goal.• Control all hexes of Paris: All 3 hexes,including the city of Paris, must becontrolled to count for all goals.• All British Units are on the Map: TheMixed Reserve unit does not count; onlythe 3 tan British units do.• The Maginot line is Out of Supply: NoFrench Maginot line hexes can trace anOverland Supply route (6.1).[15.0] OPTIONAL RULEThis rule is not usable in the Historical Game(Scenario B). See also 17.0.[15.1] Better French Armor: At the verystart of the game the French player canreplace the regular one step 2-4 “De Gaulle”Systems Development by Alan Emrich
NO RETREAT 3: THE French Front: May-JUNE 1940 v2.4 15counter with the optional two-step 4-4 DeGaulle Tank counter.• If this option is chosen, the French playermust also eliminate at start any two (2)Maginot line Fortified units (the hexshapedcounters). The German playerdoes not receive <strong>Victory</strong> <strong>Point</strong>s for this.This represents the French Governmentlistening to some of De Gaulle’s pre-wararguments, spending less on Fortificationsand more on Mobile units.[15.0] SCENARIOSThere are four Scenarios: The RegularGame allows for some “What if” historicalexplorations via the Plan cards, while theHistorical Game limits the Plan Options togive a less variable storyline to the flow ofplay. The Simulation Game and OperationDynamo both commence play after someGame Turns have already occurredhistorically, allowing the players to pick upthe action at that point.All the <strong>Victory</strong> Conditions are the same as inthe Campaign Game.A. THE REGULAR GAMESet Up Procedure1. Place the round markers in the UnusedMarkers Holding Box. The Germanplayer receives seven (7), and the Frenchplayer five (5), Initiative markers, on theirrespective Cross/Roundel side. Thesebegin already purchased and ready for use.2. Place the round Game Turn marker in the‘1’ box of the Game Turn Track with itsGerman side up. Place the square<strong>Victory</strong> <strong>Point</strong> marker in the ‘2’ box of the<strong>Victory</strong> <strong>Point</strong> Track with its German sideup, and the round Battle <strong>Victory</strong> <strong>Point</strong>smarker in the ‘0’ box of the VP Track.These <strong>Victory</strong> <strong>Point</strong>s reflect the Axiscontrol of Aachen and Saarbrucken. TheWeather marker sets up with its Goodside up, and place the British Aid markerin the “No Assistance” box on the BritishAid Track.3. Each player takes their remaining squareand hexagonal units and turns them faceup(i.e., with their full-strength sideshowing). Place those with aReinforcement Number or letter in thecorresponding Turn Box on the GameTurn Track.4. Beginning with the French player, bothplayers draw their “Secret Plan” card asper Rule 12.7.5. Both players place their remaining unitson the map as shown on the set-up map,the French player first. During setup, theGerman player can place up to six (6) ofhis starting square units (plus the 3Paratroop markers) in the Reserve Box.6. Shuffle the deck (of non-Plan cards) andplace them face-down along the southernedge of the map forming the Draw Pile.The German player draws 6 cards intohis hand, one at a time (playing the “Mustplay” cards normally).The French player starts with no cards inhand simulating lax Allied preparationsfollowing the long wait of the Phony Warperiod and the Germans’ surprise attack.7. Note the Game Turn 1 Events, including: No Allied Combat: The French playercannot initiate voluntary attacks with hisunits on Game Turn 1.• No Reserves: Neither player can addunits to the Reserve Holding Box onGame Turn 1.8. As an exception to the normal rules, theGerman player may drop, before playstarts, any or all of his Paratroopmarkers.9. After completing these Steps and notingthe above Rules, the German playercommences Game Turn 1 with hisOrganization Phase.© 2012 Carl Paradis and <strong>Victory</strong> <strong>Point</strong> <strong>Games</strong>
16 NO RETREAT 3: THE French Front May-JUNE 1940 v2.4B. THE HISTORICAL GAMESet Up ProcedureFollow the exact same set-up instructions asin A. The Regular Game, from Steps 1 to 9,altering Step 4 (only) as follows:• Before drawing his Secret Plan, theFrench player removes from the game thePlan card F5 (Initiative!*).• Before drawing his Secret Plan, theGerman player removes from the gamePlan card G2 (Anweisung No2).C. THE SIMULATION GAMESet Up Procedure1. Place the round markers in the UnusedMarkers Holding Box. Both the Germanand the French player receive four (4)Initiative markers, on their respectiveCross/Roundel sides. These begin alreadypurchased and ready for use.2. Place the round Game Turn marker in the‘2’ box of the Game Turn Track with itsGerman side up. Place the square<strong>Victory</strong> <strong>Point</strong> marker in the ‘6’ box of the<strong>Victory</strong> <strong>Point</strong> Track with its German sideup, and the round Battle <strong>Victory</strong> <strong>Point</strong>smarker in the ‘0’ box of the VP Track. TheWeather marker sets up with its Goodside up, and the British Aid marker isplaced in the “No Assistance” box on theBritish Aid Track.3. Each player takes their remaining squareand hexagonal units and turns them faceup(i.e., with their full-strength sideshowing). Place those with aReinforcement Number or letter in thecorresponding Turn Box on the GameTurn Track.4. The German player takes Plan card G5(Fall Gelb No5). The French playerdraws one Plan at random from cards F1(Plan Dyle A) or F2 (Plan Dyle B). Bothplayers can change Plans (12.7.2). Also:• The French player removes from thegame Plan card F5 (Initiative!*).• The German player removes from thegame Plan card G2 (Anweisung No2).5. Both players place their remaining unitson the map as shown on the set-up map.6. Shuffle the deck (of non-Plan cards) andplace them face-down along the southernedge of the map forming the Draw Pile.The German player draws, one at a time,6 cards into his hand, keeping any 2 hechooses (playing the “Must play” cards heopts to keep normally), and discarding theremaining 4. The French player thendraws 3 cards into his hand, (playing the“Must play” cards normally), keeping all 3(that were not “Must play” cards).7. Note the Game Turn 2 Event: ReservesAllowed.8. As an exception to the normal rules, theGerman player may deploy onto the map,before play starts, any/all of his units inthe Reserve Holding Box, as per theReserve Rules (see 9.2).9. After completing these Steps and notingthe above Rules, the German playercommences Game Turn 2 with his CardPhase.Systems Development by Alan Emrich
NO RETREAT 3: THE French Front: May-JUNE 1940 v2.4 17D. OPERATION DYNAMOSet Up Procedure1. Place the round markers in the UnusedMarkers Holding Box. The Germanplayer receives three (3), and the Frenchplayer two (2), Initiative markers, on theirCross/Roundel side. These begin alreadypurchased and ready for use.2. Place the round Game Turn marker in the‘4’ box of the Game Turn Track with itsGerman side up. Place the square<strong>Victory</strong> <strong>Point</strong> marker in the ‘10’ box ofthe <strong>Victory</strong> <strong>Point</strong> Track with its Germanside up, and the round Battle <strong>Victory</strong><strong>Point</strong>s marker in the ‘1’ box of the VPTrack. The Weather marker sets up withits Good side up, and the British Aidmarker is placed, with its “-2 VPs” sideup, in the “Aid Pledged” box (that Eventhas already happened) on the British AidTrack.Both players’ Plan A markers are placedin the Plan Box (they have both successfullycompleted their respective A Plans,so there is no need to put them on their“unknown” sides for this scenario).3. Each player takes their remaining squareand hexagonal units, placing those with aReinforcement Number higher than 3or better in the corresponding Turn Boxon the Game Turn Track.4. The German player takes Plan card G5(Fall Gelb No5). The French playerdraws one Plan at random from cards F1(Plan Dyle A) or F2 (Plan Dyle B). Bothplayers can change Plans (12.7.2). Also:• The French player removes from thegame Plan card F5 (Initiative!*).• The German player removes from thegame Plan card G2 (Anweisung No2).5. Both players place their remaining unitsand the indicated markers on the map asshown.6. Shuffle the deck (of non-Plan cards) andplace them face-down along the southernedge of the map forming the Draw Pile.The German player draws, one at a time,4 cards into his hand, keeping any 2 hechooses (playing the “Must play” cards heopts to keep normally), and discarding theremaining 2. The French player thendraws 2 cards into his hand, (playing the“Must play” cards normally), keeping all 2(that were not “Must play” cards).7. Note the Game Turn 4 Event: ChangePlans.8. After completing these Steps and notingthe above Rules, the German playercommences Game Turn 4 with his CardPhase.© 2012 Carl Paradis and <strong>Victory</strong> <strong>Point</strong> <strong>Games</strong>
18 NO RETREAT 3: THE French Front May-JUNE 1940 v2.4[16.0] EXTENDED EXAMPLESMovement ExampleIt is the German Movement Phase of GameTurn 2 – Scenario A.The German player had previously put onthe map some Panzer units (Guderian andHoth) from the Reserve Box in the previousFrench Turn (you can put units on the mapeven during the opponent’s Reserve Phase,see 9.2), and he is now ready to try to breakthe enemy’s lines along the Meuse river!The colored movement arrows and numbersindicate the number of Movement <strong>Point</strong>sspent by the unit to move into each hex.The 1st Army (a) at the bottom of thisillustration moves one hex into Luxembourg,and stops. Since it’s a German Regionalunit, it can only move to hexes adjacent tothe German Frontier until Turn 7 (14.1), itspends 2 Movement <strong>Point</strong>s (MPs) as it isentering an EZOC (the French 3rd Army).The 16th Army (b) also moves into contactwith the French, spending a total of 3MP(note that difficult terrain mostly slows downMobile units, not regular infantry).The 3-6 WIETERSHEIM Corps moves intothe same hex as the Guderian Panzer unit,paying 4MP (2MP to enter an Ardennes hexfor a mobile unit, +1MP for leaving, and+1MP for entering, EZOC hexes). Both ofthese units can stack together, since at leastone of them has the “size dot” icon (8.4.2).Note that when moving onto a hex with afriendly unit you are able to move from oneEZOC hex directly to another, but you muststop when entering the new EZOC (8.5.3).This is why the Blue “X” hexes could not beentered by a German unit. The GuderianPanzer Corps is under the same ZOClimitations, but if the Player had Card #20 inhand (Aufrollen Tactics) he could have usedit to move Guderian to an adjacent Blue“X” hex.Finally, the REINHARDT Panzer unitmoves into Weitersheim’s place, paying 5MP to do so, and stopping because of theEZOC.Combat ExampleAfter the Movement Phase, the Germanplayer attacks all four French units, using 4of his 5 Target markers (the number ofattacks you can make being limited by youravailable Target markers).The French 1st Army(b) unit at the top ofthe illustration is attacked first by Hoepnerand the 6th Army(b) using a Blitz! marker(which is allowed as at least half of theattackers are Mobile units). The Initial ratiois 10:6, which means the 3-2 Odds columnon the German Blitz Combat Table; there isno Armor Bonus shift as the defenders areMechanized (see 10.6.3). Not liking thosepoor odds, the attacker decides to play aCombat card, Screaming Stukas, givingthem +6 Combat Strength in this Battle; thisincreases the ratio to 16:6 (i.e., 2-1 Odds),but the French player counters with theRAF Fighters card, paying one preciousInitiative marker (see 5.3.3) to cancel theStukas card. So, the Odds remain the same.Note that each side cannot use more than oneCombat card before the battle (see 10.5), andspent Initiative markers remain spent if thecard they are paying for is cancelled later on.A roll of 5 produces a DR result. Thedefending unit moves back 2 hexes, and theattacking Panzer unit occupies this nowvacatedhex. Note that the Panzer unit couldhave advanced two additional hexes, since itwas Blitz! attacking into clear terrain (see10.8.2), but declines to do so, as there arepowerful Allied units north of thisillustration that could put it out of supply.Next, the German player opts to resolve thesouthernmost battle against the Maginot line:a long shot, as we shall soon see.Note that Fortified Maginot Area is treatedas a single, very large hex! As shown in theillustration, there are the four units there thatmust all be attacked, as they are all stackedin the area.The 3rd Army and all three Maginot 3 Fortsare engaged by the 16th Army(a) and the1st Army(a). The Initial ratio is 9:7, whichis 1-1 Odds. They are shifted two left (2)for the Fortress Area plus the FortifiedHexside, for a final 1-3 Odds! What is more,at these low odds all the possible results haveno chance of any effect against a hexcontaining Fort units (see the red notes onthe CRTs)... Cursing silently, the Germanplayer throws the die, and a roll of 3 yieldsa CA result on the Attrition Table (No Blitz!marker is usable here); the defender canchoose to stay put, or to order a Counterattack.“Let’s show The Boche how we fight!vive la France!” exclaims the French player,and decides to attack back. In this case, theGermans now become the defender and noterrain modifiers are used (see 10.7.2). Theratio is 7:9, which is 1-2 Odds. The attackerdecides to use the Corps d’Artillerie card,again spending one precious AlliedInitiative marker, which increases the ratioto 12:9, which is 1-1 Odds, and the Germanplayer declines to use any cards. A roll of 5on the French Attrition Table yields a CBresult! A Counterblow marker must beplaced on a German unit, as he is thePhasing player, even though the Frenchwere (counter-) attacking (see 10.7.3). The16th Army(a) is chosen by its owner, andnow the French must either attack it on hisnext turn or move away. As we shall seelater on, it would have been better for theFrench to stay safely behind the Maginot lineinstead of rashly counterattacking...Note that if a CA result were obtainedinstead of a CB, the original battle wouldhave been fought again, but this time with noterrain modifiers for the French defenders.Now the Germans decide to attack the 9thArmy, safely positioned behind the MeuseRiver. This will be another tough attack! The4th Army, Hoth Panzers and the 12thArmy(a) are engaged (with the 12thArmy(b) still in the Reserve Box, ready toexploit any Breakthroughs). The Initial ratiois 15:6, which is 2-1 Odds. They are shiftedtwo to the left (2) down to 1-1 Odds due tothe Forest and Major River, the same Riverthat is also cancelling the Panzer Bonus CRTshift. But the Germans have a surprise instore for the defenders...He reveals his Shock Troops card (and paysone Initiative marker) to cancel the MajorRiver, which also gets the Panzer BonusCRT modifier back; now the shift is only oneto the left (1) for the Forest, plus one right(1) for the Panzers, thus canceling eachother out. The French player is out of usefulcards and does not respond. A roll of 3 at 2-1 Odds yields a DR result: The 9th Armymust retreat 2 hexes, but since the retreatSystems Development by Alan Emrich
NO RETREAT 3: THE French Front: May-JUNE 1940 v2.4 19path is blocked by EZOCs (after theGermans advanced from an earlier battle thatturn), the unit is eliminated instead (10.7.1)and placed in the Destroyed Units Box (sinceit did not have an Unsupplied marker on it;if it did, it would go to the Surrendered UnitsBox instead). Two of the attacking unitsadvance into the hex but can go no further asthe Major River stops a multi-hex advance.Note that if a French unit were adjacent tothe 9th Army, say in the Forest hex west ofit, then the 9th could have retreated safely,as friendly units negate EZOCs for retreatpurposes (10.7.6, 3rd Bullet).Below is the situation at the start of theFrench player’s Turn 2. The French playershakes his head at the situation before him.Initiative markers (from his remaining poolof 5) to place on the map two Counterblowmarkers on his own units, thus forcing theFrench to attack two hexes right away!Moves and situation in the Combat Phase:With the final and largest attack nowresolved, Guderian, Reinhardt andsupporting infantry go against the French2nd Army. The Initial ratio is 18:5, which is3-1 Odds. They are shifted two left (2) forthe Forest plus the Major River hexside, so3-2 Odds, which is not good!As you can see in these combat examples, itis very difficult to make powerful attacks,even with overwhelming force, against anenemy in good defensive terrain. You mustuse the right combinations of Combat cardsto ‘make things happen.’ Getting out of theArdennes is not easy!The German player uses yet another card:Achtung Panzer!, doubling the strength ofhis Panzers. This raises the ratio back up to3-1 Odds. A roll of 5 gives a DS + result:the defending unit retreats 3 hexes andreceives a Disorganized marker; the ‘+’(German Cross) awards the German playereither a Battle VP or an Initiative marker.Having spent a lot of the latter (3 Blitz! and2 for the Event cards), he takes the freeInitiative marker. The attacking unitsadvance into the hex, but must then stopbecause of the Major River.The Panzers are starting to break through!During the Reserve Phase at the end of theTurn, the German player takes from theReserve holding box his 12th Army(b) andplaces it on the Western tip of the Ardennes.The French player also releases his lastReserve unit, the Keller Tank unit,nervously deploying it in the city of Reims.Remember, you can place Reserve unitsduring your Opponent’s Turn!Since it is still early in the game, the Frenchplayer has to put his Target markers on themap during his Organization Phase beforemoving! This means that his units will not beable to attack the German spearheads (as nounits are adjacent to them so that they can be‘lit up’ with French Target markers at thistime). Instead, he can only assemble adefensive line in the rear to hold the Panzers.Movement & Counterblow ExampleFrench troop movement is as shown in theillustration in the next column. The 2ndArmy cannot go far since it is Disorganizedand thus has only 1MP and the Keller unitcannot move adjacent to the Germanbridgehead across the Meuse River as itdoes not have enough MPs to reach it (itcosts +1MP to enter an EZOC).The rest of the French 1st Army is broughtfrom north of the map to shore up thecrumbling defenses. As he is not attackinganywhere else along the entire front lines,the French player uses the MaximeWeygand card to receive 3 badly neededInitiative markers at the start of his Turn. Hespends one of these to rebuild, at halfstrength,the destroyed 9th Army, which isautomatically added to the Reserve Box forfree (see 7.5 & 7.7).He could not also Improve that unit all theway back to full strength this turn, as theFlip Phase takes place before the ReplacementPhase (7.0) – this sequencing isimportant!After the French player completes hismovement, the German player smirks andplays Operational Feint (costing theGerman player one Initiative marker) andallowing the German player to move twoPanzer units into contact with the enemy!During the French Combat Phase, eventhough the French player has planned noattacks, the German player spends 2 moreSo, there will be three battles, all forced byCounterblow markers on German hexes.The Phasing Player (the French) plays hislast good attack card: Bataille Conduite , toadd +3 Strength to each of his battles,deciding to attack the German 16thArmy(a) first. He could use all the units inthe “Maginot 3” areas, or only some of them,as long as the Counterblow hex is attacked.He decides to use them all: the 3rd Armyand the three Maginot 3 Forts.Even though white-strength units (i.e., theForts) cannot normally attack, in the case ofa Counterblow they can (see 10.7.3).The ratio is 10:5, which is 2-1 Odds. Thereare no Defensive Terrain Bonuses in aCounterblow battle (it’s the same as aCounterattack). For this ‘sideshow’operation, neither side plays cards. A roll of3 on the French Attrition Table yieldsanother CB result! This time theCounterblow marker is placed on theFrench (Phasing) units. The Battle rages on!Next, the 1st Army(b) attacks the 12thArmy(b). This attacking unit could havechosen to attack the two adjacent Panzersalso, but given the odds of that he prefers torisk losing his tank unit instead. The ratio is9:5, which is 3-2 Odds, again with no terrainmodifiers in a Counterblow battle. A roll of3 on the French Attrition Table gives aCA result, but the German player declinesto counterattack at such low odds, and so theend result is No Effect.The last combat sees the Keller Tank unitbattling head-on with the flower of Hitler’sElite Mobile Troops. The ratio is 6:10,which is 1-2 odds. (There is no Tank bonussince the opponents have Panzers). Withoutthe previously played French Event card, theRatio/Odds would have been 3:10 / 1-4. This© 2012 Carl Paradis and <strong>Victory</strong> <strong>Point</strong> <strong>Games</strong>
20 NO RETREAT 3: THE French Front May-JUNE 1940 v2.4would mean an Automatic CA result, sincethe Initial Odds would have been below theminimum on the CRT (see 10.6.4).Sadly for the French player, he cannot spendhis only Shock! marker on this crucial battlesince the Bataille Conduite card works onlyfor Attrition Combat.Note also that, contrary to the Germans, theFrench cannot freely flip/upgrade anInitiative marker to a Shock! marker (see7.2.6).A roll of 4 on the French Attrition Tablegives a CA, and the German player gladlylaunches a counterattack! The new oddsfrom the attacking Panzers are 3:1, and theGerman player uses a just-flipped Blitz!marker to roll on the Blitz! Combat ResultsTable. No Combat cards are played for thisbattle, and the roll is 2, yielding an EXresult. Both sides lose a step, and the Frenchplayer breathes a sigh of relief.The Blitzkrieg was stopped in-extremis bythe Heavy B1-bis Tanks, but at high cost!In the Reserve Phase, the French playerplaces his reduced-strength 9th Army on themap from the Reserve Box.He cannot stack it with the 2nd Army, asneither of these units have any size dots, orwith Keller, as it’s in an EZOC (see 9.2)The German player declines to do the samewith his 12th Army (b) as he has no citiesnear enough to the front line for this to beworthwhile.You cannot deploy more than 3 hexes awayfrom a friendly city (see 9.2).The Situation at the end of the turn is notrosy for the French, as the Germans might beable to concentrate Guderian, Reinhardtand Wietersheim against the Keller Tankunit; this would probably result in a majorbreakthrough and let the Panzers roll all theway to the English Channel! The Germans’play of the Operational Feint Event wascritical, as it stopped the deployment of the9th Army on the Keller unit’s hex!Situation at the end of the French Turn:<strong>Victory</strong> <strong>Point</strong> Scoring ExampleRule 12.5.5 instructs players to “Keep theVP Count Current: It is important tomaintain a current VP count. A completeaudit should be made during each <strong>Victory</strong>Phase.” This example should help explainhow the round and square <strong>Victory</strong> <strong>Point</strong>markers interact:Example: It's the <strong>Victory</strong> Phase of GameTurn 6, as shown below (and on the back ofthe rulebook).The German player controls 8 Cities.However, 2 of them have Free City markersand thus do not count (so, a total of +6VPs).The Germans also control 2 Ports (+2VPs),and there are 3 Allied units in theSurrendered Box (reflecting the loss of theBelgian and Netherlands Fort units, foranother +3VPs). This gives the Germans atotal of +11 VPs.To this +11VP value is added or subtractedthe round Battle marker’s VP score. It iscurrently in the 1 Box on its French side, sothis translates to -1VP. The net VP score,then, is +10VPs (i.e., 11VPs - 1VP).Therefore, the square VP marker is placedin the 10 Box, while the round Battlemarker remains where it is.Since Turn 6 is a Sudden Death turn, this10VP score is compared to the FrenchSudden Death <strong>Victory</strong> level of 7VPs or less,as shown on the VP Track (so, 10VPs is toohigh for a French victory). It is alsocompared to the German Sudden Deathvictory level of 13VPs or more, also shownon the VP Track (so, 10VPs is too low for aGerman victory, and the game continues).Since the VP count of +10VPs is 3 or fewerabove the French Sudden Death <strong>Victory</strong>level of 7VPs, the British Aid marker isadvanced one space on the British Aid Track(see 12.1).[17.0] EXTENDED MAGINOTLINEThis rule is not useable in the HistoricalGame (Scenario B); or if Optional Rule 15.2(Better French Armor) was chosen.At the very start of the Campaign game, theFrench player can remove One Maginot 3and one Maginot 5 Fort from their regularset-up spots and place them in France, oneper hex, on hexes adjacent to the BelgianFrontier, North of the Maginot 3 Fortifiedarea.If this option is chosen, then: The French player cannot discard &redraw his original picked plan in the"French Plan Draw Step" at the start of thegame (rule 12.7). The "Allied units have +1MP on GameTurn 1" special instruction on the FrenchPlan cards is not valid anymore.This Represents an even more "defensive &conservative" stance for the French Army,but it will limit its grand operational choices.GAME CREDITSGame Design: Carl ParadisDocumentation and Development: CarlParadis & Alan EmrichGame Map: Tim Allen and Carl ParadisPlaytesting: Xavier Delenclos, Arnaud dePeretti, Philippe Vialet, Patrick Receveur, DavidChauvel, Andrei Shlepov, Dieter Schlaepfer,Benoit LaroseProofreaders: Bill Barrett, Brad Bernstein,Rasmus Larsen, Jason Malloy, Rick Partin,Arnaud de Peretti, Leigh Toms, Ian WakehamDedication: This game is dedicated to theFrench soldiers of the 3rd Division LégèreMécanique, who fought victoriously againstHitler’s Panzers at Hannut, Belgium, in May of1940.Proudly manufactured andassembled in the USA.Systems Development by Alan Emrich
NO RETREAT! 3 THE French Front May-JUNE 1940…units off the South map edge, orforcing the surrender of more enemies(or the Armistice! card might just notbe handy!). Also keep in mind eachplayer’s secret “Plan” <strong>Victory</strong> <strong>Point</strong>s.These are scored only with an "EndGame" <strong>Victory</strong>, so you probably won’tknow until then exactly how many youropponent might have scored. Sure,you can ignore those plan constraintsand aim for a quick "Sudden Death" oran "Automatic Win,” where Plan <strong>Point</strong>sdo not count, but you’d better beprepared to suffer the consequences ifyou are not able to succeed! Also,note that your "Battle” <strong>Victory</strong> <strong>Point</strong>s(represented by the Round marker) donot count for the VP Total in the "EndGame" <strong>Victory</strong>.This bring us to the Sudden Death<strong>Victory</strong> Condition. It's very intriguingand keeps players paying attention tothe current <strong>Victory</strong> <strong>Point</strong> (VP) score.Here is how it works: Every threeGame Turns, this victory condition ischecked against a sum of VPs on the<strong>Victory</strong> <strong>Point</strong> Track. There are manypossible threshold scores, someFrench and some German. If a Playerhas met the required VP level at thatmoment, the game is over and thatplayer wins outright! The same is truefor the Automatic Win, albeit this oneis more difficult to fulfill, but it can beachieved during any turn of the game.It isn’t easy to get that many VPs foran Automatic Win, but it’s notimpossibly hard either. This fact willstop your opponent from becomingcomplacent as the pressure willalways be on! Since, as hinted above,the Plan VPs do not count for aSudden Death victory, nor do most ofthe Destroyed/Evacuated units, this ismore of a Shock and Awe type oflandslide win that only the mostaggressive players might want to try.But the possibility is always there for asudden catastrophe, making naught allyour careful plans aiming for a longtermwin!French Player NotesYou have a great defensive army.Alas, early in the campaign, your unitswill be hard to concentrate (nostacking), and you will have greatdifficulty in fighting a mobile battle asyou must declare your targets at thestart of the Movement Phase(meaning you will not be able to attackenemy units that do not start adjacentto your own forces). Even your abilityto mount effective Shock! attacks isalso pitifully weak at the start. Spoiling“attrition” attacks are the name of thegame early on. Depending on the Planyou draw, you might just have nochoice but to move deep into Belgiumat the start to gain those critical early<strong>Victory</strong> <strong>Point</strong>s. If you survive the initialGerman attacks without losing toomany mobile units, you should be ableto build a reserve sufficient to stopadditional Panzer breakthroughs (thede Gaulle tank unit is of great help forthis). If not, then evacuate as manyBritish as you can and hold the line asbest you are able.Good luck, you’ll need it!If the Event cards are kind, you mightbe able to pull off an Anglo-FrenchUnion, and that could just allow you tohold on until the very last turn of thegame, earning you a good many<strong>Victory</strong> <strong>Point</strong>s in the process.Hold fast No Retreat!German Player NotesYou have a powerful, if fragile,offensive army. Unless you get dealta conservative Plan card, you shouldbe able, thanks to your hidden reserve(remember these can be deployedduring the enemy’s Reserve Phase!)to deal the first decisive blow early inthe game, unhinging your opponent’sdefenses from the very start. You havethe means to do this, too: strongPanzer units, lots of good Event cardsin the deck, and plenty of Initiative© 2012 Carl Paradis and <strong>Victory</strong> <strong>Point</strong> <strong>Games</strong>markers. But these advantages can bewhittled down surprisingly fast. Stayaggressive and take risks! Never allowthe French Army to regain its balanceor you’ll be stuck in a hard-to-win warof attrition (see World War I). Thehistorical Ardennes surprise attack is agreat way to take the lead, but thereare other means to do harm to theenemy if he decides to defend thatspecific area with his mobile troops –pin them there, and use your Panzersagainst his leg infantry forceselsewhere along the line before he canfully deploy into an effective defensivefront. Move fast, concentrate yourblows, and seek decisive results!Also, do not forget that sooner or lateryou’ll have to take Paris. You want thegame to end as quickly as possiblesince the longer it lasts, the greater thechance that the Allies can recover(unless you inflicted huge losses earlyon, surrounding many of their units).Never let the French and British retreatand get away!ConclusionI hope you have fun playing NoRetreat! 3 and that this intense littlegame gives you some insight into whatwent on during this cataclysmic andtragic campaign. I look forward to yourcomments, suggestions and replayson the game’s page atwww.boardgamegeek.com.Vive la France!Carl ParadisSte-Thérèse, Canada. July 2012.
The German Advance across France, 1940Turn 6EvacuationR4(2)Turn 7R2Open CityTurn 2R2Open CityTurn 4Turn 5Turn 3Turn 8R2Open CityTurn 10Turn 9Turn 11