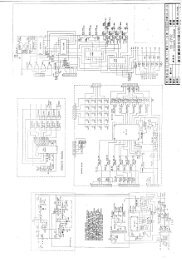
AMP One/A manual - AudioSource
AMP One/A manual - AudioSource
AMP One/A manual - AudioSource

You also want an ePaper? Increase the reach of your titles
YUMPU automatically turns print PDFs into web optimized ePapers that Google loves.
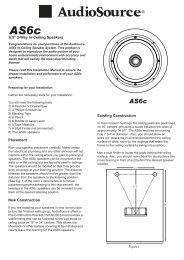
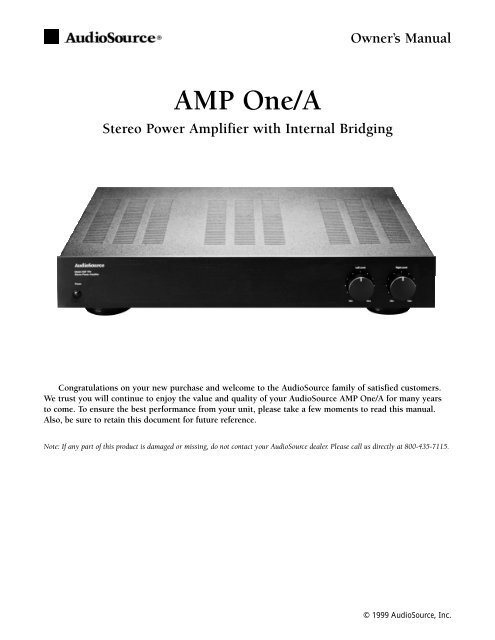
Owner’s Manual<br />
<strong>AMP</strong> <strong>One</strong>/A<br />
Stereo Power Amplifier with Internal Bridging<br />
Congratulations on your new purchase and welcome to the <strong>AudioSource</strong> family of satisfied customers.<br />
We trust you will continue to enjoy the value and quality of your <strong>AudioSource</strong> <strong>AMP</strong> <strong>One</strong>/A for many years<br />
to come. To ensure the best performance from your unit, please take a few moments to read this <strong>manual</strong>.<br />
Also, be sure to retain this document for future reference.<br />
Note: If any part of this product is damaged or missing, do not contact your <strong>AudioSource</strong> dealer. Please call us directly at 800-435-7115.<br />
© 1999 <strong>AudioSource</strong>, Inc.
Front Panel Controls<br />
Power<br />
This front panel button switches the <strong>AMP</strong> <strong>One</strong>/A on or off. A multicolored LED indicates its power status.<br />
Note: This amp uses a two-stage soft startup. The amp will power up in standby mode. When its power supply stabilizes, after<br />
a few seconds, it will become fully operative.<br />
Input Level Controls<br />
These knobs adjust the incoming signal level and thereby act as volume controls. We recommend that you<br />
leave these on max and use your signal source (receiver, CD player, preamplifier, etc.) to adjust the volume.<br />
LINE<br />
IN<br />
LINE<br />
OUT/THRU<br />
1 2<br />
LEFT<br />
BRIDGING<br />
MONO (ON) STEREO (OFF)<br />
3<br />
BRIDGED<br />
STEREO (RIGHT) (LEFT)<br />
+ -<br />
+<br />
-<br />
- +<br />
FUSE<br />
MODEL <strong>AMP</strong> ONE/A<br />
RIGHT<br />
4<br />
FUSE 4A<br />
Hooking up the Wires<br />
Audio signals travel out of one component and into another. All of your connections should also go from out to in.<br />
Line In<br />
1<br />
Connect the line out jacks from your signal source (receiver, CD player, preamplifier, etc.) to the line in<br />
jacks on the <strong>AMP</strong> <strong>One</strong>/A.<br />
Line Out/Thru<br />
2<br />
If you are using multiple amplifiers in your system, the <strong>AMP</strong> <strong>One</strong>/A features a stereo pair of Line Out/Thru<br />
jacks to send the original signal directly to these additional amplifiers.<br />
Bridging Switch (refer to wiring diagram)<br />
3<br />
In addition to providing 80 watts RMS per channel in the stereo mode, your <strong>AMP</strong> <strong>One</strong>/A can be used as a<br />
high power mono amplifier, providing over 200 watts RMS. This can be accomplished by sliding the bridging<br />
switch from the stereo position to the mono position. For mono applications, use only the right channel input.<br />
Similarly, use only the right channel input level control.<br />
Note: Be sure to observe the correct speaker connections for bridged applications. Because of the high power output in this<br />
mode, we recommend initially setting the right level control at "min", and then adjusting the volume to the desired level.<br />
Speaker Terminals<br />
4<br />
<strong>One</strong> pair of speakers can be used with the <strong>AMP</strong> <strong>One</strong>/A. This amp uses five-way binding post speaker<br />
outputs. The speaker terminals are color coded. Red posts indicate positive (+) terminals and black posts<br />
indicate negative (–) terminals. Be sure to connect the positive output terminals of your <strong>AMP</strong> <strong>One</strong>/A to<br />
the positive input terminals of your speakers and the negative output terminals of your <strong>AMP</strong> <strong>One</strong>/A to the<br />
negative input terminals of your speakers.<br />
Note: On some units, the labeling of the left and right speaker terminals has been reversed. Refer to the wiring diagrams on the<br />
next page for proper connection of speaker cables.
Stereo Setup<br />
In this configuration,<br />
the bridging switch is off<br />
for stereo operation.<br />
Connect the line out<br />
jacks from a stereo preamplifier<br />
to the line in jacks of<br />
your <strong>AMP</strong> <strong>One</strong>/A. Next, connect<br />
your speakers to the five-way<br />
binding post speaker terminals<br />
(observing proper polarity:<br />
red for "+", and black for "-").<br />
LINE<br />
IN<br />
LINE<br />
OUT/THRU<br />
LEFT<br />
RIGHT<br />
BRIDGING<br />
BRIDGED<br />
MONO (ON) STEREO (OFF)<br />
STEREO (RIGHT) (LEFT)<br />
Right Speaker<br />
Left Speaker<br />
+ -<br />
+<br />
- +<br />
-<br />
- +<br />
- +<br />
FUSE<br />
FUSE 4A<br />
MODEL <strong>AMP</strong> ONE/A<br />
Mono Setup<br />
In this configuration,<br />
the bridging switch is on.<br />
Connect the line out<br />
from a preamplifier to<br />
the line in right of your <strong>AMP</strong><br />
<strong>One</strong>/A. Connect your mono<br />
speaker to the terminals of your<br />
<strong>AMP</strong> <strong>One</strong>/A, following the example<br />
in the diagram opposite. Use the<br />
right level control on the front panel<br />
to adjust the volume.<br />
LINE<br />
IN<br />
LINE<br />
OUT/THRU<br />
LEFT<br />
RIGHT<br />
MONO (ON)<br />
BRIDGING<br />
STEREO (OFF)<br />
BRIDGED<br />
STEREO (RIGHT) (LEFT)<br />
+ -<br />
+<br />
Mono Speaker<br />
- +<br />
-<br />
- +<br />
FUSE<br />
FUSE 4A<br />
MODEL <strong>AMP</strong> ONE/A<br />
<strong>AMP</strong> <strong>One</strong>/A Specifications<br />
Amplifier Power Output . . . . . . . . .80 watts per channel<br />
200 watts monobridged<br />
Total Harmonic Distortion . . . . . . . . . . . . . . . . . .
Safety Instructions<br />
CAUTION:<br />
RISK OF ELECTRIC SHOCK.<br />
DO NOT OPEN.<br />
Warning: To reduce the risk of fire or electric shock, do not expose this appliance to rain or moisture.<br />
Caution: To reduce the risk of electric shock, do not remove cover (or back); no user serviceable parts inside. Refer servicing to<br />
qualified service personnel.<br />
Caution: To prevent electric shock, match wide blade of plug to wide slot, fully insert.<br />
Attention: Pour eviter les chocs electriques, introduire la lame la plus large de la fiche dans la borne correspondante de la prise et<br />
pousser jusqu'au fond.<br />
The lightning flash with arrowhead symbol, within an equilateral triangle, is intended to alert the user to the presence of uninsulated dangerous<br />
voltage within the product's enclosure that may be of sufficient magnitude to constitute a risk of electrical shock to persons. The exclamation point<br />
within an equilateral triangle is intended to alert the user to the presence of important operating and maintenance (servicing) instructions in the<br />
literature accompanying the appliance.<br />
Read Instructions<br />
All the safety and operating instructions should be read before<br />
the appliance is operated.<br />
Retain Instructions<br />
The safety and operating instructions should be adhered to.<br />
Heed Warnings<br />
All warnings on the appliance and in the operating instructions<br />
should be adhered to.<br />
Follow Instructions<br />
All operating and use instructions should be followed.<br />
Water and Moisture<br />
The appliance should not be used near water. For example, near a<br />
bathtub, washbowl, kitchen sink, laundry tub, in a wet basement,<br />
or near a swimming pool, etc.<br />
Ventilation<br />
The appliance should be situated so that its location or position<br />
does not interfere with its proper ventilation. For example, the<br />
appliance should not be situated on a bed, sofa, rug, or similar<br />
surface that may block the ventilation openings; or, placed in a<br />
built-in situation, such as a bookcase or cabinet that may impede<br />
the flow of air through the ventilation openings.<br />
Heat<br />
The appliance should be situated away from heat sources such as<br />
radiators, heat registers, stoves, or other appliances (including<br />
amplifiers) that produce heat.<br />
Power Sources<br />
The appliance should be connected to a power supply only of<br />
the type described in the operating instructions or as marked on<br />
the appliance.<br />
Grounding or Polarization<br />
Precautions should be taken so that the grounding or polarization<br />
means of an appliance is not defeated.<br />
Power Cord Protection<br />
Power supply cords should be routed so that they are not likely<br />
to be walked on or pinched by items placed on or against them,<br />
paying particular attention to cords at plugs, convenience receptacles,<br />
and the point where they exit from the appliance.<br />
Cleaning<br />
The appliance should be cleaned only as recommended by the<br />
manufacturer.<br />
Power Lines<br />
An outdoor antenna should be located away from power lines.<br />
Non-Use Periods<br />
The power cord of the appliance should be unplugged from the<br />
outlet when left unused for a long period of time.<br />
Object and Liquid Entry<br />
Care should be taken so that objects do not fall and liquids are<br />
not spilled into the enclosure through openings.<br />
Damage Requiring Service<br />
The appliance should be serviced by qualified service personnel<br />
when: a) The power supply cord or the plug has been damaged;<br />
b) Objects have fallen, or liquid has been spilled into the appliance;<br />
c) The appliance has been exposed to rain; d) The appliance<br />
does not appear to operate normally or exhibits a marked<br />
change in performance; or e) The appliance has been dropped,<br />
or the enclosure damaged.<br />
Servicing<br />
The user should not attempt to service the appliance beyond that<br />
described in the operating instructions. All other servicing<br />
should be referred to qualified service personnel.<br />
Product Servicing<br />
In the event that your <strong>AMP</strong> <strong>One</strong>/A fails to operated properly,<br />
please contact the dealer where you purchased the unit. Or you<br />
may contact <strong>AudioSource</strong> directly for further assistance.<br />
9300 North Decatur<br />
Portland. OR, 97203<br />
Tel. 503.286.9300<br />
Fax 503.978.3302<br />
audiosource@Phoenixgold.com<br />
www.audiosource.net<br />
Printed in Taiwan