Series 2000 Install.pdf - Aztec
Series 2000 Install.pdf - Aztec
Series 2000 Install.pdf - Aztec
Create successful ePaper yourself
Turn your PDF publications into a flip-book with our unique Google optimized e-Paper software.
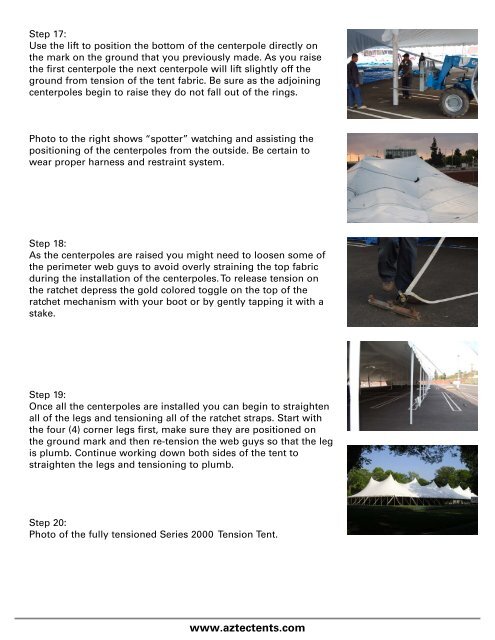
Step 17:<br />
Use the lift to position the bottom of the centerpole directly on<br />
the mark on the ground that you previously made. As you raise<br />
the first centerpole the next centerpole will lift slightly off the<br />
ground from tension of the tent fabric. Be sure as the adjoining<br />
centerpoles begin to raise they do not fall out of the rings.<br />
Photo to the right shows “spotter” watching and assisting the<br />
positioning of the centerpoles from the outside. Be certain to<br />
wear proper harness and restraint system.<br />
Step 18:<br />
As the centerpoles are raised you might need to loosen some of<br />
the perimeter web guys to avoid overly straining the top fabric<br />
during the installation of the centerpoles. To release tension on<br />
the ratchet depress the gold colored toggle on the top of the<br />
ratchet mechanism with your boot or by gently tapping it with a<br />
stake.<br />
Step 19:<br />
Once all the centerpoles are installed you can begin to straighten<br />
all of the legs and tensioning all of the ratchet straps. Start with<br />
the four (4) corner legs first, make sure they are positioned on<br />
the ground mark and then re-tension the web guys so that the leg<br />
is plumb. Continue working down both sides of the tent to<br />
straighten the legs and tensioning to plumb.<br />
Step 20:<br />
Photo of the fully tensioned <strong>Series</strong> <strong>2000</strong> Tension Tent.<br />
www.aztectents.com


