English - EastPoint Sports
English - EastPoint Sports
English - EastPoint Sports

Create successful ePaper yourself
Turn your PDF publications into a flip-book with our unique Google optimized e-Paper software.
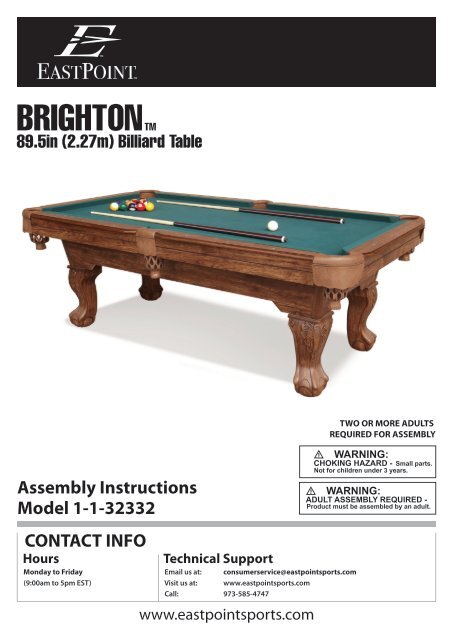
BRIGHTON TM<br />
89.5in (2.27m) Billiard Table<br />
Assembly Instructions<br />
Model 1-1-32332<br />
CONTACT INFO<br />
Hours<br />
Monday to Friday<br />
(9:00am to 5pm EST)<br />
Technical Support<br />
Email us at: consumerservice@eastpointsports.com<br />
Visit us at: www.eastpointsports.com<br />
Call: 973-585-4747<br />
www.eastpointsports.com<br />
TWO OR MORE ADULTS<br />
REQUIRED FOR ASSEMBLY<br />
WARNING:<br />
CHOKING HAZARD - Small parts.<br />
Not for children under 3 years.<br />
WARNING:<br />
ADULT ASSEMBLY REQUIRED -<br />
Product must be assembled by an adult.
IMPORTANT -<br />
Lay out all parts before you begin<br />
• Please review the parts identifier and make sure that you have all parts before beginning assembly.<br />
• If any questions or issues, please contact us at 1-973-585-4747 BEFORE returning the product to the original place<br />
of purchase.<br />
• Please keep your original sales receipt. Staple it on the adjacent page in the space provided for future reference/use.<br />
It will be required to receive service help or parts under warranty.<br />
CONTACT INFO<br />
Hours<br />
Monday to Friday<br />
(9:00am to 5pm EST)<br />
Technical Support<br />
Email us at: consumerservice@eastpointsports.com<br />
Visit us at: www.eastpointsports.com<br />
Call: 973-585-4747<br />
1
BEFORE BUILDING -<br />
Please inspect your playfield<br />
Your Table Game Playfield is NOT replaceable. Any damage that exists to your playfield is not reparable under warranty. If<br />
your playfield is damaged, the entire game must be returned to the original place of purchase for an exchange.<br />
Please attach<br />
RECEIPT HERE<br />
It will be required to receive service help or parts under warranty.<br />
2
TOOLS<br />
Required<br />
• Phillips Head Screwdriver<br />
(Standard Size) – Not Included<br />
• Allen Wrench - Included<br />
• Wrench - Included<br />
• Level<br />
(Standard Size) – Not Included<br />
Recommended (Not Required):<br />
• Electric Screwdriver or Power Driver<br />
CAUTION: DO NOT OVER TIGHTEN. If using an Electric Screwdriver or<br />
Power Driver, please make sure that the tool is set to a very low torque to<br />
prevent damage to the product.<br />
• Socket Wrench Set<br />
How to use the PARTS IDENTIFIER<br />
Before you begin assembly, please make sure that<br />
you have all the parts listed and in the correct<br />
quantities. This will ensure the quickest and most<br />
organized assembly.<br />
1<br />
Instructions Parts ID #<br />
Part Name<br />
Part Name<br />
Part Image<br />
Be sure to work on the assembly on a soft<br />
non-marring surface such as carpet or the inside of<br />
the corrugate box top to prevent causing damage<br />
to the table surface during assembly. If using the<br />
box top, remove all staples from box first.<br />
Item #<br />
Step<br />
Used In<br />
# 52703-QT x2<br />
STEP 1<br />
Part Quantity<br />
PARTS IDENTIFIER<br />
1<br />
Leg - Support A<br />
2<br />
Leg - Support B<br />
3<br />
Bracket - Steel<br />
4<br />
Leg - Base<br />
32332-01ES<br />
STEP 1<br />
x4<br />
32332-02ES<br />
STEP 1<br />
x4<br />
32332-03ES<br />
STEP 2<br />
x8<br />
32332-04ES<br />
STEP 3<br />
x4<br />
5<br />
Leg Leveler<br />
6<br />
Leg - Molded A<br />
7<br />
Leg - Molded B<br />
8<br />
Leg - Molded C<br />
32332-05ES<br />
STEP 3<br />
x4<br />
32332-06ES<br />
STEP 4<br />
x4<br />
32332-07ES<br />
STEP 4<br />
x4<br />
32332-08ES<br />
STEP 5<br />
x4<br />
9<br />
Leg - Molded D<br />
10<br />
Apron - Lower Side<br />
11<br />
Apron - Lower End<br />
12<br />
Corner Brace<br />
32332-09ES<br />
STEP 5<br />
x4<br />
32332-10ES<br />
STEP 8<br />
x2<br />
32332-11ES<br />
STEP 8<br />
x2<br />
32332-12ES<br />
STEP 8<br />
x4<br />
3
PARTS IDENTIFIER<br />
13<br />
Top Leg Panel<br />
14<br />
Support Board Assembly<br />
15<br />
Bracket - Molded<br />
16<br />
Main Cabinet<br />
32332-13ES<br />
STEP 9<br />
x4<br />
32332-14ES<br />
STEP 12<br />
x2<br />
32332-15ES<br />
STEP 12<br />
x4<br />
NOT REPLACEABLE<br />
STEP 14<br />
x1<br />
17<br />
Surface Leveler - Steel<br />
18<br />
Pocket - Corner<br />
19<br />
Pocket - Side<br />
32332-17ES<br />
PRE-INSTALLED<br />
x2<br />
32332-18ES<br />
PRE-INSTALLED<br />
x4<br />
32332-19ES<br />
PRE-INSTALLED<br />
x2<br />
HARDWARE<br />
60<br />
Screw - XXLarge<br />
61<br />
Bolt - XLarge<br />
62<br />
Screw - Large<br />
63<br />
Screw - Small<br />
32332-60ES<br />
STEP 1, 3<br />
x24<br />
32332-61ES<br />
STEP 2<br />
x16<br />
32332-62ES<br />
STEP 6<br />
x8<br />
32332-63ES<br />
STEP 7<br />
x16<br />
64<br />
Screw - Medium<br />
65<br />
Bolt - Large<br />
66<br />
Bolt - Medium<br />
67<br />
Washer<br />
32332-64ES<br />
STEP 9<br />
x8<br />
32332-65ES<br />
STEP 10<br />
x16<br />
32332-66ES<br />
STEP 12<br />
x4<br />
32332-67ES<br />
STEP 12<br />
x4<br />
68<br />
Nut<br />
69<br />
Screw - XLarge<br />
70<br />
Bolt - Small<br />
71<br />
Allen Key<br />
32332-68ES<br />
STEP 12<br />
x4<br />
32332-69ES<br />
STEP 13, 16<br />
x20<br />
32332-70ES<br />
STEP 15<br />
x12<br />
32332-71ES<br />
x1<br />
72<br />
Wrench<br />
32332-72ES<br />
x1<br />
4
ACCESSORIES<br />
80<br />
Brush<br />
81<br />
Cue Chalk<br />
82<br />
Triangle<br />
83<br />
Billiard Ball Set - 2.25in<br />
32332-80ES<br />
x1<br />
32300-09ES<br />
x2<br />
32300-02ES<br />
x1<br />
32300-01ES<br />
x1<br />
84<br />
Billiard Cue - 57in<br />
32300-11ES<br />
STEP 19<br />
x2<br />
ASSEMBLY INSTRUCTIONS<br />
Billiard Table Construction<br />
START<br />
BEFORE BUILDING - Please inspect and layout all your PARTS<br />
All parts are listed in the Parts<br />
Identifier and Accessories.<br />
Your Cabinet (Table Game<br />
Playfield) is NOT REPLACEABLE.<br />
Any damage that exists to your<br />
playfield is not reparable under<br />
warranty. If your playfield is<br />
damaged, the entire game must<br />
be returned to the original place<br />
of purchase for an exchange.<br />
Please review<br />
the Parts<br />
Identifier and<br />
make sure that<br />
you have all<br />
parts before<br />
beginning<br />
assembly.<br />
STEP 1<br />
2<br />
COMPONENTS<br />
1 Leg - Support A<br />
2 Leg - Support B<br />
QTY.<br />
x4<br />
x4<br />
NOTE:<br />
Repeat for all 4<br />
Legs.<br />
60<br />
1<br />
HARDWARE<br />
60<br />
Screw - XXLarge<br />
QTY.<br />
x16<br />
60<br />
5
STEP 2<br />
Step 1 Assembly<br />
71<br />
COMPONENTS<br />
Step 1 Assembly<br />
3 Bracket - Steel<br />
QTY.<br />
x4<br />
x8<br />
NOTE:<br />
Repeat for all 4<br />
Legs.<br />
61<br />
HARDWARE<br />
QTY.<br />
3<br />
61<br />
Bolt - XLarge<br />
x16<br />
71<br />
Allen Key<br />
x1<br />
NOTE: Outer edge of<br />
Steel Bracket should be<br />
flush with edge of Leg.<br />
STEP 3<br />
5<br />
60<br />
COMPONENTS<br />
Step 2 Assembly<br />
4 Leg - Base<br />
QTY.<br />
x4<br />
x4<br />
NOTE:<br />
Repeat for all 4<br />
Legs.<br />
5<br />
Leg Leveler<br />
x4<br />
4<br />
HARDWARE<br />
QTY.<br />
IMPORTANT:<br />
Male portion of Leg Base<br />
points down on Leg.<br />
(As shown above).<br />
Step 2 Assembly<br />
60<br />
Screw - XXLarge<br />
x8<br />
A<br />
STEP 4<br />
B<br />
COMPONENTS<br />
6 Leg - Molded A<br />
7 Leg - Molded B<br />
QTY.<br />
x4<br />
x4<br />
NOTE:<br />
Line up both<br />
Leg Molded A<br />
with Leg<br />
Molded B.<br />
6 7<br />
Then swing<br />
both together<br />
until there is a<br />
“CLICK” sound.<br />
This will<br />
indicate that<br />
the legs are<br />
locked.<br />
IMPORTANT: Listen for “CLICK” sound when snapping Legs<br />
together. This will indicate that the Legs are locked firmly in<br />
place. NO “CLICK” - NO LOCK.<br />
Repeat for all 4<br />
Legs.<br />
6
STEP 5<br />
9<br />
COMPONENTS<br />
8 Leg - Molded C<br />
9 Leg - Molded D<br />
QTY.<br />
x4<br />
x4<br />
NOTE:<br />
Slide and snap<br />
Leg Molded D<br />
into Leg<br />
Molded C.<br />
8<br />
Listen for the<br />
“CLICK” sound.<br />
This will<br />
indicate that<br />
the legs are<br />
locked.<br />
IMPORTANT: Listen for “CLICK” sound when snapping Legs<br />
together. This will indicate that the Legs are locked firmly in<br />
place. NO “CLICK” - NO LOCK.<br />
STEP 6<br />
Step 3 Assembly<br />
COMPONENTS<br />
Step 3 Assembly<br />
Step 4 Assembly (A/B Leg)<br />
QTY.<br />
x4<br />
x4<br />
NOTE:<br />
Repeat for all 4<br />
Legs.<br />
DO NOT<br />
overtighten<br />
Screws.<br />
HARDWARE<br />
QTY.<br />
62<br />
Screw - Large<br />
x8<br />
62 62<br />
Step 4 Assembly<br />
(A/B Leg)<br />
STEP 7<br />
Step 6 Assembly 63<br />
COMPONENTS<br />
Step 5 Assembly (C/D Leg)<br />
Step 6 Assembly<br />
QTY.<br />
x4<br />
x4<br />
NOTE:<br />
Place top Leg<br />
support on<br />
floor, then snap<br />
Step 5 Assembly<br />
into Step 6<br />
Assembly.<br />
Step 5 Assembly<br />
(C/D Leg)<br />
63<br />
HARDWARE<br />
63<br />
Screw - Small<br />
QTY.<br />
x16<br />
Repeat for all 4<br />
Legs.<br />
DO NOT<br />
overtighten<br />
Screws.<br />
7
STEP 8<br />
12<br />
TOP VIEW: Part # 12 SIDE VIEW: Part # 12<br />
NOTE: Flush with Aprons<br />
NOTE: Arrow on the backside of Corner Brace<br />
shows direction to slide the Corener Brace down.<br />
10 11<br />
COMPONENTS<br />
10 Apron - Lower Side<br />
11 Apron - Lower End<br />
12 Corner Brace<br />
QTY.<br />
x2<br />
x2<br />
x4<br />
NOTE:<br />
Arrow on<br />
backside of<br />
Corner Brace<br />
shows direction<br />
to slide the<br />
Corner Brace<br />
down.<br />
Repeat for all 4<br />
corners.<br />
STEP 9<br />
13<br />
64<br />
NOTE: Make sure “FLAPS” on<br />
Top Leg Panels are FLUSH<br />
AGAINST APRONS before<br />
inserting Screws.<br />
COMPONENTS<br />
Step 8 Assembly<br />
13 Top Leg Panel<br />
HARDWARE<br />
64 Screw - Medium<br />
QTY.<br />
x1<br />
x4<br />
QTY.<br />
x8<br />
NOTE:<br />
Make sure<br />
“FLAPS” on Top<br />
Leg Panels are<br />
FLUSH AGAINST<br />
APRONS before<br />
inserting<br />
Screws.<br />
Repeat for all 4<br />
Corners.<br />
Step 8 Assembly<br />
DO NOT<br />
overtighten<br />
Screws.<br />
STEP 10<br />
65 65<br />
Step 7 Assembly<br />
COMPONENTS<br />
Step 7 Assembly<br />
Step 9 Assembly<br />
QTY.<br />
x4<br />
x1<br />
NOTE:<br />
Repeat for all 4<br />
Legs.<br />
DO NOT<br />
overtighten<br />
Bolts.<br />
71<br />
HARDWARE<br />
QTY.<br />
65<br />
Bolt - Large<br />
x16<br />
71<br />
Allen Key<br />
x1<br />
Step 9 Assembly<br />
8
STEP 11<br />
COMPONENTS<br />
QTY.<br />
NOTE:<br />
Using at least 2<br />
strong adults<br />
pick up and flip<br />
table frame<br />
over and place<br />
straight down.<br />
NOTE: Avoid sideways<br />
pressure to Legs when<br />
flipping over.<br />
STEP 12<br />
15<br />
66<br />
67<br />
68<br />
17<br />
72<br />
COMPONENTS<br />
14 Support Broad<br />
15 Bracket - Molded<br />
17 Surface Leveler - Steel<br />
QTY.<br />
x2<br />
x4<br />
x2<br />
NOTE:<br />
Install Plastic<br />
Brackets on<br />
both ends of<br />
the Support<br />
Board.<br />
71<br />
14<br />
NOTE: Make sure the tops of<br />
the Surface Levelers are at<br />
the same height as the top<br />
of the Support Board.<br />
HARDWARE<br />
66 Bolt - Medium<br />
67 Washer<br />
68 Nut<br />
71 Allen Key<br />
72 Wrench<br />
QTY.<br />
x4<br />
x4<br />
x4<br />
x1<br />
x1<br />
Repeat for both<br />
Support Board.<br />
DO NOT<br />
overtighten<br />
Bolts.<br />
STEP 13<br />
Step 12 Assembly<br />
COMPONENTS<br />
Step 11 Assembly<br />
Step 12 Assembly<br />
QTY.<br />
x1<br />
x2<br />
NOTE:<br />
Install 4 Screws<br />
for each<br />
Molded Bracket.<br />
69<br />
Repeat for all 4<br />
Brackets.<br />
Step 11 Assembly<br />
HARDWARE<br />
69<br />
Screw - XLarge<br />
QTY.<br />
x16<br />
DO NOT<br />
overtighten<br />
Screws.<br />
Surface Leveler - Steel<br />
Surface Leveler - Steel<br />
NOTE: Surface Levelers should be<br />
facing inward in the table.<br />
9
STEP 14<br />
16<br />
COMPONENTS<br />
16 Main Cabinet<br />
QTY.<br />
x1<br />
NOTE:<br />
Using at least 2<br />
adults pick up<br />
the Main<br />
Cabinet and<br />
place gently on<br />
the table.<br />
NOTE: Make sure the tops of<br />
the Surface Levelers are at<br />
the same height as the top<br />
of the Support Board.<br />
STEP 15<br />
71<br />
70<br />
COMPONENTS<br />
16 Main Cabinet<br />
HARDWARE<br />
70 Bolt - Small<br />
71 Allen Key<br />
QTY.<br />
x1<br />
QTY.<br />
x12<br />
x1<br />
NOTE:<br />
Bolt the Main<br />
Cabinet to Step<br />
13 Assembly.<br />
Get all Bolts in<br />
before tightening.<br />
DO NOT<br />
overtighten<br />
Bolts.<br />
STEP 16<br />
COMPONENTS<br />
17 Surface Leveler - Steel<br />
QTY.<br />
x2<br />
NOTE:<br />
Screw in the<br />
Surface Levelers<br />
to the playfield.<br />
69<br />
HARDWARE<br />
69 Screw - XLarge<br />
QTY.<br />
x4<br />
Repeat for both<br />
Surface<br />
Levelers.<br />
DO NOT<br />
overtighten<br />
Screws.<br />
10
STEP 17<br />
COMPONENTS<br />
5 Leg Leveler<br />
QTY.<br />
x4<br />
NOTE:<br />
Using a Level<br />
check to make<br />
sure playfield is<br />
level.<br />
If playfield is<br />
not level, adjust<br />
the Leg Levelers<br />
on the bottom<br />
of each Leg<br />
until the surface<br />
is level.<br />
5<br />
17<br />
STEP 18<br />
COMPONENTS<br />
17 Surface Leveler - Steel<br />
HARDWARE<br />
72 Wrench<br />
QTY.<br />
x2<br />
QTY.<br />
x1<br />
NOTE:<br />
If playfield is still<br />
not level, then<br />
adjust the<br />
Surface Levelers<br />
using the<br />
Wrench<br />
supplied to<br />
move the<br />
playfield up and<br />
down.<br />
72<br />
11
ASSEMBLY INSTRUCTIONS<br />
Accessories Construction<br />
STEP 19<br />
COMPONENTS<br />
84 Billiard Cue - 57in<br />
QTY.<br />
x2<br />
NOTE:<br />
Screw the 2<br />
pieces of the<br />
Cue Stick<br />
together.<br />
Repeat for both<br />
Cues.<br />
84<br />
12
TABLE MAINTENANCE & CARE<br />
Table Top:<br />
• It is OK to gently vacuum the felt side of the Billiard Table with any standard handheld vacuum brush attachment.<br />
13
Limited Warranty<br />
As described in and as limited by this Limited Warranty, <strong>EastPoint</strong> <strong>Sports</strong>, Ltd. (the “Company”) warrants this Table Game (the “Product”) to be free from defects in workmanship and materials for<br />
a period of 90 days from the date of original purchase. The term defects shall mean any imperfections that impair the use of the product. The Company reserves the right to request confirmation<br />
of Proof of Purchase when requesting parts or service in order to confirm that the game is within its warranty period.<br />
What is Covered: Except as provided herein, this Limited Warranty covers all defects in materials and workmanship. This Limited Warranty is void if the Product is:<br />
• Damaged through improper usage or storage, negligence, misuse, abuse, transportation damage, acts of nature, or accident (including failure to follow the instructions supplied with the<br />
product)<br />
• Used in commercial applications, rentals or a commercial environment<br />
• Modified or repaired by anyone not authorized by the Company<br />
What is Not Covered:<br />
The Limited Warranty does not cover:<br />
• Expendable items such as cosmetic parts, game playing accessories, and any other items that may show signs of wear due to normal usage<br />
• Any transportation/delivery/installation costs incurred by the Consumer (either home from the original place of purchase or back to the original place of purchase)<br />
What the Company Will Pay For:<br />
• If any part or component of the Product which is covered by this Limited Warranty is found by the Company to be defective, the Company will provide replacement parts without charge.<br />
The Company’s obligation to repair or replace the Product or any portion thereof, shall be limited to the original purchase price of the product.<br />
• If during the Limited Warranty period, the product is found to be defective, the Company will, at the Company’s option, repair, replace, or make remuneration for the Product (either the<br />
same or equivalent value) without charge.<br />
How to Obtain Warranty Service: In order to enforce your rights under this Limited Warranty, you must follow these procedures:<br />
• You must return the ORIGINAL COPY OF YOUR SALES RECEIPT to the Company.<br />
• You must call the Company’s Consumer Service Department at 1-877-279-7071 on Monday through Friday between the hours of 9:00 A.M. and 5:00 P.M. (EST) to notify the Company of the<br />
nature of the problem. At the Company’s option, replacement parts or a new Product (either the same or equivalent value) will be sent to you at no charge.<br />
• If you are instructed to return the Product to the Company for servicing, you are responsible for shipping the Product, at your expense, to the address designated by the Company in<br />
packaging that will protect against further damage.<br />
• You must also include your name, address, daytime telephone number, Product model number, and a description of the problem.<br />
• The Company will pay for any shipping charges to return the repaired of replaced Product to you.<br />
THIS LIMITED WARRANTY IS AVAILABLE ONLY TO THE ORIGINAL PURCHASER OF THE PRODUCT AND IS VALID ONLY IN THE UNITED STATES. THE COMPANY’S LIABILITY IS LIMITED<br />
TO THE REPAIR, REPLACEMENT, OR REMUNERATION, AT ITS OPTION, OF ANY DEFECTIVE PRODUCT AND SHALL NOT INCLUDE ANY LIABILITY FOR INDIRECT, INCIDENTAL, OR<br />
CONSEQUENTIAL DAMAGES OF ANY KIND. THIS WARRANTY IS EXPRESSLY MADE IN LIEU OF ALL OTHER WARRANTIES, EXPRESSED OR IMPLIED, INCLUDING BUT NOT LIMITED TO<br />
THE IMPLIED WARRANTY OF MERCHANTABILITY AND THE IMPLIED WARRANTY OF FITNESS FOR A PARTICULAR PURPOSE. SOME STATES DO NOT ALLOW LIMITATIONS ON HOW<br />
LONG AN IMPLIED WARRANTY LASTS OR DO NOT ALLOW FOR EXCLUSION OF INCIDENTAL OR CONSEQUENTIAL DAMAGES. TO THAT EXTENT, THE ABOVE LIMITATIONS MAY NOT<br />
APPLY TO YOU.<br />
This Limited Warranty gives you specific legal rights, but you may also have other rights that vary from state to state.<br />
If you have any questions regarding this Limited Warranty or the operation of the Product, you may call or write us.<br />
ALL WARRANTY CLAIMS MUST BE ACCOMPANIED BY A COPY OF THE SALES RECEIPT/PROOF OF PURCHASE. REPORT ANY DEFECTS TO:<br />
628 ROUTE 10, SUITE #5 WHIPPANY, NEW JERSEY 07981 • 1-973-585-4747<br />
14
628 ROUTE 10, SUITE #5 WHIPPANY, NEW JERSEY 07981 • 1-973-585-4747<br />
PRINTED IN CHINA<br />
1-1-32332 IM 185.195