EverPEX⢠Installation Guide - JM Eagle
EverPEX⢠Installation Guide - JM Eagle
EverPEX⢠Installation Guide - JM Eagle
Create successful ePaper yourself
Turn your PDF publications into a flip-book with our unique Google optimized e-Paper software.
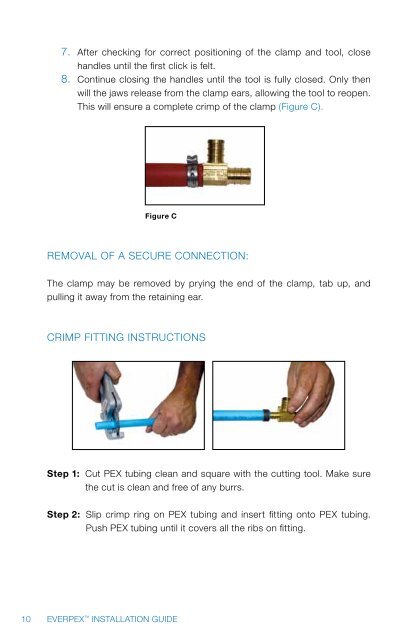
7. After checking for correct positioning of the clamp and tool, close<br />
handles until the first click is felt.<br />
8. Continue closing the handles until the tool is fully closed. Only then<br />
will the jaws release from the clamp ears, allowing the tool to reopen.<br />
This will ensure a complete crimp of the clamp (Figure C).<br />
Figure C<br />
Removal of a secure connection:<br />
The clamp may be removed by prying the end of the clamp, tab up, and<br />
pulling it away from the retaining ear.<br />
Crimp Fitting Instructions<br />
Step 1: Cut PEX tubing clean and square with the cutting tool. Make sure<br />
the cut is clean and free of any burrs.<br />
Step 2: Slip crimp ring on PEX tubing and insert fitting onto PEX tubing.<br />
Push PEX tubing until it covers all the ribs on fitting.<br />
10 EVERPEX INSTALLATION GUIDE


