EverPEX⢠Installation Guide - JM Eagle
EverPEX⢠Installation Guide - JM Eagle
EverPEX⢠Installation Guide - JM Eagle
You also want an ePaper? Increase the reach of your titles
YUMPU automatically turns print PDFs into web optimized ePapers that Google loves.
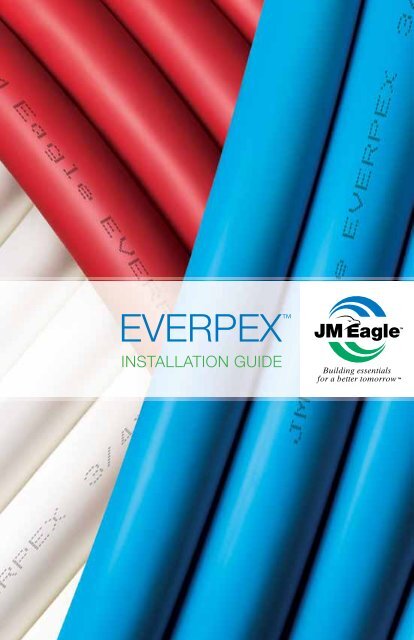
EVERPEX <br />
INSTALLATION GUIDE<br />
Building essentials<br />
for a better tomorrow<br />
EVERPEX INSTALLATION GUIDE<br />
I
II<br />
EVERPEX INSTALLATION GUIDE
EVERPEX <br />
CONTENTS<br />
01<br />
02<br />
03<br />
04<br />
05<br />
06<br />
07<br />
08<br />
09<br />
10<br />
11<br />
12<br />
13<br />
14<br />
15<br />
16<br />
17<br />
18<br />
19<br />
20<br />
21<br />
22<br />
INTRODUCTION TO EVERPEX - PLUMBING SySTEM . . . . . . . . . . . . . . . 6<br />
EVERPEX CERTIfICATIONS, LISTINGS AND<br />
MANUfACTURER STANDARDS . . . . . . . . . . . . . . . . . . . . . . . . . . . . . . . . 7<br />
STORAGE AND HANDLING . . . . . . . . . . . . . . . . . . . . . . . . . . . . . . . . . . . 7<br />
INSTALLATION GUIDELINES . . . . . . . . . . . . . . . . . . . . . . . . . . . . . . . . . . . 8<br />
PROTECTING EVERPEX TUBING . . . . . . . . . . . . . . . . . . . . . . . . . . . . . 12<br />
EVERPEX THERMAL EXPANSION RATE . . . . . . . . . . . . . . . . . . . . . . . . 12<br />
BENDING RADIUS . . . . . . . . . . . . . . . . . . . . . . . . . . . . . . . . . . . . . . . . . . 13<br />
HANGERS AND SUPPORTS . . . . . . . . . . . . . . . . . . . . . . . . . . . . . . . . . . 13<br />
RECESSED LIGHTING MINIMUM SEPARATIONS . . . . . . . . . . . . . . . . . . 14<br />
HOT WATER HEATER REQUIREMENTS . . . . . . . . . . . . . . . . . . . . . . . . . 14<br />
EVERPEX JOINTS AND CONNECTIONS . . . . . . . . . . . . . . . . . . . . . . . . 15<br />
MANIfOLD LOCATION AND ROUGH IN REQUIREMENTS . . . . . . . . . . . 16<br />
INSPECTION AND TESTING . . . . . . . . . . . . . . . . . . . . . . . . . . . . . . . . . . 17<br />
ELECTRICAL GROUNDING . . . . . . . . . . . . . . . . . . . . . . . . . . . . . . . . . . . 17<br />
THAWING fROZEN TUBING . . . . . . . . . . . . . . . . . . . . . . . . . . . . . . . . . . 17<br />
fIRE STOP . . . . . . . . . . . . . . . . . . . . . . . . . . . . . . . . . . . . . . . . . . . . . . . 18<br />
WATER HAMMER IN THE EVERPEX SUPPLIED SySTEM . . . . . . . . . . 18<br />
CONCRETE SLAB INSTALLATIONS . . . . . . . . . . . . . . . . . . . . . . . . . . . . 18<br />
SySTEM SANITIZATION . . . . . . . . . . . . . . . . . . . . . . . . . . . . . . . . . . . . . 19<br />
BURIAL INSTRUCTIONS fOR BRASS INSERT fITTINGS . . . . . . . . . . . . 19<br />
HOME-RUN MANIfOLD SySTEMS . . . . . . . . . . . . . . . . . . . . . . . . . . . . 20<br />
SUBMANIfOLD SySTEMS . . . . . . . . . . . . . . . . . . . . . . . . . . . . . . . . . . 21<br />
EVERPEX INSTALLATION GUIDE<br />
1
Limited Warranty<br />
J-M Manufacturing Company, Inc. (<strong>JM</strong> <strong>Eagle</strong> ) warrants that its EverPEX <br />
(cross-linked Polyethylene) tubing and related products (“Products”) are<br />
manufactured in accordance with applicable industry specifications referenced<br />
on the Product and are free from defects in workmanship and materials.<br />
Every claim under this warranty shall be void unless in writing and<br />
received by <strong>JM</strong> <strong>Eagle</strong> within thirty (30) days of the date the defect was<br />
discovered, and according to the following:<br />
Professionally Installed Products<br />
• EverPEX tubing: within twenty-five (25) years of the date of<br />
documented installation when properly installed by a licensed professional<br />
installer;<br />
• EverPEX system supplied fittings and manifolds: within ten<br />
(10) years of the date of documented installation when properly installed<br />
by a licensed professional installer;<br />
• EverPEX electrical and other approved applications: within<br />
two (2) years of the date of documented installation when properly<br />
installed by a licensed professional installer.<br />
• Non-Professionally Installed Products (It is highly recommended<br />
that the Product be professionally installed)<br />
• IN ALL INSTANCES WHERE THE PRODUCT IS INSTALLED BY A<br />
NON-LICENSED INSTALLER THIS LIMITED WARRANTY SHALL,<br />
FOR ANY PRODUCT AND IN ALL APPLICATIONS, IS LIMITED<br />
TO ONE (1) YEAR FROM THE DATE OF PURCHASE.<br />
This warranty specifically excludes any Products allowed to become sunbleached<br />
after shipment from the <strong>JM</strong> <strong>Eagle</strong> plant and is void if the Product<br />
is not stored away from direct sun-light.<br />
2 EVERPEX INSTALLATION GUIDE
Proof of purchase with the date thereof and a copy of the installer’s professional<br />
license must be presented to the satisfaction of <strong>JM</strong> <strong>Eagle</strong> , with any<br />
claim made pursuant to this warranty. <strong>JM</strong> <strong>Eagle</strong> must first be given an opportunity<br />
to inspect the alleged defective Products in order to determine if<br />
they meet applicable industry standards, if the handling and installation have<br />
been satisfactorily performed in accordance with <strong>JM</strong> <strong>Eagle</strong> recommended<br />
practices and if operating conditions are within standards. Written permission<br />
and/or a Return Goods Authorization (RGA) must be obtained along<br />
with instructions for return shipment to <strong>JM</strong> <strong>Eagle</strong> of any Products claimed<br />
to be defective.<br />
The limited and exclusive remedy for breach of this Limited Warranty shall<br />
be, at <strong>JM</strong> <strong>Eagle</strong>’s sole discretion, the replacement of the same type, size and<br />
like quantity of non-defective Product, or credits, offsets, or combination of<br />
thereof, for the wholesale purchase price of the defective unit.<br />
This Limited Warranty is void for any installations not conforming with industry<br />
standards and <strong>JM</strong> <strong>Eagle</strong>’s installation guidelines and/or Product failures<br />
caused by user’s flawed designs or specifications, unsatisfactory applications,<br />
improper installations, use in conjunction with incompatible materials,<br />
contact with aggressive chemical agents, direct sunlight, freezing or overheating<br />
of liquids in the Product and any other misuse causes not listed<br />
here. This Limited Warranty also excludes failure or damage caused by force<br />
majeure-type incidents (including, but not limited to, acts of nature, floods,<br />
hurricanes, and terrorist acts) or damage caused by the fault or negligence<br />
of anyone other than <strong>JM</strong> <strong>Eagle</strong> , or any other act or event beyond the control<br />
of <strong>JM</strong> <strong>Eagle</strong> .<br />
<strong>JM</strong> <strong>Eagle</strong>’s liability shall not, at any time, exceed the actual wholesale purchase<br />
price of the Product. The warranties in this document are the only<br />
warranties applicable to the Product and there are no other warranties, expressed<br />
or implied. This Limited Warranty specifically excludes any liability<br />
for general damages, consequential or incidental damages, including without<br />
limitation, costs incurred from removal, reinstallation, or other expenses<br />
resulting from any defect.<br />
EVERPEX INSTALLATION GUIDE<br />
3
<strong>JM</strong> <strong>Eagle</strong>’s Products should be used in accordance with standards set forth<br />
by local plumbing and building laws, codes, or regulations and applicable<br />
standards. Failure to adhere to these standards shall void this Limited Warranty.<br />
Products sold by <strong>JM</strong> <strong>Eagle</strong> that are manufactured by others are<br />
warranted only to the extent and limits of the warranty of the manufacturer.<br />
No statement, conduct or description by <strong>JM</strong> <strong>Eagle</strong> or its representative,<br />
in addition to or beyond this Limited Warranty, shall constitute a warranty.<br />
This Limited Warranty may only be modified in writing signed by an officer<br />
of <strong>JM</strong> <strong>Eagle</strong> .<br />
IMPLIED WARRANTIES OF MERCHANTABILITY OR FITNESS FOR A PAR-<br />
TICULAR PURPOSE ARE SPECIFICALLY DISCLAIMED NOTWITHSTAND-<br />
ING <strong>JM</strong> <strong>Eagle</strong>’s ACTUAL KNOWLEDGE OF THE PRODUCT’S INTENDED<br />
USE. Some states do not allow limitations on implied warranties ON GOODS<br />
SOLD DIRECTLY TO CONSUMERS, so the above limitation may not apply<br />
IN ALL CASES.<br />
4 EVERPEX INSTALLATION GUIDE
1. Introduction to EverPEX — Plumbing System<br />
J-M Manufacturing Company (<strong>JM</strong> <strong>Eagle</strong> ) is introducing the EverPEX <br />
plumbing system. EverPEX (cross-linked Polyethylene) tubing is an excellent<br />
alternative to traditional plumbing materials. The molecules in EverPEX <br />
are modified to cause the molecules to link together permanently. Once High<br />
Density Polyethylene (HDPE) is cross-linked it becomes a thermo-set plastic,<br />
meaning it cannot be melted and reshaped. Plumbing suppliers, contractors<br />
and builders can rest assured that <strong>JM</strong> <strong>Eagle</strong> , the industry leader in plastic<br />
pipe, will stand behind EverPEX’s tubing and fitting availability and their warranties<br />
for years to come.<br />
EverPEX is a PEX – product produced by the silane moisture cure method.<br />
Most cross-linking takes place after the material has left the extruder. The<br />
cross-linking is achieved by introducing moisture and temperature through<br />
exposure to hot water or steam.<br />
EverPEX has many useful potable water applications in residential, commercial<br />
and industrial construction. EverPEX has a high temperature capability,<br />
and is pressure rated up to 80 psi at 200° F. Because of its smooth wall,<br />
EverPEX has excellent flow characteristics. Additionally, it has increased<br />
flexibility for easy design and installation and is corrosion-resistant. In addition<br />
to hot and cold potable water plumbing applications, EverPEX can be<br />
used for hydronic radiant heating, snow and ice melting applications, solar<br />
and swimming pool heating, agricultural and turf applications, even ice rinks<br />
and refrigeration warehouses.<br />
This guide will provide plumbing suppliers, as well as tradesmen, installers<br />
and inspectors with proper handling, installation and testing requirements for<br />
<strong>JM</strong> <strong>Eagle</strong>’s EverPEX tubing systems.<br />
The use of EverPEX for purposes other than those approved by <strong>JM</strong> <strong>Eagle</strong> <br />
is considered a misapplication of the product and voids the EverPEX <br />
Limited Warranty.<br />
EVERPEX INSTALLATION GUIDE<br />
5
2. EverPEX Certifications, Listings and<br />
Manufacturer Standards<br />
NSF National Sanitation Foundation<br />
• EverPEX tubing and supplied fittings are NSF certified to NSF standards<br />
14 and 61.<br />
• PW potable water certificate. NSF-PW<br />
• NSF Cl-TD<br />
cNSF (CSA B137.0/137.5)<br />
Plastic Pipe Institute—Pressure Ratings and Temperature<br />
• High Temperature TR-4 Standards<br />
• EverPEX tubing systems are rated for 160 psi at 73° F, 100 psi at<br />
180° F. and 80 psi at 200° F.<br />
ASTM<br />
• EverPEX tubing F876, F877<br />
• Fittings F1807<br />
U.P. Code<br />
3. Storage and Handling<br />
Tubing that is discolored or has been exposed to chemicals, grease, tar or<br />
solvents should NOT be used. When cleaning the EverPEX tubing, use only<br />
a damp water cloth. Discolored, stained or contaminated tubing should be<br />
discarded and NOT used.<br />
1. EverPEX tubing should be kept out of direct sunlight, ultra violet<br />
light can degrade the pipe.<br />
2. EverPEX tubing should be stored away from heat sources.<br />
3. DO NOT allow petroleum oil or solvent-based paints to contact<br />
EverPEX .<br />
4. DO NOT allow strong acids, pesticides, organic chemicals or strong<br />
bases to come in contact with the EverPEX tubing.<br />
6 EVERPEX INSTALLATION GUIDE
5. EverPEX tubing should be stored indoors or inside a cardboard box<br />
to keep coils and lengths of tubing clean.<br />
6. DO NOT allow rodents, insects, or other pests to come in contact<br />
with tubing.<br />
7. DO NOT use glue, cements weld or use adhesives or tape on<br />
EverPEX tubing.<br />
8. DO NOT apply an open flame to EverPEX tubing.<br />
4. <strong>Installation</strong> <strong>Guide</strong>lines<br />
EverPEX tubing is color coded to prevent cross connection of hot and cold<br />
water lines. EverPEX pipe or tubing coils are lightweight and easily uncoiled<br />
and shaped by hand for easy rough in through wood frames as well as steel<br />
studs in floors, walls or ceilings.<br />
Flared Insert Fittings<br />
Flared insert fittings are manufactured to ASTM F1807 standards and meet<br />
all requirements of NSF Standard 14/61, or the listing requirements of IAPMO<br />
(uniform plumbing code).<br />
Installers of EverPEX supplied fittings should adhere to the guidelines given<br />
in this manual pertaining to the use and installation of EverPEX tubing with<br />
flared fittings and in accordance with accepted plumbing practices. Where<br />
fittings are identified as having been manufactured by a third party, the third<br />
party’s installation instructions should also be consulted.<br />
Flared fittings are designed for use with EverPEX tubing manufactured to<br />
ASTM F876-/877 standards.<br />
Flared fittings are designed to equal or exceed the maximum pressure and<br />
temperature ratings of EverPEX tubing; 160 psi at 73° F, 100 psi at 180° F<br />
and 80 psi at 200° F.<br />
EVERPEX INSTALLATION GUIDE<br />
7
Procedure for installing flared fittings:<br />
1. Cut tubing squarely, slide nut over tubing.<br />
2. Rock tubing onto flared cone until it rests against the shoulder of<br />
the fitting.<br />
3. Slide nut to the threads and tighten securely. These threads require<br />
no glue, pipe dope, or Teflon ® tape.<br />
High Temperature Plastic Manifold<br />
The manifold should be secured to an interior wall, in close proximity to the<br />
hot water heater to maximize efficiency. (The manifold should never touch<br />
the water heater or any other sources of heat.)<br />
Procedure for installing manifold:<br />
1. All tubing ends are to be cut squarely and free of any burrs.<br />
2. Slide nut over tubing.<br />
3. Firmly rock tubing onto flare cone of the fitting until it rests against the<br />
shoulder of the fitting.<br />
4. Slide the nut to the threads and tighten securely onto fitting or valve.<br />
5. Tighten swivel nut onto outlet port of manifold.<br />
These connections do not require Teflon ® tape or pipe dope. When connecting<br />
male pipe threads to female pipe threads, use only Teflon ® tape.<br />
If installing a brass ballcock valve, you need to cut the end of the tubing<br />
squarely and free of any burrs.<br />
Procedure for installing a brass ballcock valve:<br />
1. Slide crimp ring or clamp over tubing end.<br />
2. Crimp tubing to the insert end of the valve.<br />
3. Tighten swivel nut onto outlet port of manifold.<br />
8 EVERPEX INSTALLATION GUIDE
Ratchet Tool Clamping Instructions<br />
The ratchet tool clamp system secures EverPEX tubing to brass or plastic<br />
insert fittings using a stainless steel clamp manufactured to ASTM<br />
F2098 specifications.<br />
The EverPEX tubing’s elastic memory, combined with the clamps spring<br />
action, results in an ever-tightening leak-free connection. This connection will<br />
withstand specified temperature and pressure changes.<br />
The ratchet tool clamp system has the ability of one tool to crimp all sizes.<br />
Procedure for making a good connection using brass<br />
insert fittings:<br />
1. Cut the tubing to a clean straight end.<br />
Figure A<br />
2. Slide a clamp over the end of the tube (Figure A).<br />
3. Insert a fitting into tubing ensuring the fitting is fully inserted.<br />
4. Sufficient care should be taken that the tubing is straight and not<br />
stretched or pulled to reach the fitting.<br />
5. The clamp should be positioned 1 /8" to ¼" from the tubing’s cut end.<br />
6. Place the opened jaws of the ratchet tool over the raised ear of the<br />
clamp (Figure B).<br />
Figure B<br />
EVERPEX INSTALLATION GUIDE<br />
9
7. After checking for correct positioning of the clamp and tool, close<br />
handles until the first click is felt.<br />
8. Continue closing the handles until the tool is fully closed. Only then<br />
will the jaws release from the clamp ears, allowing the tool to reopen.<br />
This will ensure a complete crimp of the clamp (Figure C).<br />
Figure C<br />
Removal of a secure connection:<br />
The clamp may be removed by prying the end of the clamp, tab up, and<br />
pulling it away from the retaining ear.<br />
Crimp Fitting Instructions<br />
Step 1: Cut PEX tubing clean and square with the cutting tool. Make sure<br />
the cut is clean and free of any burrs.<br />
Step 2: Slip crimp ring on PEX tubing and insert fitting onto PEX tubing.<br />
Push PEX tubing until it covers all the ribs on fitting.<br />
10 EVERPEX INSTALLATION GUIDE
Step 3: Set crimp ring 1 /8" to ¼" from the end of PEX tubing. Crimp the ring<br />
with the crimping tool.<br />
Step 4: Use the “Go/No-Go” gauge to ensure a leak-proof joint.<br />
5. Protecting EverPEX Tubing<br />
Abrasion—EverPEX tubing must be protected from abrasion or rough<br />
edges. DO NOT pass through studs, joists or hollow masonry walls. The<br />
use of plastic sleeves or grommets, are recommended in order to eliminate<br />
tubing abrasions.<br />
Exposed piping—Exposed EverPEX tubing must be covered in order to<br />
prevent damage from external sources such as mechanical equipment,<br />
recessed lighting or UV rays. For protection, use plastic sleeves to cover<br />
exposed EverPEX tubing.<br />
6. EverPEX Thermal Expansion Rate<br />
The linear expansion rate for EverPEX tubing is approximately 1.1 inches<br />
per 100 foot per 10° F change in temperature.<br />
When connecting a vertical branch to a horizontal main, a loop (Figure D)<br />
or a 12" horizontal offset (Figure E) will allow for expansion and contraction<br />
in both sections of tubing.<br />
All installations require adequate clearance between the structure and<br />
the tubing.<br />
EVERPEX INSTALLATION GUIDE<br />
11
Figure D<br />
Figure E<br />
7. Bending Radius<br />
EverPEX tubing may be shaped by hand. The minimum radius is not to<br />
be less than six (6) times the nominal tubing diameter. External bend supports<br />
or sleeves may be used to ensure protection of the tubing. Failure to<br />
keep bend radius six times the nominal tubing diameter voids the EverPEX <br />
Limited Warranty.<br />
8. Hangers and Supports<br />
EverPEX tubing should not be rigidly anchored. EverPEX tubing must<br />
float on all hangers and straps to allow for movement during expansion and<br />
contraction. Proper care should be taken to ensure the EverPEX tubing is<br />
not pinched or in contact with abrasive or sharp edges. Horizontal tubing<br />
runs should be supported every 32 inches (Figure F). Always allow slack<br />
for expansion and contraction (7" for every 50-foot of run will be sufficient).<br />
Use only hangers designed for plastic pipe. Vertical tubing runs should be<br />
supported every 48 inches.<br />
32”<br />
Figure F<br />
12 EVERPEX INSTALLATION GUIDE
Hose Bibs<br />
Tubing connected directly to any hose bib must be anchored so any load on<br />
the hose bib will not put strain on the EverPEX tubing.<br />
Stub Outs<br />
EverPEX tubing may be stubbed directly out of a wall. Support brackets<br />
may be used so long as they do not deform or kink the EverPEX tubing.<br />
9. Recessed Lighting Minimum Separations<br />
Whenever a UV light or other high temperature emitting source is used, insulation<br />
is required to protect EverPEX tubing. DO NOT install EverPEX <br />
tubing near recessed lighting fixtures. Where applicable building codes<br />
do not exist, a minimum of 12" is required between recessed lights and<br />
EverPEX tubing. If this is not possible, appropriate insulation rated to<br />
withstand the temperature generated by the fixture is required.<br />
10. Hot Water Heater Requirements<br />
WARNING: NEVER connect EverPEX tubing directly to a water heater.<br />
A minimum of 18" of metallic piping is required between the water heater and<br />
the EverPEX tubing (Figure G).<br />
18”<br />
Figure G<br />
EVERPEX INSTALLATION GUIDE<br />
13
11. EverPEX Joints and Connections<br />
A. Crimping with copper crimp rings.<br />
B. Clamping with stainless steel clamps.<br />
Procedure for making crimp connections:<br />
1. Tubing should be cut squarely and cleanly free of any burrs.<br />
2. Slide the correct size crimp ring over the end of the tube.<br />
3. Insert the fitting into the tube up to the shoulder or tube stop. Place<br />
the ring 1 /8" to ¼" from the end of the tubing.<br />
4. The ring must be crimped on squarely. The crimping tool must be at<br />
a right angle to the tubing and the handles must close completely.<br />
Never crimp twice.<br />
5. All connections should be checked with a gauge. The gauge should be<br />
slid directly over the ring. Never slide the gauge on from the side.<br />
6. Your connection is good if the “GO” gauge fits the ring and the “NO<br />
GO” gauge does not (Figure H). Bad crimps must be cut out of the<br />
tubing and replaced.<br />
NO GO<br />
GO<br />
NO GO<br />
GO<br />
DURA-PEX<br />
DURA-PEX<br />
NO GO<br />
GO<br />
NO GO<br />
GO<br />
Figure H<br />
When making a compression type fitting, be sure the pipe or tubing is inserted<br />
fully in the tubing and the nut is fully tightened.<br />
When making a swivel connection, be sure that the tubing and fitting are<br />
aligned straight and while tightening the swivel nut, make it hand tight<br />
plus a ¼ turn.<br />
Fittings are available for PEX x PB (Polybutylene) and PEX x PE (Polyethylene).<br />
14 EVERPEX INSTALLATION GUIDE
Connecting to Fixtures<br />
When connecting EverPEX to threaded metallic fittings, only brass or copper<br />
threaded fittings should be used. Different expansion and contraction<br />
rates may result in leaks. Teflon ® tape should be used on all metallic threaded<br />
fittings.<br />
All brazing or sweating of metallic fittings should be complete and allowed to<br />
cool before connecting with EverPEX tubing.<br />
If EverPEX tubing is not being connected to a public water supply, the water<br />
must be laboratory tested for hardness. If the water is found to be aggressive<br />
(i.e. high in calcium, or other by-products), a treatment system may be<br />
required. (Follow accepted water treatment guidelines for your region).<br />
12. Manifold Location and Rough In Requirements<br />
Manifolds should be located on interior walls. Manifolds mounted on exterior<br />
walls may experience a significant heat loss. A closet is a good location if it<br />
is in close proximity to supply and return lines from the boiler or heater. Hallways<br />
or large rooms make convenient avenues for long lead runs and return<br />
runs. Manifolds must be installed a minimum of 16” above the floor.<br />
Installing EverPEX Tubing in Suspended Wood Floors<br />
When installing tubing below the subfloor between floor joists, EverPEX <br />
should be looped from one joist cavity to the next. The tubing can be looped<br />
beneath the floor joist by drilling a hole through the floor joist.<br />
*Check all local codes before drilling floor joists.<br />
EVERPEX INSTALLATION GUIDE<br />
15
Passing tubing through floor joist:<br />
1. Drill two (2) 1 ½" inch holes in each joist.<br />
2. Feed tubing off the uncoiler through the holes farthest from the sill plate<br />
until all bays are full.<br />
3. Loop tubing back to the drilled end of the floor joist alongside the sill<br />
plate and secure to the manifold.<br />
4. All tubing is to be secured by the instructions provided by the<br />
specific fastener.<br />
13. Inspection and Testing<br />
EverPEX plumbing systems shall be inspected to ensure compliance with<br />
J-M Manufacturing installation requirements and with all applicable codes<br />
and regulations.<br />
Pressure testing of the entire hot and cold water systems should conform to<br />
the local plumbing code regulations.<br />
14. Electrical Grounding<br />
WARNING: EverPEX can NEVER be used to ground an electrical system.<br />
15. Thawing Frozen Tubing<br />
EverPEX tubing is highly resistant to damage during the freeze – thaw process.<br />
The cross-linking of the high-density polyethylene enables the tubing<br />
to expand, absorbing most of the expansion energy created during the freezing<br />
process. Nevertheless, it is strongly recommended that EverPEX tubing<br />
not be exposed to severe cold weather conditions.<br />
16 EVERPEX INSTALLATION GUIDE
In the event you experience an ice blockage, the following methods should<br />
be applied to thaw the blockage:<br />
1. Pour hot water over the frozen area.<br />
2. Apply heat via a hair dryer or heatsource (not to exceed 180° F). Do not<br />
expose EverPEX tubing to open flame.<br />
3. Use a commercial system to pump hot water to the ice blockage and<br />
re-circulate the cold water to reheat.<br />
4. Wet hot towels applied to the ice blockage.<br />
Damage<br />
DO NOT use EverPEX tubing that is kinked, buckled, flattened or gouged.<br />
All damaged tubing must be removed and replaced.<br />
16. Fire Stop<br />
In the event the tubing runs through a fire-rated wall, a fire-stopping compound<br />
MUST be used. This material is required to seal any gaps around the<br />
tubing. The manufacturers specifications of the fire rated wall and fire stop<br />
compound should be followed.<br />
17. Water Hammer in the EverPEX Supplied System<br />
A condition commonly referred to as “water hammer”, may occur in<br />
EverPEX plumbing systems. EverPEX’s flexibility minimizes the intensity<br />
of pressure surges compared with metallic plumbing materials. Damage<br />
to plumbing materials is unlikely, although some hammer noise is possible.<br />
The following suggestions will help minimize, if not eliminate, water<br />
hammer noise. Water hammer arrestors are only advisable if local codes<br />
require them.<br />
EVERPEX INSTALLATION GUIDE<br />
17
1. Clamping or strapping more closely will help prevent tubing noise.<br />
2. Care should be taken to prevent the EverPEX tubing from coming in<br />
contact with ductwork or wallboard.<br />
3. Install fixtures that are less prone to water hammer noise. For example,<br />
two-handled fixtures are less prone to water hammer than single-handled<br />
fixtures.<br />
4. When closing fixtures, be sure to close them in a smooth, less abrupt<br />
manner. This also helps minimize hammer noise.<br />
18. Concrete Slab <strong>Installation</strong>s<br />
When installing EverPEX tubing beneath a concrete slab the supply lines<br />
should run under the drain lines. Trenches should be dug to ensure that the<br />
plumbing lines have appropriate clearance below the slab. Wherever a PEX<br />
supply line runs through the slab it needs to be protected with a sleeve. The<br />
sleeve material will protect the tubing from chaffing on the concrete when<br />
expansion and contraction are occurring. A four-foot length of sleeve material<br />
is recommended, providing two feet of coverage for the tubing rising out<br />
of the slab and two foot to protect the tubing beneath. Be sure to tape shut<br />
the ends of the supply lines to prevent any introduction of concrete.<br />
19. System Sanitization<br />
When local codes require system sanitization, please follow the recommended<br />
time limitations and exposure levels.<br />
1. Use a chlorine solution for a three-hour period with a concentration of<br />
50 to 100 ppm as per AWWA guidelines, or 50 ppm for 6 hours as per<br />
ICC guidelines.<br />
2. Sanitization solution must be mixed thoroughly before introducing to<br />
the system.<br />
3. The chlorine solution must occupy the entire system. All fixture valves<br />
are to be opened until chlorine smell is evident.<br />
4. The entire system must be flushed thoroughly with potable water after<br />
reaching the recommended time for the concentration chosen.<br />
18 EVERPEX INSTALLATION GUIDE
5. THE SANITIZATION SOLUTION SHALL NOT REMAIN IN THE SYSTEM<br />
FOR MORE THAN 24 HOURS OR RISK TO THE SYSTEM COMPO-<br />
NENTS MAY OCCUR, REDUCING THE SERVICE LIFE OF INSTALLED<br />
COMPONENTS. SYSTEM MUST BE FLUSHED THOROUGHLY WITH<br />
POTABLE WATER. FAILURE TO FLUSH THE SYSTEM WITHIN THE 24<br />
HOUR TIME PERIOD VOIDS THE EVERPEX LIMITED WARRANTY.<br />
20. Burial Instructions for Brass Insert Fittings<br />
Should brass insert fittings have contact with ground soil by direct burial,<br />
those brass fittings must be wrapped securely with corrugated tubing and<br />
silicone rubber-like tape.<br />
WHEN ANY CONFLICT EXISTS BETWEEN THE EVERPEX INSTALLATION<br />
GUIDE AND APPLICABLE CODES AND REGULATIONS, THE CODES AND<br />
REGULATIONS SHALL ALWAYS TAKE PRECEDENCE.<br />
EVERPEX INSTALLATION GUIDE<br />
19
21. Home-Run Manifold Systems<br />
1 2 ” tube<br />
3 8<br />
1” tube<br />
3 8 ” tube<br />
3 8 ” tube<br />
3 8 ” tube<br />
3 4” tube<br />
1 2” tube ” tube<br />
3 4 ” tube<br />
20 EVERPEX INSTALLATION GUIDE
22. Submanifold Systems<br />
1 2 ” tube<br />
1 2<br />
1” tube<br />
3 4 ” tube<br />
” tube<br />
3 4 ” tube<br />
3 4 ” tube<br />
3 8 ” tube<br />
3 8 ” tube ” tube<br />
3 8<br />
” tube<br />
3 8 ” tube<br />
3 4 1 2 ” tube<br />
EVERPEX INSTALLATION GUIDE<br />
21
Notes:
Notes:
Notes:
evised January 2009<br />
<strong>JM</strong>E-04B<br />
© J-M Manufacturing Co., Inc.<br />
Nine Peach Tree Hill Road<br />
Livingston, NJ 07039<br />
T: 973.535.1633<br />
f: 973.533.4185<br />
26 Building EVERPEX essentials INSTALLATION www.Jmeagle.com<br />
GUIDE<br />
for a better tomorrow<br />
gLobaL HeadquarterS:<br />
regionaL office:<br />
5200 West Century Blvd<br />
Los Angeles, CA 90045<br />
T: 800.621.4404<br />
f: 800.451.4170


