Hydronic Towel Warmer Installation - Homeclick
Hydronic Towel Warmer Installation - Homeclick
Hydronic Towel Warmer Installation - Homeclick
Create successful ePaper yourself
Turn your PDF publications into a flip-book with our unique Google optimized e-Paper software.
1<br />
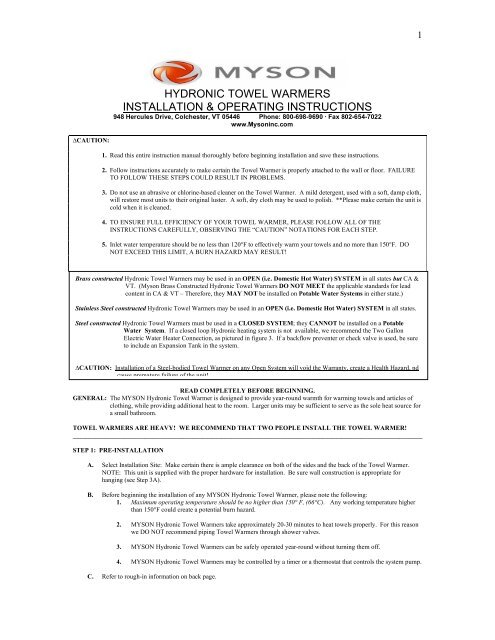
HYDRONIC TOWEL WARMERS<br />
INSTALLATION & OPERATING INSTRUCTIONS<br />
948 Hercules Drive, Colchester, VT 05446 Phone: 800-698-9690 · Fax 802-654-7022<br />
www.Mysoninc.com<br />
∆CAUTION:<br />
1. Read this entire instruction manual thoroughly before beginning installation and save these instructions.<br />
2. Follow instructions accurately to make certain the <strong>Towel</strong> <strong>Warmer</strong> is properly attached to the wall or floor. FAILURE<br />
TO FOLLOW THESE STEPS COULD RESULT IN PROBLEMS.<br />
3. Do not use an abrasive or chlorine-based cleaner on the <strong>Towel</strong> <strong>Warmer</strong>. A mild detergent, used with a soft, damp cloth,<br />
will restore most units to their original luster. A soft, dry cloth may be used to polish. **Please make certain the unit is<br />
cold when it is cleaned.<br />
4. TO ENSURE FULL EFFICIENCY OF YOUR TOWEL WARMER, PLEASE FOLLOW ALL OF THE<br />
INSTRUCTIONS CAREFULLY, OBSERVING THE “CAUTION” NOTATIONS FOR EACH STEP.<br />
5. Inlet water temperature should be no less than 120°F to effectively warm your towels and no more than 150°F. DO<br />
NOT EXCEED THIS LIMIT, A BURN HAZARD MAY RESULT!<br />
Brass constructed <strong>Hydronic</strong> <strong>Towel</strong> <strong>Warmer</strong>s may be used in an OPEN (i.e. Domestic Hot Water) SYSTEM in all states but CA &<br />
VT. (Myson Brass Constructed <strong>Hydronic</strong> <strong>Towel</strong> <strong>Warmer</strong>s DO NOT MEET the applicable standards for lead<br />
content in CA & VT – Therefore, they MAY NOT be installed on Potable Water Systems in either state.)<br />
Stainless Steel constructed <strong>Hydronic</strong> <strong>Towel</strong> <strong>Warmer</strong>s may be used in an OPEN (i.e. Domestic Hot Water) SYSTEM in all states.<br />
Steel constructed <strong>Hydronic</strong> <strong>Towel</strong> <strong>Warmer</strong>s must be used in a CLOSED SYSTEM; they CANNOT be installed on a Potable<br />
Water System. If a closed loop <strong>Hydronic</strong> heating system is not available, we recommend the Two Gallon<br />
Electric Water Heater Connection, as pictured in figure 3. If a backflow preventer or check valve is used, be sure<br />
to include an Expansion Tank in the system.<br />
∆CAUTION: <strong>Installation</strong> of a Steel-bodied <strong>Towel</strong> <strong>Warmer</strong> on any Open System will void the Warranty, create a Health Hazard, nd<br />
cause premature failure of the unit!<br />
READ COMPLETELY BEFORE BEGINNING.<br />
GENERAL: The MYSON <strong>Hydronic</strong> <strong>Towel</strong> <strong>Warmer</strong> is designed to provide year-round warmth for warming towels and articles of<br />
clothing, while providing additional heat to the room. Larger units may be sufficient to serve as the sole heat source for<br />
a small bathroom.<br />
TOWEL WARMERS ARE HEAVY! WE RECOMMEND THAT TWO PEOPLE INSTALL THE TOWEL WARMER!<br />
____________________________________________________________________________________________________________<br />
STEP 1: PRE-INSTALLATION<br />
A. Select <strong>Installation</strong> Site: Make certain there is ample clearance on both of the sides and the back of the <strong>Towel</strong> <strong>Warmer</strong>.<br />
NOTE: This unit is supplied with the proper hardware for installation. Be sure wall construction is appropriate for<br />
hanging (see Step 3A).<br />
B. Before beginning the installation of any MYSON <strong>Hydronic</strong> <strong>Towel</strong> <strong>Warmer</strong>, please note the following:<br />
1. Maximum operating temperature should be no higher than 150° F, (66°C). Any working temperature higher<br />
than 150°F could create a potential burn hazard.<br />
2. MYSON <strong>Hydronic</strong> <strong>Towel</strong> <strong>Warmer</strong>s take approximately 20-30 minutes to heat towels properly. For this reason<br />
we DO NOT recommend piping <strong>Towel</strong> <strong>Warmer</strong>s through shower valves.<br />
3. MYSON <strong>Hydronic</strong> <strong>Towel</strong> <strong>Warmer</strong>s can be safely operated year-round without turning them off.<br />
4. MYSON <strong>Hydronic</strong> <strong>Towel</strong> <strong>Warmer</strong>s may be controlled by a timer or a thermostat that controls the system pump.<br />
C. Refer to rough-in information on back page.
2<br />
____________________________________________________________________________________________________________<br />
STEP 2: INSPECT MYSON TOWEL WARMER<br />
(Note: Replacement parts are available for purchase should a part become damaged or lost during installation.)<br />
A. Unpack the Myson <strong>Towel</strong> <strong>Warmer</strong> carefully to avoid any damage or loss of any part. When opening the box and<br />
unwrapping the <strong>Towel</strong> <strong>Warmer</strong>, be sure that the parts that come with the <strong>Towel</strong> <strong>Warmer</strong>, (i.e. brackets, flanges, air vent<br />
key, Loctite 565, and #10 mounting screws), are not accidentally discarded.<br />
B. It is your responsibility to immediately inspect the <strong>Towel</strong> <strong>Warmer</strong> for any damage. Shipping damage should be reported<br />
immediately to your place of purchase.<br />
C. Check for enclosed valves.<br />
___________________________________________________________________________________________________________<br />
Valves.)**<br />
**(Some models come with Cross Handle<br />
STEP 3: INSTALLATION<br />
Carefully remove the protective wrapping and move the <strong>Towel</strong> <strong>Warmer</strong> into position.<br />
A. Mounting<br />
1. The MYSON Classic & Traditional <strong>Towel</strong> <strong>Warmer</strong>s have been designed with integral fixed flanges. These<br />
will facilitate a permanent and secure mounting of the <strong>Towel</strong> <strong>Warmer</strong> to the wall or floor using the screws<br />
provided.<br />
*PLEASE SEE PAGE 9 FOR MOUNTING INSTRUCTIONS FOR THE FOLLOWING MODELS: CMR, INT & MRR<br />
**PLEASE SEE PAGE 10 FOR MOUNTING INSTRUCTIONS FOR THE FOLLOWING MODELS: RHA, MAE & GAV<br />
***PLEASE SEE PAGE 11 FOR MOUNTING INSTRUCTIONS FOR THE FOLLOWING MODEL: COS<br />
B. Valve <strong>Installation</strong> – Monoflo Piping is Strongly Recommended! (See Page 6 For Details)<br />
NOTE: It is very important that the copper piping seats all the way into the valve body. To accomplish this, first dry- fit the<br />
valves on the copper stubs. Measure the difference between the centerline of the valve spud and the tapping on the<br />
<strong>Hydronic</strong> <strong>Towel</strong> <strong>Warmer</strong>. Cut this amount off the copper stub. THIS IS CRITICAL! If the copper is too short, the<br />
fitting will not seal.<br />
1. The valves are composed of a main body, a union connection, and a copper compression ring and nut located at<br />
the bottom of the valve. (Have the Sleeve Kit ready at this time.)<br />
2. The Sleeve Kit consists of a small escutcheon plate and matching 3” piece of tubing used to cover the water<br />
pipe connections.<br />
3. After having stubbed the copper tubing, place the sleeve and escutcheon plate over the exposed copper tubing.<br />
4. Fit the compression ring on a scrap piece of copper pipe. Turn the compression ring on the pipe to stretch it.<br />
This will allow the compression ring to more easily slide onto the copper pipe stubbed in for the installation of<br />
your MYSON <strong>Hydronic</strong> <strong>Towel</strong> <strong>Warmer</strong>.<br />
5. Place compression nut and ring onto the copper tube.<br />
6. Next, remove the valves from the <strong>Towel</strong> <strong>Warmer</strong> and check to be sure that the valves are completely OPEN.<br />
IMPORTANT: There are two valves which come with MYSON <strong>Hydronic</strong> <strong>Towel</strong> <strong>Warmer</strong>s. One valve is permanently OPEN, but<br />
the other valve can be OPENED or CLOSED.<br />
Note: The Cross Handle Valves seal only in the fully OPEN or fully CLOSED position. USING THE VALVE TO THROTTLE<br />
THE WATER FLOW WILL RESULT IN A LEAK AT THE VALVE STEM!
3<br />
7. Remove union and nipple from valve. Apply provided Loctite 565 on the threads of the nipple. Hand tighten<br />
nipple to <strong>Towel</strong> <strong>Warmer</strong>. With an Allen Wrench inserted into the nipple, hand-tighten to secure appropriate fit.<br />
DO NOT USE A PIPE WRENCH OR PLIERS!<br />
DO NOT OVER TIGHTEN – OVER TIGHTENING WILL CAUSE THE UNIT TO LEAK!<br />
Note: One to three threads may be visible when tightened.<br />
8. Set valve into position and seat copper tubing into the base of the valve. Seat the union nipple into the valve<br />
and loosely tighten the union nut.<br />
____________________________________________________________________________________________________________<br />
FOR MORE DETAILS ON INSTALLING THE MODERN & FF16 VALVE S SEE PAGE 4.<br />
FOR MORE DETAILS ON INSTALLING THE CROSS HANDLE VALVES SEE PAGE 5.<br />
FOR MORE DETAILS ON INSTALLING THE CROSS HANDLE VALVES SEE PAGE 6.<br />
∆CAUTION: Do not turn the VALVE BODY, turn the NUT only! Turning the VALVE BODY will split the compression ring,<br />
making it impossible to get a good seal. DO NOT OVER TIGHTEN!<br />
9. Turn the compression nut ¼ turn more to securely seal. Tighten union connection to valve. Repeat for second<br />
valve. Water is ready to be circulated through your MYSON <strong>Towel</strong> <strong>Warmer</strong> at this time.<br />
10. Connect the <strong>Towel</strong> <strong>Warmer</strong> to a hot water system using one of the options shown in this manual.<br />
11. When all connections are complete and the Hydonic <strong>Towel</strong> <strong>Warmer</strong> is installed properly, add water and vent the<br />
unit using the bleed valve located on the top rail at the back or the side, (will vary depending upon model), of<br />
the <strong>Hydronic</strong> <strong>Towel</strong> <strong>Warmer</strong>. (Note: The key for the bleed valve is provided with the unit.)<br />
____________________________________________________________________________________________________________<br />
STEP 4: OPERATION & MAINTENANCE<br />
Your MYSON <strong>Hydronic</strong> <strong>Towel</strong> <strong>Warmer</strong> can be left on continuously without detrimental effect either to the <strong>Towel</strong> <strong>Warmer</strong> or the<br />
articles on it.<br />
IMPORTANT: This appliance is intended for towels and similar fabrics that are washed in water. Fabrics that contain soap, laundry<br />
detergents, liquid fabric softeners or after bath oils residue may show what appear to be scorch marks. THIS IS SIMPLY THE<br />
DISCOLORATION OF THE RESIDUE. As stated, the <strong>Towel</strong> <strong>Warmer</strong> does not reach sufficient temperature to scorch fabrics.<br />
Myson, INC. is not responsible for fabric discoloration due to laundry detergents, liquid fabric softeners, soap, or after bath oils.<br />
REMINDER ON CLEANING YOUR MYSON TOWEL WARMER<br />
Do not use an abrasive or chlorine-based cleaner on the <strong>Towel</strong> <strong>Warmer</strong>.<br />
A mild detergent, (we recommend Flitz), used with a soft, damp cloth, will restore most units to their original luster.<br />
A soft, dry cloth may be used to polish the <strong>Towel</strong> <strong>Warmer</strong>.<br />
Please make certain the unit is cold when it is cleaned.
6<br />
WensumValve <strong>Installation</strong><br />
. LKD16SN valve may be positioned with<br />
adjustment cap facing down or to the side<br />
. If using 1/2" copper be sure to seat copper<br />
in valve - overall projection will be 4-3/4"<br />
. If using 1/2" NPT nipple rough-in (shown)<br />
discard compression nut and ferrule - overall<br />
projection will be 4-1/4"<br />
. Escutcheons or sleeve kit are not included<br />
4 1/4" - 4 3/4"
12<br />
03/10


