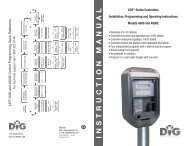
K-Rain RPS616 Controller Owner's Manual - Irrigation Direct
K-Rain RPS616 Controller Owner's Manual - Irrigation Direct
K-Rain RPS616 Controller Owner's Manual - Irrigation Direct

Create successful ePaper yourself
Turn your PDF publications into a flip-book with our unique Google optimized e-Paper software.
INTRODUCTION<br />
This unit is available in six, nine, twelve and<br />
sixteen station configurations. Designed for<br />
residential and light commercial applications,<br />
this controller has four separate schedules<br />
with up to sixteen start times a day to ensure<br />
efficient watering of a wide variety of<br />
landscapes. Different areas may require<br />
individual watering schedules and often use<br />
different types of sprinklers.<br />
EXAMPLES: Turf areas generally use gear<br />
drive sprinklers and require less frequent<br />
but heavier watering. However, flower beds<br />
use pop up sprays and require more frequent<br />
watering. Stations (valves) which water<br />
similar landscape areas are often grouped<br />
together and put into the same program.<br />
Stations (valves) will water in sequential order<br />
from the lowest number and on the days<br />
selected. Maximum watering duration for a<br />
station (valve) is 12 hours and 59 minutes.<br />
This controller has a 7 day watering schedule<br />
with individual day selection per program or<br />
a 365 calendar for Odd/Even day watering or<br />
selectable interval watering schedules from<br />
everyday to every 15th day.<br />
02 www.krain.com<br />
FEATURES<br />
A feature of this controller is the water saver<br />
feature which allows quick adjustment of the<br />
station watering times by percentages as the<br />
seasons change.<br />
Another key feature of this controller is the<br />
<strong>Rain</strong> Sensor Ready technology (RSR) which<br />
allows individual stations to be controlled by<br />
a rain switch. The switch will automatically<br />
stop the watering programs for selected<br />
stations during wet periods.<br />
CONTENTS<br />
FEATURES 02<br />
GLOSSARY 03<br />
PROGRAMMING INSTRUCTIONS 03<br />
INTRODUCTION 04<br />
PROGRAMMING EXAMPLE 04<br />
OTHER FUNCTIONS 05<br />
GENERAL TIPS FOR PROGRAMMING 05<br />
PROGRAMMING<br />
SET CURRENT TIME & CORRECT DAY 05<br />
SET CALENDAR (OPTIONAL) 05<br />
STEP 1. SET START TIMES 06<br />
STEP 2. SET WATERING DAYS 06<br />
INTERVAL DAY SELECTION 06<br />
INDIVIDUAL DAY SELECTION 06<br />
ODD / EVEN DAY SELECTION 07<br />
STEP 3. SET STATION RUN TIMES 07<br />
MANUAL OPERATIONS<br />
RUN A SINGLE STATION 08<br />
SYSTEM TEST 08<br />
RUN A PROGRAM 08<br />
OTHER FEATURES<br />
STOP 08<br />
STACKING START TIMES 08<br />
AUTOMATIC BACKUP PROGRAM 08<br />
RAIN SENSOR READY FEATURE 09<br />
RAIN OFF MODE 09<br />
WATER BUDGETING & SEASONAL ADJUSTMENTS 09<br />
FAULT FINDING GUIDE 10<br />
INSTALLATION INSTRUCTIONS<br />
MOUNTING THE CONTROLLER 10<br />
ELECTRICAL HOOK-UP 10<br />
FIELD WIRING CONNECTIONS 11<br />
TERMINAL BLOCK LAYOUT 11<br />
POWER SUPPLY CONNECTIONS 11<br />
PUMP START RELAY & MASTER VALVE CONNECTIONS 12<br />
CONNECTION OF VALVES + RAIN SWITCH 12<br />
RAIN BYPASS SWITCH 12<br />
ELECTRICAL CHARACTERISTICS 13<br />
SERVICING THE CONTROLLER 13<br />
SPARE WATERING PLANNERS 14<br />
WARRANTY INFORMATION 15
Installation, Programming and Operation <strong>Manual</strong><br />
GLOSSARY<br />
LARGE LCD DISPLAY<br />
Easy to read<br />
PROGRAMMING BUTTONS<br />
Used for Adjusting<br />
programmed information<br />
SELECTION DIAL<br />
Used for Operations<br />
& Programming.<br />
TERMINATION COVER<br />
Electrical contractor access ONLY.<br />
“WARNING” HIGH VOLTAGE<br />
TERMINAL COVER<br />
Remove to access station terminals<br />
& to change 9V battery<br />
03
PROGRAMMING INSTRUCTIONS<br />
INTRODUCTION<br />
This controller has been designed with<br />
four separate programs to allow different<br />
landscape areas to have their own individual<br />
watering schedules.<br />
A program is basically a method of grouping<br />
stations (valves) with similar watering<br />
requirements to water on the same days.<br />
These stations will water in sequential<br />
order and on the days selected.<br />
The important elements of programming<br />
your controller are:<br />
• Group the stations (valves) which ar e<br />
watering similar landscapeareas together.<br />
Examples: Turf, flower beds, gardens.<br />
These different groups may require<br />
individual watering schedules.<br />
• Plan your watering schedule<br />
completing the planner supplied at the<br />
back of this book.<br />
• Set the current time and correct day<br />
of the week.<br />
04 www.krain.com<br />
SET AUTOMATIC PROGRAM<br />
• Set the automatic program for each<br />
group of stations (valves) by completing<br />
the following three steps:<br />
1. Set Starts<br />
This sets the time when the watering<br />
schedule is to commence. Note: For each<br />
start time, all the stations (valves) selected<br />
for the program will come on in sequential<br />
order. If two start times are set, the<br />
stations (valves) will come on twice.<br />
2. Set Watering Days<br />
These are selected days when the<br />
automatic system will be active.<br />
3. Set Station Run Times<br />
This sets the watering duration required<br />
for each station (valve).<br />
PROGRAMMING EXAMPLE (right)<br />
A typical example of a 12 station system<br />
is outlined to the right as a guide to assist<br />
you when planning your watering schedule.<br />
In this example, the lawn areas are using<br />
gear driven sprinklers. The garden is using<br />
drip and the flower beds are being watered<br />
using pop-up sprays.<br />
STATION NUMBER<br />
1 FRONT LAWN<br />
2 FRONT LAWN<br />
3 FRONT LAWN<br />
4 GARDEN<br />
1<br />
2<br />
3<br />
4<br />
START TIME 1:<br />
4:00 a.m.<br />
2ND<br />
START TIME:<br />
3RD<br />
START TIME:<br />
4TH<br />
START TIME:<br />
START TIME 1:<br />
6:00 a.m.<br />
2ND<br />
START TIME:<br />
3RD<br />
START TIME:<br />
4TH<br />
START TIME:<br />
START TIME 1:<br />
5:00 a.m.<br />
2ND<br />
START TIME:<br />
3RD<br />
START TIME:<br />
4TH<br />
START TIME:<br />
START TIME 1:<br />
7:00 a.m.<br />
2ND<br />
START TIME:<br />
3RD<br />
START TIME:<br />
4TH<br />
START TIME:<br />
5 GARDEN BED<br />
6 GARDEN BED<br />
7 BACK LAWN<br />
8 SIDE LAWN<br />
9 BACK LAWN<br />
10 BACK LAWN<br />
MONDAY<br />
WEDNESDAY<br />
FRIDAY<br />
EVERYDAY<br />
EVERY<br />
2ND DAY<br />
EVERYDAY<br />
1<br />
2<br />
3<br />
4<br />
5<br />
6<br />
7<br />
8<br />
1<br />
2<br />
3<br />
4<br />
5<br />
6<br />
7<br />
8<br />
1<br />
2<br />
3<br />
4<br />
5<br />
6<br />
7<br />
8<br />
1<br />
2<br />
3<br />
4<br />
5<br />
6<br />
7<br />
8<br />
11 BACK LAWN<br />
12 GARDEN BED<br />
13<br />
14<br />
15<br />
16<br />
START TIME WATERING INTERVALS RUN TIME RUN TIME<br />
(MINUTES) (MINUTES)<br />
20<br />
20<br />
20<br />
20<br />
30<br />
10<br />
10<br />
20<br />
9<br />
10<br />
11<br />
12<br />
13<br />
14<br />
15<br />
16<br />
9<br />
10<br />
11<br />
12<br />
13<br />
14<br />
15<br />
16<br />
9<br />
10<br />
11<br />
12<br />
13<br />
14<br />
15<br />
16<br />
9<br />
10<br />
11<br />
12<br />
13<br />
14<br />
15<br />
16<br />
20<br />
20<br />
20<br />
10
Installation, Programming and Operation <strong>Manual</strong><br />
PROGRAMMING INSTRUCTIONS<br />
OTHER FUNCTIONS<br />
This controller can also manually run a selected<br />
program once, or an individual station can be<br />
set to run once from 1 minute up to 12 hours<br />
and 59 minutes. During wet conditions the<br />
automatic schedules can be suspended to<br />
prevent watering while it is raining.<br />
This feature can be selected for individual<br />
stations by using a rain switch or by using<br />
the dial if no switch is connected. A test for<br />
checking the stations (valves) and sprinklers<br />
is also provided.<br />
GENERAL TIPS FOR EASY PROGRAMMING<br />
Tips to help eliminate programming confusion.<br />
1. Complete the spare watering planner.<br />
2. When setting, one push of the button will<br />
increment one unit.<br />
3. Holding one button down will fast scroll<br />
through units.<br />
4. During programming, only flashing units<br />
are able to be set.<br />
Adjust stations by using + or buttons.<br />
5. Pressing ➜ will scroll forward through<br />
the settings in an orderly sequence.<br />
6. Pressing will scroll back to previous<br />
settings and settings can be changed.<br />
-<br />
PROGRAMMING<br />
SET CURRENT TIME & CORRECT DAY<br />
Turn the dial to Set Clock/Calendar position.<br />
The hour will be flashing.<br />
Use + or to adjust.<br />
Note: AM / PM must be set correctly.<br />
Press ➜ button and the “minutes” will flash.<br />
Use + or to adjust.<br />
-<br />
-<br />
Press ➜ and the “day of the week” will flash.<br />
-<br />
Use + or to set correct day.<br />
SET CALENDAR (OPTIONAL)<br />
NOTE: The calendar only needs to be set when<br />
selecting Odd/Even day watering in areas where<br />
water restrictions may require this feature.<br />
Press button until the year, month and day<br />
are shown. the “year” will be flashing.<br />
TURN DIAL TO<br />
REQUIRED SETTING<br />
SCROLL<br />
+<br />
SCROLL<br />
+ – ➜ ➜ ➜<br />
–<br />
INCREASE VALUE (+)<br />
DECREASE VALUE (-)<br />
Use + or to adjust, if required.<br />
Press button and the “month” will flash.<br />
Use + or to adjust.<br />
Press and the “day” will flash.<br />
Use + or to adjust.<br />
-<br />
-<br />
-<br />
Tip: To return to the clock, press , Then ➜<br />
or turn dial to another position.<br />
05
PROGRAMMING<br />
Before proceeding, ensure the spare watering<br />
planner has been completed. From your planner,<br />
you should be aware which stations (valves)<br />
a re allocated to each program. Set one pro g r a m<br />
at a time to ensure that the schedules are<br />
completed correctly.<br />
Example: SET PROGRAM 1<br />
Step 1. Set Start Times<br />
NOTE: All stations will come on in<br />
sequential order for each start time.<br />
Turn the dial to Set Start Times and<br />
ensure that “Prog 1” is flashing.<br />
The display will show:<br />
Press ➜ and “Start 1” will flash.<br />
Press ➜ and the “hour” will flash.<br />
Use + or to adjust.<br />
-<br />
Note: Ensure AM / PM position is correct.<br />
Press ➜ and the “minutes” will flash.<br />
Use + or - to adjust, if required.<br />
11AM12:00<br />
PROG<br />
No<br />
START<br />
No<br />
TIME<br />
Each program has up to four start times<br />
and should you require a second start time,<br />
Press ➜ twice and “Start1” will flash.<br />
Advance to start 2 by pressing + .<br />
The display will show:<br />
Press ➜ and proceed as per setting Start 1.<br />
TIP: To turn an active start time off,<br />
turn the dial to the Set Start times position,<br />
Select the program number by using<br />
and then press ➜ ,<br />
Select the start number required using<br />
the + button.<br />
Press ➜ until the “hour” is flashing.<br />
-<br />
Use + or until “OFF” is shown.<br />
TIME<br />
12 off<br />
TIP: “OFF” position is between 12 and 1.<br />
Step 2. Set Watering Days<br />
This unit has interval watering from everyday to<br />
every 15th day, individual day selection or a 365<br />
day calendar with odd/even day selection in areas<br />
where water restrictions require this feature.<br />
PROG<br />
No<br />
START<br />
No<br />
+<br />
Interval Day Selection<br />
Turn the dial to Set Watering Days.<br />
The display will show:<br />
“Interval 1” will be flashing. This means that<br />
watering will occur every day.<br />
To change the interval day, press<br />
button.<br />
Examples: Interval 2 means watering will take<br />
place every second day, 3 means watering<br />
will take place every third day etc.<br />
Interval watering can be set from everyday<br />
to every 15th day. The Run Day refers to the<br />
number of days before the next watering<br />
schedule will occur.<br />
Individual Day Selection<br />
Press the ➜ button.<br />
This is the selectable day option.<br />
The display will show:<br />
This refers to Mon being Day 1<br />
To turn Monday off, press<br />
1 1 0<br />
PROG<br />
No<br />
-<br />
+<br />
button.<br />
INTERVAL RUN<br />
DAY<br />
MON TUE WED THU FRI SAT SUN<br />
1 1<br />
PROG<br />
No<br />
DAY<br />
06<br />
www.krain.com
Installation, Programming and Operation <strong>Manual</strong><br />
PROGRAMMING<br />
To leave Monday active, leave as is and advance to<br />
Tuesday (day 2)<br />
by pressing the ➜ button.<br />
Again press the button to set the day<br />
off if required, followed by ➜ to advance.<br />
Continue until all seven days have been<br />
set “on” + or “off” .<br />
Odd / Even Day Selection (Optional)<br />
In some regions users are only allowed to<br />
water their landscapes on ODD dates if their<br />
house number is ODD, or on EVEN dates when<br />
their number is EVEN.<br />
This controller allows this to be done simply by<br />
setting the relevant selection of ODD or EVEN and<br />
setting the current date into the controller. The<br />
controller will account for leap years.<br />
If you require the ODD / EVEN day option,<br />
simply press the ➜ button until “Odd” is shown.<br />
Press the<br />
-<br />
-<br />
➜ button and “Even” will be shown.<br />
This feature may be required in areas where water<br />
restrictions are enforced.<br />
NOTE: Remember to set the 365 day calendar when<br />
setting the clock, or this feature will be out of sequence.<br />
(Refer Page 5 “Set Calendar”)<br />
Step 3. Set Station Run Times<br />
This is the length of time that each station (valve)<br />
is scheduled to water on a particular program.<br />
Maximum watering time is 12 hours 59 minutes for<br />
each station. A station can be assigned to 1, 2, 3 or<br />
4 programs if required.<br />
Turn the dial to the Set Station Run Times position.<br />
The display will show:<br />
This means station 1 has a default run time of 10<br />
minutes in program 1. Station 1 will be flashing.<br />
To adjust the Run time in minutes press ➜ ,<br />
and use + or .<br />
To set the run time in hours, press<br />
“0” will appear and flash.<br />
To adjust use + or .<br />
-<br />
➜ and<br />
If not required press ➜ and advance to<br />
station 2 by pressing the + button.<br />
-<br />
11 10<br />
STATION<br />
Continue until all the stations in Program 1 have<br />
been set with a run time or if a station(s) is not<br />
required to be active in this particular program,<br />
ensure that the Run time is set to “OFF”.<br />
NOTE: To set a station to “OFF” Use when the “RUN<br />
TIME” is flashing, or press + & simultaneously.<br />
PROG<br />
No<br />
-<br />
-<br />
RUN TIME<br />
This completes the setting up procedure<br />
for automatic watering of Program 1.<br />
Select from 4 programs for different<br />
watering schedules.<br />
Should you need the second program to<br />
have an automatic schedule, turn the dial<br />
to “Set Start times” and “Prog 1” will flash.<br />
Press + and change to program 2 position<br />
and follow the same 3 steps for automatic<br />
watering.<br />
1. Set Starts<br />
2. Set Watering Days<br />
3. Set Station Run Times<br />
TIP: Remember to return the dial to the<br />
“Auto Run” position at the completion of<br />
the setting up of the automatic schedules.<br />
This will ensure that the automatic cycles<br />
will take place.<br />
07
MANUAL OPERATIONS<br />
RUN A SINGLE STATION<br />
The maximum Run time for a station is 12<br />
hours 59 minutes. To manually run a single<br />
station once, turn the dial to System Test or<br />
Run Single Station position.<br />
The display will show:<br />
To adjust the Run Time, use the + button<br />
and to advance to the next station<br />
press the<br />
SYSTEM TEST<br />
➜ button.<br />
This feature can be used to test that your<br />
valves and sprinklers are working correctly.<br />
Turn the dial to System Test or Run Single<br />
Station position.<br />
The display will show:<br />
STATION<br />
RUN TIME<br />
1 :02<br />
STATION<br />
RUN TIME<br />
1 :02<br />
The controller will run through all stations for<br />
2 minutes in sequential order while you go and<br />
check your sprinklers.<br />
NOTE: The system test is preset at 2 minutes per<br />
station and can NOT be adjusted.<br />
RUN A PROGRAM<br />
To manually run a complete program once for<br />
the run times as set in the automatic schedule.<br />
Turn the dial to the Run Program position.<br />
“Prog 1” will be shown in the display.<br />
To run program 1, leave or advance to<br />
program 2 by pressing ➜ .<br />
NOTE: If a rain switch is connected and the<br />
display shows “SEN WET”, the stations set to rain<br />
sensor “ON” will not activate. However individual<br />
stations can be watered by using the Run Single<br />
Station facility.<br />
OTHER FEATURES<br />
STOP<br />
To stop an automatic or manual watering<br />
schedule, turn the dial to the Off position.<br />
TIP: for automatic watering remember to<br />
turn the dial back to the Auto Run position, as<br />
the Off position will stop any watering cycles<br />
from occurring.<br />
STACKING START TIMES<br />
Should you accidently set the same watering<br />
start time on more than one program, the<br />
<strong>Controller</strong> will stack them in sequential order<br />
from the lowest number. All programmed<br />
start times will be watered.<br />
AUTOMATIC BACKUP PROGRAM<br />
When the battery is not connected or is<br />
dead there is a backup default program in<br />
program 1 watering every day at 12:00am<br />
for 10 minutes per station.<br />
A standard 9 volt alkaline battery should be<br />
connected to the battery snap to maintain<br />
the clock accuracy and hold the automatic<br />
programs during a power outage.<br />
TIP: The display has a warning indicator<br />
to let you know when the battery is low or<br />
not connected. The word BAT appears just<br />
under the AM / PM indicator when the<br />
clock is shown.<br />
08 www.krain.com
Installation, Programming and Operation <strong>Manual</strong><br />
OTHER FEATURES<br />
RAIN SENSOR READY FEATURE<br />
IMPORTANT: The bypass switch at the terminal<br />
should be moved to the “ON” position before<br />
fitting a rain switch.<br />
This feature is only used when a rain switch has<br />
been connected. When using a standard rain<br />
switch, connect the cables from the switch to the<br />
t e rminal blocks marked “COM & “RAIN”. Tu rn t h e<br />
dial to Set <strong>Rain</strong> Sensor Pro g r a m to enable individual<br />
stations to be set rain sensor “ON or “OFF”.<br />
The display will show:<br />
NOTE: All stations are set “OFF” at first power up.<br />
The stations set to “OFF” will water automatically<br />
at all times and the stations set to “ON” will be<br />
controlled by the rain switch.IE: The stations set<br />
to “ON” will not water automatically with the<br />
rain switch in the “WET” mode.To set individual<br />
stations to “ON”<br />
press + button and advance by pressing ➜ .<br />
Continue until all stations are set “ON” for rain<br />
sensor control or “OFF”.<br />
The display will show:<br />
1 off<br />
RAIN<br />
STATION RAIN<br />
WED<br />
SENSOR<br />
2:35<br />
PM<br />
SENSE<br />
DRY<br />
BYPASS SWITCH - RAIN SENSOR<br />
To override the rain switch move the bypass<br />
switch to the “OFF” position. This position<br />
will enable automatic watering and manual<br />
operation to Run Program to occur at any<br />
time regardless of whether the sensor is<br />
wet or dry.<br />
NOTE: Both the System Test and Run Single<br />
Station will work regardless of whether the sensor<br />
is wet or dry.<br />
RAIN OFF MODE<br />
To stop the automatic watering cycles during<br />
winter, turn the dial to the Off position. The<br />
word “Off” will appear in the display. This<br />
means the automatic schedules will not<br />
come on, but the programmed information is<br />
still retained in the memory.<br />
To reactivate the automatic schedule, turn<br />
the dial back to the Auto Run position.<br />
NOTE: If a rain switch has been connected,<br />
it will turn the stations set to rain sensor control,<br />
OFF. This happens automatically when the<br />
switch is wet.<br />
WATER BUDGETING & SEASONAL ADJUSTMENT<br />
The automatic station run times can be adjusted<br />
by percentage as the seasons change. This will<br />
save time and money as the run times can be<br />
adjusted quickly in spring, summer and fall to<br />
reduce the amount of water used.<br />
E n s u re that the dial is in the Auto Run p o s i t i o n ,<br />
press the & ➜ buttons simultaneously.<br />
The display will show:<br />
Displayed is the word “Budget” and “100%”. This<br />
represents current automatic watering run times<br />
as being 100%. The percentage budget can be set<br />
in 25% increments from 25% up to 150%.<br />
Example: 50% reduces watering by half.<br />
To adjust in 25% increments, use +<br />
buttons.<br />
-<br />
To return to the clock press the<br />
buttons simultaneously.<br />
%<br />
100<br />
WATER<br />
BUDGET<br />
or<br />
and ➜<br />
The word Budget will be displayed to indicate<br />
that the water budgeting feature is in use.<br />
09
OTHERFEATURES<br />
FAULT FINDING GUIDE<br />
SYMPTOM<br />
No display.<br />
POSSIBLE CAUSE<br />
Faulty transformer.<br />
Fuse blown.<br />
SUGGESTION<br />
Check fuse. Check field wiring. Check transformer.<br />
INSTALLATION INSTRUCTIONS<br />
MOUNTING THE CONTROLLER<br />
Install the controller near a 120VAC outlet,<br />
preferably located in a house, garage or other<br />
covered area. For ease of operation, eye level<br />
placement is recommended.<br />
Single Station not<br />
working.<br />
Fuse blows.<br />
No automatic start.<br />
Buttons on keypad<br />
not responding.<br />
Faulty solenoid coil.<br />
Incorrect wiring or<br />
bad wiring connections.<br />
Incorrect programming<br />
or fuse.<br />
Short on keypad or<br />
Programming not correct.<br />
Swap faulty station wire on controller terminal block with known<br />
working station wire. If the faulty valve still does not work on the<br />
known working connection then the solenoid coil is faulty. The<br />
panel may need to be repaired.<br />
Check wiring and connections.<br />
If unit works manually check programming.<br />
Check fuse and field wiring.<br />
Check instruction book to ensure programming correct. If keypad<br />
still not responding return panel to supplier or manufacturer.<br />
Ideally, your controller location should not<br />
be exposed to rain or areas prone to flooding<br />
or heavy water.<br />
INBUILT MODEL:<br />
The inbuilt controller unit is an OUTDOOR<br />
MODEL and can be exposed to light rain<br />
& is weatherproof.<br />
Fasten the controller using the two mounting<br />
holes positioned externally on the top, and the<br />
additional hole positioned internally under the<br />
terminal cover.<br />
System coming on<br />
at random.<br />
Too many start times entered<br />
on automatic programs.<br />
Check number of start times entered on each program. If<br />
programming is correct return panel to supplier or manufacturer.<br />
ELECTRICAL HOOK-UP<br />
More than 1 station<br />
coming on at once.<br />
Pump start<br />
chattering.<br />
Display cracked or<br />
missing segments.<br />
Damaged main output<br />
driver chip.<br />
Faulty relay or pump<br />
contactor.<br />
Display damaged during<br />
transportation.<br />
Check wiring and swap faulty station wire(s) on controller terminal<br />
block with known working station wire. If the same outputs are still<br />
locked on, return panel to supplier or manufacturer.<br />
Electrician to check voltage on pump relay or contactor.<br />
Return panel to supplier or manufacturer.<br />
WARNING<br />
1. All electrical work must be carried out in<br />
accordance with these instructions following<br />
all applicable Local, State and Federal codes,<br />
or warranty will be void.<br />
2. Disconnect main power supply before<br />
maintenance work to controller or valves<br />
and when connecting and disconnecting field<br />
wiring and pump or master valve hook-ups.<br />
10<br />
www.krain.com
Installation, Programming and Operation <strong>Manual</strong><br />
INSTALLATION INSTRUCTIONS<br />
FIELD WIRING CONNECTIONS<br />
PREPARATION<br />
1. Prepare wires for hook-up by cutting the wires<br />
to the correct length and stripping approximately<br />
.25 in. (6.0mm ) of insulation from the end to be<br />
connected to the controller.<br />
2. Ensure terminal block screws are loosened<br />
sufficiently to permit easy access for wire ends.<br />
Insert stripped wire ends into the clamp aperture<br />
and tighten screws. Do not over tighten as this<br />
may damage the terminal block.<br />
3. A maximum of 0.75 Amps may be supplied<br />
by any output. Check the inrush current of your<br />
solenoid coils before connecting more than two<br />
valves to any one station.<br />
POWER SUPPLY CONNECTIONS<br />
Inbuilt Transformer<br />
It is recommended that the transformer is not<br />
connected to a 120V AC supply which is also<br />
servicing or supplying motors (i.e. Air conditioners,<br />
pool pumps,refrigerators, etc.) Lighting circuits are<br />
suitable as a power source.<br />
This inbuilt transformer model, is suitable for<br />
outdoor installation as the housing is weatherproof<br />
and UV stabilized. However, it is recommended that<br />
the unit be installed in an area which is not exposed<br />
directly to the weather.<br />
Connections to the unit are as follows:<br />
TERMINAL BLOCK LAYOUT<br />
The terminal block is laid out as follows:<br />
EG: 16 station<br />
USE ONLY 1 AMP FUSE M-205<br />
X X X X X X X X X X X X X X X X X X X X X X<br />
USE ONLY 1 AMP FUSE M-205<br />
X X X X X X X X X X X X X X X X X X X X X X<br />
M<br />
24 VAC<br />
M<br />
24 VAC<br />
GLOSSARY<br />
INBUILT<br />
TRANSFORMER<br />
24VAC<br />
24VAC Power Supply<br />
RAIN<br />
COM<br />
<strong>Rain</strong> switch wire input<br />
Common valve wire input<br />
REPLACE 9V BATTERY ANNUALLY<br />
M<br />
Master valve or pump start active wire<br />
ST1 to ST16<br />
Station (Valve) active wire connection<br />
11
INSTALLATION INSTRUCTIONS<br />
PUMP START RELAY<br />
& MASTER VALVE CONNECTIONS<br />
This controller does not provide main power for a<br />
pump. Complete this section for master valve and<br />
pump start relay installation. Connect the master<br />
valve or pump start relay wiring to the ”M” and<br />
“COM” controller terminals as shown below.<br />
WARNING<br />
For systems supplied with water from a Pump,<br />
unused stations must be connected back to the<br />
last used station to eliminate the possibility of the<br />
pump running against a closed head. Failure to do<br />
so could lead to pump damage or injury.<br />
The diagram shows an 16 Station <strong>Controller</strong>:<br />
CONNECTION OF VALVES & RAIN SWITCH<br />
Up to three 24VAC Solenoid Valves can be connected to each<br />
station output and wired back to the common (COM) thus:<br />
BYPASS SWITCH<br />
X X X X X X X X X X X X X X X X X X X X X X<br />
V V V V V V V V V V V V V V V V V<br />
USE ONLY 1 AMP FUSE M-205<br />
M<br />
24 VAC<br />
VALVE WIRES ENTER THE CONTROLLER<br />
THROUGH THE KNOCKOUTS POSITIONED<br />
ON THE BOTTOM OR AT THE REAR.<br />
RAIN SWITCH WIRES CAN ALSO ENTER<br />
THROUGH THE CONTROLLER KNOCKOUTS.<br />
USE ONLY 1 AMP FUSE M-205<br />
X X X X X X X X X X X X X X X X X X X X X X<br />
M<br />
24 VAC<br />
BYPASS SWITCH<br />
V V V V V V V V V V V V V V V V<br />
STATIONS IN USE<br />
PUMPSTART<br />
MAGNET<br />
STARTER<br />
24 VAC RELAY<br />
MAIN POWER SUPPLY<br />
RAIN BYPASS SWITCH<br />
OFF - This position will bypass the<br />
rain switch if it is wet.<br />
ON - This position will allow the rain<br />
switch to turn stations OFF when in<br />
the wet mode.<br />
12 www.krain.com
Installation, Programming and Operation <strong>Manual</strong><br />
ELECTRICAL CHARACTERISTICS<br />
ELECTRICAL OUTPUTS<br />
Power Supply<br />
MAIN SUPPLY: This unit runs off a 120VAC 60Hz<br />
delivering 24VAC through a 30VA rated transformer.<br />
Electrical Power Supply:<br />
Input: 24Volts AC 60Hz.<br />
Electrical Outputs: Maximum of 1.0 AMP<br />
TO SOLENOID VALVES:<br />
24 VAC 50/60 Hz 0.75 AMPs max.<br />
NOTE: Up to 3 valves with the inbuilt model.<br />
TO THE MASTER VALVE/PUMP START:<br />
24VAC 0.25 AMPs max.<br />
NOTE: Transformer and fuse capacity must<br />
be compatible with output requirements.<br />
Overload protection:<br />
Standard 20mm 1 AMP fuse.<br />
Power failure:<br />
9 Volt block type battery maintains clock and<br />
programs for up to 4 weeks.<br />
Wiring:<br />
The output circuits should be installed and protected<br />
in accordance with wiring rules.<br />
SERVICING THE CONTROLLER<br />
THE CONTROLLER SHOULD ALWAYS BE SERVICED BY AN<br />
AUTHORIZED AGENT.<br />
Follow these steps:<br />
1. Turn main power off to the controller.<br />
2. Disconnect 24 Volt power leads at the controller<br />
24VAC terminals.<br />
3. Clearly mark or identify all valve wires<br />
according to the terminals they are connected<br />
to, (1 to 16). This allows you to easily wire them<br />
back to the controller, maintaining your valve<br />
watering sequence.<br />
4. Disconnect valve wires from the terminal block.<br />
5. Remove the complete panel from the box by<br />
unscrewing the two screws at both ends of the<br />
terminal block.<br />
6. Carefully wrap the panel in protective wrapping<br />
and pack in a suitable box. Return to your service<br />
agent or the manufacturer.<br />
NOTE: Tampering with the unit will void the warranty.<br />
7. Replace your controller panel by reversing this<br />
procedure. The <strong>Controller</strong> should always be<br />
serviced by an authorized agent.<br />
13
SPARE WATERING PLANNER<br />
STATION NUMBER<br />
1<br />
2<br />
3<br />
4<br />
5<br />
6<br />
7<br />
8<br />
9<br />
10<br />
11<br />
12<br />
13<br />
14<br />
15<br />
16<br />
STATION NUMBER<br />
1<br />
2<br />
3<br />
4<br />
5<br />
6<br />
7<br />
8<br />
9<br />
10<br />
11<br />
12<br />
13<br />
14<br />
15<br />
16<br />
STATION NUMBER<br />
1<br />
2<br />
3<br />
4<br />
5<br />
6<br />
7<br />
8<br />
9<br />
10<br />
11<br />
12<br />
13<br />
14<br />
15<br />
16<br />
1<br />
2<br />
3<br />
4<br />
START TIME WATERING INTERVALS RUN TIME RUN TIME<br />
(MINUTES) (MINUTES)<br />
START TIME 1:<br />
2ND<br />
START TIME:<br />
3RD<br />
START TIME:<br />
4TH<br />
START TIME:<br />
START TIME 1:<br />
2ND<br />
START TIME:<br />
3RD<br />
START TIME:<br />
4TH<br />
START TIME:<br />
START TIME 1:<br />
2ND<br />
START TIME:<br />
3RD<br />
START TIME:<br />
4TH<br />
START TIME:<br />
START TIME 1:<br />
2ND<br />
START TIME:<br />
3RD<br />
START TIME:<br />
4TH<br />
START TIME:<br />
1<br />
2<br />
3<br />
4<br />
5<br />
6<br />
7<br />
8<br />
1<br />
2<br />
3<br />
4<br />
5<br />
6<br />
7<br />
8<br />
1<br />
2<br />
3<br />
4<br />
5<br />
6<br />
7<br />
8<br />
1<br />
2<br />
3<br />
4<br />
5<br />
6<br />
7<br />
8<br />
9<br />
10<br />
11<br />
12<br />
13<br />
14<br />
15<br />
16<br />
9<br />
10<br />
11<br />
12<br />
13<br />
14<br />
15<br />
16<br />
9<br />
10<br />
11<br />
12<br />
13<br />
14<br />
15<br />
16<br />
9<br />
10<br />
11<br />
12<br />
13<br />
14<br />
15<br />
16<br />
1<br />
2<br />
3<br />
4<br />
START TIME WATERING INTERVALS RUN TIME RUN TIME<br />
(MINUTES) (MINUTES)<br />
START TIME 1:<br />
2ND<br />
START TIME:<br />
3RD<br />
START TIME:<br />
4TH<br />
START TIME:<br />
START TIME 1:<br />
2ND<br />
START TIME:<br />
3RD<br />
START TIME:<br />
4TH<br />
START TIME:<br />
START TIME 1:<br />
2ND<br />
START TIME:<br />
3RD<br />
START TIME:<br />
4TH<br />
START TIME:<br />
START TIME 1:<br />
2ND<br />
START TIME:<br />
3RD<br />
START TIME:<br />
4TH<br />
START TIME:<br />
1<br />
2<br />
3<br />
4<br />
5<br />
6<br />
7<br />
8<br />
1<br />
2<br />
3<br />
4<br />
5<br />
6<br />
7<br />
8<br />
1<br />
2<br />
3<br />
4<br />
5<br />
6<br />
7<br />
8<br />
1<br />
2<br />
3<br />
4<br />
5<br />
6<br />
7<br />
8<br />
9<br />
10<br />
11<br />
12<br />
13<br />
14<br />
15<br />
16<br />
9<br />
10<br />
11<br />
12<br />
13<br />
14<br />
15<br />
16<br />
9<br />
10<br />
11<br />
12<br />
13<br />
14<br />
15<br />
16<br />
9<br />
10<br />
11<br />
12<br />
13<br />
14<br />
15<br />
16<br />
14 www.krain.com
Installation, Programming and Operation <strong>Manual</strong><br />
WARRANTY<br />
K-<strong>Rain</strong> products carry a “LIMITED WARRANTY”. For two<br />
(2) years from the date of manufacture, K-<strong>Rain</strong> will repair<br />
or replace (at K-<strong>Rain</strong>’s option) the product or any part, if<br />
the product is found to be defective as to workmanship<br />
or material. This warranty does not extend to damage to<br />
a K-<strong>Rain</strong> product resulting from misuse, neglect or abuse,<br />
normal wear and tear, or accident, to exterior appearance<br />
or color or due to improper installation. This warranty<br />
extends only to an original user of a K-<strong>Rain</strong> product.<br />
IN NO EVENT SHALL K-RAIN BE LIABLE FOR<br />
INCIDENTAL OR CONSEQUENTIAL DAMAGES. ALL<br />
IMPLIED WARRANTIES ARE LIMITED IN DURATION<br />
TO TWO YEARS FOLLOWING DATE OF MANUFACTURE.<br />
Some states do not permit the exclusions or limitation<br />
of incidental or consequential damages or of implied<br />
warranties. Therefore, the above exclusions or limitations<br />
may not apply to you.<br />
If a defect arises in a K-<strong>Rain</strong> product within the warranty<br />
period, you should promptly contact your K-<strong>Rain</strong><br />
distributor or K-RAIN MANUFACTURING CORP.<br />
Please allow up to 4 weeks for completion of repairs<br />
or replacement and return of product. If a product is<br />
replaced, the replacement product is covered only for<br />
the remainder of the original warranty period dating from<br />
the purchase of the original product.<br />
This warranty gives you specific legal rights, and you may<br />
also have other rights which vary from state to state. If<br />
you have any questions concerning the warranty or its<br />
application, please write:<br />
K-<strong>Rain</strong> Manufacturing Corporation<br />
1640 Australian Avenue, Riviera Beach, Florida 33404<br />
Attn: Product Manager.<br />
15