TraumaCad™ and Stentor integration - Voyant Health
TraumaCad™ and Stentor integration - Voyant Health
TraumaCad™ and Stentor integration - Voyant Health

Create successful ePaper yourself
Turn your PDF publications into a flip-book with our unique Google optimized e-Paper software.
Version: A<br />
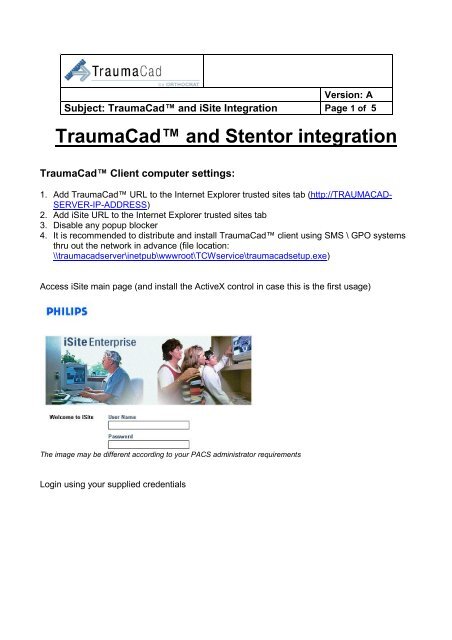
Subject: TraumaCad <strong>and</strong> iSite Integration Page 1 of 5<br />
TraumaCad <strong>and</strong> <strong>Stentor</strong> <strong>integration</strong><br />
TraumaCad Client computer settings:<br />
1. Add TraumaCad URL to the Internet Explorer trusted sites tab (http://TRAUMACAD-<br />
SERVER-IP-ADDRESS)<br />
2. Add iSite URL to the Internet Explorer trusted sites tab<br />
3. Disable any popup blocker<br />
4. It is recommended to distribute <strong>and</strong> install TraumaCad client using SMS \ GPO systems<br />
thru out the network in advance (file location:<br />
\\traumacadserver\inetpub\wwwroot\TCWservice\traumacadsetup.exe)<br />
Access iSite main page (<strong>and</strong> install the ActiveX control in case this is the first usage)<br />
The image may be different according to your PACS administrator requirements<br />
Login using your supplied credentials
Version: A<br />
Subject: TraumaCad <strong>and</strong> iSite Integration Page 2 of 5<br />
Open iSite Preferences<br />
Navigate to:<br />
Machine preferences<br />
Plug Ins<br />
Click on Add <strong>and</strong> fill the plug-in details according to your TraumaCad server configuration<br />
(according to the below image)
Version: A<br />
Subject: TraumaCad <strong>and</strong> iSite Integration Page 3 of 5<br />
Please bear in mind that once the Disable API will be unchecked – you might receive the<br />
following warning – please click on OK <strong>and</strong> ignore.<br />
Finally – please click on OK to close the preferences page.<br />
Before start working with <strong>Stentor</strong> Plug-in, you must log off from the iSite<br />
application <strong>and</strong> log on again to reload the configuration.
Version: A<br />
Subject: TraumaCad <strong>and</strong> iSite Integration Page 4 of 5<br />
iSite <strong>and</strong> TraumaCad <strong>integration</strong><br />
Start iSite client<br />
Perform query<br />
Double click on the study you wish to retrieve<br />
ISite client will be opened with the images<br />
Right click on the image you would like to template (the following drop down menu will be<br />
shown) click on Export Image TraumaCAD
Version: A<br />
Subject: TraumaCad <strong>and</strong> iSite Integration Page 5 of 5<br />
When clicking on the Export Image TraumaCad – TraumaCad client will be<br />
downloaded <strong>and</strong> installed (administrative rights must be applied for the first<br />
installation)<br />
A progress window will appear<br />
TraumaCad will be opened with the desired image