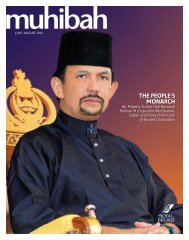
Hansel & Gretel: Witch Hunters Oz The Great And Powerful Dido
Hansel & Gretel: Witch Hunters Oz The Great And Powerful Dido
Hansel & Gretel: Witch Hunters Oz The Great And Powerful Dido

You also want an ePaper? Increase the reach of your titles
YUMPU automatically turns print PDFs into web optimized ePapers that Google loves.
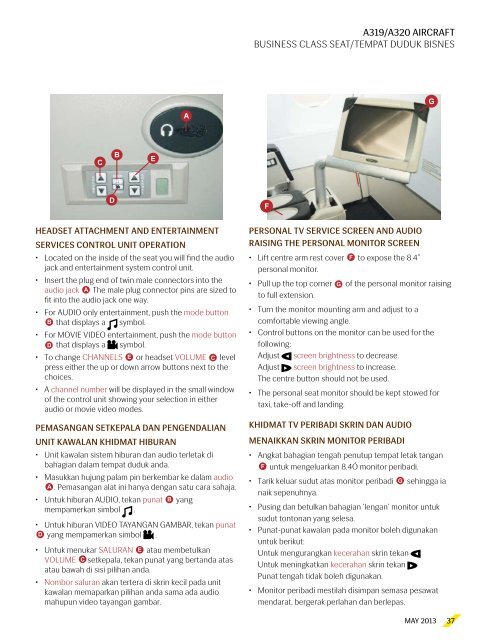
A319/A320 AIRCRAFT<br />
BUSINESS CLASS SEAT/TEMPAT DUDUK BISNES<br />
G<br />
A<br />
C<br />
B<br />
E<br />
D<br />
F<br />
Headset Attachment and Entertainment<br />
Services Control Unit Operation<br />
• Located on the inside of the seat you will find the audio<br />
jack and entertainment system control unit.<br />
• Insert the plug end of twin male connectors into the<br />
audio jack A <strong>The</strong> male plug connector pins are sized to<br />
fit into the audio jack one way.<br />
• For AUDIO only entertainment, push the mode button<br />
B that displays a symbol.<br />
• For MOVIE VIDEO entertainment, push the mode button<br />
D that displays a symbol.<br />
• To change CHANNELS E or headset VOLUME C level<br />
press either the up or down arrow buttons next to the<br />
choices.<br />
• A channel number will be displayed in the small window<br />
of the control unit showing your selection in either<br />
audio or movie video modes.<br />
Pemasangan Setkepala Dan Pengendalian<br />
Unit Kawalan Khidmat Hiburan<br />
• Unit kawalan sistem hiburan dan audio terletak di<br />
bahagian dalam tempat duduk anda.<br />
• Masukkan hujung palam pin berkembar ke dalam audio<br />
A . Pemasangan alat ini hanya dengan satu cara sahaja.<br />
• Untuk hiburan AUDIO, tekan punat B yang<br />
mempamerkan simbol .<br />
• Untuk hiburan VIDEO TAYANGAN GAMBAR, tekan punat<br />
D yang mempamerkan simbol .<br />
• Untuk menukar SALURAN E atau membetulkan<br />
VOLUME C setkepala, tekan punat yang bertanda atas<br />
atau bawah di sisi pilihan anda.<br />
• Nombor saluran akan tertera di skrin kecil pada unit<br />
kawalan memaparkan pilihan anda sama ada audio<br />
mahupun video tayangan gambar.<br />
Personal TV Service Screen and Audio<br />
Raising the Personal Monitor Screen<br />
• Lift centre arm rest cover F to expose the 8.4”<br />
personal monitor.<br />
• Pull up the top corner G of the personal monitor raising<br />
to full extension.<br />
• Turn the monitor mounting arm and adjust to a<br />
comfortable viewing angle.<br />
• Control buttons on the monitor can be used for the<br />
following:<br />
Adjust screen brightness to decrease.<br />
Adjust screen brightness to increase.<br />
<strong>The</strong> centre button should not be used.<br />
• <strong>The</strong> personal seat monitor should be kept stowed for<br />
taxi, take-off and landing.<br />
Khidmat TV Peribadi Skrin Dan Audio<br />
Menaikkan Skrin Monitor Peribadi<br />
• Angkat bahagian tengah penutup tempat letak tangan<br />
F untuk mengeluarkan 8.4Ó monitor peribadi.<br />
• Tarik keluar sudut atas monitor peribadi G sehingga ia<br />
naik sepenuhnya.<br />
• Pusing dan betulkan bahagian ‘lengan’ monitor untuk<br />
sudut tontonan yang selesa.<br />
• Punat-punat kawalan pada monitor boleh digunakan<br />
untuk berikut:<br />
Untuk mengurangkan kecerahan skrin tekan<br />
Untuk meningkatkan kecerahan skrin tekan<br />
Punat tengah tidak boleh digunakan.<br />
• Monitor peribadi mestilah disimpan semasa pesawat<br />
mendarat, bergerak perlahan dan berlepas.<br />
MAY 2013<br />
37