Triplex Real Time Stand Alone DVR 2 - Ch-change.com
Triplex Real Time Stand Alone DVR 2 - Ch-change.com
Triplex Real Time Stand Alone DVR 2 - Ch-change.com

You also want an ePaper? Increase the reach of your titles
YUMPU automatically turns print PDFs into web optimized ePapers that Google loves.
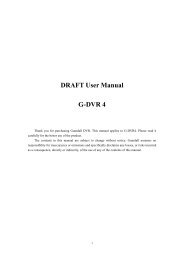
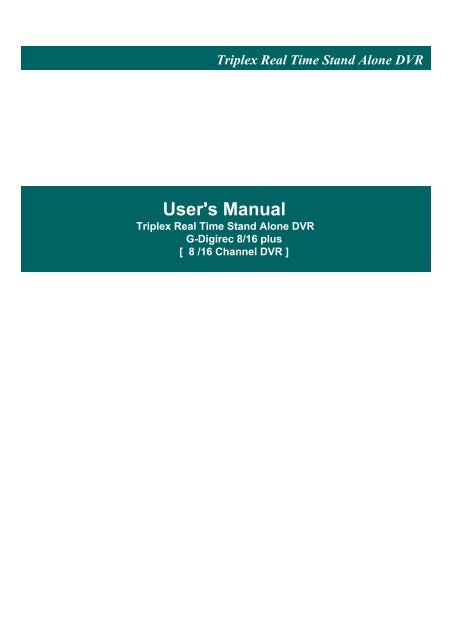
<strong>Triplex</strong> <strong>Real</strong> <strong>Time</strong> <strong>Stand</strong> <strong>Alone</strong> <strong>DVR</strong><br />
User's Manual<br />
<strong>Triplex</strong> <strong>Real</strong> <strong>Time</strong> <strong>Stand</strong> <strong>Alone</strong> <strong>DVR</strong><br />
G-Digirec 8/16 plus<br />
[ 8 /16 <strong>Ch</strong>annel <strong>DVR</strong> ]<br />
1
<strong>Triplex</strong> <strong>Real</strong> <strong>Time</strong> <strong>Stand</strong> <strong>Alone</strong> <strong>DVR</strong><br />
CAUTION<br />
TO REDUCE THE RISK OF ELECTRICAL SHOCK, DO NOT OPEN COVERS.<br />
NO USER SERVICEABLE PARTS INSIDE. REFER SERVICING TO QUALIFIED SERVICE S<br />
PERSONNEL.<br />
Please beware of the following precautions before installing the <strong>DVR</strong>.<br />
• Avoid any place with moisture, dust, or soot.<br />
• Avoid any place with direct sunlight or heating appliances.<br />
• Keep the product away from electric shock or magnetic substances.<br />
• Avoid high or low temperature.<br />
(Re<strong>com</strong>mended operation temperature is between 0°C ~ 40°C).<br />
• Do not place any conductive material through the ventilation.<br />
• Turn off the system before installation.<br />
• Ensure enough space for cable connections.<br />
• Place the system on a solid surface with sufficient air ventilation.<br />
Avoid any surface that vibrates.<br />
• Placing the system near electronic devices such as radio or TV may cause breakdown<br />
to the product.<br />
• Do not disassemble the product without an assistance from the manufacturer.<br />
• Do not place any heavy object on the system.<br />
Note<br />
This equipment had been tested and found to <strong>com</strong>ply with the limits for a CLASS A<br />
digital device, pursuant to Part 15 of FCC Rules. These limits are designed to provide<br />
reasonable protection against harmful interference when the equipment is operated in<br />
a <strong>com</strong>mercial environment.<br />
PLEASE READ THIS MANUAL THOROUGHLY FOR EFFECTIVE AND SAFE USAGE<br />
OF THE DEVICE.<br />
2
<strong>Triplex</strong> <strong>Real</strong> <strong>Time</strong> <strong>Stand</strong> <strong>Alone</strong> <strong>DVR</strong><br />
Contents<br />
CHAPTER 1. KEY FEATURES<br />
CHAPTER 2. PACKING DRTAILS<br />
CHAPTER 3. NAMES AND FUNCTIONS<br />
3.1 FRONT PANEL<br />
3.2 REAR PANEL<br />
CHAPETR 4. INSTALLATION<br />
4.1 TOTAL CONNECTION DIAGRAM<br />
4.2 INDIVIDUAL CONNECTION<br />
4.2.1 POWER<br />
4.2.2 CAMERA<br />
4.2.3 MONITOR<br />
4.2.4 VGA<br />
4.2.5 AUDIO<br />
4.2.6 USB<br />
CHAPTER 5. OPERATION<br />
5.1 FACTORY DEFAULT<br />
5.2 FRONT PANEL CONTROL<br />
FUNCTION<br />
5.2.1 MULTI DISPLAY<br />
5.2.2 PIP DISPLAY<br />
5.2.3 AUTO SEQUENCE DISPLAY<br />
5.2.4 TRIPLEX DISPLAY<br />
5.2.5 <strong>DVR</strong> INFORMATION<br />
5.2.6 RECORD<br />
5.2.7 SEARCH & PLAYBACK<br />
5.3 REMOTE CONTROLLER<br />
5.3.1 REMOTE CONTROL<br />
FUNCTION<br />
5.3.2 MUTE<br />
6~7<br />
8<br />
9<br />
9~10<br />
11~12<br />
13<br />
13<br />
14<br />
14<br />
14<br />
15<br />
15<br />
16<br />
17<br />
18<br />
18<br />
19<br />
19<br />
20<br />
21<br />
22~23<br />
24<br />
25<br />
26~27<br />
28<br />
28<br />
29<br />
3
<strong>Triplex</strong> <strong>Real</strong> <strong>Time</strong> <strong>Stand</strong> <strong>Alone</strong> <strong>DVR</strong><br />
Contents<br />
5.3.3 DIGITAL ZOOM<br />
5.3.4 PANORAMA<br />
5.3.5 PTZ CONTROL<br />
5.3.6 BACKUP<br />
5.3.6.1 CD-RW BACKUP<br />
5.3.6.2 USB BACKUP<br />
30<br />
31<br />
32~33<br />
34~40<br />
34~35<br />
36~40<br />
CHAPTER 6. SETUP MENU<br />
6.1 LANGUAGE<br />
6.2 SYSTEM SETUP<br />
6.2.1 HDD SETUP<br />
6.2.2 PASSWORD SETUP<br />
6.2.3 CHANNEL NAME SETUP<br />
6.2.4 DATE/TIME SETUP<br />
6.2.5 BEEP & PTZ SETUP<br />
6.2.6 SYSTEM RESET<br />
6.3 DISPLAY SETUP<br />
6.3.1 BLANK CHANNEL SETUP<br />
6.3.2 PIP CHANNEL SETUP<br />
6.3.3 ADJUST CHANNEL SETUP<br />
6.3.4 VIDEO SIGNAL TYPE<br />
6.3.5 SEQUENCE<br />
6.3.6 BOUNDARY COLOR<br />
6.3.7 BLANK COLOR<br />
6.4 EVENT SETUP<br />
6.4.1 RECORD TIME<br />
6.4.2 SENSOR IN<br />
6.4.3 EVENT ACTION<br />
6.4.4 MOTION SETUP<br />
6.5 RECORD SETUP<br />
6.5.1 RECORD TYPE<br />
6.5.2 RECORD SPEED<br />
6.5.3 RECORD QUALITY<br />
6.5.4 PB SPEED<br />
6.5.5 CHANNEL ENABLE<br />
6.5.6 AUDIO SETUP<br />
41<br />
41<br />
42<br />
42<br />
43<br />
44<br />
45<br />
46<br />
47<br />
48<br />
48<br />
49<br />
50<br />
51<br />
51<br />
52<br />
52<br />
53<br />
53<br />
53<br />
54<br />
55<br />
56<br />
56<br />
56<br />
56<br />
56<br />
57<br />
57<br />
4
<strong>Triplex</strong> <strong>Real</strong> <strong>Time</strong> <strong>Stand</strong> <strong>Alone</strong> <strong>DVR</strong><br />
Contents<br />
6.5.7 SCHEDULE SETUP<br />
6.6 NETWORK SETUP<br />
CHAPTER 7. EXTERNAL TERMINAL<br />
INFORMATION<br />
7.1 RS-232<br />
7.2 ALARM IN/OUT & RS-485<br />
7.3 VGA (Optional)<br />
7.4 ETHERNET & USB<br />
CHAPTER 8. SPECIFICATIONS<br />
CHAPTER 9. HDD & CD-RW<br />
INSTALLATION<br />
9.1 HDD INSTALLATION<br />
9.2 CD-RW INSTALLATION<br />
CHAPTER 10. CLIENT NETWORK<br />
VIEWER MANUAL<br />
10.1 SYSTEM REQUIREMENT<br />
10.2 NETWORK ENVIRONMENT<br />
10.3 NETWORK VIEWER<br />
INSTALLATION<br />
10.4 NAMES & FUNCTIONS<br />
10.5 OPERATION<br />
10.5.1 LIVE VIEW MODE<br />
10.5.2 PLAY BACK MODE<br />
10.5.3 DRIVE SCAN MODE<br />
10.5.4 FILE PLAY MODE<br />
10.5.5 CD PLAY MODE<br />
CHAPTER 11. Q & A<br />
57<br />
58<br />
59<br />
59~60<br />
61~62<br />
63<br />
64<br />
65<br />
66<br />
66<br />
67<br />
68<br />
68<br />
68<br />
68<br />
69~70<br />
71<br />
71~72<br />
73<br />
74<br />
75<br />
76<br />
77~78<br />
5
<strong>Triplex</strong> <strong>Real</strong> <strong>Time</strong> <strong>Stand</strong> <strong>Alone</strong> <strong>DVR</strong><br />
CHAPTER 1. KEY FEATURES<br />
Operation<br />
• Display, Playback, Recording, Network transmission simultaneously<br />
• <strong>Real</strong> time single or multi-screen display<br />
• <strong>Triplex</strong> display (8ch Live & 8ch playback display)<br />
• Pan & Tilt, 2X digital zoom and 3 PIP display<br />
• Easy operation by IR remote controller<br />
• Hidden camera option (covert)<br />
• User-friendly setup menu and operation<br />
Playback<br />
• Multi-screen playback (Full, Quad, 6/ 8/ 9/ 13/ 16 split)<br />
• Search by date / time list, event list and data / time<br />
• Playback speed mode to be adjustable<br />
Recording<br />
• Recording quality level to be adjustable<br />
• Camera frame rate can be set by user<br />
• The recording speed of max. 120 images per second (NTSC)<br />
• Manual, schedule and event (motion, alarm) recording<br />
• Recording image size (EACH / CIF) to be adjustable<br />
• 1 channel audio recording<br />
Network<br />
• Live and playback viewing and recording with exclusive client viewer<br />
• Remote control via networked PC with the exclusive client viewer<br />
• (The viewer software provided in the package.)<br />
• Flexible connections - 10/ 100 Mbps Ethernet / ADSL<br />
6
<strong>Triplex</strong> <strong>Real</strong> <strong>Time</strong> <strong>Stand</strong> <strong>Alone</strong> <strong>DVR</strong><br />
Audio<br />
• 1 channel audio recording in real time<br />
• One audio channel setup for each channel<br />
BACKUP<br />
• Remote backup on network PC with the exclusive client viewer<br />
• CD-RW backup<br />
• USB 2.0 backup (Video file & Still image backup)<br />
General<br />
• PAL / NTSC in a display setup menu to be adjustable<br />
• Built-in hardware Watchdog<br />
• S-Video output<br />
• Alarm In/Out, RS-485, RS-232 Connections<br />
• Loop-through connections<br />
• Multiple Languages<br />
• VGA output for PC monitor (Optional)<br />
7
<strong>Triplex</strong> <strong>Real</strong> <strong>Time</strong> <strong>Stand</strong> <strong>Alone</strong> <strong>DVR</strong><br />
CHAPTER 2. PACKING DETAILS<br />
1. <strong>DVR</strong> unit<br />
2. Network Viewer Program CD<br />
3. User’s Manual<br />
4. Remote controller<br />
5. HDD Screws<br />
6. DC Adaptor<br />
7. Power Cord<br />
8. Battery<br />
1. <strong>DVR</strong> unit<br />
CONTENTS<br />
2. Network Viewer Program CD<br />
3. User’s Manual<br />
4. Remote controller<br />
5. HDD Screws<br />
6. DC Adaptor<br />
7. Power Cord<br />
8. Battery<br />
8
<strong>Triplex</strong> <strong>Real</strong> <strong>Time</strong> <strong>Stand</strong> <strong>Alone</strong> <strong>DVR</strong><br />
CHAPTER 3. NAMES AND FUNCTIONS<br />
3.1 FRONT PANEL<br />
11 19<br />
5<br />
2<br />
6<br />
18<br />
16<br />
7<br />
23 10 8<br />
24<br />
9<br />
12<br />
21<br />
4<br />
3<br />
1<br />
20 22<br />
14<br />
13 17 15<br />
1. 1 to 16 <strong>Ch</strong>annel Selection / Direction<br />
• To select a channel to be viewed as full-size screen during live display or playback.<br />
• To navigate in the menu, press Up(CH1) / Down(CH2) / Left(CH3) / Right(CH4).<br />
2 ~ 5. LED Signs<br />
• There are four LED signs that indicate current status.<br />
2. POWER : <strong>DVR</strong> power status<br />
3. NET : ON means that LAN cable is connected and it is ready to transfer information via network.<br />
If user accesses to the <strong>DVR</strong> via network, network icon ( ) is showed<br />
in the upper right side of screen.<br />
If someone accesses to the <strong>DVR</strong> via network, LED light turns on.<br />
4. PLAY : ON means the <strong>DVR</strong> is in search mode of playback.<br />
5. REC : ON means the <strong>DVR</strong> is on recording.<br />
6. Remote Controller Sensor<br />
7. MULTI<br />
• It converts to live display mode directly.<br />
• To surf various live display modes like 16CH, 13CH, 9CH, 8CH and 6CH display<br />
by pressing the button repeatedly.<br />
8. PIP<br />
• To convert to PIP mode (Picture in Picture ).<br />
• To surf various PIP modes like 1PIP, 2PIPs and 3PIPs by pressing the button repeatedly.<br />
9. AUTO<br />
• To convert to auto sequence mode.<br />
• If you press AUTO on the front panel, channels will be automatically switched as follows.<br />
- <strong>Ch</strong>1 -> <strong>Ch</strong>2 -> <strong>Ch</strong>3 ->….-> <strong>Ch</strong>14 -> <strong>Ch</strong>15 -> <strong>Ch</strong>16 -> 16<strong>Ch</strong> in CIF -> <strong>Ch</strong>1 -> <strong>Ch</strong>2 …<br />
keeping this order until you press Auto button again to release the function.<br />
9
<strong>Triplex</strong> <strong>Real</strong> <strong>Time</strong> <strong>Stand</strong> <strong>Alone</strong> <strong>DVR</strong><br />
10. TRI (TRIPLEX)<br />
• To convert to triplex function like 8 channel live display and 8 channel playback in the screen<br />
simultaneously.<br />
• Press the button first, you will have CH1 ~ CH 8 live displays and playbacks and press it again,<br />
you will do next other channels like CH9 ~ CH16 live displays and playbacks.<br />
- When you press the button in live display mode with no playback,<br />
you will see 8 channel live displays and 8 channel playbacks with no video.<br />
- When you press the button in playback mode,<br />
you will see 8 channel live displays and 8 channel playbacks that you have selected.<br />
11. INFO (INFORMATION) / BACKUP<br />
• To show system information of <strong>DVR</strong>, press it in live display mode.<br />
12. Removable HDD or CD-Burner(CD-RW is optional)<br />
• To burn CD for data back-up<br />
13. REWIND ()<br />
• Select speed level among 4 levels<br />
14. PLAY () / PAUSE (II)<br />
• To play and pause the recorded videos<br />
15. Faster Forward ()<br />
• Select speed level among 6 levels<br />
16. STOP (■)<br />
• To stop playing videos<br />
17. RECORD<br />
• To start and stop recording.<br />
18. SEARCH<br />
• To access recordings from HDD<br />
19. ENTER<br />
• To enter a selection<br />
20. MENU<br />
• To access System Setup Menu.<br />
21. USB 2.0 port<br />
• To backup video & still image<br />
22. PTZ<br />
• To control PTZ camera<br />
23. ZOOM<br />
24. Backup<br />
• To backup videos, press it and select CD-RW or USB in playback mode.<br />
10
<strong>Triplex</strong> <strong>Real</strong> <strong>Time</strong> <strong>Stand</strong> <strong>Alone</strong> <strong>DVR</strong><br />
3.2 REAR PANEL<br />
1 2 4 12<br />
13<br />
[ 16CH <strong>DVR</strong> ]<br />
3 5 6 7<br />
8 9 10 11<br />
[ 8CH <strong>DVR</strong> ]<br />
[ 4CH <strong>DVR</strong> ]<br />
11
<strong>Triplex</strong> <strong>Real</strong> <strong>Time</strong> <strong>Stand</strong> <strong>Alone</strong> <strong>DVR</strong><br />
1. Cooling Fan<br />
2. Power Switch<br />
3. DC Power Inlet<br />
4. 16 BNC connectors for camera input<br />
5. 16 BNC connectors for auto loop-through<br />
These are mainly to retransmit just receiving video signals directly from external cameras to other<br />
external devices.<br />
6. Audio In / Out Port<br />
7. USB 2.0 Port<br />
8. RS-232 Port (9 Pin D-Sub Connector)<br />
9. Alarm In / Out and RS-485 Port (25 Pin D-Sub Connector)<br />
• It is to <strong>com</strong>municate with external sensors, alarm and PTZ camera to control.<br />
10. S-Video Output<br />
11. LAN Terminal<br />
• It is to connect to LAN or Internet.<br />
12. BNC connectors for monitor output<br />
• These are mainly for monitors. And also you can use these for VCR recorder backup.<br />
13. VGA Output Port (Optional)<br />
• This is mainly for PC monitors.<br />
12
<strong>Triplex</strong> <strong>Real</strong> <strong>Time</strong> <strong>Stand</strong> <strong>Alone</strong> <strong>DVR</strong><br />
CHAPTER 4. INSTALLATION<br />
4.1 TOTAL CONNECTION DIAGRAM<br />
13
<strong>Triplex</strong> <strong>Real</strong> <strong>Time</strong> <strong>Stand</strong> <strong>Alone</strong> <strong>DVR</strong><br />
4.2 INDIVIDUAL CONNECTION<br />
4.2.1 POWER<br />
* Connect the DC adaptor provided in the package.<br />
* And then turn on the power switch.<br />
4.2.2 CAMERA<br />
16 Cameras<br />
…………………………...............<br />
* Connect a female BNC connector of each camera to a male BNC connector, ”CAMERA IN” port.<br />
14
<strong>Triplex</strong> <strong>Real</strong> <strong>Time</strong> <strong>Stand</strong> <strong>Alone</strong> <strong>DVR</strong><br />
4.2.3 MONITOR<br />
* Connect the female BNC for monitor output.<br />
* Connect the male DIN socket for S-VIDEO monitor output.<br />
[ S-VIDEO ] [ Main Monitor ]<br />
4.2.4 VGA (Optional)<br />
[ PC monitor ]<br />
* Connect the D-sub connector of <strong>com</strong>puter (VGA) monitor to VGA out of <strong>DVR</strong>.<br />
15
<strong>Triplex</strong> <strong>Real</strong> <strong>Time</strong> <strong>Stand</strong> <strong>Alone</strong> <strong>DVR</strong><br />
4.2.5 AUDIO<br />
Line Audio<br />
Amplified<br />
Speaker<br />
Monitor<br />
* Audio Input<br />
- AUDIO IN : Connect the RCA Line Jack of the relevant equipment (for example, a camera with a builtin<br />
microphone ) to the AUDIO IN port.<br />
* Audio Output<br />
- AUDIO OUT : Connect the RCA Line output to a monitor with a built-in speaker.<br />
Note<br />
This <strong>DVR</strong> can be connected only with a line audio and not support a microphone for audio input<br />
and output.<br />
To record audio, AUDIO function should be enable in the AUDIO setup of main menu.<br />
As the audio is linked to a camera, it is required that linked camera should be viewed in the screen<br />
during playback in order to hear the recorded audio.<br />
16
<strong>Triplex</strong> <strong>Real</strong> <strong>Time</strong> <strong>Stand</strong> <strong>Alone</strong> <strong>DVR</strong><br />
4.2.6 USB (USB 2.0 port)<br />
* The USB port is provided to connect USB memory stick for video backup & still image copying.<br />
Note<br />
How to operate USB backup<br />
For further details, please go to USB backup, page 36.<br />
17
<strong>Triplex</strong> <strong>Real</strong> <strong>Time</strong> <strong>Stand</strong> <strong>Alone</strong> <strong>DVR</strong><br />
CHAPTER 5. OPERATION<br />
5.1 FACTORY DEFAULT<br />
Main Menu<br />
Language<br />
System Setup<br />
Display Setup<br />
Event Setup<br />
Record Setup<br />
Network Setup<br />
HDD Setup<br />
Password Setup<br />
<strong>Ch</strong>annel Name Setup<br />
Date / <strong>Time</strong> Setup<br />
Beep & PTZ Setup<br />
Blank <strong>Ch</strong>annel Setup<br />
PIP <strong>Ch</strong>annel Setup<br />
Adjust <strong>Ch</strong>annel Setup<br />
Sequence<br />
Boundary<br />
Blank<br />
Rec. <strong>Time</strong><br />
Sensor In<br />
Event Action<br />
Motion Setup<br />
Type<br />
Rec. Speed<br />
Quality<br />
PB Speed<br />
<strong>Ch</strong>annel Enables<br />
Audio Setup<br />
Schedule Setup<br />
Bypass<br />
Network ID<br />
Password<br />
Sub Menu<br />
English<br />
Overwrite<br />
ON<br />
Record OSD<br />
ON<br />
Select<br />
OFF<br />
Input<br />
1111<br />
Live<br />
ON<br />
PB<br />
ON<br />
Live<br />
ON<br />
PB<br />
ON<br />
Type<br />
YY/ MM/ DD<br />
PAN / TILT<br />
PELCO-D<br />
PTZ Speed<br />
3<br />
Baud Rate<br />
9600 BPS<br />
Record Beep<br />
ON<br />
HDD Fail<br />
ON<br />
CH1 ~ CH16<br />
OFF<br />
Main<br />
CH 1<br />
Sub 1<br />
CH 2<br />
Sub 2<br />
CH 3<br />
Sub 3 CH 4<br />
<strong>Ch</strong>annel CH 1<br />
CON<br />
50<br />
HUE<br />
50<br />
BRI<br />
50<br />
COL 50<br />
1 sec<br />
White<br />
Blue<br />
30 sec<br />
N.O<br />
Alarm Out<br />
ON<br />
Sensor<br />
BEEP + OSD<br />
Video Loss<br />
OSD<br />
Motion<br />
OFF<br />
<strong>Ch</strong>annel<br />
CH 1<br />
Sensitivity<br />
9<br />
Area<br />
Full<br />
EACH<br />
60 F/S<br />
Level 3<br />
AUTO<br />
CH1 ~ CH16<br />
ON<br />
<strong>Ch</strong>annel CH 1<br />
Display<br />
ON<br />
Schedule<br />
OFF<br />
Day<br />
Daily<br />
OFF<br />
12345678<br />
00000000<br />
18
<strong>Triplex</strong> <strong>Real</strong> <strong>Time</strong> <strong>Stand</strong> <strong>Alone</strong> <strong>DVR</strong><br />
5.2 FRONT PANEL CONTROL FUNCTION<br />
5.2.1 MULTI DISPLAY<br />
Users can enjoy this “MULTI DISPLAY” functions in any mode.<br />
It converts to 16 channel live display on the screen as below by pressing MULTI button.<br />
* To convert to live display, press MULTI button in any mode.<br />
You can surf 13 CH / 9 CH / 8 CH / 6 CH display by pressing MULTI button repeatedly.<br />
[ 13 CH display Mode] [ 9 CH display Mode]<br />
[ 8 CH display Mode]<br />
[ 6 CH display Mode]<br />
19
<strong>Triplex</strong> <strong>Real</strong> <strong>Time</strong> <strong>Stand</strong> <strong>Alone</strong> <strong>DVR</strong><br />
5.2.2 PIP DISPLAY<br />
You can select PIP ( Picture In Picture ) options by pressing PIP button repeatedly. PIP mode offers a<br />
convenient way of monitoring multiple channels while focusing more attention on a particular channel. It<br />
has a main video channel view and up to 3 small video channel views on the screen.<br />
You can surf 1 PIP/ 2 PIPs/ 3 PIPs mode with 4 positions by pressing PIP button repeatedly.<br />
To release this mode, press MULTI button on the front panel.<br />
[ 1PIP ] [ 2 PIPs ] [ 3 PIPs ]<br />
20
<strong>Triplex</strong> <strong>Real</strong> <strong>Time</strong> <strong>Stand</strong> <strong>Alone</strong> <strong>DVR</strong><br />
5.2.3 AUTO SEQUENCE DISPLAY<br />
If you select Auto Sequence mode, channels will be switched automatically among 17 types of display in the<br />
order of “CH 1-CH 2-CH3- …- CH 15- CH 16-16 channel mode” and keep the order until you press MULTI<br />
button. The <strong>DVR</strong> skips channels with no video.<br />
You can find that the <strong>DVR</strong> indicates “AUTO” in the upper left of the screen in this mode.<br />
To release this mode, press AUTO button again.<br />
[ CH 1 ] [ CH 2 ]<br />
[ CH 3 ]<br />
It indicates current status is in “Auto Sequence mode”.<br />
[…….]<br />
[ 16 CH CIF Mode ]<br />
[ CH 16 ]<br />
[ CH 15]<br />
21
<strong>Triplex</strong> <strong>Real</strong> <strong>Time</strong> <strong>Stand</strong> <strong>Alone</strong> <strong>DVR</strong><br />
5.2.4 TRIPLEX DISPLAY<br />
You can experience new triplex function (simultaneous recording, playback and network transmission)<br />
with our new line of Digital Video Recorders.<br />
It enables you to convert playback mode to live mode directly without any delay.<br />
[ 16CH Playback]<br />
- Press TRI button on the front panel in playback mode<br />
and then you will see 8 channel live display mode<br />
and playback mode with each channel 1~8 as below.<br />
- Press TRI button three times repeatedly, it returns to<br />
16ch playback mode.<br />
- To surf the other 8 channel live display and playback<br />
with each channel 9~16, press MULTI button<br />
or Up/Down button in the remote controller.<br />
- If you press channel button in this mode, you can see<br />
the full channel video of playback mode in the screen.<br />
- To exit to live display mode, press MULTI button or<br />
TRI button again.<br />
[ <strong>Triplex</strong> Mode -1] [ <strong>Triplex</strong> Mode -2]<br />
Date/<strong>Time</strong> in white means current real-time.<br />
Date/<strong>Time</strong> in green means playback date/time.<br />
22
<strong>Triplex</strong> <strong>Real</strong> <strong>Time</strong> <strong>Stand</strong> <strong>Alone</strong> <strong>DVR</strong><br />
[ 16CH Live Display]<br />
- Press TRI button on the front panel in live display<br />
mode with no playback and you will see 8 channel<br />
live display and 8 channel playback with no video as<br />
below.<br />
Because the <strong>DVR</strong> has no playback videos at that time.<br />
- Press TRI button three times repeatedly, it returns<br />
to 16ch playback mode with no videos.<br />
- To surf the other 8 channel live display and playback<br />
with each channel 9~16, press MULTI button or<br />
Up/Down button in the remote controller.<br />
- To return to live display mode, press Multi button or<br />
TRI button again.<br />
[ <strong>Triplex</strong> Mode - 1 ] [ <strong>Triplex</strong> Mode - 2 ]<br />
It shows no videos in black because of no playback.<br />
23
<strong>Triplex</strong> <strong>Real</strong> <strong>Time</strong> <strong>Stand</strong> <strong>Alone</strong> <strong>DVR</strong><br />
5.2.5 <strong>DVR</strong> INFORMATION<br />
It shows all information about the <strong>DVR</strong> system like HDD, CD-RW, USB and software version in live<br />
display mode. You can access to system information easily just by pressing INFO (Information) button.<br />
1) MASTER<br />
- Model : It shows the model no. of Master HDD.<br />
- Size : It shows the size of Master HDD.<br />
- Rec. : It means the capacity of used HDD.<br />
- Over : It means how many times the HDD is overwritten.<br />
2) SLAVE<br />
- Model : It shows the model no. of Slave HDD.<br />
- Size : It shows the size of Slave HDD.<br />
- Rec. : It means the capacity of used HDD.<br />
- Over : It means how many times the HDD is overwritten.<br />
3) CD-RW<br />
- It shows the model no. of CD-RW installed in the <strong>DVR</strong>.<br />
4) USB DRIVE<br />
- It shows USB detection and USB capacity for data backup in the <strong>DVR</strong>.<br />
5) Version (VER 1.073B)<br />
- It shows current software version of the <strong>DVR</strong>.<br />
• To exit from this menu, press INFO (Information) button again.<br />
24
<strong>Triplex</strong> <strong>Real</strong> <strong>Time</strong> <strong>Stand</strong> <strong>Alone</strong> <strong>DVR</strong><br />
5.2.6 RECORD<br />
3<br />
2<br />
1<br />
1. If you press REC button on the front panel of the <strong>DVR</strong>, you will see REC in green on the right bottom of<br />
screen. It means the <strong>DVR</strong> is in the recording process.<br />
- MA-REC : It records videos in Master HDD.<br />
-SL-REC : It records videos in Slave HDD.<br />
• To release REC function, press REC button again.<br />
2. It indicates that playback function is on in live display mode, which is one of our main features,<br />
that is simultaneous multi-function operation in one screen.<br />
-MA-PLAY :It plays videos that have been stored in Master HDD.<br />
-SL-PLAY :It plays videos that have been stored in Slave HDD.<br />
3. It means that audio function is set to channel 1 (default).<br />
Users can select one channel audio function among 16 channels as they desire.<br />
Note<br />
* Schedule Record Mode<br />
When Schedule Record Mode is selected, the recording will be automatically executed according<br />
to the recording schedule set by users.<br />
(Please refer to Schedule Setup in Record Setup, page 57.)<br />
25
<strong>Triplex</strong> <strong>Real</strong> <strong>Time</strong> <strong>Stand</strong> <strong>Alone</strong> <strong>DVR</strong><br />
5.2.7 SEARCH & PLAYBACK<br />
With <strong>Triplex</strong> function, you can enter search menu while the <strong>DVR</strong> is in recording mode. So you don’t<br />
need to press "STOP" button on the front panel to stop recording.<br />
Now you press SEARCH button on the front panel. You can scroll through recordings using “Up/Down”<br />
button and navigate among pages of the recordings using “Right/ Left” button.<br />
To view a desired recording in the list, press “ENTER” button where the recording is highlighted.<br />
The <strong>DVR</strong> will playback the recording. You can stop the video at any time by pressing “STOP” button.<br />
5.2.7.1 DATE / TIME LIST SEARCH<br />
1) Press SER button on the front panel.<br />
2) Select “Date/<strong>Time</strong> List Search” by using Up/Down button and press ENTER button.<br />
3) Select one between MASTER and SLAVE by pressing SER button.<br />
4) Select your desired one in the recording lists and press ENTER button.<br />
5) <strong>Ch</strong>eck if the list is the right one that you select, and then press ENTER button again.<br />
6) It plays the list.<br />
* To be out of this menu, press MENU button repeatedly.<br />
26
<strong>Triplex</strong> <strong>Real</strong> <strong>Time</strong> <strong>Stand</strong> <strong>Alone</strong> <strong>DVR</strong><br />
5.2.7.2 EVENT LIST SEARCH<br />
1) Press SER button on the front panel.<br />
2) Select “Event List Search” by using Up/Down button and press ENTER button.<br />
3) Select one between MASTER and SLAVE by pressing SER button.<br />
4) Select your desired one in the recording lists and press ENTER button.<br />
5) <strong>Ch</strong>eck if the list is the right one that you select, and then press ENTER button again.<br />
6) It plays the list.<br />
* To be out of this menu, press MENU button repeatedly.<br />
5.2.7.3 DATE/TIME SEARCH<br />
1) Press SER button on the front panel.<br />
2) Select “Date / <strong>Time</strong> Search” by using Up/Down button and press ENTER button.<br />
3) Select one between MASTER and SLAVE by using ENTER button.<br />
4) Type in specific date/time upon your desired list by pressing Up/Down button<br />
and press ENTER button.<br />
5) It plays the list.<br />
* To be out of this menu, press MENU button repeatedly.<br />
27
<strong>Triplex</strong> <strong>Real</strong> <strong>Time</strong> <strong>Stand</strong> <strong>Alone</strong> <strong>DVR</strong><br />
5.3 REMOTE CONTROLLER<br />
5.3.1 REMOTE CONTROLLER FUNCTIONS<br />
10<br />
15<br />
1 2<br />
3<br />
4 5<br />
6<br />
7 8<br />
11<br />
14<br />
13<br />
16 17<br />
9<br />
19 21 20<br />
22<br />
23 24 25<br />
26 27<br />
28 29<br />
12<br />
18<br />
1. REC (Record)<br />
2. Mute<br />
3. CH1~CH10 (<strong>Ch</strong>annel selection)<br />
4. Zoom (2x2 digital zoom)<br />
5. INFO (Information)<br />
6. MENU<br />
7. Multi<br />
8. PIP<br />
9. Auto (Sequence)<br />
10 Left<br />
11 ▲ Up<br />
12 Right<br />
13 ▼ Down<br />
14. ENTER<br />
15. All (Search menu)<br />
16. <strong>Time</strong> (Search by date/time)<br />
17. List (Search by date/time list)<br />
18 ■ Stop<br />
19. REW (x2, x4, x8, x16 rewind)<br />
20. FF (x2, x4, x8, x16, x32, x64 fast forward)<br />
21 Play<br />
22. II Pause<br />
23. P.B (Playback)<br />
24. TRI (<strong>Triplex</strong>)<br />
25. Panorama<br />
26. P/T (Pan/Tilt)<br />
27. Z/F (Zoom/Focus)<br />
28. CD-RW Backup<br />
29. USB Backup<br />
28
<strong>Triplex</strong> <strong>Real</strong> <strong>Time</strong> <strong>Stand</strong> <strong>Alone</strong> <strong>DVR</strong><br />
5.3.2 MUTE<br />
When you’d like to make the video with audio silent, you can select MUTE function in the remote<br />
controller.<br />
1) Press MUTE button in the remote controller when monitoring (or playing) the video with audio.<br />
2) The activated icon in green in the upper right of screen is <strong>change</strong>d to one in gray with this function.<br />
3) The <strong>DVR</strong> makes it silent.<br />
* To release this function, press MUTE button again.<br />
29
<strong>Triplex</strong> <strong>Real</strong> <strong>Time</strong> <strong>Stand</strong> <strong>Alone</strong> <strong>DVR</strong><br />
5.3.3 DIGITAL ZOOM<br />
You can magnify a certain part of the full size screen two times digitally when you use this function<br />
as described below. This function can be applied to all display and search modes.<br />
You can operate this function with only remote controller.<br />
1) Select the desired channel among 16 channels.<br />
2) Press Zoom button in the remote controller.<br />
3) Select the target area by pressing Left/Right/Up/Down<br />
button in the remote controller .<br />
And then press Zoom button again.<br />
It indicates Digital Zoom function.<br />
4) You can see the video that is magnified two times digitally.<br />
5) To exit this mode, push Zoom button again<br />
in the remote controller.<br />
30
<strong>Triplex</strong> <strong>Real</strong> <strong>Time</strong> <strong>Stand</strong> <strong>Alone</strong> <strong>DVR</strong><br />
5.3.4 PANORAMA<br />
This function enables you to monitor each channel with 16 split-channel panorama mode in the screen.<br />
It is available only in playback mode.<br />
1) Select and play your desired video in the recording list first.<br />
2) Press PANORAMA button in the remote controller.<br />
3) Select your desired channel by pressing PANORAMA button repeatedly.<br />
4) To exit this function, press MULTI button.<br />
Note<br />
* Press PANORAMA button again in PANORAMA mode and you will return to playback mode.<br />
To be out of playback mode, press STOP button.<br />
31
<strong>Triplex</strong> <strong>Real</strong> <strong>Time</strong> <strong>Stand</strong> <strong>Alone</strong> <strong>DVR</strong><br />
5.3.5 PTZ CONTROL<br />
To control an external Pan/ Tilt/ Zoom/Focus camera,<br />
5.3.5.1 Pan/ Tilt Function<br />
It indicates Pan/Tilt function.<br />
1) 16 channel display mode<br />
1. First, press P/ T button in the remote controller.<br />
2. Select your desired channel by pressing channel selection button directly.<br />
3. Control the camera with the direction buttons (Up/ Down/ Right/ Left).<br />
4. To release this function, press P/T button again and then “P/T” disappears on the screen.<br />
2) One channel Mode<br />
It indicates Pan/Tilt function.<br />
1. First, select your desired channel installed in Pan/Tilt camera by pressing channel selection button.<br />
2. And then you will see a full-size screen.<br />
3. Press P/T button in the remote controller.<br />
4. Control the camera with the direction buttons (Up/ Down/ Right/ Left).<br />
5. To release this function, press P/T button again in the remote controller.<br />
32
<strong>Triplex</strong> <strong>Real</strong> <strong>Time</strong> <strong>Stand</strong> <strong>Alone</strong> <strong>DVR</strong><br />
5.3.5.2 Zoom/ Focus Function<br />
It indicates Zoom Focus function.<br />
1) 16 channel display mode<br />
1. First, press Z/ F button in the remote controller.<br />
2. Select your desired channel by pressing channel selection button directly.<br />
3. Control the camera with the direction buttons (Up/ Down/ Right/ Left).<br />
4. To release this function, press Z/F button again and then “Z/F” disappears on the screen.<br />
2) One channel mode<br />
It indicates Zoom Focus function.<br />
1. First, select your desired channel installed in Zoom/Focus camera by pressing channel selection button.<br />
2. And then you will see a the full-size screen.<br />
3. Press Z/F button in the remote controller.<br />
4. Control the camera with the direction buttons (Up/ Down/ Right/ Left).<br />
5. To release this function, press Z/F button again in the remote controller.<br />
33
<strong>Triplex</strong> <strong>Real</strong> <strong>Time</strong> <strong>Stand</strong> <strong>Alone</strong> <strong>DVR</strong><br />
5.3.6 BACKUP<br />
5.3.6.1 CD-RW BACKUP<br />
1. Insert a blank CD into CD-RW of <strong>DVR</strong>.<br />
Select your desired list and play it.<br />
Press “Backup” button and select “CD-RW” as left.<br />
It shows current time and recording time on the screen.<br />
2. Press Enter button.<br />
It pauses playback mode and shows “CD-RW backup checking”<br />
on the screen, which may take some time to <strong>com</strong>plete “<strong>Ch</strong>ecking”.<br />
3. It indicates that it is ready for CD-RW backup mode<br />
showing “Ready” on the screen to users.<br />
Press Enter button and then it starts CD-RW backup<br />
showing “Setting” on the screen.<br />
34
<strong>Triplex</strong> <strong>Real</strong> <strong>Time</strong> <strong>Stand</strong> <strong>Alone</strong> <strong>DVR</strong><br />
4. It burns CD showing “Burning” on the screen.<br />
It updates stop time and recorded CD capacity as it burns CD<br />
with data.<br />
You can stop the burning by pressing backup button<br />
(or CD backup button in the remote controller) at any time<br />
as you want.<br />
5. It stops burning CD showing “Stopping - Closing” on the screen<br />
after <strong>com</strong>pleting it.<br />
It pauses playback mode.<br />
Note<br />
For your reference, it usually takes max. 30 minutes<br />
to burn 700MB blank CD.<br />
6. The burned CD <strong>com</strong>es out automatically from CD-RW<br />
showing “Close” on the screen.<br />
Note<br />
In case that the list size is bigger than blank CD capacity,<br />
you can continue to backup the remained size with another<br />
blank CD.<br />
Insert new one into <strong>DVR</strong> and press Enter button.<br />
It continues to backup the remained size of the list.<br />
7. To get out of this mode, press backup button.<br />
And press Play button and then it plays the list continuously<br />
right from the pause point.<br />
To return to live display mode, press “Stop” button.<br />
Note<br />
How to play the data in the CD<br />
You can play the data in the CD only using “network viewer”<br />
program provided in the package.<br />
For further details, please refer to page 76.<br />
35
<strong>Triplex</strong> <strong>Real</strong> <strong>Time</strong> <strong>Stand</strong> <strong>Alone</strong> <strong>DVR</strong><br />
5.3.6.2 USB BACKUP<br />
1) Video File Backup<br />
1. Insert USB memory stick into USB port on the front panel of <strong>DVR</strong>.<br />
It takes 4~5 seconds to detect it.<br />
You can check in the “Information” menu if <strong>DVR</strong> detects it or not.<br />
Note<br />
USB stick memory format in your PC<br />
You have to format it by only “FAT 32” as file system.<br />
2. Select the desired recording list and play it.<br />
It plays the list in CIF mode as left.<br />
3. To operate USB backup function, press Backup button<br />
in the front panel (or USB button in remote controller) at your<br />
convenience.<br />
Select USB and then press Enter button.<br />
36
<strong>Triplex</strong> <strong>Real</strong> <strong>Time</strong> <strong>Stand</strong> <strong>Alone</strong> <strong>DVR</strong><br />
4. It pauses playback mode and shows “USB backup checking”<br />
on the screen, which may take some time to <strong>com</strong>plete “<strong>Ch</strong>ecking”.<br />
5. It indicates that it is ready for USB backup mode<br />
showing “Ready” on the screen.<br />
6. Press Enter button and then it starts USB backup<br />
showing “Backup” on the screen.<br />
It updates stop time and recorded USB capacity as it stores the data<br />
in the USB memory stick.<br />
You can stop the USB backup by pressing backup button<br />
(or USB backup button in the remote controller) at any time<br />
as you want.<br />
7. To stop it, press Backup button (or USB in remote controller) again.<br />
It stops USB backup showing “Close” on the screen.<br />
And it pause playback mode.<br />
It may take some time.<br />
Note<br />
<strong>DVR</strong> may be shut down if you remove USB memory<br />
stick in the process of backup.<br />
37
<strong>Triplex</strong> <strong>Real</strong> <strong>Time</strong> <strong>Stand</strong> <strong>Alone</strong> <strong>DVR</strong><br />
8. To get out of this mode, press backup button.<br />
And press Play button and then it plays the list continuously<br />
right from the pause point.<br />
To return to live display mode, press “Stop” button.<br />
9. You can find the file in USB memory stick.<br />
M 051121 091025 0001.dvr<br />
- M means video file.<br />
- 051121 means year / month / day.<br />
- 091025 means hour / minute / second.<br />
- 0001 means file counting number.<br />
- .dvr means that the file is recorded by MJPEG <strong>com</strong>pression.<br />
Note<br />
E0511210910250001.dvr<br />
- E shows that some errors happen in the process of<br />
backup, which users cannot play it due to file error.<br />
How to play the file in USB memory stick<br />
Note<br />
You can play the file in USB memory stick<br />
by using only “network viewer” program to be provided<br />
in the package.<br />
For further details, please refer to page 75.<br />
CAUTION !<br />
- If you remove USB stick in the process, <strong>DVR</strong> may be shut<br />
down (or in crash).<br />
38
<strong>Triplex</strong> <strong>Real</strong> <strong>Time</strong> <strong>Stand</strong> <strong>Alone</strong> <strong>DVR</strong><br />
2) Still Image Copying<br />
1. Insert USB memory stick into USB port on the front panel of <strong>DVR</strong>.<br />
It takes 4~5 seconds to detect it.<br />
You can check in the “Information” menu if <strong>DVR</strong> detects it or not.<br />
Note<br />
USB stick memory format in your PC<br />
Users have to format it by only “FAT 32” as file system.<br />
2. Select the desired recording list. It plays the list in CIF mode.<br />
And then select one channel that you want.<br />
3. Press Backup button in the front panel<br />
(or USB button in remote controller) at your convenience.<br />
“USB STILL” is displayed and disappeared on the bottom of screen.<br />
USB memory stick starts storing it<br />
showing that the LED of USB stick flickers.<br />
39
<strong>Triplex</strong> <strong>Real</strong> <strong>Time</strong> <strong>Stand</strong> <strong>Alone</strong> <strong>DVR</strong><br />
4. After ”USB STILL” is disappeared on the bottom of screen,<br />
you can continue to do it by pressing Backup button on the front panel<br />
of <strong>DVR</strong> (or USB button in remote controller) repeatedly.<br />
You can continue to do still image copying<br />
by pressing Backup button repeatedly<br />
(or USB button in remote controller) as you want.<br />
<strong>DVR</strong> may be shut down if you press the button repeatedly<br />
before “USB STILL” is disappeared on the screen.<br />
5. You can find the file in USB memory stick.<br />
S 051121 091025 0001.dvr<br />
- S means still image file.<br />
- 051121 means year / month / day.<br />
- 091025 means hour / minute / second.<br />
- 0001 means file counting number.<br />
- .dvr means that the file is recorded by MJPEG <strong>com</strong>pression.<br />
Note<br />
E0511210910250001.dvr<br />
- E shows that some errors happen in the process of<br />
backup, which users cannot play it due to file error.<br />
How to play the file in USB memory stick<br />
Note<br />
You can play the file in USB memory stick<br />
by using only “network viewer” program to be provided<br />
in the package.<br />
For further details, please refer to page 75.<br />
CAUTION !<br />
1. If you remove USB memory stick in the process of backup,<br />
<strong>DVR</strong> may be shut down (or in crash).<br />
2. You cannot store still images in USB memory stick<br />
in the pause mode of playback.<br />
40
<strong>Triplex</strong> <strong>Real</strong> <strong>Time</strong> <strong>Stand</strong> <strong>Alone</strong> <strong>DVR</strong><br />
CHAPTER 6. SETUP MENU<br />
6.1 Language<br />
• When you first call the main menu via the MENU button, you’ll see that the current language is<br />
highlighted (see screen shot above).<br />
• To exit to main menu, press MENU button.<br />
41
<strong>Triplex</strong> <strong>Real</strong> <strong>Time</strong> <strong>Stand</strong> <strong>Alone</strong> <strong>DVR</strong><br />
6.2 System Setup<br />
6.2.1 HDD Setup<br />
This menu enables HDD setup.<br />
1) Overwrite ON/OFF<br />
To enable (ON) or disable (OFF) to overwrite HDD.<br />
2) Record OSD ON/OFF<br />
To show “REC” in green in the right bottom of screen during recording mode.<br />
Note<br />
-“MA-REC“ shows videos are recorded in master hard disk.<br />
-“SL-REC” shows videos are recorded in slave hard disk.<br />
3) Format<br />
To format the HDD, press ENTER button and then select YES.<br />
You have to make sure of it before HDD format.<br />
Once HDD formatted, you are not able to retrieve any video that has<br />
been recorded previously.<br />
• To return to main menu, press MENU button.<br />
42
<strong>Triplex</strong> <strong>Real</strong> <strong>Time</strong> <strong>Stand</strong> <strong>Alone</strong> <strong>DVR</strong><br />
6.2.2 Password Setup<br />
This menu allows to choose system password.<br />
1) Select ON/OFF<br />
To enable (ON) or disable (OFF) a password.<br />
2) Input ****<br />
To type in your desired 4 digit password among 0~9 by pressing ENTER & direction button.<br />
To return to the sub menu, press MENU button after <strong>com</strong>pleting password input.<br />
Note<br />
Remember that the password is set to 1111 as factory default.<br />
• To return to main menu, press MENU button.<br />
43
<strong>Triplex</strong> <strong>Real</strong> <strong>Time</strong> <strong>Stand</strong> <strong>Alone</strong> <strong>DVR</strong><br />
6.2.3 <strong>Ch</strong>annel Name Setup<br />
To make camera names easy to remember, you can assign names to individual channels up to 8<br />
characters per channel. For example, if your one external camera is located in a factory, you can<br />
name it as “factory”. You can see videos with this name on the screen during operation.<br />
1) Live ON/OFF<br />
2) PB ON/OFF<br />
- When turned ON, it enables display of camera names in playback mode.<br />
- When turned OFF, it disables display of camera names in playback mode.<br />
3) CH 1 ~ CH 16 ■■CH ■1/2/…/16 ■ ■<br />
- When the pointer is located next to CAMERA1/2/3/4…/14/15/16,<br />
1. Press ENTER button.<br />
2. See the active cursor on the first letter of ■ which means a blank.<br />
3. Surf along letters by pressing Up/Down button.<br />
4. When you find your desired letter, press Right/Left button to move the active cursor to the next<br />
letter.<br />
5. After the naming process is <strong>com</strong>pleted, press MENU button and then press Up/Down button<br />
to move to other cameras.<br />
To return to main menu, press MENU button.<br />
44
<strong>Triplex</strong> <strong>Real</strong> <strong>Time</strong> <strong>Stand</strong> <strong>Alone</strong> <strong>DVR</strong><br />
6.2.4 Date/ <strong>Time</strong> Setup<br />
Everybody agrees that surveillance digital video recorders must indicate the exact date and time<br />
information in which an event took place in order to be used as an evidence. Therefore, configuring<br />
the <strong>DVR</strong> to correct time and date is very important.<br />
.<br />
1) Live ON/OFF<br />
2) PB ON/OFF<br />
- When turned ON, it enables display of date/time in playback mode.<br />
- When turned OFF, it disables display of date/time in playback mode.<br />
3) Type YY/MM/DD, DD/MM/YY, MM/DD/YY<br />
4) Date 2005/05/11<br />
5) <strong>Time</strong> 20:51:49<br />
- When the pointer is located next to Date or <strong>Time</strong>,<br />
1. Press ENTER button<br />
2. Set Date or <strong>Time</strong><br />
- To Select it by pressing Up/Down button<br />
- To Move to the next by pressing Left/Right button<br />
3. When you finish setting Date/ <strong>Time</strong>, press MENU button and then press Up/Down button<br />
to move to other sub menu.<br />
To return to main menu, press MENU button.<br />
45
<strong>Triplex</strong> <strong>Real</strong> <strong>Time</strong> <strong>Stand</strong> <strong>Alone</strong> <strong>DVR</strong><br />
6.2.5 Beep & PTZ Setup<br />
This menu enables recording beep and external Pan/ Tilt & Zoom/ Focus cameras setup to<br />
<strong>com</strong>municate with.<br />
1) PAN / TILT Hitron / LG / Dongyang / PELCO-P / PELCO-D / COP1 / COP2<br />
To select a desired protocol which is used for <strong>com</strong>munication between the external Pan/ Tilt camera<br />
and the <strong>DVR</strong> set.<br />
Note<br />
Compatible Pan/ Tilt camera list<br />
- All cameras using LG, Hitron, Dongyang protocol.<br />
- PELCO-D, PELCO-P<br />
2) PTZ Speed 1 ~ 5<br />
To select PTZ camera speed among 5 levels.<br />
Lower level makes the camera speed slower.<br />
3) Baud Rate 2400 BPS ~ 12400 BPS<br />
Users can select Baud rate to be in accordance with one of installed cameras.<br />
For example, if you install a camera with the protocol of “PELCO-P 4800”, you have to select<br />
PTZ type as “PELCO-P” and baud rate as 4800 BPS (Bits Per Second).<br />
4) Record Beep ON/OFF<br />
To enable recording beep when pressing REC button to start and release the function.<br />
46
<strong>Triplex</strong> <strong>Real</strong> <strong>Time</strong> <strong>Stand</strong> <strong>Alone</strong> <strong>DVR</strong><br />
5) HDD Fail ON/OFF<br />
To enable to beep when the <strong>DVR</strong> detects a bad sector of HDD in recording mode or playback mode.<br />
It skips the bad sector detected and records videos or plays recorded videos in the next sector<br />
of bad sector automatically.<br />
HDD is logically divided to a large amount of sectors. It may have some bad sectors out of a large<br />
amount of it. When this function is on, you are re<strong>com</strong>mended to ex<strong>change</strong> with new one in order to<br />
preventing from any potential problems caused by the HDD with bad sectors.<br />
• To return to main menu, press MENU button.<br />
6.2.6 System Reset ON/OFF<br />
To reset the system, press Enter button and select YES.<br />
• To return to main menu, press MENU button.<br />
You have to make sure of it before system reset.<br />
Once system reset, all data that you had selected previously are<br />
converted to factory mode including password.<br />
47
<strong>Triplex</strong> <strong>Real</strong> <strong>Time</strong> <strong>Stand</strong> <strong>Alone</strong> <strong>DVR</strong><br />
6.3. Display Setup<br />
6.3.1 Blank <strong>Ch</strong>annel Setup<br />
To enable to make channels hidden behind the screen during live display mode as below.<br />
CH 1 ~ CH 16<br />
ON/OFF<br />
To return to main menu, press MENU button.<br />
Note<br />
Even though some channels are hidden behind the screen during live<br />
display mode, <strong>DVR</strong> is recording them in HDD.<br />
48
<strong>Triplex</strong> <strong>Real</strong> <strong>Time</strong> <strong>Stand</strong> <strong>Alone</strong> <strong>DVR</strong><br />
6.3.2 PIP <strong>Ch</strong>annel Setup<br />
You can select PIP ( Picture In Picture ) options. PIP mode offers a convenient way of monitoring<br />
multiple channels while focusing more attention on a particular channel. It has a main video channel<br />
view and up to 3 small video channel views on the screen.<br />
Main CH 1 ~ CH 16<br />
Sub 1 CH 1 ~ CH 16<br />
Sub 2 CH 1 ~ CH 16<br />
Sub 3 CH 1 ~ CH 16<br />
To define which channel is the main channel for full screen or sub channel among 16 channels.<br />
• To return to main menu, press MENU button<br />
49
<strong>Triplex</strong> <strong>Real</strong> <strong>Time</strong> <strong>Stand</strong> <strong>Alone</strong> <strong>DVR</strong><br />
6.3.3 Adjust <strong>Ch</strong>annel Setup<br />
This menu allows to opt color adjustment for individual cameras.<br />
1) <strong>Ch</strong>annel CH1 ~ CH 16<br />
- To select your desired channel to adjust video display.<br />
2) CON (Contrast) 50<br />
- To control light and shade of video display.<br />
3) HUE 50<br />
- To control color tone of video display.<br />
4) BRI (Brightness) 50<br />
- To control brightness of video display.<br />
5) COL (Color) 50<br />
- To control saturation of color of video display.<br />
• To return to main menu, press MENU button.<br />
Note<br />
Default factory mode is set to 50.<br />
Remember that the values range is from 01 to 99.<br />
50
<strong>Triplex</strong> <strong>Real</strong> <strong>Time</strong> <strong>Stand</strong> <strong>Alone</strong> <strong>DVR</strong><br />
6.3.4 Video Signal Type NTSC / PAL<br />
To select your local video signal type between NTSC and PAL, press Enter button and select it.<br />
It reboots the system automatically after your selection.<br />
It reboots the system automatically after your selection.<br />
Once it reboots, all data that you had selected previously is set to factory default.<br />
6.3.5 Sequence 1 sec ~ 1 min<br />
To select interval time of Auto Switch.<br />
With the Auto Sequence feature, a range of interval time among some different views can be<br />
selected.<br />
“AUTO” mark in the left top of screen indicates “(Auto) Sequence” mode.<br />
In this mode, it may skip the channels with no video.<br />
• To return to menu, press MENU button.<br />
51
<strong>Triplex</strong> <strong>Real</strong> <strong>Time</strong> <strong>Stand</strong> <strong>Alone</strong> <strong>DVR</strong><br />
6.3.6 Boundary White/Black/OFF<br />
To select the boundary color that is divided into each channel.<br />
6.3.7 Blank Blue/Black<br />
To select the background color of no video channels between two colors.<br />
• To return to menu, press MENU button.<br />
52
<strong>Triplex</strong> <strong>Real</strong> <strong>Time</strong> <strong>Stand</strong> <strong>Alone</strong> <strong>DVR</strong><br />
6.4. Event Setup<br />
This screen enables simple set up of <strong>DVR</strong> motion detection, alarm and external sensor configurations.<br />
6.4.1 REC <strong>Time</strong> 3 sec ~ 30 min<br />
Once event recording is triggered, the video will be recorded <strong>com</strong>pulsorily during the time<br />
selected by the user or administrator.<br />
6.4.2 Sensor In N.O/N.C<br />
The Sensor-in terminals of the <strong>DVR</strong> are used to connect external motion sensors or door/window<br />
contacts.<br />
There are two types of general sensors in the market. The one is "normal mode-open“, N.O, which<br />
means two sensor lines are not connected (open) in the normal mode but the lines are to be<br />
connected (close) in the activation mode. The other is "normal mode-close“, N.C, which means two<br />
sensor lines are connected (close) in the normal mode but the lines are to be disconnected (open)<br />
in the activation mode.<br />
• To return to menu, press Menu button.<br />
You have to make sure of sensor type between N.O and N.C<br />
before installation. Otherwise, it may not work properly.<br />
- N.O : Normal Open type sensor<br />
- N.C : Normal Close type sensor<br />
53
<strong>Triplex</strong> <strong>Real</strong> <strong>Time</strong> <strong>Stand</strong> <strong>Alone</strong> <strong>DVR</strong><br />
6.4.3 Event Action<br />
To select notice method in order to make users get more attention when event recording occurs.<br />
1) Alarm Out ON/OFF<br />
You can set to enable (ON) or disable (OFF) the outbound signal from the <strong>DVR</strong>.<br />
2) Sensor BEEP+OSD/ OSD/ OFF<br />
When <strong>DVR</strong> detects signals from external sensors, <strong>DVR</strong> will beep or OSD to get your attention.<br />
- BEEP + OSD : Beeps and shows “AL” mark together in the channel with video loss.<br />
- OSD : On-Screen-Display only<br />
- OFF : Disables to activate the alarm action<br />
3) Video Loss BEEP+OSD/ OSD/ OFF<br />
If video signals from the cameras do not reach the <strong>DVR</strong>, a beep will sound to get your attention.<br />
- BEEP+OSD : Beeps and shows “L” mark together in the channel with video loss.<br />
- OSD : On-Screen-Display only<br />
- OFF : Disables to activate the alarm action<br />
4) Motion BEEP+OSD/ OSD/ OFF<br />
When <strong>DVR</strong> detects motion on a certain part of the screen, <strong>DVR</strong> will beep or OSD to get your<br />
attention.<br />
- BEEP + OSD : Beeps and shows “MO” mark together in the channel with video loss.<br />
- OSD : On-Screen-Display only<br />
- OFF : Disables to activate the alarm action<br />
• To return to main menu, press MENU button<br />
54
<strong>Triplex</strong> <strong>Real</strong> <strong>Time</strong> <strong>Stand</strong> <strong>Alone</strong> <strong>DVR</strong><br />
6.4.4 Motion Setup<br />
This menu enables users to set motion functions.<br />
1) <strong>Ch</strong>annel CH1~CH16<br />
You must manually set each channel for the motion detection area. Select a channel for this motion<br />
detection.<br />
2) Sensitivity 1~15<br />
It offers 1 to 15 level of sensitivity. Remember that the higher level is more sensitive to detect<br />
motions.<br />
3) Area OFF/ FULL/ SET<br />
- OFF : Disable to select motion areas.<br />
- FULL : Select full area as motion area.<br />
- SET : To select the area as you desire, move to POSITON menu.<br />
4) Position<br />
- Press Enter button and surf areas in the desired channel by pressing direction button and then<br />
press ENTER button to select, press it again to release.<br />
- Once you select the areas, you don’t need to select them again when you get back from<br />
other modes like OFF or FULL. It gives you easy-operation.<br />
• To return to main menu, press MENU button<br />
55
<strong>Triplex</strong> <strong>Real</strong> <strong>Time</strong> <strong>Stand</strong> <strong>Alone</strong> <strong>DVR</strong><br />
6.5. Record Setup<br />
Here you can set recording options.<br />
6.5.1 Type EACH/ CIF<br />
There are two recording modes: Each and CIF.<br />
If you set it to Each mode, <strong>DVR</strong> records the full size videos of 16 different channels.<br />
If you set it to CIF mode, <strong>DVR</strong> records 16 video channels in CIF resolution.<br />
6.5.2 Rec. Speed 1~60 F/S (EACH mode) / 120F/S (CIF mode, Fixed)<br />
You can select various recording speed in field per second (F/S).<br />
60 F/S in each mode means that it records 60 images per second.<br />
Rule of thumb is that higher field per second requires more HDD space.<br />
Depending on NTSC or PAL mode, range of fps available varies.<br />
NTSC and PAL have the following fps available:<br />
- NTSC : 1~60 F/S (Each Mode) / 120 F/S (CIF Mode)<br />
- PAL : 1~50 F/S (Each Mode) / 100 F/S (CIF Mode)<br />
6.5.3 Quality Level 1~6<br />
It is to set video quality from level 1 to level 6.<br />
The higher the video quality, the more HDD space needed.<br />
High quality has lower network transmission due to image size.<br />
6.5.4 PB Speed AUTO, 1~60 F/S (EACH mode) / 120F/S (CIF mode, Fixed)<br />
You can select various recording speed in field per second (F/S).<br />
“AUTO” (Default) means that it plays videos at the same rate of recording speed.<br />
60 F/S in each mode means that it plays 60 images per second.<br />
Depending on NTSC or PAL mode, range of fps available varies.<br />
NTSC and PAL have the following fps available:<br />
- NTSC : 1~60 F/S (EACH mode) / 120 F/S (CIF mode)<br />
- PAL : 1~50 F/S (EACH mode) / 100 F/S (CIF mode)<br />
56
<strong>Triplex</strong> <strong>Real</strong> <strong>Time</strong> <strong>Stand</strong> <strong>Alone</strong> <strong>DVR</strong><br />
6.5.5 <strong>Ch</strong>annel Enables CH1 ~ CH16 (EACH mode) / Group 1~Group 4 (CIF mode)<br />
- ON : Enable to record the channels<br />
- OFF : Disable to record the channels<br />
- Each group indicates each 4 channels. (For example, group 1 shows CH1 ~ CH4.)<br />
6.5.6 Audio Setup<br />
1) <strong>Ch</strong>annel CH1~CH16<br />
It is to select one audio channel among 16 channels.<br />
2) (Icon) Display ON/OFF<br />
To enable icon of audio function in the upper right of screen as below.<br />
6.5.7 Schedule Setup<br />
1) Schedule ON/OFF<br />
To disable (OFF) or enable (ON) Schedule recording feature.<br />
2) Day Daily/ SUN~SAT<br />
Select the desired day for schedule recording.<br />
- Daily, Sun, Mon, Tue, Wed, Thu, Fri, Sat<br />
3) <strong>Time</strong><br />
When you finish to set Day, press ENTER button to go into the <strong>Time</strong>line. Surf left or right in the<br />
timeline by pressing Left or Right button. If you find a desired time for schedule recording,<br />
press Up button to set or Down button to release.<br />
To return to main menu, press MENU button.<br />
57
<strong>Triplex</strong> <strong>Real</strong> <strong>Time</strong> <strong>Stand</strong> <strong>Alone</strong> <strong>DVR</strong><br />
6.6 Network Setup<br />
To monitor and control videos remotely through internet, you need to have the right set up.<br />
6.6.1 IP Address *000.000.000.000<br />
Type in the IP address of your <strong>DVR</strong>.<br />
6.6.2 Subnet Mask *000.000.000.000<br />
Type in the Subnet mask number.<br />
6.6.3 Gateway *000.000.000.000<br />
Type in the Gateway number.<br />
6.6.4 Bypass ON/OFF<br />
- ON : The videos are transferred directly not through memory,<br />
which means that it may display abnormal videos in network viewer.<br />
- OFF : The videos are transferred through memory, which means that it checks abnormal videos.<br />
It is re<strong>com</strong>mended as “Bypass - OFF”.<br />
6.6.5 Sequence Internet / Ethernet<br />
- Internet : The videos are displayed in network viewer according to the order of transferred videos.<br />
“Internet” updates videos faster than “Ethernet”.<br />
- Ethernet : The videos are displayed in network viewer in sequence from channel 1 to channel 16.<br />
“ Ethernet” doesn’t update channel 2 until channel 1 is displayed.<br />
6.6.6 Network ID ******** ( 8 letters)<br />
6.6.7 Password ******** ( 8 letters)<br />
You must register your Network ID before using network viewer program first.<br />
Press Enter button and type in network ID & Password by pressing direction button.<br />
To access to network viewer program, you need to type in the ID & Password for log-in.<br />
• To return to main menu, press MENU button<br />
1. we would like to re<strong>com</strong>mend you to check your local Firewall or personal<br />
network security programs. Sometimes they block certain ports for network<br />
security purpose.<br />
2. If you don’t have right information about network, please contact your<br />
network administrator.<br />
Note<br />
To check Mac. Address, Server IP Address & Port number (default : 5000),<br />
press CH4 button in network setup menu.<br />
The main reason of hidden Mac. address & DDNS server IP menu is just for<br />
security in order to prevent from being <strong>change</strong>d without user’s approval.<br />
58
<strong>Triplex</strong> <strong>Real</strong> <strong>Time</strong> <strong>Stand</strong> <strong>Alone</strong> <strong>DVR</strong><br />
CHAPTER 7. EXTERNAL TERMINAL INFORMATION<br />
7.1 RS-232<br />
[ 16CH <strong>DVR</strong> ]<br />
RS-232<br />
5 4 3 2 1<br />
9 8 7 6<br />
No<br />
1<br />
2<br />
3<br />
4<br />
5<br />
Description<br />
N/C<br />
TX 232C<br />
RX 232C<br />
N/C<br />
GND<br />
6 ~ 9 N/C<br />
* N/C : Connection Not Required<br />
59
<strong>Triplex</strong> <strong>Real</strong> <strong>Time</strong> <strong>Stand</strong> <strong>Alone</strong> <strong>DVR</strong><br />
[ 8CH <strong>DVR</strong> ]<br />
RS-232 & Alarm In/Out & RS-485<br />
[ 4CH <strong>DVR</strong> ]<br />
13 12 11<br />
10<br />
9<br />
8<br />
7<br />
6<br />
5<br />
4<br />
3<br />
2<br />
1<br />
25 24 23 22 21 20 19<br />
18<br />
17<br />
16<br />
15 14<br />
No<br />
8CH <strong>DVR</strong><br />
No<br />
4CH <strong>DVR</strong><br />
1 ~ 8<br />
Alarm In<br />
1 ~ 4<br />
Alarm In<br />
9 ~ 14<br />
GND<br />
5 ~ 14<br />
GND<br />
15<br />
RX 232C<br />
15<br />
RX 232C<br />
16<br />
TX 232C<br />
16<br />
TX 232C<br />
17 ~ 20<br />
GND<br />
17 ~ 20<br />
GND<br />
21 Alarm Out COM<br />
22 Alarm Out NO<br />
23 Alarm Out NC<br />
24 485A<br />
25 485B<br />
21 Alarm Out COM<br />
22 Alarm Out NO<br />
23 Alarm Out NC<br />
24 485A<br />
25 485B<br />
60
<strong>Triplex</strong> <strong>Real</strong> <strong>Time</strong> <strong>Stand</strong> <strong>Alone</strong> <strong>DVR</strong><br />
7.2 ALARM IN/OUT & RS-485<br />
[ 16CH <strong>DVR</strong> ]<br />
Alarm In/Out & RS-485<br />
13 12 11<br />
10<br />
9<br />
8<br />
7<br />
6<br />
5<br />
4<br />
3<br />
2<br />
1<br />
25 24 23 22 21 20 19<br />
18<br />
17<br />
16<br />
15 14<br />
No<br />
1 ~ 16<br />
17 ~ 20<br />
21<br />
22<br />
23<br />
Description<br />
Alarm In<br />
GND<br />
Alarm Out COM<br />
Alarm Out NO<br />
Alarm Out NC<br />
24 485A<br />
25 485B<br />
61
<strong>Triplex</strong> <strong>Real</strong> <strong>Time</strong> <strong>Stand</strong> <strong>Alone</strong> <strong>DVR</strong><br />
[ 8CH <strong>DVR</strong> ]<br />
RS-232 & Alarm In/Out & RS-485<br />
[ 4CH <strong>DVR</strong> ]<br />
13 12 11<br />
10<br />
9<br />
8<br />
7<br />
6<br />
5<br />
4<br />
3<br />
2<br />
1<br />
25 24 23 22 21 20 19<br />
18<br />
17<br />
16<br />
15 14<br />
No<br />
8CH <strong>DVR</strong><br />
No<br />
4CH <strong>DVR</strong><br />
1 ~ 8<br />
Alarm In<br />
1 ~ 4<br />
Alarm In<br />
9 ~ 14<br />
GND<br />
5 ~ 14<br />
GND<br />
15<br />
RX 232C<br />
15<br />
RX 232C<br />
16<br />
TX 232C<br />
16<br />
TX 232C<br />
17 ~ 20<br />
GND<br />
17 ~ 20<br />
GND<br />
21 Alarm Out COM<br />
22 Alarm Out NO<br />
23 Alarm Out NC<br />
24 485A<br />
25 485B<br />
21 Alarm Out COM<br />
22 Alarm Out NO<br />
23 Alarm Out NC<br />
24 485A<br />
25 485B<br />
62
<strong>Triplex</strong> <strong>Real</strong> <strong>Time</strong> <strong>Stand</strong> <strong>Alone</strong> <strong>DVR</strong><br />
7.3 VGA (Optional)<br />
[ 16CH <strong>DVR</strong> ]<br />
[ 8CH <strong>DVR</strong> ]<br />
[ 4CH <strong>DVR</strong> ]<br />
5<br />
4<br />
3<br />
2<br />
1<br />
10<br />
9<br />
8<br />
7<br />
6<br />
15<br />
14 13<br />
12<br />
11<br />
No<br />
1<br />
2<br />
3<br />
4 ~ 12<br />
13<br />
14<br />
15<br />
Description<br />
RED (Red Video [75ohm, 0.7Vp-p])<br />
GREEN (Green Video [75ohm, 0.7Vp-p])<br />
BLUE (Blue Video [75ohm, 0.7Vp-p])<br />
Reserved<br />
HSYNC or CSYNC (Horizontal or Composite Sync.)<br />
VSYNC (Vertical Sync.)<br />
Reserved<br />
63
<strong>Triplex</strong> <strong>Real</strong> <strong>Time</strong> <strong>Stand</strong> <strong>Alone</strong> <strong>DVR</strong><br />
7.4 ETHERNET & USB<br />
[ 16CH <strong>DVR</strong> ]<br />
1) USB 2) ETHERNET<br />
1) USB<br />
No<br />
1<br />
2<br />
3<br />
4<br />
Description<br />
VCC<br />
USB DATA -<br />
USB DATA +<br />
GND<br />
2) ETHERNET<br />
No<br />
1<br />
2<br />
3<br />
4<br />
5<br />
6<br />
7<br />
Description<br />
N/C (Not Connected)<br />
N/C (Not Connected)<br />
RX- (Receive Data-)<br />
N/C (Not Connected)<br />
N/C (Not Connected)<br />
RX+ (Receive Data+)<br />
TX- (Transmit Data-)<br />
8 TX+ (Transmit Data+)<br />
64
<strong>Triplex</strong> <strong>Real</strong> <strong>Time</strong> <strong>Stand</strong> <strong>Alone</strong> <strong>DVR</strong><br />
CHAPTER 8. SPECIFICATIONS<br />
Specifications<br />
Category<br />
Video<br />
Input<br />
Signal<br />
Output<br />
Input / Output<br />
Audio<br />
Recording Mode<br />
Display FPS (NTSC/PAL)<br />
Display Resolution<br />
Display<br />
Screen Split Mode<br />
Zoom Mode<br />
<strong>Triplex</strong> Mode<br />
Video Compression<br />
Video Resolution<br />
Recording Ways<br />
Recording<br />
Recording FPS<br />
Image File Size<br />
Internal Hard Drives<br />
Remote access through Internet<br />
Playback Mode<br />
Playback Screen Mode<br />
Playback<br />
Search Ways<br />
Zoom Mode<br />
External Alarm Input<br />
Alarm<br />
Alarm Output<br />
Control<br />
Alarm Setup Period<br />
Protocol<br />
Resolution<br />
Network Remote Control<br />
Browser<br />
Recording<br />
Data Backup<br />
Auto Screen Switching<br />
Signal Loss Detection<br />
Display Hidden Function<br />
Remote Control<br />
Others<br />
Power Supply<br />
Dimension<br />
Weight<br />
Approval<br />
4CH <strong>DVR</strong><br />
8CH <strong>DVR</strong><br />
16CH <strong>DVR</strong><br />
NTSC/PAL, 1V 75 Ohm, BNC (4, 8 and 16CH), Auto-loop throughout<br />
CVBS, S-Video, VGA (optional)<br />
2 X RCA (1CH Input , 1CH Output)<br />
Mono PCB 8KB / sec<br />
120 / 100 FPS 240 /200 FPS 480 / 400 FPS<br />
720 X 480 (NTSC) / 720 X 576 (PAL)<br />
Full, Quad, Split and 3 PIPs<br />
2 X 2 Digital Zoom<br />
Simultaneous Recording / Playback / Live / Network<br />
<strong>Real</strong>-time full duplex M-JPEG codec core<br />
720 (360) X 480 (NTSC) / 720 (360) X 576 (PAL)<br />
Continuous, Scheduled, Event (internal motion, external sensor)<br />
NTSC : 120 FPS / PAL : 100 FPS<br />
NTSC : 3 ~ 25 KB / PAL : 4 ~ 27 KB<br />
EIDE, ATA-100, MAX 2 HDDs supported, Unlimited HDD Capacity<br />
Remote monitoring via network viewer program<br />
Live & Playback, Playback, Panorama<br />
Full, Quad, PIP, Zoom, Split, Panorama<br />
Search by Date/ <strong>Time</strong> List, Event List & Date/<strong>Time</strong><br />
Digital 2 x Zoom ; Playback available in Zoom Mode<br />
Alarm Input : NO, NC Type<br />
Internal Buzzer, OSD, Internal Relay (Combined with External Device)<br />
30 sec ~ 30 min<br />
TCP / IP ; RJ-45<br />
720(360) X 480 (NTSC) / 720(360) X 576 (PAL)<br />
Functional remote client software<br />
Own Application provided<br />
Motion Picture, Event, Manual Recording<br />
Ethernet, CD-RW, USB<br />
Switching Period : 1 ~ 60 sec<br />
Automatic Alarm<br />
Display Hidden Function by Each <strong>Ch</strong>annel ; Recording Available<br />
IR Remote Control, RS-485 / RS-232<br />
12V 5.0 A DC Adaptor (AC 100V ~ 240V, AC 50~60Hz Input)<br />
17.0” X 14.1” X 3.0” (430 x 360 x 75 mm)<br />
6.3 kg 6.5 kg 6.7 kg<br />
FCC, CE<br />
65
<strong>Triplex</strong> <strong>Real</strong> <strong>Time</strong> <strong>Stand</strong> <strong>Alone</strong> <strong>DVR</strong><br />
CHAPTER 9. HDD & CD-RW INSTALLATION<br />
9-1. HDD INSTALLATION<br />
1<br />
Unscrew the both sides and rear of the <strong>DVR</strong><br />
and then remove the top cover.<br />
2<br />
Fix HDDs to rack mount by screwing as left.<br />
3<br />
Install the HDDs on the HDD plate and screw as left.<br />
HDD Jumper Setting Information<br />
Before installing the Hard Disk Drives, please read the jumper<br />
setting information on the label. If the jumper is not set properly,<br />
the system will be disordered.<br />
4<br />
Make sure that the HDDs are set to “Master” & “Slave” properly<br />
and then connect the power cable and IDE cable as left.<br />
* <strong>Ch</strong>eck if HDD has no problem after HDD installation because<br />
record function may not work well due to HDD problem.<br />
* It may reboot automatically when HDD has problems<br />
or it doesn’t detect HDD.<br />
* Contact your local distributor and ex<strong>change</strong> with new one<br />
when you find your HDD has a problem.<br />
5<br />
Close the top cover and screw and turn on the power.<br />
66
<strong>Triplex</strong> <strong>Real</strong> <strong>Time</strong> <strong>Stand</strong> <strong>Alone</strong> <strong>DVR</strong><br />
9-2. CD-RW INSTALLATION<br />
1<br />
Unscrew the both sides and rear of the <strong>DVR</strong><br />
and then remove the top cover.<br />
2<br />
Fix CD-RW to rack mount by screwing as left.<br />
3<br />
Install the CD-RW on the CD-RW plate and screw as left.<br />
4<br />
Connect the power cable and IDE cable as left.<br />
5<br />
Close the top cover and screw and turn on the power.<br />
67
<strong>Triplex</strong> <strong>Real</strong> <strong>Time</strong> <strong>Stand</strong> <strong>Alone</strong> <strong>DVR</strong><br />
CHAPTER 10. CLIENT NETWORK VIEWER MANUAL<br />
10.1 SYSTEM REQUIREMENT<br />
- Pentium III or above re<strong>com</strong>mended<br />
- O/S : Microsoft Windows 2000 / XP<br />
- 256MB RAM or above re<strong>com</strong>mended<br />
- Super VGA 16M or above re<strong>com</strong>mended<br />
- 10/100 Base T network card for LAN operation<br />
10.2 NETWORK ENVIRONMENT<br />
Minimum<br />
Re<strong>com</strong>mend<br />
(16 Frames/sec)<br />
Client PC<br />
More than 1 Mbps<br />
More than 3 Mbps<br />
<strong>DVR</strong><br />
More than 0.5 Mbps<br />
More than 3 Mbps<br />
* Transfer rate of image varies with the number of client accessing to <strong>DVR</strong>.<br />
10.3 NETWORK VIEWER INSTALLATION<br />
• To start network viewer installation,<br />
1. Start Windows 2000 or XP.<br />
2. Insert install CD into the CD-ROM drive.<br />
3. Install the network viewer and then the shortcut icon is located on your PC screen.<br />
4. Simply double-click the icon to start.<br />
5. The network viewer will appear on the screen as below.<br />
68
<strong>Triplex</strong> <strong>Real</strong> <strong>Time</strong> <strong>Stand</strong> <strong>Alone</strong> <strong>DVR</strong><br />
10.4 NAMES & FUNCTIONS<br />
12<br />
13<br />
14<br />
15<br />
16 17<br />
1 2 3 4 5 6<br />
7<br />
9<br />
8<br />
11<br />
10<br />
10<br />
No Names Description<br />
1 Connect / Pause Connect to <strong>DVR</strong> server or Pause<br />
2 Reverse Step Play Play videos reversely frame by frame<br />
3 Forward Step Play Play videos forwardly frame by frame<br />
4 Start point of File Move to the start point of the recording list<br />
5 End point of File Move to the end point of the recording list<br />
6 <strong>Ch</strong>annel Selection Select a channel<br />
7 Operation Mode Select operation mode<br />
8 Log-in Log in network viewer to the <strong>DVR</strong> server<br />
9 Display Mode Select display mode<br />
69
<strong>Triplex</strong> <strong>Real</strong> <strong>Time</strong> <strong>Stand</strong> <strong>Alone</strong> <strong>DVR</strong><br />
10 LED<br />
<strong>DVR</strong> Show that the <strong>DVR</strong> is remotely operated<br />
AVI<br />
Show that storing the video by AVI file format is on<br />
Local Show that storing the video by MJPEG format is on<br />
Connect Show that network viewer is connected<br />
Disconnect Show that network viewer is not connected<br />
Reading Show that the network viewer is reading data from the <strong>DVR</strong><br />
11 Close Close the network viewer<br />
12 Local Store the video by MJPEG format<br />
13 AVI Store the video by AVI format<br />
14 Setup Type in <strong>DVR</strong> IP address<br />
15 Save As Save the selected video as a image by JPEG format<br />
16 Save All Save all videos as images by JPEG format<br />
17 Print Print the selected video<br />
Note<br />
How to record videos by AVI or Local (MJPEG) format.<br />
You can enjoy this function in all mode.<br />
1. Record by AVI format<br />
To start recording, press AVI button and to stop it, do the button again.<br />
2. Record by Local (MJPEG) format<br />
To start recording, press Local button and to stop it, do the button again.<br />
Each LED (AVI or Local) is activated when the function is on.<br />
Note<br />
Default directory is as below.<br />
1. AVI file : “C” drive > “dvr” folder<br />
- Users can select a directory as they desire in setup menu.<br />
2. Local (MJPEG) file : “C” drive > “dvr” folder<br />
- Users can select a directory in the setup menu.<br />
3. File Save : “C” drive >”dvr” folder<br />
Note<br />
To play the files recorded by AVI or Local (M-JPEG) format,<br />
1. AVI file<br />
- Users can play AVI files in any PC without network viewer.<br />
2. Local (MJPEG) file<br />
- Users can play local (M-JPEG) file only in the network viewer.<br />
70
<strong>Triplex</strong> <strong>Real</strong> <strong>Time</strong> <strong>Stand</strong> <strong>Alone</strong> <strong>DVR</strong><br />
10.5 Operation<br />
This network viewer program has 5 types of operation modes.<br />
[ Live View / Playback / Drive Scan / File Play / CD Play ]<br />
Each operation mode is designed for its own purpose.<br />
Please refer to the details for your use.<br />
No Mode Description<br />
1 Live View To monitor live display remotely<br />
2 Playback To playback videos stored in the HDD of <strong>DVR</strong> remotely<br />
3 Drive Scan To play videos from the HDD that is connected to user’s PC<br />
4 File Play To play video files stored in user’s PC HDD through file transmission<br />
5 CD Play To play the burned CD with videos<br />
10.5.1 Live View Mode<br />
71
<strong>Triplex</strong> <strong>Real</strong> <strong>Time</strong> <strong>Stand</strong> <strong>Alone</strong> <strong>DVR</strong><br />
10.5.1.1 To connect to <strong>DVR</strong> server,<br />
1. Click Setup button, type in your <strong>DVR</strong> IP address and select your desired codec type &<br />
<strong>change</strong> default directory.<br />
2. Press Log-in button and type in your ID and password.<br />
Please remember that factory default is as below.<br />
- ID : 12345678 / - PW : 00000000<br />
3. Finally press Connect button and then you will monitor live display.<br />
10.5.1.2 To record videos as AVI format,<br />
1. Press AVI button.<br />
2. First select channels that you want to record and type in the file name.<br />
3. Click OK button and then select the file location as you want.<br />
It activates AVI LED when the function is on .<br />
4. To stop, press AVI button again<br />
10.5.1.3 To record videos as Local (MJPEG) format,<br />
1. Press Local button.<br />
2. It records videos in the directory that you select in the setup menu.<br />
It activates Local LED when the function is on.<br />
3. To stop, press Local button again.<br />
72
<strong>Triplex</strong> <strong>Real</strong> <strong>Time</strong> <strong>Stand</strong> <strong>Alone</strong> <strong>DVR</strong><br />
10.5.2 Playback Mode<br />
This mode enables you to access all recording list in the remote <strong>DVR</strong>.<br />
When this function is on, “<strong>DVR</strong>” LED below is activated.<br />
1<br />
2<br />
3<br />
No Names Description<br />
1 HDD Selection Select HDD between master and slave<br />
2 Date / <strong>Time</strong> List Search Access date/time recording list in the <strong>DVR</strong> remotely<br />
3 Event List Search Access event list in the <strong>DVR</strong> remotely<br />
• To connect to Playback mode,<br />
1. Press log-in button and type in your ID and password.<br />
Please remember that factory default is as below.<br />
- ID : 12345678 / - PW : 00000000<br />
2. Press Connect button and then you will monitor live display.<br />
3. Click operation mode and select playback mode.<br />
• To access to date/time list or event list,<br />
1. Select a HDD between master and slave in the HDD selection menu.<br />
2. Click Select button.<br />
3. The recording list is shown in the screen.<br />
4. Select your desired one in the list.<br />
5. Finally, press Connect button and you can play the video.<br />
73
<strong>Triplex</strong> <strong>Real</strong> <strong>Time</strong> <strong>Stand</strong> <strong>Alone</strong> <strong>DVR</strong><br />
10.5.3 Drive Scan Mode<br />
You can play videos from the HDD that is connected to your PC after uninstalling it from the <strong>DVR</strong>.<br />
1<br />
21<br />
2<br />
No Names Description<br />
1 Physical Disk Speed Select playback speed<br />
2 Hard drive Selection Select the hard drive that is installed in your PC.<br />
• To connect to Drive Scan mode,<br />
1. Press log-in button and type in your ID and password.<br />
Please remember that factory default is as below.<br />
- ID : 12345678 / - PW : 00000000<br />
2. Press Connect button and then you will monitor live display.<br />
3. Click Operation mode and select Drive Scan mode.<br />
• To enable Drive Scan mode,<br />
1. Select playback speed and the HDD connected to your PC.<br />
2. Press Connect button.<br />
3. You will see the videos from the HDD.<br />
74
<strong>Triplex</strong> <strong>Real</strong> <strong>Time</strong> <strong>Stand</strong> <strong>Alone</strong> <strong>DVR</strong><br />
10.5.4 File Play Mode<br />
This mode enables you to access all recording lists that are stored in the HDD of your PC<br />
through file transmission.<br />
1<br />
2<br />
No Names Description<br />
1 Open Select your desired file in your PC.<br />
2 Recording <strong>Time</strong> Show start & end time of the file<br />
• To connect to File Play mode,<br />
1. Press log-in button and type in your ID and password.<br />
Please remember that factory default is as below.<br />
- ID : 12345678 / - PW : 00000000<br />
2. Press Connect button and then you will monitor live display.<br />
3. Click Operation mode and select File Play mode.<br />
• To play the files stored in the HDD of your PC,<br />
1. Click Open button and select your desired file in the HDD of your PC.<br />
2. Press Connect button.<br />
(It may take a few seconds to read the selected file in the HDD of your PC.)<br />
3. You will see the videos in the HDD of your PC.<br />
75
<strong>Triplex</strong> <strong>Real</strong> <strong>Time</strong> <strong>Stand</strong> <strong>Alone</strong> <strong>DVR</strong><br />
10.5.5 CD Play Mode<br />
This mode enables you to play CD with data (videos).<br />
1<br />
2<br />
No Names Description<br />
1 Drive Selection Select the drive in which CD-ROM is installed.<br />
2<br />
File Save (Start)<br />
File Save (Stop)<br />
Start saving CD data as “MJPEG” format in the default directory of user’s PC.<br />
Stop saving CD data as “MJPEG” format in the default directory of user’s PC.<br />
• To connect to CD Play mode,<br />
1. Press log-in button and type in your ID and password.<br />
Please remember that factory default is as below.<br />
- ID : 12345678 / - PW : 00000000<br />
2. Press Connect button and then you will monitor live display.<br />
3. Click Operation mode and select CD Play mode.<br />
• To play CD with data (videos),<br />
1. Select the drive in which CD-ROM is installed in the Drive Selection menu.<br />
2. To play, press Connect button.<br />
3. You will see the videos in the CD.<br />
• To save the CD data as “MJPEG” format in the default directory of your PC,<br />
1. Select the drive in which CD-ROM is installed in the Drive Selection menu.<br />
2. To save, press Start button and to stop, press Stop button.<br />
3. You will find the files in the default directory of your PC, which is transferred from the CD.<br />
76
<strong>Triplex</strong> <strong>Real</strong> <strong>Time</strong> <strong>Stand</strong> <strong>Alone</strong> <strong>DVR</strong><br />
CHAPTER 11. Q & A<br />
1 The system power does not turn on.<br />
<strong>Ch</strong>eck if the power cable is connected correctly.<br />
<strong>Ch</strong>eck if the input voltage is correct.<br />
If the system power does not turn on when the power cable is connected correctly,<br />
please contact the local distributor or manufacturer.<br />
2 The system power is turned on, but no video is displayed on the monitor.<br />
<strong>Ch</strong>eck if the monitor power cable is connected properly<br />
<strong>Ch</strong>eck to make sure the monitor is turned on.<br />
<strong>Ch</strong>eck if the video output cable of the <strong>DVR</strong> is properly connected to the monitor.<br />
Unplug the power cable and plug in again.<br />
3 The camera numbers are displayed on the screen, but camera images are not displayed.<br />
<strong>Ch</strong>eck if the camera video output is connected to the <strong>DVR</strong> system correctly.<br />
<strong>Ch</strong>eck if the power cable on the camera is connected correctly.<br />
<strong>Ch</strong>eck if the video cable connecting the camera to the <strong>DVR</strong> system has a problem.<br />
This problem can occur because of weak video signal if the video is <strong>com</strong>ing through<br />
the video splitter when the video is connected to multiple systems. Connect the camera<br />
directly to the <strong>DVR</strong>.<br />
Turn off <strong>DVR</strong> system and turn it on again.<br />
4 The camera video is shown on the screen, but the system doesn’t record video.<br />
<strong>Ch</strong>eck to make sure the recording mode in the recording setting mode is not set to “NONE”.<br />
Turn off the <strong>DVR</strong> and turn it on again.<br />
5 It is impossible to search through the recorded video.<br />
<strong>Ch</strong>eck if there is a recorded video data at the time that you are trying to search on the table.<br />
If there is no recorded video data, check to make sure the recording mode in the recording<br />
setting mode is not set to “NONE”.<br />
77
<strong>Triplex</strong> <strong>Real</strong> <strong>Time</strong> <strong>Stand</strong> <strong>Alone</strong> <strong>DVR</strong><br />
6 Audio data recorded with video data is not playing.<br />
<strong>Ch</strong>eck if the audio recording option is correctly set to the camera you wish to record audio.<br />
<strong>Ch</strong>eck if the audio mute is enabled.<br />
<strong>Ch</strong>eck if the microphone and speaker port on the rear of <strong>DVR</strong> system are connected correctly.<br />
<strong>Ch</strong>eck if the connected microphone is working properly.<br />
<strong>Ch</strong>eck if the connected speaker is working properly.<br />
7<br />
Color of videos are strange or videos are shown abnormally.<br />
<strong>Ch</strong>eck if the camera connected to the system has a problem. <strong>Ch</strong>eck to make sure the camera is<br />
not damaged by trying another camera into a working video output.<br />
<strong>Ch</strong>eck if the video system setting is the same with your camera system. Depending on your<br />
region, the camera system can support either PAL, or NTSC. Depending on the camera system,<br />
the video process can differ greatly, therefore it can be difficult to recognize the video data if the<br />
video system setting is different from the camera system.<br />
8<br />
There are a lot of (screen) noise on the image.<br />
<strong>Ch</strong>eck if the video signal output from the camera has a problem.<strong>Ch</strong>eck to make sure the camera<br />
is not damaged by trying another camera into a working video output.<br />
<strong>Ch</strong>eck if the video cable connecting the camera and the <strong>DVR</strong> is cut, cross-wired, or shorted.<br />
<strong>Ch</strong>eck if there is a high voltage wire around the video cable connecting the camera to the <strong>DVR</strong><br />
system. It can cause the noise problem to decrease video quality.<br />
<strong>Ch</strong>eck if the video cable connecting the camera to the <strong>DVR</strong> system is the correct video cable.<br />
When a normal power-supplying cable is used instead of the video cable, screen noise can be<br />
generated.<br />
9<br />
Sometimes the system restarts itself.<br />
The system can restart itself due to watchdog function when any problem occurs to the <strong>DVR</strong>.<br />
10<br />
The connected sensor is not operating.<br />
<strong>Ch</strong>eck if the type of sensor in Event Setup menu is the same with the connected sensor.<br />
<strong>Ch</strong>eck if the system is set to use the sensor in recording schedule window in the recording<br />
setting menu.<br />
<strong>Ch</strong>eck if the power cable of the sensor is properly connected.<br />
<strong>Ch</strong>eck if the signal cable of the sensor is properly connected.<br />
78