Command Reference - KYOCERA Document Solutions
Command Reference - KYOCERA Document Solutions
Command Reference - KYOCERA Document Solutions

Create successful ePaper yourself
Turn your PDF publications into a flip-book with our unique Google optimized e-Paper software.
PRESCRIBE <strong>Command</strong>s<br />
<strong>Command</strong> <strong>Reference</strong>
We shall have no liability or responsibility to customers or any other person or entity with respect to any liability, loss or<br />
damage caused or alleged to be caused directly or indirectly by equipment sold or furnished by us, including, but not limited<br />
to, any interruption of service, loss of business or anticipatory profits, or consequential damages resulting from the use or<br />
operation of the equipment or software.<br />
NO LIABILITY WILL BE ASSUMED FOR ANY DAMAGE CAUSED BY IMPROPER INSTALLATION.<br />
Notice on Software<br />
SOFTWARE USED WITH THIS PRINTER MUST SUPPORT THE PRINTER’S NATIVE MODE OR ONE OF ITS EMULA-<br />
TION MODES.<br />
Notice<br />
This manual, the computer programs in the page printer referred to in this manual, and any other copyrightable subject<br />
matter sold or provided with or in connection with the sale of the page printer, are protected by copyright. All rights are<br />
reserved. Copying or other reproduction of all or part of this manual, the computer programs, or any other copyrightable<br />
subject matter without the prior written consent of Kyocera Mita Corporation is prohibited. Any copies made of all or part of<br />
this manual, the computer programs, or any other copyrightable subject must contain the same copyright notice as the<br />
material from which the copying is done.<br />
The information in this manual is subject to change without notification. Additional pages may be inserted in future editions.<br />
The user is asked to excuse any omissions or errors in the present edition.<br />
No responsibility is assumed if accidents occur while the user is following the instructions in this manual. No responsibility<br />
is assumed for defects in the printer’s firmware.<br />
Regarding Tradenames:<br />
PRESCRIBE is a registered trademark of Kyocera Corporation. KPDL is a trademark of Kyocera Corporation.<br />
Diablo 630 is a product of Xerox Corporation. IBM Proprinter X-24E is a product of International Business Machines Corporation.<br />
Epson LQ-850 is a product of Seiko Epson Corporation. HP LaserJet III, HP LaserJet 4, HP LaserJet 4 Plus, HP<br />
LaserJet 5Si, HP LaserJet 5P, HP LaserJet 5M, HP LaserJet 2100, HP LaserJet 4000, and HP 7550A are products of<br />
Hewlett-Packard Company. Hewlett-Packard, PCL, and HP-GL are registered trademarks of Hewlett-Packard Company.<br />
Centronics is a trade name of Centronics Data Computer Corp. Other product names and company names that appear in<br />
this manual are trademarks or registered trademarks of their respective owners.<br />
ii
Typeface Trademark Acknowledgement<br />
All resident fonts in the print system are licensed from Bitstream Inc. and Agfa corporation. For font license information for<br />
each model, refer to the User’s Manual.<br />
Helvetica, Palatino and Times are registered trademarks of Linotype-Hell AG. Centutry Schoolbook, Stymie, and Cooper-<br />
Black are trademarks of Kingsley-ATF Type Corporation. ITC Avant Garde Gothic, ITC ZapfChancery, ITC ZapfDingbats,<br />
ITC Souvenir, ITC Benguiat, and ITC Bookman are registered trademarks of International Typeface Corporation. Revue is<br />
a trademark of Esselte Pendaflex Corporation in the U.S., Letraset Canada Ltd. in Canada, and Esselte Letraset Ltd. elsewhere.<br />
Agfa Japan License Agreement Guidelines<br />
1. “Software” shall mean the digitally encoded, machine readable, scalable outline data as encoded in a special format as<br />
well as the UFST Software.<br />
2. You agree to accept a non-exclusive license to use the Software to reproduce and display weights, styles and versions<br />
of letters, numerals, characters and symbols (“Typefaces”) solely for your own customary business or personal purposes<br />
at the address stated on the registration card you return to Agfa Japan. Under the terms of this License Agreement,<br />
you have the right to use the Fonts on up to three printers. If you need to have access to the fonts on more than<br />
three printers, you need to acquire a multi-user license agreement which can be obtained from Agfa Japan. Agfa Japan<br />
retains all rights, title and interest to the Software and Typefaces and no rights are granted to you other than a License<br />
to use the Software on the terms expressly set forth in this Agreement.<br />
3. To protect proprietary rights of Agfa Japan, you agree to maintain the Software and other proprietary information concerning<br />
the Typefaces in strict confidence and to establish reasonable procedures regulating access to and use of the<br />
Software and Typefaces.<br />
4. You agree not to duplicate or copy the Software or Typefaces, except that you may make one backup copy. You agree<br />
that any such copy shall contain the same proprietary notices as those appearing on the original.<br />
5. This License shall continue until the last use of the Software and Typefaces, unless sooner terminated. This License<br />
may be terminated by Agfa Japan if you fail to comply with the terms of this License and such failure is not remedied<br />
within thirty (30) days after notice from Agfa Japan. When this License expires or is terminated, you shall either return<br />
to Agfa Japan or destroy all copies of the Software and Typefaces and documentation as requested.<br />
6. You agree that you will not modify, alter, disassemble, decrypt, reverse engineer or decompile the Software.<br />
7. Agfa Japan warrants that for ninety (90) days after delivery, the Software will perform in accordance with Agfa Japanpublished<br />
specifications, and the diskette will be free from defects in material and workmanship. Agfa Japan does not<br />
warrant that the Software is free from all bugs, errors and omissions.<br />
THE PARTIES AGREE THAT ALL OTHER WARRANTIES, EXPRESSED OR IMPLIED, INCLUDING WARRANTIES<br />
OF FITNESS FOR A PARTICULAR PURPOSE AND MERCHANTABILITY, ARE EXCLUDED.<br />
8. Your exclusive remedy and the sole liability of Agfa Japan in connection with the Software and Typefaces is repair or<br />
replacement of defective parts, upon their return to Agfa Japan.<br />
IN NO EVENT WILL AGFA JAPAN BE LIABLE FOR LOST PROFITS, LOST DATA, OR ANY OTHER INCIDENTAL OR<br />
CONSEQUENTIAL DAMAGES, OR ANY DAMAGES CAUSED BY ABUSE OR MISAPPLICATION OF THE SOFT-<br />
WARE AND TYPEFACES.<br />
9. New York, U.S.A. law governs this Agreement.<br />
10. You shall not sublicense, sell, lease, or otherwise transfer the Software and/or Typefaces without the prior written consent<br />
of Agfa Japan.<br />
11. Use, duplication or disclosure by the Government is subject to restrictions as set forth in the Rights in Technical Data<br />
and Computer Software clause at FAR 252-227-7013, subdivision (b)(3)(ii) or subparagraph (c)(1)(ii), as appropriate.<br />
Further use, duplication or disclosure is subject to restrictions applicable to restricted rights software as set forth in FAR<br />
52.227-19 (c)(2).<br />
12. YOU ACKNOWLEDGE THAT YOU HAVE READ THIS AGREEMENT, UNDERSTAND IT, AND AGREE TO BE<br />
BOUND BY ITS TERMS AND CONDITIONS. NEITHER PARTY SHALL BE BOUND BY ANY STATEMENT OR REP-<br />
RESENTATION NOT CONTAINED IN THIS AGREEMENT. NO CHANGE IN THIS AGREEMENT IS EFFECTIVE<br />
UNLESS WRITTEN AND SIGNED BY PROPERLY AUTHORIZED REPRESENTATIVES OF EACH PARTY. BY OPEN-<br />
ING THIS DISKETTE PACKAGE, YOU AGREE TO ACCEPT THE TERMS AND CONDITIONS OF THIS AGREE-<br />
MENT.<br />
iii
iv<br />
This page is left blank intentionally
Table of Contents<br />
Overview of PRESCRIBE <strong>Command</strong>s by Function 2<br />
Access <strong>Command</strong>s ————————————————————————————— 2<br />
Print System Setting <strong>Command</strong>s ——————————————————————— 2<br />
Margin and Page Portrait/Landscape Orientation <strong>Command</strong>s ———————————— 3<br />
Font <strong>Command</strong>s —————————————————————————————— 4<br />
Cursor Movement <strong>Command</strong>s ———————————————————————— 5<br />
Vector Graphics <strong>Command</strong>s ————————————————————————— 5<br />
Path Mode Graphics <strong>Command</strong>s ——————————————————————— 6<br />
Raster Graphics <strong>Command</strong>s ————————————————————————— 7<br />
Color <strong>Command</strong>s ————————————————————————————— 7<br />
Barcode <strong>Command</strong>s ———————————————————————————— 8<br />
Macro <strong>Command</strong>s ————————————————————————————— 8<br />
Debug <strong>Command</strong>s ————————————————————————————— 9<br />
External Media Control <strong>Command</strong>s —————————————————————— 9<br />
e-MPS <strong>Command</strong>s ———————————————————————————— 10<br />
PRESCRIBE <strong>Command</strong>s 11<br />
ACLI — Add CoLor by Index ——————————————————————— 12<br />
ALTB A — [ALlocate TaBle] Assign user-defined character table ————————— 14<br />
ALTB C — [ALlocate TaBle] Convert character code —————————————— 15<br />
ALTB D — [ALlocate TaBle] Delete user-defined character table ————————— 16<br />
ALTB E — [ALlocate TaBle] End defining combination characters ———————— 17<br />
ALTB G — [ALlocate TaBle] Generate user-defined table ———————————— 18<br />
ALTB R — [ALlocate TaBle] Release user-defined character table————————— 19<br />
ALTB S — [ALlocate TaBle] Start to define the combination character ——————— 20<br />
ALTB T — [ALlocate TaBle] define combined character by Table ————————— 21<br />
ALTF — change to ALTernate Font ————————————————————— 23<br />
AMCR — call Automatic MaCRo—————————————————————— 25<br />
ARC — draw filled-in ARC ———————————————————————— 27<br />
ASFN — ASsign external characters for FoNt ————————————————— 30<br />
ASTK — Assign STacKer trays —————————————————————— 31<br />
BARC — draw BARCode ———————————————————————— 33<br />
BKLT — print in BooKLeT binding ———————————————————— 37<br />
BLK — draw filled-in BLocK ——————————————————————— 39<br />
BOX — draw BOX ——————————————————————————— 41<br />
CALL — CALL macro —————————————————————————— 43<br />
CCPY — Carbon CoPY—————————————————————————— 45<br />
CDSK — Check hard DiSK ———————————————————————— 48<br />
CID — Configure color-Image Data ————————————————————— 49<br />
CIR — draw CIRcle ——————————————————————————— 51<br />
CLIP — CLIP current path ———————————————————————— 53<br />
CLPR — CLiP Rectangular area —————————————————————— 54<br />
CLSP — CLoSe Path ——————————————————————————— 56<br />
CMNT — CoMmeNT —————————————————————————— 58<br />
CMOD — Color MODe—————————————————————————— 59<br />
COPY — set number of COPIES —————————————————————— 60<br />
CPAL — Control PALette ————————————————————————— 62<br />
CPTH — Character PaTH ————————————————————————— 63<br />
CSET — Change symbol SET by symbol-set ID ———————————————— 64<br />
Contents—i
Contents—ii<br />
CSTK — select Collator STacKer —————————————————————— 67<br />
CTXT — print Centered TeXT ——————————————————————— 68<br />
DAF — Delete All Fonts ————————————————————————— 70<br />
DAM — Delete All Macros ———————————————————————— 71<br />
DAP — Draw to Absolute Position ————————————————————— 72<br />
DELF — DELete Font —————————————————————————— 74<br />
DELM — DELete Macro ————————————————————————— 75<br />
DPAT — select Dashed PATtern —————————————————————— 77<br />
DRP — Draw to Relative Position —————————————————————— 79<br />
DRPA — Draw to Relative Position specified by Angle ————————————— 81<br />
DUPX — select/deselect DUPleX mode———————————————————— 83<br />
DXPG — select DupleX PaGe side—————————————————————— 84<br />
DZP — Draw to Zero-relative Position ———————————————————— 86<br />
EMCR — Enable MaCRo depending on paper source —————————————— 88<br />
ENDB — END a two-dimensional Barcode string ———————————————— 90<br />
ENDC — END carbon Copy ———————————————————————— 91<br />
ENDD — END Dump —————————————————————————— 92<br />
ENDM — END Macro —————————————————————————— 93<br />
ENDR — END Raster data ————————————————————————— 95<br />
EPL — select EcoPrint Level ———————————————————————— 97<br />
EXIT — EXIT from PRESCRIBE mode ——————————————————— 98<br />
FDIR — MP tray Feed DIRection —————————————————————— 99<br />
FILL — FILL closed path ———————————————————————— 100<br />
FLAT — set FLATness ————————————————————————— 103<br />
FLST — print Font LiST ———————————————————————— 104<br />
FOLD — FOLD printed pages —————————————————————— 106<br />
FONT — change current FONT —————————————————————— 107<br />
FPAT — generate Fill PATtern —————————————————————— 109<br />
FRPO — Firmware RePrOgram —————————————————————— 111<br />
FRPO INIT — FRPO-INITialize ————————————————————— 113<br />
FSET — change current Font SETting by characteristic ———————————— 114<br />
FTMD — bitmap FonT MoDe —————————————————————— 118<br />
GPAT — set Gray PATtern ——————————————————————— 121<br />
GRAY — represent GRAY ———————————————————————— 123<br />
GRRD — GRaphic data ReaD —————————————————————— 124<br />
HUE — adjust HUE——————————————————————————— 126<br />
INTL — InterNaTionaL characters ———————————————————— 128<br />
JOBD — JOB Deletion ————————————————————————— 131<br />
JOBL — print JOB List ————————————————————————— 133<br />
JOBO — JOB Output —————————————————————————— 135<br />
JOBP — JOB, print with Print options ——————————————————— 137<br />
JOBS — JOB Start ——————————————————————————— 139<br />
JOBT — JOB Terminate ————————————————————————— 143<br />
JOG — JOG output stacks for separation —————————————————— 144<br />
LAPI — LoaD API Program ——————————————————————— 145<br />
LDFC — LoaD Font Character —————————————————————— 146<br />
LDFN C — generate bitmap character for LoaDing FoNt ———————————— 148<br />
LDFN F — create header for LoaDing FoNt ————————————————— 150<br />
LDFN S — LoaD truetype FoNt ————————————————————— 152<br />
LGHT — adjust LiGHTness ——————————————————————— 154<br />
MAP — Move to Absolute Position ———————————————————— 156<br />
MCLR — Match CoLoR ———————————————————————— 158<br />
MCRO — define MaCRO ———————————————————————— 159<br />
MDAT — set MeDia type ATtribute ———————————————————— 161<br />
MID — Multi-tray ID —————————————————————————— 163<br />
MPSS — e-MPS Storage————————————————————————— 164<br />
MRP — Move to Relative Position ————————————————————— 165
MRPA — Move to Relative Position specified by Angle ————————————— 167<br />
MSTK — select Mailbox STacKer ————————————————————— 169<br />
MTYP — select Media TYPe ——————————————————————— 170<br />
MZP — Move to Zero-relative Position ——————————————————— 172<br />
NEWP — start NEW Path ———————————————————————— 174<br />
OTRY — select paper Output TRaY ————————————————————— 175<br />
PAGE — start new PAGE ———————————————————————— 177<br />
PANT — create PANTone color palette ——————————————————— 178<br />
PARC — in Path, draw ARC ——————————————————————— 180<br />
PAT — select fill PATtern ———————————————————————— 182<br />
PCRP — in Path, Curve to Relative Position ————————————————— 184<br />
PCZP — in Path, Curve to Zero-relative Position ———————————————— 186<br />
PDIR — set Print DIRection ———————————————————————— 188<br />
PDRP — in Path, Draw to Relative Position —————————————————— 191<br />
PDZP — in Path, Draw to Zero-relative Position ———————————————— 193<br />
PELP — in Path, draw ELlipse ——————————————————————— 195<br />
PIE — draw PIE chart —————————————————————————— 197<br />
PMRA — in Path, Move to Relative position specified by Angle ————————— 199<br />
PMRP — in Path, Move to Relative Position ————————————————— 201<br />
PMZP — in Path, Move to Zero-relative Position———————————————— 203<br />
PNCH — PuNCH ———————————————————————————— 205<br />
PRBX — in Path, draw Round BoX ————————————————————— 207<br />
PRRC — in Path, at Relative position, draw aRC ———————————————— 209<br />
PSRC — select Paper SouRCe ——————————————————————— 211<br />
PXPL — PiXel PLacement ———————————————————————— 212<br />
!R! — PRESCRIBE start sequence ————————————————————— 213<br />
RCLT — Rotated CoLlaTion———————————————————————— 215<br />
RDMP — Received-data DuMP —————————————————————— 216<br />
RES — RESet ————————————————————————————— 218<br />
RESL — select RESoLution ———————————————————————— 220<br />
RGBL — control RGB Level ——————————————————————— 221<br />
RGST — offset ReGiSTration ——————————————————————— 223<br />
RPCS — Return to Previous Code Set ———————————————————— 224<br />
RPF — Return to Previous Font —————————————————————— 225<br />
RPG — Return to Previous Graphics state —————————————————— 226<br />
RPP — Return to Previous Position ————————————————————— 228<br />
RPPL — Return to Previous PaLette ————————————————————— 230<br />
RPU — Return to Previous Unit —————————————————————— 231<br />
RTTX — RoTate TeXt —————————————————————————— 232<br />
RTXT — print Right-aligned TeXT ————————————————————— 234<br />
RVCD — ReceiVe Compressed raster Data —————————————————— 236<br />
RVCL — ReceiVe CoLor raster data ———————————————————— 237<br />
RVRD — ReceiVe Raster Data —————————————————————— 238<br />
RWER D — [Read/Write External Resource] Delete data on external media ————— 240<br />
RWER F — [Read/Write External Resource] Format external media ———————— 241<br />
RWER I — [Read/Write External Resource] automatically print partition Information — 242<br />
RWER L — [Read/Write External Resource] print partition List—————————— 243<br />
RWER R — [Read/Write External Resource] Read data from external media————— 244<br />
RWER S — [Read/Write External Resource] Store TrueType font ————————— 246<br />
RWER T — [Read/Write External Resource] set Terminate string ————————— 248<br />
RWER W — [Read/Write External Resource] Write data to external media ————— 249<br />
RWRF D — [Read/Write Resource File] Delete data on external device——————— 250<br />
RWRF F — [Read/Write Resource File] Format external device —————————— 251<br />
RWRF L — [Read/Write Resource File] print resource file List —————————— 252<br />
RWRF P — [Read/Write Resource File] set hidden file ————————————— 253<br />
RWRF T — [Read/Write Resource File] set Terminate string ——————————— 254<br />
RWRF W — [Read/Write Resource File] Write data to external device (API program) — 255<br />
Contents—iii
Contents—iv<br />
RWRF W — [Read/Write Resource File] Write data to external device (font) ———— 256<br />
RWRF W — [Read/Write Resource File] Write data to external device (macro) ——— 258<br />
SATU — adjust SATUration level ————————————————————— 259<br />
SBM — Set Bottom Margin ——————————————————————— 260<br />
SCAP — Set line CAP ————————————————————————— 262<br />
SCCS — Save Current Code Set ————————————————————— 264<br />
SCF — Save Current Font ———————————————————————— 266<br />
SCG — Save Current Graphics state ———————————————————— 268<br />
SCOL — Select COLor ————————————————————————— 270<br />
SCP — Save Current Position —————————————————————— 271<br />
SCPI — Set Characters Per Inch —————————————————————— 272<br />
SCPL — Save Current PaLette —————————————————————— 274<br />
SCRC — Set <strong>Command</strong> Recognition Character ———————————————— 275<br />
SCS — Set Character Spacing——————————————————————— 277<br />
SCSZ — Set Custom paper SiZe—————————————————————— 278<br />
SCU — Save Current Unit ———————————————————————— 279<br />
SDP — Store Dash Pattern ———————————————————————— 281<br />
SEM — Set Emulation Mode ——————————————————————— 283<br />
SETF — SET alternate Font ——————————————————————— 284<br />
SFA — Set bitmap Font Attributes ————————————————————— 286<br />
SFNT — Select current FoNT by typeface —————————————————— 290<br />
SGPC — Set kcGl Pen Color ——————————————————————— 293<br />
SHMI — Set HMI ——————————————————————————— 294<br />
SIMG — Set IMaGe model ——————————————————————— 295<br />
SIMP — create SIMPle color palette ———————————————————— 298<br />
SIR — Set Image Refinement level ———————————————————— 300<br />
SLJN — Set Line JoiN ————————————————————————— 301<br />
SLM — Set Left Margin ————————————————————————— 303<br />
SLPI — Set Lines Per Inch ———————————————————————— 305<br />
SLPP — Set Lines Per Page ——————————————————————— 306<br />
SLS — Set Line Spacing ———————————————————————— 308<br />
SMLT — Set Miter LimiT ———————————————————————— 309<br />
SMNT — Set MoNiTor simulation ————————————————————— 311<br />
SPAL — Select PALette ————————————————————————— 313<br />
SPD — Set Pen Diameter ———————————————————————— 314<br />
SPL — Set Page Length ————————————————————————— 316<br />
SPO — Set Page Orientation ——————————————————————— 318<br />
SPSZ — Set Paper SiZe ————————————————————————— 320<br />
SPW — Set Page Width ————————————————————————— 322<br />
SRM — Set Right Margin ———————————————————————— 324<br />
SRO — Set Raster Options ———————————————————————— 326<br />
SROP — Set Raster OPeration —————————————————————— 328<br />
SSTK — select Sorter STacKer —————————————————————— 330<br />
STAK — select paper STAcKer —————————————————————— 331<br />
STAT — STATus ——————————————————————————— 332<br />
STM — Set Top Margin ————————————————————————— 334<br />
STPC — set STaPle Counter ——————————————————————— 336<br />
STPL — STaPLe ———————————————————————————— 337<br />
STR — SeT dot Resolution ——————————————————————— 339<br />
STRK — STRoKe current path —————————————————————— 340<br />
SULP — Set UnderLine Parameters ———————————————————— 342<br />
TATR — apply Tray ATtributes —————————————————————— 344<br />
TEXT — print TEXT —————————————————————————— 345<br />
TPRS — Text PaRSing ————————————————————————— 347<br />
TRSM — TRansparency Separate Mode —————————————————— 348<br />
UNIT — set UNIT of measurement ———————————————————— 349<br />
UOM — Unit Of Measurement per dots ——————————————————— 351
VMAL — Virtual Mailbox ALias —————————————————————— 353<br />
VMOB — Virtual Mailbox Output Bin ———————————————————— 354<br />
VMPW — set Virtual Mailbox PassWord——————————————————— 355<br />
WIDE — set WIDE A4 mode ——————————————————————— 357<br />
WRED — WRite EnD —————————————————————————— 358<br />
XBAR — print two dimensional barcode ——————————————————— 359<br />
XBCP 0 — select barcode type/reset all other XBCP parameters—————————— 361<br />
XBCP 1 — specify narrowest element width ————————————————— 362<br />
XBCP 2 — specify error correction level by percentage ————————————— 363<br />
XBCP 3 — set error correction level ————————————————————— 364<br />
XBCP 4 — set data code word rows ————————————————————— 365<br />
XBCP 5 — set data code word columns ——————————————————— 366<br />
XBCP 6 — determine aspect ratio of vertical height and horizontal width —————— 367<br />
XBCP 7 — determine bar height —————————————————————— 369<br />
XBCP 8 — automatically set rows and columns ———————————————— 370<br />
XBCP 9 — enable truncation———————————————————————— 371<br />
XBCP 10 — enable file name ——————————————————————— 372<br />
XBCP 11 — enable block count —————————————————————— 373<br />
XBCP 12 — enable time stamp ——————————————————————— 374<br />
XBCP 13 — enable sender ID ——————————————————————— 375<br />
XBCP 14 — enable addressee ID —————————————————————— 376<br />
XBCP 15 — enable file size ———————————————————————— 377<br />
XBCP 16 — enable checksum ——————————————————————— 378<br />
XBCP 17 — allow control of file ID ————————————————————— 379<br />
XBCP 18 — enable Macro PDF417 symbol mode ——————————————— 381<br />
XBCP 19 — position symbols at the specified locations ————————————— 383<br />
XBUF — define a BUFfer name —————————————————————— 387<br />
XPAT — generate eXpanded fill PATtern —————————————————— 389<br />
Index Index - 1<br />
Contents—v
Contents—vi
PRESCRIBE <strong>Command</strong> <strong>Reference</strong>
PRESCRIBE <strong>Command</strong> <strong>Reference</strong><br />
1. Overview of PRESCRIBE <strong>Command</strong>s by Function<br />
The tables in this section list all the printing system commands supported by the various<br />
models. Support for certain commands varies depending on the printing system model.<br />
Access <strong>Command</strong>s<br />
These commands provide access in and out of PRESCRIBE mode.<br />
<strong>Command</strong> Function Page<br />
EXIT EXIT from PRESCRIBE mode 98<br />
!R! PRESCRIBE start sequence 213<br />
SCRC Set <strong>Command</strong> Recognition Character 275<br />
Print System Setting <strong>Command</strong>s<br />
These commands establish general printing environment parameters.<br />
<strong>Command</strong> Function Page<br />
COPY set number of COPIES 60<br />
EPL select EcoPrint Level 97<br />
FDIR MP tray Feed DIRection 99<br />
FRPO Firmware RePrOgram 111<br />
FRPO INIT FRPO-INITialize 113<br />
MDAT set MeDia type ATtribute 161<br />
MTYP select Media TYPe 170<br />
OTRY select paper Output TRaY 175<br />
PSRC select Paper SouRCe 211<br />
RCLT Rotated CoLlaTion 215<br />
RES RESet 218<br />
RESL select RESoLution 220<br />
RGST offset ReGiSTration 223<br />
RPU Return to Previous Unit 231<br />
SCSZ Set Custom paper SiZe 278<br />
SCU Save Current Unit 279<br />
SEM Set Emulation Mode 283<br />
SIR Set Image Refinement level 300<br />
SPSZ Set Paper SiZe 320<br />
STAK select paper STAcKer 331<br />
STAT STATus 332<br />
TRSM TRansparency Separate Mode 348<br />
UNIT set UNIT of measurement 348<br />
UOM Unit Of Measurement per dots 351<br />
WIDE set WIDE A4 mode 357<br />
2
Overview of PRESCRIBE <strong>Command</strong>s by Function<br />
Page Control, Text, and Comment <strong>Command</strong>s<br />
The placement commands determine where text will be placed on the page.<br />
<strong>Command</strong> Function Page<br />
CMNT CoMmeNT 58<br />
CTXT print Centered TeXT 68<br />
PAGE start new PAGE 177<br />
RTTX RoTate TeXt 232<br />
RTXT print Right-aligned TeXT 234<br />
TEXT print TEXT 344<br />
Margin and Page Portrait/Landscape Orientation<br />
<strong>Command</strong>s<br />
These commands are used to set the top, bottom, right, and left margins, and to specify<br />
portrait or landscape page orientation. Normal text data is printed inside the margins, but<br />
the TEXT and RTEXT commands can be used to print character strings or graphics<br />
anywhere in the entire printable area of the page, regardless of the margin settings. There<br />
are several commands for setting margins, so it is possible to select the one that best suits<br />
the purpose at hand. Margin settings can be changed in the middle of a page.<br />
Note that the following limitations apply to the margin setting commands.<br />
• The right margin must be at least one space character to the right of the left margin.<br />
• The bottom margin must be at least one line below the top margin.<br />
• It is not possible to specify negative values as margin settings.<br />
For example, a right margin setting beyond the printable area’s right edge would be<br />
brought back just inside the right edge of the printable area. In like manner, it is not<br />
possible to use a bottom margin setting that would place the bottom margin past the<br />
bottom edge of the printable area. An easy way to set the right and bottom margins to the<br />
very edge of the printable area is to use a large value such as 100 (centimeters).<br />
The margins and page orientation can be reset by using the RES command.<br />
<strong>Command</strong> Function Page<br />
SBM Set Bottom Margin 260<br />
SLM Set Left Margin 303<br />
SLPP Set Lines Per Page 306<br />
SPL Set Page Length 316<br />
SPO Set Page Orientation 318<br />
SPW Set Page Width 322<br />
SRM Set Right Margin 324<br />
STM Set Top Margin 334<br />
Margins and page orientation are more fully explained in Section 1.3. of the Technical<br />
<strong>Reference</strong> manual.<br />
3
PRESCRIBE <strong>Command</strong> <strong>Reference</strong><br />
Text Spacing <strong>Command</strong>s<br />
These commands control the line spacing, character spacing, underline spacing, and<br />
underline thickness. The SLS and SLPI commands are used to set the line spacing. The<br />
SCS and SCPI commands are used to set the character spacing. These spacing settings<br />
may be changed even in the middle of a page.<br />
The table below lists the minimum, maximum, and default values for the text spacing<br />
command parameters. If values outside of the above ranges are used, the command is<br />
ignored. If a value smaller than one dot is specified for the character spacing, it is<br />
interpreted as 0, which results in proportional spacing.<br />
Line spacing<br />
Character spacing<br />
Minimum value Maximum value Default value<br />
1 dot<br />
0.01 cm<br />
0.004 inch<br />
1 dot<br />
0.01 cm<br />
0.004 inch<br />
2,047 dots<br />
17.3 cm<br />
6.8 inch<br />
2,047 dots<br />
17.3 cm<br />
6.8 inch<br />
6 lpi<br />
0.423 cm<br />
0.167 inch<br />
10 cpi<br />
0.254 cm<br />
0.1 inch<br />
Using the font mode (FTMD command), the line spacing and character spacing can be<br />
set automatically when the bitmap fonts are selected. Refer to the sections on the FTMD<br />
and SFA commands for additional details.<br />
<strong>Command</strong> Function Page<br />
SCPI Set Characters Per Inch 272<br />
SCS Set Character Spacing 277<br />
SHMI Set HMI 294<br />
SLPI Set Lines Per Inch 305<br />
SLS Set Line Spacing 308<br />
SULP Set UnderLine Parameters 342<br />
Font <strong>Command</strong>s<br />
The font commands are used to select fonts. Fonts can be selected using substitute<br />
numbers instead of a font’s specific number. It is also possible to change the attributes of<br />
fonts and print them in a unique style. Additionally, there are commands to download<br />
fonts to the printing system from an external source, and to generate fonts.<br />
<strong>Command</strong> Function Page<br />
ALTB A [ALlocate TaBle] Assign user-defined character table 14<br />
ALTB C [ALlocate TaBle] Convert character code 15<br />
ALTB D [ALlocate TaBle] Delete user-defined character table 16<br />
ALTB E [ALlocate TaBle] End defining combination characters 17<br />
ALTB G [ALlocate TaBle] Generate user-defined table 18<br />
ALTB R [ALlocate TaBle] Release user-defined character table 19<br />
ALTB S [ALlocate TaBle] Start to define the combination character 20<br />
ALTB T [ALlocate TaBle] define combined character by Table 21<br />
ALTF change to ALTernate Font 23<br />
ASFN ASsign external characters for FoNt 30<br />
4
Overview of PRESCRIBE <strong>Command</strong>s by Function<br />
<strong>Command</strong> Function Page<br />
CSET Change symbol SET by symbol-set ID 64<br />
DAF Delete All Fonts 70<br />
DELF DELete Font 74<br />
FLST print Font LiST 104<br />
FONT change current FONT 107<br />
FSET change current Font SETting by characteristic 114<br />
FTMD bitmap FonT MoDe 118<br />
INTL InterNaTionaL characters 128<br />
LDFC LoaD Font Character 146<br />
LDFN C generate bitmap character for LoaDing FoNt 148<br />
LDFN F create header for LoaDing FoNt 150<br />
LDFN S LoaD truetype FoNt 152<br />
RPCS Return to Previous Code Set 224<br />
RPF Return to Previous Font 225<br />
SCCS Save Current Code Set 264<br />
SCF Save Current Font 266<br />
SETF SET alternate Font 284<br />
SFA Set bitmap Font Attributes 286<br />
SFNT Select current FoNT by typeface 290<br />
TPRS Text PaRSing 347<br />
Fonts are more fully explained in Chapter 4 of the Technical <strong>Reference</strong> manual.<br />
Cursor Movement <strong>Command</strong>s<br />
These commands move the cursor to specific positions. Cursor movements can be<br />
established for absolute positions based on the margins, zero point positions based on the<br />
printable area, or relative positions based on the current cursor position.<br />
Cursor movement commands only change the position of the cursor. Also, the cursor<br />
may not be moved outside of the printable area (see MZP command). It is possible to<br />
store the cursor position in memory then to return to that position stored in memory.<br />
<strong>Command</strong> Function Page<br />
MAP Move to Absolute Position 156<br />
MRP Move to Relative Position 165<br />
MRPA Move to Relative Position specified by Angle 167<br />
MZP Move to Zero-relative Position 172<br />
RPP Return to Previous Position 228<br />
SCP Save Current Position 271<br />
Vector Graphics <strong>Command</strong>s<br />
The commands below are used to create figures such as lines, circles, and rectangles, and<br />
to add shading, simply by adding parameters.<br />
It is possible to specify colors for all vector graphics. For details, see a color specific<br />
command such as SCOL.<br />
5
PRESCRIBE <strong>Command</strong> <strong>Reference</strong><br />
If an attempt is made to create figures outside of the printable area using these<br />
commands, the coordinates are adjusted automatically so that the figures print inside the<br />
printable area. As in the example below, this can produce printed results different from<br />
what is expected.<br />
Print settings according to command<br />
Actual printed result<br />
Printing extremely complex figures can exhaust printing system memory. Downloadable<br />
fonts can be particularly taxing on printing system memory, producing unexpected print<br />
results. It may be possible to correct the problem by removing some of the downloaded<br />
fonts or by simplifying the graphic. To determine current memory usage, refer to a status<br />
page.<br />
<strong>Command</strong> Function Page<br />
ARC draw filled-in ARC 27<br />
BLK draw filled-in BLocK 39<br />
BOX draw BOX 41<br />
CIR draw CIRcle 51<br />
DAP Draw to Absolute Position 72<br />
DPAT select Dashed PATtern 77<br />
DRP Draw to Relative Position 79<br />
DRPA Draw to Relative Position specified by Angle 81<br />
DZP Draw to Zero-relative Position 86<br />
FPAT generate Fill PATtern 109<br />
GPAT set Gray PATtern 121<br />
PAT select fill PATtern 182<br />
PIE draw PIE chart 197<br />
SPD Set Pen Diameter 314<br />
XPAT generate eXpanded fill PATtern 389<br />
Path Mode Graphics <strong>Command</strong>s<br />
The following commands provide a variety of path construction operators and painting<br />
operators for stroking or filling paths.<br />
<strong>Command</strong> Function Page<br />
CLIP CLIP current path 53<br />
CLPR CLiP Rectangular area 54<br />
CLSP CLoSe Path 56<br />
CPTH Character PaTH 63<br />
6
Overview of PRESCRIBE <strong>Command</strong>s by Function<br />
<strong>Command</strong> Function Page<br />
FILL FILL closed path 100<br />
FLAT set FLATness 103<br />
NEWP start NEW Path 174<br />
PARC in Path, draw ARC 180<br />
PCRP iin Path, Curve to Relative Position 184<br />
PCZP in Path, Curve to Zero-relative Position 186<br />
PDIR set Print DIRection 188<br />
PDRP in Path, Draw to Relative Position 191<br />
PDZP in Path, Draw to Zero-relative Position 193<br />
PELP in Path, draw ELlipse 195<br />
PMRA in Path, Move to Relative position specified by Angle 199<br />
PMRP in Path, Move to Relative Position 201<br />
PMZP in Path, Move to Zero-relative Position 203<br />
PRBX in Path, draw Round BoX 207<br />
PRRC in Path, at Relative position, draw aRC 209<br />
RPG Return to Previous Graphics state 226<br />
SCAP Set line CAP 262<br />
SCG Save Current Graphics state 268<br />
SDP Store Dash Pattern 281<br />
SIMG Set IMaGe model 294<br />
SLJN Set Line JoiN 301<br />
SMLT Set Miter LimiT 309<br />
STRK STRoKe current path 340<br />
Raster Graphics <strong>Command</strong>s<br />
Raster graphics commands can be used to draw any graphic design by specifying the<br />
individual dots. The dot resolution is selectable from 75, 100, 150, 200, 300, 600, and<br />
1200 dots per inch.<br />
<strong>Command</strong> Function Page<br />
ENDR END Raster data 95<br />
PXPL PiXel PLacement 212<br />
RVCD ReceiVe Compressed raster Data 236<br />
RVRD ReceiVe Raster Data 238<br />
SRO Set Raster Options 326<br />
SROP Set Raster OPeration 328<br />
STR SeT dot Resolution 339<br />
Color <strong>Command</strong>s<br />
Color commands are used to create a color palette, assign colors to a palette, and specify<br />
colors. In this manual, color commands are marked with COLOR under the command<br />
name.<br />
7
PRESCRIBE <strong>Command</strong> <strong>Reference</strong><br />
<strong>Command</strong> Function Page<br />
ACLI Add CoLor by Index 12<br />
CID Configure color-Image Data 49<br />
CMOD Color MODe 59<br />
CPAL Control PALette 62<br />
GRAY represent GRAY 123<br />
GRRD GRaphic data ReaD 124<br />
HUE adjust HUE 126<br />
LGHT adjust LiGHTness 154<br />
MCLR Match CoLoR 158<br />
PANT create PANTone color palette 178<br />
RGBL control RGB Level 221<br />
RPPL Return to Previous PaLette 230<br />
RVCL ReceiVe CoLor raster data 237<br />
SATU adjust SATUration level 259<br />
SCOL Select COLor 270<br />
SCPL Save Current PaLette 274<br />
SGPC Set kcGl Pen Color 293<br />
SIMP create SIMPle color palette 298<br />
SMNT Set MoNiTor simulation 311<br />
SPAL Select PALette 313<br />
Barcode <strong>Command</strong>s<br />
Barcodes conforming to various specifications can be printed simply by specifying the<br />
type of barcode and the barcode data. It is also possible to print barcodes with check<br />
digits added.<br />
<strong>Command</strong> Function Page<br />
BARC draw BARCode 33<br />
ENDB END a two-dimensional Barcode string 90<br />
XBAR print two dimensional barcode 359<br />
XBCP select barcode type/reset all other XBCP parameters, etc. 361 to 383<br />
XBUF define a BUFfer name 387<br />
Macro <strong>Command</strong>s<br />
A series of PRESCRIBE commands can be defined for sequential processing as a macro.<br />
Macros are selected using the CALL command and automatically using the AMCR<br />
command.<br />
<strong>Command</strong> Function Page<br />
AMCR call Automatic MaCRo 25<br />
CALL CALL macro 43<br />
CCPY Carbon CoPY 45<br />
8
Overview of PRESCRIBE <strong>Command</strong>s by Function<br />
<strong>Command</strong> Function Page<br />
DAM Delete All Macros 71<br />
DELM DELete Macro 75<br />
EMCR Enable MaCRo depending on paper source 88<br />
ENDC END carbon Copy 91<br />
ENDM END Macro 93<br />
MCRO define MaCRO 159<br />
Debug <strong>Command</strong>s<br />
These commands can be used to check the print data in hexadecimal format for print jobs<br />
with unexpected output.<br />
<strong>Command</strong> Function Page<br />
ENDD END Dump 92<br />
RDMP Received-data DuMP 216<br />
External Media Control <strong>Command</strong>s<br />
If an external storage, such as JEIDA Ver. 4 memory card or CompactFlash card, or a<br />
hard disk, is installed in the printing system, the following commands can be used to<br />
write data to or read from it. These commands do not apply to the models that do not<br />
have an external storage.<br />
<strong>Command</strong> Function Page<br />
RWER D [Read/Write External Resource] Delete data on external media 240<br />
RWER F [Read/Write External Resource] Format external media 241<br />
RWER I<br />
[Read/Write External Resource] automatically print partition Information<br />
242<br />
RWER L [Read/Write External Resource] print partition List 243<br />
RWER R [Read/Write External Resource] Read data from external media 244<br />
RWER S [Read/Write External Resource] Store TrueType font 246<br />
RWER T [Read/Write External Resource] set Terminate string 248<br />
RWER W [Read/Write External Resource] Write data to external media 249<br />
RWRF D [Read/Write Resource File] Delete data on external device 250<br />
RWRF F [Read/Write Resource File] Format external device 251<br />
RWRF L [Read/Write Resource File] print resource file List 252<br />
RWRF P [Read/Write Resource File] set hidden file 253<br />
RWRF T [Read/Write Resource File] set Terminate string 254<br />
RWRF W [Read/Write Resource File] Write data to external device (API program)<br />
255<br />
RWRF W [Read/Write Resource File] Write data to external device (font) 256<br />
RWRF W [Read/Write Resource File] Write data to external device (macro) 258<br />
WRED WRite EnD 358<br />
9
PRESCRIBE <strong>Command</strong> <strong>Reference</strong><br />
Control <strong>Command</strong>s for Option Devices<br />
A variety of options, such as feeders, sorters, document finishers, etc., are available for<br />
print systems. The commands below provides access to the optional equipment.<br />
<strong>Command</strong> Function Page<br />
ASTK Assign STacKer trays 31<br />
BKLT print in BooKLeT binding 37<br />
CSTK select Collator STacKer 67<br />
DUPX select/deselect DUPleX mode 83<br />
DXPG select DupleX PaGe side 84<br />
FOLD FOLD printed pages 106<br />
JOG JOG output stacks for separation 144<br />
MID Multi-tray ID 163<br />
MSTK select Mailbox STacKer 169<br />
PNCH PuNCH 205<br />
SSTK select Sorter STacKer 330<br />
STPC set STaPle Counter 336<br />
STPL STaPLe 337<br />
e-MPS <strong>Command</strong>s<br />
The printing system features various job storing options – e-MPS (enhanced Multiple<br />
Printing System) – that utilize the hard disk. For this feature to be performed, a print job<br />
must be defined as an e-MPS job by the JOBS command. Once the job is defined and<br />
stored in the hard disk by the JOBS command, it can be retrieved from the hard disk for<br />
printing with various printing features such as stapling, duplex-printing, mailboxing,<br />
etc., added on the fly.<br />
<strong>Command</strong> Function Page<br />
CDSK Check hard DiSK 48<br />
JOBD JOB Deletion 131<br />
JOBL print JOB List 133<br />
JOBO JOB Output 135<br />
JOBP JOB, print with Print options 137<br />
JOBS JOB Start 139<br />
JOBT JOB Terminate 143<br />
MPSS e-MPS Storage 164<br />
VMAL Virtual Mailbox ALias 353<br />
VMOB Virtual Mailbox Output Bin 354<br />
VMPW set Virtual Mailbox PassWord 355<br />
10
PRESCRIBE <strong>Command</strong>s<br />
2. PRESCRIBE <strong>Command</strong>s<br />
In the command format descriptions below, the command is written in fixed-pitch<br />
CAPITAL letters. Parameters are indicated in lowercase italics. Optional parameters,<br />
which may be omitted, are enclosed in brackets [ ]. Three dots (...) mean that the<br />
preceding parameters may be repeated. Except for the initial !R!, PRESCRIBE<br />
commands may be written in lowercase letters if preferred.<br />
Example:<br />
!R! SFNT ’Helvetica’; EXIT;<br />
Refer to Chapter 1 of the Technical <strong>Reference</strong> manual for the discussion on how<br />
PRESCRIBE follows the rule regarding upper- and lowercase letters.<br />
The functions of some PRESCRIBE commands are duplicated by the panel keys. For<br />
example, the same status page can be printed by the STAT command or by pressing the<br />
panel keys. The User’s Manual provides a full description of the control panel functions.<br />
Many PRESCRIBE commands can be embedded commands within word processing<br />
software. This support depends upon the emulation mode and the software. See<br />
Emulation of the Technical <strong>Reference</strong> manual.<br />
11
PRESCRIBE <strong>Command</strong> <strong>Reference</strong><br />
ACLI — Add CoLor by Index<br />
COLOR<br />
Format<br />
Parameters<br />
ACLI index, color1, color2, color3;<br />
index:<br />
color1:<br />
color2:<br />
color3:<br />
integer from 1 to 255<br />
value for red, integer from 0 to 255, in RGB color space<br />
value for lightness, number from 0.0 to 100.0, in L*a*b color space<br />
value for green, integer from 0 to 255, in RGB color space<br />
value for red/green, number from 0.0 to 100.0, in L*a*b color space<br />
value for blue, integer from 0 to 255, in RGB color space<br />
value for yellow/blue, number from 0.0 to 100.0, in L*a*b color space<br />
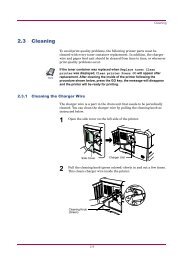
Function<br />
The ACLI command adds a color to the currently active palette. This command is<br />
ignored when the currently active palette is a simple color palette or the Pantone color<br />
palette. If an index number larger than the palette size is given, this command is also<br />
ignored. If a color is added to the existing index number, the current color for that index<br />
number is automatically replaced with the new color.<br />
To add a color in a palette, the following guidelines must be used depending on the color<br />
space used:<br />
For RGB color space, specify the values for red, green, and blue with an integer from 0<br />
to 255, where 0 = 0% and 255 = 100%. Any value outside this range is rounded to the<br />
minimum or maximum value, namely 0 or 255. A fractional value beyond the decimal<br />
point is discarded.<br />
For L*a*b color space, specify relative values for the lightness, red/green, and yellow/<br />
blue with a number from 0.0 to 100.0. Any value outside this range is rounded to the<br />
minimum or maximum value, namely 0.0 or 100.0.<br />
12
ACLI<br />
File<br />
!R! RES;<br />
DAM;<br />
UNIT C;<br />
SFNT ’AntiqueOlive-Bd’, 20;<br />
CPAL C; SPAL 1; CID 0, 1;<br />
ACLI 1, 0, 0, 255;<br />
ACLI 2, 0, 255, 0;<br />
ACLI 3, 255, 0, 0;<br />
MZP 1, 1; SCOL 1;<br />
TEXT ’This line is printed in blue.’;<br />
MZP 1, 2.4; SCOL 2;<br />
TEXT ’This line is printed in green.’;<br />
MZP 1, 3.8; SCOL 3;<br />
TEXT ’This line is printed in red.’;<br />
EXIT;<br />
Printout<br />
Related <strong>Command</strong>s<br />
CPAL, SPAL<br />
13
PRESCRIBE <strong>Command</strong> <strong>Reference</strong><br />
ALTB A — [ALlocate TaBle] Assign user-defined<br />
character table<br />
Format<br />
Parameter<br />
ALTB A, table-id;<br />
table-id:<br />
number identifying the character table assigned to the resident font, from 1 to 65535<br />
Function<br />
The ALTB A command assigns the user-defined character table to the current resident<br />
font.<br />
File<br />
See ALTB C on page 15.<br />
14
ALTB C<br />
ALTB C — [ALlocate TaBle] Convert character code<br />
Format<br />
Parameters<br />
ALTB C, table-id, source-character, target-character;<br />
table-id:<br />
number identifying the character table to convert the character, from 1 to 65535<br />
source-character:<br />
character code before conversion: 1-byte code = 0 to 255; 2-byte code = 0 to 65533, or<br />
in hexadecimal notation ($xxxx).<br />
target-character:<br />
character code after conversion: 1-byte code = 0 to 255; 2-byte code = 0 to 65533, or in<br />
hexadecimal notation ($xxxx).<br />
Function<br />
File<br />
The ALTB C command converts the character code given as source-character to the<br />
character code given as target-character in the user-defined character table.<br />
If the character table having the identical number already exists, the existing character<br />
table is replaced by the new character table.<br />
In the example below, the character table number 56535 is generated by ALTB G, in<br />
which the character ‘‘\ (backslash, character code 92)’’ is replaced with the Euro<br />
currency symbol ‘‘a (character code 186 for Roman-9 symbol set).’’<br />
Printout<br />
!R!<br />
SFNT "TimesNewRoman", 14;<br />
CSET 4U; CMNT Roman-9;<br />
ALTB G, 56535, 1;<br />
ALTB C, 56535, 92, 186;<br />
ALTB A, 56535;<br />
TEXT "The Euro currency is symbolized as \.";<br />
ALTB R, 56535; CMNT Release user table;<br />
PAGE; EXIT;<br />
15
PRESCRIBE <strong>Command</strong> <strong>Reference</strong><br />
ALTB D — [ALlocate TaBle] Delete user-defined<br />
character table<br />
Format<br />
Parameter<br />
ALTB D, table-id;<br />
table-id:<br />
number identifying the character table, from 1 to 65535, to be deleted<br />
Function<br />
The ALTB D command deletes the character table defined by the user.<br />
If the table to be deleted is currently allocated to the resident font (see ALTB A),<br />
terminate the allocation by using ALTB R before deleting. It is possible to delete all userdefined<br />
character tables at once by using ALTB D, 0;.<br />
File<br />
See ALTB C on page 15.<br />
Related <strong>Command</strong>s<br />
ALTB A, ALTB R<br />
16
ALTB E<br />
ALTB E — [ALlocate TaBle] End defining<br />
combination characters<br />
Format<br />
Parameter<br />
Function<br />
ALTB E;<br />
None<br />
Related <strong>Command</strong><br />
This command signals the end of defining combination characters in an already<br />
generated user-defined character table which was started by the ALTB S command.<br />
(page 20). The registered combined characters can be printed by specifying the character<br />
code which was assigned at the time of definition.<br />
ALTB S<br />
17
PRESCRIBE <strong>Command</strong> <strong>Reference</strong><br />
ALTB G — [ALlocate TaBle] Generate user-defined<br />
table<br />
Format<br />
Parameters<br />
ALTB G, table-id, table-format;<br />
table-id:<br />
table ID number: 1 to 65535<br />
table-format:<br />
1 = 1-byte, character codes 0 to 255<br />
2 = 2-byte, character codes 0 to 65533<br />
Function<br />
The ALTB G command generates a user-defined table in either 1-byte or 2-byte format.<br />
If the same table ID number already exists, the format table is replaced with the newly<br />
generated table.<br />
18
ALTB R<br />
ALTB R — [ALlocate TaBle] Release user-defined<br />
character table<br />
Format<br />
Parameter<br />
ALTB R, table-id;<br />
table-id:<br />
number identifying the character table to be released<br />
Function<br />
The ALTB R command terminates the assignment of the user-defined character table for<br />
the current resident font. It is also possible to terminate the assignment of all userdefined<br />
character tables by using ALTB R, 0;.<br />
19
PRESCRIBE <strong>Command</strong> <strong>Reference</strong><br />
ALTB S — [ALlocate TaBle] Start to define the<br />
combination character<br />
Format<br />
Parameters<br />
ALTB S, table-id, code[, width, height[[, x-coordinate, y-coordinate,<br />
[paint-mode]]];<br />
table-id:<br />
code:<br />
width:<br />
height:<br />
number identifying the character table to define the combination character, from1 to<br />
65535<br />
character code for which the combination character is defined. 1-byte code = 0 to 255;<br />
2-byte code = 0 to 65533, or in hexadecimal notation ($xxxx).<br />
overall width of the combined character, represented by number from 1 to 65535 in units<br />
where the width of the resident font character is 1000<br />
overall height of the combined character, represented by number from 1 to 65535 in units<br />
where the height of the resident font character is 1000<br />
x-coordinate:<br />
X coordinate of the reference point, integer value converted in reference to 1000 units<br />
y-coordinate:<br />
Y coordinate of the reference point, integer value converted in reference to 1000 units<br />
paint-mode:<br />
paint mode: 0 = normal (filled), non-zero = line width of outline character (stroked):<br />
1 to 100 units<br />
Function<br />
This command starts to define the combination of characters by specifying the region<br />
and coordinates. The characters to combine in this region are registered using the<br />
ALTB T command (page 21). The ALTB S sequence is terminated by the ALTB E<br />
command. If the identical table number already exists, the existing character table is<br />
replaced with the new character table.<br />
20
ALTB T<br />
ALTB T — [ALlocate TaBle] define combined<br />
character by Table<br />
Format<br />
Parameters<br />
ALTB T, character-code, width, height, x-coordinate, y-coordinate;<br />
code:<br />
width:<br />
height:<br />
character code for which the combined character is defined, or hexadecimal notation<br />
($xxxx), JIS code<br />
character width: the value from 1 to the character width specified by ALTB S<br />
(page 20)<br />
character height: the value from 1 to the character height specified by ALTB S<br />
(page 20)<br />
x-coordinate:<br />
X coordinate of the reference point, integer value calculated in 1000 unit basis<br />
y-coordinate:<br />
Y coordinate of the reference point, integer value calculated in 1000 unit basis<br />
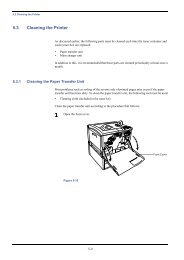
Function<br />
This command defines the region in which to store the combination of characters within<br />
coordinates (0, 0) to (1000, 1000) by specifying a rectangular area and reference point<br />
for the characters. There are no restrictions on the number of characters to be combined.<br />
Example:<br />
Y<br />
(1000, 1000)<br />
(0, 0)<br />
21
PRESCRIBE <strong>Command</strong> <strong>Reference</strong><br />
File<br />
Printout<br />
!R! res; unit c;<br />
SFNT ’TimesNewRoman’, 48;<br />
ALTB G, 1000, 1;<br />
ALTB A, 1000;<br />
ALTB S, 1000, 64, 1800, 1000;<br />
ALTB T, 77, 700, 700, 0, 700; CMNT M;<br />
ALTB T, 65, 700, 700, 630, 700; CMNT A;<br />
ALTB T, 85, 700, 700, 1050, 700; CMNT U;<br />
ALTB T, 73, 700, 700, 1570, 700; CMNT I;<br />
ALTB T, 36, 700, 700, 0, 0; CMNT $;<br />
ALTB T, 57, 700, 700, 400, 0; CMNT 9;<br />
ALTB T, 57, 700, 700, 800, 0; CMNT 9;<br />
ALTB T, 57, 700, 700, 1200, 0; CMNT 9;<br />
ALTB E;<br />
MZP 2, 4; SFNT ’TimesNewRoman’,48; TEXT "HOLIDAYS!";<br />
PAGE; EXIT;<br />
22
ALTF<br />
ALTF — change to ALTernate Font<br />
Format<br />
Parameter<br />
Function<br />
ALTF alternate-number;<br />
alternate-number: a number from 0 to 47<br />
The ALTF command changes the current font to a font designated by an alternate<br />
number. The actual font assigned to this alternate number is set by a previous SETF<br />
command.<br />
The alternate number can be a bitmap font number or a number specifically assigned to<br />
the scalable font using the SFNT command (See File on the next page).<br />
If no font has been assigned to the specified alternate number, the ALTF command has<br />
no effect: the font does not change.<br />
The ALTF command enables you to prepare a document using several fonts, without<br />
deciding in advance which specific fonts to use. For example, you could use ALTF 1 to<br />
designate plain text and ALTF 2 to designate italics, and allow the specific size and style<br />
of type to be determined by SETF commands at a later time.<br />
23
PRESCRIBE <strong>Command</strong> <strong>Reference</strong><br />
File<br />
Printout<br />
!R! RES;<br />
SFNT "Helvetica-Nr", 12, 1000;<br />
SFNT "TimesNewRoman-It", 11, 1001;<br />
SETF 1, 1000;<br />
SETF 2, 1001;<br />
MCRO BIBLIO;<br />
ALTF 1; TEXT %1, E; TEXT " ", E;<br />
ALTF 2; TEXT %2, E; TEXT " ", E;<br />
ALTF 1; TEXT %3, N;<br />
ENDM;<br />
ALTF 1; TEXT "Bibliography", N, U;<br />
TEXT, N;<br />
CALL BIBLIO,<br />
"Radin, Paul,",<br />
"Hero Cycles of the Winnebago,",<br />
"Indiana University Publications";<br />
CALL BIBLIO,<br />
"Neumann, Erich,",<br />
"Amor and Psyche,", "Bollingen Press";<br />
CALL BIBLIO,<br />
"Jung, Carl G.,", "Man and His Symbols,",<br />
"Bollingen Press";<br />
PAGE;<br />
EXIT;<br />
24
AMCR<br />
AMCR — call Automatic MaCRo<br />
Format<br />
Parameters<br />
AMCR mode, [repeat-count] macro-name, parameter, ...;<br />
mode:<br />
E = Enable automatic macro; Save and retain current printing parameters<br />
T = Enable automatic macro; Do not save current printing parameters<br />
D = Disable automatic macro<br />
repeat-count:<br />
number of times the macro is executed<br />
macro-name:<br />
name defined by the MCRO command<br />
parameter:<br />
values given to the dummy parameters in the macro definition<br />
Function<br />
The AMCR command enables the automatic macro (overlay). It automatically executes<br />
the macro defined by a MCRO command each time a page is printed. For example, it<br />
would be used to print multiple copies of the same form, filled in with different text.<br />
The AMCR command closely resembles the CALL command; therefore, the user should<br />
refer to the section on the CALL command for further information.<br />
When the automatic macro is enabled using mode E, the following printing system<br />
settings are saved and retained upon completion of the macro: font information, margins,<br />
cursor position, line spacing, character spacing, page orientation, unit of measurement,<br />
underline parameters, and fill pattern.<br />
When the automatic macro is enabled with mode T, the printing system settings are<br />
modified according to the parameter settings contained in the macro.<br />
Color specifications may be used within macros. When an auto-macro (AMCR) is<br />
executed, the active palette and color index number are saved and restored after the<br />
macro has executed.<br />
The automatic macro remains enabled until the AMCR command with the mode set to D<br />
is encountered or the printing system is switched off. Note that mode D requires no other<br />
parameters such as repeat-count.<br />
The following commands are invalid within a macro: ASTK, PSRC, CCPY, DUPX,<br />
DXPG, JOBD, JOBL, JOBO, JOBP, JOBS, JOBT, JOG, LDFC, LDFN, MID, MSTK,<br />
RDMP, SEM, SPSZ, SSTK, STAK, STAT, STPL, VMAL, VMPW<br />
25
PRESCRIBE <strong>Command</strong> <strong>Reference</strong><br />
File<br />
Printout<br />
!R! RES;<br />
MCRO CROPMARK;<br />
UNIT C;<br />
MZP 2.46, 3.96; SCP; SCP; SCP;<br />
MRP -.635, 0; DRP -1.9, 0; RPP;<br />
MRP 0, -.635; DRP 0, -1.9; RPP;<br />
MRP 14.85, 0; SCP; SCP;<br />
MRP .635, 0; DRP 1.9, 0; RPP;<br />
MRP 0, -.635; DRP 0, -1.9; RPP;<br />
MRP 0, 21; SCP; SCP;<br />
MRP .635, 0; DRP 1.9, 0; RPP;<br />
MRP 0, .635; DRP 0, 1.9; RPP;<br />
MRP -14.85, 0; SCP;<br />
MRP -.635, 0; DRP -1.9, 0; RPP;<br />
MRP 0, .635; DRP 0, 1.9;<br />
RPP;<br />
ENDM;<br />
AMCR E, CROPMARK;<br />
PAGE; UNIT C; SLM 3.6; STM 5.2; EXIT;<br />
The text starts here.<br />
Related <strong>Command</strong><br />
CCPY<br />
26
ARC<br />
ARC — draw filled-in ARC<br />
Format<br />
Parameters<br />
ARC inner-radius, outer-radius, start-angle, end-angle;<br />
inner-radius:<br />
inner radius of arc<br />
outer-radius:<br />
outer radius of arc<br />
start-angle:<br />
starting angle<br />
end-angle:<br />
ending angle<br />
Function<br />
The ARC command works in the standard graphics mode. It draws a filled-in arc-shaped<br />
area extending from the inner radius to the outer radius, and from the starting angle to the<br />
ending angle. The area is filled with the pattern designated by the previous PAT, FPAT, or<br />
GPAT command. The starting and ending angles are specified in integer degrees<br />
measured clockwise from the vertical. (Note that the PARC command measures the<br />
angles from the positive x axis.) The cursor is located at the center of curvature of the<br />
arc, and does not move.<br />
If the inner radius is zero, the area has a pie-slice shape, and can be used to fill in one<br />
sector of a pie chart.<br />
If the inner and outer radii are nearly equal and the fill pattern is the all-black pattern<br />
(PAT 1, for example), the result is a line arc. The line thickness is the difference between<br />
the two radii, rather than the value designated by the SPD (set pen diameter) command.<br />
The ARC command does not draw the boundary of the filled-in area.<br />
27
PRESCRIBE <strong>Command</strong> <strong>Reference</strong><br />
File<br />
!R! RES; UNIT C;<br />
MAP 5, 8;<br />
PAT 52;<br />
ARC 1, 2, -45, 45;<br />
MAP 5, 10;<br />
PIE 2, 0, 10, 20, 30;<br />
ARC 0, 2, 0, 60;<br />
PAT 20;<br />
ARC 0, 2, 60, 180;<br />
PAT 10;<br />
ARC 0, 2, 180, 360;<br />
PAT 1;<br />
NEWP;<br />
PMZP 4, 2;<br />
PARC 4, 3, 1, 90, 270;<br />
PARC 5, 4, 1, 180, 360;<br />
PARC 6, 3, 1, 270, 90;<br />
PARC 5, 2, 1, 0, 180;<br />
STRK;<br />
MRP 0.6, 1.1;<br />
SFNT "Univers-Md";<br />
TEXT "ARC";<br />
PAGE; EXIT;<br />
28
ARC<br />
Printout<br />
Related <strong>Command</strong><br />
PARC<br />
29
PRESCRIBE <strong>Command</strong> <strong>Reference</strong><br />
ASFN — ASsign external characters for FoNt<br />
Format<br />
Parameters<br />
ASFN mode, font-number;<br />
mode:<br />
A = assign external characters<br />
R = release external characters<br />
font-number:<br />
number identifying the external character font:1000 to 65535<br />
Function<br />
The ASFN command assigns external characters which are defined by the user to the<br />
current resident font. The external characters should be generated and downloaded in the<br />
printing system as an external font by using the LDFC or LDFN command.<br />
For the print systems supporting 2-byte font system, if the user-defined font is a 1-byte<br />
code font, it is assigned to the current resident roman (ANK) font. If it is a 2-byte code<br />
font, it is assigned to the current 2-byte font.<br />
This command has no effect if the resident font is a bitmap font and the font to be<br />
assigned is an outline font, or vice versa.<br />
mode = R is used to release the current resident font from the external characters. Note<br />
that it is necessary to release the external font assignment if you want to delete the<br />
external font.<br />
30
ASTK<br />
ASTK — Assign STacKer trays<br />
Format<br />
ASTK tray1, tray2, tray3, ...;<br />
Parameters<br />
tray1, tray2, tray3, ...:<br />
Number representing the tray in the optional sorter which becomes the last (bottom) tray<br />
in each group, as counted from the top towards the bottom tray.<br />
Function<br />
The ASTK command assigns the sorter trays in groups so that the sorter can be shared<br />
among the multiple users. Each parameter represents the last tray in each group of trays.<br />
The maximum number of parameters must be equal to the number of the trays the sorter<br />
is equipped with. By the factory default, the trays are grouped as the following table:<br />
Group<br />
Sorter model<br />
SO-6 SO-30 SO-60<br />
1 1, 2 1, 2 1, 2<br />
2 3, 4 3, 4 3, 4<br />
3 5, 6 5, 6 5<br />
4 7, 8 7, 8 —<br />
5 9 to 15 9 —<br />
Equiv. ASTK command ASTK 2, 4, 6, 8; ASTK 2, 4, 6, 8; ASTK 2, 4;<br />
The ASTK command is ignored if parameters include the value greater than the actual<br />
number of trays. If the number of parameters is less than the maximum number of sorter<br />
trays, the printing system automatically groups the remaining trays in one, making it the<br />
last group. For example, the command sequence ASTK 2, 4, 6; is equivalent to ASTK 2,<br />
4, 6, (bottom tray number);.<br />
The tray group setting made by ASTK is stored indefinitely in the printing system’s<br />
permanent memory while the power is off, or until it is changed by another ASTK<br />
command. It is ignored in the normal sorter mode (FRPO S0, 0;) but the printing system<br />
automatically sets up the previous tray group setting when the sorter is again switched to<br />
the multiple environment mode (FRPO S0, 1; or FRPO S0, 2;).<br />
31
PRESCRIBE <strong>Command</strong> <strong>Reference</strong><br />
File<br />
Related <strong>Command</strong>s<br />
The following command sequence delivers print jobs to trays 4, 5, 6, and 7 (the second<br />
group).<br />
!R! FRPO S0, 1; CMNT Enter multiple sorter mode;<br />
ASTK 3, 7, 9; CMNT Create three groups;<br />
MID 2; CMNT Send the output to 2nd grp.;<br />
SSTK; CMNT Sort;<br />
EXIT;<br />
CSTK, MID, MSTK, SSTK<br />
32
BARC<br />
BARC — draw BARCode<br />
Format<br />
Parameters<br />
BARC type, flag, ’string’[, short, tall [, bar1, bar2, bar3, bar4, space1,<br />
space2, space3, space4]];<br />
type:<br />
There are the following barcode types:<br />
0 = UPC A<br />
1 = UPC A with two-digit supplement<br />
2 = UPC A with five-digit supplement<br />
3 = UPC D-1<br />
4 = UPC D-2<br />
5 = UPC D-3<br />
6 = UPC D-4<br />
7 = UPC D-5<br />
8 = UPC E<br />
9 = UPC E with two-digit supplement<br />
10 = UPC E with five-digit supplement<br />
11 = EAN-8 (Truncated JAN)<br />
12 = EAN-13 (Truncated JAN)<br />
13 = DUN-14 (Distribution Unit Number, EAN)<br />
14 = DUN-16 (Distribution Unit Number, EAN)<br />
15 = MSI with no check digit<br />
16 = MSI with single mod-10 check digit<br />
17 = MSI mod-10 followed by mod-10 check digit<br />
18 = MSI mod-11 followed by mod-10 check digit<br />
19 = CODE 39 with no check digit<br />
20 = CODE 39 with mod-43 check digit<br />
21 = Interleaved two of five with no check digit<br />
22 =Identicon two of five with no checksum<br />
23 = Code 128 (manual mode change)<br />
24 = Code 128 (auto mode change)<br />
25 = Code 11 with only ‘c’<br />
26 = Code 11 with both ‘c’ and ‘k’ checksum<br />
27 = Code 93 with both ‘c’ and ‘k’ checksum<br />
28 = CODABAR with no check digit (narrow gap)<br />
29 = Matrix two of five with no checksum<br />
31 = Industrial two of five with no checksum<br />
32 = Ames with no checksum<br />
33 = Delta distance ‘a’ (IBM) with no checksum<br />
34 = Delta distance ‘a’ (IBM) with no checksum<br />
35 = EAN 8 with two-digit supplement<br />
36 = EAN 8 with five-digit supplement<br />
37 = EAN 13 with two-digit supplement<br />
38 = EAN 13 with five-digit supplement<br />
39 = POSTNET<br />
40 = FIM<br />
41 = Interleaved two of five with check digit<br />
42 = UPC/EAN128<br />
33
PRESCRIBE <strong>Command</strong> <strong>Reference</strong><br />
43 = CUSTOM CODE (Japan) 1<br />
44 = CODABAR with no check digit (wide gap)<br />
flag:<br />
string:<br />
short:<br />
tall:<br />
Y = Print the string under the barcode<br />
N = Do not print the string<br />
Text to be converted to a barcode. The text must be enclosed with single or double quote<br />
marks.<br />
Height of short bars in barcode types that have bars in two different heights. Height of all<br />
bars in other cases. Default value is 1.52cm (0.6 inches, 180 dots). The unit of<br />
measurement is determined by the UNIT command.<br />
Minimum value 0.254cm (0.1 inch, 30 dots)<br />
Maximum value 27.9cm (11 inches, 3300 dots)<br />
Height of tall bars in barcode types that have bars in two different heights. Default values<br />
are the same as that of the short height.<br />
bar1/2/3/4:<br />
Width of a bar.<br />
Minimum value 0.0085cm (0.0033 inches, 1 dot)<br />
Maximum value 1.6933cm (0.6667 inches, 200 dots)<br />
space1/2/3/4:<br />
The width of a space.<br />
The minimum and maximum values are the same as that of the bar width.<br />
Function<br />
The BARC command converts a string to a barcode and prints it. The specification of the<br />
type, flag and string parameters is necessary. After printing, the cursor positions at the<br />
upper left corner of the barcode.<br />
If a value not mentioned above is specified as the barcode type, 12 EAN-13 will be<br />
automatically selected.<br />
Specify the flag parameter to Y when printing the text under the printed barcode or N<br />
when not printing the text. The text will be printed in the font currently selected for the<br />
printing system. However, a font selection command can be written ahead of the BARC<br />
command to print the text in an arbitrary font.<br />
Characters that can be converted<br />
The length of the string varies depending on the type of barcode to use. Characters that<br />
can be used for the most barcode type are described in the table below.<br />
1 FS-600/FS-7000/FS-9100/FS-9500 only<br />
34
BARC<br />
Table 20 Characters that can be used<br />
Type Max Characters to be used Default<br />
0 11 0123456789 0<br />
1 13 0123456789 0<br />
2 16 0123456789 0<br />
3 13 0123456789 0<br />
4 18 0123456789 0<br />
5 22 0123456789 0<br />
6 25 0123456789 0<br />
7 29 0123456789 0<br />
8 6 0123456789 0<br />
9 8 0123456789 0<br />
10 11 0123456789 0<br />
11 7 0123456789 0<br />
12 12 0123456789 0<br />
13 13 0123456789 0<br />
14 15 0123456789 0<br />
15 1 - 14 0123456789 0<br />
16 1 - 14 0123456789 0<br />
17 1 - 14 0123456789 0<br />
18 1 - 14 0123456789 0<br />
19 1 - 40 $%+-./0123456789ABCDEFGHIJKLMNOPQRSTUVWXYZ and spaces space<br />
20 1 - 40 $%+-./0123456789ABCDEFGHIJKLMNOPQRSTUVWXYZ and spaces space<br />
21 2 - 26 0123456789 0<br />
22 1 - 25 0123456789 0<br />
23 1 - 40 All (ASCII characters 32 - 126) space<br />
24 2 - 40 All (ASCII characters 32 - 126) space<br />
25 1 - 45 -0123456789 space<br />
26 1 - 45 -0123456789 space<br />
27 1 - 50 All (ASCII characters 32 - 126) space<br />
28 3 - 32 $+-./0123456789:abcdetn* -<br />
29 1 - 25 0123456789 0<br />
30 1 - 25 0123456789 0<br />
31 1 - 25 0123456789 0<br />
32 1 - 25 -0123456789 0<br />
33 1 - 25 0123456789KLMO 0<br />
34 1 - 25 0123456789KLMO 0<br />
35 9 0123456789 0<br />
36 12 0123456789 0<br />
37 14 0123456789 0<br />
38 17 0123456789 0<br />
39 139 0123456789 -<br />
35
PRESCRIBE <strong>Command</strong> <strong>Reference</strong><br />
Type Max Characters to be used Default<br />
40 1 The following FIM pattern type<br />
A. Country Reply Mail with POSTNET<br />
B. Business Reply, Penalty and Franked Mail without POSTNET<br />
C. Business Reply, Penalty and Franked Mail with POSTNET<br />
D. OCR Readable Mail without POSTNET<br />
41 125 0123456789 0<br />
42 80 All (ASCII characters 32 - 126)<br />
43 1 - 20 0123456789ABCDEFGHIJKLMNOPQRSTUVWXYZ -<br />
44 3 - 32 $+-./0123456789:abcdetn* and spaces -<br />
Length of the bars<br />
For the UPC and EAN (JAN) barcode type, the length of the short and tall bars can be<br />
adjusted. When adjusting the length of the tall or short bars, specify that of both tall and<br />
short bars. If the length of only the tall or short bars is adjusted, the bars' length does not<br />
change. It is recommended to use the dot for the unit of measurement in order to avoid<br />
the translation error by the barcode reader. In the example below, the length of the short<br />
bar is specified as 1.5cm and the tall bar as 1.7cm.<br />
!R! UNIT D; BARC 8, Y, '123456', 180, 200; PAGE; EXIT;<br />
0<br />
Width and space of the bar<br />
It is possible to adjust the widths of the bars and space between the bars. When adjusting<br />
these widths, specify all of the eight width and space parameters. Specify the bar 1 to bar<br />
4 in the ascending order. The values can be specified between 1 and 200 dots.<br />
1dot ≤ bar1 < bar2 < bar3 < bar4 ≤ 200dots<br />
1dot ≤ space1 < space2 < space3 < space4 ≤ 200dots<br />
It is recommended to use the dot for the unit of width in order to avoid the translation<br />
error by the barcode reader. The example below specifies the width of the first bar and<br />
space as 5 dots and that of the remaining bars as 10 dots.<br />
!R! UNIT D;<br />
BARC 19, Y, '0123ABC', 60, 60, 5, 10, 10, 10, 10, 5, 10, 10;<br />
PAGE;<br />
EXIT;<br />
36
BKLT<br />
BKLT — print in BooKLeT binding<br />
Format<br />
Parameter<br />
BKLT binding;<br />
binding:<br />
number representing binding mode:<br />
0 = None<br />
1 = Left-to-right binding<br />
2 = Right-to-left binding<br />
Function<br />
The BKLT command allows printing a job as a booklet, reordering and printing the<br />
pages two-up on a sheet of paper. Booklet printing requires the hard disk to be installed<br />
in the printing system.<br />
a = First page<br />
b = Last page<br />
a<br />
b<br />
b<br />
a<br />
The job to booklet-print must be defined using the JOBS command. Used together with<br />
the FOLD command, the paper can be folded in the middle to form a booklet.<br />
Booklet printing is possible for documents of A4, A5, B5, letter, or statement size<br />
documents and are automatically printed on double size paper, namely A3, A4-R, B4,<br />
ledger, or letter-R. The original page size must be specified by the SPSZ command, for<br />
example, SPSZ 8; for A4 page size. It is also possible to reduce the original page size by<br />
commanding the second parameter for SPSZ. For example, to print two A4 pages on a<br />
A4 sheet, command SPSZ 8, 5;. For details on page size, refer to the SPSZ command<br />
page in this manual. The document must have the same page size for all pages. If the<br />
double size paper for the document is not available in the printing system, the printing<br />
system ignores the BKLT command and prints in the original paper size. Duplex printing<br />
is also possible by adding the DUPX command. To correctly arrange two neighboring<br />
pages in line, short-edge binding duplex must be used by commanding DUPX 2;.<br />
The order of print pages can be selected by binding in either of the following manners:<br />
37
PRESCRIBE <strong>Command</strong> <strong>Reference</strong><br />
binding = 1, reading<br />
pages from left to right<br />
binding = 2, reading<br />
pages from right to left<br />
This command is not supported by some photocopier models.<br />
File<br />
The following command sequence prints a copy of a 12-page A4 document in booklet<br />
mode, folding the stack in the middle. The printing system will require A4-R paper to be<br />
loaded.<br />
!R! RES; SPSZ 8, 5;<br />
UNIT C;<br />
BKLT 1;<br />
DUPX 2;<br />
FOLD;<br />
SFNT ’Helvetica-Bd’, 72;<br />
JOBS 0, 1, 0, 0;<br />
MZP 4, 5; TEXT ”Page 1”;<br />
PAGE;<br />
MZP 4, 5; TEXT ”Page 2”;<br />
PAGE;<br />
MZP 4, 5; TEXT ”Page 3”;<br />
PAGE;<br />
MZP 4, 5; TEXT ”Page 4”;<br />
PAGE;<br />
MZP 4, 5; TEXT ”Page 5”;<br />
PAGE;<br />
MZP 4, 5; TEXT ”Page 6”;<br />
PAGE;<br />
MZP 4, 5; TEXT ”Page 7”;<br />
PAGE;<br />
MZP 4, 5; TEXT ”Page 8”;<br />
PAGE;<br />
MZP 4, 5; TEXT ”Page 9”;<br />
PAGE;<br />
MZP 4, 5; TEXT ”Page 10”;<br />
PAGE;<br />
MZP 4, 5; TEXT ”Page 11”;<br />
PAGE;<br />
MZP 4, 5; TEXT ”Page 12”;<br />
PAGE;<br />
JOBT;<br />
EXIT;<br />
38
BLK<br />
BLK — draw filled-in BLocK<br />
Format<br />
Parameters<br />
BLK width, depth[, option];<br />
width:<br />
depth:<br />
option:<br />
width of the block<br />
depth of the block<br />
B = Leave the cursor unmoved (Default)<br />
H = Move the cursor to the horizontally adjacent corner<br />
V = Move the cursor to the vertically adjacent corner<br />
E = Move the cursor to the diagonally opposite corner<br />
L = Move the cursor one line down<br />
N = Move the cursor to the beginning of the next line<br />
B-option (No motion)<br />
H-option<br />
N-option<br />
L-option<br />
Left margin<br />
V-option<br />
E-option<br />
Function<br />
The BLK command draws a block of a specified size with one corner at the current<br />
cursor position. The block is filled in with the pattern designated by the previous PAT,<br />
FPAT, or GPAT command. The cursor is moved as specified by the option. If the option<br />
is omitted, the cursor is not moved (same as option B).<br />
39
PRESCRIBE <strong>Command</strong> <strong>Reference</strong><br />
File<br />
Printout<br />
!R! RES; UNIT C;<br />
MAP 5, 5;<br />
PAT 20;<br />
BOX 4, 1; BLK 4, 1;<br />
MRP 0, 1.5;<br />
BOX 4, 1; BLK 4, 1;<br />
MRP .9, .6;<br />
SFNT "Helvetica-Nr";<br />
TEXT ’OVERPRINTING’;<br />
MRP 0, 5;<br />
PAT 29; BOX 1, -4; BLK 1, -4, H;<br />
PAT 39; BOX 1, -3; BLK 1, -3, H;<br />
PAT 49; BOX 1, -2; BLK 1, -2, H;<br />
PAT 59; BOX 1, -1; BLK 1, -1, H;<br />
PAGE;<br />
EXIT;<br />
40
BOX<br />
BOX — draw BOX<br />
Format<br />
Parameters<br />
BOX width, depth[, option];<br />
width:<br />
depth:<br />
option:<br />
width of the box<br />
depth of the box<br />
B = Leave the cursor unmoved (Default)<br />
H = Move the cursor to the horizontally adjacent corner<br />
V = Move the cursor to the vertically adjacent corner<br />
E = Move the cursor to the diagonally opposite corner<br />
L = Move the cursor one line down<br />
N = Move the cursor to the beginning of the next line<br />
B-option (No motion)<br />
H-option<br />
N-option<br />
L-option<br />
Left margin<br />
V-option<br />
E-option<br />
Function<br />
The BOX command draws a box of a specified size with one corner at the current cursor<br />
position. The line thickness is designated by the SPD (set pen diameter) command. The<br />
size and thickness is measured on the basis of value established in the UNIT command.<br />
The cursor is moved as specified by the option. If the option is omitted, the cursor is not<br />
moved (same as option B).<br />
The BOX command draws only the outline of the box. To fill in the box, use the BLK<br />
command.<br />
The width and depth may use either a positive or negative value.<br />
File<br />
!R! RES; UNIT C; SPD .1;<br />
SLM 2;<br />
41
PRESCRIBE <strong>Command</strong> <strong>Reference</strong><br />
Printout<br />
MAP 4, 0;<br />
SCP;<br />
SFNT "Helvetica-Nr", 10;<br />
BOX 4, 2, L; TEXT ’Text printed with option L’;<br />
RPP;<br />
BOX 4, 2, N; TEXT ’Text printed with option N’;<br />
PAGE;<br />
EXIT;<br />
42
CALL<br />
CALL — CALL macro<br />
Format<br />
Parameters<br />
CALL[ repeat-count] macro-name, parameter-value, ...;<br />
repeat-count:<br />
number of times the macro is to be executed<br />
macro-name:<br />
name defined by a MCRO command<br />
parameter-values:<br />
values given to the dummy parameters in the macro definition<br />
Function<br />
The CALL command executes a macro previously defined by a MCRO command. The<br />
macro may be executed any desired number of times by specifying a repeat count. Note<br />
that the repeat count is not followed by a comma. If the repeat count is omitted, the<br />
macro is executed once.<br />
Only the first four characters of the macro name are significant. They must match the<br />
first four characters of a macro name defined by a previous MCRO command.<br />
A parameter value consists of the characters that occur between the delimiting commas,<br />
excluding the commas. These parameters are substituted without change for the<br />
corresponding dummy parameter in the macro definition, except that consecutive spaces<br />
are compressed to a single space.<br />
When a character-string parameter is enclosed in apostrophes or quotation marks, the<br />
enclosed string together with the enclosing apostrophes or quotation marks is substituted<br />
for the dummy parameter. In this case, consecutive spaces are not compressed.<br />
If a CALL command has too few parameters, it is still valid. The macro is partially<br />
executed; any commands in the macro body without appropriate parameters will be<br />
ignored.<br />
The CALL command, like other commands, is limited to 255 characters in length.<br />
43
PRESCRIBE <strong>Command</strong> <strong>Reference</strong><br />
File<br />
Printout<br />
!R! RES; UNIT C; SLS .5;<br />
CMNT Requires BX and SCREEN macros;<br />
CMNT See ENDM command page;<br />
MAP 9, 3; CALL BX;<br />
MAP 7, 4; CALL 5 BX;<br />
MAP 5, 5; CALL 9 BX;<br />
MAP 8, 6; CALL SCREEN, 2.2, 1.7;<br />
MAP 8.6, 7;<br />
TEXT ’Narrow’, L;<br />
TEXT ’screen’;<br />
MAP 5,9; CALL SCREEN, 8.2,1.2;<br />
MAP 8,10;<br />
TEXT ’Wide screen’;<br />
PAGE;<br />
EXIT;<br />
44
CCPY<br />
CCPY — Carbon CoPY<br />
Format<br />
Parameter<br />
CCPY mode;<br />
mode:<br />
E = enable carbon copy<br />
D = disable carbon copy<br />
Function<br />
The CCPY command continuously executes different automacros using different paper<br />
sources, enabling to apply the different form overlay using the different paper type to a<br />
document to be carbon-copied, similarly to hand-writing carbon copy forms. The CCPY<br />
statement should be terminated with the ENDC command.<br />
The macro and paper source for each form should be described following the CCPY<br />
command in a separate line using the PSRC and AMCR command, and terminated by<br />
the TERM command. For example, the second line in the following example is applied<br />
to the first page of the document and executes the CROPMARK macro printing the page<br />
on the paper fed from cassette #2. The third line applies to the second page of the<br />
document, and so on. It is possible to add as many lines as required to match the number<br />
of pages of the document to print.<br />
CCPY E;<br />
PSRC 2; AMCR E, CROPMARK; TERM;<br />
PSRC 3; AMCR E, SIGNATURE; TERM;<br />
PSRC 4; AMCR E, COLOPHON; TERM;<br />
ENDC;<br />
During the carbon copy is executed, the copy count (COPY command) is forced to be 1.<br />
To apply no overlay to a specific page, describe only the TERM command in the line<br />
corresponding to the page. Note that the same paper source as the previous line is applied<br />
to that line. For example:<br />
CCPY E;<br />
PSRC 2; AMCR E, CROPMARK; TERM;<br />
TERM;<br />
PSRC 4; AMCR E, COLOPHON; TERM;<br />
ENDC;<br />
In the example above, the second page is printed using cassette #2 with no form overlay.<br />
In carbon copy, duplex printing is not possible. The paper size and the page orientation<br />
should be consistent for all pages in the document to be carbon copied. Otherwise, the<br />
carbon copy is cancelled.<br />
To terminate carbon copy, send CCPY D to the printing system.<br />
45
PRESCRIBE <strong>Command</strong> <strong>Reference</strong><br />
File<br />
!R!<br />
RES; DAM; CCPY D; UNIT C;<br />
MCRO COVER;<br />
UNIT C;<br />
SFNT 'Helvetica-Bd',14;<br />
TEXT 'Registration Form', L;<br />
SFNT 'Helvetica', 9;<br />
TEXT 'Please provide your personal details:';<br />
MRP 0, .2;<br />
BOX 6, 1;<br />
MRP 0, .35;<br />
TEXT ' Your Name';<br />
ENDM;<br />
MCRO MAIL;<br />
UNIT C;<br />
SFNT 'Helvetica-Bd',14;<br />
TEXT 'Mailing Information', L;<br />
SFNT 'Helvetica', 9;<br />
TEXT 'Shipping Department Use Only';<br />
MRP 0, .2;<br />
BOX 6, 1;<br />
MRP 0, .35;<br />
TEXT " Client's Name";<br />
ENDM;<br />
MCRO COPY;<br />
UNIT C;<br />
SFNT 'Helvetica-Bd',14;<br />
TEXT "Client's Copy", L;<br />
SFNT 'Helvetica', 9;<br />
TEXT 'Please retain this copy for future reference.';<br />
MRP 0, .2;<br />
BOX 6, 1;<br />
MRP 0, .35;<br />
TEXT ' Registered Client';<br />
ENDM;<br />
CCPY E;<br />
PSRC 1; AMCR E,COVER; TERM;<br />
PSRC 0; AMCR E,MAIL; TERM;<br />
PSRC 1; AMCR E,COPY; TERM;<br />
ENDC;<br />
EXIT;<br />
!R! CMNT <strong>Document</strong> to be carbon-copied;<br />
SFNT 'Helvetica', 12;<br />
MZP 0, 1.9;<br />
TEXT ' David Sumimoto';<br />
PAGE;<br />
EXIT;<br />
46
CCPY<br />
Printout<br />
47
PRESCRIBE <strong>Command</strong> <strong>Reference</strong><br />
CDSK — Check hard DiSK<br />
Format<br />
Parameter<br />
Function<br />
File<br />
CDSK;<br />
None<br />
The CDSK command verifies data in the hard disk (garbage collection). It deletes<br />
garbage jobs such as page image data that were accidentally generated in the hard disk<br />
and normally inaccessible for deletion.<br />
!R! CDSK; EXIT;<br />
48
CID<br />
CID — Configure color-Image Data<br />
COLOR<br />
Format<br />
Parameters<br />
CID color-space, encoding;<br />
color-space:<br />
0 = Device-dependent RGB (Default)<br />
1 = Device-dependent CMY<br />
2 = Void<br />
3 = CIE L*a*b<br />
encoding:<br />
Pixel encoding<br />
1 = Indexed by Pixel (Default)<br />
3 = Direct by Pixel<br />
Function<br />
The CID command creates a new color palette using the ID which is assigned to the<br />
currently active palette. Note that the currently active palette is deleted by this command.<br />
It is possible to add and change colors on this palette. However, the currently active<br />
colors do not change even though a new palette is created with this command.<br />
The same colors as simple colors are defined for index numbers 0 through 7 when the<br />
RGB color space is specified. The color assignments for these indices can be changed<br />
using the ACLI command.<br />
Indexed by Pixel encoding assigns colors onto the palette. This is used for rendering text<br />
and vector objects. Direct by Pixel encoding assigns colors directly to pixels. This is<br />
used for bitmap images.<br />
Changing a color palette does not affect color print quality on output pages.<br />
49
PRESCRIBE <strong>Command</strong> <strong>Reference</strong><br />
File<br />
Printout<br />
!R! RES;<br />
DAM;<br />
UNIT C;<br />
SFNT ’Helvetica-Bd’, 20;<br />
CPAL C, 1; SPAL 1;<br />
CID 0, 1; CMNT RGB Color Space used;<br />
ACLI 1, 0, 0, 255;<br />
MZP 1, 1; SCOL 1;<br />
TEXT ’An RGB color palette is used.’<br />
CID 3, 1; CMNT L*a*b Color Space used;<br />
ACLI 2, 100, 75, 0;<br />
MZP 1, 2; SCOL 2;<br />
TEXT ’An L*a*b color palette is used.’;<br />
PAGE;<br />
EXIT;<br />
50
CIR<br />
CIR — draw CIRcle<br />
Format<br />
Parameter<br />
CIR radius;<br />
radius:<br />
radius of the circle<br />
Function<br />
In standard graphics mode, the CIR command draws a circle centered at the current<br />
cursor position. The line thickness used is designated by the SPD command.<br />
A circle can also be drawn by using the path mode graphics. Refer to the PARC<br />
command.<br />
File<br />
!R! RES; UNIT C; SLS .5;<br />
SPD .01; MAP 10, 1;<br />
CIR .1; MRP 0, .1;<br />
CIR .2; MRP 0, .2;<br />
CIR .4; MRP 0, .4;<br />
CIR .8; MRP 0, .8;<br />
SPD .02;<br />
CIR 1.6; MRP 0, 1.6;<br />
CIR 3.2; MRP 0, 3.2;<br />
SPD .2;<br />
CIR .1; MRP .2, .4;<br />
SFNT "Helvetica-Nr"; TEXT ’Cursor now here’;<br />
PAGE;<br />
EXIT;<br />
51
PRESCRIBE <strong>Command</strong> <strong>Reference</strong><br />
Printout<br />
52
CLIP<br />
CLIP — CLIP current path<br />
Format<br />
Parameter<br />
CLIP [clip-mode];<br />
clip-mode:<br />
1: EO clip<br />
2: Non-zero winding clip<br />
Function<br />
The CLIP command sets the current path as the clipped path. After this command is<br />
issued, no painting is done outside the area of the path. Executing this command does not<br />
delete the current path.<br />
The RES command initializes paths to a state with no clip area.<br />
53
PRESCRIBE <strong>Command</strong> <strong>Reference</strong><br />
CLPR — CLiP Rectangular area<br />
Format<br />
Parameters<br />
CLPR [x1, y1, x2, y2];<br />
x1:<br />
y1:<br />
x2:<br />
y2:<br />
x coordinate of the top-left corner of the rectangle<br />
y coordinate of the top-left corner of the rectangle<br />
x coordinate of the bottom-right corner of the rectangle<br />
y coordinate of the bottom-right corner of the rectangle<br />
Function<br />
The CLPR command describes a rectangular path which intersects the inside of the texts,<br />
current path, or raster graphics objects. The clipping rectangle does not clip those<br />
graphics segments drawn in the standard mode graphics. Any painting operations outside<br />
the specified rectangle is erased and those segments within it are painted on the page.<br />
The coordinates are measured from the top and left edge limits in the units designated by<br />
the UNIT command. If the parameters are omitted, the rectangle is equal to the size of<br />
the current page size. If an attempt is made to position the top-left corner to the right of<br />
the bottom-left corner [greater values for (x1, y1) than for (x2, y2)], the printing system<br />
exchanges the coordinate values with each other.<br />
The printing system resets the size of the rectangular clipping path to be equal to the<br />
maximum printable area of the current page size when a PSRC, RES, SPO, or SPSZ (Set<br />
Page SiZe) command is encountered.<br />
54
CLPR<br />
File<br />
!R! RES; UNIT C;<br />
NEWP;<br />
SPD 1;<br />
PMRA 6, 9, 3, 0;<br />
PAT 1;<br />
PARC 6, 9, 3, 0, 360;<br />
CLPR 3, 6, 9, 12;<br />
STRK;<br />
PAGE;<br />
EXIT;<br />
Printout<br />
55
PRESCRIBE <strong>Command</strong> <strong>Reference</strong><br />
CLSP — CLoSe Path<br />
Format<br />
Parameter<br />
Function<br />
File<br />
CLSP;<br />
None<br />
The CLSP command closes an open path by adding a line segment extending from the<br />
end of the path to the beginning of the path.<br />
Simply ending a path at the path’s starting point does not make it a closed path; such a<br />
path remains open until it is closed. Closure can be made either explicitly, by means of<br />
the CLSP command, or implicitly by means of the FILL (FILL current path) command.<br />
!R! RES; UNIT C;<br />
NEWP;<br />
CMNT The 1 st path below is stroked without closing;<br />
SPD .25;<br />
PMZP 5, 10;<br />
PMRA 5, 10, 1, 90;<br />
PARC 5, 10, 1, 90, 270;<br />
PARC 7, 10, 1, 270, 90;<br />
STRK;<br />
NEWP;<br />
CMNT Next path is closed by CLSP before stroked;<br />
PMZP 5, 14;<br />
PMRA 5, 14, 1, 90;<br />
PARC 5, 14, 1, 90, 270;<br />
PARC 7, 14, 1, 270, 90;<br />
CLSP;<br />
STRK;<br />
PAGE; EXIT;<br />
56
CLSP<br />
Printout<br />
Related <strong>Command</strong><br />
NEWP<br />
57
PRESCRIBE <strong>Command</strong> <strong>Reference</strong><br />
CMNT — CoMmeNT<br />
Format<br />
Parameter<br />
CMNT string;<br />
string:<br />
any character string<br />
Function<br />
The CMNT command adds a character string, typically a comment explaining the<br />
purpose of the following PRESCRIBE commands. The CMNT command statement will<br />
be ignored by the printing system.<br />
Although character strings are normally enclosed in apostrophes or quotation marks, this<br />
is unnecessary for comment strings as long as the string does not itself contain an<br />
apostrophe, quotation mark, or semicolon.<br />
File<br />
!R! RES;<br />
SLM 2; STM 2;<br />
SFNT ’TimesNewRoman’; CMNT TimesNewRoman;<br />
EXIT;<br />
The CMNT command in the above program reminds<br />
you that SFNT represents the TimesNewRoman font.<br />
Printout<br />
58
CMOD<br />
CMOD — Color MODe<br />
COLOR<br />
Format<br />
Parameter<br />
CMOD mode;<br />
mode:<br />
color mode:<br />
0 = Monochrome<br />
1 = Color (Default)<br />
Function<br />
The CMOD command switches between monochrome and color modes.<br />
In monochrome mode, other color commands are still enabled, but printing is converted<br />
to monochrome or grayscale.<br />
This command causes a page break.<br />
59
PRESCRIBE <strong>Command</strong> <strong>Reference</strong><br />
COPY — set number of COPIES<br />
Format<br />
Parameter<br />
COPY number;<br />
number:<br />
number of copies<br />
Function<br />
The COPY command designates the number of copies for each page in a print job. This<br />
copy count value can be changed by sending the printing system another COPY<br />
command or by issuing a reset command. For best results, place the copy command near<br />
the start of a job or at the top of a page. If two or more copy commands are placed on the<br />
same page, the last one will be recognized.<br />
File<br />
!R! RES;<br />
SLM 0.5;<br />
UNIT P;<br />
SFNT ’Helvetica-Bd’, 14.4;<br />
SLS 17;<br />
COPY 3;<br />
EXIT;<br />
Announcement<br />
Party Tonight at 6:00<br />
!R! PAGE; EXIT;<br />
60
COPY<br />
Printout<br />
61
PRESCRIBE <strong>Command</strong> <strong>Reference</strong><br />
CPAL — Control PALette<br />
COLOR<br />
Format<br />
Parameters<br />
CPAL mode[, palette-id];<br />
mode:<br />
palette control mode:<br />
A = Delete all palettes<br />
S = Delete all stacked palettes<br />
D = Delete the palette having the specified ID<br />
C = Copy the active palette to the specified ID<br />
palette-id:<br />
number from 0 to 32767 (Default is 0)<br />
Function<br />
The CPAL command controls the palette identified by palette-id in the way described by<br />
the control mode. If palette-id is not specified, the command is applied to palette of ID 0.<br />
No check is made whether the palette ID number given already exists for another palette.<br />
The palette ID number is reset to 0 by RES command.<br />
Mode A deletes all existing palettes and brings the default palette back to the default state<br />
(ID 0). Note that non-active palettes are not deleted. Also, palette-id is not used when<br />
mode is A.<br />
Mode S deletes all palettes that are not active. The active palette is not affected. Also,<br />
any ID specified by palette-id is not used.<br />
Mode D deletes the palette having the ID specified by palette-id regardless of being<br />
active or inactive. If the palette deleted was active, then the current palette will be a<br />
monochrome palette having the same ID as that of the deleted palette.<br />
Mode C copies the currently active palette to a new palette with the new ID specified by<br />
palette-id. If the palette having the same ID already exists, that palette is overwritten.<br />
Deleting or copying a color palette does not affect color print quality on output pages.<br />
62
CPTH<br />
CPTH — Character PaTH<br />
Format<br />
Parameter<br />
CPTH ’string’;<br />
string:<br />
any character string except from ASCII code 31 (hex 1F) and lower<br />
Function<br />
The CPTH command constructs a path which adds the outlines of characters to the<br />
current path. When stroked or filled, it prints the given string at the current cursor<br />
position and moves the cursor to the end of the string. The current font preceding this<br />
command must be a resident or a soft scalable font.<br />
The character path can be filled in with the pattern or shade of gray designated by the<br />
previous PAT, FPAT, or GPAT command.<br />
File<br />
!R! FSET 1p72v1s0b4148T; CMNT Univers-MdIt;<br />
NEWP;<br />
PMZP 2, 2;<br />
CPTH ’Enjoy’;<br />
STRK;<br />
PAGE;<br />
EXIT;<br />
Printout<br />
63
PRESCRIBE <strong>Command</strong> <strong>Reference</strong><br />
CSET — Change symbol SET by symbol-set ID<br />
Format<br />
Parameter<br />
CSET symbol-set-id;<br />
symbol-set-id:<br />
symbol set ID:<br />
0D = ISO 60 Norway<br />
0E = Roman Extension<br />
0F = ISO 25 French<br />
0G = HP German<br />
0I = ISO 15 Italian<br />
0K = ISO 14 JIS ASCII<br />
0N = ECMA-94 Latin 1<br />
0S = ISO 11 Swedish<br />
0U = ISO 6 ASCII<br />
1D = ISO 61 Norwegian<br />
1E = ISO 4 U.K.<br />
1F = ISO 69 France<br />
1G = ISO 21 Germany<br />
1S = ISO 15 Spanish<br />
1U = US Legal<br />
2K = ISO 57 Chinese<br />
2N = ISO Latin 2<br />
2S = ISO 17 Spain<br />
2U = ISO 2 IRV<br />
3R = PC Cyrillic*<br />
3S = ISO 10 Swedish<br />
4S = ISO 16 Portuguese<br />
4U = Roman-9<br />
5M = PS Math<br />
5N = ISO Latin 5<br />
5S = ISO 84 Portuguese<br />
5T = ISO Windows Latin 5<br />
6J = MS Publishing<br />
6M = Ventura Math<br />
6N = ISO8859/10 Latin 6<br />
6S = ISO 85 Spanish<br />
7J = Desktop<br />
8G = Greek-8<br />
8M = Math 8<br />
8Q = PC Set 1 IBM<br />
8T = Turkish-8<br />
8U = Roman-8<br />
9E = Windows Latin 2<br />
9G = Windows 3.1 Latin/Greek<br />
9J = PC-1004<br />
9L = Ventura ITC Zapf Dingbats<br />
9N = ISO Latin 9<br />
9Q = PC Extension<br />
64
CSET<br />
9R = Windows 3.1 Latin/Cyrillic<br />
9T = PC-Turkish<br />
9U = Windows 3.0<br />
10G = PC-851 Latin/Greek<br />
10J = PS Text<br />
10N = ISO8859/5 Latin/Cyrillic<br />
10R = PC-855 Cyrillic/Serbia<br />
10U = IBM PC-8<br />
11G = PC-869 Latin/Greek<br />
11U = IBM PC-8 Danish/Norwegian<br />
12G = PC-8 Latin/Greek<br />
12J = Macintosh<br />
12N = ISO8859/7 Latin/Greek<br />
12R = USSR-GOST<br />
12U = IBM PC-850<br />
13P = ABICOMP Brazil/Portugal<br />
13R = PC-8 Bulgarian<br />
13U = PC-858<br />
14G = Greek Alternate 437G<br />
14L = PS ITC Zapf Dingbats 1<br />
14P = ABICOMP International<br />
14R = PC Ukrainian<br />
15U = Pi Font<br />
16U = PC-857<br />
17U = PC 852<br />
18N = ISO-10646<br />
18U = PC-853 Turkish/Latin 3<br />
19L = Windows 3.1 Baltic †<br />
19M = Symbol (Symbol-Set-SWM font only)<br />
19U = Windows Latin 1<br />
20U = PC-860 Portugal †<br />
21U = PC-861 Iceland †<br />
23U = PC-863 Canada-French †<br />
24Q = PC-8 Polish Mazovia †<br />
25U = PC-865 Norway †<br />
26U = PC-775 Baltic †<br />
27Q = PC-8 PC Nova †<br />
579L = Windings (More Wingbats-RegularSWM font only)<br />
1 Available only with models having Agfa fonts<br />
65
PRESCRIBE <strong>Command</strong> <strong>Reference</strong><br />
Function<br />
Files<br />
Printout<br />
‘Symbol set’ refers to a specific group of alphabetic, numeric, and symbolic characters.<br />
The CSET command summons the symbol set to suit the various languages with the<br />
current font. The factory default symbol set is 0U (US ASCII).<br />
When the FSET command is used to select a font, the printing system selects a font<br />
based on a prioritization of the font characteristics. Among the given characteristics, the<br />
symbol set has the highest priority in the font selection process. Refer to the FSET<br />
command page.<br />
The available symbol sets depend on the printing system model and the fonts. If the<br />
specified symbol set does not exist, the symbol set remains unchanged.<br />
!R! RES;<br />
SFNT ’Helvetica’, 24;<br />
SLPI 3;<br />
CMNT Current symbol set is ISO 6: ASCII;<br />
TEXT ’@ABCDEFG’, N;<br />
CSET 5M; CMNT Changed to PS math;<br />
TEXT ’@ABCDEFG’;<br />
PAGE;<br />
EXIT;<br />
66
CSTK<br />
CSTK — select Collator STacKer<br />
Format<br />
Parameter<br />
CSTK [tray, tray, ...]; or CSTK 0;<br />
tray:<br />
number from 1 to the maximum (bottom)<br />
Function<br />
The CSTK command is effective only when the optional sorter is installed to the printing<br />
system. It instructs the printing system to deliver printed pages to the sorter in the<br />
collator mode. Each tray specified receives all copies of one page. The copies of the first<br />
page go to the first tray, the copies of the second page to the second tray, and so on. If the<br />
tray parameter is omitted, the trays are used in order from top to bottom.<br />
The copy count must be selected with the COPY command. The maximum copy count is<br />
the maximum capacity of the sorter trays (which varies from sorter model to model).<br />
Upon receiving the CSTK command, the printing system automatically performs a form<br />
feed.<br />
The tray parameter of 0 (CSTK 0;) should be used only to deselect the collator mode and<br />
to receive the pages in the sorter’s bulk tray (if available).<br />
Note<br />
This command is irrelevant to certain combination of photocopier models and option finisher<br />
models.<br />
File<br />
!R! RES; CSTK 1, 2; COPY 2;<br />
EXIT;<br />
Page 1 (2 copies, tray 1) !R! PAGE; EXIT;<br />
Page 2 (2 copies, tray 2) !R! PAGE; EXIT;<br />
Page 3 (2 copies, tray 1) !R! PAGE; EXIT;<br />
Page 4 (2 copies, tray 2) !R! PAGE; EXIT;<br />
67
PRESCRIBE <strong>Command</strong> <strong>Reference</strong><br />
CTXT — print Centered TeXT<br />
Format<br />
Parameters<br />
CTXT [,string][,option][,U-option];<br />
string:<br />
option:<br />
any character string<br />
B = Leave cursor at center of string<br />
E = Move cursor at end of string<br />
L = Move cursor down one line<br />
N = Move cursor to beginning of next line<br />
U-option:<br />
Underline text<br />
Function<br />
File<br />
The CTXT command prints the given string centered at the cursor location, then moves<br />
the cursor as designated by the option. The string must be enclosed in either single or<br />
double quotation marks. (If the string includes one kind of quotation marks, use the other<br />
kind to enclose it.) If the string is omitted, nothing is printed. If the option is omitted, the<br />
cursor is not moved. If the U-option is specified, the text is underlined. The underline<br />
thickness and location can be set by the SULP command.<br />
The string is not centered between the right and left margins unless the cursor is located<br />
halfway between the margins. Before the CTXT command, the cursor should be moved<br />
to the desired center position by a command such as MAP, MRP, or PMRP.<br />
The length of the string is unlimited, except that the command as a whole may not be<br />
longer than 255 characters. Carriage-return and linefeed codes in the string are ignored.<br />
!R! RES; SLPI 3; SFNT "Helvetica-Bd", 16;<br />
MAP 4, 1;<br />
CTXT ’NEWS!’, L, U;<br />
SFNT "TimesNewRoman-It", 16;<br />
CTXT ’Unforgettable Holidays in Sydney’, L;<br />
CTXT ’For 6 Days Only at $1000!’;<br />
PAGE;<br />
EXIT;<br />
68
CTXT<br />
Printout<br />
69
PRESCRIBE <strong>Command</strong> <strong>Reference</strong><br />
DAF — Delete All Fonts<br />
Format<br />
Parameter<br />
Function<br />
File<br />
Printout<br />
DAF;<br />
None<br />
The DAF command deletes all nonresident fonts and the font numbers assigned to<br />
scalable fonts by the SFNT command from the printing system’s memory. This enables<br />
the user to make room for new fonts, macros, and graphics.<br />
!R! UNIT P; SLS 16;<br />
SFNT ’Helvetica-Bd’, 15, 2000, 277, 2, 0;<br />
SFNT ’Helvetica’, 15, 2001, 277, 1, .5;<br />
FONT 10; TEXT ’1. FAREWELL TO ’, E;<br />
FONT 2000; TEXT ’FONT 2000’, N;<br />
FONT 2001; TEXT ’AND FONT 2001’, N;<br />
TEXT, N;<br />
DAF;<br />
FONT 10; TEXT ’2. FAREWELL TO ’, E;<br />
FONT 2000; TEXT ’FONT 2000’, N;<br />
FONT 2001; TEXT ’AND FONT 2001’;<br />
PAGE;<br />
EXIT;<br />
70
DAM<br />
DAM — Delete All Macros<br />
Format<br />
Parameter<br />
Function<br />
File<br />
Printout<br />
DAM;<br />
None<br />
The DAM command deletes all macro definitions made by using the PRESCRIBE<br />
MCRO command from the printing system’s memory. This enables the user to make<br />
room for new macros, fonts, or graphics.<br />
!R! RES; UNIT C;<br />
CMNT Print ENDM file first.;<br />
SFNT "Helvetica-Bd";<br />
MAP 5, 4; CALL SCREEN, 9.2, 1.7;<br />
MAP 7, 5; TEXT ’This text is enclosed by’, L;<br />
TEXT ’SCREEN macro.’;<br />
DAM;<br />
MAP 5, 6; CALL 10 BX;<br />
MAP 5, 7; CALL SCREEN, 9.2, 1.7;<br />
MAP 6, 8; TEXT ’SCREEN macro was deleted by DAM.’;<br />
PAGE;<br />
EXIT;<br />
71
PRESCRIBE <strong>Command</strong> <strong>Reference</strong><br />
DAP — Draw to Absolute Position<br />
Format<br />
Parameters<br />
DAP x-coordinate, y-coordinate;<br />
x-coordinate:<br />
distance from the left margin<br />
y-coordinate:<br />
distance from the top margin<br />
Function<br />
File<br />
The DAP command draws a line from the current cursor position to a position specified<br />
relative to the top and left margins. The thickness of the line is designated by the SPD<br />
(set pen diameter) command. The coordinates and line thickness are measured in the<br />
units designated by the UNIT command.<br />
The coordinates may be positive or negative. Negative coordinates cause the line to<br />
extend outside the margin.<br />
The DAP command is ignored in the path mode graphics.<br />
!R! RES;<br />
UNIT C;<br />
CMNT Tree Diagram;<br />
STM 8; SLM 8;<br />
MAP 0, 0; DAP 2, 0.5;<br />
MAP 0, 1; DAP 2, 0.5;<br />
MAP 0, 1; DAP 2, 1.5;<br />
MAP 0, 2; DAP 2, 1.5;<br />
MAP 0, 2; DAP 2, 2.5;<br />
MAP 0, 3; DAP 2, 2.5;<br />
MAP 2, 0.5; DAP 4, 1;<br />
MAP 2, 1.5; DAP 4, 1;<br />
MAP 2, 1.5; DAP 4, 2;<br />
MAP 2, 2.5; DAP 4, 2;<br />
MAP 4, 1; DAP 6, 1.5;<br />
MAP 4, 2; DAP 6, 1.5;<br />
PAGE; EXIT;<br />
72
DAP<br />
Printout<br />
73
PRESCRIBE <strong>Command</strong> <strong>Reference</strong><br />
DELF — DELete Font<br />
Format<br />
Parameter<br />
DELF font-number;<br />
font-number:<br />
number identifying the font to be deleted<br />
Function<br />
File<br />
Printout<br />
The DELF command deletes any designated non-resident font from the printing system’s<br />
memory. This enables the user to make room for new fonts, macros, and graphics.<br />
The printing system’s memory is large but not unlimited, and judicious use of the DELF<br />
command may prevent memory overflow. (If a memory overflow occurs, the printing<br />
system gives an overflow warning message.) The amount of memory still available can<br />
be viewed on a status page, available by executing the STAT command.<br />
!R! UNIT P; SLS 16;<br />
SFNT ’Helvetica-Bd’, 15, 2000, 277, 1.5, 0;<br />
SFNT ’Helvetica’, 15, 2001, 277, 1, .5;<br />
FONT 2000; TEXT ’1. FAREWELL TO ’, E;<br />
FONT 2001; TEXT ’ITALICS’, N;<br />
TEXT, N;<br />
DELF 2001;<br />
FONT 2000; TEXT ’2. FAREWELL TO ’, E;<br />
FONT 2001; TEXT ’ITALICS’;<br />
PAGE;<br />
EXIT;<br />
74
DELM<br />
DELM — DELete Macro<br />
Format<br />
Parameter<br />
DELM macro-name;<br />
macro-name:<br />
name defined by a previous MCRO command<br />
Function<br />
The DELM command deletes a specified macro definition from the printing system’s<br />
memory to make room for new macros, fonts, or graphics, or so that the same name can<br />
be used for another macro.<br />
75
PRESCRIBE <strong>Command</strong> <strong>Reference</strong><br />
File<br />
Printout<br />
!R! UNIT C;<br />
MCRO BX;<br />
SPD .05; BOX .8, -.8; MRP 1, 0;<br />
ENDM;<br />
MCRO SCREEN %, width, depth;<br />
CMNT Draws box with rounded corners;<br />
CMNT Leaves cursor at previous position;<br />
SPD .08;<br />
SCP;<br />
MRP .25, .25; ARC .23, .30, 270, 0;<br />
MRP 0, -.25; DRP %1, 0;<br />
MRP 0, .25; ARC .23, .30, 0, 90;<br />
MRP .27, 0; DRP 0, %2;<br />
MRP -.27, 0; ARC .23, .30, 90, 180;<br />
RPP;<br />
MRP 0, .25; DRP 0, %2;<br />
MRP .25, 0; ARC .23, .30, 180, 270;<br />
MRP 0, .27; DRP %1, 0;<br />
RPP;<br />
ENDM;<br />
SFNT "Helvetica-Bd";<br />
MAP 5, 4;<br />
CALL SCREEN, 9.2, 1.7;<br />
MAP 7, 5;<br />
TEXT ’This text is enclosed by’, L;<br />
Text ’SCREEN macro.’;<br />
DELM SCREEN;<br />
MAP 5,8;<br />
CALL SCREEN, 9.2, 1.7;<br />
MAP 6, 10;<br />
TEXT ’SCREEN macro was deleted by DELM.’;<br />
PAGE;<br />
EXIT;<br />
76
DPAT<br />
DPAT — select Dashed PATtern<br />
Format<br />
Parameter<br />
DPAT number;<br />
number:<br />
number from 1 to 20 (11 to 20 are for user-defined patterns.)<br />
Function<br />
The DPAT command specifies the pattern of alternating black and white dashes to stroke<br />
the current path.<br />
The resident patterns range in value between 1 and 10. Refer to resident patterns list on<br />
page 78. Numbers 11 to 20 are reserved for use with defining particular patterns using<br />
the SDP (Store Dash Pattern) command. If you specify a value between 11 to 20 when no<br />
user pattern has been defined, the path will be stroked in solid black.<br />
The DPAT command does not affect the line drawn by the standard graphics commands<br />
such as DRP, BOX, ARC, etc.<br />
File<br />
!R! RES; UNIT C;<br />
MCRO DPAT;<br />
NEWP;<br />
SPD .2;<br />
SCP;<br />
SFNT "Helvetica-Nr", 10;<br />
TEXT ’DPAT %1’;<br />
PMRP 1.4, -.1; DPAT %1; PDRP 9, 0;<br />
RPP; PMRP 0, .7;<br />
STRK;<br />
ENDM;<br />
MZP 5, 5;<br />
FONT 13;<br />
CALL DPAT,1;<br />
CALL DPAT,2;<br />
CALL DPAT,3;<br />
CALL DPAT,4;<br />
CALL DPAT,5;<br />
CALL DPAT,6;<br />
CALL DPAT,7;<br />
CALL DPAT,8;<br />
CALL DPAT,9;<br />
CALL DPAT,10;<br />
PAGE;<br />
EXIT;<br />
77
PRESCRIBE <strong>Command</strong> <strong>Reference</strong><br />
Printout<br />
Related <strong>Command</strong><br />
SDP<br />
78
DRP<br />
DRP — Draw to Relative Position<br />
Format<br />
Parameter<br />
DRP x-coordinate, y-coordinate, ...;<br />
x-coordinate/y-coordinate:<br />
coordinates as measured from the current cursor position<br />
Function<br />
File<br />
The DRP command draws a line from the current cursor position to a specified relative<br />
position. The thickness of the line is designated by the SPD (set pen diameter) command.<br />
The coordinates and line thickness are measured by the value designated by the UNIT<br />
command.<br />
Multiple pairs of coordinates may be specified. The printing system then draws a<br />
connected series of line segments, proceeding from one point to the next. For example,<br />
DRP 1, 2, 3, 4; is equivalent to DRP 1, 2; DRP 3, 4;. The coordinates may<br />
be positive or negative.<br />
The DRP command is ignored in the path mode graphics. To add a line segment to a<br />
path, use the PDRP (in Path, Draw to Relative Position) command.<br />
!R! RES;<br />
UNIT C; SPD .3;<br />
CMNT Cube;<br />
MZP 5, 10;<br />
DRP 4, 0, 2, -2, 0, -4, -4, 0, -2, 2, 0, 4;<br />
MRP 4, 0;<br />
DRP 0, -4, -4, 0, 4, 0, 2, -2;<br />
PAGE;<br />
EXIT;<br />
79
PRESCRIBE <strong>Command</strong> <strong>Reference</strong><br />
Printout<br />
Related <strong>Command</strong><br />
PDRP<br />
80
DRPA<br />
DRPA — Draw to Relative Position specified by<br />
Angle<br />
Format<br />
Parameters<br />
DRPA length, angle;<br />
length:<br />
angle:<br />
length of the line<br />
angle in degrees, measured clockwise from the vertical<br />
Function<br />
The DRPA command draws a line of a specified length at a specified angle, starting from<br />
the current cursor position, with the thickness designated by the SPD command.<br />
This command is ignored if placed within a path.<br />
File<br />
!R! RES; UNIT C;<br />
MAP 2, 11;<br />
DRPA 2, 72;<br />
DRPA 2, 0;<br />
DRPA 2, 144;<br />
DRPA 2, 72;<br />
DRPA 2, 216;<br />
DRPA 2, 144;<br />
DRPA 2, 288;<br />
DRPA 2, 216;<br />
DRPA 2, 0;<br />
DRPA 2, 288;<br />
PAGE;<br />
EXIT;<br />
81
PRESCRIBE <strong>Command</strong> <strong>Reference</strong><br />
Printout<br />
82
DUPX<br />
DUPX — select/deselect DUPleX mode<br />
Format<br />
Parameter<br />
DUPX mode;<br />
mode:<br />
a number representing one of the following binding mode:<br />
0 = simplex mode<br />
1 = duplex mode, long-edge binding<br />
2 = duplex mode, short-edge binding<br />
Function<br />
The DUPX command is effective only when the option duplexer is installed to the<br />
printing system. It instructs the printing system to select or deselect duplex printing and<br />
sets the binding mode.<br />
Portrait,<br />
long-edge<br />
Portrait,<br />
short-edge<br />
Landscape,<br />
long-edge<br />
Landscape,<br />
short-edge<br />
File/Printout<br />
See DXPG on page 84.<br />
83
PRESCRIBE <strong>Command</strong> <strong>Reference</strong><br />
DXPG — select DupleX PaGe side<br />
Format<br />
Parameter<br />
DXPG side;<br />
side:<br />
a number representing the side of the ensuing page:<br />
0 = Select next side (the same as form feed)<br />
1 = Select front side<br />
2 = Select back side<br />
Function<br />
The DXPG command is effective only when the option duplexer is installed to the<br />
printing system. It ends printing on the current page in the same manner as a form feed.<br />
However, unlike the form feed, it also selects the paper side, front or back, on which<br />
printing of the ensuing page is printed.<br />
The side parameter 1 prints the ensuing page begins on the front side of the next sheet,<br />
regardless of whether the current page was printed on the front or back side of the current<br />
sheet.<br />
The side parameter 2 prints the ensuing page begins on the back side of the current sheet<br />
if the current page was printed on the front side, or on the back side of the next sheet if<br />
the current page was printed on the back side.<br />
84
DXPG<br />
File<br />
The following example selects the duplex mode with short-edge binding, a portrait page<br />
orientation which results in text printing on both sides of the page.<br />
!R! CMNT Initiates a PRESCRIBE command sequence; RES;<br />
CMNT Causes a page break and resets parameters;<br />
DUPX 2;<br />
CMNT Selects duplex mode, short-edge binding;<br />
SPO P;<br />
CMNT Selects portrait orientation;<br />
STAK 1;<br />
CMNT Select face-down delivery;<br />
EXIT;<br />
This text prints right-side up on the front side of the page<br />
!R! DXPG 0;<br />
CMNT Ends current page (front side of the paper);<br />
EXIT;<br />
This text prints upside-down on the reverse side of the page<br />
!R! RES; EXIT;<br />
Printout<br />
This text points right side-up on the front side of the page<br />
This text points upside-down on the reverse side of the page<br />
85
PRESCRIBE <strong>Command</strong> <strong>Reference</strong><br />
DZP — Draw to Zero-relative Position<br />
Format<br />
Parameters<br />
DZP x-coordinate, y-coordinate;<br />
x-coordinate:<br />
distance from the left edge limit of paper<br />
y-coordinate:<br />
distance from the top edge limit of paper<br />
Function<br />
File<br />
The DZP command draws a line from the current cursor position to a position specified<br />
relative to the top and left edge limits of the paper.<br />
The thickness of the line is designated by the SPD (set pen diameter) command. The<br />
coordinates and line thickness are measured in the value designated by the UNIT<br />
command. The coordinates should be positive or zero. Negative coordinates are treated<br />
as zero.<br />
The DZP command is ignored within a path construction. To add a zero-relative line<br />
segment in a path, use the PDZP (in Path, Draw to Zero-relative Position) command.<br />
!R! RES;UNIT C;<br />
MZP 0, 0; DZP 0, 5;<br />
MZP 1, 0; DZP 0, 4;<br />
MZP 2, 0; DZP 0, 3;<br />
MZP 3, 0; DZP 0, 2;<br />
MZP 4, 0; DZP 0, 1;<br />
MZP 5, 0; DZP 0, 0;<br />
PAGE;<br />
EXIT;<br />
86
DZP<br />
Printout<br />
Related <strong>Command</strong><br />
PDZP<br />
87
PRESCRIBE <strong>Command</strong> <strong>Reference</strong><br />
EMCR — Enable MaCRo depending on paper<br />
source<br />
Format<br />
Parameters<br />
EMCR mode, paper-source [ = print-side], [repeat-count] macro-name<br />
[, parameter...];<br />
mode:<br />
E = enable automatic macro<br />
D = disable automatic macro<br />
paper-source:<br />
0 = multi-purpose feeder<br />
1 = cassette 1 (printing system’s cassette)<br />
2 = cassette 2<br />
3 = cassette 3<br />
4 = cassette 4<br />
5 = cassette 5<br />
6 = cassette 6 (bottom)<br />
99 = envelope or universal feeder<br />
print-side:<br />
side of the page the macro is executed when duplex-printing<br />
0 = front<br />
1 = back<br />
repeat-count:<br />
number of times the macro is executed<br />
macro-name:<br />
name defined by the MCRO command<br />
parameter:<br />
values given to the dummy parameters in the macro definition<br />
88
EMCR<br />
Function<br />
The EMCR command allows separate auto macros to be assigned for each of the<br />
separate paper sources. In duplex printing, it is also possible to assign separate auto<br />
macros for both the front and back sides of a page.<br />
The following commands are invalid within a macro:<br />
AMCR, ASTK, PSRC, CCPY, DUPX, DXPG, JOBD, JOBL, JOBO, JOBP, JOBS,<br />
JOBT, JOG, LDFC, LDFN, MID, MSTK, RDMP, SEM, SPSZ, SSTK, STAK, STAT,<br />
STPL, VMAL, VMPW<br />
To disable the auto macro, use EMCR D. Note that EMCD D does not require other<br />
parameters such as paper-source.<br />
89
PRESCRIBE <strong>Command</strong> <strong>Reference</strong><br />
ENDB — END a two-dimensional Barcode string<br />
Format<br />
Parameter<br />
Function<br />
ENDB;<br />
None<br />
The ENDB command terminates a barcode data string preceded by a XBAR or XBUF<br />
command. If there is no ENDB command after data input for the XBAR and XBUF<br />
commands, a malfunction may occur. As in the case of XBAR or XBUF command, if<br />
data length is omitted, 0, negative value or non integer, data string is counted, all<br />
characters until the program sees ;ENDB;. It is necessary to have no space and line feed<br />
between ‘;’ and ENDB.<br />
If the XBCP 18 command is executed, the second and subsequent macro PDF417<br />
symbols will be output. When ENDB is used immediately after XBCP 18 is executed, it<br />
is used alone, without association with XBAR or XBUF.<br />
For details on two-dimensional barcodes, see Section 5.2. of the Technical <strong>Reference</strong><br />
manual.<br />
90
ENDC<br />
ENDC — END carbon Copy<br />
Format<br />
Function<br />
ENDC;<br />
The ENDC command ends definition of the CCPY E command sequence. For details,<br />
refer to the CCPY command.<br />
91
PRESCRIBE <strong>Command</strong> <strong>Reference</strong><br />
ENDD — END Dump<br />
Format<br />
Parameter<br />
Function<br />
File<br />
ENDD;<br />
None<br />
Related <strong>Command</strong><br />
The ENDD command ends a hexadecimal dump initiated by the RDMP (Received-data<br />
DuMP) command and returns to the PRESCRIBE command mode.<br />
See RDMP on page 216.<br />
RDMP<br />
92
ENDM<br />
ENDM — END Macro<br />
Format<br />
Parameter<br />
Function<br />
File<br />
ENDM;<br />
None<br />
The ENDM command ends a macro definition and returns to the PRESCRIBE command<br />
mode.<br />
!R! RES; DAM; UNIT C;<br />
MCRO BX;<br />
SPD .05; BOX .8, -.8; MRP 1, 0;<br />
ENDM;<br />
MCRO SCREEN %, width, depth;<br />
CMNT Draws box with rounded corners;<br />
CMNT Leaves cursor at previous position;<br />
SPD .08;<br />
SCP; SCP;<br />
MRP .25, .25; ARC .23, .30, 270, 0;<br />
MRP 0, -.25; DRP %1, 0;<br />
MRP 0, .25; ARC .23, .30, 0, 90;<br />
MRP .27, 0; DRP 0, %2;<br />
MRP -.27, 0; ARC .23, .30, 90, 180;<br />
RPP;<br />
MRP 0, .25; DRP 0, %2;<br />
MRP .25, 0; ARC .23, .30, 180, 270;<br />
MRP 0, .27; DRP %1, 0;<br />
RPP;<br />
ENDM;<br />
PAGE;<br />
EXIT;<br />
93
PRESCRIBE <strong>Command</strong> <strong>Reference</strong><br />
Printout<br />
Related <strong>Command</strong>s<br />
CALL, DAM, DELM, MCRO<br />
94
ENDR<br />
ENDR — END Raster data<br />
Format<br />
Parameter<br />
Function<br />
File<br />
ENDR;<br />
None<br />
The ENDR command declares the end of raster data. To declare the start of raster data, a<br />
RVRD command is used.<br />
The following example prints an illustrated crown using the RVRD and ENDR.<br />
!R! RES; DAM; DAF; UNIT C; SRO 1;<br />
MAP 5, 5;<br />
RVRD;<br />
5, 0, 0, 7, 0, 0;<br />
5, 0, 0, 24, 192, 0;5, 0, 0, 32, 32, 0;<br />
5, 0, 0, 64, 16, 0; 5, 0, 0, 64, 16, 0;<br />
5, 0, 0, 128, 8, 0; 5, 0, 0, 128, 8, 0;<br />
5, 0, 0, 128, 8, 0; 5, 0, 0, 64, 16, 0;<br />
5, 0, 0, 64, 16, 0; 5, 0, 0, 32, 32, 0;<br />
5, 0, 0, 120, 192, 0; 5, 0, 0, 103, 0, 0;<br />
5, 0, 0, 96, 0, 0; 5, 0, 0, 144, 0, 0;<br />
5, 0, 0, 144, 0, 0; 5, 0, 0, 144, 0, 0;<br />
5, 0, 1, 8, 0, 0; 5, 0, 1, 8, 0, 0;<br />
5, 0, 1, 136, 0, 0; 5, 0, 2, 68, 0, 0;<br />
5, 0, 2, 36, 0, 0; 5, 0, 2, 36, 0, 0;<br />
5, 0, 6, 66, 0, 0; 5, 0, 5, 130, 0, 0;<br />
5, 0, 4, 6, 0, 0; 5, 0, 8, 9, 0, 0;<br />
5, 0, 8, 17, 0, 0; 5, 0, 14, 17, 0, 0;<br />
5, 0, 17, 9, 128, 0; 5, 0, 16, 134, 128, 0;<br />
5, 0, 16, 128, 128, 0; 5, 0, 32, 128, 64, 0;<br />
5, 0, 49, 0, 64, 0; 5, 0, 46, 0, 64, 0;<br />
5, 0, 64, 28, 32, 0; 5, 0, 64, 34, 32, 0;<br />
5, 0, 64, 65, 32, 0; 5, 0, 128, 65, 16, 0;<br />
5, 0, 184, 65, 16, 0; 5, 0, 196, 34, 16, 0;<br />
5, 1, 130, 28, 8, 0; 5, 1, 130, 0, 8, 0;<br />
5, 1, 130, 0, 120, 0; 5, 2, 68, 0, 132, 0;<br />
5, 14, 56, 97, 7, 0; 5, 10, 0, 145, 5, 0;<br />
5, 11, 255, 255, 253, 0; 5, 8, 0, 0, 1, 0;<br />
5, 15, 255, 255, 255, 0; 5, 4, 0, 0, 2, 0;<br />
5, 52, 8, 1, 2, 192; 5, 76, 8, 1, 3, 32;<br />
5, 76, 8, 1, 3, 32; 5, 68, 62, 7, 194, 32;<br />
5, 34, 8, 1, 4, 64; 5, 34, 8, 1, 4, 64;<br />
5, 18, 8, 1, 4, 128; 5, 13, 0, 0, 11, 0;<br />
5, 1, 0, 0, 8, 0; 5, 0, 128, 0, 16, 0;<br />
5, 0, 131, 12, 16, 0; 5, 0, 64, 144, 32, 0;<br />
95
PRESCRIBE <strong>Command</strong> <strong>Reference</strong><br />
Printout<br />
5, 0, 160, 96, 80, 0; 5, 1, 24, 1, 136, 0;<br />
5, 14, 134, 6, 23, 0; 5, 48, 65, 248, 32, 192;<br />
5, 192, 129, 8, 16, 48; 5, 0, 64, 144, 32, 0;<br />
5, 0, 32, 96, 64, 0; 5, 0, 16, 0, 128, 0;<br />
5, 0, 32, 0, 64, 0; 5, 0, 16, 0, 128, 0;<br />
5, 0, 8, 1, 0, 0; 5, 0, 6, 6, 0, 0;<br />
5, 0, 1, 104, 0, 0; 5, 0, 0, 144, 0, 0;<br />
ENDR;<br />
PAGE;<br />
EXIT;<br />
96
EPL<br />
EPL — select EcoPrint Level<br />
Format<br />
Parameter<br />
EPL level;<br />
level:<br />
0 = off<br />
2 = on<br />
Function<br />
The EPL command switches the Ecoprint on or off (default). Ecoprint is a standard<br />
feature of the print systems that enables the user to reduce the amount of toner placed on<br />
the page which saves on printing costs. With EPL 2;, the printing image appears lighter,<br />
yet remains readable.<br />
The following example simulates typical Ecoprint effect:<br />
0 = off 2 = on<br />
Only one EPL level is possible for a page. If more than one EPL command are put on a<br />
page, the last one is effective.<br />
The Ecoprint setting does not effect print speed.<br />
File<br />
!R! RES; SFNT "Helvetica-Bd", 24;<br />
SLPI 3;<br />
EPL 2; TEXT "Ecoprint is ON.";<br />
PAGE;<br />
EXIT;<br />
Sample<br />
97
PRESCRIBE <strong>Command</strong> <strong>Reference</strong><br />
EXIT — EXIT from PRESCRIBE mode<br />
Format<br />
Parameter<br />
Function<br />
File<br />
Printout<br />
EXIT [, E];<br />
None<br />
When the printing system receives the EXIT command, it exits from the PRESCRIBE<br />
mode and treats the following information as characters to be printed.<br />
If the parameter E is added (EXIT, E;), the printing system ignores one carriagereturn/linefeed<br />
immediately following the command.<br />
!R! RES; SFNT "Helvetica"; EXIT;<br />
<strong>Command</strong>s ending in EXIT; leave a gap<br />
in the output,<br />
!R! CMNT Like this; EXIT;<br />
while commands ending in EXIT, E;<br />
!R! CMNT Like this; EXIT, E;<br />
leave no trace of their presence except<br />
possibly a shortage of lines on the page.<br />
!R! PAGE; EXIT;<br />
98
FDIR<br />
FDIR — MP tray Feed DIRection<br />
Format<br />
Parameter<br />
FDIR direction;<br />
direction:<br />
paper orientation on the MP tray<br />
0 = Lengthwise<br />
1 = Widthwise<br />
Function<br />
The FDIR command specifies the paper orientation during feeding paper on the MP tray.<br />
This is possible when the paper is A4 or letter or B5 size although this depends on the<br />
printing system model.<br />
This command is enabled only when the MP tray’s operational mode is cassette or<br />
manual feed. Printing on A4 and letter size paper can only be done widthwise in first<br />
mode.<br />
This command causes a page break.<br />
This command is irrelevant to paper cassettes and envelope feeders.<br />
The paper orientation setting is restored to the default orientation (FRPO T8) when the<br />
printing system receives the RES command.<br />
99
PRESCRIBE <strong>Command</strong> <strong>Reference</strong><br />
FILL — FILL closed path<br />
Format<br />
Parameter<br />
FILL rule;<br />
rule:<br />
drawing rule:<br />
1 = use even-odd rule<br />
2 = use non-zero winding number rule<br />
Function<br />
Related <strong>Command</strong>s<br />
The FILL command fills the area enclosed by the current path with the current drawing<br />
rule. It also fills all independent subpaths contained in a path. An open subpath is<br />
implicitly closed before being painted (as done by a CLSP command). This command<br />
clears the current path after filling and moves the cursor to the end of that path.<br />
With drawing rule 1, even-odd, whether or not a point is deemed to be inside the path is<br />
determined by drawing a ray from that point in any direction and counting the number of<br />
times the ray crosses segments of the path. The point is deemed to be inside the path if<br />
the result is an odd number; if the result is an even number, the point is deemed to be<br />
outside the path.<br />
The non-zero winding rule also draws a ray from a point in any direction to determine<br />
whether or not that point is deemed to be inside the path and examines the points at<br />
which a segment of the path crosses the ray. However, it then starts counting from zero<br />
and adds one each time a segment in the path crosses the ray from left to right; and<br />
subtract one each time a segment in the path crosses the ray from right to left. If the<br />
result of counting all the crossings is zero, the point is deemed to be outside; otherwise<br />
the point is deemed to be inside the path.<br />
The way in which several filled-in parts are stacked with each other to produce<br />
transparent and opaque effects is controlled by the SIMG (Set IMaGe model) command.<br />
FPAT, GPAT, PAT, SIMG, XPAT<br />
100
FILL<br />
File<br />
!R! RES; UNIT C; SIMG 1;<br />
CMNT Drawing clusters;<br />
NEWP;<br />
PMZP 10, 12; PDRP -5.7, -1.75;<br />
PCRP 0, 0, 0, -3.4, 3.1, -3.6; CLSP; PAT 2; FILL;<br />
PMZP 10, 12; PDRP -2.6, -5.35;<br />
PCRP 0, 0, 2.5, -2.5, 4.9, .1; CLSP; PAT 3; FILL;<br />
PMZP 10, 12; PDRP 5.7, -1.75;<br />
PCRP 0, 0, 0, -3.5, -3.4, -3.5; CLSP; PAT 4; FILL;<br />
PMZP 12, 12; PDRP 5.7, -1.75;<br />
PCRP 0, 0, 1.5, 1.75, 0, 3.5; CLSP; PAT 5; FILL;<br />
PMZP 10, 12; PDRP -5.7, 1.75;<br />
PCRP 0, 0, 0, 3.4, 3.1, 3.6; CLSP; PAT 6; FILL;<br />
PMZP 10, 12; PDRP -2.6, 5.35;<br />
PCRP 0, 0, 2.5, 2.5, 4.9, -.1; CLSP; PAT 7; FILL;<br />
PMZP 10, 12; PDRP 5.7, 1.75;<br />
PCRP 0, 0, 0, 3.5, -3.4, 3.5; CLSP; PAT 8; FILL;<br />
PMZP 10, 12; PDRP -5.7, 1.75;<br />
PCRP 0, 0, -1.5, -1.75, 0, -3.5; CLSP; PAT 9; FILL;<br />
PAGE;<br />
EXIT;<br />
101
PRESCRIBE <strong>Command</strong> <strong>Reference</strong><br />
Printout<br />
102
FLAT<br />
FLAT — set FLATness<br />
Format<br />
Parameters<br />
FLAT flatness;<br />
flatness:<br />
number from 1 to 100<br />
Function<br />
The FLAT command determines how smoothly curves in paths are to be drawn when a<br />
STRK or FILL command is used. Higher number values produce rougher curves and<br />
lower number values create smoother curves which require greater computation. The<br />
number actually specifies the maximum error tolerance of a straight line segment<br />
approximation of any portion of the curve.<br />
The printing system resets the flatness to 1 when it receives the RES command.<br />
File<br />
!R! RES; FRPO N8,0; CMNT 300 dpi;<br />
UNIT C; SPD 0.02;<br />
NEWP; CMNT 1st circle (FLAT 1);<br />
PMRA 7, 16.5, 2, 0;<br />
PARC 7, 16.5, 2, 0, 360;<br />
STRK;<br />
NEWP; CMNT 2nd circle (FLAT 50);<br />
FLAT 50;<br />
PMRA 12, 16.5, 2, 0;<br />
PARC 12, 16.5, 2, 0, 360;<br />
STRK;<br />
PAGE; EXIT;<br />
Printout<br />
103
PRESCRIBE <strong>Command</strong> <strong>Reference</strong><br />
FLST — print Font LiST<br />
Format<br />
Parameter<br />
Function<br />
FLST;<br />
None<br />
Related <strong>Command</strong>s<br />
File<br />
The FLST command prints a list of all resident and downloaded (user-defined) fonts in<br />
the printing system. The list provides information on each font such as font name,<br />
whether it is scalable or bitmap, font selection sequence using FSET, font ID, etc. The<br />
resident fonts are identified by the letter I (internal) in the font ID; the downloaded fonts<br />
are identified by the letter M or D depending on whether the font is stored in the memory<br />
card or the hard disk, respectively.<br />
The font list may differ depending on models.<br />
FSET, SFNT, STAT<br />
!R! FLST; EXIT;<br />
104
FLST<br />
Sample of Font List<br />
Internal Scalable and Bitmapped Fonts List<br />
PRESCRIBE<br />
Font Name Scalable/Bitmap Password Selection [FSET] Font ID<br />
105
PRESCRIBE <strong>Command</strong> <strong>Reference</strong><br />
FOLD — FOLD printed pages<br />
Format<br />
Parameter<br />
FOLD [staple];<br />
staple:<br />
1 = stapling<br />
Function<br />
The FOLD command is effective only when the optional document finisher having the<br />
booklet stitcher is installed to the printing system. This command is most conveniently<br />
used with the BKLT command that allows printing a job as a booklet, reordering and<br />
printing the pages ‘two-up’ on a sheet of paper.<br />
The FOLD command outputs printed pages stapling and binding them together at its<br />
center. The job to be stapled and folded should be initiated by the JOBS command (See<br />
page 141).<br />
With the staple value given, the pages are stapled (two) and folded at its center in<br />
reference to the short edge of the paper.<br />
Folding and stapling<br />
Paper sizes available for this mode include A4-R, letter-R, B4, A3 and ledger. The job is<br />
automatically delivered on the face-down output tray of the document finisher.<br />
File<br />
!R! FOLD 1;<br />
JOBS 1,1,2,0,0;<br />
TEXT ’Stapled and folded with the next page’;<br />
PAGE;<br />
TEXT ’Stapled and folded with the preceding page’;<br />
JOBT;<br />
EXIT;<br />
106
FONT<br />
FONT — change current FONT<br />
Format<br />
Parameter<br />
FONT font-number;<br />
font-number:<br />
number identifying the font<br />
Function<br />
File<br />
The FONT command specifies a typeface for all text that follows.<br />
The font-number should designate a resident bitmap font, a scalable font selected by the<br />
SFNT command, or a nonresident font generated by the LDFC command or downloaded<br />
from the computer. If an undefined font-number is specified, the font will not change. To<br />
print a font list, use the FLST command.<br />
For a bitmap font, depending on the font mode (FTMD) value, the FONT command also<br />
sets the line and character spacing and page orientation to match the attributes of the<br />
selected font. The scalable fonts, however, ignore the font mode setting. Line spacing<br />
must be specified by the user in this case using one of the line spacing commands (SLS,<br />
SLPI, etc.).<br />
!R! RES; UNIT P;<br />
SFNT ’Univers-BdIt’, 18, 2000;<br />
SFNT ’Univers-BdIt’, 14, 2001;<br />
FONT 2000;<br />
EXIT;<br />
—-—- Font Guideline —-—-<br />
!R! FONT 2001; EXIT;<br />
Be distinctive.<br />
!R! FONT 13; FTMD 15; EXIT;<br />
Use different font sizes and styles to set off titles,<br />
headings, footnotes, etc.<br />
!R! PAGE; EXIT;<br />
107
PRESCRIBE <strong>Command</strong> <strong>Reference</strong><br />
Printout<br />
Related <strong>Command</strong>s<br />
ALTF, FLST, SETF<br />
108
FPAT<br />
FPAT — generate Fill PATtern<br />
Format<br />
Parameters<br />
FPAT #, #, #, #, #, #, #, #;<br />
#:<br />
number from 0 to 255<br />
Function<br />
The FPAT command establishes a new shading pattern, for use by the BLK, ARC, and<br />
FILL commands, as described in a 8 × 8 matrix of dots.<br />
Each number corresponds to one row of 8 dots. The value of the number is calculated<br />
according to the black dots in its row, counting 1 for a black dot in the rightmost column,<br />
2 for a black dot in the next column left, 4 for a black dot in the next column, and so on.<br />
Column Values<br />
FPAT Parameters<br />
To calculate the third number in the example above, add up the values of the columns<br />
that have black dots in the first row: 16+8 = 24.<br />
To calculate the forth number in the example above, add up the values of the columns<br />
that have black dots in the second row: 32+16+8+4 = 60, and so on.<br />
For printing system models that support 600/1200 dpi resolution printing, the default<br />
resolution generated by the FPAT command is 300 dpi; however, 600/1200 dpi can be<br />
selected using the FRPO B8 command. See Section 6.2. of the Technical <strong>Reference</strong><br />
manual (FRPO B8). The printing system recognizes a dot in the pattern as having the<br />
size of 1/300 inch in the 300 dpi resolution, and 1/600 inch in the 600 dpi resolution, and<br />
1/1200 inch in the 1200 dpi resolution.<br />
For an all-white row, specify 0. The FPAT command for creating all white rows is<br />
specified below:<br />
FPAT 0, 0, 24, 60, 60, 24, 0, 0;<br />
For an all-black row, specify 255 (1 + 2 + 4 + 8 + 16 + 32 + 64 + 128 = 255). The default<br />
value is FPAT 255, 255, 255, 255, 255, 255, 255, 255; giving a solid<br />
black pattern which is equivalent to the PAT 1; command.<br />
109
PRESCRIBE <strong>Command</strong> <strong>Reference</strong><br />
File<br />
Printout (300 dpi)<br />
!R! RES; DAM; UNIT C;<br />
FSET 1p08V0s0b5T;<br />
MCRO PATTERN;<br />
FPAT %1, %2, %3, %4, %5, %6, %7, %8;<br />
BOX 5, 1; BLK 5, 1; MRP 0, 1.55;<br />
TEXT ’FPAT %1, %2, %3, %4, %5, %6, %7, %8;’, L;<br />
ENDM;<br />
MAP 2, 2; SCP;<br />
CALL PATTERN, 3, 3, 0, 0, 0, 0, 0, 0;<br />
CALL PATTERN, 255, 0, 0, 0, 0, 0, 0, 0;<br />
CALL PATTERN, 1, 1, 1, 1, 1, 1, 1, 255;<br />
RPP; MRP 5.5, 0;<br />
CALL PATTERN, 0, 0, 24, 60, 60, 24, 0, 0;<br />
CALL PATTERN, 1, 2, 4, 8, 16, 32, 64, 128;<br />
CALL PATTERN, 8, 8, 8, 8, 8, 8, 8, 8;<br />
PAGE;<br />
EXIT;<br />
110
FRPO<br />
FRPO — Firmware RePrOgram<br />
Format<br />
Parameters<br />
FRPO parameter, value;<br />
parameter:<br />
parameter stored in permanent memory<br />
value:<br />
new parameter value<br />
Function<br />
The FRPO command sets the various printing parameters stored in permanent memory.<br />
Each parameter is identified by a code consisting of a letter and a numeral, such as P1.<br />
Details of the parameters and their values are given in Chapter 6 of the Technical<br />
<strong>Reference</strong> manual. The FRPO command should be used only when it is necessary to<br />
change a parameter permanently. They are not effective as temporary changes in the<br />
middle of a print job.<br />
The FRPO command effects values for interface dependent and non-interface dependent<br />
parameters as they appear on the status page (See STAT on page 332.). Changes to the<br />
interface dependent parameters will effect the current interface only.<br />
Changes made with FRPO commands can be reset to the factory-set values by the FRPO<br />
INIT (FRPO-INITialize) command. Note that the RES command does not reset those<br />
changes made with the FRPO command.<br />
File<br />
!R!<br />
FRPO P1, 1; CMNT To power up in the IBM emulation;<br />
FRPO P3, 2; CMNT To change the linefeed action to CR+LF;<br />
FRPO U6, 9; CMNT To select the US Legal character set;<br />
EXIT;<br />
US Legal characters:<br />
\^{|}~<br />
!R! PAGE; EXIT;<br />
111
PRESCRIBE <strong>Command</strong> <strong>Reference</strong><br />
Printout<br />
Related <strong>Command</strong><br />
FRPO INIT<br />
112
FRPO INIT<br />
FRPO INIT — FRPO-INITialize<br />
Format<br />
Parameter<br />
Function<br />
File<br />
Printout<br />
FRPO INIT;<br />
None<br />
The FRPO INIT command resets all FRPO parameters to their original, factory default<br />
values. This reset applies to the interface dependent parameters for the current interface<br />
as well as all non-interface dependent parameters. For a list of the factory default values,<br />
see Chapter 6 of the Technical <strong>Reference</strong> manual. The FRPO INIT command causes a<br />
page break.<br />
To activate the changes made with the FRPO INIT command, turn the printer power off<br />
then on again or reset the printer using the control panel keys.<br />
!R! FRPO INIT; EXIT;<br />
Omitted<br />
113
PRESCRIBE <strong>Command</strong> <strong>Reference</strong><br />
FSET — change current Font SETting by<br />
characteristic<br />
Format<br />
Parameters<br />
FSET spacing-pitch-height-style-weight-typeface;<br />
spacing:<br />
pitch:<br />
height:<br />
style:<br />
weight:<br />
fixed or proportional spacing, followed by a terminator P:<br />
0 = fixed font<br />
1 = proportional font<br />
pitch in cpi, from 0.44 to 99.99 cpi (ignored in a proportional font), followed by a<br />
terminator H<br />
the line-to-line spacing in points from 0.25 to 999.25; followed by a terminator V<br />
upright or italic, followed by a terminator S:<br />
0 = upright<br />
1 = italic<br />
4 = condensed<br />
5 = condensed italic<br />
degree of bolding, -7 to +7; followed by a terminator B:<br />
-7 = Ultra thin<br />
-6 = Extra thin<br />
-5 = Thin<br />
-4 = Extra light<br />
-3 = Light<br />
-2 = Demi light<br />
-1 = Semi light<br />
0 = Medium<br />
1 = Semi bold<br />
2 = Demi bold<br />
3 = Bold<br />
4 = Extra bold<br />
5 = Black<br />
6 = Extra black<br />
7 = Ultra black<br />
114
FSET<br />
typeface:<br />
Function<br />
typeface as represented by one of the following numbers, followed by a terminator T:<br />
0 = LinePrinterBM8.5-Roman<br />
3 = CourierBM<br />
4 = Swiss721BM<br />
5 = Dutch801BM<br />
6 = LetterGothicBM<br />
8 = PrestigeEliteBM<br />
4099 = Courier<br />
4101 = CG Times<br />
4102 = LetterGothic<br />
4113 = CGOmega<br />
4116 = Coronet<br />
4140 = Clarendon-Cd<br />
4148 = Univers<br />
4168 = AntiqueOlive<br />
4197 = GaramondAntiqua<br />
4297 = Marigold<br />
4362 = Albertus<br />
16602 = Arial<br />
16686 = Symbol<br />
16901 = TimesNewRoman<br />
24579 = CourierPS<br />
24591 = Palatino<br />
24580 = Helvetica<br />
24607 = ITCAvantGardeGothic-Bk<br />
24703 = NewCenturySchoolbook<br />
24623 = ITCBookman<br />
25093 = Times<br />
31402 = Wingdings<br />
45099 = ITCZapfChancery-MdIt<br />
45101 = ITCZapfDingbats<br />
45358 = SymbolPS<br />
The typeface values for option fonts, if installed, can be obtained by printing a font list.<br />
To print a font list, use the FLST command or the control panel keys.<br />
The FSET command can be used to select either bitmap fonts or scalable fonts. It is also<br />
convenient for changing one or several characteristics of the current font, e.g. changing<br />
the upright style to italic. The example at the end of this section demonstrates this<br />
function.<br />
Font selection is made based on the characteristics of the font, the font’s location in the<br />
printer, and the font’s orientation. In the list below, the characteristics of font are listed in<br />
order of priority, from highest to lowest:<br />
Symbol set<br />
Spacing (pitch)<br />
Point size (height)<br />
Style<br />
Stroke weight<br />
Typeface family<br />
Location<br />
Orientation<br />
Highest Priority Selection<br />
Lowest Priority Selection<br />
115
PRESCRIBE <strong>Command</strong> <strong>Reference</strong><br />
In selecting a font, the printer engages in a process of elimination. It first examines all<br />
fonts to match based on symbol set (the highest priority). All matches are next examined<br />
based on spacing. When the printer has reduced the matches to one font, it selects that<br />
font. Bitmap fonts have priority over scalable fonts.<br />
FSET enables the user to select a general class of font first, then specify characteristics<br />
(e.g. size and appearance) later. It is still preferable to specify all font parameters to<br />
ensure correct selection.<br />
The pitch and height parameters are measured in cpi and points respectively, regardless<br />
of the current unit setting (UNIT).<br />
Terminators following each parameter (P, H, V, S, B, and T) can use either lowercase or<br />
uppercase.<br />
The example below shows an FSET command sequence that selects the fixed-pitch (0p),<br />
12-cpi (12h), 12-point (12v), upright-style (0s), normal stroke weight (0b), Letter Gothic<br />
(6T) font. This command sequence may be followed by a CSET command which selects<br />
the desired symbol set.<br />
Fixed or<br />
proportional Height Weight<br />
FSET 0p12h12v0s0b6T;<br />
Pitch Style Typeface<br />
116
FSET<br />
File<br />
!R! UNIT P; SFNT ’Swiss742SWC-Roman’, 10; SLS 12; EXIT;<br />
First, this line is printed in a 10 point Swiss742SWC-Roman<br />
font.<br />
!R! FSET 14V; SLS 16; EXIT, E;<br />
Let’s see if the height parameter is changed to 14<br />
points by FSET 14V;.<br />
!R! FSET 1s3B; EXIT,E;<br />
Now this line demonstrates what happens with FSET<br />
1s3B;. Only the style and stroke weight are changed.<br />
!R! FSET 4101T; SLS 14; EXIT,E;<br />
The FSET 4101T; command switches the typeface to<br />
CGTimes. All other characteristics remain<br />
unchanged.<br />
!R! FSET 0P; FTMD 15; EXIT,E;<br />
Now the FSET 0P; command requests a fixed pitch<br />
font. The method for selecting this font is based<br />
on the change from the previous pitch<br />
characteristic.<br />
!R! PAGE; EXIT;<br />
Printout<br />
117
PRESCRIBE <strong>Command</strong> <strong>Reference</strong><br />
FTMD — bitmap FonT MoDe<br />
Format<br />
FTMD value;<br />
Parameter<br />
value:<br />
an integer from 0 to 15<br />
Function<br />
The FTMD command determines which attributes will be changed automatically when a<br />
bitmap font (simulated based on scalable fonts) is selected by the FONT, ALTF, or RPF<br />
command. The attributes and values appear as follows:<br />
Horizontal motion index (character spacing) 1<br />
Vertical motion index (line spacing) 2<br />
Fixed or proportional spacing 3<br />
Portrait or landscape orientation 4<br />
The values 1, 2, 4, and 8 change a single font attribute using the FTMD command. When<br />
the FTMD command is executed, the printer adjusts the designated attributes of the<br />
current font. Later, if the current font is changed by a FONT, ALTF, or RPF command,<br />
the printer automatically changes the designated attributes to the values of the new font.<br />
The default value of the FTMD command depends on the emulation mode.<br />
The printer does not automatically change any attributes not designated by the FTMD<br />
command. If necessary, these attributes must be adjusted by other commands: SCS or<br />
SCPI for the character spacing; SLS or SLPI for the line spacing; and SPO for the page<br />
orientation. The FTMD command is ignored when the current font is a scalable font.<br />
Font Mode Values<br />
Font<br />
mode<br />
Character<br />
spacing<br />
Automatic changes<br />
Line<br />
spacing<br />
Fixed or<br />
proportional<br />
Portrait or<br />
landscape<br />
0<br />
1 Yes<br />
2 Yes<br />
3 Yes Yes<br />
4 Yes<br />
5 Yes Yes<br />
6 Yes Yes<br />
7 Yes Yes Yes<br />
8 Yes<br />
9 Yes Yes<br />
10 Yes Yes<br />
118
FTMD<br />
Font<br />
mode<br />
Character<br />
spacing<br />
Automatic changes<br />
Line<br />
spacing<br />
Fixed or<br />
proportional<br />
Portrait or<br />
landscape<br />
11 Yes Yes Yes<br />
12 Yes Yes<br />
13 Yes Yes Yes<br />
14 Yes Yes Yes<br />
15 Yes Yes Yes Yes<br />
Default Font Modes<br />
Emulation mode Font Printer’s action when font is changed<br />
mode<br />
0 (Line Printer) 15 Adjusts page orientation, character<br />
spacing, line spacing.<br />
1 (IBM X-24E) or 0 Does not adjust anything.<br />
2 (Diablo 630)<br />
5 (Epson LQ-850)<br />
6 (HP LaserJet) 13 Adjusts page orientation and character<br />
8 (KC-GL)<br />
spacing. Does not adjust line<br />
spacing.<br />
File<br />
!R! RES; SLM 1; STM 2;<br />
FTMD 5;<br />
CMNT Character spacing is automatically adjusted at each<br />
font change, but line spacing and page orientation are left<br />
alone;<br />
UNIT C; SLS 1;<br />
BOX .5, -.5; MRP 1, 0; FONT 47;<br />
TEXT ’Font 47, correctly spaced at 16.6 cpi’, N;<br />
BOX .5, -.5; MRP 1, 0; FONT 37;<br />
TEXT ’Font 37, correctly spaced at 10 cpi’, N;<br />
BOX .5, -.5; MRP 1, 0; FONT 52;<br />
TEXT ’Font 52, proportionally spaced’, N;<br />
BOX .5, -.5; MRP 1.1, -.1; FONT 26;<br />
CMNT Landscape font in portrait orientation;<br />
TEXT ’ = < = ’;<br />
RES;<br />
EXIT;<br />
119
PRESCRIBE <strong>Command</strong> <strong>Reference</strong><br />
Printout<br />
120
GPAT<br />
GPAT — set Gray PATtern<br />
Format<br />
Parameter<br />
GPAT gray-level;<br />
gray-level:<br />
any number from 0 (black) to 1 (white)<br />
Function<br />
File<br />
The GPAT command specifies the shade of gray for painting a block in both the standard<br />
mode and path mode graphics. Numbers with up to four decimal places are accepted.<br />
The default value is 0 (solid black).<br />
The printer recognizes a dot in the pattern as having the size of 1/300 inch in the 300 dpi<br />
resolution, and 1/600 inch in the 600 dpi resolution, and 1/1200 inch in the 1200 dpi<br />
resolution. For printer models that support 600/1200 dpi resolution printing, the default<br />
resolution generated by the GPAT command is 300 dpi; however, 600/1200 dpi can be<br />
selected using the FRPO B8 command. See Section 6.2. of the Technical <strong>Reference</strong><br />
manual (FRPO B8).<br />
!R! RES; UNIT C;<br />
MCRO GP;<br />
NEWP;<br />
GPAT %1;<br />
PDRP 2, 0, 0, 2, -2, 0, 0, -2;<br />
FILL 1;<br />
PMRP .5, .5;<br />
ENDM;<br />
CALL GP,0;<br />
CALL GP,.125;<br />
CALL GP,.25;<br />
CALL GP,.375;<br />
CALL GP,.5;<br />
CALL GP,.625;<br />
CALL GP,.75;<br />
CALL GP,.875;<br />
PAGE;<br />
EXIT;<br />
121
PRESCRIBE <strong>Command</strong> <strong>Reference</strong><br />
Printout<br />
Related <strong>Command</strong>s<br />
FPAT, PAT<br />
122
GRAY<br />
GRAY — represent GRAY<br />
COLOR<br />
Format<br />
Parameter<br />
GRAY gray-mode;<br />
gray-mode:<br />
0 = represents gray in K (black, default)<br />
1 = represents gray in CMY<br />
Function<br />
The GRAY command determines whether gray in graphic images is represented using<br />
black or combination of cyan, magenta, and yellow.<br />
If each value of the RGB signals is the same, the corresponding area will be achromatic<br />
(grayed). For example, if R = G = B = 0, the corresponding area will be black. If R = G =<br />
B = 100, the corresponding area will be gray. If R = G = B = 255, the corresponding area<br />
will be white, that is, there will be no color components. (White and black are not colors.<br />
They are states in which all the light is reflected and absorbed respectively.)<br />
If each value of RGB is the same when processing images, the corresponding area can be<br />
represented by using either the same quantity of toner or only K toner for each of CMY.<br />
(If C = M = Y, the color is black in theory.) However, the black represented by C = M =<br />
Y is not the same as the black represented by K alone.<br />
When representing an image, for example, if it contains an area represented by R = G =<br />
B, the look and impression of that image will be completely different when it is<br />
represented by CMY and when it is represented by K alone. (Which look is better is<br />
dependent on the viewer’s taste, the contents to be printed, and so on.)<br />
The graying process defaults to representation using K toner alone. However, a toggle<br />
switch is provided since, as mentioned earlier, this process cannot be determined<br />
objectively.<br />
This command is irrelevant to models FS-8000C and KM-C830.<br />
Note<br />
123
PRESCRIBE <strong>Command</strong> <strong>Reference</strong><br />
GRRD — GRaphic data ReaD<br />
COLOR<br />
Format<br />
Parameters<br />
GRRD format, width, height; ;ENDG;<br />
format:<br />
image format:<br />
B = Bitmap<br />
J = JPEG<br />
T = TIFF<br />
width:<br />
height:<br />
image:<br />
number from 0 to 65535<br />
number from 0 to 65535<br />
file name based on a specified format<br />
Function<br />
The GRRD command allows the image data of a specified format to be drawn in a<br />
specified size at a specified location. This command is terminated with the ENDG<br />
command.<br />
The color space for each format is compatible only with RGB. In the case of TIFF<br />
format, the command is compatible with non-compression, LZW, and PackBit. Upon<br />
receipt of incompatible format and/or color-space data, this command is ignored.<br />
Width and height specifications are dependent on the current unit of measurement<br />
(UNIT). If the output image has a specified width of 0, the image will be printed in a<br />
width varying with the height of the output image, while retaining the vertical-horizontal<br />
ratio of the original image data as it is. If the output image has a specified height of 0, the<br />
image will be printed in a height varying with the width of the output image, while<br />
retaining the vertical-horizontal ratio of the original image data as it is. When the output<br />
image has both a specified width and height of 0, the output image pixels will be printed<br />
according to the raster resolution specified by the STR command.<br />
Since the command ends with ;ENDG; do not insert space between the preceding ‘;’ and<br />
ENDG. If space is inserted, the command is ignored.<br />
When monochrome mode is specified, the output is printed as a grayscale image.<br />
File<br />
The following example uses DOS to transfer both the command sequences and the<br />
graphics data to the printing system’s parallel interface.<br />
124
GRRD<br />
c:¥> echo !R! STR 300; MZP 1,1; GRRD J,0,0; > lpt1<br />
c:¥> copy /b fluit.jpg lpt1<br />
c:¥> echo ;ENDG; PAGE; EXIT; > lpt1<br />
Printout<br />
125
PRESCRIBE <strong>Command</strong> <strong>Reference</strong><br />
HUE — adjust HUE<br />
COLOR<br />
Format<br />
Parameters<br />
HUE color, angle[, type];<br />
color:<br />
angle:<br />
number representing the color for hue adjustment:<br />
0 = all colors<br />
1 = R<br />
2 = Y<br />
3 = G<br />
4 = C<br />
5 = B<br />
6 = M<br />
angle of hue rotation in degrees:<br />
color = 0, – 180 to 180 (default = 0)<br />
color = 1 – 6, –10 to 10 (default = 0)<br />
type:<br />
object type<br />
Function<br />
The HUE command shifts all the pixels around the ‘color wheel’ to a different point for<br />
adjusting the tint of a color. For example, shifting the red pixels to green turns the green<br />
pixels to blue and yellow pixels to cyan.When color is 0, the HUE command shifts all<br />
hues at the specified angle.<br />
As shown in the figure below, shifting hues can be liken to rotating the color wheel.<br />
When the wheel is rotated by 60 degrees clockwise, red shifts to magenta and yellow to<br />
red.<br />
126
HUE<br />
When color is other than 0, a particular hue can be shifted. The example below shows<br />
that the yellow hue has been shifted in the direction of green indicating that yellow<br />
images will be slightly reddish and the image in the vicinity of yellowish green will be<br />
yellow. Note that hues cannot be set to move beyond their next hues.<br />
R<br />
Y<br />
G<br />
C<br />
B<br />
M<br />
If this command is issued to rotate a particular hue when all hues are rotated, the hues are<br />
controlled after they are reset to their default state. The HUE command is enabled for all<br />
color spaces, all color modes and all monitor simulation modes. If ink simulation is set to<br />
other than NONE, the HUE is disabled.<br />
127
PRESCRIBE <strong>Command</strong> <strong>Reference</strong><br />
INTL — InterNaTionaL characters<br />
Format<br />
Parameters<br />
INTL country-code, code-set;<br />
country-code:<br />
0 = US ASCII<br />
1 = France<br />
2 = Germany<br />
3 = UK<br />
4 = Denmark/Norway<br />
5 = Sweden<br />
6 = Italy<br />
7 = Spain<br />
8 = Japan<br />
9 = US Legal<br />
10 = IBM PC-850 (Multilingual)<br />
11 = IBM PC-860 (Portuguese)<br />
12 = IBM PC-863 (Canadian French)<br />
13 = IBM PC-865 (Norwegian)<br />
14 = Norway<br />
15 = Denmark 2<br />
16 = Spain 2<br />
17 = Latin America<br />
code-set:<br />
Function<br />
0 = Epson code set<br />
1 = HP LaserJet code set<br />
2 = Daisywheel code set<br />
4 = IBM/Line Printer code set<br />
The INTL command selects a symbol set appropriate for the alphabet of a particular<br />
country. A symbol set includes the specific alphabetic and numeric characters and other<br />
symbols of a particular written language, country, or software application. Charts of the<br />
available symbol sets are displayed in Emulation of the Technical <strong>Reference</strong> manual,<br />
emulation by emulation.<br />
Depending on the current emulation, the printer selects one of the symbol sets of the<br />
emulated printer appropriate for the country as requested by the country-code value. For<br />
example, when the printer is set in the default emulation mode 6 (HP LaserJet), country<br />
code 0 (US ASCII) selects the ISO-6 ASCII symbol set of the HP LaserJet printer. If the<br />
current emulation mode is 1 (IBM), country code 0 selects the IBM US symbol set of the<br />
IBM Proprinter.<br />
Differences in symbol sets can be seen in the upper half of the character code table,<br />
consisting of character codes 128 through 254 (hex 80 through FE). The availability of<br />
the symbol sets to the country-code values appear in the table below.<br />
128
INTL<br />
For example, the character assigned to character code 93 (hex 5D) varies according to<br />
the country code as follows:<br />
US ]<br />
France §<br />
Germany Ü<br />
Denmark Å<br />
Italy é<br />
Spain ¿<br />
The code-set parameter adjusts for the different symbol sets. According to the code-set<br />
parameter specified, the printer selects a symbol set available to the current emulation.<br />
The default country-code value appears as the U6 parameter and can be set using an<br />
FRPO command. The factory setting is 0: the standard US ASCII symbol set. The<br />
default code-set value appears as the U7 parameter. The factory setting is 0.<br />
Symbol Sets Available with INTL<br />
Country-code<br />
0<br />
(Epson)<br />
Code-set (emulation)<br />
1<br />
(HP LaserJet) a<br />
2<br />
(Daisywheel)<br />
4<br />
(IBM/Line Printer)<br />
0 b (US ASCII) LQ US ISO-6 ASCII Diablo US IBM US<br />
1 (France) LQ France ISO-25 France Diablo France<br />
2 (Germany) LQ Germany HP German Diablo Germany<br />
3 (UK) LQ U.K. ISO-4 U.K. Diablo U.K.<br />
4 (Denmark/Norway)<br />
LQ Denmark ISO-60 Norway Diablo Denmark IBM D/N<br />
5 (Sweden) LQ Sweden ISO-11 Swedish Diablo Sweden<br />
6 (Italy) LQ Italy ISO-15 Italian Diablo Italy<br />
7 (Spain) LQ Spain HP Spanish Diablo Spain<br />
8 (Japan) LQ Japan ISO-14 JIS ASCII Diablo Japan<br />
9 (US Legal) LQ US Legal US Legal US Legal US Legal<br />
10 (IBM PC-850) IBM PC-850 IBM PC-850 IBM PC-850<br />
11 (IBM PC-860) IBM PC-860 IBM PC-860 IBM PC-860<br />
12 (IBM PC-863) IBM PC-863 IBM PC-863 IBM PC-863<br />
13 (IBM PC-865) IBM PC-865 IBM PC-865 IBM PC-865<br />
14 (Norway) LQ Norway<br />
15 (Denmark 2) LQ Denmark 2<br />
16 (Spain 2) LQ Spain 2<br />
17 (Latin America) Latin America<br />
a The INTL command is primarily intended to access foreign characters not found in a current symbol<br />
set. (Default is US ASCII). It does not fully support all of the HP LaserJet symbol sets. To use one of<br />
the HP symbol sets not listed above, see the CSET command page.<br />
b Factory-set (default) value<br />
129
PRESCRIBE <strong>Command</strong> <strong>Reference</strong><br />
File<br />
Printout<br />
!R!<br />
CMNT This file will not print correctly in the IBM;<br />
CMNT emulation (mode 1);<br />
RES; INTL 2, 2; SLM 1; STM 2;<br />
SFNT "Helvetica", 14;<br />
EXIT;<br />
Diese [pfel sind eine ]berraschung!<br />
!R! PAGE; EXIT;<br />
130
JOBD<br />
JOBD — JOB Deletion<br />
Format<br />
Parameters<br />
JOBD [mode[, job-id or mailbox-id[, password]]];<br />
mode:<br />
mode of deletion:<br />
1 = Deletes temporary jobs<br />
2 = Deletes permanent jobs<br />
8 = Deletes the jobs in the virtual mailbox specified by mailbox-id<br />
9 = Deletes the virtual mailbox specified by mailbox-id<br />
15 = Resets all virtual mailboxes to a clean state<br />
job-id or mailbox-id:<br />
an integer or character string that specifies the job ID or mailbox ID<br />
0 = for modes 8, 9, and 15 only, affects all the mailboxes<br />
1 to 255 = tray ID (specified by JOBS)<br />
Character string = job ID or alias of virtual mailbox, must be enclosed by single or<br />
double quotation marks<br />
password:<br />
four-digit number specified by VMPW to secure the mailbox<br />
Function<br />
The JOBD command deletes the jobs stored in the hard disk. This command may be used<br />
to make more free space in the hard disk by deleting unnecessary jobs.<br />
Modes 1 and 2 delete the temporary and permanent jobs, respectively. By giving a job ID<br />
(specified by the JOBS command), it deletes only the job having the matching job ID.<br />
Modes 8, 9, and 15 are used for deletion of the jobs stacked in the virtual mailbox: Mode<br />
8 deletes all jobs stored in the mailbox which is specified by mailbox-id. It does not<br />
affect the alias and password for the mailbox, if any. (For details on aliasing and<br />
password-protection of the mailbox, see VMAL and VMPW, respectively.) Mode 9<br />
deletes the mailbox and its contents at once. The alias and password for the mailbox is<br />
also deleted. Mode 15 resets all mailboxes to a clean state by deleting all the contents in<br />
the mailboxes and clearing the aliases and the passwords altogether (JOBD 15, 0,<br />
0;).<br />
131
PRESCRIBE <strong>Command</strong> <strong>Reference</strong><br />
Files<br />
To delete the temporary job with an ID of 28L016T50 from the hard disk:<br />
!R! JOBD 1, "28L016T50"; EXIT;<br />
To delete all permanent jobs in the hard disk:<br />
!R! JOBD 2; EXIT;<br />
To delete all temporary and permanent jobs in the hard disk:<br />
!R! JOBD; EXIT;<br />
To delete the jobs stacked in virtual mailbox number 3, which has the password of 9999:<br />
!R! JOBD 8, 3, 9999; EXIT;<br />
132
JOBL<br />
JOBL — print JOB List<br />
Format<br />
Parameter<br />
JOBL mode;<br />
mode:<br />
1 = prints a list of temporary jobs in the hard disk<br />
2 = prints a list of permanent jobs in the hard disk<br />
8 = prints a list of virtual mailboxes to represent their usage status<br />
Function<br />
The JOBL command prints a list of all permanent jobs in the hard disk, or all temporary<br />
jobs, for checking the stored contents in the hard disk and to selectively delete jobs. The<br />
jobs stored can be directly printed by reading barcodes on the job list with the barcode<br />
reader BC-1.<br />
The JOBL 8; command outputs a list representing the usage status of virtual mailboxes.<br />
Example of VMB virtual mailbox usage status list output<br />
Regardless of whether mailboxes contain any data, information is displayed for<br />
mailboxes which have been used at least once. The information displayed for each<br />
mailbox is: the mailbox (Bin) number, the alias set for the mailbox, the number of jobs in<br />
the mailbox, the number of pages, the size of jobs held in that mailbox only, and the size<br />
of jobs entered in other mailboxes as well. A is displayed over the mailbox<br />
number for virtual mailboxes which contain jobs. A Full!! is displayed next to the job<br />
size entry for virtual mailboxes containing jobs which caused an error during data is<br />
written to the mailbox. An error log indicating failure is also printed when jobs within<br />
such a mailbox are printed.<br />
133
PRESCRIBE <strong>Command</strong> <strong>Reference</strong><br />
File<br />
To print a permanent job list:<br />
!R! JOBL 2; EXIT;<br />
134
JOBO<br />
JOBO — JOB Output<br />
Format<br />
Parameters<br />
JOBO mode, ’job-id’ or ’mailbox-id’[, password];<br />
mode:<br />
0 = normal<br />
8 = virtual mailbox<br />
job-id (mode 0):<br />
job ID or page ID<br />
mailbox-id (mode 8):<br />
mailbox ID from 1 to 255, or alias<br />
password (mode 8 only):<br />
password for the mailbox<br />
Function<br />
The JOBO command retrieves a temporary or permanent job or the jobs saved in the<br />
virtual mailbox and prints with the finishing arrangements previously made.<br />
Mode 0 is used to retrieve and print a temporary or permanent job. The job to be<br />
retrieved may be specified by the job ID which is given internally by the printing system.<br />
It is also possible to specify the page ID if only a particular page is required to be printed.<br />
The page is automatically assigned and printed on a page when one of the ID barcode<br />
position parameters of 128 though 135 is specified for JOBS. A list of job names<br />
currently stored in the hard disk can be obtained by printing a job list (See JOBL on page<br />
134).<br />
Settings such as the number of pages to print, whether to print barcode ID on the printed<br />
pages, etc., for the job to be retrieved by JOBO can be made by issuing JOBP followed<br />
by a JOBO (See JOBP on page 138).<br />
If the job name does not exist or the job is corrupted in hard disk, an error is messaged on<br />
the operator panel display as follows:<br />
Hard Disk Error Meaning<br />
99 The job does not exist.<br />
98 The job is corrupted.<br />
Mode 8 retrieves jobs stacked on a virtual mailbox for printing. In mode 8, the ID<br />
number (or the alias, if the mailbox has one given) for the mailbox should be specified in<br />
place of job-name. The mailbox ID number should be 1 to 255. All jobs in the mailbox<br />
specified by its mailbox ID are printed at once. After printing is finished, all jobs in the<br />
mailbox are automatically deleted.<br />
135
PRESCRIBE <strong>Command</strong> <strong>Reference</strong><br />
Files<br />
All jobs are delivered to the current output stack (all jobs to the same stack). Note<br />
however the jobs with stapling enabled will be forcibly sent to the stapler.<br />
The master password, if set previously by VMPW, is valid for all virtual mailboxes for<br />
which a password is set. An error will be displayed on the operator panel if no password<br />
or an incorrect password is specified. An error will result also if no virtual mailbox<br />
corresponds to the alias given or if no job is present in the specified mailbox. It is not<br />
possible to select a virtual mailbox using the operator panel when no jobs are posted in<br />
the virtual mailbox.<br />
If the CANCEL key is pressed during virtual mailbox job output, processing will halt<br />
and the printing system will return to Ready status. The job being output and jobs in the<br />
virtual mailbox can be printed.<br />
To output the job with job ID 4H90058I0 in the hard disk, with no barcode printed, in 7<br />
copies:<br />
!R! JOBP 0, 7; JOBP 1, 2; JOBO 0, ’4H90058I0’;<br />
EXIT;<br />
To print the jobs stacked on virtual mailbox number 3, for which no password is set:<br />
!R! JOBO 8, 3; EXIT;<br />
To output the jobs stacked on the virtual mailbox with the alias Jonathan, for which the<br />
password 9999 is set:<br />
!R! JOBO 8, ’Jonathan’, 9999; EXIT;<br />
136
JOBP<br />
JOBP — JOB, print with Print options<br />
Format<br />
Parameters<br />
JOBP print-option, parameter;<br />
print-option:<br />
an integer that specifies the print option from the ones below<br />
parameter:<br />
an integer, the letter m, or character string that specifies the parameter for the print option<br />
as indicated in the table below<br />
printoption<br />
Function Parameter Effective to:<br />
0 Copy count 1 to 999<br />
1 Printing barcode 0 = first-page only<br />
1 = whole page<br />
2 = disabled<br />
2 Duplex printing 0 = off<br />
1 = long edge binding<br />
2 = short edge binding<br />
JOBO<br />
3 Destination stack 1 = face-down<br />
2 = face-up<br />
3 = finisher tray<br />
4 Stapling 0 = off<br />
1 = bottom left, angled<br />
2 = top left, automatic angled or upright<br />
3 = two centered<br />
5 Barcode position 0 to 7 or 128 to 135 (printing page ID’s)<br />
6 Staple count M or m = staples the maximum number of<br />
sheets. For example, 20 sheets for models DF-<br />
30/31.<br />
0 = does not staple jobs that exceed the maximum<br />
number of sheets.<br />
–1 = staple only the sheets that exceed the<br />
maximum number of sheets.<br />
2 to 20 = staples the number of specified<br />
sheets.<br />
7 Center stitch 0 = off<br />
1 = center stitch and stapling<br />
8 Punching 0 = off<br />
1 = main position<br />
2 = alternate position<br />
9 Transparency separator 0 = off<br />
1 = blank separator<br />
2 = duplicated separator<br />
10 Source for transparency number representing the paper source (tray)<br />
separator<br />
11 Rotated collation 0 = off<br />
1 = on<br />
12 Thumbnailing number of pages printed per sheet, 1, 2, 4, 6,<br />
9, or 16<br />
JOBO<br />
JOBO<br />
137
PRESCRIBE <strong>Command</strong> <strong>Reference</strong><br />
Function<br />
Files<br />
printoption<br />
Function Parameter Effective to:<br />
13 Booklet 0 = off<br />
1 = longitudinal feeding, left binding<br />
2 = longitudinal feeding, right binding<br />
3 = lateral feeding, left binding<br />
4 = lateral feeding, right binding<br />
The JOBP command implements printing a print job which was prologued by JOBS and<br />
epilogued by JOBT in the similar manner as the JOBO command (See JOBO on page<br />
135.). Use of the JOBP command allows to use the different settings for copy count,<br />
duplex printing, stapling, etc., from those originally set for the print job. For example, it<br />
is possible to duplex-print the print job (in which duplex-printing was not originally<br />
implemented) by commanding JOBP 2, 1; or remove stapling from the print job (in<br />
which stapling was originally implemented) by commanding JOBP 4, 0;.<br />
Print options 2, 3, 4, and 16 are valid only when the JOBP command follows the JOBO<br />
command to print the job. For example, the JOBP command sequence JOBP 2, 1; will<br />
not activate duplex printing if the preceding job to print was assigned by JOBS.<br />
A JOBP command sequence is cancelled if the host interface of the printing system is<br />
switched from one to another after the timer has expired for the interface.<br />
To print the print job ‘monthlyreport,’ disabling the original barcode printing option, in<br />
the number of copies of 15:<br />
!R! JOBP 0, 15; JOBP 1, 2; JOBO 'monthlyreport'; EXIT;<br />
138
JOBS<br />
JOBS — JOB Start<br />
Format<br />
Parameters<br />
save-mode:<br />
save mode:<br />
JOBS save-mode, copy, barcode, barcode-position[, share, ’job-name’,<br />
’user-name’, ’time’];<br />
0 = electronic sorting only<br />
1 = temporary<br />
2 = permanent<br />
8 = (Print to) virtual mailbox<br />
copy:<br />
number of copies to print:<br />
1 to 999<br />
barcode (starting-mailbox when save-mode is 8):<br />
a number representing the page(s) barcode is printed 1 :<br />
0 = On cover page only<br />
1 = On whole pages<br />
2 = None<br />
barcode-position (ending-mailbox when save-mode is 8):<br />
a number representing the position of barcode:<br />
0 to 7 or 128 to 135 (See page 142.)<br />
share:<br />
reserved: Must be 0<br />
job-name:<br />
job name, character string up to 80 bytes<br />
user-name:<br />
user name, character string up to 80 bytes<br />
time:<br />
time stamp, character string up to 80 bytes<br />
1 Save-mode must be permanent (2).<br />
139
PRESCRIBE <strong>Command</strong> <strong>Reference</strong><br />
Function<br />
The JOBS command defines start of a job which is processed using e-MPS. The<br />
subsequent document is spooled in the hard disk or RAM disk. (Only HP mopier<br />
compatible spooling is possible if the printing system uses RAM disk.) Electronic sorting<br />
becomes possible in emulations other than PJL and KPDL. This command must be<br />
terminated by JOBT as exampled in Files below on page 144.<br />
Among the e-MPS finishing functions, not all of them require a hard disk. For example,<br />
using the staple function does not require a hard disk in the printing system.<br />
If the size of the permanent jobs saved in the hard disk has reached the maximum limit<br />
while the first parameter specifies the permanent job saving mode, the printing system<br />
indicates ‘harddisk error 97’ meaning that no more permanent jobs are storable. The<br />
printing system forcibly uses save-mode 0.<br />
With mode 0, 1, or 2, it is possible to print a barcode ID which is directly read by an<br />
option barcode scanner for reprinting the job at any later time. The position for the<br />
barcode ID can be one of the following positions depending according to the given<br />
barcode position parameter. Note that parameters 128 through 135 allow a humanreadable<br />
barcode ID printed along the barcode ID.<br />
Barcode positions<br />
Spooling to Virtual Mailbox<br />
Specifying 8 for save-mode enables virtual mailbox spool mode.<br />
The starting-mailbox value must be greater than the ending-mailbox value. Otherwise,<br />
only the starting mailbox becomes valid.<br />
When no virtual mailbox corresponds to the alias given, the message display shows ‘hard<br />
disk error 85 (see page 8-8 of the Technical <strong>Reference</strong> manual.)’ and information<br />
regarding the job which was thrown away is displayed in the error log.<br />
If JOBS-JOBT pairs are nested or if they are not paired properly, the job defined between<br />
the innermost JOBS-JOBT pair will be valid.<br />
The command is invalid if any of the job name, user name or time stamp exceed<br />
31 bytes. Note that the job which would have been placed in a virtual mailbox will be<br />
immediately printed.<br />
Note that if parameters starting-mailbox and ending-mailbox do not specify a valid<br />
virtual mailbox number (1 to 255), or if the JOBP command does not include a valid<br />
140
JOBS<br />
virtual mailbox specification (See JOBP on page 137.), the job in question will not be<br />
saved to any virtual mailbox and no error will be displayed.<br />
While jobs are being stacked on a virtual mailbox, a message indicating that jobs are<br />
being stacked on virtual mailboxes (when the VMB-compatible printer driver is being<br />
used) will be displayed on the message display instead of Processing.<br />
Files<br />
To print 25 copies of the job named Project-report1 with user name<br />
T. Anderson, and time stamp of July 29, 2002. The job is saved in HP mode.<br />
!R! JOBS 0,25,0,0,0,<br />
’Project-report1’,<br />
’T. Anderson’,<br />
’07/29/02’;<br />
EXIT;<br />
To print 3 copies of the job named Beauty-parlor-list with<br />
user name<br />
Salt Lake and time stamp of January 12, 2002. The job is<br />
saved in permanent mode.<br />
!R!<br />
JOBS 2,3,2,2,0,’Beauty-parlor-list’, ’Saltlake’,’01/12/02’;<br />
TEXT ’Page 1...’;<br />
PAGE;<br />
TEXT ’Page 2...’;<br />
PAGE;<br />
TEXT ’Page 3...’;<br />
PAGE;<br />
JOBT;<br />
JOBL;<br />
EXIT;<br />
To print one copy of the job named Inventory List 2002 with user name<br />
Susan and time stamp of February 12, 2002. The job is saved in temporary mode.<br />
!R!<br />
JOBS 1,1,1,0,0,’Inventory List 2002’, ’Susan’, ’02/12/02’;<br />
TEXT ’Page 1...’;<br />
PAGE;<br />
TEXT ’Page 2...’;<br />
PAGE;<br />
TEXT ’Page 3...’;<br />
PAGE;<br />
JOBT;<br />
EXIT;<br />
To stack the jobs between JOBS and JOBT on the virtual<br />
mailbox named Sales.<br />
!R! JOBS 8, 3, ’Sales’, 0, 0, ’Invoice’, ’Sales’, ’01/14/02<br />
16:30:25’;<br />
UNIT C; MZP 5, 10; BOX 6, 6; PAGE; TEXT ’November Result’;<br />
PAGE; TEXT ’To Mr. Johnson’; PAGE;<br />
JOBT; EXIT;<br />
To stack the jobs between JOBS and JOBT on all virtual<br />
mailboxes having numbers 3 to 15.<br />
141
PRESCRIBE <strong>Command</strong> <strong>Reference</strong><br />
!R! JOBS 8, 3, 3, 15, 0, ’Service’, ’Repair’, ’01/14/02<br />
16:30:25’;<br />
UNIT C; MZP 5, 10; BOX 6, 6; PAGE; TEXT ’ABCDE’; PAGE;<br />
TEXT ’Domestic’; PAGE;<br />
JOBT; EXIT;<br />
142
JOBT<br />
JOBT — JOB Terminate<br />
Format<br />
Parameter<br />
Function<br />
File<br />
JOBT;<br />
None<br />
The JOBT command terminates defining a job which is started by JOBS. The JOBT<br />
command is used in combination with JOBS to constitute a job definition. The printing<br />
system prints the job in the number of copies as specified by the repeat count<br />
commanded by JOBS or JOBP in the cyclic manner.<br />
At execution, the JOBT command starts printing the job including stapling, job<br />
separation, job offset (if the relevant option device is installed).<br />
The file below sorts and prints the defined job in 40 copies. The pages between JOBS<br />
and JOBT are output to virtual mailbox number 3. Pages after JOBT are output to the<br />
current physical stack.<br />
!R! JOBS 0,40,2,0;<br />
TEXT "Circulation Slip";<br />
PAGE;<br />
TEXT "Response Slip";<br />
PAGE;<br />
JOBT;<br />
EXIT;<br />
143
PRESCRIBE <strong>Command</strong> <strong>Reference</strong><br />
JOG — JOG output stacks for separation<br />
144<br />
Format<br />
Parameter<br />
Function<br />
File<br />
JOG;<br />
None<br />
It is possible to offset separate jobs in the output stack by explicitly repeating the JOG<br />
command so that the user can clearly distinguish his/her print jobs from the others. This<br />
command is only enabled when an optional stacker is attached. The STAK command<br />
must be used to explicitly forward printed pages to the optional stacker.<br />
The optional stacker has two modes for ‘jogging:’ to jog only the first page or all pages<br />
of the job to the left or right. Selection of jog mode can be made by the FRPO S8<br />
command as follows:<br />
All pages FRPO S8 = 0<br />
First page only FRPO S8 = 1<br />
Unlike the job offset provided by HP PJL for each individual job, the JOG command<br />
affects any subsequent print jobs until another JOG command is issued. This is<br />
unaffected even by the reception of a command such as RES, FRPO and SEM which<br />
results in a reset of the printer.<br />
When JOG is issued with a job defined by JOBS and JOBT, jogging affects the<br />
individual job (in the similar way as PJL). Therefore, JOG placed between JOBS and<br />
JOBT is ignored (except for the first page).<br />
If used together with STPL, STPL overrides JOG, regardless of the order the commands<br />
are issued.<br />
The example below prints 3 copies of the job defined between JOBS and JOBT (job<br />
name: My Trial, user name: Halle Berry, date: January 12, 2002) with the electronic<br />
sorting function and deliver printed pages to the face-down tray of the optional stacker in<br />
offset mode or separation mode. (A barcode is output on the first page only. The barcode<br />
position is “0”.)<br />
!R!<br />
STAK 3; CMNT Face-down;<br />
JOG;<br />
JOBS 0,3,0,0,0,"My Trial", "Halle Berry", "01/12/02";<br />
TEXT "Page One: Testing how JOG works.";<br />
PAGE;<br />
TEXT "Page Two: Testing how JOG works.";<br />
PAGE;<br />
TEXT "Page Three: Testing how JOG works.";<br />
PAGE;<br />
JOBT;<br />
EXIT;
LAPI<br />
LAPI — LoaD API Program<br />
Format<br />
Parameters<br />
LAPI Program type, PRESCRIBE command, function name;<br />
Program type:<br />
Type of the downloading program<br />
"PRE" PRESCRIBE command<br />
PRESCRIBE command name:<br />
Name of the PRESCRIBE command to be stored<br />
Alphanumeric string of 2 to 4 characters<br />
(Only in the case of "PRE")<br />
Function name:<br />
Name of the function that starts the user program<br />
(Only in the case of "PRE")<br />
Up to 31 characters<br />
Function<br />
The LAPI command downloads the API program.<br />
As described in the example below, add the string "WRED" to the end of the<br />
downloading data as a terminator.<br />
It is possible to add a string other than "WRED." It is because if the downloading<br />
program includes the string "WRED," this must be changed. To change the terminator,<br />
use the RWRF T command.<br />
When storing a new PRESCRIBE command, if the specified command name has already<br />
been stored, the sending data will be invalid.<br />
Data downloaded with the LAPI command will be deleted (invalid) upon the system<br />
restart.<br />
Example:<br />
!R! LAPI "PRE" , "XXXX" , "XXXXXXXX" ;[Program Data]WRED;<br />
EXIT;<br />
After "WRED" is changed to "TEST"<br />
!R! LAPI "PRE" , "XXXX" , "XXXXXXXX" ;[Program Data]TEST;<br />
EXIT;<br />
145
PRESCRIBE <strong>Command</strong> <strong>Reference</strong><br />
LDFC — LoaD Font Character<br />
Format<br />
Parameters<br />
LDFC font-number, code, height, width, y-offset, x-offset,<br />
cell-width, center, rotation[, resolution]; bit-map;<br />
font-number:<br />
font number (integer from 1000 to 65535). Same for all characters in the font. Must not<br />
duplicate any resident bitmap font number.<br />
code:<br />
height:<br />
width:<br />
y-offset:<br />
x-offset:<br />
ASCII code of the character (0 to 255)<br />
height of the character bitmap, in dots (integer from 0 to 3999)<br />
width of the character bitmap, in dots (integer from 0 to 3999)<br />
distance from the baseline to the top of the character bitmap, in micro dots [1/32 dot]<br />
(integer from -32768 to 32767); positive – up, negative – down<br />
distance from the left edge of the character cell to the left edge of the character bitmap, in<br />
micro dots [1/32 dot] (integer from -32768 to 32767); positive – up, negative – down<br />
cell-width:<br />
total width of the character cell, in micro dots [1/32 dot] (integer from 0 to 65535). This<br />
parameter is used in proportional spacing.<br />
center:<br />
rotation:<br />
distance from the left edge of the character cell to center of the character, in micro dots<br />
[1/32 dot] (integer from 0 to 65535)<br />
0 = portrait<br />
1 = upside-down landscape<br />
2 = upside-down portrait<br />
3 = landscape<br />
resolution:<br />
resolution of the character, 300 [dpi], 600 [dpi], or 1200 [dpi]<br />
146
LDFC<br />
bit-map:<br />
dot pattern of the character, coded as a character string<br />
Function<br />
The LDFC command defines one character of a new bitmap font. It can be used to create<br />
special characters such as the one shown below, which is defined as the ‘+’ symbol<br />
(character code 43) of font 1000. Details and another example appear in<br />
Chapter 4 of the Technical <strong>Reference</strong> manual.<br />
The resolution is valid only on a 600/1200 dpi printer model.<br />
File<br />
!R!<br />
LDFC 1000, 43, 39, 29, 1216, 0, 1216, 608, 0;<br />
@@2@@0@@2@@0@@2@@0@@2@@0@@7@@0@@7@@0@@7@@0@@?‘@0<br />
@@?‘@0@A?p@0@A?p@0@C?x@0@G?|@0@O?~@0@_?/@0@/?/‘0<br />
A/?/p0G/?/x0O/?/~0//?//8O/?/~0G/?/x0A/?/p0@/?/‘0<br />
@_?/@0@O?~@0@G?|@0@C?x@0@A?p@0@A?p@0@@?‘@0@@?‘@0<br />
@@7@@0@@7@@0@@7@@0@@2@@0@@2@@0@@2@@0@@2@@0;<br />
FONT 1000; SLM 1; SCPI 6; SLPI 6;<br />
TEXT ’+ + + + + + + + + + + + +’, N;<br />
TEXT ’ + + + + + + + + + + + + ’, N;<br />
TEXT ’+ + + + + + + + + + + + +’, N;<br />
TEXT ’ + + + + + + + + + + + + ’, N;<br />
TEXT ’+ + + + + + + + + + + + +’, N;<br />
EXIT;<br />
Printout<br />
147
PRESCRIBE <strong>Command</strong> <strong>Reference</strong><br />
LDFN C — generate bitmap character for LoaDing<br />
FoNt<br />
Format<br />
Parameters<br />
LDFN C, font-number, code, height, width, y-offset, x-offset, cell-width;<br />
bit-map;<br />
font-number:<br />
font number (integer from 1000 to 65535)<br />
code:<br />
height:<br />
width:<br />
y-offset:<br />
x-offset:<br />
ASCII code of the character code (0 to 255 for European; 0 to 65533 for Japanese) or in<br />
hexadecimal notation ($xxxx)<br />
height of the character bitmap, in dots (integer from 1 to 65535)<br />
width of the character bitmap, in dots (integer from 1 to 65535)<br />
bitmap Y offset, in 1/32 dots (integer from -32768 to 32767)<br />
bitmap X offset, in 1/32 dots (integer from -32768 to 32767)<br />
cell-width:<br />
character width, in 1/32 dots (integer from 1 to 65535)<br />
bit-map:<br />
bitmap transfer data (BBN format)<br />
148
LDFN C<br />
Function<br />
The LDFN C command defines bitmap characters for each character code for the<br />
downloaded font header already defined using LDFN F. Note that each character code<br />
defined must match the font number, symbol set (1- or 2-byte code), and other<br />
information of the font header already created. The bitmap data transferred at the end of<br />
this command is transferred under Kyocera’s original BBN format. This is the transfer<br />
format used by the LDFC and LDKC commands.<br />
This command is recommended for use with downloading bitmap fonts. In other words,<br />
this command is intended as an equivalent for the old LDFC and LDKC commands. Use<br />
this command when creating a new bitmap font. LDFC, LDKC and CRKF will be<br />
deleted in the future.<br />
Units used in height, width, y-offset, x-offset and cell-width are dots of the resolution<br />
defined in the font header.<br />
The coordinate system used when defining bitmap fonts with this command is defined as<br />
follows. Note the sign of the offset value.<br />
Font Registration Coordinate System<br />
+ direction<br />
Y<br />
Origin<br />
X<br />
+ direction<br />
A command error will result and the command has no effect if any of the parameters are<br />
outside the given range. This command is ignored if even one parameter error occurs.<br />
149
PRESCRIBE <strong>Command</strong> <strong>Reference</strong><br />
LDFN F — create header for LoaDing FoNt<br />
Format<br />
Parameters<br />
LDFN F, font-number, resolution, name, symbol-set, spacing, width, height,<br />
style, stroke, type-face, type;<br />
font-number:<br />
font number:1000 to 65535<br />
resolution:<br />
resolution:<br />
0 = 300-dpi bitmap<br />
1 = 600-dpi bitmap<br />
3 = 1200-dpi bitmap (Fine mode)<br />
name:<br />
font name (ASCII text string up to 31 characters long). This string must be enclosed in<br />
either single or double quotation marks.<br />
symbol-set:<br />
symbol set:<br />
numeric value = 1-byte code symbol set (1 to 65535 [619: Shift JIS code])<br />
J = 2-byte JIS code<br />
spacing:<br />
width:<br />
height:<br />
style:<br />
stroke:<br />
spacing:<br />
0 = fixed spacing<br />
1 = proportional spacing<br />
font width (in dots set by resolution):3 to 3000<br />
font height (in dots set by resolution):4 to 4165<br />
font style:0 to 32767<br />
stroke weight:-127 to +127<br />
type-face:<br />
type face:0 to 32767<br />
150
LDFN F<br />
type:<br />
font type:<br />
0 = character codes from 32 to 127<br />
1 = character codes from 32 to 127 and from 160 to 255<br />
2 = character codes from 0 to 255<br />
Function<br />
The LDFN F command creates a font header for downloading a font to the printer. After<br />
the header is created, you must continue with downloading bitmap characters using the<br />
LDFN C command. This command only generates a font information header; it includes<br />
no character definition information. Since the font header defined by this command is<br />
capable of registering extensions to ANK codes (a 1-byte code), it is necessary to select a<br />
font after assigning fonts using the ASFN command when using 2-byte characters. Refer<br />
to the ASFN command page for details.<br />
This command is recommended for use with downloading bitmap fonts. This command<br />
is intended as an equivalent for the old LDFC, LDKC and CRKF commands to create a<br />
new bitmap font. LDFC, LDKC and CRKF will be discontinued in the future.<br />
Font Select <strong>Command</strong><br />
FONT, SFNT<br />
KFNT, SKFT<br />
Description<br />
European character (1-byte code) emulation<br />
Japanese character (2-byte code) emulation<br />
(linked using ASFN)<br />
A command error will result and the command has no effect if any of the parameters are<br />
outside the given range. This command is ignored if even one parameter error occurs.<br />
151
PRESCRIBE <strong>Command</strong> <strong>Reference</strong><br />
LDFN S — LoaD truetype FoNt<br />
Format<br />
Parameters<br />
LDFN S, format, font-number, name, length[, symbol-set, style, stroke,<br />
type-face]; binary-data WRED;<br />
format:<br />
font format:<br />
0 = TrueType font<br />
1 = Japanese TrueType font<br />
2 = Japanese TrueType Collection font<br />
font-number:<br />
font number:1000 to 65535<br />
Since there are two font headers for Japanese TrueType fonts, the printer automatically<br />
creates a font number increased by 1.<br />
name:<br />
length:<br />
font name:ASCII text string of up to 31 characters long. This string must be enclosed in<br />
either single or double quotation marks.<br />
font data length:number of bytes sent as binary data<br />
symbol-set:<br />
font symbol set value:1 to 65535 (619 = Shift JIS code)<br />
style:<br />
stroke:<br />
font style: 0 to 32767<br />
stroke weight: –127 to +127<br />
type-face:<br />
type face:0 to 32767<br />
binary-data:<br />
font data (in TrueType format)<br />
152
LDFN S<br />
Function<br />
The LDFN S command allows outline fonts (TrueType fonts) to be downloaded to the<br />
printing system. A binary format is used to represent font data. The size of this data must<br />
match that given by length (font data length).<br />
Always explicitly terminate font data using WRED;. The five bytes represented by<br />
WRED; are not counted as part of the font data length.<br />
The maximum number of fonts that can be downloaded is up to the memory available or<br />
256 fonts (512 when format is 2). Use FONT or SFNT command to select 1-byte fonts to<br />
be defined with this command.<br />
TrueType fonts defined using this command cannot be completely deleted unless both<br />
DELF n; and DELF n+1; are specified.<br />
A command error will result and the command has no effect if any of the parameters are<br />
outside the given range. This command is ignored if even one parameter error occurs.<br />
Although symbol-set, style, stroke and type-face may be omitted, we recommend that all<br />
parameters be used to define font selection information.<br />
153
PRESCRIBE <strong>Command</strong> <strong>Reference</strong><br />
LGHT — adjust LiGHTness<br />
COLOR<br />
Format<br />
Parameters<br />
LGHT mode, degree;<br />
mode:<br />
degree:<br />
mode of lightness adjustment:<br />
0 = gamma control<br />
1 = contrast control<br />
degree of saturation level:<br />
number from –10 to 10 (Default is 0)<br />
Function<br />
The LGHT command controls lightness and darkness balance based on the specified<br />
parameters. The gamma and contrast can be set independently of each other.<br />
In gamma control mode, the color bars below represent the lightness gamma variation<br />
using hue R as an example. The top color bar represents the default lightness variation (γ<br />
= 1.0) with its median indicated by the symbol. The left side represents the lower<br />
lightness range and the right side the higher lightness range. The middle color bar is an<br />
example lightness balance made brighter (set to γ > 1.0). The bottom color bar is an<br />
example lightness balance made darker (set to γ
LGHT<br />
Default contrast<br />
Contrast set to high<br />
Contrast set to low<br />
Varying the darkness contrast allows the difference between the light and dark shades of<br />
the image to be articulated and the intensity of control changes the difference between<br />
the light and dark shades of the image.<br />
Lightness gamma and darkness contrast cannot be controlled hue by hue. However, since<br />
impressions vary with hue, you need to control with care.<br />
The LGHT command is enabled for all color spaces, all color modes and all monitor<br />
simulation modes.<br />
If ink simulation is set to other than none, this command is disabled. This mode is not<br />
held permanently in the printing system. For this reason, saturation is reset to its default<br />
state when the power is turned on.<br />
155
PRESCRIBE <strong>Command</strong> <strong>Reference</strong><br />
MAP — Move to Absolute Position<br />
Format<br />
Parameters<br />
MAP x-coordinate, y-coordinate;<br />
x-coordinate:<br />
distance from the left margin<br />
y-coordinate:<br />
distance from the top margin<br />
Function<br />
File<br />
The MAP command moves the cursor to a position specified relative to the top and left<br />
margins, measured in the units designated by the UNIT command. The coordinates may<br />
be positive or negative. Negative coordinates move the cursor outside the margin.<br />
The MAP command is ignored in path mode graphics.<br />
!R! RES; UNIT C; STM 2; SLM 2;<br />
SFNT ’Helvetica-Nr’, 9;<br />
MAP 0, 0; BOX 40, 40; SPD .2;<br />
MAP 0, 1.4; TEXT ’< = = = Margins’;<br />
MAP 0, 0; CIR .1; TEXT, L; TEXT ’ MAP 0, 0;’;<br />
MAP 4, 0; CIR .1; TEXT, L; TEXT ’ MAP 4, 0;’;<br />
MAP 0, 2; CIR .1; TEXT, L; TEXT ’ MAP 0, 2;’;<br />
MAP 4, 2; CIR .1; TEXT, L; TEXT ’ MAP 4, 2;’;<br />
MAP -1, -1; CIR .1; TEXT, L; TEXT ’ MAP -1, -1;’;<br />
PAGE;<br />
EXIT;<br />
156
MAP<br />
Printout<br />
Related <strong>Command</strong>s<br />
MRP, MZP, MRPA<br />
157
PRESCRIBE <strong>Command</strong> <strong>Reference</strong><br />
MCLR — Match CoLoR<br />
COLOR<br />
Format<br />
Parameter<br />
MCLR mode;<br />
mode:<br />
mode of color matching:<br />
0 = none (default)<br />
1 = auto<br />
2 = vivid color<br />
3 = display<br />
Function<br />
The MCLR command selects the mode of color matching.<br />
Color matching mode is changed according to the various conditions of emulation, paper<br />
type, and print quality. In monochrome mode, color matching is defaulted to 0 (none).<br />
Mode 0 does not perform color matching. Mode 1 automatically selects color correction<br />
mode depending on the printing data. Text or vector graphics data are processed using<br />
Vivid Color; raster image data are processed using display mode. Mode 2 (Vivid color)<br />
performs correction on cyan color. Mode 3 (display) performs color correction suited to<br />
simulate the standard display monitor.<br />
This command causes a form feed.<br />
158
MCRO<br />
MCRO — define MaCRO<br />
Format<br />
Parameters<br />
MCRO name[ dummy-sign[, comment]];<br />
name:<br />
character string starting with a letter<br />
dummy-sign:<br />
any character (default: % preceded by a space)<br />
comment:<br />
any character string<br />
Function<br />
The MCRO command assigns a name to the sequence of PRESCRIBE commands that<br />
follows, up to the ENDM (end macro) command. Thereafter, the entire sequence of<br />
commands can be executed by specifying the assigned name in a single CALL or AMCR<br />
(automatic macro) command.<br />
The name can be any length but only the first four characters count. The rest will be<br />
ignored. The distinction between upper and lowercase letters is also ignored. For<br />
example, the following macro names are all the same:<br />
ABCD<br />
abcd<br />
ABCDE<br />
Abcdxyz<br />
The name must start with a letter, but the other characters can include digits and special<br />
symbols such as hyphens. For example, F-1 and GRY2 are valid macro names.<br />
dummy-sign (normally the percent sign) indicates dummy parameters in the body of the<br />
macro. Dummy parameters are given by writing the dummy sign followed by a number:<br />
%1 for the first dummy parameter, %2 for the second dummy parameter, and so on, up to<br />
a maximum of 19 dummy parameters. The same dummy parameter can be used any<br />
number of times. Values are assigned to dummy parameters when the macro is invoked<br />
by the CALL command.<br />
If a macro with the same name has already been defined, the new definition is ignored.<br />
To redefine a macro, you must first delete the old definition with the DELM (delete<br />
macro) or DAM (delete all macros) command, or by switching power off.<br />
See the Technical <strong>Reference</strong> manual for information on the limitations about the usage of<br />
macros.<br />
The PCL5E command language, available in the mode 6 emulation, enables users to<br />
record HPGL/2 macros inside of HPGL/2 commands.<br />
159
PRESCRIBE <strong>Command</strong> <strong>Reference</strong><br />
File<br />
Printout<br />
The following table shows the source of the PCL macros, the location in the printer, and<br />
the property value for the resource — important if resource protection mode is used. See<br />
also Resource Protection in the Technical <strong>Reference</strong> manual.<br />
Macro Location Property<br />
Downloaded RAM Temporary/Permanent<br />
Memory card Memory card Permanent<br />
Internal ROM Permanent<br />
The internal printer firmware manages the PCL macros, recognizing the source, location<br />
and property value of the macros.<br />
If the printer encounters PCL macros with the same macro ID, it will prioritize them in<br />
the following order: macros downloaded to RAM, macros residing on a memory card,<br />
and macros stored in the EPROM.<br />
Memory card and EPROM based PCL macros cannot be deleted. Downloaded PCL<br />
macros, available for all FS-series printers, may be removed using the PCL reset or<br />
delete commands: &f6X or &f8X. Downloaded macros may also be sent<br />
to specific host buffers of the printer interfaces. The memory card and ROM macros will<br />
be available on all interfaces.<br />
!R! RES; FSET 1p12v0s3b24580T;<br />
MCRO SIGN %, string, length + 0.3;<br />
SPD .03;<br />
BOX %2, .3; MRP .15, .2;<br />
TEXT %1; MRP -.15, .35;<br />
ENDM;<br />
CALL SIGN, ’CHECK ALL SWITCHES AND INDICATORS ...’, 3.9;<br />
CALL SIGN, ’BE SAFE; NOT SORRY’, 2.1;<br />
PAGE;<br />
EXIT;<br />
160
MDAT<br />
MDAT — set MeDia type ATtribute<br />
Format<br />
Parameters<br />
MDAT [media-type[, paper-weight, fuser-mode, duplex[, density]]];<br />
media-type<br />
1 = Plain<br />
2 = Transparency<br />
3 = Preprinted<br />
4 = Label<br />
5 = Bond<br />
6 = Recycled<br />
7 = Vellum<br />
8 = Rough<br />
9 = Letterhead<br />
10 = Color<br />
11 = Prepunched<br />
12 = Envelope<br />
13 = Cardstock<br />
14 = Coated<br />
15 = Second side<br />
16 = Thick<br />
21 = Custom 1<br />
22 = Custom 2<br />
23 = Custom 3<br />
24 = Custom 4<br />
25 = Custom 5<br />
26 = Custom 6<br />
27 = Custom 7<br />
28 = Custom 8<br />
paper-weight<br />
0 = Normal<br />
1 = Heavy (Thick)<br />
2 = Light (Thin)<br />
3 = Extra thick<br />
10 = Light<br />
11 = Normal 1<br />
12 = Normal 2<br />
13 = Normal 3<br />
14 = Heavy 1<br />
15 = Heavy 2<br />
16 = Heavy 3<br />
17 = Extra heavy<br />
161
PRESCRIBE <strong>Command</strong> <strong>Reference</strong><br />
fuser-mode<br />
0 = High<br />
1 = Middle<br />
2 = Low<br />
3 = Vellum<br />
duplex<br />
density<br />
0 = Enable<br />
1 = Disable<br />
1 = Light<br />
2 = Medium Light<br />
3 = Normal<br />
4 = Medium Heavy<br />
5 = Heavy<br />
Function<br />
The MDAT command is used to customize the default attributes of a media type for<br />
optimization. The paper-weight attribute affects the printing system’s transfer bias,<br />
fuser-mode affects the fuser temperature, and duplex determines whether the paper with<br />
that paper type is allowed for duplex printing or not.<br />
If the parameters paper-weight and fuser-mode are omitted, this command resets the<br />
three attributes back to their defaults. If all the parameter are omitted (MDAT;), all the<br />
attributes for the all media types are reset to the default.<br />
File<br />
Related <strong>Command</strong><br />
To set the transparency paper type to the thick paper weight and the high fuser<br />
temperature mode, disabling the duplex printing, command:<br />
!R! MDAT 2, 1, 0, 1; EXIT;<br />
MTYP<br />
162
MID<br />
MID — Multi-tray ID<br />
Format<br />
Parameter<br />
MID tray-group;<br />
tray-group:<br />
number from 1 (top) to the maximum<br />
Function<br />
The MID command selects a group of trays in the sorter, which is assigned by the ASTK<br />
command and allows the subsequent SSTK (select Sorter STacKer) or CSTK (select<br />
Collator STacKer) command to deliver the output pages into the trays of that group for<br />
sorting or collating.<br />
The MID command should be placed at the beginning of a file or program, or at the top<br />
of a new page. The selection of a tray group made by the MID command is effective until<br />
it is changed by another MID command (It is not reset by the RES command).<br />
If the printer receives an ASTK command or one of the FRPO commands, the MID<br />
command is canceled (the output pages will be sorted in the normal sorter mode) and you<br />
must reselect the tray group by specifying the MID command.<br />
The MID command is ignored while the multiple environment mode is interface-specific<br />
(FRPO S0, 2;) or off (FRPO S0, 0;). Refer to the sorter’s User’s Manual.<br />
File<br />
Note<br />
This command is irrelevant to certain combination of photocopier models and option finisher<br />
models.<br />
Related <strong>Command</strong>s<br />
To enable the multiple user mode (FRPO S0, 1;), to create three groups, to select the<br />
second group, and to deliver outputs in the fourth tray in the (second) group, send the<br />
following command sequence:<br />
!R! FRPO S0, 1; ASTK 2, 5; MID 2; SSTK 2; EXIT;<br />
This page must be delivered to the 4th tray in the sorter.<br />
!R! RES; EXIT;<br />
ASTK, CSTK, MSTK, SSTK<br />
163
PRESCRIBE <strong>Command</strong> <strong>Reference</strong><br />
MPSS — e-MPS Storage<br />
Format<br />
Parameters<br />
MPSS ’job-type’, ’limit’, size;<br />
job-type:<br />
limit:<br />
size:<br />
CODE = temporary or permanent job<br />
VMB = virtual mailbox job<br />
JOBR = retention job<br />
TEMPLIMITSIZE = Limit of the capacity for temporary stored jobs<br />
PERMLIMITSIZE = Limit of the capacity for permanent stored jobs<br />
VMBLIMITSIZE = Limit of the capacity for virtual mailbox jobs<br />
QUICKLIMITCOUNT = Limit of the number of Quick Copy jobs<br />
number from 0 to 9999 in unit of megabytes<br />
number from 1 to 50 for QUICKLIMITCOUNT<br />
Function<br />
The MPSS command is used to allocate the limit values for the storage capacities to store<br />
temporary and permanent jobs, virtual mailbox jobs, and the number of Quick Copy jobs<br />
in the hard disk.<br />
Files<br />
To set the maximum capacity for the permanent jobs to 600 MB:<br />
!R! MPSS ’CODE’, ’PERMLIMITSIZE’, 600; EXIT;<br />
To set the maximum capacity of the virtual mailbox to 800 MB:<br />
!R! MPSS ’VMB’, ’VMBLIMITSIZE’, 800; EXIT;<br />
To set the maximum number of Quick Copy jobs (Job Retention) to 50:<br />
!R! MPSS ’JOBR’, ’QUICKLIMITCOUNT’, 50; EXIT;<br />
164
MRP<br />
MRP — Move to Relative Position<br />
Format<br />
Parameters<br />
MRP x-coordinate, y-coordinate;<br />
x-coordinate/y-coordinate:<br />
coordinates as measured from the current cursor position<br />
Function<br />
File<br />
The MRP command moves the cursor from its current position to a specified relative<br />
position, measured in the units designated by the UNIT command. The coordinates may<br />
be positive or negative.<br />
The MRP command works in the standard mode graphics only. To move to a relative<br />
position in a path construction, use the PMRP (in Path, Move to Relative Position)<br />
command.<br />
!R! RES; UNIT C;<br />
SFNT ’Helvetica-Bd’;<br />
CMNT MRP and baseball;<br />
MRP 8, 8; CIR .2;<br />
TEXT ’ 1st’;<br />
MRP -2, -2; CIR .2;<br />
TEXT ’ 2nd’;<br />
MRP -2, 2; CIR .2;<br />
TEXT ’ 3rd’;<br />
MRP 2, 2; CIR .2;<br />
TEXT ’ Home’;<br />
PAGE;<br />
EXIT;<br />
165
PRESCRIBE <strong>Command</strong> <strong>Reference</strong><br />
Printout<br />
Related <strong>Command</strong>s<br />
MAP, MZP, MRPA<br />
166
MRPA<br />
MRPA — Move to Relative Position specified by<br />
Angle<br />
Format<br />
Parameters<br />
MRPA distance, angle;<br />
distance:<br />
angle:<br />
distance to move<br />
angle in degree, measured clockwise from the vertical<br />
Function<br />
The MRPA command moves the cursor from its current position across a specified<br />
distance using a specified angle. The distance is measured in the units designated by the<br />
UNIT command.<br />
The MRPA command is ignored in the path mode graphics. To move to a relative<br />
position specifying angle in a path construction, use the PMRA (in Path, Move to<br />
Relative position by Angle) command.<br />
File<br />
!R! RES; UNIT C;<br />
CMNT Numbers indicate cursor movement;<br />
SFNT ’Helvetica-Bd’;<br />
MAP 6, 12; CIR 1; TEXT ’1’;<br />
MRPA 2, 60; CIR 1; TEXT ’2’;<br />
MRPA 2, 120; CIR 1; TEXT ’3’;<br />
MRPA 2, 180; CIR 1; TEXT ’4’;<br />
MRPA 2, 240; CIR 1; TEXT ’5’;<br />
MRPA 2, 300; CIR 1; TEXT ’6’;<br />
PAGE;<br />
EXIT;<br />
167
PRESCRIBE <strong>Command</strong> <strong>Reference</strong><br />
Printout<br />
Related <strong>Command</strong>s<br />
MAP, MRP, MZP<br />
168
MSTK<br />
MSTK — select Mailbox STacKer<br />
Format<br />
Parameter<br />
MSTK [tray, tray, ...]; or MSTK 0;<br />
tray:<br />
number from 1 to the maximum<br />
Function<br />
The MSTK command is valid only when the option sorter is installed with the printing<br />
system. It instructs the printing system to deliver printed pages in the mailbox mode. In<br />
the mailbox mode, the printed pages are delivered to the trays in the reverse order of tray<br />
parameters. The printed pages are delivered first to the last specified tray until it becomes<br />
full; when the last specified tray becomes full, then the pages are delivered to the second<br />
to the last specified tray, and so on until the first specified tray becomes full. When the<br />
first specified tray becomes full, the bulk tray receives the overflowed pages until it also<br />
becomes full.<br />
When the bulk tray becomes full, the printing system pauses and displays a message<br />
which urges the user to remove paper. By removing all the pages in the bulk tray and<br />
pressing the ON LINE key, printing commences.<br />
If the tray parameters are omitted, all trays excluding the bulk tray are used.<br />
Upon receiving the MSTK command, the printer automatically performs a page feed.<br />
The MSTK 0; command is applicable only for the SO-6. This command cancels the<br />
mailbox mode and delivers all pages in the bulk output tray.<br />
File<br />
!R! RES; MSTK; COPY; EXIT;<br />
PAGE 1 (2 copies, bottom tray) !R! PAGE; EXIT;<br />
PAGE 2 (2 copies, bottom tray) !R! PAGE; EXIT;<br />
169
PRESCRIBE <strong>Command</strong> <strong>Reference</strong><br />
MTYP — select Media TYPe<br />
Format<br />
Parameter<br />
MTYP media-type;<br />
media-type:<br />
1 = Plain<br />
2 = Transparency<br />
3 = Preprinted<br />
4 = Label<br />
5 = Bond<br />
6 = Recycled<br />
7 = Vellum<br />
8 = Rough<br />
9 = Letterhead<br />
10 = Color<br />
11 = Prepunched<br />
12 = Envelope<br />
13 = Cardstock<br />
14 = Coated<br />
15 = Second side<br />
16 = Thick<br />
21 = Custom 1<br />
22 = Custom 2<br />
23 = Custom 3<br />
24 = Custom 4<br />
25 = Custom 5<br />
26 = Custom 6<br />
27 = Custom 7<br />
28 = Custom 8<br />
Function<br />
The MTYP command automatically selects the paper source (tray or cassette) depending<br />
on the given media-type. When the MTYP command is issued, the printing system looks<br />
for the paper source which has the matching media type. To assign a paper type to the<br />
paper cassette, use the operator panel or the FRPO X0 – X7 commands.<br />
For the MTYP command to work, the automatic cassette switching mode must be set to<br />
on in the printing system. To do this, command: !R! PSRC 100; EXIT;. For details<br />
see the PSRC (set paper source) command section in this manual.<br />
To ensure that the paper having the correct size and type of media is always selected, it is<br />
recommended to place the SPSZ (set page size) command following the MTYP<br />
command. For example, to automatically print on the plain A4 paper in the cassette one<br />
(topmost cassette), first assign the plain paper type to the cassette 1 by FRPO X1, 1;,<br />
then command MTYP 1; SPSZ 8;.<br />
This command is valid only for the print systems that support the automatic media type<br />
function.<br />
170
MTYP<br />
File<br />
To print on the A4 label loaded on the printer’s MP tray, set the MP tray size to A4 and<br />
the MP tray type to Labels (See the user’s manual for details.)<br />
!R! RES;<br />
PSRC 100;<br />
CMNT Sets the printer to automatic casette mode;<br />
CMNT Depending on the current media type;<br />
SPSZ 8; MTYP 4;<br />
CMNT Paper size = A4, media type = label;<br />
RES; EXIT;<br />
Related <strong>Command</strong>s<br />
PSRC, SPSZ<br />
171
PRESCRIBE <strong>Command</strong> <strong>Reference</strong><br />
MZP — Move to Zero-relative Position<br />
Format<br />
Parameters<br />
MZP x-coordinate, y-coordinate;<br />
x-coordinate:<br />
distance from the left edge limit of paper<br />
y-coordinate:<br />
distance from the top edge limit of paper<br />
Function<br />
File<br />
The MZP command moves the cursor to a position specified relative to the top and left<br />
edge limits of the paper, measured in the units designated by the UNIT command. The<br />
coordinates may be positive or negative. Negative coordinates, however, move the<br />
cursor off the page, which should be avoided.<br />
The MZP command is ignored in the path mode graphics. To move to a zero-relative<br />
position in a path construction, use the PMZP (in Path, Move to Zero-relative Position)<br />
command.<br />
!R! RES; UNIT C; STM 2; SLM 2;<br />
SFNT ’Helvetica-Nr’;<br />
MZP 0, 0; BOX 40, 40; SPD .2;<br />
MZP 0, 4; TEXT ’< = = = Edge limits’;<br />
MZP 0, 0; CIR .1; TEXT, L; TEXT ’ MZP 0, 0;’;<br />
MZP 6, 0; CIR .1; TEXT, L; TEXT ’ MZP 6, 0;’;<br />
MZP 0, 2; CIR .1; TEXT, L; TEXT ’ MZP 0, 2;’;<br />
MZP 6, 2; CIR .1; TEXT, L; TEXT ’ MZP 6, 2;’;<br />
PAGE;<br />
EXIT;<br />
172
MZP<br />
Printout<br />
Related <strong>Command</strong>s<br />
MAP, MRP, MRPA<br />
173
PRESCRIBE <strong>Command</strong> <strong>Reference</strong><br />
NEWP — start NEW Path<br />
Format<br />
Parameter<br />
Function<br />
File<br />
Printout<br />
NEWP;<br />
None<br />
The NEWP command empties the current path and starts a new path. A path construction<br />
ends with the CLSP (CLoSe Path) command or with any painting operator that paints the<br />
path or draws a line along it (STRK, FILL).<br />
For a full description of path, refer to Chapter 1 of the Technical <strong>Reference</strong> manual.<br />
!R! RES; UNIT C;<br />
NEWP;<br />
PMZP 5, 5;<br />
PDRP 1, -2, 3, 0, -1, 2, -3, 0;<br />
STRK; CMNT Stroking the path;<br />
NEWP;<br />
PMZP 10, 5;<br />
PDRP 1, -2, 3, 0, -1, 2, -3, 0;<br />
GPAT .5; FILL 1; CMNT Filling the path;<br />
PAGE; EXIT;<br />
Related <strong>Command</strong>s<br />
CLSP, FILL, STRK<br />
174
OTRY<br />
OTRY — select paper Output TRaY<br />
Format<br />
Parameter<br />
OTAY tray;<br />
tray:<br />
1 = printing system’s face-down output tray<br />
2 = face-up output tray of the printing system or the option stacker<br />
3 = face-down output tray of the option stacker<br />
4 = face-up output tray of the option stacker (subtray)<br />
5 = job separator<br />
7 = face-down output tray of option stacher (subtray)<br />
11 = face-down output tray of the option mailbox 1<br />
12 = face-up output tray of the option mailbox 1<br />
13 = face-down output tray of the option mailbox (all trays)<br />
14 = face-up output tray of the option mailbox (all trays)<br />
21 = face-down output tray of the option mailbox 2<br />
22 = face-up output tray of the option mailbox 2<br />
31 = face-down output tray of the option mailbox 3<br />
32 = face-up output tray of the option mailbox 3<br />
41 = face-down output tray of the option mailbox 4<br />
42 = face-up output tray of the option mailbox 4<br />
51 = face-down output tray of the option mailbox 5<br />
52 = face-up output tray of the option mailbox 5<br />
61 = face-down output tray of the option mailbox 6<br />
62 = face-up output tray of the option mailbox 6<br />
71 = face-down output tray of the option mailbox 7<br />
72 = face-up output tray of the option mailbox 7<br />
Function<br />
The OTRY command instructs the printing system to deliver pages to the corresponding<br />
output stack of the printing system or the option stacker. The selected tray remains in<br />
effect until changed by another OTRY command. The default value is 1: the printing<br />
system’s face-down tray.<br />
If an optional device such as a stacker, a document finisher, or a sorter is installed, the<br />
tray value 2 instructs the printing system to deliver printed pages to its face-up tray; the<br />
value 3 delivers the pages to its face-down tray. The tray values of 5, 7, 11, 12, 13, 14,<br />
21, 22, 31, 32, 41, 42, 51, 52, 61, 62, 71, and 72 are valid for certain copiers installed<br />
with the applicable option device.<br />
The OTRY command should be placed at the top of a file or program.<br />
175
PRESCRIBE <strong>Command</strong> <strong>Reference</strong><br />
File<br />
!R! OTRY 2; EXIT;<br />
PAGE 1<br />
On printers with only one paper tray this file will be<br />
delivered face-down as usual, page 1 first.<br />
!R! PAGE; EXIT;<br />
PAGE 2<br />
PAGE 2 next, and so on, stacking in the correct order.<br />
!R! PAGE; EXIT;<br />
PAGE 3<br />
But on printers with two paper trays this file will be<br />
delivered to the face-up tray with the pages in reverse<br />
order, page 3 on top.<br />
!R! PAGE; EXIT;<br />
176
PAGE<br />
PAGE — start new PAGE<br />
Format<br />
Parameter<br />
Function<br />
File<br />
PAGE;<br />
None<br />
The PAGE command causes a page break without resetting the printer. Subsequent data<br />
will be printed on a new page with no changes made to page formatting parameters such<br />
as spacing, margins, font selection.<br />
If there is no printing on the current page, the PAGE command will have no effect. It<br />
does not feed out a blank page.<br />
!R! RES;<br />
SLM 1; STM 1;<br />
EXIT;<br />
Page 1:<br />
Following this line, a page break will occur.<br />
!R! PAGE; EXIT;<br />
Page 2:<br />
177
PRESCRIBE <strong>Command</strong> <strong>Reference</strong><br />
PANT — create PANTone color palette<br />
COLOR<br />
Format<br />
Parameters<br />
PANT color-number or ’color-name’;<br />
color-number:<br />
Pantone color number, integer from 100 to 5999<br />
color-name:<br />
Pantone color name<br />
Function<br />
The PANT command can be used to specify the PANTONE uncoated color by number or<br />
name. (See http://www.pantone.com for details on Pantone Colors.)<br />
The following should be noted when specifying a color by its PANTONE number.<br />
• In PANTONE numbers, a C or U symbol is added after the number to distinguish<br />
between coated and uncoated. These symbols are not necessary when a color is<br />
specified using the PRESCRIBE command. In fact, the command becomes invalid if<br />
one of these symbols is added to a number. If there is no color corresponding to the<br />
number specified in the valid range, then the color black is specified.<br />
The following should be noted when specifying a color by its PANTONE name.<br />
• Always enclose character strings in single quotation marks or double quotation<br />
marks. Character strings may be entered in either upper case or lower case.<br />
• In names that contain a combination of words and numbers, such as Red 032 and<br />
Cool Black 2, a space must be inserted between the words and number. If spaces are<br />
not inserted, the words and numbers will be recognized as a different name, in which<br />
case the color will not be specified correctly.<br />
• If a nonexistent name is specified, the command is ignored.<br />
When PANTONE is specified, a color space RGB palette is created, and a color<br />
corresponding to the specified color number is assigned to the palette and selected. The<br />
color is always assigned to index number 0.<br />
Colors may be added to the palette or changed. However, when a color is assigned to<br />
index number 0, the colors created with the PANT command are discarded.<br />
The palette remains valid unless a new one is generated. Therefore, colors created with<br />
the PANT command can be selected using SCOL 0;.<br />
If the PANT command is issued multiple times (either in succession or not in<br />
succession), the color which is valid is the color corresponding to the last entered<br />
command. The colors corresponding to previously entered commands are deleted.<br />
The palette ID number remains valid (active) and does not change.<br />
A total of 45 colors can be specified by name (see list below). These colors must be<br />
spelled as shown, although the letters may be in upper case or lower case.<br />
178
PANT<br />
Process Yellow Process Magenta Process Cyan Process Black<br />
Process Blue<br />
Red 032 Warm Red Rubine Red Rhodamine Red<br />
Blue 072 Reflex Blue Orange 021 Yellow<br />
Green Purple Violet<br />
Black Black 2 Black 3 Black 4<br />
Black 5 Black 6 Black 7<br />
Warm Gray 1 Warm Gray 2 Warm Gray 3 Warm Gray 4<br />
Warm Gray 5 Warm Gray 6 Warm Gray 7 Warm Gray 8<br />
Warm Gray 9 Warm Gray 10 Warm Gray 11<br />
Cool Gray 1 Cool Gray 2 Cool Gray 3 Cool Gray 4<br />
Cool Gray 5 Cool Gray 6 Cool Gray 7 Cool Gray 8<br />
Cool Gray 9 Cool Gray 10 Cool Gray 11<br />
The PANT command may not work with certain printer models and versions. Set the<br />
print quality to Quick mode when this command is used with model FS-5800C.<br />
PANTONE colors cannot be used by the PANT command in KPDL emulations.<br />
File<br />
!R! PANT ’Cool Gray 1’; EXIT;<br />
179
PRESCRIBE <strong>Command</strong> <strong>Reference</strong><br />
PARC — in Path, draw ARC<br />
Format<br />
Parameters<br />
PARC x-coordinate, y-coordinate, radius, start-angle,<br />
end-angle;<br />
x-coordinate, y-coordinate:<br />
coordinates of the center of arc, measured from the left and top edge limits<br />
radius:<br />
radius of arc<br />
start-angle:<br />
starting angle, measured counterclockwise from the positive x axis<br />
end-angle:<br />
ending angle, measured counterclockwise from the positive x axis<br />
Function<br />
File<br />
This command first of all adds a line extending from the current position to the<br />
beginning of the arc, then adds an arc to the current path. Coordinates and radius are<br />
measured in the units designated by the UNIT command; the starting and ending angles<br />
are measured counterclockwise from the positive x axis.<br />
To draw a simple arc as specified by the parameters, the cursor must be moved to the<br />
beginning of the arc by using the PMRA command. (See the example below.)<br />
The arc is drawn at the starting angle through the ending angle in counterclockwise<br />
direction only. After the path is stroked, the cursor remains at the ending angle of the arc.<br />
!R! RES; UNIT C;<br />
NEWP; SPD .1;<br />
PMZP 5.0, 10.0;<br />
PARC 6.5, 12.5, 1.5, 180, 270;<br />
STRK;<br />
NEWP;<br />
CMNT This program draws a circle;<br />
PMRA 6.5, 18, 1.5, 0;<br />
CMNT Moves cursor 1.5 cm by 0 degree;<br />
PARC 6.5, 18, 1.5, 0, 360;<br />
STRK;<br />
PAGE; EXIT;<br />
180
PARC<br />
Printout<br />
181
PRESCRIBE <strong>Command</strong> <strong>Reference</strong><br />
PAT — select fill PATtern<br />
Format<br />
Parameters<br />
PAT pattern-number[, resolution];<br />
pattern-number:<br />
number from 1 to 60 or 100 to 105<br />
resolution:<br />
300 [dpi], 600 [dpi], or 1200 [dpi]<br />
Function<br />
The PAT command specifies the shading pattern used by the BLK and ARC commands<br />
and to fill a path.<br />
The pattern-number should be any number between 1 through 60 if a resident pattern is<br />
selected. A full list of the printer’s resident patterns appear on the following page.<br />
Pattern numbers 100 through 105 are reserved for selecting the expanded patterns and<br />
can be generated by using the XPAT command. If you specify a pattern number between<br />
100 and 105 when no expanded patterns are defined, the printer selects the No. 1 (solid<br />
black) resident pattern.<br />
Variable resolution support is valid for 600 dpi and 1200 dpi models only.<br />
182
PAT<br />
Resident Fill Patterns (300 dpi)<br />
183
PRESCRIBE <strong>Command</strong> <strong>Reference</strong><br />
PCRP — in Path, Curve to Relative Position<br />
Format<br />
Parameters<br />
PCRP x1, y1, x2, y2, x3, y3;<br />
x1, y1:<br />
x2, y2:<br />
x3, y3:<br />
coordinates of the first control point as measured from the current cursor position<br />
coordinates of the second control point as measured from the current cursor position<br />
coordinates of the end point as measured from the current cursor position<br />
Function<br />
The PCRP command adds a Bézier curve segment to the path, starting from the current<br />
cursor point, referred to as current position as shown at right, through two control points<br />
of (x1, y1) and (x2, y2), and ending at (x3, y3).<br />
Example:<br />
NEWP;<br />
PMZP 5, 10;<br />
PCRP 2.5, -4, 7, -5, 7, 0;<br />
STRK;<br />
<br />
<br />
184
PCRP<br />
File<br />
!R! RES; UNIT C;<br />
NEWP;<br />
SPD .1;<br />
PMZP 3, 3;<br />
PCRP 4, 2, 5, 1.5, 6, 1.8;<br />
STRK;<br />
PAGE;<br />
EXIT;<br />
Printout<br />
Current positon<br />
(4, 2)<br />
(5, 1.5)<br />
(6, 1.8)<br />
File<br />
!R! RES; UNIT C;<br />
NEWP;<br />
SPD .1;<br />
PMZP 3, 3;<br />
PCRP 5.5, 1.5, 1.5, 5.5, 7, 7;<br />
STRK;<br />
PAGE;<br />
EXIT;<br />
Printout<br />
Current positon<br />
(5.5, 1.5)<br />
(1.5, 5.5)<br />
(7, 7)<br />
185
PRESCRIBE <strong>Command</strong> <strong>Reference</strong><br />
PCZP — in Path, Curve to Zero-relative Position<br />
Format<br />
Parameters<br />
PCZP x1, y1, x2, y2, x3, y3;<br />
x1, y1:<br />
x2, y2:<br />
x3, y3:<br />
coordinates of the first control point as measured from the left and top edge limits of<br />
paper<br />
coordinates of second control point as measured from the left and top edge limits of<br />
paper<br />
coordinates of end point as measured from the left and top edge limits of paper<br />
Function<br />
The PCZP command adds a Bézier curve segment to the path, starting from the current<br />
cursor position through two controls points of (x1, y1) and (x2, y2), and ending at (x3,<br />
y3), measured from the left and top edge limits of the paper.<br />
Example:<br />
NEWP;<br />
PMZP 1.5, 3.5;<br />
PCZP 4.5, 1.5, 5.5, 5.5, 8, 3.5;<br />
STRK;<br />
(4.5, 1.5)<br />
Current position (1.5, 3.5)<br />
(8, 3.5)<br />
(5.5, 5.5)<br />
186
PCZP<br />
File<br />
!R! RES; UNIT C;<br />
PMZP 3, 6;<br />
PCZP 11, 3, 2, 2, 9, 6;<br />
STRK;<br />
PAGE;<br />
EXIT;<br />
Printout<br />
(2, 2)<br />
(11, 3)<br />
Current position (3, 6)<br />
(9, 6)<br />
187
PRESCRIBE <strong>Command</strong> <strong>Reference</strong><br />
PDIR — set Print DIRection<br />
Format<br />
Parameter<br />
PDIR angle;<br />
angle:<br />
angle in degrees; in 90° increments in a counterclockwise direction<br />
0 = portrait<br />
90 = landscape<br />
180 = reverse portrait<br />
270 = reverse landscape<br />
Function<br />
The PDIR command rotates the coordinates of the logical page by the degree represented<br />
by the value of the angle which orients the page in one of four directions. It does not<br />
change the current page orientation.<br />
When the print direction is changed by the PDIR command, the logical page coordinate<br />
system is transformed so the margins maintain the same printable area (the area enclosed<br />
by the margins) as shown on next page. The current position uses the same coordinate<br />
values as the previous print direction; line-spacing, and the character-spacing of the<br />
current font are effected by the new print direction as are the raster and pattern graphics.<br />
Scalable fonts should be used for printed text in different page directions. The PDIR<br />
command rotates only the coordinates of the logical page on the current page orientation<br />
and does not affect the current page orientation. A bitmap font prints text according to<br />
the current page orientation (it adheres to the current font mode).<br />
The PDIR command does not cause a page break, so you can print text in four different<br />
directions on the same page as shown in the sample file on the next page.<br />
188
PDIR<br />
Portrait (PDIR 0;) Landscape (PDIR 90;)<br />
Reverse Landscape (PDIR 270;) Reverse Portrait (PDIR 180;)<br />
File<br />
!R! RES;<br />
UNIT P; SFNT ’Helvetica’, 8;<br />
UNIT C; MZP 10, 12; SPD .144; CIR .075;<br />
PDIR 270; TEXT ’ ENDLESS VARIETY AND VERSATILITY’;<br />
PDIR 180; TEXT ’ ENDLESS VARIETY AND VERSATILITY’;<br />
PDIR 90; TEXT ’ ENDLESS VARIETY AND VERSATILITY’;<br />
PDIR 0; TEXT ’ ENDLESS VARIETY AND VERSATILITY’;<br />
PAGE;<br />
EXIT;<br />
189
PRESCRIBE <strong>Command</strong> <strong>Reference</strong><br />
Printout<br />
190
PDRP<br />
PDRP — in Path, Draw to Relative Position<br />
Format<br />
Parameters<br />
PDRP x-coordinate, y-coordinate, ...;<br />
x-coordinate, y-coordinate:<br />
coordinates as measured from the current cursor position<br />
Function<br />
File<br />
The PDRP command adds a line to the current path from the current cursor position to a<br />
specified relative position, measured in the units designated by the UNIT command. The<br />
cursor moves to the specified coordinates. The coordinates may be positive or negative.<br />
Negative coordinates may draw the line extending outside the current page. The<br />
thickness of the line is designated by the SPD command.<br />
Multiple pairs of coordinates may be specified. The printer then draws a connected series<br />
of line segments, proceeding from one point to the next. For example, PDRP 1, 2, 3, 4; is<br />
equivalent to PDRP 1, 2; PDRP 3, 4;.<br />
!R! UNIT C; SPD .3;<br />
CMNT Cube;<br />
NEWP;<br />
PMZP 5, 15;<br />
PDRP 4, 0, 2, -2, 0, -4, -4, 0, -2, 2, 0, 4;<br />
CLSP;<br />
PMRP 4, 0;<br />
PDRP 0, -4, -4, 0, 4, 0, 2, -2;<br />
STRK;<br />
PAGE;<br />
EXIT;<br />
191
PRESCRIBE <strong>Command</strong> <strong>Reference</strong><br />
Printout<br />
Related <strong>Command</strong><br />
PDZP<br />
192
PDZP<br />
PDZP — in Path, Draw to Zero-relative Position<br />
Format<br />
Parameters<br />
PDZP x-coordinate, y-coordinate;<br />
x-coordinate, y-coordinate:<br />
coordinates as measured from the left and top edge limits of the current page<br />
Function<br />
File<br />
The PDZP command adds a line to the current path from the current cursor position to a<br />
position specified relative to the top and left edge limits of the current page, measured in<br />
the units designated by the UNIT command. The cursor moves to the specified<br />
coordinates.<br />
The coordinates may be positive or negative. Negative coordinates may draw the line<br />
extending outside the current page. The thickness of the line is designated by the SPD<br />
command.<br />
!R! RES; UNIT C;<br />
NEWP;<br />
PMZP 0, 0; PDZP 0, 5;<br />
PMZP 1, 0; PDZP 0, 4;<br />
PMZP 2, 0; PDZP 0, 3;<br />
PMZP 3, 0; PDZP 0, 2;<br />
PMZP 4, 0; PDZP 0, 1;<br />
PMZP 5, 0; PDZP 0, 0;<br />
STRK;<br />
PAGE;<br />
EXIT;<br />
193
PRESCRIBE <strong>Command</strong> <strong>Reference</strong><br />
Printout<br />
Related <strong>Command</strong><br />
PDRP<br />
194
PELP<br />
PELP — in Path, draw ELlipse<br />
Format<br />
Parameters<br />
PELP x-diagonal, y-diagonal[, x-start, y-start, x-end, y-end[, ellipsepath]];<br />
x-diagonal:<br />
X-coordinate of diagonal point of bounding box<br />
y-diagonal:<br />
Y-coordinate of diagonal point of bounding box<br />
x-start:<br />
y-start:<br />
x-end:<br />
y-end:<br />
X-coordinate of start control point of the ellipse<br />
Y-coordinate of start control point of the ellipse<br />
X-coordinate of end control point of the ellipse<br />
Y-coordinate of end control point of the ellipse<br />
ellipse-path:<br />
ellipse options:<br />
N = define an ellipse path<br />
C = define an ellipse-based arc path<br />
P = define an ellipse-based pie shape path<br />
Function<br />
The PELP command adds an ellipse-based path to the current path. This command<br />
cannot paint figures by itself. In addition, STRK or FILL is required. A complete ellipse<br />
path will be defined if the parameters in brackets are omitted. Executing this command<br />
will close current sub-paths.<br />
An error will result and the command has no effect if the bounding box is specified as a<br />
straight line or a point.<br />
195
PRESCRIBE <strong>Command</strong> <strong>Reference</strong><br />
Current cursor position<br />
(x-start, y-start)<br />
(x-end, y-end)<br />
Bounding box<br />
(x-diagonal, y-diagonal)<br />
N :<br />
C :<br />
P :<br />
File<br />
!R!<br />
RES;<br />
UNIT C;<br />
MZP 0, 0;<br />
BOX 2, 3;<br />
NEWP;<br />
PMZP 0, 0;<br />
PELP 2, 3, 2, 0, 0, 0, N;<br />
STRK;<br />
MZP 5, 5;<br />
BOX 2, -3;<br />
NEWP;<br />
PMZP 5, 5;<br />
PELP 2, -3, 2, 0, 0, 0, N;<br />
STRK;<br />
MZP 10, 5;<br />
BOX -2, -3;<br />
NEWP;<br />
PMZP 10, 5;<br />
PELP -2, -3, -2, 0, 0, 0, N;<br />
STRK;<br />
MZP 15, 0;<br />
BOX -2, 3;<br />
NEWP;<br />
PMZP 15,0;<br />
PELP -2, 3, -2, 0, 0, 0, N;<br />
STRK;<br />
RES;<br />
EXIT;<br />
196
PIE<br />
PIE — draw PIE chart<br />
Format<br />
Parameters<br />
PIE radius, starting-angle, slice-size, ...;<br />
radius:<br />
radius of the pie chart<br />
starting-angle:<br />
position of the first slice<br />
slice-size:<br />
relative sizes of the slices<br />
Function<br />
File<br />
The PIE command is a standard mode graphics command which draws a pie chart<br />
centered at the current cursor position. The sizes of the slices may be specified using any<br />
convenient non-negative integers. (PIE commands are ignored if they contain negative<br />
slices, or slices with decimal fractions.) The sum of the slice sizes should not exceed<br />
9999. The total length of the command must not exceed 255 characters.<br />
The printer automatically converts the slice sizes to angles totaling 360 degrees. It draws<br />
the first slice starting at the position specified by the second parameter (0 = vertically<br />
up), then draws the other slices in order, proceeding in a clockwise movement. The line<br />
thickness is designated by the SPD command.<br />
!R! RES; UNIT C;<br />
MZP 10, 10;<br />
PIE 3, 0, 10, 20, 30, 40;<br />
PAGE;<br />
EXIT;<br />
197
PRESCRIBE <strong>Command</strong> <strong>Reference</strong><br />
Printout<br />
198
PMRA<br />
PMRA — in Path, Move to Relative position<br />
specified by Angle<br />
Format<br />
Parameters<br />
PMRA x-coordinate, y-coordinate, distance, angle;<br />
x-coordinate, y-coordinate:<br />
coordinates as measured from the left and top edge limits of the page<br />
distance:<br />
angle:<br />
distance specified in increments governed by the unit value.<br />
angle in degrees, measured counterclockwise from the positive x axis<br />
Function<br />
The PMRA command moves the cursor to a position in a path construction, specified<br />
relative to the left and top edge limits of the page, then across a distance specified<br />
relative to the x- and y-coordinate and at a specified angle.<br />
It should be noted that the x and y coordinates are measured from the top and left edge<br />
limits of the page, and not from the current cursor position.<br />
The coordinates and distance are measured in the units designated by the UNIT<br />
command. The angle is measured counterclockwise from the positive x axis.<br />
New cursor position<br />
Distance<br />
(x, y)<br />
Angle<br />
Positive x axis<br />
199
PRESCRIBE <strong>Command</strong> <strong>Reference</strong><br />
File<br />
Printout<br />
!R! RES; UNIT C; SPD 0.2;<br />
NEWP;<br />
PMRA 10, 19, 5, 45;<br />
PARC 10, 19, 5, 45, 135;<br />
STRK;<br />
PAGE; EXIT;<br />
200
PMRP<br />
PMRP — in Path, Move to Relative Position<br />
Format<br />
Parameters<br />
PMRP x-coordinate, y-coordinate;<br />
x-coordinate, y-coordinate:<br />
coordinates as measured from the current cursor position<br />
Function<br />
File<br />
The PMRP command moves the cursor from its current position to a specified relative<br />
position in a path construction, measured in the unit value designated by the UNIT<br />
command.<br />
The coordinates may be positive or negative.<br />
!R! RES; UNIT C;<br />
NEWP;<br />
PMZP 5, 5;<br />
PDRP 5, 0, 0, 5, -5, 0, 0, -5; GPAT .2; FILL 1;<br />
PMRP 4, 4;<br />
PDRP 5, 0, 0, 5, -5, 0, 0, -5; GPAT .8; FILL 1;<br />
PAGE;<br />
EXIT;<br />
201
PRESCRIBE <strong>Command</strong> <strong>Reference</strong><br />
Printout<br />
Related <strong>Command</strong><br />
PMZP<br />
202
PMZP<br />
PMZP — in Path, Move to Zero-relative Position<br />
Format<br />
Parameters<br />
PMZP x-coordinate, y-coordinate;<br />
x-coordinate, y-coordinate:<br />
coordinates as measured from left edge limit of the current page<br />
Function<br />
File<br />
The PMZP command moves the cursor to a position in a path construction, specified<br />
relative to the top and left edge limits of the current page, and measured in the units<br />
designated by the UNIT command.<br />
The coordinates may be positive or negative. Negative coordinates move the cursor off<br />
the current page.<br />
!R! RES; UNIT C; STM 2; SLM 2;<br />
SFNT "Helvetica-Nr";<br />
NEWP;<br />
PMZP 0, 0; SPD .2;<br />
PMZP 0, 4; FONT 13; TEXT ’< = = = Paper edge limits’;<br />
PMZP 0, 0; PARC 0, 0, .1, 0, 360;<br />
PMRP 0, .333; TEXT ’ PMZP 0, 0;’;<br />
PMZP 4, 0; PARC 4, 0, .1, 0, 360;<br />
PMRP 0, .333; TEXT ’ PMZP 4, 0;’;<br />
PMZP 3, 6; PARC 3, 6, .1, 0, 360;<br />
PMRP 0, .333; TEXT ’ PMZP 3, 6;’;<br />
PMZP 7, 7; PARC 7, 7, .1, 0, 360;<br />
PMRP 0, .333; TEXT ’ PMZP 7, 7;’;<br />
STRK;<br />
PAGE;<br />
EXIT;<br />
203
PRESCRIBE <strong>Command</strong> <strong>Reference</strong><br />
Printout<br />
Related <strong>Command</strong><br />
PMRP<br />
204
PNCH<br />
PNCH — PuNCH<br />
Format<br />
Parameter<br />
PNCH[ mode];<br />
mode:<br />
number of punched holes:<br />
1 = 2 (Europe) or 3 (U.S.)<br />
2 = 4 (Europe) or 2 (U.S.)<br />
51 = 2 (Europe) or 3 (U.S.), left<br />
52 = 4 (Europe) or 2 (U.S.), left<br />
61 = 2 (Europe) or 3 (U.S.), right<br />
62 = 4 (Europe) or 2 (U.S.), right<br />
71 = 2 (Europe) or 3 (U.S.), top<br />
72 = 4 (Europe) or 2 (U.S.), top<br />
Function<br />
The PNCH command lets the option finisher perform punching through the printed page<br />
with the number of holes depending on the country. mode selects either the standard or<br />
additional number of holes for the country. For example, mode 1 selects 2-hole punching<br />
for European countries and mode 2 selects 4-hole punching for European countries.<br />
Mode = 1, Europe<br />
Mode = 1, US/Canada<br />
A4<br />
B5<br />
A3<br />
A4-R<br />
B4<br />
B5-R<br />
Letter<br />
Ledger<br />
Mode = 2, Europe<br />
Mode = 2, US/Canada<br />
A4<br />
A3<br />
Letter-R Legal<br />
205
PRESCRIBE <strong>Command</strong> <strong>Reference</strong><br />
File<br />
The mode parameters of 51, 52, 61, 62, 71, and 72 are valid for some copier models only.<br />
These parameters allow to position the holes in either of the left, right, and top sides of<br />
the page by logically aligning the page in reference to the punched holes.<br />
Note that the mode parameter is valid for a finisher with the dual mode punching system,<br />
such as the DF-71, only. It becomes invalid if it is specified in a finisher with the<br />
standard punch unit.With a finisher with the standard punch unit only (e.g. the DF-75),<br />
the number of punched holes is uniquely determined according to the country of<br />
destination and paper size.<br />
Like stapling and other finishing operations, punching is done per one job at a time.<br />
Therefore, this command is invalid unless it is used in combination with JOBS. See<br />
Page 141.<br />
The option finisher is not switched automatically by this command to perform punching.<br />
Therefore, it is necessary in advance to specify the option finisher as the output<br />
destination using the STAK 3; command.<br />
The following example is for European countries.<br />
!R!<br />
STAK 3; CMNT Stack to the finisher;<br />
PNCH 1;<br />
JOBS 1, 1, 2, 0, 0;<br />
TEXT ’This page is punched with two holes.’;<br />
JOBT;<br />
EXIT;<br />
206
PRBX<br />
PRBX — in Path, draw Round BoX<br />
Format<br />
Parameters<br />
PRBX width, height, radius;<br />
width:<br />
height:<br />
radius:<br />
width of round box<br />
height of round box<br />
radius of round box corners<br />
Function<br />
The PRBX command adds a round box path to the current path. This command close the<br />
sub-paths but does not stroke the path by itself. Therefore, STRK or FILL is required to<br />
follow this command.<br />
The parameter value for the width, height and radius of the round box should be positive.<br />
207
PRESCRIBE <strong>Command</strong> <strong>Reference</strong><br />
File<br />
Printout<br />
!R! RES; UNIT C;<br />
SPD 0.125; NEWP;<br />
PMZP 1, 1;<br />
PRBX 11.7, 1.7, 0.5; STRK;<br />
MZP 1.5, 2.15;<br />
SFNT "Helvetica-Bd", 24;<br />
TEXT "CAUTION: HOT SURFACE!";<br />
PAT 5; NEWP;<br />
PMZP 1, 4;<br />
PRBX 5, 2.4, 0.3; FILL;<br />
MZP 1.4, 4.7;<br />
SFNT "Helvetica-Nr", 12;<br />
TEXT "Barefoot Systems, Inc.", L;<br />
TEXT "4203 Charleston Avenue", L;<br />
TEXT "P.O. Box 150", L;<br />
TEXT "Edinburgh, CA 94039-1057";<br />
PAGE;<br />
EXIT;<br />
208
PRRC<br />
PRRC — in Path, at Relative position, draw aRC<br />
Format<br />
Parameters<br />
PRRC x-coordinate, y-coordinate, radius, start-angle, end-angle;<br />
x-coordinate/ y-coordinate:<br />
coordinates as measured from the current cursor position<br />
radius:<br />
radius of arc<br />
start-angle:<br />
starting angle, measured counterclockwise from the positive x axis<br />
end-angle:<br />
ending angle, measured counterclockwise from the positive x axis<br />
Function<br />
The PRRC command first of all adds a line extending from the current position to the<br />
beginning of the arc which is centered at the coordinates relative to the current position,<br />
then adds the line and the arc to the current path.<br />
Coordinates and radius are measured in the units designated by the UNIT command; the<br />
starting and ending angles are measured counterclockwise from the positive x axis. For<br />
example, the following example draws an arc extending over the center of the arc:<br />
PRRC 1, 1, 0, 180;<br />
Whereas, the following command, having the reversed starting and ending angles, draws<br />
the arc under the center of the arc:<br />
209
PRESCRIBE <strong>Command</strong> <strong>Reference</strong><br />
PRRC 1, 1, 180, 0;<br />
Negative values are acceptable for angle. For example, an angle of 315 degrees is the<br />
same as –45 degrees.<br />
File<br />
Printout<br />
!R! RES;<br />
SPD 0.05;<br />
MZP 4.5, 5;<br />
NEWP;<br />
PRRC -1, 0, 1, 90, 270;<br />
PRRC 1, -2, 1, 0, 180;<br />
PRRC 2, 1, 1, -90, 90;<br />
PRRC -1, 2, 1, 180, 0;<br />
STRK;<br />
PAGE;<br />
EXIT;<br />
210
PSRC<br />
PSRC — select Paper SouRCe<br />
Format<br />
Parameter<br />
PSRC mode;<br />
mode:<br />
0 = multi-purpose tray<br />
1 = Cassette 1<br />
2 = Cassette 2<br />
3 = Cassette 3<br />
4 = Cassette 4<br />
5 = Cassette 5<br />
6 = Cassette 6<br />
99 = envelope feeder<br />
100 = automatic<br />
Function<br />
The PSRC command selects whether to feed paper from the cassette, multi-purpose tray,<br />
cassettes of the paper feeders, or the envelope feeder. Each cassette of the paper feeder is<br />
assigned a cassette number in the order from the top as 1 through 6.<br />
Mode 100 of PSRC enables the automatic cassette switching depending on media type<br />
and size. The printing system automatically selects the paper cassette having the paper<br />
that matches the type and size defined by MTYP and SPSZ respectively.<br />
The PSRC command causes a page break, so it should be placed at the beginning of a file<br />
or program, or at the top of a new page. The current paper source will remain selected if<br />
the specified cassette is not installed.<br />
File<br />
!R! RES; UNIT C;<br />
SFNT "Helvetica-Nr", 24;<br />
PSRC 1;<br />
TEXT "This page is fed from the default cassette.";<br />
PAGE;<br />
PSRC 0;<br />
TEXT "This page is fed from the multi-purpose tray."<br />
PSRC 100; SPSZ 10;<br />
TEXT "This page is printed on a A3 sheet that the print<br />
system looks for automatically.";<br />
PAGE;<br />
EXIT;<br />
211
PRESCRIBE <strong>Command</strong> <strong>Reference</strong><br />
PXPL — PiXel PLacement<br />
Format<br />
Parameter<br />
PXPL mode;<br />
mode:<br />
pixel placement mode<br />
0 = Grid intersection<br />
1 = Grid centered<br />
Function<br />
The PXPL command determines how pixels are rendered in images. It selects whether<br />
pixels are centered at grid intersections or inside the boxes created by the grid. See the<br />
figure below.<br />
0<br />
1 2 3 4 0<br />
1 2 3 4<br />
1<br />
1<br />
2<br />
2<br />
3<br />
3<br />
4<br />
4<br />
5<br />
5<br />
Assuming a rectangle extending from coordinate (1, 1) to coordinate (3, 4), a different<br />
result is obtained depending on each pixel placement mode. Grid intersection is default<br />
to HP PCL; and grid centered mode is used by Microsoft Windows.<br />
This command is ignored when used with DAP, DRP, DRPA, DZP, BOX, BLK, CIR,<br />
ARC, or PIE. This command has no effect for text or images.<br />
The printing system is reset to grid intersection mode by the RES command.<br />
212
!R!<br />
!R! — PRESCRIBE start sequence<br />
Format<br />
Parameter<br />
!command-recognition-character!<br />
command-recognition-character:<br />
capital R, unless changed by the SCRC or FRPO P9 command<br />
Function<br />
File<br />
When the printing system receives !R!, it enters PRESCRIBE mode and treats the<br />
following data as PRESCRIBE commands. The command that follows the !R! command<br />
should be separated from the !R! by a space or placed on a new line.<br />
The command recognition character can be changed from capital R to another character.<br />
Temporary changes can be made using the SCRC (Set <strong>Command</strong> Recognition Character)<br />
command described later. The RES command restores the command recognition<br />
character to its FRPO-set value. Permanent changes can be made with the FRPO<br />
command described in Chapter 6 of the Technical <strong>Reference</strong> manual.<br />
If !R! is used by mistake when the printer is already in the PRESCRIBE mode, the<br />
printer ignores the mistaken !R! and whatever follows, up to the next semicolon.<br />
!R! SFNT ’Helvetica’, 14; EXIT;<br />
Following these five<br />
lines, the printer<br />
enters PRESCRIBE<br />
mode to execute<br />
commands.<br />
!R! UNIT I;<br />
BOX 2, 2;<br />
BOX 1, 1, E;<br />
CIR 1;<br />
BOX 1, 1;<br />
PAGE;<br />
EXIT;<br />
213
PRESCRIBE <strong>Command</strong> <strong>Reference</strong><br />
Printout<br />
Related <strong>Command</strong>s<br />
EXIT, SCRC<br />
214
RCLT<br />
RCLT — Rotated CoLlaTion<br />
Format<br />
Parameter<br />
Function<br />
RCLT;<br />
None<br />
The RCLT command instructs the printing system to stack the sets on the tray in<br />
alternating orientations. The RCLT command require a hard disk installed in the printing<br />
system or a RAM disk.<br />
File<br />
The RCLT command is available when printing using A4, B5 and letter size paper.<br />
During printing, the same size paper must be loaded into two separate cassettes. For<br />
example, Portrait (A4) and Landscape (A4-R) would be used when printing onto A4<br />
paper. The MP tray can also be used as a paper source.<br />
!R! RES; RCLT; STAK 1;<br />
JOBS 0, 5, 0, 0;<br />
TEXT "Page 1"; PAGE;<br />
TEXT "Page 2"; PAGE;<br />
TEXT "Page 3"; PAGE;<br />
JOBT; EXIT;<br />
215
PRESCRIBE <strong>Command</strong> <strong>Reference</strong><br />
RDMP — Received-data DuMP<br />
Format<br />
Parameter<br />
Function<br />
RDMP;<br />
None<br />
Related <strong>Command</strong><br />
The RDMP command causes all subsequent data to be printed in hexadecimal form (two<br />
hexadecimal digits per character) until an ENDD (END Dump) command is received, or<br />
until the printing system runs out of data and times out.<br />
ENDD<br />
216
RDMP<br />
Sample<br />
217
PRESCRIBE <strong>Command</strong> <strong>Reference</strong><br />
RES — RESet<br />
Format<br />
Parameter<br />
Function<br />
RES;<br />
None<br />
The RES command causes a page break and resets parameters as indicated below.<br />
Some reset values can also be changed by the FRPO command. For these, the factory<br />
reset value is given, followed by the FRPO parameters that can be used to change this<br />
value in parenthesis.<br />
In HP-7475A emulation, the RES command resets the printer environment in the same<br />
manner as the KC-GL DF instruction. Refer to section HP 7550A Emulation [KC-GL]<br />
(Mode 8) of the Technical <strong>Reference</strong> manual.<br />
The RES command does not:<br />
• delete permanent macros or permanent fonts from memory<br />
• delete positions or fonts stored by the SCP and SCF commands<br />
• reset font attributes set by the SFA command<br />
• change any values in permanent memory (Refer to the FRPO INIT command page.)<br />
Parameter<br />
Value after reset<br />
(Related FRPO parameter)<br />
LaserJet (PCL) IBM/Epson Diablo<br />
Related PRE-<br />
SCRIBE <strong>Command</strong>s<br />
<strong>Command</strong> recognition<br />
R (P9) ← ← SCRC<br />
character<br />
Emulation mode 6 (P1) a ← ← SEM<br />
Unit of measurement<br />
Inches ← ← UNIT<br />
Number of copies 1 a ← ← COPY<br />
per page<br />
Cassette Cassette 1 (main cassette) (R4) a ← PSRC<br />
Paper tray Face-down (R0) a ← ← STAK<br />
Paper size Cassette size (R2) a ← ← SPSZ<br />
Top margin 1/2 inch (150 dots) 0 (A1/2) ← STM<br />
Left margin Left logical 0 (A3/4) ← SLM<br />
Right margin Right logical Max. size (A5/6) ← SRM, SPW<br />
Bottom margin 1/2 inch (150 dots) Max. size (A7/8) ← SBM, SPL,<br />
SLPP<br />
Page orientation<br />
Portrait (Orientation<br />
of font C5/2/3)<br />
Portrait (Orientation<br />
of font C5/2/3)<br />
Portrait (C1) †<br />
Line spacing 6 lpi (U0/1) ← ← SLS, SLPI<br />
Character spacing 10 cpi (Spacing of 10 cpi (U2/3) ← SCS, SCPI<br />
font C5/2/3)<br />
SPO<br />
218
RES<br />
Underline thickness<br />
and distance below<br />
baseline<br />
Current font<br />
Alternate font<br />
assignment<br />
4 dots, 7 dots ← ← SULP<br />
Font 1 (C5/2/3) or<br />
V3 (scalable font)†<br />
None<br />
Font 8 (IBM)<br />
Font 1 (Epson)<br />
See Emulation of ←<br />
the Technical <strong>Reference</strong><br />
manual.<br />
Font 1 (C5/2/3)<br />
or V3 (scalable<br />
font) a<br />
FONT, FSET,<br />
SFNT<br />
SETF<br />
Country code 0 (U6)† ← ← INTL<br />
Symbol set Roman-8 (U6/7) See Emulation of<br />
the Technical <strong>Reference</strong><br />
manual.†<br />
US ASCII (U7)† CSET, INTL<br />
Current path Empty ← ← NEWP<br />
Graphics pen diameter<br />
3 dots ← ← SPD<br />
Line cap Square ← ← SCAP<br />
Line join Beveled join ← ← SLJN<br />
Miter limit 10 ← ← SMLT<br />
Flatness 1 ← ← FLAT<br />
Dash pattern Solid line ← ← DPAT, SDP<br />
Clipping rectangle Size of printable<br />
←<br />
CLPR<br />
page<br />
Fill pattern Solid black ← ← PAT, FPAT,<br />
GPAT<br />
Image model Transparent [3] ← ← SIMG<br />
Graphics resolution 75 dpi ← ← STR<br />
CR action CR CR (P2) ← –<br />
LF action LF LF (P3) ← –<br />
a<br />
Parameter<br />
Value after reset<br />
(Related FRPO parameter)<br />
LaserJet (PCL) IBM/Epson Diablo<br />
Related PRE-<br />
SCRIBE <strong>Command</strong>s<br />
These values can be set as permanent using the prin system’s operator panel only when the FRPO<br />
C6 (panel keep) is active with a parameter of 1 (default).<br />
219
PRESCRIBE <strong>Command</strong> <strong>Reference</strong><br />
RESL — select RESoLution<br />
Format<br />
Parameter<br />
RESL resolution;<br />
resolution:<br />
300 [dpi], 600 [dpi] or 1200 [dpi]<br />
Function<br />
The RESL command switches the resolution of the printing system between 300 dpi,<br />
600 dpi, and 1200 dpi.When this command is received, the image data currently<br />
remaining is forcibly output on paper. This does not affect the current unit of measure,<br />
but the system’s memory will be reconfigured, causing PCL resources (fonts, macros,<br />
patterns, and symbol sets) which have been downloaded into RAM to be purged.<br />
The printing system’s resolution setting enabled by this command is reset to default<br />
(FRPO N8), if a command which results in reset (RES, FRPO and SEM) is received.<br />
Actual resolution may be decreased to 300 dpi even though printing resolution is set to<br />
600 dpi or 1200 dpi when there is insufficient memory because a duplex unit is installed<br />
and duplex mode has been set or because the video memory size has been increased for<br />
page protection.<br />
Printing resolution cannot be switched from 300 dpi to higher resolutions for the<br />
following emulations: line printer, IBM ProPrinter, Diablo 630, EPSON LQ850.<br />
220
RGBL<br />
RGBL — control RGB Level<br />
COLOR<br />
Format<br />
Parameters<br />
RGBL color, level;<br />
color:<br />
level:<br />
0 = red<br />
1 = green<br />
2 = blue<br />
number from –10 to 10 (Default = 0)<br />
Function<br />
The RGBL command controls balance for each level of RGB. It individually corrects the<br />
gamma for each color.<br />
The color bars below represent color balance variations for each of RGB. The top bar<br />
represents the default saturation variation. The output result for an input value is<br />
maintained in linear form. The middle color bar is an example showing an increase in<br />
output for the input value. Indicates γ > 1.0 when being equivalent to the gamma curve.<br />
The bottom color bar is an example showing a decrease in output for the input value.<br />
Indicates γ < 1.0 when being equivalent to the gamma curve.<br />
Default color balance (R)<br />
Color balance increased<br />
Color balance decreased<br />
Default color balance (G)<br />
Color balance increased<br />
Color balance decreased<br />
Default color balance (B)<br />
Color balance increased<br />
Color balance decreased<br />
Varying color balance allows the output image results to vary. Issuing this command<br />
resets hue, saturation, and luminosity control values to their default settings.<br />
221
PRESCRIBE <strong>Command</strong> <strong>Reference</strong><br />
This command is enabled for all color spaces, all color modes and all monitor simulation<br />
modes.<br />
If ink simulation is set to other than none, this command is disabled. The RES command<br />
resets saturation to its default state.<br />
This mode is not held in the printing system. For this reason, color balance is reset to its<br />
default state when the power is turned on.<br />
222
RGST<br />
RGST — offset ReGiSTration<br />
Format<br />
Parameters<br />
RGST horizontal-offset, vertical-offset;<br />
horizontal-offset:<br />
horizontal offset value from the absolute coordinate (0, 0) for the physical paper feed<br />
direction, in current unit. The coordinates may be positive or negative.<br />
vertical-offset:<br />
vertical offset value from the absolute coordinate (0, 0) for the physical paper feed<br />
direction, in current unit. The coordinates may be positive or negative.<br />
Function<br />
This command moves the coordinate origin by the offset (physical horizontal and<br />
vertical directions) as measured from the values specified. The intersection (shared area)<br />
of the current printable area and the printable area shifted by the new offset registration<br />
is defined as the valid printable area.<br />
No page break is caused when this command is received. The offset values set using this<br />
command are valid even when the printing system is in HP emulation mode.<br />
Since this command is PCL command-compatible (&l #U, & l #Z), the<br />
offset values are cleared to zero only by a software reset (E). In other words, the<br />
offset is only cleared by PRESCRIBE (RES and FRPO INIT commands) when the<br />
emulation is HP.<br />
An error will result and the command has no effect if a command format other than the<br />
above is used. An error will result and the value in question will be ignored if horizontaloffset<br />
or vertical-offset is specified as a value exceeding the physical dimensions of the<br />
current paper size.<br />
223
PRESCRIBE <strong>Command</strong> <strong>Reference</strong><br />
RPCS — Return to Previous Code Set<br />
Format<br />
Parameter<br />
Function<br />
File<br />
RPCS;<br />
None<br />
The RPCS command resumes use of a code set saved by a previous SCCS (save current<br />
code set) command. The RPCS commands return to the code sets in reverse order in<br />
which they were nested.<br />
See SCCS on page 264.<br />
Related <strong>Command</strong>s<br />
RPF, SCCS, SCF<br />
224
RPF<br />
RPF — Return to Previous Font<br />
Format<br />
Parameter<br />
Function<br />
File<br />
Printout<br />
RPF;<br />
None<br />
The RPF command resumes use of a font saved by a previous SCF (save current font)<br />
command. The RPF commands return to the fonts in the reverse order in which they<br />
were saved.<br />
SCF and RPF are particularly useful in macros.<br />
!R! RES; UNIT P;<br />
MCRO SMALLPRINT;<br />
SCF; FSET 10V; TEXT %1, E;<br />
RPF;<br />
ENDM;<br />
SFNT ’Helvetica’, 12; SLS 14;<br />
EXIT;<br />
Computer literature is littered with acronyms such<br />
as !R! CALL SMALLPRINT, ’CPU, DOS, EEPROM’;<br />
EXIT; and the like. Small capitals<br />
make these easier to read. Compare the effect of<br />
printing CPU, DOS, and EEPROM in regular capitals.<br />
!R! PAGE; EXIT;<br />
225
PRESCRIBE <strong>Command</strong> <strong>Reference</strong><br />
RPG — Return to Previous Graphics state<br />
Format<br />
Parameter<br />
Function<br />
File<br />
RPG;<br />
None<br />
The RPG command restores the graphics state most recently saved by a SCG (Save<br />
Current Graphics) command. The following items of graphics state revert to the state<br />
saved previously.<br />
• Path and cursor position (if defined)<br />
• Pen diameter (line width)<br />
• Line join type<br />
• Line cap type<br />
• Miter limit<br />
• Dash pattern<br />
• Flatness<br />
• Fill pattern (16 × 16 dots)<br />
• Clipping rectangle<br />
• Raster resolution<br />
• Image model<br />
It is useful to save the graphics state then later restore it when you want to use a path for<br />
both stroking and filling. One such example is shown below.<br />
The RPG command does not affect other printing system parameters such as page<br />
orientation, unit of measurement, etc. (See RES on page 218.)<br />
!R! RES; UNIT C;<br />
NEWP;<br />
PMZP 4, 2;<br />
PARC 3, 3, 1, 90, 270;<br />
PARC 5, 3, 1, 270, 90;<br />
CLSP;<br />
SCG; CMNT Saves the graphics state;<br />
STRK; CMNT Strokes the path;<br />
RPG; CMNT Restores the graphics state;<br />
GPAT .5;<br />
FILL 1; CMNT Fills the path;<br />
PAGE;<br />
EXIT;<br />
226
RPG<br />
Printout<br />
Related <strong>Command</strong><br />
SCG<br />
227
PRESCRIBE <strong>Command</strong> <strong>Reference</strong><br />
RPP — Return to Previous Position<br />
Format<br />
Parameter<br />
Function<br />
File<br />
RPP;<br />
None<br />
The RPP command moves the cursor to a position saved by a previous SCP (save current<br />
position) command. If the RPP command is executed by mistake when no previous<br />
position has been saved, the resulting cursor movement is unpredictable.<br />
The RPP command can be used in both standard mode and path mode graphics.<br />
!R! RES; UNIT P;<br />
SFNT ’Helvetica-BdOb’, 16;<br />
UNIT C;<br />
MAP 8, 8; CIR .2;<br />
MRP -.1, .1;<br />
CMNT Save this position seven times;<br />
SCP; SCP; SCP; SCP; SCP; SCP; SCP;<br />
MRPA 2, 0; TEXT ’N’;<br />
RPP; MRPA 2, 45; TEXT ’NE’;<br />
RPP; MRPA 2, 90; TEXT ’E’;<br />
RPP; MRPA 2, 135; TEXT ’SE’;<br />
RPP; MRPA 2, 180; TEXT ’S’;<br />
RPP; MRPA 2, 225; TEXT ’SW’;<br />
RPP; MRPA 2, 270; TEXT ’W’;<br />
RPP; MRPA 2, 315; TEXT ’NW’;<br />
PAGE;<br />
EXIT;<br />
228
RPP<br />
Printout<br />
Related <strong>Command</strong><br />
SCP<br />
229
PRESCRIBE <strong>Command</strong> <strong>Reference</strong><br />
RPPL — Return to Previous PaLette<br />
COLOR<br />
Format<br />
Parameter<br />
Function<br />
RPPL;<br />
None<br />
File and Printout<br />
The RPPL command restores the color palette most recently saved by a SCPL (save<br />
current palette) command. A color palette restored using the RPPL command<br />
immediately becomes active.<br />
If the saved palette does not exist, this command is ignored.<br />
See SCPL on page 274.<br />
230
RPU<br />
RPU — Return to Previous Unit<br />
Format<br />
Parameter<br />
Function<br />
File/Printout<br />
RPU;<br />
None<br />
Related command<br />
The RPU command brings the unit of measurement (inches, centimeters, points, or dots;<br />
as specified by the UNIT command) back to the unit saved by the SCU (save current<br />
unit) command.<br />
See SCU on page 279.<br />
SCU<br />
231
PRESCRIBE <strong>Command</strong> <strong>Reference</strong><br />
RTTX — RoTate TeXt<br />
Format<br />
Parameters<br />
RTTX angle, ’string’[, U-option];<br />
angle:<br />
string:<br />
angle of rotation in degrees<br />
character string<br />
U-option:<br />
Underline text<br />
Function<br />
File<br />
Taking the normal output angle for text as zero, the RTTX command rotates a character<br />
string around its starting point by the angle of rotation specified.<br />
After this command is executed, text output returns to original orientation.<br />
This command is ignored if the current font is a bitmap font.<br />
!R! RES; PSRC 1;<br />
SFNT "Helvetica", 10;<br />
MZP 3, 3;<br />
RTTX 15, " ----- Leo, 23 - August 22";<br />
RTTX 45, " ----- Cancer, 22 - July 22";<br />
RTTX 75, " ----- Gemini, 21 - June 21";<br />
RTTX 105, " ----- Taurus, 20 - May 20";<br />
RTTX 135, " ----- Aries, 21 - April 19";<br />
RTTX 165, " ----- Pisces, 19 - Mar 20";<br />
RTTX 195, " ----- Aquarius, 20 - February 18";<br />
RTTX 225, " ----- Capricorn, 22 - January 19";<br />
RTTX 255, " ----- Sagittarius, 22 - December 21";<br />
RTTX 285, " ----- Scorpio, 24 - November 21";<br />
RTTX 315, " ----- Libra, 23 - October 23";<br />
RTTX 345, " ----- Virgo, 23 - September 22";<br />
PAGE; EXIT;<br />
232
RTTX<br />
Printout<br />
233
PRESCRIBE <strong>Command</strong> <strong>Reference</strong><br />
RTXT — print Right-aligned TeXT<br />
Format<br />
Parameters<br />
RTXT[’string’][,option][,U-option];<br />
string:<br />
option:<br />
any character string<br />
B = Leave cursor at back end of string<br />
E = Move cursor to front end of string<br />
L = Move cursor down one line<br />
N = Move cursor to beginning of next line<br />
U-option:<br />
Underline text<br />
Function<br />
The RTXT command prints the given string, ending at the cursor location, then moves<br />
the cursor as designated by the option. It accepts either a bitmap font or a scalable font to<br />
print the string.<br />
The string must be enclosed in either single or double quotation marks. (If the string<br />
includes one kind of quotation mark, use the other kind to enclose it.) If the string is<br />
omitted, nothing is printed. If the option is omitted, the cursor is not moved (same as<br />
option B). If the U-option is specified, the string is underlined. The underline thickness<br />
and location can be set by the SULP command.<br />
The RTXT command can be used to position a line of text so that it ends at an exact<br />
location. The RTXT command should be executed between left and right margins.<br />
The length of the string is unlimited, except that the command as a whole may not be<br />
longer than 255 characters. Carriage-return and linefeed codes in the string are ignored.<br />
The RTXT command can be used both in the standard mode and path mode graphics.<br />
234
RTXT<br />
File<br />
!R! RES;<br />
UNIT P;<br />
SFNT ’TimesNewRoman’;<br />
UNIT I;<br />
MCRO PF;<br />
MRP .15, 0;<br />
BOX .1, -.1; MRP .5, 0;<br />
BOX .1, -.1; MRP -.65, 0;<br />
ENDM;<br />
MAP 3, 3; TEXT ’Pass Fail’, L, U;<br />
CALL PF; RTXT ’Unit test’, L;<br />
CALL PF; RTXT ’Integration test’, L;<br />
PAGE;<br />
EXIT;<br />
Printout<br />
235
PRESCRIBE <strong>Command</strong> <strong>Reference</strong><br />
RVCD — ReceiVe Compressed raster Data<br />
Format<br />
Parameters<br />
RVCD[ compression-mode]; length, data, ... ;<br />
compression-mode:<br />
0 = uncompressed<br />
1 = run-length encoding<br />
2 = TIFF (Tagged Image File Format) [rev. 4.0]<br />
length:<br />
data:<br />
bytes of raster data<br />
binary raster data, 0H to FFH<br />
Function<br />
Related <strong>Command</strong>s<br />
The RVCD command transfers and encodes the subsequent raster data by the amount of<br />
bytes represented by the length parameter.<br />
The STR (SeT dot Resolution) command sets the dot resolution for raster graphics which<br />
starts at the current cursor position. The SRO (Set Raster Options) command specifies<br />
the orientation of the raster image in either physical (default) or logical page direction.<br />
If the compression-mode value is zero [or omitted], the printing system simply transfers<br />
raster data in an uncompressed binary format. A single bit means a single dot. Seventh<br />
bit in the first byte refers to the starting dot within that raster row and bit 0 refers to the<br />
eighth dot and continues.<br />
In the run-length encoding mode, the printing system treats raster data in pairs of bytes.<br />
The first byte of each pair is the repetition count for the data in second pattern byte. The<br />
repetition count accepts any value within a range of 0H to FFH.<br />
compression-mode 2, TIFF rev. 4.0, translates raster data to be packbits in which a<br />
control byte precedes the raster data. A TIFF rev. 4.0 encoded data arrangement appears<br />
below.<br />
control byte (1 byte) + data (1–128 bytes) + control byte<br />
(1 byte) + data (1–128 bytes) ...<br />
A control byte with a negative value from -127 to -1 (81H to FFH) means the repetition<br />
count for the subsequent data. A zero to 127 (0H to 7FH) indicates the number of data<br />
bytes that follow. A control byte of -128 (80H) represents a non-operative control byte.<br />
ENDR, STR<br />
236
RVCL<br />
RVCL — ReceiVe CoLor raster data<br />
COLOR<br />
Format<br />
Parameters<br />
RVCL [compression-mode,] length, data;<br />
compression-mode:<br />
0 = uncompressed (Default)<br />
1 = run-length encoded<br />
2 = TIFF (Tagged Image File Format) [rev. 4.0]<br />
length:<br />
data:<br />
bytes of raster data<br />
binary raster data, 0H to FFH<br />
Function<br />
The RVCL command is the color version of the RVCD (ReceiVe Compressed raster<br />
Data) command. It transfers the color raster data. Color specification must be made to<br />
each pixel. An 8 bps color specification is used for the color data for each pixel. Also,<br />
this command is only valid for an RGB color space. Accordingly, 3 bytes of data must be<br />
sent for each pixel to be drawn when transferring color images.<br />
Although this command handles monochrome or color data for encoding, since it relies<br />
on the active palette, the correct palette matching the print data must be used.<br />
The end of raster data must be declared by the ENDR (END Raster) command.<br />
When transferring color data using RVCL (ReceiVe CoLor raster data), always specify a<br />
palette using the CID (Configure color-Image Data) command. Data will not be properly<br />
processed if the palette is specified using the SIMP (SIMPle color palette) or PANT<br />
(PANTone color palette) commands.<br />
If the image data actually sent exceeds the width or height of the specified source data,<br />
the excessive portion will be truncated, resulting a clipped image.<br />
237
PRESCRIBE <strong>Command</strong> <strong>Reference</strong><br />
RVRD — ReceiVe Raster Data<br />
Format<br />
Function<br />
RVRD; number of data, data, ... ;<br />
The RVRD command declares the start of raster data. Raster data represents dot lines<br />
encoded as numeric values as shown below. Each dot line is divided into 8-dot segments.<br />
Each segment is converted to a number by the same system of column weights as used in<br />
the FPAT (Fill PATtern) command.<br />
128 64 32 16 8 4 2 1 128 64 32 16 8 4 2 1<br />
The first segment in the example above encodes to 7 as follows:<br />
0+0+0+0+0+4+2+1 = 7<br />
The second segment encodes similarly to 192:<br />
128+64+0+0+0+0+0+0 = 192<br />
In the printing system command language, the segments are being treated as bytes of<br />
data in which the black dots are 1s and the white dots are 0s. The raster data values are<br />
the decimal values of the bytes.<br />
Each line of raster data starts with a positive integer (1 to 511) indicating the number of<br />
segments in the line (2 in the example shown). The raster data follows, separated by<br />
commas. Each data value is an integer from 0 to 255. A semicolon ends the line. Spaces<br />
occurring anywhere in the line are ignored.<br />
Carriage returns following commas are also ignored, so long as raster lines can be broken<br />
up if necessary, as shown below. The carriage return must be placed after a comma, as<br />
follows:<br />
34, 1, 1, 1, 1, 1, 1, 1, 1, 1, 1, 1, 1, 1, 1, 1, 1, 1,<br />
1, 1, 1, 1, 1, 1, 1, 1, 1, 1, 1, 1, 1, 1, 1, 1, 1;<br />
There are no limits on the length of a raster line or the number of lines.<br />
Zeros can be omitted, retaining only the delimiting commas. For zeros at the end of the<br />
line, the commas can also be omitted. The following example displays equivalent raster<br />
data lines:<br />
7, 0, 0, 15, 0, 15, 0, 0; and 7, , , 15, , 15;<br />
The following example demonstrates two ways to produce a blank raster line:<br />
1, 0; or 1, ;<br />
238
RVRD<br />
The following examples produce invalid raster data lines:<br />
Wrong:<br />
0,; Count cannot be 0.<br />
1; Use 1,; for a blank line.<br />
2, 1, 1, 1; Too many data values.<br />
2, -1, -1; Negative values are not allowed.<br />
2, 1<br />
, 1; Carriage return before comma.<br />
An invalid raster data line is not printed, and invalidates all raster lines that follow.<br />
Again, the following example demonstrates how to create the raster graphic on the<br />
previous page.<br />
!R! STR 75; RVRD;<br />
2;A|0;<br />
2;GG0;<br />
2;^S;<br />
2;˜{>>;<br />
2;^S;<br />
2;GG0;<br />
2;A|0;<br />
ENDR;<br />
PAGE; EXIT;<br />
The value 2 in each raster data line indicates the number of data which follows. The<br />
subsequent data can be obtained by following the same procedure as explained in<br />
Defining Fill Patterns in Chapter 2 of the Technical <strong>Reference</strong> manual.<br />
239
PRESCRIBE <strong>Command</strong> <strong>Reference</strong><br />
RWER D — [Read/Write External Resource] Delete<br />
data on external media<br />
Format<br />
Parameters<br />
RWER D, medium, data-type, ’partition-name’;<br />
medium:<br />
0 = hard disk or RAM disk<br />
A = memory card<br />
data-type:<br />
type of data to be deleted<br />
1 = Font data<br />
2 = Printable data<br />
16 = Macro data<br />
112 = File data<br />
128 = API data (downloadable program)<br />
partition-name:<br />
Name of partition from which data is deleted<br />
Function<br />
The RWER D command deletes data on any external media whether it is a memory card<br />
or the hard disk. This command has no effect if the media has been write protected using<br />
KPDL or PJL.<br />
The partition name may be a maximum of 15 printable ASCII characters (20H through<br />
7EH); upper and lower case letters are regarded distinct. A partition name may not have<br />
leading spaces, and in the command, the partition name must be enclosed in single or<br />
double quotation marks.<br />
A partition list is not automatically printed when deleting data on external media, even<br />
though the automatic printing of partition information was enabled (by the RWER I<br />
command). ( See page 244.)<br />
A command error results and the command has no effect if parameters other than the<br />
above are used.<br />
This command causes a page break.<br />
240
RWER F<br />
RWER F — [Read/Write External Resource]<br />
Format external media<br />
Format<br />
Parameter<br />
RWER F, medium;<br />
medium:<br />
0 = hard disk<br />
A = memory card<br />
Function<br />
The RWER F command formats any external media whether it is a memory card or the<br />
hard disk. The hard disk is physically formatted when it is specified. This command has<br />
no effect if the media has been write-protected using KPDL or PJL.<br />
A command error results and the command has no effect if parameters other than the<br />
above are used.<br />
This command causes a page break and prints a format information page (if the medium<br />
is a compact flash card) when executed.<br />
241
PRESCRIBE <strong>Command</strong> <strong>Reference</strong><br />
RWER I — [Read/Write External Resource]<br />
automatically print partition Information<br />
Format<br />
Parameter<br />
RWER I, mode;<br />
mode:<br />
control mode:<br />
E = Enable automatic printing of partition information<br />
D = Disable automatic printing of partition information<br />
Function<br />
The RWER I command toggles the automatic printing of partition lists for any external<br />
media whether it is a memory card or the hard disk. With the automatic printing of<br />
partition lists enabled (RWER I, E;), the printing system prints partition lists whenever<br />
data are written to external media.<br />
The setting made with this command returns to default when the power is turned off.<br />
A command error results and the command has no effect if parameters other than the<br />
above are used.<br />
242
RWER L<br />
RWER L — [Read/Write External Resource] print<br />
partition List<br />
Format<br />
Parameter<br />
RWER L[, medium];<br />
medium:<br />
0 = hard disk or RAM disk<br />
A = memory card<br />
E = EPROM<br />
Function<br />
The RWER L command explicitly prints partition lists for any external media whether it<br />
is a memory card, the hard disk, or the RAM disk. The lists of partitions for all external<br />
media can be printed by omitting parameter medium.<br />
Disk capacity, font cache capacity and data type are listed, with login file names for file<br />
data output in separate columns.<br />
A command error results and the command has no effect if parameters other than the<br />
above are used.<br />
243
PRESCRIBE <strong>Command</strong> <strong>Reference</strong><br />
RWER R — [Read/Write External Resource] Read<br />
data from external media<br />
Format<br />
Parameters<br />
RWER R, medium, data-type[, ’partition-name’];<br />
medium:<br />
0 = hard disk or RAM disk<br />
A = memory card<br />
E = EPROM<br />
data-type:<br />
2 = Printable data<br />
128 = API data (downloadable program)<br />
partition-name:<br />
Name of partition from which data is read, a maximum of 15 printable ASCII characters<br />
Function<br />
The RWER R command reads data from any external media whether it is a memory card,<br />
hard disk, EPROM, or RAM disk.<br />
Only data types 2 and 128 are allowed. Note that reading data of other data types, such as<br />
fonts and macros, does not require this command since the printing system automatically<br />
reads them at power up.<br />
If the same partition name exists on different external media, the priority with which data<br />
is read is as follows.<br />
High > Low<br />
Card Hard disk (RAM disk) EPROM<br />
The partition name may be a maximum of 15 printable ASCII characters (20H through<br />
7EH); upper and lowercase letters are regarded as distinct. A partition name may not<br />
have leading spaces, and in the command, the partition name must be enclosed in single<br />
or double quotation marks.<br />
This command causes a page break.<br />
Reading data from a memory card:<br />
To read partition DataS001 from the memory card:<br />
1. Verify the printing system’s message display indicates Ready.<br />
2. Enter the following at the DOS prompt:<br />
C:\>ECHO !R! RWER R, A, 2, ’DataS001’; EXIT; >PRN<br />
244
RWER R<br />
Related <strong>Command</strong><br />
The following example demonstrates how to send data from the computer to a memory<br />
card. Typically, partition names should be specified when writing to the card. If omitted,<br />
the partition names will be assigned automatically as follows:<br />
DataS001, DataS002 ... DataSnnn.<br />
Writing data to a memory card:<br />
To write the contents of file DATA123.DOC to partition DATA123 on the memory card:<br />
1. Verify the printing system’s message display indicates Ready.<br />
2. Enter the following at the DOS prompt:<br />
C:\>ECHO !R! RWER W, A, 2, ’DATA123’; >PRN<br />
The message display will change from Ready to Processing, and then to Waiting.<br />
The printing system is now ready to receive data, so send the file from the computer to<br />
the printing system. Do not press the FORM FEED key to clear the waiting message.<br />
3. To do this, enter the following at the DOS prompt:<br />
C:\>COPY DATA123.DOC PRN<br />
4. The message display will change to Processing as the file is written to partition<br />
DATA123 on the memory card. Next, check that the message display has changed to<br />
Waiting, and then send a WRED command, as follows:<br />
C:\>ECHO WRED; EXIT, E; >PRN<br />
The WRED command terminates writing to the memory card. Alternatively, you can<br />
terminate writing by pressing the FORM FEED key on the printing system front panel.<br />
Note that in W mode the ICCD command is accompanied by a form feed.<br />
If a partition name conflict occurs when writing a new partition to a memory card, the<br />
name of the new partition will be modified as follows:<br />
• If a partition name of 11 characters or less conflicts with an existing partition name,<br />
‘Snnn’ (nnn represents a numeric value) is appended to the partition’s name.<br />
• If a partition name of 12 or more characters conflicts with an existing partition name,<br />
the 12th and following characters of the new partition’s name will be replaced by<br />
‘Snnn’ (nnn represents a numeric value).<br />
WRED<br />
245
PRESCRIBE <strong>Command</strong> <strong>Reference</strong><br />
RWER S — [Read/Write External Resource] Store<br />
TrueType font<br />
Format<br />
Parameters<br />
RWER S, medium, font-type, file-name, font-name, length[, value, style,<br />
weight, type-face];binary-data WRED;<br />
medium:<br />
drive specification:<br />
0 = hard disk or RAM disk<br />
A = memory card<br />
font-type:<br />
font type:<br />
0 = TrueType font<br />
1 = Japanese TrueType font<br />
2 = Japanese TrueType Collection font<br />
file-name:<br />
file name: (string of up to 11 characters; the extension .INF is added internally.) This<br />
string must be enclosed in either single or double quotation marks.<br />
font-name:<br />
font name (ASCII text string up to 31 characters long; only up to 28 characters if fonttype<br />
= 2). This string must be enclosed in either single or double quotation marks.<br />
length:<br />
value:<br />
style:<br />
weight:<br />
font data length (number of bytes sent as binary data)<br />
font symbol set value (1 to 65535, 619: Shift JIS code)<br />
font style (0 to 32767)<br />
stroke weight (-127 to +127)<br />
type-face:<br />
type face (0 to 32767)<br />
246
RWER S<br />
binary-data:<br />
font data (TrueType format)<br />
Function<br />
The RWER S command allows outline fonts (in TrueType format) to be downloaded to<br />
the printing system and to be stored on the specified media as font data. TrueType fonts<br />
particularly can be defined easily just by adding the TrueType font format as binarydata.<br />
Always explicitly terminate the end of font data using WRED;. The five bytes<br />
represented by WRED; are not counted as part of the font data length.<br />
Since value, style, weight and type-face represent font attributes they have an affect<br />
during font selection. Although they may be omitted, we recommend that all parameters<br />
be used to define font selection information.<br />
In order to delete a Japanese TrueType font defined using this command, it is necessary<br />
to delete two separate file names using RWER D, ’xxxxxx’ and RWER D,<br />
’xxxxxx.inf’. Up to 512 fonts may be registered on a single memory card or up to<br />
4096 on a single hard disk. Note carefully that registration beyond this limit will result in<br />
data being interpreted as unneeded.<br />
Only 28 characters are valid for Japanese TrueType font names when font-type = 2 is<br />
specified because the system automatically appends (P) for proportional fonts and (F)<br />
for fixed pitch fonts.<br />
A command error will result and the command has no effect if any of the parameters are<br />
outside the given range. This command is ignored if even one parameter error occurs.<br />
The font data following the semicolon for this command must match the length given by<br />
length. An error will result and the font data will not be defined if the data length is<br />
shorter than specified.<br />
247
PRESCRIBE <strong>Command</strong> <strong>Reference</strong><br />
RWER T — [Read/Write External Resource] set<br />
Terminate string<br />
Format<br />
Parameter<br />
RWER T[, ’terminator’];<br />
terminator:<br />
ASCII text string up to 4 bytes, enclosed in either single or double quotation marks<br />
Function<br />
The RWER T command sets a terminator string for external media whether it is a<br />
memory card or the hard disk. This terminator is used when storing binary data to<br />
external media. See the RWER S command page (page 248) for example. WRED is set<br />
as the default terminator if parameter terminator is omitted.<br />
A command error results and the command has no effect if parameters other than the<br />
above are used.<br />
248
RWER W<br />
RWER W — [Read/Write External Resource] Write<br />
data to external media<br />
Format<br />
Parameters<br />
RWER W, medium, data-type[, ’partition-name’];<br />
medium:<br />
0 = hard disk or RAM disk<br />
A = memory card<br />
data-type:<br />
1 = Font data<br />
2 = Printable data<br />
16 = Macro data<br />
112 = File data<br />
128 = API data (downloadable program)<br />
partition-name:<br />
Name of partition to which data is written, in a maximum of 15 printable ASCII<br />
characters. If this parameter is omitted the printing system will automatically determine<br />
the partition name.<br />
Function<br />
The RWER W command writes data to any external media whether it is a memory card<br />
or the hard disk.<br />
Although all data types may be written up to the amount allowed by the storage size of<br />
the given media, note carefully that writing beyond this limit will result in data being<br />
interpreted as unneeded.<br />
Even if data is written to a device using the same file name, that data will be written<br />
without overwriting the original file. A partition list will be printed as a warning when<br />
this happens.<br />
A command error results and the command has no effect if parameters other than the<br />
above are used.<br />
This command causes a page break and prints a write information page when executed.<br />
249
PRESCRIBE <strong>Command</strong> <strong>Reference</strong><br />
RWRF D — [Read/Write Resource File] Delete<br />
data on external device<br />
Format<br />
Parameters<br />
RWRF D, medium, data-type, file-name;<br />
medium:<br />
0 = hard disk<br />
A = memory card<br />
data-type:<br />
"API" API program<br />
"FNT" Font data<br />
"MCR" Macro data<br />
file-name:<br />
ASCII text string up to 15 bytes<br />
Function<br />
The RWRF D command deletes data that is written to an external device such as the hard<br />
disk.<br />
This command has no effect if the media has been write protected using KPDL or PJL.<br />
This command causes a page break.<br />
Any write information page is not printed when the file is deleted.<br />
Example:<br />
Delete macro file "TEST", which is registered in the hard disk.<br />
!R! RWRF D,0 "MCR" , "TEST"; EXIT;<br />
250
RWRF F<br />
RWRF F —<br />
[Read/Write Resource File] Format<br />
external device<br />
Format<br />
Parameters<br />
RWRF F, medium;<br />
medium:<br />
0 = hard disk<br />
A = memory card<br />
Function<br />
The RWRF F command physically and logically formats an external device such as the<br />
hard disk.<br />
This command has no effect if the target device has been write-protected using KPDL or<br />
PJL.<br />
This command causes a page break.<br />
Example:<br />
Format the hard disk.<br />
!R! RWRF F , 0; EXIT;<br />
251
PRESCRIBE <strong>Command</strong> <strong>Reference</strong><br />
RWRF L —<br />
[Read/Write Resource File] print<br />
resource file List<br />
Format<br />
Parameters<br />
RWRF L[, ’medium’];<br />
medium:<br />
0 = hard disk<br />
A = memory card<br />
Prints a resource file list for all devices if omitted.<br />
Function<br />
The RWRF L command prints a resource file list registered in an external device.<br />
Example:<br />
Print a resource file list in the hard disk.<br />
!R! RWRF L , 0; EXIT;<br />
252
RWRF P<br />
RWRF P — [Read/Write Resource File] set hidden<br />
file<br />
Format<br />
Parameters<br />
RWRF P, medium, data-type, file-name;<br />
medium:<br />
0 = hard disk<br />
A = memory card<br />
data-type:<br />
"API"<br />
"FNT"<br />
"MCR"<br />
API program<br />
Font data<br />
Macro data<br />
file-name:<br />
ASCII text string up to 15 bytes.<br />
Function<br />
The RWRF P command sets the specified file as a hidden one.<br />
The specified file, which is hidden, cannot be accessed from any PC.<br />
This command causes a page break.<br />
Example:<br />
Set macro file "TEST" in the hard disk as a hidden file.<br />
!R! RWRF P , 0 , "MCR" , "TEST"; EXIT;<br />
Set macro file "TEST" in the memory card as a hidden file.<br />
!R! RWRF P , A , "MCR" , "TEST"; EXIT;<br />
253
PRESCRIBE <strong>Command</strong> <strong>Reference</strong><br />
RWRF T —<br />
[Read/Write Resource File] set<br />
Terminate string<br />
Format<br />
Parameters<br />
RWRF T[, ’terminator’];<br />
terminator:<br />
ASCII text string up to 4 bytes<br />
Set to default "WRED" if omitted.<br />
Function<br />
The RWRF T command changes a terminator (default: WRED).<br />
The terminator that was changed with this command is also available for the LAPI<br />
command to load the API program.<br />
Turning the power on again will return the changed terminator to "WRED".<br />
Example:<br />
Change the terminator to "TEST".<br />
!R! RWRF T , "TEST"; EXIT;<br />
254
RWRF W<br />
RWRF W — [Read/Write Resource File] Write data<br />
to external device (API program)<br />
Format<br />
Parameters<br />
RWRF W, medium, "API", program-type, prescribe-command-name, APIprogram-start-function-name,<br />
file-name;<br />
medium:<br />
0 = hard disk<br />
A = memory card<br />
program-type:<br />
"PRE"<br />
prescribe command<br />
prescribe-command-name:<br />
ASCII text string up to 4 bytes<br />
API-program-start-function-name:<br />
ASCII text string up to 31 bytes<br />
Cannot be omitted.<br />
file-name:<br />
ASCII text string up to 15 bytes<br />
Automatically set by the system if omitted.<br />
Function<br />
The RWRF W command writes data to an external device such as the hard disk.<br />
The number of writable files, which is not limited, depends on the capacity of the<br />
external media. If the device runs out of free space during saving, the remaining data will<br />
be discarded.<br />
Duplicating a file name causes the system to rename the specified one and save data<br />
(without overwriting data).<br />
Example:<br />
Write and register the FILT prescribe command.<br />
!R! RWEF W , 0 , "API" , "PRE" , "FILT" ,<br />
"apl_main";[Program Data]WRED; EXIT;<br />
255
PRESCRIBE <strong>Command</strong> <strong>Reference</strong><br />
RWRF W — [Read/Write Resource File] Write data<br />
to external device (font)<br />
Format<br />
Parameters<br />
RWRF W, medium, "FNT", font-type, file-name, font-name, font-data-length,<br />
symbol-set-value, font-style, stroke-weight, typeface;<br />
medium:<br />
0 = hard disk<br />
A = memory card<br />
font-type:<br />
0 = TrueType Font<br />
1 = Japanese TrueType Font<br />
2 = Japanese TrueType Font Collection<br />
RSF = RomSlotFormat<br />
file-name:<br />
ASCII text string up to 11 bytes<br />
Up to 15 bytes for font type RSF<br />
font-name:<br />
ASCII text string up to 31 bytes<br />
Up to 28 bytes for font type 2<br />
font-data-length:<br />
Number of bytes in font data to be downloaded<br />
symbol-set-value:<br />
1 to 65535 (619 = Shift JIS code)<br />
font-style:<br />
0 to 32767<br />
stroke-weight:<br />
-127 to +127<br />
typeface:<br />
0 to 32767<br />
256
RWRF W<br />
Function<br />
The RWRF W command writes data to an external device such as the hard disk.<br />
The available number of fonts is max. 512 in the same compact flash and max. 4096 in<br />
the hard disk.<br />
Duplicating a file name causes the system to rename the specified one and save data<br />
(without overwriting data).<br />
For Japanese TrueType Font Collection, the print system automatically appends (P) for<br />
proportional fonts and (F) for fixed pitch fonts. If TrueType Font Collection contains<br />
three or more fonts, the print system automatically appends (1), (2), (3)...(9).<br />
You can omit the parameters ranging from symbol-set-value to typeface; however, you<br />
should not omit those font attributes to exactly select a font.<br />
The length of the font data to be written must match the specified one. Failure to do so<br />
will result in an error, and disables you to write data.<br />
Specify WRED; command following . "WRED;" (five bytes) are not<br />
included in the font data length.<br />
To delete the registered Japanese TrueType font, use the RWRF D command.<br />
To write font data in the external media, you need to have the owner grant the intellectual<br />
property right for fonts.<br />
Example:<br />
!R! RWEF W , 0 , "FNT" , "RSF" , "testfont"; [FontData]<br />
WRED; EXIT;<br />
!R! RWRF W , 0 , "FNT" , 0 , "testfile" , "testfont" , 619 ,<br />
1 , 10 , 0 , 100; [FontData] WRED; EXIT;<br />
257
PRESCRIBE <strong>Command</strong> <strong>Reference</strong><br />
RWRF W — [Read/Write Resource File] Write data<br />
to external device (macro)<br />
Format<br />
Parameters<br />
RWRF W, medium, "MCR", macro-type, macro-ID or macro-name, filename;<br />
medium:<br />
0 = hard disk<br />
A = memory card<br />
macro-type:<br />
"PRE"<br />
"PCL"<br />
prescribe macro<br />
PCL macro<br />
macro-ID or macro-name:<br />
macro-ID for PCL macro (0 to 32767)<br />
macro-name for prescribe macro (ASCII text string up to 4 bytes)<br />
file-name<br />
file-name:<br />
ASCII text string up to 15 bytes<br />
Automatically set by the system if omitted.<br />
Function<br />
The RWRF W command writes data to an external device such as the hard disk.<br />
The number of writable files, which is not limited, depends on the capacity of the<br />
external media. If the device runs out of free space during saving, the remaining data will<br />
be discarded.<br />
Duplicating a file name causes the system to rename the specified one and save data<br />
(without overwriting data).<br />
Example:<br />
Write and register prescribe macro "TEST".<br />
!R! RWEF W,0 , "MCR" , "PRE" , "TEST" , "test_macro";[Macro<br />
Data]WRED; EXIT;<br />
Write and register the PCL macro (macro ID: 1111).<br />
!R! RWEF W,0 , "MCR" , "PCL" , "1111" , "test_macro";[Macro<br />
Data]WRED; EXIT;<br />
258
SATU<br />
SATU — adjust SATUration level<br />
COLOR<br />
Format<br />
Parameter<br />
SATU degree;<br />
degree:<br />
degree of saturation level:<br />
number from –10 to 10 (Default = 0)<br />
Function<br />
The SATU command adjusts saturation level based on the specified parameter.<br />
The color bars below show saturation variations using hue “R” as an example. The top<br />
color bar represents the default saturation variation. The symbol indicates the median.<br />
The left side represents the lower saturation range and the right side the higher saturation<br />
range. The middle color bar is an example showing an increase in saturation. (The higher<br />
saturation range is increased.) The middle color bar is an example showing a decrease in<br />
saturation. (The lower saturation range is increased.)<br />
Default saturation<br />
balance<br />
Saturation<br />
increased<br />
Saturation<br />
decreased<br />
Varying saturation allows images in the lower saturation range to be more saturated and<br />
sharp or, conversely, images in the higher saturation range to be faint and shaded off.<br />
Saturation cannot be controlled hue by hue. However, since impressions vary with hue,<br />
you need to control with care.<br />
This command is enabled for all color spaces, all color modes and all monitor simulation<br />
modes.<br />
If ink simulation is set to other than None, this command is disabled.<br />
This mode is not held in the printing system. For this reason, saturation is reset to its<br />
default state when the power is turned on.<br />
259
PRESCRIBE <strong>Command</strong> <strong>Reference</strong><br />
SBM — Set Bottom Margin<br />
Format<br />
Parameter<br />
SBM length;<br />
length:<br />
distance from top of paper to bottom margin<br />
Function<br />
The SBM command sets the bottom margin, as measured from the top edge limit of the<br />
paper in the units designated by the UNIT command.<br />
If an attempt is made to print below the bottom margin, the characters will be printed on<br />
the next page.<br />
A bottom margin setting in a document file should be placed at the beginning of the file<br />
or at a page break.<br />
The SPL (set page length) and SLPP (set lines per page) commands also set the bottom<br />
margin, but these commands measure from the top margin position.<br />
File<br />
!R! RES; UNIT C;<br />
STM 1; SLS 1; SBM 11;<br />
SFNT ’Helvetica-Nr’;<br />
EXIT, E;<br />
Top margin at 1 cm, bottom margin at 11 cm. (Line 1)<br />
Line 2<br />
Line 3<br />
Line 4<br />
Line 5<br />
Line 6<br />
Line 7<br />
Line 8<br />
Line 9<br />
Line 10<br />
Line 11<br />
Line 12<br />
!R! PAGE; EXIT;<br />
260
SBM<br />
Printout<br />
261
PRESCRIBE <strong>Command</strong> <strong>Reference</strong><br />
SCAP — Set line CAP<br />
Format<br />
Parameter<br />
SCAP mode;<br />
mode:<br />
line cap mode:<br />
1 = square caps<br />
2 = butt caps<br />
3 = round caps<br />
Function<br />
The SCAP command determines the shape of line ends (or a line cap) in a path where<br />
they are finally stroked. The default caps is butt caps (2).<br />
Square caps have square ends which extend one-half of a line width beyond the<br />
endpoints of the line. Butt caps are similar to square caps but the caps are flash with the<br />
endpoints and do not extend beyond them. Round caps end the lines with semicircular<br />
caps with diameters identical to the line width.<br />
Square caps (default)<br />
Butt caps<br />
Round caps<br />
File<br />
!R! UNIT C; SPD .5;<br />
NEWP; CMNT Round-capped on every end;<br />
SCAP 3;<br />
PMZP 6, 6;<br />
SCP; SCP;<br />
PDRP 1, -1; RPP;<br />
PDRP 1, 1; RPP;<br />
PDRP 5, 0;<br />
STRK;<br />
PAGE; EXIT;<br />
262
SCAP<br />
Printout<br />
263
PRESCRIBE <strong>Command</strong> <strong>Reference</strong><br />
SCCS — Save Current Code Set<br />
Format<br />
Parameter<br />
Function<br />
File<br />
SCCS;<br />
None<br />
The SCCS command instructs the printing system to remember the code set of the<br />
current font. This command may be used in conjunction with a SCF (save current font)<br />
command to prevent the font from losing the current code set after a command operation<br />
has been made, even if the command changes the code set (macro, etc.).<br />
To return to the saved code set later, use the RPCS (return to previous code set)<br />
command. In the case of using the SCCS command together with a SCF command, it is<br />
recommended that the RPCS command be used with a RPF command.<br />
The current code set can be saved up to eight times using a separate SCCS for each.<br />
RPCS commands retrieve the previously saved code set in reverse order.<br />
!R! RES; SFNT ’TimesNewRoman’; SCF; SCCS;<br />
SLPI 3;<br />
TEXT ’The following line is printed using ISO 6: ASCII’, L;<br />
TEXT ’@ABCDEFG’, L;<br />
TEXT ’Now changing to Ventura Math, using a different<br />
font’, L;<br />
SFNT ’Univers-Md’; CSET 5M; TEXT ’@ABCDEFG’, L;<br />
RPF; RPCS;<br />
TEXT ’Now bringing the previous font and code set back by a<br />
RPF and RPCS command.’, L;<br />
TEXT ’@ABCDEFG’;<br />
PAGE;<br />
EXIT;<br />
264
SCCS<br />
Printout<br />
Related <strong>Command</strong>s<br />
RPCS, RPF, SCF<br />
265
PRESCRIBE <strong>Command</strong> <strong>Reference</strong><br />
SCF — Save Current Font<br />
Format<br />
Parameter<br />
Function<br />
File<br />
SCF;<br />
None<br />
The SCF command saves the current font so that it can be retrieved later using the RPF<br />
(return to previous font) command. The font to be saved can be either a bitmap font or a<br />
scalable font.<br />
Up to eight font numbers can be saved in the printing system’s memory by SCF<br />
commands (using a separate SCF command for each).<br />
The SCF command only instructs the printing system to remember the font. It does not<br />
move actual fonts in or out of memory.<br />
!R! RES;<br />
SLM 1; STM 2;<br />
SFNT ’TimesNewRoman’, 12;<br />
EXIT;<br />
Affixed to the door was a large sign that read:<br />
!R! SCF; SFNT ’Univers-BdIt’, 20;<br />
MRP 1, .423;<br />
TEXT ’KEEP OUT’;<br />
RPF;<br />
EXIT;<br />
Being one of those people who assume that such<br />
signs are put up to be ignored, she reached out<br />
266
SCF<br />
Printout<br />
Related <strong>Command</strong><br />
RPF<br />
267
PRESCRIBE <strong>Command</strong> <strong>Reference</strong><br />
SCG — Save Current Graphics state<br />
Format<br />
Parameter<br />
Function<br />
File<br />
SCG;<br />
None<br />
The SCG command saves the graphics state comprised of the following characteristics:<br />
• Current path and cursor position<br />
• Current pen diameter<br />
• Current line join<br />
• Current line cap<br />
• Current miter limit<br />
• Current dash pattern<br />
• Current flatness<br />
• Current current fill pattern (16 × 16 dots)<br />
• Current current clipping path<br />
• Current raster resolution<br />
• Current image model<br />
Once the current graphics state is saved, it can be retrieved later using the RPG (return to<br />
previous graphics state) command. Saving and retrieving the graphics state in this way<br />
simplifies recovery of paths which stroke a filled and outlined shape. Note that the FILL<br />
command clears the current path, leaving no strokable path.<br />
The printing system holds as much graphics state information as the user memory area<br />
can accommodate; however, graphics state information larger than the memory area can<br />
cause a memory error.<br />
!R! RES; UNIT C;<br />
NEWP;<br />
PMZP 5, 5;<br />
SFNT ’Helvetica-Bd’, 72;<br />
CPTH ’Mary’;<br />
SCG;<br />
STRK;<br />
RPG;<br />
GPAT .9;<br />
FILL 1;<br />
PAGE;<br />
EXIT;<br />
268
SCG<br />
Printout<br />
Related <strong>Command</strong>s<br />
FILL, RPG<br />
269
PRESCRIBE <strong>Command</strong> <strong>Reference</strong><br />
SCOL — Select COLor<br />
COLOR<br />
Format<br />
Parameter<br />
SCOL number;<br />
number:<br />
number from 0 to 255 (Default is 0.)<br />
Function<br />
File and Printout<br />
The SCOL command selects a color from the currently active palette.<br />
If no color is assigned to the specified number, this command is ignored. If the specified<br />
number exceeds the valid range, this command is invalid.<br />
Color specification using SCOL affects the following objects to be printed:<br />
• Texts<br />
• Vector graphics<br />
• Monochrome patterns<br />
• Monochrome raster images<br />
And, it does not affect the following objects:<br />
• Color patterns<br />
• Color raster images<br />
Once a color is specified by SCOL, the active color does not change until the next color<br />
specification is made even if a palette is created, changed or deleted.<br />
See ACLI on page 12.<br />
Related <strong>Command</strong>s<br />
ACLI<br />
270
SCP<br />
SCP — Save Current Position<br />
Format<br />
Parameter<br />
Function<br />
SCP;<br />
None<br />
File and Printout<br />
Related <strong>Command</strong><br />
The SCP command instructs the printing system to remember the current cursor position,<br />
so that it can be retrieved later using the RPP (return to previous position) command.<br />
Up to eight positions can be saved in the printing system’s memory (using a separate<br />
SCP command for each). RPP commands return to the positions in the reverse order in<br />
which they were saved.<br />
See RPP on page 228.<br />
RPP<br />
271
PRESCRIBE <strong>Command</strong> <strong>Reference</strong><br />
SCPI — Set Characters Per Inch<br />
Format<br />
Parameter<br />
SCPI number;<br />
number:<br />
number of characters per inch<br />
Function<br />
The SCPI command sets the number of characters per inch (even if the UNIT command<br />
designates a non-inch unit).<br />
When a proportionally-spaced font is used and the font mode (FTMD) is 0 to 3 or 8 to<br />
11, SCPI 0 (zero) must be specified to obtain the innate spacing of each character. A nonzero<br />
specification results in unnatural spacing of proportional fonts.<br />
SCPI 0 does not change the width of the space character.<br />
The character spacing can also be controlled by the SCS (set character spacing)<br />
command.<br />
File<br />
!R! RES; SLM 1; STM 2; EXIT;<br />
This line has 10 characters per inch.<br />
!R! SCPI 8; EXIT;<br />
This line has 8 characters per inch.<br />
!R! SFNT ’Helvetica’, 10; SCS .2; EXIT;<br />
This proportional font<br />
is printed with fixed<br />
spacing.<br />
!R! SCS 0; EXIT;<br />
This is correct proportional spacing.<br />
!R! PAGE; EXIT;<br />
272
SCPI<br />
Printout<br />
Related <strong>Command</strong><br />
SCS<br />
273
PRESCRIBE <strong>Command</strong> <strong>Reference</strong><br />
SCPL — Save Current PaLette<br />
COLOR<br />
Format<br />
Parameter<br />
Function<br />
File<br />
Printout<br />
SCPL;<br />
None<br />
The SCPL command saves the currently active palette, so that it can be retrieved later<br />
using the RPPL (return to previous palette) command.<br />
Palettes can be saved as many as there is enough memory. If there is insufficient<br />
memory, a memory overflow will result and the palette will not be saved.<br />
This command does not change the active palette. RPPL commands return to the saved<br />
palettes in the reverse order in which they were saved.<br />
!R! RES;<br />
SEM 6;<br />
UNIT C;<br />
SFNT 'Incised901SWC-Black', 20;<br />
SPAL 100; CID 0, 1; ACLI 1, 128, 64, 64; SCPL;<br />
SPAL 101; CID 0, 1; ACLI 1, 128, 0, 128; SCPL;<br />
MZP 1, 1; RPPL; SCOL 1;<br />
TEXT 'This line is printed using palette 101.';<br />
MZP 1, 2; RPPL; SCOL 1;<br />
TEXT 'This line is printed using palette 100.';<br />
PAGE;<br />
EXIT;<br />
274
SCRC<br />
SCRC — Set <strong>Command</strong> Recognition Character<br />
Format<br />
Parameter<br />
SCRC character;<br />
character:<br />
new command recognition character, any character from ASCII code 33 (!) to ASCII<br />
code 126 ( ~ ) except the apostrophe (’), quotation mark (”) or semicolon (;).<br />
Function<br />
File<br />
The SCRC command changes the command recognition character between the<br />
exclamation points in the PRESCRIBE start sequence.<br />
The change remains in effect until power is turned off or a RES (reset) command is<br />
executed.<br />
Originally the command recognition character is the capital letter R within the<br />
PRESCRIBE start sequence of !R!.<br />
One reason for changing the command recognition character is to print listings of files or<br />
programs containing PRESCRIBE commands. If the command recognition character is<br />
not changed, then instead of printing the PRESCRIBE commands, the printing system<br />
will execute them.<br />
!R! RES; UNIT C;<br />
GPAT .7; BLK 1, 1; BOX 1, 1, E;<br />
GPAT .5; BLK 1.3, 1.3; BOX 1.3, 1.3, E;<br />
GPAT .3; BLK 1.6, 1.6; BOX 1.6, 1.6, E;<br />
CMNT Now list the above commands;<br />
SCRC L;<br />
EXIT;<br />
!R! RES; UNIT C;<br />
GPAT .7; BLK 1, 1; BOX 1, 1, E;<br />
GPAT .5; BLK 1.3, 1.3; BOX 1.3, 1.3, E;<br />
GPAT .3; BLK 1.6, 1.6; BOX 1.6, 1.6, E;<br />
PAGE; EXIT;<br />
!L! RES; EXIT;<br />
275
PRESCRIBE <strong>Command</strong> <strong>Reference</strong><br />
Printout<br />
276
SCS<br />
SCS — Set Character Spacing<br />
Format<br />
Parameter<br />
SCS distance;<br />
distance:<br />
character-to-character spacing, or 0<br />
Function<br />
The SCS command sets the distance from the beginning of one character to the<br />
beginning of the next character.<br />
When a proportionally-spaced font is used and the font mode (FTMD) is 0 to 3 or 8 to<br />
11, SCS 0 (zero) must be specified to obtain the innate spacing of each character. A nonzero<br />
specification results in unnatural spacing of proportional fonts.<br />
SCS 0 does not change the width of the space character.<br />
The character spacing can be set using either the SCS or the SCPI command.<br />
File<br />
!R! RES; SLM 1; STM 2; EXIT;<br />
This line has the default spacing.<br />
!R! UNIT C; SCS .3; EXIT;<br />
This line has a slightly wider spacing.<br />
!R! SFNT ’TimesNewRoman’, 10; SCS .2; EXIT;<br />
This is a proportional font printed with fixed spacing.<br />
!R! SCS 0; EXIT;<br />
This is correct proportional spacing.<br />
!R! PAGE; EXIT;<br />
Printout<br />
277
PRESCRIBE <strong>Command</strong> <strong>Reference</strong><br />
SCSZ — Set Custom paper SiZe<br />
Format<br />
Parameters<br />
SCSZ width, height, unit;<br />
width:<br />
height:<br />
unit:<br />
width of custom paper size<br />
height of custom paper size<br />
M = millimeters<br />
I = inches<br />
Function<br />
The SCSZ command sets the paper size when the user-defined size paper is used in the<br />
universal cassette. This command defines the width and height values for the custom<br />
paper size which is summoned by the SPSZ (set page size) 19; command.<br />
The SCSZ command causes a page break, so it should be placed at the top of a file or<br />
program, or at the beginning of a new page. This command uses the unit set in the unit<br />
parameter of this command, regardless of the unit set in the UNIT command. The setting<br />
made with this command provides a non-printing area of 5 mm × 5 mm, independent of<br />
emulation mode.<br />
File<br />
!R! SCSZ 260, 300, M; EXIT;<br />
278
SCU<br />
SCU — Save Current Unit<br />
Format<br />
Parameter<br />
Function<br />
File<br />
SCU;<br />
None<br />
The SCU command instructs the printing system to save the current unit of<br />
measurement. Saving the current unit can prove useful when a macro containing a UNIT<br />
command changes the unit of measurement. The saved unit can be retrieved later using<br />
the RPU (return to previous unit) command.<br />
The current unit can be saved up to eight times using a separate SCU command for each.<br />
RPU commands retrieve the unit of measurement in reverse order.<br />
!R! FRPO N8, 0; RES;<br />
SENT "Univers-MdCd", 9;<br />
UNIT C; SCU;<br />
MZP 1.5, 1.5;<br />
TEXT "THE DAYS ON THE ISLAND: PART I", U;<br />
MCRO TITLE;<br />
FSET 24V;<br />
UNIT I;<br />
MZP 4, 3;<br />
CIR 2;<br />
MRP –1.5, .125;<br />
TEXT %1;<br />
ENDM;<br />
CALL TITLE, "CHAPTER 1: PROLOGUE";<br />
RPU;<br />
SLM 2;<br />
STM 13;<br />
FSET 12v;<br />
EXIT;<br />
My long anticipated vacation started at Mallorca<br />
island which<br />
279
PRESCRIBE <strong>Command</strong> <strong>Reference</strong><br />
Printout<br />
Related commands<br />
SCF, SCP, UNIT<br />
280
SDP<br />
SDP — Store Dash Pattern<br />
Format<br />
Parameters<br />
SDP pattern-number, dash1, space1, dash2, space2, ..., dash10, space10;<br />
pattern-number:<br />
number from 11 to 20<br />
dash1 ... 10:<br />
length of dash<br />
space1 ... 10:<br />
space between dashes<br />
Function<br />
The SDP command generates a new dash pattern used by the DPAT (dashed pattern)<br />
command for stroking a path. The dash and space values represent the lengths of<br />
alternating black and white segments for stroking the line segment in the path, using the<br />
unit value designated by the UNIT command.<br />
For example, SDP 11, 2, 2, 5, 5; stores the following dash pattern in pattern<br />
number 11:<br />
Beginning of the pattern<br />
End of the pattern<br />
The maximum number of pairs of dash and space allowed for a SDP command is 10. If<br />
the dash pattern begins with a space, 0 must be specified for the first dash value (dash1).<br />
To end the pattern with a dash, the last space value may be omitted.<br />
The user-defined dash patterns are valid until another SDP command changes the current<br />
definition or until the printing system is switched off.<br />
281
PRESCRIBE <strong>Command</strong> <strong>Reference</strong><br />
File<br />
Printout<br />
!R! RES; UNIT P;<br />
SDP 11, 2, 2, 5, 5;<br />
NEWP;<br />
UNIT C;<br />
SPD .2; PMRA 10, 10, 3, 0;<br />
DPAT 11; PARC 10, 10, 3, 0, 360;<br />
STRK;<br />
PAGE;<br />
EXIT;<br />
Related <strong>Command</strong><br />
DPAT<br />
282
SEM<br />
SEM — Set Emulation Mode<br />
Format<br />
Parameter<br />
SEM mode;<br />
mode:<br />
0 = Line Printer<br />
1 = IBM Proprinter X-24E<br />
2 = Diablo 630<br />
5 = Epson LQ-850<br />
6 = HP LaserJet/PCL<br />
8 = KC-GL (Plotter)<br />
9 = KPDL (an option on some models)<br />
Function<br />
The SEM command temporarily changes the printing system’s emulation mode. The new<br />
mode remains in effect until another SEM or an RES (reset) command is issued.<br />
The SEM command also resets the margins and various other parameters. It should<br />
therefore be placed at the beginning of a program or file.<br />
The SEM command does not change the power-up emulation mode. When power is<br />
switched off, the printing system loses the mode set by the SEM command. Upon power<br />
up, it retains the default emulation, which is set by the P1 parameter of the FRPO<br />
command.<br />
If you usually work in ‘emulation A’ but occasionally use ‘emulation B,’ it is convenient<br />
to set ‘emulation A’ with the FRPO command and use the SEM command to change to<br />
‘emulation B’ when necessary. In this case you must avoid using the RES command in<br />
‘emulation B,’ because the RES command resets the printing system to ‘emulation A.’<br />
File<br />
!R! CMNT To work temporarily in the LQ-850 emulation;<br />
SEM 5;<br />
EXIT;<br />
283
PRESCRIBE <strong>Command</strong> <strong>Reference</strong><br />
SETF — SET alternate Font<br />
Format<br />
Parameters<br />
SETF alternate-number, font-number;<br />
alternate-number:<br />
a number from 0 to 31<br />
font-number:<br />
a number from 0 to 65535<br />
Function<br />
File<br />
The SETF command assigns a font to an alternate number, so that it can be selected by<br />
the ALTF (alternate font) command. The font number can be one of the resident font<br />
numbers or the number of a nonresident font defined by LDFC (load font character)<br />
commands.<br />
A scalable font can also be assigned to an alternate number when given a temporary font<br />
number in advance. See the SFNT (set font) command page.<br />
In some emulation modes, default assignments are given to low alternate numbers so that<br />
SETF commands can be embedded for some word processing software. See Emulation<br />
of the Technical <strong>Reference</strong> manual.<br />
!R! RES;<br />
SFNT ’Helvetica’, 10, 2000;<br />
SFNT ’Helvetica-BdOb’, 10, 2001;<br />
SETF 1, 2000;<br />
SETF 2, 2001;<br />
MCRO BIBLIO;<br />
ALTF 1; TEXT %1, E; TEXT " ", E;<br />
ALTF 2; TEXT %2, E; TEXT " ", E;<br />
ALTF 1; TEXT %3, N;<br />
ENDM;<br />
ALTF 1; TEXT ’BIBLIOGRAPHY’,N,U;<br />
TEXT,N;<br />
CALL BIBLIO, "Engelberger, Joseph L., ",<br />
"Robotics in Practice,", "Kogan Page";<br />
CALL BIBLIO, "Cohen, J.,",<br />
"Human Robots in Myth and Science,", "Allen and Irwin";<br />
CALL BIBLIO, "McCorduck, Pamela,",<br />
"Machines Who Think,", "W. H. Freeman and Company";<br />
CALL BIBLIO, "Asimov, Isaac,",<br />
"I, Robot,", "Doubleday & Co.";<br />
EXIT;<br />
284
SETF<br />
Printout<br />
285
PRESCRIBE <strong>Command</strong> <strong>Reference</strong><br />
SFA — Set bitmap Font Attributes<br />
Format<br />
SFA hmi, vmi, F/P[, rotation, symbol-set, height, U/I, weight, typeface][,<br />
font-type];<br />
Executable Parameters<br />
hmi:<br />
vmi:<br />
F/P:<br />
horizontal motion index; in a fixed font, the distance from the center of one character to<br />
the center of the next; in a proportionally spaced font, the width of the space character<br />
vertical motion index—the line-to-line spacing<br />
F = fixed spacing<br />
P = proportional spacing<br />
Non-executable Parameters<br />
rotation:<br />
0 = normal<br />
1 = face-down<br />
2 = upside down<br />
3 = face-up (used in landscape mode)<br />
symbol-set:<br />
symbol set (number from 0 to 65535):<br />
4 = ISO 60 Norway<br />
5 = Roman Extension<br />
9 = ISO 15 Italian<br />
14 = ECMA-94 Latin 1<br />
19 = ISO 11 Swedish<br />
21 = ISO 6 ASCII<br />
37 = ISO 4 U. K.<br />
38 = ISO 69 France<br />
39 = ISO 21 Germany<br />
53 = US Legal<br />
75 = ISO<br />
83 = ISO 17 Spain<br />
277 = HP Roman-8<br />
305 = PC Extension<br />
341 = IBM PC-8<br />
373 = IBM PC-8 (D/N)<br />
405 = IBM PC-850<br />
286
SFA<br />
height:<br />
U/I:<br />
weight:<br />
maximum height of the font<br />
U = upright<br />
I = italic<br />
degree of bolding, from -7 (light) to +7 (bold)<br />
type-face:<br />
0 = Line Printer<br />
1 = Pica 2 = Elite<br />
3 = Courier<br />
4 = Swiss 721<br />
5 = Dutch 801<br />
6 = Gothic<br />
7 = Script<br />
8 = Pret. Elite<br />
9 = Caslon<br />
10 = Orator<br />
font-type:<br />
0 = 7-bit, 96 characters (character codes 32 to 127)<br />
1 = 8-bit, 192 characters (character codes 32 to 127 and 160 to 255)<br />
2 = 8-bit, 256 characters (All character codes. The printing system must be set to the HP<br />
transparency mode. See Emulation of the Technical <strong>Reference</strong> manual.)<br />
Function<br />
The SFA command specifies the attributes of the current bitmap font. It can be used to<br />
change the default attributes of the bitmap font and will be ignored when the current font<br />
is a scalable font. The font retains its new attributes until they are changed by another<br />
SFA command or power is switched off. Font attributes are not reset by the RES (reset)<br />
command.<br />
The SFA command has two types of parameters. The executable parameters adjust the<br />
intrinsic character and line spacing of the font. The non-executable parameters do not<br />
change the appearance of the font at all, but they affect the way in which the font is<br />
selected by word-processing software in the HP LaserJet emulation.<br />
Executable Parameters<br />
The first three parameters are required in every SFA command. The hmi parameter sets<br />
the character spacing of a fixed font or the word spacing of a proportional font. The vmi<br />
parameter adjusts the line spacing. The vmi and hmi parameters both use the unit value<br />
designated by the UNIT command.<br />
The third parameter designates the font as fixed or proportional. Normally you should<br />
specify F for a fixed font (example: font 1) and P for a proportional font (example:<br />
font 2).<br />
If the font mode (FTMD) value is 15, the assigned attributes take effect immediately. If<br />
the font mode value is less than 15, some of the attributes, although assigned to the font,<br />
287
PRESCRIBE <strong>Command</strong> <strong>Reference</strong><br />
File<br />
will not take effect. If the font mode is 0 (the default value in the daisywheel emulation<br />
mode), none of the attributes will take effect.<br />
Non-executable Parameters<br />
The fourth and subsequent parameters of the SFA command are optional, although if one<br />
of these parameters is desired, then the preceding parameters must also be specified. The<br />
optional parameters are used to describe downloaded fonts for selection by embedded<br />
commands in the HP LaserJet emulation mode. The parameters can also redefine the<br />
attributes of resident fonts. However, they do not actually change the physical<br />
appearance of the font, only how the printing system interprets the font’s attributes.<br />
The rotation parameter should be 0 for a portrait font or 3 for a landscape font. The<br />
values 1 and 2 are not normally used. You cannot change the orientation of a font with<br />
this parameter.<br />
The symbol set parameter identifies the font’s character set. Specifying this parameter<br />
does not actually change the character set. The height parameter is measured in the unit<br />
value designated by the UNIT command.<br />
!R! RES; FTMD 15;<br />
UNIT C; SLM 2; STM 4;<br />
FONT 1; SFA .25, 1, F;<br />
FONT 2; SFA .15, .5, P;<br />
FONT 1;<br />
EXIT;<br />
At these settings, in<br />
font mode 15, font 1 is<br />
double spaced (1 cm),<br />
!R! FONT 2; EXIT,E;<br />
while font 2 is single<br />
spaced (0.5 cm) with 1.5<br />
mm spaces between words.<br />
!R! FONT 1; EXIT,E;<br />
The printer remembers<br />
the spacing assigned<br />
to each font.<br />
288
SFA<br />
Printout<br />
289
PRESCRIBE <strong>Command</strong> <strong>Reference</strong><br />
SFNT — Select current FoNT by typeface<br />
Format<br />
Parameters<br />
SFNT ’type-face’[, height [, font-number [, symbol-set, compression,<br />
shear]]];<br />
type-face:<br />
Name of the typeface of the font to be selected.<br />
height:<br />
Height of the characters in points. The minimum value is 0.25 points and the maximum<br />
value is 999.75 points, in 0.25-point increments.<br />
font-number:<br />
Integer from 1000 to 65535<br />
symbol-set:<br />
Symbol set, number from 0 to 65535; Refer to LaserJet Symbol Sets in Emulation of the<br />
Technical <strong>Reference</strong> manual, pages 7-40 to 7-42.<br />
compression:<br />
1 for normal character width. Smaller values for narrow characters; and larger values for<br />
wider characters. The minimum value is 0.3 and the maximum value is 3.<br />
shear:<br />
0 for normal (unitalicized) characters. Positive values give forward italicization; and<br />
negative values give backward italicization. The minimum value is -1 and the maximum<br />
value is 1.<br />
Function<br />
The SFNT command selects the font which matches the type-face parameters. It enables<br />
the user to size its height, assign a font number and vary some of the font attributes so<br />
that characters can appear compressed or sheared. All parameters except type-face are<br />
ignored if a bitmap typeface is specified.<br />
By designating a font number for a scalable font, it can later be retrieved by using a<br />
FONT command. If you specify the symbol set, compression, and shear parameters<br />
together, the FONT command recalls the font with these effects intact.<br />
type-face should be a name from the font table in Section 4.2. of the Technical <strong>Reference</strong><br />
manual. Specify the full name exactly as it appears in the table, including case<br />
sensitivity. This command is ignored and the current font is not changed if the typeface<br />
name is not in the table or is not typed correctly.<br />
height defines the size of the font, using the unit of points regardless of the current unit<br />
setting. The SFNT command is ignored if the height value is out of the range. If the<br />
290
SFNT<br />
height parameter is omitted, the printing system sizes the font to the height of the current<br />
font. The following example displays a range of font heights.<br />
You can assign any number from 1000 to 65535 as a temporary font-number, as long as<br />
you do not duplicate the number of a bitmap font or a font number already in use. If the<br />
number matches one already assigned to another font, the printing system ignores the<br />
SFNT command.<br />
symbol-set uses HP PCL matching code to change the font’s symbol set. Unsupported<br />
symbol set values, if specified, are ignored.<br />
compression squeezes or expands characters in the horizontal direction.<br />
Compression = 0.3 Compression = 1 Compression = 3<br />
shear imparts a slant to the characters: forward if the angle value is positive; backward if<br />
it is negative. Zero gives upright characters.<br />
Shear = -1 Shear = 0 Shear = 1<br />
Changes made with SFNT to a scalable font in its height, symbol set, compression, and<br />
shear remain effective until another font selection command is encountered. To retrieve<br />
this scalable font later, use the FONT command.<br />
File<br />
!R! RES; SPO P;<br />
SFNT ’Helvetica-Nr’, 10, 3000, 277, 2, .3;<br />
EXIT;<br />
291
PRESCRIBE <strong>Command</strong> <strong>Reference</strong><br />
Printout<br />
This is 10-point Helvetica-Nr,<br />
with Roman-8 symbol set, compression is 2, and<br />
shear is .3. You can later recall this font by the<br />
FONT 3000; command.<br />
!R! PAGE; EXIT;<br />
292
SGPC<br />
SGPC — Set kcGl Pen Color<br />
COLOR<br />
Format<br />
Parameters<br />
SGPC pen-number, color;<br />
pen-number:<br />
number from 1 to 8 corresponding to FRPO G1 to G8 parameter<br />
color:<br />
0 = Black<br />
1 = Red<br />
2 = Green<br />
3 = Yellow<br />
4 = Blue<br />
5 = Magenta<br />
6 = Cyan<br />
7 = White<br />
Function<br />
The SGPC command sets the color of a pen 1 through 8 for use with KCGL to a<br />
specified color. The specified value is permanently saved in the printing system.<br />
293
PRESCRIBE <strong>Command</strong> <strong>Reference</strong><br />
SHMI — Set HMI<br />
Format<br />
Parameter<br />
SMHI hmi;<br />
hmi:<br />
horizontal motion index; in a fixed font, the distance from the center of one character to<br />
the center of the next; in a proportionally spaced font, the width of the space character<br />
Function<br />
The SHMI command sets the HMI. The parameter is measured in the unit value specfied<br />
by the UNIT command.<br />
File<br />
!R! RES; SLM 1; STM 2; EXIT;<br />
This line has the default spacing.<br />
!R! UNIT C; SHMI .3; EXIT;<br />
This line has a slightly wider spacing.<br />
!R! SFNT ’TimesNewRoman’, 10; SHMI .3; EXIT;<br />
Proportional fonts are not influenced.<br />
!R! PAGE; EXIT;<br />
Printout<br />
294
SIMG<br />
SIMG — Set IMaGe model<br />
Format<br />
Parameter<br />
operation-mode:<br />
SIMG operation-mode;<br />
Source image Pattern image<br />
1 = Transparent –<br />
2 = Opaque –<br />
3 = Transparent Transparent<br />
4 = Transparent Opaque<br />
5 = Opaque Transparent<br />
6 = Opaque Opaque<br />
Function<br />
The SIMG command sets the mode for controlling the transparency and opaqueness of<br />
an image and the current pattern when they are overlaid on each other.<br />
In the table above, the source image can be a rectangular area, characters, or a raster<br />
graphics image preceded by an SIMG command. The fill patterns and gray shade<br />
rendered with the PAT (pattern), FPAT (fill pattern), and GPAT (gray pattern) commands<br />
can be used for pattern images.<br />
With operation modes 1 and 2, the SIMG command takes care of the source image’s<br />
transparency only. The default operation mode is 1. The white pixels of the source image<br />
do not overlay on the destination. For example, you cannot pattern a character. With<br />
operation mode 2, the SIMG command applies the white pixels of the source image onto<br />
the destination directly.<br />
295
PRESCRIBE <strong>Command</strong> <strong>Reference</strong><br />
The figure on the next page illustrates the effects of operation mode 3 through 6. In this<br />
example, the letter A represents the source image overlaid with the pattern image, while<br />
the two rectangles are referred to as the destination image.<br />
operation-mode = 3: Both the source image and pattern image are transparent. Since the<br />
source image is transparent, in the first example, the letter A is patterned and overlaid<br />
onto the destination image (two rectangles).<br />
operation-mode = 4: The source image is transparent and the pattern image is now<br />
opaque. The pattern’s white pixels overlay the destination image in the shape of the letter<br />
A.<br />
operation-mode = 5: The source image is opaque and the pattern image is transparent.<br />
Being opaque, the source image (the letter A) as it is enclosed within a square comes<br />
overlaid onto the destination. The pattern image fills only the area on the destination<br />
which is covered by white pixels. Note that the letter A is patterned only with its<br />
opposing quarters.<br />
operation mode = 6: Both source and pattern images are opaque, the entire letter A is<br />
patterned, and the full source image is overlaid onto the destination.<br />
Operation Modes<br />
<br />
<br />
296
SIMG<br />
File<br />
!R! RES; UNIT C;<br />
NEWP;<br />
PMZP 5, 5;<br />
PDRP 2.5, 0, 0, 2.5, -5, 0, 0, 2.5, 2.5, 0;<br />
PAT 1; SIMG 4;<br />
FILL 1;<br />
MRP -1, 3.5; PAT 18;<br />
FSET 4158T3B0S1P108V; TEXT "A";<br />
FILL 1;<br />
PAGE; EXIT;<br />
Printout<br />
297
PRESCRIBE <strong>Command</strong> <strong>Reference</strong><br />
SIMP — create SIMPle color palette<br />
COLOR<br />
Format<br />
SIMP palette;<br />
Parameter<br />
palette:<br />
1 = single plane K (Black) palette (Default)<br />
3 = 3-plane device RGB palette<br />
Function<br />
The SIMP command creates a palette already defined by the system from either a single<br />
plane (monochrome) or 3-plane (8-color) RGB palette. The default palette is a<br />
monochrome palette.<br />
Colors and parameters specifiable by SCOL command for each palette are as follows:<br />
palette SCOL Color<br />
command<br />
parameter<br />
1 (single plane) 0 White<br />
1 Black<br />
3 (3-plane) 0 Black<br />
1 Red<br />
2 Green<br />
3 Yellow<br />
4 Blue<br />
5 Magenta<br />
6 Cyan<br />
7 White<br />
Color assignments (using the ACLI command) cannot be made to the pallette created<br />
using the SIMP command.<br />
The currently acative palette ID does not change.<br />
298
SIMP<br />
File !R! RES; UNIT C; SIMP 3;<br />
MCRO SIMP;<br />
NEWP;<br />
SCOL %2;<br />
PDRP 2, 0, 0, 2, -2, 0, 0, -2;<br />
FILL 1;<br />
PMRP .5, .5;<br />
ENDM;<br />
CALL SIMP,0,0;<br />
CALL SIMP,0,1;<br />
CALL SIMP,0,2;<br />
CALL SIMP,0,3;<br />
CALL SIMP,0,4;<br />
CALL SIMP,0,5;<br />
CALL SIMP,0,6;<br />
CALL SIMP,0,7;<br />
PAGE;<br />
EXIT;<br />
Printout<br />
299
PRESCRIBE <strong>Command</strong> <strong>Reference</strong><br />
SIR — Set Image Refinement level<br />
Format<br />
Parameter<br />
SIR level;<br />
level:<br />
0 = Off<br />
2 = On (Medium)<br />
Function<br />
The SIR command accesses different levels of Kyocera Image Refinement (KIR). The<br />
image refinement level remains in effect until the printing system receives a RES<br />
command or a different SIR command. The default value is On.<br />
Refer to the User’s Manual for details about how to obtain the optimum level of the<br />
image refinement.<br />
File<br />
!R! SIR 0; CMNT KIR is off; EXIT;<br />
300
SLJN<br />
SLJN — Set Line JoiN<br />
Format<br />
Parameter<br />
SLJN mode;<br />
mode:<br />
line join mode:<br />
1 = Beveled join<br />
2 = Mitered join<br />
3 = Round join<br />
4 = Notched join<br />
Function<br />
The SLJN command determines how two connected lines in a path are joined. The<br />
default join is beveled (1).<br />
Beveled join ends the lines with butt caps (Refer to the SCAP command) and fills the<br />
larger angle between the lines with a triangle. Mitered join extends the edges of the lines<br />
until they touch. The current miter limit value affects this join type (Refer to SMLT<br />
command page). Round join connects lines with a circular join noted by a diameter equal<br />
to the width of the lines. Notched join enables the lines to overlap.<br />
Beveled join Mitered join Round join Notched join<br />
301
PRESCRIBE <strong>Command</strong> <strong>Reference</strong><br />
File<br />
!R! RES; UNIT C;<br />
NEWP;<br />
SPD .5;<br />
SCAP 3;<br />
CMNT Round-capped at the upper-left corner;<br />
SLJN 3;<br />
CMNT Round-joined at other corners;<br />
PMZP 5, 16.5;<br />
PDRP 3, 0, 0, 3, -3, 0, 0, -3;<br />
STRK;<br />
NEWP;<br />
SCAP 1;<br />
CMNT Square-capped at the upper-left corner;<br />
SLJN 2;<br />
CMNT Mitered-joined at other corners;<br />
PMZP 11, 16.5;<br />
PDRP 3, 0, 0, 3, -3, 0, 0, -3;<br />
STRK;<br />
Printout<br />
PAGE;<br />
EXIT;<br />
302
SLM<br />
SLM — Set Left Margin<br />
Format<br />
Parameter<br />
SLM distance;<br />
distance:<br />
size of left margin<br />
Function<br />
The SLM command sets the left margin, as measured from the left edge limit of the<br />
paper in the unit value designated by the UNIT command.<br />
If the margin is moved to the right of the current cursor position, the cursor moves to the<br />
new margin.<br />
When the left margin is moved to the right, the right margin does not change. But when<br />
the left margin is moved toward the left, the right margin moves with it, keeping a<br />
constant page width. To move the left margin to the left but leave the right margin in its<br />
original position, you must add an SRM command after the SLM command to restore the<br />
original right margin.<br />
File<br />
!R! RES; UNIT C; FONT 2;<br />
SFNT "TimesNewRoman";<br />
SLM 1;<br />
EXIT;<br />
Location of 1-cm left margin<br />
!R! SLM 2; EXIT;<br />
Location of 2-cm left margin<br />
!R! SLM 3; EXIT;<br />
Location of 3-cm left margin<br />
!R! PAGE; EXIT;<br />
303
PRESCRIBE <strong>Command</strong> <strong>Reference</strong><br />
Printout<br />
304
SLPI<br />
SLPI — Set Lines Per Inch<br />
Format<br />
Parameter<br />
SLPI number;<br />
number:<br />
Number of lines per inch<br />
Function<br />
The SLPI command sets the number of lines per inch (even if the UNIT command<br />
designates a non-inch unit).<br />
File<br />
!R! RES; STM 2;<br />
SFNT "Helvetica";<br />
EXIT;<br />
These lines have the<br />
default spacing of<br />
six lines per inch.<br />
!R! SLPI 2; EXIT;<br />
These lines are<br />
spaced at two lines<br />
per inch.<br />
!R! PAGE; EXIT;<br />
Printout<br />
Related <strong>Command</strong><br />
SLS<br />
305
PRESCRIBE <strong>Command</strong> <strong>Reference</strong><br />
SLPP — Set Lines Per Page<br />
Format<br />
Parameter<br />
SLPP number;<br />
number:<br />
number of lines per page<br />
Function<br />
The SLPP command sets the bottom margin for an exact number of lines per page based<br />
on the current line spacing. As long as you do not change the line spacing or use<br />
PRESCRIBE commands that move the cursor, you will get the specified number of lines<br />
per page.<br />
To control the page size in terms of inches or centimeters instead of a number of lines,<br />
use the SBM (Set Bottom Margin) or SPL (Set Page Length) command. The advantage<br />
of the SLPP command is that it sets the bottom margin to accommodate an exact number<br />
of lines, so no excess is carried over to the next page.<br />
A bottom margin setting in a document file should be placed at the beginning of the file<br />
or at a page break.<br />
File<br />
!R! RES; UNIT C;<br />
SFNT "TimesNewRoman";<br />
STM 1; SLS 1; SLPP 10;<br />
EXIT, E;<br />
Top margin at 1 cm, with 10 lines per page. (Line 1)<br />
Line 2<br />
Line 3<br />
Line 4<br />
Line 5<br />
Line 6<br />
Line 7<br />
Line 8<br />
Line 9<br />
Line 10<br />
Line 11<br />
Line 12<br />
!R! PAGE; EXIT;<br />
306
SLPP<br />
Printout<br />
307
PRESCRIBE <strong>Command</strong> <strong>Reference</strong><br />
SLS — Set Line Spacing<br />
Format<br />
Parameter<br />
SLS distance;<br />
distance:<br />
Line-to-line spacing<br />
Function<br />
The SLS command sets the distance from the base of one line to the base of the next line.<br />
The distance is measured in the unit value designated by the UNIT command.<br />
The line spacing can be set by either the SLS or the SLPI (set lines per inch) command.<br />
SLPI sets the number of lines per inch. SLS sets the number of inches (or other units) per<br />
line.<br />
File<br />
!R! RES; UNIT C; STM 5;<br />
SFNT "TimesNewRoman";<br />
EXIT;<br />
These lines have the<br />
default line spacing<br />
of 0.423 cm (6 lpi).<br />
!R! SLS .6; EXIT;<br />
These lines are<br />
spaced at intervals<br />
of .6 centimeters.<br />
!R! PAGE; EXIT;<br />
Printout<br />
Related <strong>Command</strong><br />
SLPI<br />
308
SMLT<br />
SMLT — Set Miter LimiT<br />
Format<br />
SMLT limit-value;<br />
Parameter<br />
limit-value:<br />
Ratio of the length through a join to the width of line, expressed by the following<br />
formula (Default is 10. Minimum value is 1).<br />
limit-value =<br />
miter length<br />
line width<br />
=<br />
1<br />
sin (a/2)<br />
W = line width<br />
L = miter length<br />
W<br />
L<br />
Function<br />
The miter limit value set by the SMLT command is the maximum ratio of the miter<br />
length through a join to the width of the lines connected to each other.<br />
The default miter limit value is 10. In smaller miter-limit values, say 3, the miter join<br />
automatically switches to the beveled join. This switching prevents the problem of a<br />
spike extending beyond the intersection of the path because a small angle is used for the<br />
miter-join.<br />
Miter limit = 10 Miter limit = 3<br />
309
PRESCRIBE <strong>Command</strong> <strong>Reference</strong><br />
File<br />
!R! RES; UNIT C;<br />
NEWP;<br />
PMZP 5, 15;<br />
SPD .5;<br />
SLJN 2; CMNT Mitered join;<br />
PDRP 1.5, -2, 1.5, 2, 1.5, -2,<br />
1.5, 2, 1.5, -2, 1.5, 2;<br />
SMLT 10; CMNT Miter limit is 10;<br />
STRK;<br />
NEWP;<br />
PMZP 5, 19;<br />
SPD .5;<br />
SLJN 2; CMNT Mitered join;<br />
PDRP 1.5, -2, 1.5, 2, 1.5, -2,<br />
1.5, 2, 1.5, -2, 1.5, 2;<br />
SMLT 1; CMNT Miter limit is 1;<br />
STRK;<br />
Printout<br />
PAGE;<br />
EXIT;<br />
Related <strong>Command</strong><br />
SLJN<br />
310
SMNT<br />
SMNT — Set MoNiTor simulation<br />
COLOR<br />
Format<br />
Parameters<br />
SMNT monitor-type [,temperature, red-x, red-y, green-x, green-y, blue-x, blue-y,<br />
gamma];<br />
monitor-type:<br />
0 = None<br />
1 = SMPTE 240M<br />
2 = HDTV (sRGB) [default]<br />
3 = Sony Trinitron<br />
4 = Apple RGB<br />
5 = NTSC<br />
6 = KC-RGB<br />
7 = Custom<br />
temperature:<br />
color temperature<br />
3500, 5000, 5500, 6500 (default), 6740, 7500, 9300<br />
red-x/red-y/...<br />
chromaticity coordinates:<br />
red-x: number from 0.0 to 3.0 (default = 0.64)<br />
red-y: number from 0.0 to 3.0 (default = 0.33)<br />
green-x: number from 0.0 to 3.0 (default = 0.30)<br />
green-y: number from 0.0 to 3.0 (default = 0.60)<br />
blue-x: number from 0.0 to 3.0 (default = 0.15)<br />
blue-y: number from 0.0 to 3.0 (default = 0.06)<br />
gamma<br />
value of gamma correction:<br />
number from 1.0 to 3.0 (default = 2.2)<br />
Function<br />
The SMNT command simulates a particular monitor or a monitor customized by<br />
specifying the color temperature, etc. Parameters except monitor-name are enabled only<br />
when monitor-name value is 7 (custom).<br />
Resetting the printing system or switching emulation modes resets all custom parameters<br />
to the default states.<br />
The simulation provided by this command is enabled only when the device-dependent<br />
color space is in use.<br />
311
PRESCRIBE <strong>Command</strong> <strong>Reference</strong><br />
This command is irrelevant to some color printing system models. At the time of release<br />
of this manual, the command is irrelevant to model FS-5800C; and monitor-name values<br />
of 0 and 2 are valid for model FS-8000C.<br />
Resetting the printing system and switching emulation mode reset all parameters to the<br />
default states.<br />
312
SPAL<br />
SPAL — Select PALette<br />
COLOR<br />
Format<br />
Parameter<br />
SPAL id;<br />
id:<br />
palette ID number: 0 to 32767 (default is 0)<br />
Function<br />
File and Printout<br />
The SPAL command selects the palette to activate from among the palettes that are<br />
currently available. If no palette is associated with the specified number, this command is<br />
ignored.<br />
The palette activated by SPAL is deleted when a new palette is created by the CID<br />
command. The active palette number does not change. All palettes are deleted by the<br />
reset command, leaving only the default palette.<br />
See ACLI on page 12.<br />
313
PRESCRIBE <strong>Command</strong> <strong>Reference</strong><br />
SPD — Set Pen Diameter<br />
Format<br />
Parameter<br />
SPD diameter;<br />
diameter:<br />
line thickness<br />
Function<br />
The SPD command sets the thickness of the line used in the graphics commands (DRP,<br />
PDRP, etc.). The thickness is specified in the unit value designated by the UNIT<br />
command. The maximum thickness is 4200 dots (14 inches or 35.56 centimeters) in path<br />
graphics mode, and 127 dots (0.42 inches or 1.08 centimeters) in standard graphics<br />
mode. The minimum thickness is 1 dot (about 0.01 centimeters or 0.0033 inches). The<br />
printing system rounds off all decimal values to the nearest integer value.<br />
The SPD command affects graphics segments created by DZP, DAP, DRP, DRPA, BOX,<br />
CIR, and PIE commands. It also affects the width of the line and curve segments stroked<br />
as paths.<br />
A slant line drawn by the standard graphics commands becomes thicker than specified<br />
by the SPD command. The effect may be most noticeable with a 45° slant. In the path<br />
mode graphics, however, the thickness of any slant lines is automatically adjusted so that<br />
the slant lines are maintained in constant thickness as specified by SPD. (See below.)<br />
Thickness of the line drawn by printing system<br />
Thickness specified by SPD<br />
314
SPD<br />
File<br />
!R! RES; UNIT C; STM 2; SLM 2; SLS .6;<br />
SFNT "Helvetica-Nr";<br />
SPD 0.01; DRP 5, 0; TEXT ’ 0.01 cm’, N;<br />
SPD 0.02; DRP 5, 0; TEXT ’ 0.02 cm’, N;<br />
SPD 0.05; DRP 5, 0; TEXT ’ 0.05 cm’, N;<br />
SPD 0.1; DRP 5, 0; TEXT ’ 0.1 cm’, N;<br />
SPD 0.2; DRP 5, 0; TEXT ’ 0.2 cm’, N;<br />
PAGE; EXIT;<br />
Printout<br />
0.01 cm<br />
0.02 cm<br />
0.05 cm<br />
0.1 cm<br />
0.2 cm<br />
315
PRESCRIBE <strong>Command</strong> <strong>Reference</strong><br />
SPL — Set Page Length<br />
Format<br />
Parameter<br />
SPL length;<br />
length:<br />
distance from top margin to bottom margin<br />
Function<br />
The SPL command sets the bottom margin, as measured from the top margin position in<br />
the unit value designated by the UNIT command.<br />
If an attempt is made to print below the bottom margin, the characters are printed on the<br />
next page.<br />
A page length setting in a document file should be placed at the beginning of the file or at<br />
a page break.<br />
The SBM (Set Bottom Margin) and SLPP (Set Lines Per Page) commands also set the<br />
bottom margin.<br />
File<br />
!R! RES; UNIT C;<br />
SFNT "TimesNewRoman";<br />
STM 1; SLS 1; SPL 10;<br />
EXIT, E;<br />
Top margin at 1 cm, with 10 cm page length. (Line 1)<br />
Line 2<br />
Line 3<br />
Line 4<br />
Line 5<br />
Line 6<br />
Line 7<br />
Line 8<br />
Line 9<br />
Line 10<br />
Line 11<br />
Line 12<br />
!R! PAGE; EXIT;<br />
316
SPL<br />
Printout<br />
317
margin<br />
Left<br />
margin<br />
PRESCRIBE <strong>Command</strong> <strong>Reference</strong><br />
SPO — Set Page Orientation<br />
Format<br />
Parameter<br />
SPO orientation;<br />
orientation:<br />
P = portrait (upright)<br />
L = landscape (lengthwise)<br />
Function<br />
The SPO command instructs the printing system how to orient the page, laying text and<br />
graphics on the page in a vertical direction (portrait orientation) or a horizontal direction<br />
(landscape orientation).<br />
When the orientation is changed, the margins are adjusted so that they remain the same<br />
distance from the four edges of the paper (provided cassette paper is being used). See the<br />
illustration.<br />
Portrait margins<br />
Landscape margins<br />
Top<br />
margin<br />
Left<br />
Right<br />
margin<br />
Top<br />
margin<br />
Right<br />
margin<br />
Bottom<br />
margin<br />
Bottom<br />
margin<br />
If the printing system cannot adjust the margins as described above, it sets them to the<br />
edge limits. For example, if you set a top portrait margin greater than the paper width,<br />
then switch to landscape orientation, the printing system resets the top margin to zero.<br />
The printing system uses separate bitmap fonts for portrait and landscape orientations.<br />
When the font mode (FTMD) is 8 or higher, as it is in the IBM, Epson, and LaserJet III/<br />
4/4 Plus emulations, the printing system automatically sets the correct page orientation<br />
each time a new font is selected. Outside of the FTMD range, the printing system will<br />
not change orientation with a change in fonts. After using the SPO command, remember<br />
to select a font with the new orientation.<br />
The orientation can be changed without starting a new page, as in the example below. It<br />
should be noted, however, the printable areas in portrait and landscape orientations are<br />
not symmetrical because the edge limits in each orientation are not identical. See page<br />
1-7 of the Technical <strong>Reference</strong> manual for details.<br />
318
SPO<br />
File<br />
!R! RES;<br />
SFNT ’TimesNewRoman-It’, 10;<br />
CMNT This file is for an A4 cassette.;<br />
SPSZ 8;<br />
PAT 16, 300;<br />
UNIT C;<br />
MZP 4, 24; BOX 6, –6;<br />
MZP 7, 24; BOX 3, –3; BLK 3, –3;<br />
MZP 4, 24;<br />
TEXT, L;<br />
TEXT ’Portrait orientation’;<br />
SPO L;<br />
MZP 12, 10; BOX 6, –6;<br />
MZP 15, 10; BOX 3, –3; BLK 3, –3;<br />
MZP 12, 10;<br />
TEXT, L;<br />
TEXT ’Landscape orientation’;<br />
PAGE;<br />
EXIT;<br />
Printout<br />
319
PRESCRIBE <strong>Command</strong> <strong>Reference</strong><br />
SPSZ — Set Paper SiZe<br />
Format<br />
Parameters<br />
SPSZ size-code [, ratio];<br />
size-code:<br />
0 = Same as the size of the paper cassette<br />
1 = Monarch (3-7/8 × 7-1/2 inches) 1<br />
2 = Business (4-1/8 × 9-1/2 inches) 2<br />
3 = International DL (11 × 22 cm) †<br />
4 = International C5 (16.2 × 22.9 cm) †<br />
5 = Executive (7-1/4 × 10-1/2 inches) †<br />
6 = US Letter (8-1/2 × 11 inches)<br />
7 = US Legal (8-1/2 × 14 inches)<br />
8 = A4 (21.0 × 29.7 cm)<br />
9 = JIS B5 (18.2 × 25.7 cm)<br />
10 = A3 (29.7 × 42 cm)<br />
11 = B4 (25.7 × 36.4 cm)<br />
12 = US Ledger (11 × 17 inches)<br />
13 = A5 (14.8 × 21 cm)<br />
14 = A6 (10.5 × 14.8 cm) †<br />
15 = JIS B6 (12.8 × 18.2 cm)<br />
16 = Commercial #9 (3-7/8 × 8-7/8 inches) †<br />
17 = Commercial #6 (3-5/8 × 6-1/2 inches) †<br />
18 = ISO B5 (17.6 × 25 cm)<br />
19 = Custom (11.7 × 17.7 inches) ††<br />
30 = C4 (22.9 × 32.4 cm) ††<br />
31 = Hagaki (10 × 14.8 cm) ††<br />
32 = Ofuku-Hagaki (14.8 × 20 cm) ††<br />
33 = Officio II<br />
36 = A3 Wide ††<br />
37 = Ledger Wide ††<br />
39 = 8K<br />
40 = 16K<br />
50 = Statement ††<br />
51 = Folio ††<br />
52 = Youkei 2 ††<br />
53 = Youkei 4 ††<br />
ratio:<br />
Enlargement/reduction ratio (for print systems handling A3/ledger):<br />
0 = 100% [Cassette size to cassette size]<br />
5 = 70% [A3 to A4, B4 to JIS B5, A4 to A5]<br />
6 = 81% [B4 to A4, B5 to A5]<br />
7 = 86% [A4 to JIS B5]<br />
8 = 94% [A4 to letter]<br />
9 = 98% [Cassette size to cassette size × 98% ]<br />
1 Inoperable if ratio is specified.<br />
2 Not supported by some print systems<br />
320
SPSZ<br />
Function<br />
The SPSZ command sets the paper edge limits to the dimensions of a standard paper<br />
size, allowing for a 5 mm border of all sides. The margins are set to the edge limits. This<br />
command is particularly useful for printing on envelopes (size-code 1 through 4, 16, and<br />
17). If size-code is 0, the printing system adjusts the edge limits to match the cassette<br />
size. size-code defaults to 0 at power-up and after a reset.<br />
Size codes 10 through 12, 19, and 30 are supported only by the printing system model<br />
that handles the A3 size paper. Support for other paper sizes and reduction ratios vary<br />
depending on models. For details, see the user’s manual supplied with the printing<br />
system.<br />
If your printing system model supports the A3 size paper, the enlargement/reduction<br />
ratio parameter controls reduction and enlargement of printing a page sized by the sizecode<br />
parameter. Although the enlargement/reduction ratio parameter is optional, an<br />
enlargement/reduction ratio setting remains effective until an SPSZ command with new<br />
enlargement/reduction ratio specified or a reset command is encountered.<br />
Note that the enlargement/reduction ratio parameter is ignored unless the source paper<br />
size and the cassette paper size does not match.<br />
The SPSZ command causes a page break, so it should be placed at the top of a file or<br />
program, or at the beginning of a new page.<br />
Files<br />
!R! CMNT Size the page as Monarch; SPSZ 1;<br />
EXIT;<br />
!R! CMNT Size the page as A3 and reduce it to A4;<br />
SPSZ 10, 5;<br />
EXIT;<br />
!R! CMNT Size the page as letter and reduce it to<br />
98%; SPSZ 6, 9;<br />
EXIT;<br />
321
PRESCRIBE <strong>Command</strong> <strong>Reference</strong><br />
SPW — Set Page Width<br />
Format<br />
Parameter<br />
SPW width;<br />
width:<br />
width of page, from left margin to right margin<br />
Function<br />
The SPW command sets the right margin, as measured from the left margin position in<br />
the unit value designated by the UNIT command.<br />
If an attempt is made to print beyond the right margin, the characters are printed on the<br />
next line in the IBM and Epson emulation modes and discarded in the other emulations.<br />
The SRM (Set Right Margin) command also sets the right margin, but it measures from<br />
the left edge limit of the paper.<br />
File<br />
!R! RES; UNIT C; SLM 1;<br />
CMNT Emulation mode is 1 (IBM);<br />
SFNT "Univers-MdCd", 18; SLPI 4;<br />
SPW 10;<br />
EXIT;<br />
Line with 1-cm left margin and 10-cm width<br />
!R! SPW 8; EXIT;<br />
Line with 1-cm left margin and 8-cm width<br />
!R! SPW 6; EXIT;<br />
Line with 1-cm left margin and 6-cm width<br />
!R! PAGE; EXIT;<br />
322
SPW<br />
Printout<br />
Related <strong>Command</strong><br />
SRM<br />
323
PRESCRIBE <strong>Command</strong> <strong>Reference</strong><br />
SRM — Set Right Margin<br />
Format<br />
Parameter<br />
SRM width;<br />
width:<br />
size of right margin<br />
Function<br />
The SRM command sets the right margin, as measured from the left edge limit of the<br />
paper in the unit value designated by the UNIT command.<br />
If an attempt is made to print beyond the right margin, the characters are printed on the<br />
next line in the IBM and Epson emulation modes and discarded in the other emulations.<br />
The SPW (Set Page Width) command also sets the right margin, but it measures from the<br />
left margin position.<br />
File<br />
!R! RES; UNIT C; SLM 1;<br />
CMNT Emulation mode is 1 (IBM);<br />
SFNT "Univers-MdCd", 18; SLPI 4;<br />
SRM 11;<br />
EXIT;<br />
Line with 1-cm left margin and 11-cm right margin<br />
!R! SRM 9; EXIT;<br />
Line with 1-cm left margin and 9-cm right margin<br />
!R! SRM 7; EXIT;<br />
Line with 1-cm left margin and 7-cm right margin<br />
!R! PAGE; EXIT;<br />
324
SRM<br />
Printout<br />
Related <strong>Command</strong><br />
SPW<br />
325
PRESCRIBE <strong>Command</strong> <strong>Reference</strong><br />
SRO — Set Raster Options<br />
Format<br />
Parameters<br />
SRO presentation-mode [, width, height];<br />
presentation-mode:<br />
0 = physical raster direction<br />
1 = logical page direction<br />
width:<br />
height:<br />
width of raster area in dot; min. 1 to max. 4200 dots<br />
height of raster area in dot; min. 1 to max. 4200 dots<br />
Function<br />
The SRO command specifies the presentation mode which defines the orientation of the<br />
raster image. If the presentation-mode is 0 (default), the printing system creates the raster<br />
image along the width of the physical page regardless of the current page orientation.<br />
With the presentation-mode 1, however, the raster graphics prints in the orientation of<br />
the logical page. Presentation modes 0 and 1 are depicted in the next page.<br />
The width and height options define the size of the raster area which has the current<br />
position as its left-top corner of the area. These options are measured in the dot unit<br />
regardless of the current designation of the UNIT command.<br />
Raster data extending beyond the border along the width of the raster area is clipped in<br />
the increment of dot.<br />
After a RVRD command sequence finishes, the current position is moved down by 1/300<br />
inch.<br />
326
Width<br />
Height<br />
SRO<br />
presentation-mode = 0<br />
The width and height of the raster area are defined based on the physical page regardless<br />
of the current page orientation. The current page orientation affects the position of the<br />
current point, however.<br />
Current point<br />
Width<br />
Height<br />
Current point<br />
Height<br />
Portrait (SPO P;)<br />
Landscape (SPO L;)<br />
presentation-mode = 1<br />
The orientation of the logical page determines the width and height of the raster image.<br />
The current position also depends on the current page orientation.<br />
Current point<br />
Width<br />
Current point<br />
Width<br />
Height<br />
Portrait (SPO P;)<br />
Landscape (SPO L;)<br />
File<br />
!R! SPO L; SRO 0; STR 75;<br />
RVRD;<br />
2;A|0; 2;GG0; 2;^S;<br />
2;^S
PRESCRIBE <strong>Command</strong> <strong>Reference</strong><br />
SROP — Set Raster OPeration<br />
Format<br />
Parameter<br />
SROP value;<br />
value:<br />
logical operation value: 0 to 255<br />
Function<br />
The SROP command applies logical functions (AND, OR, XOR, NOT) to source,<br />
texture, and destination. Possible logical operations provided by this command is 255.<br />
These logical operations directory map to their raster operations (ROP3).<br />
Logical operation value is eset to the default of 252 by the RES command. An error<br />
results and this command has no effect if the ROP3 value is outside the range 0 to 255.<br />
File<br />
!R!<br />
DAM;<br />
RES;<br />
MCRO DBOX;<br />
NEWP;<br />
PMRP 0,0;<br />
PDRP 0.5,0;<br />
PDRP 0,0.5;<br />
PDRP -0.5,0;<br />
CLSP;<br />
SROP 252;<br />
GPAT 0;<br />
FILL;<br />
NEWP;<br />
PMRP 0.2,0.2;<br />
PDRP 0.5,0;<br />
PDRP 0,0.5;<br />
PDRP -0.5,0;<br />
CLSP;<br />
SROP %1;<br />
PAT 25;<br />
FILL;<br />
MRP 0.8, -0.2;<br />
ENDM;<br />
MCRO TROP;<br />
MZP0,2;<br />
CALL DBOX,0;<br />
CALL DBOX,1;<br />
328
SROP<br />
CALL DBOX,2;<br />
CALL DBOX,3;<br />
RES; EXIT;<br />
Printout<br />
329
PRESCRIBE <strong>Command</strong> <strong>Reference</strong><br />
SSTK — select Sorter STacKer<br />
Format<br />
Parameter<br />
SSTK [tray, tray, ...]; or SSTK 0;<br />
tray:<br />
number from 1 to the maximum (bottom)<br />
Function<br />
The SSTK command is effective only when the optional sorter is installed to the printing<br />
system. It instructs the printing system to deliver printed pages in the sorter mode. Each<br />
specified tray receives a complete set of pages, one copy of each.<br />
If the parameters are omitted, the top n trays are used, where n is the copy count (equal or<br />
less than the number of trays). If you specify the copy count which is greater than the<br />
number of the trays being selected, the bulk tray receives the overflowed pages. If the<br />
tray parameters are specified, the COPY command is unnecessary as the printing system<br />
automatically makes the copy count to be the same as the number of the tray parameters<br />
specified.<br />
Upon receiving the SSTK command, the printing system automatically performs a page<br />
feed.<br />
If the parameter is 0 for SSTK (SSTK 0;) this command disables sorting and delivers all<br />
pages to the bulk output tray.<br />
Note<br />
This command is irrelevant to certain combination of photocopier models and option finisher<br />
models.<br />
File<br />
!R! RES; SSTK 1, 3, 5; EXIT;<br />
Three copies of this file will be printed.<br />
The output goes to sorter trays 1, 3, and 5.<br />
!R! PAGE; EXIT;<br />
If the tray parameters were omitted (SSTK; COPY3;), sorter<br />
trays 1, 2, and 3 would be used.<br />
!R! PAGE; EXIT;<br />
330
STAK<br />
STAK — select paper STAcKer<br />
Format<br />
Parameter<br />
STAK stacker;<br />
stacker:<br />
1 = printing system’s face-down output tray<br />
2 = face-up output tray of the printing system or the option stacker<br />
3 = face-down output tray of the option stacker<br />
51 = face-up output tray of the option mailbox<br />
52 = face-down output tray of the option mailbox<br />
61 = face-down output tray of the option job separator (or the DF-610 subtray)<br />
62 = face-up output tray of the DF-610 subtray<br />
Function<br />
The STAK command instructs the printing system to deliver pages to the corresponding<br />
output stack of the printing system or the option stacker. The selected tray remains in<br />
effect until changed by another STAK command. The default value is 1: the printing<br />
system’s face-down tray.<br />
If an optional device such as a stacker, a document finisher, or a sorter is installed, the<br />
stacker value 2 instructs the printing system to deliver printed pages to its face-up tray;<br />
the value 3 delivers the pages to its face-down tray. The stacker values of 51, 52, and 61<br />
are valid for certain copiers installed with the applicable option device.<br />
The STAK command should be placed at the top of a file or program.<br />
File<br />
!R! STAK 2; EXIT;<br />
PAGE 1<br />
On printers with only one paper tray this file will be<br />
delivered face-down as usual, page 1 first.<br />
!R! PAGE; EXIT;<br />
PAGE 2<br />
PAGE 2 next, and so on, stacking in the correct order.<br />
!R! PAGE; EXIT;<br />
PAGE 3<br />
But on printers with two paper trays this file will be<br />
delivered to the face-up tray with the pages in reverse<br />
order, page 3 on top.<br />
!R! PAGE; EXIT;<br />
331
PRESCRIBE <strong>Command</strong> <strong>Reference</strong><br />
STAT — STATus<br />
Format<br />
Parameter<br />
STAT [mode];<br />
mode:<br />
0 = prints a user status page (default)<br />
1 = prints a service person status page<br />
Function<br />
The STAT command instructs the printing system to print a page of status information,<br />
starting on a new page. The status page lists the software version and release date as well<br />
as the following information:<br />
• The current unit (inches, centimeters, points, or dots; not available in KPDL mode)<br />
• The current page orientation, font, and country code (not available in KPDL mode)<br />
• Current margins, line spacing, character spacing, and graphics line width, as<br />
measured in the current unit (not available in KPDL mode)<br />
• Current memory allocations<br />
The above status settings are temporary conditions set by PRESCRIBE commands. They<br />
revert to their default values when power is switched off. Other status page information<br />
includes:<br />
• Miscellaneous status: a list of options stored in permanent memory. See Chapter 6 of<br />
the Technical <strong>Reference</strong> manual for the definitions of the option values. These values<br />
do not change when power is switched off. Only the FRPO command can alter them.<br />
• Service information to inform a service person.<br />
• Nonresident fonts in memory: Fonts generated by the LDFC command,<br />
downloadable soft fonts from software or read from a memory card. Font size and<br />
numbers appear alongside the font name. These fonts are lost when power is<br />
switched off.<br />
Note<br />
Items and values on the status page may vary among the printing system’s firmware versions.<br />
Depending on the parameters, different information may be printed on the status page.<br />
(There are two types of status pages: one intended for the end user, and one intended for<br />
service personnel.) Also, the printing system can print the status page in different<br />
languages in accordance with the language setting of the printing system’s control panel.<br />
The default is the English status page.<br />
332
STAT<br />
Sample Status Page<br />
User status page<br />
Service status page<br />
333
PRESCRIBE <strong>Command</strong> <strong>Reference</strong><br />
STM — Set Top Margin<br />
Format<br />
Parameter<br />
STM distance;<br />
distance:<br />
size of top margin<br />
Function<br />
The STM command sets the top margin, in the unit value designated by the UNIT<br />
command.<br />
A top margin setting in a document file should be placed at the beginning of the file or at<br />
a page break.<br />
If the top margin is moved below the current cursor position, the cursor moves to the new<br />
margin. But if the top margin is moved above the current cursor position, the cursor does<br />
not move.<br />
File<br />
!R! RES; UNIT C;<br />
SFNT "Helvetica-Nr", 18;<br />
STM 2;<br />
EXIT, E;<br />
First page with 2-cm top margin<br />
!R! RES; UNIT C;<br />
SFNT "Helvetica-Nr", 18;<br />
STM 4;<br />
EXIT, E;<br />
Second page with 4-cm top margin<br />
!R! PAGE; EXIT;<br />
334
STM<br />
Printout<br />
335
PRESCRIBE <strong>Command</strong> <strong>Reference</strong><br />
STPC — set STaPle Counter<br />
Format<br />
Parameter<br />
STPC [staple-count or letter M (or m)];<br />
staple-count:<br />
number of sheets to be stapled at a time (When this parameter is omitted, ‘0’ is<br />
assumed):<br />
2 to 50 1 = divides output pages into stacks of pages of this value and staples each of<br />
them. The odd stack is also stapled.<br />
M = divides output pages into stacks of pages equal to the maximum allowable number<br />
of sheets of stapling and staples each of them. The odd stack is also stapled.<br />
0 = same as M above but does not divide nor staple a job at all if the total number of<br />
pages of the job is more than the maximum allowable number of sheets of stapling. The<br />
odd stack is neither stapled.<br />
–1 = same as 0 above but the odd stack is stapled.<br />
Function<br />
File<br />
The STPC command specifies the number of sheets that the stapler (finisher) staples a<br />
job. This command does not execute stapling therefore should be used with the STPL<br />
(staple) command.<br />
For more simplified explanation on the staple-count, here is an example.<br />
To print a 50-page job using a DF-31 finisher (20 pages stapler):<br />
STPC parameter Stapling operation<br />
M or m 20 sheets, 20 sheets, and 10 sheets are stapled.<br />
15 15 sheets, 15 sheets, 15 sheets, and 5 sheets are stapled.<br />
0 No stapling occurs.<br />
–1 Only the last 10 sheets are stapled.<br />
To staple every 5 sheets of a job at the center 2 staples, printing 15 copies of the job:<br />
!R! STPL 3; STPC 5;<br />
JOBS 2, 15, 1, 0, 1, "Interim Report 1", "Steve", "09/22/02<br />
19:24";<br />
TEXT "This is Interim Report 1 ..."; PAGE;<br />
UNIT C; BOX 5,10; PAGE;<br />
JOBT; EXIT;<br />
1 This value depends on the stapler to be used.<br />
336
A<br />
STPL<br />
STPL — STaPLe<br />
Format<br />
Parameter<br />
STPL [position];<br />
position:<br />
stapling position:<br />
1 = bottom left, one staple<br />
2 = top left, one staple<br />
3 = left, two staples (straight for Legal size)<br />
50 = top left, one staple<br />
51 = top right, one staple<br />
52 = left, two staples<br />
53 = right, two staples<br />
54 = top, two staples<br />
Staple parameters and positions<br />
1<br />
2 2, Legal 3<br />
A<br />
A<br />
A<br />
A<br />
50 51 52 53 54<br />
A<br />
A<br />
A<br />
A<br />
Function<br />
The STPL command staples the pages of a job at the position specified by the position<br />
parameter (See above.) using a document finisher incorporating the stapler unit. With<br />
position 2 (top left), stapling is automatically straightened (vertical) when Legal size<br />
paper is used.<br />
Parameter values 50 to 54 are valid for certain copier models only.<br />
The number of sheets that the stapler can staple at a time depends on the STPC command<br />
setting.<br />
The job to be stapled must be defined by the JOBS command. Stapling is valid only<br />
when the STPL command is issued preceding a JOBS command sequence.<br />
The STPL command automatically deactivates Jog and Job Separation if these functions<br />
are enabled in advance. The output stack is enforced to be the stapler output ignoring the<br />
337
PRESCRIBE <strong>Command</strong> <strong>Reference</strong><br />
File<br />
current output stack which may be specified by STAK. (For the document finisher such<br />
as the DF-31, the MSTK command may be used to guide stapled pages to one of the<br />
output trays as desired.)<br />
STPL command causes a page break.<br />
!R!<br />
STPL 3; CMNT Two staples on the left;<br />
JOBS 0,3,0,0;<br />
TEXT "Stapling Test, Page 1";<br />
PAGE;<br />
TEXT "Stapling Test, Page 2";<br />
PAGE;<br />
TEXT "Stapling Test, Page 3";<br />
PAGE;<br />
TEXT "Stapling Test, Page 4";<br />
PAGE;<br />
TEXT "Stapling Test, Page 5";<br />
JOBT;<br />
EXIT;<br />
Related <strong>Command</strong>s<br />
STPC<br />
338
STR<br />
STR — SeT dot Resolution<br />
Format<br />
Parameter<br />
STR dot-resolution;<br />
dot-resolution:<br />
75, 100, 150, 200, 300, 600, or 1200<br />
Function<br />
The STR command sets the dot resolution for raster graphics to 75, 100, 150, 200, 300,<br />
600, or 1200 dots per inch. The 200, 600, and 1200 dpi resolutions are available only for<br />
the printing system models that support the 600 or 1200 dpi printing resolution. The<br />
default value is 75 dots per inch.<br />
The STR command affects only PRESCRIBE raster graphics. It does not change the<br />
resolution of vector graphics commands or HP LaserJet raster graphics.<br />
The following diagrams show examples of printing a raster graphics data using different<br />
dot resolution.<br />
75 dpi resolution<br />
(Default)<br />
100 dpi resolution 150 dpi resolution 200 dpi resolution 300 dpi resolution 600 dpi resolution 1200 dpi resolution<br />
339
PRESCRIBE <strong>Command</strong> <strong>Reference</strong><br />
STRK — STRoKe current path<br />
Format<br />
Parameter<br />
Function<br />
File<br />
STRK;<br />
None<br />
The STRK command strokes the constructed path onto the current page according to the<br />
following current graphics state:<br />
• Pen diameter (SPD)<br />
• Dash pattern (DPAT)<br />
• Fill pattern (FPAT)<br />
• Line cap (SCAP)<br />
• Line join (SLJN)<br />
• Flatness (FLAT)<br />
A path itself will not place a line or graphic on a page because PRESCRIBE pathconstruction<br />
commands only define the path. For the path to be drawn or filled as a line,<br />
box, character, etc., on the page, the STRK command must be issued.<br />
After stroking the current path, the STRK command clears the path and moves the cursor<br />
to the end of the path.<br />
!R! RES; UNIT C;<br />
NEWP;<br />
PMZP 7, 17;<br />
SPD .2;<br />
PDRP -2.5, 0, 0, 2.5, 2.5, 0, 0, -2.5;<br />
PDRP 2.1, 1.25, 1.25, -2.1, -2.1, -1.25, -1.25, 2.1;<br />
PMRP 0, 2.5;<br />
PDRP 2.1, -1.25, 1.25, 2.1, -2.1, 1.25, -1.25, -2.1;<br />
STRK;<br />
PAGE;<br />
EXIT;<br />
340
STRK<br />
Printout<br />
Related <strong>Command</strong>s<br />
FILL, NEWP<br />
341
PRESCRIBE <strong>Command</strong> <strong>Reference</strong><br />
SULP — Set UnderLine Parameters<br />
Format<br />
Parameters<br />
SULP distance, thickness;<br />
distance:<br />
distance below the baseline<br />
thickness:<br />
thickness of the underline<br />
Function<br />
File<br />
The SULP command sets the thickness of any subsequent underlining as well as the<br />
distance below the baseline, in the unit value designated by the UNIT command. The<br />
distance parameter is limited only by the size of the page. Negative values can be used to<br />
obtain overlines.<br />
The minimum underline thickness is one dot. The maximum underline thickness is 127<br />
dots. The default values include:<br />
• Distance below baseline: 7 dots<br />
• Thickness of underline: 4 dots<br />
• One dot equals approximately 0.0083 cm or 0.0033 inches.<br />
The SULP command does not affect the underline character (_), which is an independent<br />
character with ASCII code 95 (hex 5F). If your word-processing software writes<br />
underlines by backing up and printing the underline character instead of using the<br />
printing system’s automatic underline feature, the SULP command will control only<br />
underlines printed by the U-option in PRESCRIBE commands such as TEXT.<br />
!R! RES; UNIT C; SLS 0.8;<br />
SFNT ’Helvetica-Nr’, 12;<br />
TEXT ’Default paramaters’, E, U; TEXT ’, ’, E;<br />
SULP .2, .1;<br />
TEXT ’heavier underlining’, N, U;<br />
TEXT ’and even’, E;<br />
SULP -.32, .04;<br />
TEXT ’OVERLINING’, E, U;<br />
TEXT ’!’;<br />
PAGE;<br />
EXIT;<br />
342
SULP<br />
Printout<br />
343
PRESCRIBE <strong>Command</strong> <strong>Reference</strong><br />
TATR — apply Tray ATtributes<br />
Format<br />
Parameters<br />
TATR [source[, thickness, print-density]];<br />
source<br />
paper source:<br />
0 = MP tray<br />
1 = main cassette<br />
2 = second cassette<br />
thickness<br />
thickness of paper:<br />
0 = normal (normal)<br />
1 = thick<br />
2 = thin<br />
print-density<br />
print density:<br />
lighter (1) to darker (5), default is 3.<br />
Function<br />
The TATR command applies a paper source (MP tray or cassette) thickness of paper and<br />
print density. This enables the printing system to optimize the electrical properties (such<br />
as the fuser temperature and the transfer bias) so that the best print quality is achieved<br />
with different thicknesses of paper.<br />
The attributes are reset for a tray when thickness and print-density parameters are<br />
omitted. All trays are reset when all three parameters are omitted.<br />
This command is relevant to the FS-1000 printer only.<br />
Note<br />
File<br />
To attribute the MP tray for thick paper and normal density:<br />
!R! TATR 0, 1, 3; EXIT;<br />
To reset the second paper cassette (option feeder) to the defaults:<br />
!R! TATR 2; EXIT;<br />
To reset all paper sources to the defaults:<br />
!R! TATR; EXIT;<br />
344
TEXT<br />
TEXT — print TEXT<br />
Format<br />
Parameters<br />
TEXT [’string’][,option][,U-option];<br />
string:<br />
option:<br />
any character string<br />
B = Leave cursor at beginning of string<br />
E = Move cursor to end of string<br />
L = Move cursor down one line<br />
N = Move cursor to beginning of next line<br />
U-option:<br />
Underline text<br />
Function<br />
The TEXT command prints the given string at the cursor location, then moves the cursor<br />
as designated by the option. The string to be printed must be enclosed in either single or<br />
double quotation marks. (If the string includes one kind of quotation mark, use the other<br />
kind to enclose it.) If the string is omitted, nothing is printed. TEXT, N; can be used to<br />
print a blank line, for example. If the option is omitted, the cursor is not moved (same as<br />
option B). If the U-option is specified, the string is underlined. The underline thickness<br />
and location can be set by the SULP command.<br />
The TEXT command can be used to position a line of text at an exact location.<br />
The length of the string is unlimited, except that the command as a whole may not be<br />
longer than 255 characters. Carriage-return and linefeed codes in the string are ignored.<br />
345
PRESCRIBE <strong>Command</strong> <strong>Reference</strong><br />
File<br />
Printout<br />
!R! RES; UNIT C; MAP 2, 2;<br />
SFNT ’Univers-MdCd’;<br />
TEXT ’Check desired options:’, L, U;<br />
FONT 2;<br />
BOX .1, -.1; TEXT ’Power steering’, L;<br />
BOX .1, -.1; TEXT ’CD auto changer’, L;<br />
BOX .1, -.1; TEXT ’Air conditioner’, L;<br />
PAGE;<br />
EXIT;<br />
Related <strong>Command</strong>s<br />
CTXT, RTXT<br />
346
TPRS<br />
TPRS — Text PaRSing<br />
Format<br />
Parameter<br />
TPRS mode;<br />
mode:<br />
0 = ANK (alphabetic numeric and kana)<br />
1 = shift JIS (2-byte code)<br />
Function<br />
The TPRS command allows character codes to be interpreted as 1-byte or 2-byte<br />
character code while printing using a text command.<br />
To parse such characters, the current font must supports 2-byte characters and a 2-byte<br />
symbol set such as Windows 3.1J (19K). The pursing method will automatically be shift<br />
JIS encoding (2) if the default font and symbol set is of 2-byte.<br />
This command is valid only in HP emulation.<br />
347
PRESCRIBE <strong>Command</strong> <strong>Reference</strong><br />
TRSM — TRansparency Separate Mode<br />
Format<br />
Parameters<br />
TRSM mode[, tray];<br />
mode:<br />
tray:<br />
Transparency separate mode:<br />
0 = Off<br />
1 = Inserting a blank page<br />
2 = Inserting a page which the transparency content is printed on<br />
The number of the paper source which the inserting paper loads from: 1 or above. The<br />
number varies depending on the printing system and its configuration. When omitting<br />
the tray parameter, 1 is automatically set to the tray parameter.<br />
Function<br />
The TRSM command instructs printing system to insert blank or printed page between<br />
each transparency. The printing system loads transparency from MP tray and inserting<br />
paper from the paper source other than MP tray. When face-down printing, the printing<br />
system print the transparency page first. When face-up printing, the printing system print<br />
the blank or printed page first.<br />
File<br />
!R!<br />
MTYP 2;<br />
TRSM 1,1;<br />
JOBS 0,1,2,0;<br />
TEXT "page 1";<br />
PAGE;<br />
TEXT "page 2";<br />
PAGE;<br />
JOBT;<br />
EXIT;<br />
348
UNIT<br />
UNIT — set UNIT of measurement<br />
Format<br />
Parameter<br />
UNIT code;<br />
code:<br />
I = inches<br />
C = centimeters<br />
P = points<br />
D = dots<br />
Function<br />
The UNIT command sets the unit of measurement used in other PRESCRIBE<br />
commands.<br />
The initial unit is inches. Other supported units of measurement can be calculated as<br />
follows:<br />
• 1 inch = 2.54 centimeters<br />
• 1 inch = 72 points<br />
• 1 inch = 300 dots (300 dpi)/600 dots (600 dpi)/1200 dots (1200 dpi)<br />
UNIT commands are not retroactive. They do not affect values set by previous<br />
commands.<br />
File<br />
!R! UNIT C; MRP 3, 3;<br />
SFNT "Univers-MdCd", 12;<br />
MRP 3, 3;<br />
CIR .35;<br />
TEXT ’ 7mm pistol’;<br />
UNIT I; MRP 0, 1;<br />
CIR .225;<br />
TEXT ’<br />
.45 caliber pistol’;<br />
PAGE;<br />
EXIT;<br />
349
PRESCRIBE <strong>Command</strong> <strong>Reference</strong><br />
Printout<br />
350
UOM<br />
UOM — Unit Of Measurement per dots<br />
Format<br />
Parameter<br />
UOM number;<br />
number:<br />
96, 100, 120, 144, 150, 160, 180, 200, 225, 240, 288, 300, 360, 400, 450, 480, 600, 720,<br />
800, 900, 1200, 1440, 1800, 2400, 3600, 7200<br />
Function<br />
The UOM command applies only to the printing system models that support the 600 dpi<br />
resolution. It defines the unit of measurement in dots per inch for cursor movements. The<br />
command requires that the UNIT value be set to D.<br />
The default unit of measurement is 300 (dpi). For example, the cursor movement of 50<br />
dots equals 1/6 inches.<br />
The command accepts only the above numbers for the unit of measurement. Any other<br />
numbers will be ignored when used with this command.<br />
File<br />
!R! FRPO N8, 1; RES;<br />
UNIT C;<br />
SFNT "Helvetica-Nr", 9;<br />
MZP 5, 5;<br />
TEXT "UOM 120; BOX 100, 100;", L;<br />
UNIT D;<br />
UOM 120;<br />
BOX 100, 100;<br />
UNIT C;<br />
MZP 5, 9;<br />
TEXT "UOM 720; BOX 100, 100;", L;<br />
UNIT D;<br />
UOM 720;<br />
BOX 100, 100;<br />
PAGE; EXIT;<br />
351
PRESCRIBE <strong>Command</strong> <strong>Reference</strong><br />
Printout<br />
Related <strong>Command</strong><br />
UNIT<br />
352
VMAL<br />
VMAL — Virtual Mailbox ALias<br />
Format<br />
Parameters<br />
VMAL mailbox, alias[, password];<br />
mailbox:<br />
alias:<br />
number from 1 to 255 or character string representing number or alias of virtual mailbox<br />
Character string representing the alias being set for the virtual mailbox given by mailbox<br />
(up to 31 bytes)<br />
password:<br />
The password for the virtual mailbox given by mailbox if a password has been set for it.<br />
Function<br />
File<br />
The VMAL command sets an alias for a virtual mailbox. When an alias is set for a<br />
virtual mailbox using this command, that alias may be used to identify the mailbox just<br />
like the virtual mailbox number.<br />
If this command is used on a virtual mailbox for which an alias has already been set, the<br />
old alias will be overwritten. If the alias specified has already been set for another virtual<br />
mailbox, an error will be displayed on the operator panel and the specification will be<br />
invalid.<br />
If an alias is to be set for a virtual mailbox for which a password is set, that virtual<br />
mailbox’s password is required. An error will be displayed on the operator panel if no<br />
password or the incorrect password is specified. (See page 8-8 of the Technical<br />
<strong>Reference</strong> manual.)<br />
Note that if command syntax is incorrect, such as when an alias longer than 31 bytes is<br />
specified, the command will be invalid and no error will be displayed on the operator<br />
panel.<br />
The master password is valid for all virtual mailboxes.<br />
To set the alias MyMailbox for virtual mailbox number 3 for which the password 9999<br />
has been set:<br />
!R! VMAL 3, "MyMailbox", 9999; EXIT;<br />
353
PRESCRIBE <strong>Command</strong> <strong>Reference</strong><br />
VMOB — Virtual Mailbox Output Bin<br />
Format<br />
Parameter<br />
VMOB mailbox;<br />
mailbox:<br />
number from 1 to 255 or character string representing an alias<br />
Function<br />
The VMOB command specifies virtual mailboxes that receive print jobs. It is possible to<br />
specify multiple virtual mailboxes by issuing multiple instances of this command.<br />
If no virtual mailbox corresponds to the alias given, an error will be displayed on the<br />
operator panel. (See page 8-8 of the Technical <strong>Reference</strong> manual.)<br />
This command is irrelevant to photocopy virtual mailbox function.<br />
Files<br />
Note<br />
To stack jobs on virtual mailbox number 3:<br />
!R! VMOB 3; EXIT;<br />
To stack jobs on the virtual mailbox having the alias<br />
MyMailbox:<br />
!R! VMOB "MyMailbox"; EXIT;<br />
354
VMPW<br />
VMPW — set Virtual Mailbox PassWord<br />
Format<br />
Parameters<br />
VMPW mailbox, current-password, new-password;<br />
mailbox:<br />
0 = Sets the master password<br />
1 to 255 = Number of virtual mailbox for which the password is set<br />
Character string = Alias of virtual mailbox for which the password is set<br />
current-password:<br />
1 to 65535 = Current password for the virtual mailbox specified by mailbox<br />
0 = Indicates no password is set for the virtual mailbox specified by mailbox<br />
new-password:<br />
1 to 65535 = New password for the virtual mailbox specified by mailbox<br />
0 = Indicates no password is to be set for the virtual mailbox specified by mailbox<br />
Function<br />
The VMPW command sets the output password for a virtual mailbox.<br />
If this command is used on a virtual mailbox for which a password is already set, that<br />
password must be specified by current-password or the command will be invalid and an<br />
error will be displayed on the operator panel. An error also will results if the password<br />
specification fails or no virtual mailbox corresponds to the alias given. For error<br />
displays, see page 8-8 of the Technical <strong>Reference</strong> manual.<br />
The master password is valid as the current password for all virtual mailboxes.<br />
Virtual mailboxes for which a password has been set are not shown on the VMB LIST<br />
page (See page 134).<br />
This command is irrelevant to photocopy virtual mailbox function.<br />
Note<br />
355
PRESCRIBE <strong>Command</strong> <strong>Reference</strong><br />
Files<br />
To set 9999 as the password for virtual mailbox number 3 for<br />
which no password is set:<br />
!R! VMPW 3, 0, 9999; EXIT;<br />
To set no password for the virtual mailbox with the alias<br />
MyMailbox for which the password 9999 had been set:<br />
!R! VMPW "MyMailbox", 9999, 0; EXIT;<br />
To change the password for the virtual mailbox with the alias Purchase Dept. from 9999<br />
to 3333:<br />
!R! VMPW "Purchase Dept.", 9999, 3333; EXIT;<br />
356
WIDE<br />
WIDE — set WIDE A4 mode<br />
Format<br />
Parameter<br />
WIDE mode;<br />
mode:<br />
0 = Off<br />
1 = On<br />
Function<br />
The wide A4 function widens the A4 printing width in order to prevent unnatural line<br />
breaks or clipping of graphics in cases where a document created as a letter-size<br />
document is output in A4 size. The WIDE command sets and clears the wide A4<br />
function. The setting made with this command is initialized by the RES and FRPO<br />
commands.<br />
Printing area<br />
• The width of the A4 printing area is set to that of Letter size.<br />
• The width is increased symmetrically to the left and right.<br />
• The width is always increased in the shorter direction (either width or height,<br />
whichever is shorter). Thus if the document is set to landscape orientation, the height<br />
is increased.<br />
• The printing area for sizes other than A4 is not affected.<br />
Original A4 printing area<br />
Printing area using Wide A4<br />
Original A4<br />
printing area<br />
Printing area<br />
using Wide A4<br />
Portrait<br />
Landscape<br />
357
PRESCRIBE <strong>Command</strong> <strong>Reference</strong><br />
WRED — WRite EnD<br />
Format<br />
Parameter<br />
Function<br />
WRED;<br />
None<br />
Related command<br />
The WRED command terminates a RWER command sequence that writes data to the<br />
memory card.<br />
Alternatively, you can terminate writing by pressing the FORM FEED key on the<br />
printing system’s operator panel.<br />
RWER W<br />
358
XBAR<br />
XBAR — print two dimensional barcode<br />
Format<br />
Parameters<br />
XBAR [data-length]; data-string;ENDB;<br />
or<br />
XBAR buffer-name;ENDB;<br />
data-length:<br />
length of data in bytes, terminated with a semicolon (;)<br />
If this value is omitted, data-string is counted all characters after the first semicolon until<br />
the program sees ;ENDB; .<br />
data-string:<br />
data to be encoded, terminated with a semicolon (;) immediately followed by an ENDB<br />
command (256 international characters or binary data)<br />
buffer-name:<br />
name of buffer previously defined by XBUF command<br />
Function<br />
The XBAR command prints a two dimensional barcode (sometimes referred to as<br />
PDF417 symbol). The ENDB must follow as a terminator for the barcode data string.<br />
Note that carriage return, line feed, space and all other characters must be counted as part<br />
of data in the data string field. If data-length is omitted, 0, negative value, or non integer,<br />
then data-string is counted all characters until the program sees ;ENDB;. If data-length<br />
is 0, the semicolon to terminate the data cannot be omitted. (<strong>Command</strong> as<br />
XBAR;;ENDB;.) It is necessary to have no space between ‘‘;” and ‘‘ENDB;”.<br />
359
PRESCRIBE <strong>Command</strong> <strong>Reference</strong><br />
Files<br />
Printout<br />
!R! XBAR; The Milky Way is a gravitationally bound<br />
collection of roughly a hundred billion stars. Our Sun is<br />
one of these stars and is located roughly 24,000 light years<br />
(or 8000 parsecs) from the center of our the Milky Way.<br />
The Galaxy has three major components. A thin disk<br />
consisting of young and intermediate age stars - this disk<br />
also contains gas and is actively forming new stars. Dust in<br />
the disk makes it appear orange in the picture. Dust absorbs<br />
blue light more than red light and thus makes stars appear<br />
reddish. Our Galaxy has spiral arms in its disk - these<br />
spiral arms are regions of active star formation.;ENDB;<br />
360
XBCP 0<br />
XBCP 0 — select barcode type/reset all other XBCP<br />
parameters<br />
Format<br />
Parameter<br />
XBCP 0[, type];<br />
type:<br />
two dimensional barcode type:<br />
1 = PDF417 (only type currently supported)<br />
Function<br />
The XBCP 0 command selects a barcode type and resets all parameters to the defaults.<br />
File<br />
See XBCP 1 (page 353) command page.<br />
361
PRESCRIBE <strong>Command</strong> <strong>Reference</strong><br />
XBCP 1 — specify narrowest element width<br />
Format<br />
Parameter<br />
XBCP 1, element-width;<br />
element-width:<br />
narrowest bar and space width:<br />
More than or equal to 1 dot. If less than 1 dot, truncated to 1 dot. Default is 3 dots.<br />
Function<br />
File<br />
Printout<br />
PDF417 supports 8 different bar and space widths. The each width is a multiple of 1 to 8<br />
times of the narrowest element width. The XBCP command set to mode 1 specifies the<br />
narrowest element width (narrowest bar width) in the current unit as designated by a<br />
UNIT command.<br />
In the following example, the element width is set to .02 inches as the default unit is<br />
inches. Minimum width allowed by the printing system is 1 dot. Minimum readable<br />
width is probably higher. Minimum width meeting AIM recommendation for open<br />
systems is 3 dots. After the first example has been printed, the printing system moves<br />
cursor 1 inch down to print another example in which the minimum element width is<br />
reverted to its default (3 dots).<br />
!R! RES;<br />
MZP 0, 0;<br />
XBCP 1, .02;<br />
XBAR;Min. element width is .02 inches;ENDB;<br />
MZP 0, 1;<br />
XBCP 0;<br />
XBAR;Min. element width is reset (to 3 dots);ENDB; EXIT;<br />
Minimum element width is 0.02 inch.<br />
Default minimum element width (3 dots)<br />
362
XBCP 2<br />
XBCP 2 — specify error correction level by<br />
percentage<br />
Format<br />
Parameter<br />
XBCP 2, percentage;<br />
percentage:<br />
value between 0 and 400<br />
Function<br />
File<br />
PDF417 supports an error correction scheme. The XBCP 2 command specifies the error<br />
correction level as a percentage of the number of code word values for the data to be<br />
encoded. An illegal value defaults to 10.<br />
Note that XBCP 3, as explained on the next page, sets the error correction level by<br />
predetermined values, and the execution of XBCP 3 disables the setting of XBCP 2, even<br />
if XBCP 2 is executed after XBCP 3, until RES (reset) or XBCP 0.<br />
To set 50% error correction level:<br />
!R! RES; XBCP 2, 50;<br />
XBAR;This is an error correction level test;ENDB;<br />
EXIT;<br />
363
PRESCRIBE <strong>Command</strong> <strong>Reference</strong><br />
XBCP 3 — set error correction level<br />
Format<br />
Parameter<br />
XBCP 3, level;<br />
level:<br />
error correction level, integer from 0 to 8<br />
Function<br />
The XBCP 3 command sets the error correction level by predetermined values. An<br />
illegal value defaults to 0. Note that the execution of XBCP 3 overrides the setting of<br />
XBCP 2 and remains valid until RES (reset) or XBCP 0.<br />
File<br />
To sets the error correction level to level 4:<br />
!R! RES;<br />
XBCP 3, 4;<br />
XBAR;Error correction can also be set by level;ENDB;<br />
EXIT;<br />
364
XBCP 4<br />
XBCP 4 — set data code word rows<br />
Format<br />
Parameter<br />
XBCP 4, number;<br />
number:<br />
number of data code word rows, ranging from 3 to 90<br />
Function<br />
The XBCP 4 command sets the number of data code word rows in the PDF417 barcode.<br />
Illegal values make XBCP 4 ignored. XBCP 6 default provides default.<br />
Note that this command is not effective if XBCP 8 is issued. Precedence of XBCP modes<br />
is: 46, 4+8< 6.<br />
File<br />
To set 20 rows of barcode:<br />
!R! RES;<br />
XBCP 4, 20;<br />
MZP 1.5, 1.5;<br />
XBAR;Visit Sea World, the world famous San Diego Zoo &<br />
Wild Animal Park, historic Old Town, Tijuana (Mexico),<br />
Mission Bay, the downtown Gaslamp District and all<br />
those great beaches. And, as the natives know, the end<br />
of September is the best time of year.;ENDB;<br />
EXIT;<br />
Printout<br />
Number of rows is set to 20.<br />
Number of rows is normal.<br />
365
PRESCRIBE <strong>Command</strong> <strong>Reference</strong><br />
XBCP 5 — set data code word columns<br />
Format<br />
Parameter<br />
XBCP 5, number;<br />
number:<br />
number of data code word columns, ranges between 1 and 30 inclusive (Illegal values<br />
make XBCP 5 ignored.)<br />
Function<br />
The XBCP 5 command sets the number of data code word columns in the PDF417<br />
barcode. There are also row indicator code words at each end of the row which are not<br />
counted as data code words. XBCP 6 default provides default.<br />
Note that this command is not effective if XBCP 8 is issued. Precedence of XBCP modes<br />
is: 56, 5+8
XBCP 6<br />
XBCP 6 — determine aspect ratio of vertical height<br />
and horizontal width<br />
Format<br />
Parameters<br />
XBCP 6, height, width;<br />
height/width:<br />
parts of the aspect ratio of vertical height and horizontal width, ranging between 10: 1<br />
(XBCP 6, 10, 1) and 1: 10 (XBCP 6, 1, 10)<br />
Function<br />
File<br />
The XBCP 6 command determines aspect ratio of vertical height and horizontal width of<br />
the barcode. Illegal values default to 1: 2. Default is 1: 2.<br />
Note that this command is not effective if XBCP 4 and/or 5 is issued, however, this has<br />
the highest priority if both XBCP 8 and XBCP 4 and/or 5 are issued together. Precedence<br />
of XBCP modes is: 4/56, 4/5+8
PRESCRIBE <strong>Command</strong> <strong>Reference</strong><br />
Printout<br />
Aspect ratio is 3:2 in vertical and horizontal<br />
directions.<br />
Aspect ratio is normal.<br />
368
XBCP 7<br />
XBCP 7 — determine bar height<br />
Format<br />
Parameter<br />
XBCP 7, mod-ratio;<br />
mod-ratio:<br />
ratio of module height to element width, ranging from 1 to 10<br />
Function<br />
File<br />
Printout<br />
The XBCP 7 command determines the bar height by a ratio to the narrowest element<br />
width. An illegal value defaults to 3.<br />
To set the module height twice as high as the element width:<br />
!R! RES;<br />
XBCP 7, 2;<br />
XBAR;Visit Sea World, the world famous San Diego Zoo & Wild<br />
Animal Park, historic Old Town, Tijuana (Mexico), Mission<br />
Bay, the downtown Gaslamp District and all those great<br />
beaches. And, as the natives know, the end of September is<br />
the best time of year.;ENDB;<br />
EXIT;<br />
The bar height is twice as high as the element width.<br />
Since the default bar height is a triple of the element<br />
width, the barcode aspect ratio is now in ratio of 2:3.<br />
(See XBCP 6.)<br />
Original (default) barcode<br />
369
PRESCRIBE <strong>Command</strong> <strong>Reference</strong><br />
XBCP 8 — automatically set rows and columns<br />
Format<br />
Parameter<br />
Function<br />
XBCP 8;<br />
None<br />
The XBCP 8 command permits the system to automatically set rows and columns so that<br />
it satisfies the requirement that the multiplication of rows times columns is less than or<br />
equal to 928. Default is disabled.<br />
Note that the XBCP 8 overrides XBCP 4 and/or 5 which set the number of rows and<br />
columns. However, this command is not effective if both XBCP 6 and XBCP 4 and/or 5<br />
are issued together. Precedence of XBCP modes is: 4/5
XBCP 9<br />
XBCP 9 — enable truncation<br />
Format<br />
Parameter<br />
Function<br />
XBCP 9;<br />
None<br />
The XBCP 9 command can generate a truncated PDF417 symbol that omits the right row<br />
indicator and the stop pattern. Default is non-truncation.<br />
371
PRESCRIBE <strong>Command</strong> <strong>Reference</strong><br />
XBCP 10 — enable file name<br />
Format<br />
Parameter<br />
XBCP 10, ’file-name’;<br />
file-name:<br />
string containing a file name<br />
Function<br />
File<br />
A Macro PDF417 symbol contains an optional file name field. The XBCP 10 command<br />
enables this field and defines its contents.<br />
The string must be surrounded by single or double quote marks, be less than 200<br />
characters long and only contain EXC mode compaction characters (20H~7FH). This<br />
command is ignored if the string does not satisfy these conditions. The execution of this<br />
command automatically sets Macro PDF417 symbol mode.<br />
!R! RES;<br />
XBCP 10, ’A00254’;<br />
MZP 1,0; XBCP 18,0;<br />
XBAR; ...<br />
...<br />
EXIT;<br />
372
XBCP 11<br />
XBCP 11 — enable block count<br />
Format<br />
Parameter<br />
Function<br />
File<br />
XBCP 11;<br />
None<br />
A Macro PDF417 symbol contains an optional block count field. The XBCP 11<br />
command enables this function. Default is not enabled.<br />
The execution of this command also automatically sets Macro PDF417 symbol mode.<br />
!R! RES;<br />
XBCP 11;<br />
MZP 1,0; XBCP 18,0;<br />
XBAR; ...<br />
...<br />
EXIT;<br />
373
PRESCRIBE <strong>Command</strong> <strong>Reference</strong><br />
XBCP 12 — enable time stamp<br />
Format<br />
Parameter<br />
XBCP 12, time;<br />
time:<br />
total number of seconds since 00:00:00 AM January 1, 1970 Greenwich mean time<br />
Function<br />
A Macro PDF417 symbol contains an optional time stamp field. The XBCP 12 command<br />
enables this function. The execution of this command also automatically sets Macro<br />
PDF417 symbol mode.<br />
File<br />
To set time stamp at 06:15:30AM on Jan. 2, 1970:<br />
!R! RES;<br />
XBCP 12, 108930;<br />
MZP 1,0; XBCP 18,0;<br />
XBAR; ...<br />
...<br />
EXIT;<br />
374
XBCP 13<br />
XBCP 13 — enable sender ID<br />
Format<br />
Parameter<br />
XBCP 13, ’sender-id’;<br />
sender-id:<br />
string containing sender ID<br />
Function<br />
File<br />
A Macro PDF417 symbol contains an optional Sender ID field. The XBCP 13 command<br />
enables this field and defines its contents.<br />
The string must be surrounded by single or double quote marks, be less than 200<br />
characters long and only contain EXC compaction mode characters (20H~7FH). This<br />
command is ignored if the string does not satisfy these conditions. The execution of this<br />
command automatically sets Macro PDF417 symbol mode.<br />
!R! RES;<br />
XBCP 13, "BETTERDAYSINC"<br />
MZP 1,0; XBCP 18,0;<br />
XBAR; ...<br />
...<br />
EXIT;<br />
375
PRESCRIBE <strong>Command</strong> <strong>Reference</strong><br />
XBCP 14 — enable addressee ID<br />
Format<br />
Parameter<br />
XBCP 14, ’addressee-id’;<br />
addressee-id:<br />
string containing addressee ID<br />
Function<br />
File<br />
A Macro PDF417 symbol contains an optional Addressee ID field. The XBCP 14<br />
command enables this field and defines its contents.<br />
The string must be surrounded by single or double quote marks, be less than 200<br />
characters long and only contain EXC compaction mode characters (20H~7FH). This<br />
command is ignored if the string does not satisfy these conditions. The execution of this<br />
command also automatically sets Macro PDF417 symbol mode.<br />
!R! RES;<br />
XBCP 14, ’BAREFOOTINC’;<br />
MZP 1,0; XBCP 18,0;<br />
XBAR; ...<br />
...<br />
EXIT;<br />
376
XBCP 15<br />
XBCP 15 — enable file size<br />
Format<br />
Parameter<br />
Function<br />
File<br />
XBCP 15;<br />
None<br />
A Macro PDF417 symbol contains an optional file size field. The XBCP 15 command<br />
enables this function. Note that the execution of this command also automatically sets<br />
Macro PDF417 symbol mode. This function is disabled in default condition.<br />
!R! RES;<br />
XBCP 15;<br />
MZP 1,0; XBCP 18,0;<br />
XBAR; ...<br />
...<br />
EXIT;<br />
377
PRESCRIBE <strong>Command</strong> <strong>Reference</strong><br />
XBCP 16 — enable checksum<br />
Format<br />
Parameter<br />
Function<br />
File<br />
XBCP 16;<br />
None<br />
A Macro PDF417 symbol contains an optional checksum. The XBCP 16 command<br />
enables this function. Note that the execution of this command automatically sets Macro<br />
PDF symbol mode. This function is disabled in default condition.<br />
!R! RES;<br />
XBCP 16;<br />
MZP 1, 0; XBCP 18, 0;<br />
XBAR; ...<br />
EXIT;<br />
378
XBCP 17<br />
XBCP 17 — allow control of file ID<br />
Format<br />
Parameter<br />
XBCP 17, ’file-id’;<br />
file-id:<br />
string containing a file ID<br />
Function<br />
A Macro PDF417 symbol contains a required file ID. The XBCP 17 command allows<br />
control of this field. A random file ID is generated when XBCP 10 through 16 or XBCP<br />
18 are executed without executing XBCP 17.<br />
The string must be surrounded by single or double quotation marks, be less than 50<br />
characters long and only contain EXC compaction mode characters (20H~7FH). This<br />
command is ignored if the string does not satisfy these conditions.<br />
The execution of this command automatically sets Macro PDF417 symbol mode. Note<br />
that PDF barcode is positioned a half inch below the previous PDF barcode if there are<br />
no positioning parameters exist [See XBCP 19 (page 374).] or insufficient number of<br />
parameters exist. See the example in File below.<br />
File<br />
In Macro PDF mode, data such as large as 3000 bytes print 3 90-column-by-30-row PDF<br />
symbols which are a half inch apart vertically:<br />
!R! RES;<br />
XBCP 17,"BookOne";<br />
XBAR; large data such as 3000 bytes;ENDB;<br />
EXIT;<br />
379
PRESCRIBE <strong>Command</strong> <strong>Reference</strong><br />
Printout<br />
380
XBCP 18<br />
XBCP 18 — enable Macro PDF417 symbol mode<br />
Format<br />
Parameter<br />
XBCP 18[, block-index];<br />
block-index:<br />
0 to k-1, and k is the number of blocks<br />
Function<br />
File<br />
Executing the XBCP 18 command enables the Macro PDF417 symbol mode. The Macro<br />
PDF417 symbol mode directs the reader to separate large data and allows Macro<br />
PDF417 two dimensional barcodes with a single file-id.<br />
To bar-code data ‘abcdXYZ12345’ as a Macro PDF417 using block indices 0, 1, and 2:<br />
!R!<br />
UNIT C; CMNT Set unit to centimeters;<br />
XBCP 17,"file-id"; CMNT Set file ID to file-id;<br />
MZP 1,0; CMNT Move cursor to (1, 0) [centimeters];<br />
XBCP 18,0; CMNT Set block index 0 to next data;<br />
XBAR; abcd;ENDB; CMNT Encode and print data "abcd";<br />
MZP 1,5; CMNT Move cursor to (1, 5) [centimeters];<br />
XBCP 18,1; CMNT Set block index 1 to next data;<br />
XBAR; XYZ;ENDB; CMNT Encode and print data "XYZ";<br />
MZP 1,10; CMNT Move cursor to (1, 10) [centimeters];<br />
XBCP 18,2; CMNT Set block index 2 to next data;<br />
XBAR; 12345;ENDB; CMNT Encode and print data "12345";<br />
EXIT;<br />
381
PRESCRIBE <strong>Command</strong> <strong>Reference</strong><br />
Printout<br />
382
XBCP 19<br />
XBCP 19 — position symbols at the specified<br />
locations<br />
Format<br />
Parameter<br />
XBCP 19[, x1, y1, x2, y2, x3, y3, ...];<br />
x1, y1, x2, y2, x3, y3, ...<br />
x and y coordinates that represent the positions of the divided barcodes measured from<br />
the current cursor position<br />
Function<br />
File 1<br />
The multiple PDF417 symbol from one large data can be positioned at the specified<br />
locations using the XBCP 19 command. X 1 , Y 1 is the relative location of second PDF<br />
symbol to the first symbol, X 2 , Y 2 for third, and so on as measured from the current<br />
coordinate (like the MRP command described on the printing system’s manual). The<br />
remaining pairs of positioning parameters are ignored if there are no more PDF symbol<br />
to print.<br />
The relative location parameters, X n and Y n can not define the location beyond first<br />
page. The positioning command such as MZP and ENDB should be used to specify the<br />
macro PDF location if there are data beyond first page. PDF symbol will be positioned a<br />
half inch below the previous PDF symbol if there are no positioning parameter exist or<br />
insufficient number of positioning parameters exist.<br />
The combination with multiple number of ENDB command allows to print multiple<br />
number of macro PDF on multiple pages. Note RES, XBCP0, and XBAR command will<br />
delete the remaining macro PDF data if all data has not been printed. Therefore, the page<br />
eject should not be done by RES command.<br />
In Macro PDF mode, data such as large as 3000 bytes print 3 90-column-by-30-row PDF<br />
symbols at specified locations specified by XBCP 19. In the file below, the second line<br />
XBCP 17 activates Macro PDF mode and specifies QualitySt for file-id. The third line<br />
MZP command positions the first barcode at 1 inch each from the left and right paper<br />
edge limits. The fourth line XBCP 19 moves the cursor 1 inch from the left and 2 inches<br />
below the point where the first barcode started and prints the second barcode; then<br />
moves the cursor 1 inch from the left and 2 inches below the point where the second<br />
barcode started and prints the third barcode.:<br />
!R! RES;<br />
XBCP 17,"QualitySt";<br />
MZP 1, 1;<br />
XBCP 19,1,2,1,2;<br />
XBAR; large data such as 3000 bytes;ENDB;<br />
EXIT;<br />
383
PRESCRIBE <strong>Command</strong> <strong>Reference</strong><br />
Printout 1<br />
File 2<br />
To print 4 30-column-by-20-row PDF symbols at specified locations in Macro PDF<br />
mode. In example below, the first line XBCP command resets all XBCP parameters to<br />
the defaults and selects the barcode type for PDF417 (though it is the only type currently<br />
available); the second line XBCP sets the number of rows in the barcode to 20 (rows);<br />
the third line XBCP sets the number of data codeword in the barcode to 30 (codewords).<br />
Note that with the number of rows and codewords of 20 and 30 respectively, the data the<br />
XBAR encodes are split into 4 barcodes which can be positioned separately at different<br />
coordinates as specified by the seventh line XBCP command.:<br />
!R! RES;<br />
XBCP 0,1;<br />
XBCP 4,20;<br />
XBCP 5,30;<br />
XBCP 17,"TrnOvr9";<br />
MZP 0.5, 0.5;<br />
XBCP 19,0.5,1,0.5,1,0.5,1,0.5,1;<br />
XBAR; large data such as 3000 bytes;ENDB;<br />
EXIT;<br />
384
XBCP 19<br />
Printout 2<br />
File 3<br />
To print multiple Macro PDF barcodes beyond the current page. In the example below,<br />
the fourth line XBCP 19 has no coordinating parameters specified. This allows the first<br />
segment barcode of the ensuing PDF data to be positioned at the current cursor position<br />
and the remaining data on the subsequent pages if there are data beyond the first page.<br />
The PAGE command on the sixth line starts the new page. The combinations of MZP<br />
and ENDB allow the second and third PDF barcodes printed at the specific coordinates<br />
on the following page.:<br />
!R! RES;<br />
XBCP 0,1;<br />
XBCP 17,"TrnOvr0";<br />
XBCP 19;<br />
XBAR; large data such as 3000 bytes;ENDB;<br />
PAGE;<br />
MZP 1,2; ENDB;<br />
MZP 4,4; ENDB;<br />
EXIT;<br />
385
PRESCRIBE <strong>Command</strong> <strong>Reference</strong><br />
Printout 3<br />
First page<br />
Second page<br />
386
XBUF<br />
XBUF — define a BUFfer name<br />
Format<br />
Parameters<br />
XBUF buffer-name[,[data-length]]; data-string;ENDB;<br />
buffer-name:<br />
name of the buffer that contains XBAR data<br />
data-length:<br />
length of data in bytes, terminated with a semicolon<br />
data-string:<br />
data to be encoded, terminated with a semicolon immediately followed by an ENDB<br />
command (256 international characters or binary data)<br />
Function<br />
The XBUF command defines/undefines a buffer that contains actual data for the two<br />
dimensional barcodes.<br />
The buffer name can be any length but only the first four characters count. The rest will<br />
be ignored. The distinction between upper and lowercase letters is also ignored. For<br />
example, the following names are all the same.<br />
• ABCD<br />
• abcd<br />
• ABCDE<br />
• Abcdxyz<br />
The name must start with a letter, but the other characters can include digits and special<br />
symbols such as hyphens. For example, F-1 and GRY-2 are valid buffer names.<br />
As the above Format instruction implies, the XBUF command sequence can have two<br />
other formats implementing the different functions as follows:<br />
XBUF buffer-name,; data-string;ENDB;<br />
Note the comma ( , ) placed between the buffer-name and “;”. As is the case of XBAR,<br />
this format allows that data-length can be omitted, 0, negative value, or non integer, the<br />
comma after buffer-name must be left in place, however. Then data-string is counted all<br />
characters until the program encounters “;ENDB;”. It is necessary to have no space or<br />
linebreak between “;” and “ENDB;”.<br />
The XBUF command sequence with no comma and data-length specified<br />
XBUF buffer-name;<br />
is used to delete the buffer name from the printing system memory.<br />
The XBUF command sequence with no comma, buffer-name and data-length specified<br />
XBUF;<br />
387
PRESCRIBE <strong>Command</strong> <strong>Reference</strong><br />
Files<br />
is used to delete all buffer name from the printing system memory.<br />
...<br />
XBCP 0,1;<br />
XBUF PDF 1, 25; This is a PDF417 example. ;ENDB;<br />
XBUF PDF 2, 15; This is a test. ;ENDB;<br />
...<br />
XBAR PDF 1;<br />
MRP 1,1;<br />
XBAR PDF 2;<br />
The sixth line prints PDF417 barcode containing the data string buffered in the third line<br />
and the last line prints PDF417 barcode containing the data string buffered in the fourth<br />
line.<br />
...<br />
XBCP 0, 1;<br />
XBUF PDF 1, 25; This is a PDF417 example. ;ENDB;<br />
XBUF PDF 2, 15; This is a test. ;ENDB;<br />
...<br />
MCRO PDF;<br />
XBAR PDF 1;<br />
MRP 1, 1;<br />
XBAR PDF 2;<br />
ENDM;<br />
CALL PDF;<br />
The last line prints the two PDF417 barcodes defined in the macro which is defined by<br />
MCRO in the sixth line.<br />
388
XPAT<br />
XPAT — generate eXpanded fill PATtern<br />
Format<br />
Parameters<br />
XPAT pattern-number, bitmap;<br />
pattern-number:<br />
number from 100 to 105<br />
bitmap:<br />
dot pattern of the pattern, coded as a character string<br />
Function<br />
The XPAT command generates a new, expanded shading pattern. The new pattern can be<br />
specified with the PAT command for use by the BLK and ARC commands and in a path.<br />
Details for creation of new patterns appear in Chapter 4 of the Technical <strong>Reference</strong><br />
manual.<br />
File<br />
!R! RES; UNIT C; MAP 5, 5;<br />
XPAT 105;//?//?p@0p@0p@0p@0p@0p@0p@0p@0p@0p@0p@0p@0p@0p@0;<br />
PAT 105; BOX 4, 1; BLK 4, 1;<br />
PAGE;<br />
EXIT;<br />
Printout<br />
Related <strong>Command</strong>s<br />
PAT, BLK, ARC<br />
389
PRESCRIBE <strong>Command</strong> <strong>Reference</strong><br />
This page left blank intentionally.<br />
390
Index
Numerics<br />
2-dimentional barcode<br />
See Two-dimentional barcode, 359<br />
A<br />
Absolute position, 72, 156<br />
Alternate font<br />
assigning, 284<br />
API, 240<br />
Arc<br />
drawing an arc, 180<br />
standard graphics, 27<br />
B<br />
Barcode<br />
barcode positions diagrammed, 140<br />
command, 33<br />
flag, 34<br />
Beveled line join, 301<br />
Block, 39<br />
cursor moving option, 39<br />
Box, 41<br />
cursor moving option, 41<br />
Butt cap, 262<br />
C<br />
Character path, 63<br />
Character spacing, 277<br />
Circle, 51<br />
Clipping<br />
rectangle, 54<br />
Code set, 128, 224, 264<br />
returning to the saved set, 224<br />
saving current, 264<br />
Collator, 67<br />
Color, 158, 259, 270, 274<br />
adjusting lightness, 154<br />
color matching, 158<br />
commands, 7<br />
gamma control, 154<br />
monitor simulation, 311<br />
palette, 298<br />
saturation, 154, 259<br />
saving current palette, 274<br />
selecting in palette, 270<br />
vivid color, 158<br />
<strong>Command</strong> recognition character, 213, 275<br />
changing, 275<br />
<strong>Command</strong> start sequence, 213<br />
changing, 275<br />
Comment, 58<br />
Compression (SFNT), 290<br />
Coordinates, 156<br />
moving to, 156<br />
Country code, 128<br />
Cursor option, 41<br />
Cursor position, 271<br />
Curve<br />
drawing to relative position, 184<br />
drawing to zero-relative, 186<br />
D<br />
Dash pattern, 77, 281<br />
a list as printout, 78<br />
Dashed pattern, 78<br />
Data dump, 216<br />
ending, 92<br />
Destination image, 296<br />
Downloading character, 146<br />
Drawing rule (for fill), 100<br />
Dummy sign (macro), 159<br />
Dumping data, 216<br />
Duplex<br />
inhibiting by media type, 161, 162<br />
E<br />
EcoPrint, 97<br />
level, 97<br />
e-MPS, 164<br />
limiting values for storage, 164<br />
e-MPS starting, 140<br />
Emulation, 283<br />
changing, 283<br />
End cap, 262<br />
butt, 262<br />
round, 262<br />
square, 262<br />
Ending angle, 27, 180<br />
Exit, 98<br />
exiting from PRESCRIBE, 98<br />
External media<br />
assigning terminating string, 248<br />
deleting data, 240<br />
formatting, 241<br />
How to read data from, 244<br />
How to write data to, 245<br />
printing information, 242<br />
printing partitions, 243<br />
reading data from, 244<br />
storing TrueType fonts, 246<br />
terminator, 358<br />
writing data to, 249<br />
F<br />
Face-down output tray, 331<br />
Face-up output tray, 331<br />
Fill, 182<br />
Fill pattern, 109<br />
8 by 8 bit, 109<br />
a list of resident, 183<br />
a list of resident fill patterns, 183<br />
column value, 109<br />
Filling path, 100<br />
Index-2
Firmware, 111<br />
initializing, 113<br />
Reprogramming, 111<br />
Flatness of curves, 103<br />
Font, 70, 74, 114, 266<br />
assigning attributes (bitmap), 286<br />
changing by characteristic, 114<br />
changing by number, 107<br />
characteristics, 115<br />
deleting a, 74<br />
deleting all nonresident, 70<br />
evaluation by priority, 115<br />
font mode, 107, 118<br />
saving current, 266<br />
selection by assigning typeface, 290<br />
Font attributes, 287<br />
Font list, 104<br />
printing a, 104<br />
Font mode, 118<br />
Fuser mode, 161, 162<br />
G<br />
Graphics state, 226, 268<br />
Gray pattern, 121<br />
H<br />
Hard disk, 140<br />
Harddisk, 135<br />
error codes, 135<br />
I<br />
Image model, 295<br />
International characters, 128<br />
J<br />
Job, 135, 137, 139<br />
printing a list of, 133<br />
printing jobs, 135<br />
printing with different finishing options, 137<br />
starting to define a ..., 139<br />
terminating to define a ..., 143<br />
Job offset, 144<br />
Job separation, 144<br />
choosing first or all pages, 144<br />
separating copies by command, 144<br />
K<br />
KCGL<br />
pen color, 293<br />
KIR, 300<br />
refinement level, 300<br />
KPDL, 283<br />
Kyocera Image Refinement, 300<br />
L<br />
Lightness, 154<br />
Line, 72, 79, 81, 86<br />
drawing by angle, 81<br />
drawing to absolute, 72<br />
drawing to relative, 79<br />
drawing to zero-relative, 86<br />
Line join, 301<br />
Line end (caps), 262<br />
Line join, 309<br />
beveled, 301<br />
miter limite, 309<br />
mitered, 301<br />
notched, 301<br />
round, 301<br />
Line spacing, 308<br />
Lines per inch, 305<br />
Lines per page, 306<br />
Logical page, 188<br />
diagrams, 189<br />
Print direction, 188<br />
M<br />
Macro, 71, 75<br />
automatic macro, 25<br />
calling a, 43<br />
commands, 8<br />
defining, 159<br />
deleting a, 75<br />
deleting all, 71<br />
dummy parameter, 159<br />
ending a, 93<br />
macro overlay, 25<br />
sources, locations, properties, 160<br />
Margin, 260<br />
bottom, 260<br />
right, 324<br />
top, 334<br />
Margine<br />
left margin, 303<br />
Media type, 161, 162, 170<br />
attributing media type, 161, 162<br />
Miter limit, 301, 309<br />
Mitered line join, 301<br />
Move, 156, 165, 172<br />
moving to absolute, 156<br />
moving to relative, 165<br />
moving to zero-relative, 172<br />
Moving specifying angle, 167<br />
N<br />
Notched line join, 301<br />
Number of copies, 60<br />
O<br />
Operation mode, 295<br />
Index-3
P<br />
Page break, 177<br />
Page length, 316<br />
Page orientation, 318<br />
Page width, 322<br />
Palette, 274<br />
creating simple color, 298<br />
selecting, 313<br />
Pantone, 178<br />
creating a palette, 178<br />
Pantone colors, 35, 179<br />
Paper size, 278, 320<br />
customize, 278<br />
enlargement/reduction, 320<br />
Paper weight, 161, 162<br />
Parsing text, 347<br />
Path, 174, 180, 182, 191, 193, 195, 199, 201, 203<br />
elipse path, 195<br />
filling a, 100<br />
Line, drawing to relative, 191<br />
Line, drawing to zero-relative, 193<br />
move, moving to relative, 201<br />
move, moving to relative by angle, 199<br />
move, moving to zero-relative, 203<br />
selecting a fill pattern, 182<br />
stroking a path, 340<br />
Pen<br />
color, 293<br />
diameter, 314<br />
thickness, 314<br />
Permanent job, 140<br />
Pie chart, 197<br />
Pitch, 272, 277, 305, 306<br />
characters-per-inch, 272<br />
PRESCRIBE start sequence, 213<br />
Presentation mode, 326<br />
Previous position, 228<br />
print density, 344<br />
Printing right-aligned text, 234<br />
R<br />
Radius, 27, 197<br />
Raster<br />
compression, 236<br />
dot resolution, 339<br />
logical operation, 328<br />
presentation mode, 326<br />
receiving, 238<br />
receiving color raster data, 237<br />
ROP3, 328<br />
run-length encoding, 236<br />
TIFF rev. 4.0, 236<br />
Raster data<br />
ending, 95<br />
Registration, 223<br />
Relative position, 79, 81, 165<br />
Resetting the printer<br />
by emulation, 218<br />
RGB<br />
color balance level, 221<br />
gamma, 221<br />
ROP3, 328<br />
Round cap, 262<br />
Round line join, 301<br />
Run-length, 237<br />
S<br />
Saturation, 154, 259<br />
Saving current, 271<br />
Saving cursor position<br />
restoring, 228<br />
Saving graphics state, 268<br />
restoring, 226<br />
Shade of gray, 121<br />
Shear, 290<br />
Sorter, 163, 330<br />
addressing a tray group, 163<br />
selecting trays, 330<br />
Source image, 295<br />
Square cap, 262<br />
Stacker, 331<br />
selecting tray, 331<br />
Staple, 140, 336<br />
changing number of pages, 336<br />
position, 337<br />
Starting a new page, 177<br />
Starting a new path, 174<br />
Starting angle, 27, 180, 197<br />
Status page, 332<br />
user mode and service mode, 332<br />
Symbol set, 64, 128, 224, 264, 290<br />
as a bitmap attribute, 286<br />
ID by CSET, 64<br />
returning to the saved set, 224<br />
T<br />
Temporary job, 139<br />
Test page, 332<br />
Text, 68, 345<br />
centering a, 68<br />
Text parsing, 347<br />
Thickness, 314<br />
TIFF 4.0, 237<br />
Transparency, 295<br />
TrueType, 152, 246<br />
loading ..., 152<br />
Two-dimentional barcode<br />
addressee ID, 376<br />
automatic rows and columns, 370<br />
bar height, 369<br />
block count, 373<br />
checksum, 378<br />
data code word columns, 366<br />
data code word rows, 365<br />
error correction level, 364<br />
error correction level by percentage, 363<br />
file ID control, 379<br />
file name, 372<br />
file size, 377<br />
Index-4
macro PDF417, 381<br />
naming buffer, 387<br />
positioning at specified locations, 383<br />
printing a, 359<br />
ratio of height and width, 367<br />
selecting type, 361<br />
sender ID, 375<br />
specifying narrowest width, 362<br />
time stamp, 374<br />
truncation, 371<br />
type of paper, 344<br />
Typeface, 290<br />
U<br />
Underline, 342<br />
distance and thickness, 342<br />
Unit, 279, 349<br />
saving current, 279<br />
Unit of measurement, 279, 349, 351<br />
per dots, 351<br />
V<br />
Vector graphics<br />
commands, 5<br />
Virtrual mailbox<br />
spooling as a job, 140<br />
Virtual mailbox, 353, 354<br />
aliasing a mailbox, 353<br />
assigning a mailbox to receive jobs, 354<br />
definiing a job to store in a mailbox, 139<br />
password, 355<br />
printing a list of, 133<br />
printing using command, 135<br />
W<br />
Wide A4, 357<br />
Z<br />
Zero-relative position, 86, 172<br />
Index-5
2006<br />
is a trademark of Kyocera Corporation
Rev. 4.5 2006.6