MODEL 306· PRINTER - Bitsavers - Trailing-Edge
MODEL 306· PRINTER - Bitsavers - Trailing-Edge
MODEL 306· PRINTER - Bitsavers - Trailing-Edge

You also want an ePaper? Increase the reach of your titles
YUMPU automatically turns print PDFs into web optimized ePapers that Google loves.
.~ Ou - ZS-8- / c))2<br />
S;:c?:1 ~ ¢ L/ f.-? ( ? (;<br />
- G;O '2.C><br />
l Lf t{ _ I<br />
q _SI.J"' '''tvw(e,<br />
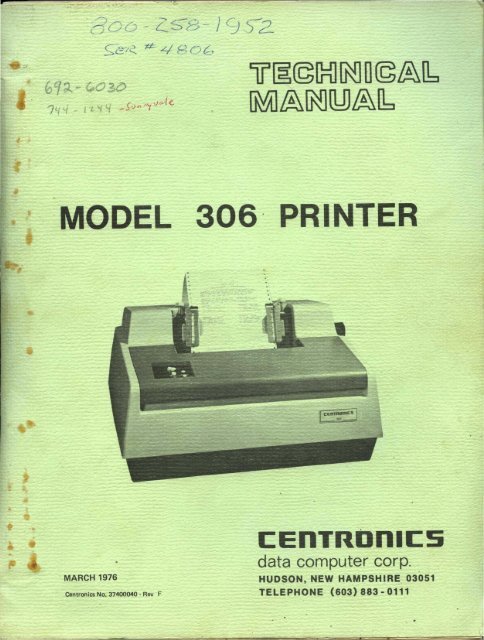
<strong>MODEL</strong><br />
306· <strong>PRINTER</strong><br />
MARCH 1976<br />
Centronics No. 37400040 - Rev F<br />
l:EnTRDnll:S<br />
data computer corp.<br />
HUDSON, NEW HAMPSHIRE, 03051<br />
TELEPHONE (603) 883 - 0·111
<strong>MODEL</strong> 306 <strong>PRINTER</strong><br />
REVISION F<br />
MARCH 1976<br />
THE INFORMATION CONTAINED HEREIN IS<br />
PROPRIETARY AND IS NOT TO BE RELEASED<br />
OR REPRODUCED WITHOUT WRITTEN PER<br />
MISSION OF CENTRONICS data computer corp.<br />
I:EnTROnll:S<br />
data computer corp.<br />
HUDSON, NEW HAMPSHIRE 03051<br />
TELEPHONE (603) 883 - 0111
TABLE OF CONTENTS<br />
SECTION 1<br />
INTRODUCTION<br />
Section<br />
1.1<br />
1.2<br />
1.3<br />
GENERAL DESCRIPTION. .<br />
LOGIC FLOW DIAGRAM .<br />
<strong>PRINTER</strong> OPERATION . .<br />
1-2<br />
1-2<br />
1-3<br />
1. 3.1<br />
1. 3. 2<br />
1.3.3<br />
Character Printing .<br />
Paper Movement. .<br />
Special Functions.<br />
1.4 SYSTEM FEATURES<br />
1.4.1 Specifications Summary. . .<br />
1.4.2 Standard and Optional Features<br />
1.5 PHYSICAL DESCRIPTION . . . . . . .<br />
1-3<br />
1-4<br />
1-5<br />
1-6<br />
1-6<br />
1-7<br />
1-7<br />
SECTION 2 AND 3<br />
INSTALLATION AND OPERATION<br />
2.1 SITE PREPARATION<br />
2.2 SHIPPING CRATE<br />
2-1<br />
2-2<br />
SECTION 4<br />
THEORY OF OPERATION<br />
4.1 INTRODUCTION<br />
4.2 BASIC TIMING<br />
4-1<br />
4-1<br />
-1-
Section<br />
TABLE OF CONTENTS (cont'd)<br />
4.3 INITIALIZING THE <strong>PRINTER</strong>. . . . . .<br />
4.3.1 Prime. . . . . .• . •••<br />
4.3.2 Select • . . . . . . . . .<br />
Page<br />
4.4 DATA INPUT .•......•.. 4-6<br />
4.4.1 Data Input Timing. . .. ...•.. 4-6<br />
4.4.2 Busy .... ......•.. 4-9<br />
4.4.3 Function Decoder. . . . . . . . . . .. 4-10<br />
4-3<br />
4-3<br />
4-5<br />
4.5<br />
4.6<br />
4.7<br />
SHIFT REGISTER (BUFFER) .<br />
CHARACTER PRINTING. . .<br />
4.6.1<br />
. 4.6.2<br />
4.6.3<br />
4.6.4<br />
4.6.5<br />
Initiating the Printer Operation. ....<br />
Character Registration and Timing . .•.<br />
Character Generator (ROM) ...... .<br />
Print Head Operation. . . . . . . . . . .<br />
Power Driver Circuits . .. ...<br />
PAPER MOVEMENT . • .<br />
4-12<br />
4-14<br />
4-14<br />
4-17<br />
4-18<br />
4-21<br />
4-22<br />
4-23<br />
4.7.1<br />
4.7.2<br />
4.7.3<br />
4.7.4<br />
4.7.5<br />
Line Feed . . . .<br />
Form Feed • . . . • . . •• ...<br />
Vertical Tab . . . . . . . . . . . . .<br />
Vertical Format Unit (Optional) .....<br />
Line Feed Solenoid Driver. . . . .<br />
4-25<br />
4-26<br />
4-28<br />
4-28<br />
4-29<br />
4.8 SPECIAL FUNCTIONS • . .<br />
4.8.1<br />
4.8.2<br />
4.8.3<br />
4.8.4<br />
4.9 POWER SUPPLIES<br />
4.9.1<br />
4.9.2<br />
4.9.3<br />
Bell (Optional) . . . . .<br />
Delete . . . . . . . . . . • .<br />
+35V Power Supply (Unregulated) .<br />
Motor Control (Optional) . . . . . . . . .<br />
+5V Regulator. . . .<br />
+12V and -12V Regulators . .<br />
+35V Power Supply (Unregulated) .<br />
4.10 OUTPUTS FROM LSI CHIPS (ME25 AND ME16) . .<br />
4.10.1 LSI Chip ME25<br />
4.10.2 LSI Chip ME16<br />
4-30<br />
4-30<br />
4-30<br />
4-31<br />
4-31<br />
4-33<br />
4-34<br />
4-34<br />
4-34<br />
4-38<br />
4-38<br />
4-41<br />
-ii-
TABLE OF CONTENTS (cont'd)<br />
SECTION 5<br />
REMOVAL REPLACEMENT AND ADJUSTMENT PROCEDURES<br />
Section<br />
5.1<br />
5.2<br />
INTRODUCTION. · · ·<br />
MECHANICAL ASSEMBLIES.<br />
5.2.1 Carriage Mechanism<br />
5.2.2 Platen (Figure AB)<br />
5.2.3 Paper Pan (Fi gure AC).<br />
·<br />
.· ·. · ·<br />
5.2.4 Driving Mechanism (Figure AD, Part 1).<br />
5.2.5 Driving Mechanism (Figure AE, Part 2).<br />
5.2.6 Idler Pulley Assembly (Figure AF) .<br />
5.2.7 Reed Switch (AG)<br />
· ·<br />
5.2.8 Printer Base (Figure AH) . . ..<br />
5.2.9 Frame (Figure AI)<br />
5.2.10 Paper Feed (Figure AJ).<br />
· · .<br />
5.2.11 Pin Feed Unit (Figure AK).<br />
5.2.12 Ribbon Feed (Figure AL) ·<br />
5.2.13 Cover (Figure AM)<br />
· · · 5.2.14 Operator Panel (Figure AN)<br />
· ·<br />
5.2.15 Electrical Components (Figure AO)<br />
·<br />
5.2.16 Electrical Components (Figure AP)<br />
5.2.17 Electrical Components (Figure AQ)<br />
·. · . . .<br />
5.2.18 Print Head and Associated Assemblies (Fig. 8-19)<br />
5.2.19 Motor Control Assembly Option . .<br />
5.2.20 Vertical Format Unit (VFU) - Option<br />
5.2.21 Printer Drive Mechanism, Model 306.<br />
· . .<br />
.<br />
.<br />
Page<br />
5-1<br />
5-1<br />
5-2<br />
5-6<br />
5-9<br />
5-11<br />
5-14<br />
5-21<br />
5-24<br />
5-27<br />
5-27<br />
5-29<br />
5-32<br />
5-34<br />
5-45<br />
5-45<br />
5-46<br />
5-46<br />
5-46<br />
5-46<br />
5-51<br />
5-52<br />
5-54<br />
SECTION 6<br />
MAINTENANCE<br />
6.1<br />
6.2<br />
6.3<br />
ADJUSTMENTS. •. ...<br />
PREVENTIVE MAINTENANCE . . . .<br />
TROUBLESHOOTING GUIDE.<br />
6-1<br />
6-2<br />
6-8<br />
SECTION 7<br />
DRAWINGS AND LISTS OF MATERIALS, ELECTRICAL<br />
7-1<br />
-iii-<br />
Rev. E
Section<br />
TABLE OF CONTENTS (cont'd)<br />
SECTION 8<br />
MECHANICAL DRAWINGS AND PARTS LISTS<br />
8-1<br />
APPENDICES<br />
A<br />
B<br />
SIGNAL GLOSSARY. . . . . . .<br />
PARALLEL INTERFACE SPECIFICATIONS. .<br />
A-I<br />
B-1<br />
-iv-
LIST OF ILLUSTRATIONS<br />
Figure<br />
1-1<br />
1-2<br />
1-3<br />
1-4<br />
1-5<br />
1-6<br />
1-7<br />
1-8<br />
1-9<br />
2-1<br />
4-1<br />
4-2<br />
4-3<br />
4-4<br />
4-5<br />
4-6<br />
4-7<br />
4-8<br />
4-9<br />
4-10<br />
4-11<br />
4-12<br />
4-13<br />
4-14<br />
4-15<br />
5-1<br />
5-2<br />
5-3<br />
5-4<br />
Model 306 Printer (Top and VFU Covers Removed).<br />
Basic Block Diagram.<br />
Printing the Letter (H) .<br />
Print Head Components .<br />
Paper Movement Mechanism .<br />
Left Front View of 306<br />
Right Front View of 306 .<br />
Rear View of 306<br />
Rear View (306 Logic/P.S. Board Removed).<br />
Printer Dimensions .<br />
Model 306 - Block Diagram.<br />
Prime Timing<br />
Input Data Timing - No Busy Condition<br />
Input Data Timing - Causing Busy Condition .<br />
Forward Clutch Interconnection Diagram .<br />
Character Timing<br />
Normal and Elongated Characters.<br />
Print Head Timing .<br />
Line Feed Timing<br />
Form Feed and Vertical Tab Timing .<br />
VFU Tape Reader Amplifier (Located in VFU) •<br />
Motor Control Timing .<br />
+5 Volt Regulator Interconnection Diagram .<br />
~12V Regulators Interconnection Diagram .<br />
+35V Unregulated Supply Interconnection Diagram .<br />
Carriage Movement Adjustments .<br />
Timi ng Fence Mounting, Model 306 .<br />
Adjustment of Timing Belt (AD-15) (View from back of<br />
printer, forward) .<br />
Adjustment of Timing Belt (AD-41) (View from back of<br />
printer, forward) . . . . .<br />
Page<br />
1-2<br />
1-3<br />
1-4<br />
1-4<br />
1-4<br />
1-8<br />
1-8<br />
1-9<br />
1-9<br />
2-1<br />
4-2<br />
4-4<br />
4-7<br />
4-8<br />
4-15<br />
4-16<br />
4-20<br />
4-22<br />
4-25<br />
4-27<br />
4-29<br />
4-32<br />
4-35<br />
4-36<br />
4-37<br />
5-5<br />
5-8<br />
5-13<br />
5-14<br />
-v-<br />
Rev. E
LIST OF ILLUSTRATIONS (cont'd)<br />
Figure<br />
5-5 Main Motor Belt Adjustment (AE-9). 5-18<br />
5-6 Forward Clutch Adjustment (Air-Gap) . 5-19<br />
5-7 Bushing End-Play Adjustment for (Forward Clutch Shaft<br />
Air-Gap and Preload Clutch) 5-19<br />
5-7A Location of Drive Pulley Bracket (AE-21) . 5-20<br />
5-8 Torque Limiting Device (Brake) 5-24<br />
5-9 Reed Switch Assembly, Left (AG) . 5-25<br />
5-10 Left Reed Switch (AG-1) Static-Adjustment . 5-26<br />
5-11 Two Adjustments, Paper Feed Mechanism (AJ). 5-31<br />
5-12 Locating Idler Pulley Assembly 5-37<br />
5-13 Locating Dimension for Ribbon Feed Rack. 5-38<br />
5-14 Rack and Pinion Adjustment, Ribbon Mechanism . 5-39<br />
5-15 Locating Dimension for Left Ribbon Holder Plate with<br />
Respect to Rear Guide Bar 5-40<br />
5-16 Locating Dimension for Right Ribbon Holder Plate with<br />
Respect to Rear Guide Bar 5-40<br />
5-17 Left Operator and Stopper Adjustment. 5-41<br />
5-18 Ribbon Feed Plate and Guide Bar (Left Side) . 5-42<br />
5-19 Adjusting Nuts for Right Pawl Operator Movement . 5-42<br />
5-20 Right Pawl Operator Starting Position . 5-43<br />
5-21 Pawl, Ratchet and Cam Movement. 5-44<br />
5-22 Spur on Left Releaser.(AL-174) and Roller (AL-46). 5-44<br />
5-23 Fibre Optics Head, Adjustment from Optic Fence . 5-50<br />
5-24 Fibre Optics Head Alinement and Flexible Timing Fence. 5-50<br />
5-25 Motor Control Location and Installation. 5-51<br />
5-26 Removal/Replacement of Drive Shaft 63060142-5001 and<br />
Couplings 63060144-2002 for VFU Assembly . 5-53<br />
5-27 Paper Tape Reader Adjustment . 5-54<br />
5-28 Printer Drive Mechanism, Model 306 . 5-55<br />
7-1 Schematic Diagram, Logic/P.S. Board (+5V) (Sheet 1 of 4) 7-3<br />
7-2 Schematic Diagram, Logic/P.S. Board (+5V) (Sheet 2 of 4) 7-4<br />
7-3 Schematic Diagram, Logic/P.S. Board (+5V) (Sheet 3 of 4) 7-5<br />
7-4 Schematic Diagram, Logic/P.S. Board (+5V) (Sheet 4 of 4) 7-6<br />
7-5 Schematic Diagram, Power Driver Board (Sheet 1 of 2) . 7-7<br />
7-6 Schematic Diagram, Power Driver Board (Sheet 2 of 2) . 7-8<br />
Rev. E<br />
-vi-
LIST OF ILLUSTRATIONS (cont'd)<br />
Figure<br />
7-7<br />
7-8<br />
7-9<br />
7-10<br />
7-1.1<br />
7-12<br />
7-13<br />
7-14<br />
7-15<br />
7-16<br />
7-17<br />
7-18<br />
7-19<br />
7-20<br />
8-i<br />
8-1<br />
8-2<br />
8-3<br />
8-4<br />
8-5<br />
8-5A<br />
8-6<br />
8-7<br />
8-8<br />
8-9<br />
8-10<br />
8-11<br />
8-12<br />
8-13<br />
8-14<br />
8-15<br />
Page<br />
Schematic Diagram, Video Amplifier. · 7-9<br />
Interconnection Diagram, Connector Card . . 7-10<br />
Wiring Diagram, Printer Mechanism. . 7-11<br />
Schematic Diagram, Elapsed Time Indicator (Option) . . 7-12<br />
Logic/Power Supply Board Connections . . 7-13<br />
PC Board Ass'y, Logic/Power Supply Board (Sheet 1 of 2). 7-15<br />
PC Board Ass'y, Logic/Power Supply Board (Sheet 2 of 2). 7-16<br />
PC Board Ass'y, Power Driver Board (Sheet 1 of 2). . 7-20<br />
PC Board Ass'y, Power Driver Board (Sheet 2 of 2).<br />
PC Board Ass'y, Video Amplifier and Cable Ass'y .<br />
PC Board Ass'y, Connector Card<br />
PC Board Ass'y, Elapsed Time Indicator (Option) .<br />
Cable Ass'y, Data Input .<br />
Cable Ass'y, Computer Input.<br />
Model 306 Subassemblies •<br />
Carriage - AA<br />
Platen - AB<br />
Paper Pan - AC .<br />
Driving Mechanism (Part 1 of 2) - AD .<br />
Driving Mechanism (AE, Part 2) (This Drawing Applies<br />
to Air-Gap Clutch Only)<br />
Driving Mechanism (AE, Part 2) (This Drawing Applies<br />
to Preload Clutch Only)<br />
Idler Pulley - AF<br />
Reed Switch - AG<br />
Base - AH<br />
Frame - AI<br />
Paper Feed - AJ .<br />
Pi n Feed - AK.<br />
Ribbon Feed - AL (Part 1 of 2) .<br />
Ribbon Feed - AL (Part 2 of 2) •<br />
Cover - AM<br />
Operator Panel - AN.<br />
· 7-21<br />
· 7-23<br />
· 7-25<br />
· 7-27<br />
· 7-29<br />
· 7-31<br />
· 8-3<br />
· 8-5<br />
· 8-7<br />
· 8-9<br />
• 8-11<br />
· 8-13<br />
· 8-15<br />
· 8-17<br />
8-19<br />
· 8-21<br />
· 8-23<br />
8-25<br />
· 8-29<br />
· 8-31<br />
· 8-32<br />
· 8-35<br />
· 8-37<br />
-vii-<br />
Rev. E
Figure<br />
8-16<br />
8-17<br />
8-18<br />
8-19<br />
8-20<br />
8-20A<br />
LIST OF ILLUSTRATIONS (cont 'd)<br />
Electrical Components (Part 1 of 3) - AO<br />
Electrical Components (Part 2 of 3) - AP<br />
Electrical Components (Part 3 of 3) - AQ<br />
Print Head and Associated .<br />
Tape Reader Assembly 68060125-5003 (Option)<br />
Tape Reader Assembly 68060125-5002, (Option) (Alternate).<br />
Page<br />
8-39<br />
8-41<br />
8-43<br />
8-45<br />
8-47<br />
8-49<br />
4-1<br />
306 Special Function<br />
TABLES<br />
4-8<br />
Note<br />
Refer to the Engineering Change Notice<br />
(ECN) sheets shipped with the printer<br />
for changes made to the printer which<br />
have not yet been incorporated into the<br />
technical manual. Always keep these<br />
Engineering Change Notice sheets with<br />
the manual.<br />
Note<br />
Revision level indications at the lower<br />
right-hand corner of a page reflect at<br />
what revision of the manual that page was<br />
updated.<br />
-viii-<br />
Rev. E
SECTION 1<br />
INTRODUCTION<br />
This manual describes the Model 306 printer, manufactured by<br />
Centronics Data Computer Corporation. It provides general information,<br />
detailed theory of operation and maintenance information enabling field<br />
service personnel to service the printer. For serial input or other<br />
detailed interface information, a separate document for each interface<br />
is published for your reference.<br />
The manual is subdivided into eight sections, each with its<br />
specific purpose.<br />
Section 1 - INTRODUCTION, introduces the reader to the scope and<br />
content of the manual, and provides the reader with<br />
a general description of the printer.<br />
Section 2 - INSTALLATION, contains unpacking and installation instructions<br />
for the printer.<br />
Section 3 - OPERATION, describes the use of all operator controls<br />
and indicators.<br />
Section 4 - THEORY OF OPERATION, contains a detailed description<br />
of each major operation performed by the printer<br />
electronics, including flow charts, timing diagrams<br />
and circuit diagrams.<br />
Section 5 - REMOVAL, REPLACEMENT AND ADJUSTMENT PROCEDURES, includes<br />
step-by-step removal and replacement procedures<br />
for all major assemblies and sub-assemblies in the<br />
printer.<br />
Section 6 - MAINTENANCE, includes electrical adjustments, preventive<br />
maintenance procedures, and a troubleshooting guide.<br />
Section 7 - ELECTRICAL DRAWINGS AND LIST OF MATERIALS, contains a<br />
complete set of schematic, wiring and component board<br />
layout diagrams and their associated list of materials<br />
for the electrical portion of the printer.<br />
Section 8 - MECHANICAL DRAWINGS AND PARTS LISTS, includes all printer<br />
assembly drawings and their associated part lists for the<br />
mechanical portion of the printer.<br />
1-1
At the end of the manual are several appendices which include a<br />
glossary of signal mnemonics, standard 5 x 7 and optional 9 x 7 character<br />
set, and parallel interface specifications.<br />
1.1 GENERAL DESCRIPTION (Figure 1-1)<br />
The Model 306 printer is a medium speed impact printer which uses<br />
a standard 5 x 7 or optional 9 x 7 dot matrix for character generation.<br />
Figure 1-1. <strong>MODEL</strong> 306 <strong>PRINTER</strong> (TOP AND VFU COVERS REMOVED)<br />
The unit prints at a rate of 120 characters per second, which is<br />
approximately one full 80-character line per second (including carriage<br />
return time). Paper is sprocket-fep, and paper widths from 4 inches to<br />
9~ inches can be accommodated. The printer can produce one original and<br />
four copies. Standard print format consists of 10 characters per inch<br />
horizontally and 6 lines per inch vertically.<br />
1.2 LOGIC FLOW DIAGRAM (Figure 1-2)<br />
The standard printer contains an 80-character buffer. For serial<br />
data inputs, optional serial interfaces allow data to be received at<br />
rates from 100 to 9600 baud. Several other optional interfaces are<br />
available as required by the user.<br />
Once a line of printable characters is stored in the buffer, head<br />
motion is initiated by activating the forward clutch, causing the print<br />
head to move from left to right across the paper. With the head in motion,<br />
data is transmitted from the buffer to the character generator. From there,<br />
character write pulses are sent to the driver circuits, which energize<br />
the print head solenoids causing the print wires to form the characters on<br />
the paper.<br />
Rev. E 1-2
PARALLEL INPUT (TIMING)<br />
M.,k - Binlty , - +2.410 !!U:; Vo!U<br />
5p";l _ Bln.ty Q - 0 10 + 0.4 '0'011<br />
O.'I~~<br />
'~':'Sl ~ ~ ,"st"lo'<br />
OI.IS.'Obl-U------U-<br />
.t I-ISImlnl1<br />
5oo1-151m .. J<br />
~--l....:.-+-"""<br />
RS 232 SERIAL INPUT (TIMING)<br />
Blud A.'I - tOO - 9600<br />
5'1" Puille - On. Bit Timl<br />
StOP Puille - min. of ani Bit Tlml<br />
M"k - Binlty , _ -3 to ·21 Voln<br />
SPiel - Bin.,y 0 - +3 to +21 Voln<br />
Figure 1-2. BASIC BLOCK DIAGRAM<br />
Paper movement is initiated by a line feed, vertical tab and form<br />
feed function. In the standard 306 printer, vertical form movement is software<br />
controlled by means of line count pulses, rather than hardware-controlled.<br />
However, an optional vertical format unit, (VFU) is available for<br />
hardware-controlled vertical formatting, identical to the Series 100 printers.<br />
In addition, the printer recognizes the following special control<br />
codes: bell, delete and elongated character, as described in Section 1.3.3.<br />
1.3 <strong>PRINTER</strong> OPERATION<br />
Basically, all printer functions can be grouped into one of the<br />
following three categories: 1) character printing, 2) paper movement, and<br />
3) other auxiliary functions such as bell, delete, etc.<br />
1.3.1 CHARACTER PRINTING (Figures 1-3, 1-4)<br />
A small aluminum carriage supports the print head assembly. During<br />
printing operation, the carriage travels along the print line from left to<br />
right. Printing is accomplished by selectively firing the print wires as<br />
the print head moves from left to right across the print line. Printing<br />
impulses energize the print solenoids and drive the print wires against the<br />
ribbon, paper and platen to form the characters in a dot matrix pattern.<br />
When the solenoids are de-energized, the wires are withdrawn so they are<br />
flush with the surface of the jewel. Each solenoid can fire independently<br />
up to five times for anyone character. Figure 1-3 shows an example of the<br />
dot matrix forming the letter H. All character formation in the 5 x 7 and<br />
9 x 7 dot matrix are shown in Series 300 Operators Manual.<br />
1-3 Rev. F
JEWEL<br />
'----A-~<br />
Figure 1-3. PRINTING THE LETTER (H)<br />
Figure 1-4. PRINT HEAD COMPONENTS<br />
The print head (Figure 1··4) consists of the jewel, casting and seven<br />
solenoids with attached print wires. The seven print solenoids and their<br />
attached print wires are arranged radially around the print head. The free<br />
ends of the print wires pass through a wire guide at the front of the print<br />
head, which properly spaces the wires so that the correct wires pass through<br />
the correct hole in the print jewel.<br />
Printing action is initiated when the input buffer has been filled<br />
or a carriage return (CR) code has been received. The print head then sweeps<br />
across the page until a CR command is decoded at the buffer output of the<br />
head reaches the aO-column limit switch. At this time, the print head returns<br />
to the left margin and an automatic line feed is performed. As an option,<br />
the automatic line feed can be disabled.<br />
/'<br />
1.3.2 PAPER MOVEMENT (Figure 1-5)<br />
Paper can be moved manually by rotating the platen knob or automatically<br />
by any of three paper movement commands: line feed, vertical tab<br />
and form feed.<br />
Rev. D<br />
Figure 1-5. PAPER MOVEMENT MECHANISM
Power necessary to drive the sprocket-feed paper tractors controlling<br />
paper movement, is transmitted from the main motor through an O-ring belt<br />
to the form feed mechanism, where it is then transferred via the paper drive<br />
shaft to the paper tractors. The form feed mechanism consists of a form feed<br />
or release clutch, a line feed solenoid with slide unit, and a gear train<br />
mechanically linking the main motor to the paper feed tractors.<br />
To initiate a single line feed, the line feed solenoid is energized<br />
15 milliseconds. Upon completion of the line feed command, a 60-90 millisecond<br />
delayed line feed interval is generated. This allows the clutch pawl and<br />
clutch mechanism to return home before another line feed is allowed.<br />
Vertical forms movement is accomplished by applying a DC level to<br />
the paper feed solenoid. In the standard 306 printer, this paper movement<br />
continues until it is either terminated by the reception of a delete code<br />
(octal 177) or an INPUT PRIME signal at the interface connector, or a paper<br />
time-out condition. However, if the optional Vertical Format Unit (VFU) is<br />
used, the paper movement is terminated when a hole is detected in the<br />
appropriate channel of the vertical format paper tape.<br />
As paper moves in the printer, each line advance causes a line count<br />
switch located in the form feed mechanism to open and close. The two wires<br />
from this switch go to the interface connector via the logic card. As a<br />
result, a line count level from the input device is switched on and off by<br />
the printer for each line advance. If the 306 contains no optional VFU,<br />
the user's software can control vertical formatting by counting these line<br />
count pulses and terminating the paper movement operation when appropriate.<br />
When the printer runs out of paper, a sensing switch activates a<br />
two-second audible tone in a speaker (option) located at the rear. The<br />
printer also stops printing and lights the PAPER EMPTY light on the control<br />
panel.<br />
1.3.3 SPECIAL FUNCTIONS<br />
In addition to the printable characters shown in Appendix B, and<br />
the carriage return, line feed, form feed, and vertical tab codes previously<br />
described, the printer also recognizes the following special control codes.<br />
Delete (Octal 177) - Primes the printer electronics and clears the<br />
buffer.<br />
Bell (Octal 007) - With Bell option only - Generates a two-second<br />
audible tone in the speaker at the front of the printer.<br />
Select (Octal 021) - Allows printer to receive data, same as<br />
activating SELECT switch.<br />
same<br />
1-5<br />
Rev. 0
1.4 SYSTEM FEATURES<br />
1.4.1 SPECIFICATIONS SUMMARY<br />
The Model 306 printer contains all the features described in the previous<br />
sub-sections of this manual. Some of these features, in addition to a<br />
few characteristics not previously mentioned, are summarized in the<br />
following specifications.<br />
Printing Method<br />
Printing Rate - Characters<br />
- Full Lines<br />
~ Short Lines<br />
Transmission Rate - Serial<br />
- Parallel<br />
Data Input<br />
Character Structure<br />
Code<br />
Indicator-Switch Controls<br />
Indicators<br />
Manual Controls<br />
Character Buffer<br />
Format<br />
Paper Feed<br />
Paper<br />
Number of Copies<br />
Dimensions<br />
Weight<br />
Electrical Requirements<br />
Temperature - Operating<br />
-Storage<br />
Humidity - Operating<br />
-Storage<br />
Impact, character-by-character, one line at a time<br />
120 characters per second<br />
60 lines per minute (80 character line)<br />
150 lines per minute (20-30 characters)<br />
100 to 9600 baud (with Serial option)<br />
See Timing Diagram, Appendix B<br />
Parallel (Serial option available)<br />
5 x 7 dot matrix, 10-point type equivalent<br />
9 x 7 dot matrix, 10-point type equivalent (option)<br />
USASCII- 64 characters printed<br />
ON/OFF, SELECT, FORMS OVERRIDE.<br />
Option. LINE FEED. TOP OF FORM<br />
PAPER OUT, SELECT<br />
Form ThiCkness, Paper Advance Knob<br />
80 characters (1 line)<br />
80 characters maximum per line, 6 lines per inch<br />
Sprocket feed, adjustable to 9 1 /2" width<br />
Standard sprocketed paper<br />
Original and up to four carbon copies<br />
12 3 //' high, 18 3 //' deep, 23 1 /4" wide<br />
66 pounds<br />
115 VAC ±10%,60 Hz.<br />
115/230 VAC +10%,50 Hz (option)<br />
40° to 100°F<br />
-40° to 160°F<br />
5% to 90% (no condensation)<br />
0% to 95%<br />
B. RIBBON SPECIFICATIONS<br />
The printer uses a I-inch nylon ribbon mounted on 3-inch diameter<br />
spools. The following four colors are available:<br />
Bl ack - Part No. 63002293-·5001<br />
Red - Part No. 63002293-5002<br />
Green - Part No. 63002293-5003<br />
Blue - Part No. 63002293-5004<br />
Rev. E<br />
1-6
C. PAPER SPECIFICATIONS<br />
The printer uses continuous form paper with standard feed holes on<br />
each edge. Paper widths from 4 to 9~ inches can be accommodated by the<br />
printer. Using multiple-part form, one original and up to 4 copies can be<br />
printed, all very legible. Paper weight specifications are as follows:<br />
Single-Part Forms:<br />
Multiple-Part Forms:<br />
Carbon Paper:<br />
15 to 20 lb<br />
Original - 12 to 15 lb<br />
Copies - 9 to 12 lb, last copy 15 lb<br />
(Maximum of five parts)<br />
7~ lb with medium hardness<br />
1.4.2 STANDARD AND OPTIONAL FEATURES<br />
standard features<br />
• Parallel data input<br />
• Elongated boldface characters (Iine-by-line)<br />
• Paper runaway inhibit (10 second time out)<br />
• Lower case prints as upper case<br />
• Automatic line feed on carriage return<br />
" Gated strobe pulse (data input)<br />
• 115 Volts, 60 Hertz<br />
• Prints original plus four copies<br />
• Coded character software<br />
• Fixed vertical/horizontal registration<br />
• Low noise level<br />
• 5 x 7 Dot matrix<br />
optional features<br />
• Vertical format control<br />
• Automatic motor control<br />
• Additional sets of 64,96 or 128 characters<br />
• 9 x 7 dot matrix character sets<br />
Q<br />
g<br />
Audio alarm buzzer<br />
50 Hertz, 230 Volts AC<br />
• Line feed switch<br />
• Non-gated strobe<br />
• Automatic line feed disabled<br />
• Selectable sinQle Character elongation<br />
• Automatic carriage return on line feed,<br />
vertical tab and form feed<br />
• Serial communication interfaces<br />
• Popular parallel computer interfaces<br />
• Bottom of form<br />
• Inhibit delete code<br />
1.5 PHYSICAL DESCRIPTION<br />
The printer is approximately 12" high by 19" deep by 23" wide, and<br />
weighs approximately 66 pounds .. The complete printer is assembled on a base<br />
made of cast aluminum. Enclosing the printer are three removable plastic<br />
covers: the main cover, top cover and VFU cover. The top cover can be opened<br />
to give access to the print head by tilting the cover back of lifting it<br />
completely off. The VFU cover can also be tilted back or removed for access<br />
to the optional Vertical Format Unit, if it is used.<br />
Figures 1-6 to 1-9 are different photographic views of the printer<br />
taken with the covers removed. All major assemblies are identified, in<br />
addition to a few other important components, the locations of which should be<br />
noted.<br />
1-7 Rev. D
1. Print Head Assembly<br />
2. Video Ampl. and Cable Ass'y<br />
3. Carriage<br />
4. Ribbon Cable<br />
5. Damper Piston<br />
6. Operator Panel<br />
7. Damper Cylinder<br />
8. left Ribbon Feed<br />
9. Vertical Format Unit Option<br />
10. Pin Feed Mechan1sms<br />
11. Paper Feed Shaft<br />
12. Platen<br />
13 . Platen Knob<br />
14 . R1ght R1bbon Feed<br />
Figure 1-6. LEFT FRONT VIEW OF 306<br />
1. Ha1n Dr1ve Motor<br />
2. Dr1ve Mechan1sm<br />
3. Forward Clutch<br />
' 4. Reed Swftch (EOP)<br />
5. Mafn Drfve Belt<br />
6. T1m1ng Fence<br />
7. Carr1age Return Spr1ng<br />
8. Power Dr1ver Board<br />
9. Optfcal Pfck-Up<br />
10. l1ght Source<br />
11. Optfc Bundle<br />
12. Penetrat10n Control Knob<br />
13. Form Feed Mechanfsm<br />
14. Solenofd Ffnger Board<br />
Figure 1-7. RIGHT FRONT VIEW OF 306<br />
Rev. 0<br />
1-8
1. Logic/Power Supply Board 7. AC Power Input<br />
2. Logic/P.S. Fuses<br />
8. Input Cable (W2)<br />
3. AC and 35V Input Connector (JI) 9. Motor Control Option<br />
4. DC Output Connector (J2) 10. Line Feed Solenoid<br />
5. Input Connector 11. Line Count Switch<br />
6. In-Line Fuse<br />
Figure 1-8. REAR VIEW OF 306<br />
1. 35V Power Supply 5. Paper Out Switch<br />
2. Power Transformer 6. Main Printer Harness<br />
3. DC Output Connector (J2) 7. Motor Starting Capacitor<br />
4. AC and 35V Input Connector (J1)<br />
Figure 1-9. REAR VIEW OF 306 (LOGIC/P.S. BOARD REMOVED)<br />
Rev.D 1-9/1-10
SECTIONS 2 AND 3<br />
INSTALLATION AND OPERATION<br />
A separate Series 300 Operators Manual contains most of the installation,<br />
set-up and operating procedures for the Model 306 printer.<br />
This Operators Manual should be referred to during normal printer installation<br />
and operation.<br />
Included on the following pages is additional information not<br />
contained in the Operators Manual.<br />
2.1 SITE PREPARATION (Figure 2-1)<br />
A line drawing of the printer dimensions is shown in Figure 2-1.<br />
I<br />
12.82"<br />
It-------r.<br />
I·<br />
11--------~""'"'-===--2J.17" HA,-===--~/I<br />
WEIGHT: 615 POUNDS<br />
Figure 2-1. <strong>PRINTER</strong> DIMENSIONS<br />
Enviromental and electrical requirements at the installation<br />
site are as follows:<br />
Temperature:<br />
Humidity (% RH):<br />
Electrical:<br />
40~ to 100 0 F (Operating)<br />
-40 to 160 0 F (Storage)<br />
5% to 90% (no condensation) - Operating<br />
0% to 95% - Storage<br />
115 VAC ±10% 60 Hz, 3 amps<br />
115/230 VAC t10%, 50 Hz, 3 amps<br />
2-1
2.2 SHIPPING CRATE<br />
The printer is shipped in a crate approximately 22 inches high,<br />
27 inches deep and 28 inches wide. The crate is made of weatherized,<br />
triple-walled cardboard. When properly strapped, the packing crate and<br />
printer is capable of fork lift operation with a seven-high stacking<br />
capability.<br />
Shipped with the printer are the following items:<br />
(1) If a special interfaceis used, the interface card is included<br />
with the printer. For certain interfaces such as the<br />
RS232, a special cab1e is also shipped. Cabling requirements<br />
for the standard parallel interface are defined in Appendix C.<br />
(2) If optional vertical format unit is installed a standard<br />
vertical format paper tape providing six line feeds (one<br />
inch) for each vertical tab and 66 lines (11 inches) for<br />
each form feed code is provided. Refer to the Operators<br />
Manual for duplicating the existing tape, or if a different<br />
format is desired, for generating a new tape.<br />
(3) Documentation - All documentation describing that particular<br />
printer is included in a plastic bag under the printer. This<br />
documentation includes a technical manual for the printer and<br />
any optional interface, and a notice of all approved changes<br />
incorporated in the printer but not documented in the manual.<br />
Please keep this documentation with the printer at all times<br />
so that accurate information will be available for troubleshooting<br />
purposes.<br />
(4) Pin Feed Knobs - These knobs are contained in a small plastic<br />
bag stapled to the g~ide bar for the pin feed unit.<br />
(5) Print Sample - A sample printout from that particular printer<br />
is included in the upper paper pane.<br />
(6) Unpacking/Repacking and Set-Up Instruction Sheet.<br />
2-2
SECTION 4<br />
THEORY OF OPERATION<br />
4.1 INTRODUCTION<br />
This section on the theory of operation contains a detailed<br />
description of each major function performed by the Model 306 printer<br />
electronics. Figure 4-1 shows a basic functional diagram of the printer<br />
electronics.<br />
Throughout this section, reference is made to the schematic<br />
diagrams contained in Section 7. The section is organized as follows:<br />
Paragraph 4.2<br />
4.3<br />
Basic Timing<br />
Initializing the Printer (Prime, Select)<br />
4.4 Data Input (Data, Strobe~ Busy, Acknowledge)<br />
4.5<br />
4.6<br />
Shift Register (Buffer)<br />
Character Printing<br />
4.7<br />
4.8<br />
Paper Movement (Line Feed, Vertical Tab, Form Feed)<br />
Special Functions (Bell, Paper Empty, Delete,<br />
Motor Control)<br />
4.9 Power Supplies<br />
4.10 Outputs from LSI chips<br />
4.2 BASIC TIMING<br />
The basic timing clock for the printer electronics is derived<br />
from signal OSC. This OSC signal is generated on LSI chip ME16 pin 25.<br />
The frequency of OSC, determined by the RC circuit (R41-C9) on pin 26 of<br />
this chip, ranges from 100 to 200 KHz.<br />
4-1
.,J:::o<br />
I<br />
N<br />
INTERFACE<br />
CONNECTOR<br />
1.--------------------------.<br />
I LOGIC/POWER SUPPLY BOARD<br />
I<br />
I PARALLEL DATA INPUT I PRINT WIRE I<br />
i (DSI-DS8) I<br />
~ SHIFT TBI-TB8 CHARACTER CONTROL CGI-7 I.t-.....,<br />
REGISTER<br />
GENERATORS<br />
I<br />
:><br />
I 8 x 81 (ROM's) I V<br />
I<br />
I<br />
I<br />
I<br />
I<br />
I<br />
I<br />
CLKTB2, v<br />
0<br />
I<br />
I<br />
I<br />
SRCL, ,<br />
I<br />
I<br />
......<br />
PRIME 0<br />
:3<br />
I<br />
I<br />
I<br />
U<br />
e<br />
I<br />
I<br />
DRIVER<br />
I ......<br />
co I CIRCUITS<br />
~<br />
I<br />
~<br />
I<br />
I-<br />
:z ,<br />
~ I<br />
I<br />
..... ......<br />
I -'<br />
u :::E :3<br />
..... u I<br />
I<br />
I<br />
l- e<br />
PAPER<br />
--<br />
PMSOLD I<br />
I I MOVEMENT I<br />
I INPUT PRIME, L.!....J..... I<br />
I DATA STROBE I<br />
V LSI CONTROL LSI FWD CLUTCH CIP I<br />
CHIP #1 CHIP #2<br />
: ACKNOWLEDGE, BUSY I (DATA DECODE) (PRINT CONTROL) I<br />
I<br />
I<br />
I<br />
I<br />
I<br />
I<br />
i STROBE J STROBE I<br />
I<br />
I<br />
DL YSTB lONE-SHOTS I VIDEO AMP<br />
I<br />
I<br />
___________ -..1<br />
I<br />
IBUZZER<br />
(OPTIONAL)<br />
L ___<br />
-- -- ---------<br />
rFU TAPE IVTH, FFH<br />
READER<br />
(OPTI ONAL)I<br />
e<br />
:z<br />
c:( Vl<br />
cr:<br />
Vl 0<br />
W I-<br />
:I:c:(<br />
U U<br />
I- .....<br />
..... Cl<br />
32:<br />
Vl .....<br />
OPERATOR I<br />
PANEL<br />
RTPSW, EOPSW J LIMIT<br />
I SWITCHES<br />
I<br />
h><br />
~<br />
TO PRINT HEAD<br />
SOLENOIDS<br />
TO LINE FEED<br />
SOLENOID<br />
~ TO FWD CLUTCH<br />
Figure 4-1. <strong>MODEL</strong> 306 BLOCK DIAGRAM
This OSC clock is then used by both LSI chips (ME16 and ME25) for<br />
internal timing, and is inverted by ME20-6 to generate OSCXT. Signal<br />
OSCXT goes to the printer interface connector and if an optional interface<br />
is used, it also goes to this optional interface board (e.g., RS232 Serial<br />
Interface) .<br />
4.3 INITIALIZING THE <strong>PRINTER</strong><br />
Before the printer can accept input data, it must first be PRIME1d<br />
and SELECT1ed. The prime operation initializes the printer logic to a<br />
ready state. The select operation after causing a prime condition, (which<br />
can be disabled by jumper E14-E15), resets the busy line to the interface<br />
connector and makes the printer ready to receive data.<br />
4.3.1 PRIME<br />
The PRIME signal, generated on LSI chip ME16-37, is generated by<br />
any of the following conditions:<br />
d. Power Turn-on - When the printer is turned on, capacitor<br />
C10 is initially discharged causing a low 100-500 msec<br />
PWRPRM signal into ME16-32. This generates a high PRIME<br />
signal at ME16-37. As C10 charges to +5V, PWRPRM goes<br />
high terminating the power prime operation.<br />
b. Printer Selecti~n - If the Delete Inhibit option (DELINH)<br />
is not used (i.e., jumper E13 to E14 is connected), then a low<br />
SLCT input to ME16-40 and a high Q.ELINH to ME16-39 generates<br />
a 100-400 usec PRIME pulse at ME16-37.<br />
c. End of a Printed Line - At the end of a line of print,<br />
CIPX at ME16-30 goes high, turning off the forward clutch<br />
and generating a 100-400 usec PRIME pulse at LSI chip<br />
ME16-37.<br />
4-3
d. Delete Code - Receiving a delete code (octal 177)* on<br />
input data lines DS1-DS7 generates a low DCPRM output<br />
at LSI chip ME25-8. Signal DCPRM then generates a 100-<br />
400 usec PRIME pulse out of LSI chip ME16-37.<br />
e. Input Prime - Reception of a low INPUT PRIME level at the<br />
interface connector generates a high IP signal into LSI<br />
chip ME25-36. This produces a low DCPRM output at LSI<br />
chip ME25-8 (same as the delete code), which in turn generates<br />
a 100-400 usec PRIME pulse out of LSI chip ME16-37.<br />
In all of the above cases, the high PRIME signal out of LSI chip<br />
MEi6-37 resets the printer logic including the shift register and places<br />
a dummy character in the first character position in the register. A<br />
timing diagram of the prime timing is shown in Figure 4-2.<br />
PRIME_~<br />
100-400 Il S<br />
SRCL -<br />
____ ---'<br />
LOAD DUMMY '1n :<br />
CHARACTER<br />
CLKTB2 _______________________________ ~<br />
I<br />
~I __ __<br />
1 -I<br />
1-20 IlS----I --<br />
Figure 4-2.<br />
PRIME TIMING<br />
*Throughout this section, input codes are defined only by their first<br />
seven bits. However, bit 8 into the function decoder contained in LSI<br />
chip 25, must be a ONE.<br />
4-4
The high PRIME signal into pin 3 of the two shift register elements<br />
(ME18 and ME19) disables all inputs to these elements and internally resets<br />
all stages of the shift register. When PRIME goes low, recirculate<br />
signal SRCL from LSI chip ME16-38 remains high and a single CLKTB2 pulse<br />
is generated at ME16-36. The high SRCL (and low PRIME) connects shift<br />
--<br />
register outputs TB1-TB7 back to inputs OSl-DS7. and enables a high (+5V)<br />
input to stage 8. Note that since the shift register uses inverted signals<br />
for both inputs and outputs (e.g., DS1 and TBl), a high input to<br />
stage 8 represents a ZERO into that stage.<br />
The single CLKTB2 pulse then clocks a dummy character into the<br />
register (i.e., ONES into stages 1-7 and a ZERO into stage 8).<br />
4.3.2 SELECT<br />
Before the printer can receive data, it must first be selected.<br />
This can be done either by the SELECT switch on the operator panel or by<br />
an octal 021 code on the input data lines.<br />
Pressing the SELECT switch (S2) generates a low SELSW signal into<br />
LSI chip ME25-31. The chip contains "anti-bounce" protection which<br />
requires the SELSW line to be noise-free for approximately 2-8 msec<br />
before the level is recognized by the chip. After this delay, the low<br />
SELSW input sets a Select latch in the chip. The output of this latch<br />
appears as signal SLCT ' on LSI chip ME25-40.<br />
Similarly, a decoded octal 021 code on data inputs DS1-DS7 ANOed<br />
with ungated data strobe pulse OSTA also sets this Select latch.<br />
The printer is deselected (i.e., the internal Select latch is<br />
reset) either by again pressing the SELECT switch or by an octal 023<br />
on data lines OSl-DS7 and a DSTA pulse. Alternately pressing the SELECT<br />
switch alternately selects and deselects the printer. Note that when<br />
power is turned on, PWRPRM resets the internal Select latch so that the<br />
printer initially appears in a deselect state.<br />
A high SLCT ' signal at ME2S-40 indicates that the printer is<br />
selected. This signal, inverted by ME22-6 (SLCT) turns on the SELECT<br />
lamp on the operator panel. SLCT inverted by ME20-4 generates a SLCT<br />
signal to the interface connector.<br />
4-S
If DELINH jumper E13 to E14 is connected, then selecting the printer<br />
will also cause a prime condition. If jumper E14 to E15 is used, select<br />
will not cause a prime condition.<br />
4.4 DATA INPUT<br />
Inputs to the printer consist of seven standard parallel data lines<br />
(DATAl-DATA7), an optional DATA8 line, an active low DATA STROBE input, and<br />
an active low INPUT PRIME line. The first seven data lines represent the<br />
7 bit USASCII code shown in Series 300 Operators Manual. The optional<br />
eighth bit is used as a control bit either for specifying an elongated<br />
character or for selecting an additional character set. The data strobe<br />
is used to synchronize the input data with the printer electronics. The<br />
prime line is used to prime (initialize) the printer electronics.<br />
The eight data inputs have a unity loading factor and are terminated<br />
by a lK pull-up resistor to +5 volts. The data strobe and prime<br />
inputs are terminated by a 470 ohm resistor to +5 volts. Note that with<br />
no input on DATA8 line, terminating resistor R15 holds the input at +5V,<br />
making bit 8 appear as a ONE on the logic card.<br />
In response to received data, the printer generates an Acknowledge<br />
pulse to acknowledge reception of a character. If the received character<br />
caused the printer to perform some function such as paper movement,<br />
character printing, etc., the printer responds with a Busy signal.<br />
4.4.1 DATA INPUT TIMING<br />
In general, the data transfer sequence consists of the input<br />
device placing the appropriate code on the data lines to the printer and<br />
then generating a data strobe pulse. The printer, after a slight delay,<br />
responds with an acknowledge pulse. Or if the received data caused a<br />
busy condition, the printer firs~ activates the busy line for the duration<br />
of the busy condition and then responds with an acknowledge pulse.<br />
Rev. E 4-6
4.4.1.1 Normal Data Input - No Busy<br />
The diagram in Figure 4-3 shows the timing involved in transferring<br />
data, which does not cause a busy condition.<br />
PARALLELDATA--..-..~I~~~..-..~~~1=..-....-....-....-....-....-....-....-....-..-.ooo-.ooo..-..---..-....-....-....-....-....-..--<br />
--1<br />
1. 0 jlS I-- ----..I 1. 0 liS<br />
(m._in..<br />
) ... --, (min)<br />
.,...,.,,,....,...,=----,, _..-.. _____<br />
OAT A STROBE I ,.1 _____ .:......-..-.000..-....-.. ___ ..-.._..-.. ____ ..-.._..-.. __<br />
-..-I I-- 1.0 jlS (min)<br />
. I I 500/1 S (max)<br />
ACKNOWLEOGE-"-""-""-""-"~"-"~-"-"~~~"-""-""-""-""-""-""-""-""-"~I<br />
ACKNOWLEDGE DELAY<br />
•<br />
.. ~<br />
__ -----2.5/1 S (min) --------4-1-'<br />
10 /1S (max) ~ 2.5/1 S (min) I<br />
5.0/1 S (max) I""<br />
Figure 4-3.<br />
INPUT DATA TIMING - NO BUSY CONDITION<br />
As shown in the diagram, each data line must be stable at least<br />
1. 0 usec before and after DATA STROBE, and the DATA STROBE" pul se must be<br />
at least 1.0 usec wide. In response to the received data, some 2.5 to 10<br />
usec after the trailing edge of DATA STROBE, the printer generates a 2.5<br />
to 5.0 usec ACKNOWLEDGE pulse indicating that it is ready to receive<br />
additional data. As a standard feature, the 306 will not recognize a<br />
data strobe during the acknowledge delay interval. As an option, however,<br />
a non-gated data strobe is avqilable.<br />
4.4.1.2 Data Input Causing Busy<br />
The diagram in Figure 4-4 shows the interface timing involved<br />
receiving any character which causes a busy condition in the printer.<br />
(Note that a Bell code does not cause a busy condition).<br />
4-7 Rev. E
DATA<br />
DATA-~~--~--~~~~-----------------------------------------<br />
DATA STROBE _.z....:.;,;,,;,,:,;,;.:, ...<br />
1.0,..5 (min)<br />
,500 /-L S (max)<br />
* BUSY------~~~~rt/4<br />
ACKNOWLEDGE---------~~---~-----------------------_;<br />
*Note: Duration of BUSY condition (See Table 4-1)<br />
o /-LS (min)<br />
10 /-LS (max)<br />
2.5 /-LS (min)<br />
5.0 /-LS (max)<br />
Figure 4-4.<br />
INPUT DATA TIMING - CAUSING BUSY CONDITION<br />
As shown in the diagram, the printer responds to any of the<br />
characters in Table 4-1 by generating a BUSY signal from 0 to 1.5 usec after<br />
the trailing edge of DATA STROBE. As shown in Table 4-1, the duration<br />
of busy depends on the specific function being performed.<br />
From 0 to 10 usec after BUSY is terminated, the printer generates<br />
a 2.5 to 5.0 usec ACKNOWLEDGE pulse, to indicate that the specified<br />
function is completed.<br />
Table 4-1<br />
Any printable character<br />
(except 80th character<br />
on a line).<br />
Line Feed<br />
Vertical Tab (I inch)<br />
Form Feed (11 inches)<br />
Delete<br />
Bell<br />
Select<br />
Deselect<br />
Print (CR or last<br />
character)<br />
No Busy<br />
75-105 msec<br />
300-310 msec (with optional VFU)<br />
3-3.5 sec (with optional VFU)<br />
100-400 usec<br />
No Busy<br />
100-400 usec<br />
Until printer is selected<br />
8.4 msec per character plus<br />
75-105 msec line feed. Printer<br />
is not busy during return time<br />
(270 msec max.).<br />
4-8<br />
Rev. E
4.4.2 BUSY<br />
A busy indication is developed by LSI chip ME25 pin 11. This<br />
BUSY output, normally high when the printer is not busy, goes low when<br />
any of the following conditions occurs:<br />
(1) CSBSY goes low - This occurs when a dummy character (TB8)<br />
is detected at the shift register output and a prime operation<br />
is not in progress. This indicates that the 80th character<br />
has just been loaded into the shift register (without a<br />
carriage return code).<br />
(2) PRIME goes high - This occurs during a prime operation as<br />
described in Section 4.3.1.<br />
(3) LFF (internal to ME25) goes high - This occurs either when a<br />
form feed code (octal 014) is received, orif the optional TOP<br />
OF FORM switch on the operator panel is pressed. (Note: If<br />
the DSC option is used, the received FF code will first cause<br />
the line to be printed before activating LFF). LFF is normally<br />
reset by the trailing edge of DLYLF.<br />
(4) LLF (internal to ME25) goes high - This occurs when a line feed<br />
code (octal 012) is received or the optional LINE FEED switch<br />
on the operator panel is pressed. LLF is reset by the trailing<br />
edge of DLYLF.<br />
(5) LTF (internal to ME25) goes high - (Similar to the LFF signal) -<br />
LTF goes high when a vertical tab code (octal 013) is received<br />
and is reset by the trailing edge of DLYLF.<br />
(6) DCPRM goes low - This occurs: (a) when a delete code (octal<br />
177) is received, or (b) when an INPUT PRIME signal is received<br />
at the interface connector, or (c) a power prime (PWRPRM) condition<br />
exists.<br />
(7) REMCR (internal to ME25) goes high - This occurs when a control<br />
character is clocked into the shift register, indicating the<br />
start of a character printing operation. In the standard 306<br />
printer, only the carriage return control code (octal 015) is<br />
stored in the shift register.<br />
4-9
However, if the DSC option is used (jumper E10 to Ell), then<br />
a LF, VT, FF, or CR code (octal 012, 013, 014, and 015 respectively)<br />
may be loaded into the shift register.<br />
(8) PMSOL goes low - This occurs while the paper movement solenoid<br />
is activated.<br />
(9) FAULT goes high - This occurs: (a) if the printer is deselected<br />
(SLCT ' is low), or (b) if the printer is out of paper<br />
(PE is low), or (c) during a paper time-out condition, or (d)<br />
during a Light Detect (LD) error condition. LD goes low if<br />
no video signal is detected as the print head travels across<br />
the page.<br />
(10) DLYLF goes high - This 60-90 millisecond line feed delay occurs<br />
following a paper movement operation.<br />
As shown in the timing diagram in Figure 4-4, BUSY can occur up<br />
to 1.5 usec following the trailing edge of DATA STROBE. The worst case<br />
(1.5 usec) condition arises when CSBSY goes active. This occurs because<br />
of the accumulated delays in loading the 80th character in the shift<br />
register, detecting the dummy character at the output, generating. the<br />
CSBSY on LSI chips ME16 and finally generating the BUSV on LSI chip ME25.<br />
4.4.3 FUNCTION DECODER<br />
The buffered data inputs are applied to a function decoder on<br />
LSI chip ME25. These data lines gated with a data strobe signal are decoded<br />
and if a control code is detected, the following actions occur:<br />
Octal<br />
Output<br />
Function Code Jumpers Strobe Mnemonic Printer Action<br />
Bell 007 None Gated BELL Generates an audible tone,<br />
(optional)<br />
1 to 2 seconds in duration,<br />
in the speaker at the front<br />
of th~ printer.<br />
4-10
Octal<br />
Output<br />
Function Code Jumpers Strobe Mnemonic Printer Action<br />
Line Feed* 012 None Gated CSLF 2 Advances the paper one line.<br />
PMSOL<br />
Vertical 013 None Gated PMsoL Causes paper to advance. If<br />
Tab*<br />
the optional Vertical Format<br />
Unit is used, paper advances<br />
until the next hole in channel<br />
5 of the paper tape is reached.<br />
Fonn Feed* 014 None Gated PMsoL Causes paper to advance. If<br />
the optional Vertical Format<br />
Unit is used, paper advances<br />
until the next hole in channel<br />
7 of the paper tape is reached.<br />
Carriage 015 None Gated DS"CR Causes the received line of<br />
Return<br />
characters to be printed.<br />
Elongated 016 E16-E18 Gated UPSC Causes all characters on the<br />
Character E20-E23 line to-se printed at double<br />
the normal width.<br />
Select 021 None Ungated SLCT ' Selects the printer. E14 to<br />
E15 inhibits a prime operation<br />
during select.<br />
Deselect 023 None Ungated SLCT ' Deselects the printer.<br />
Delete 177 None Ungated DCPRM Primes the printer.<br />
*If the DSC option is used (jumper E10 to Ell), LF, VT, and FF also cause<br />
the received line of characters to be printed.<br />
In addition to the functions listed above, the function decoder<br />
also monitors the input data for the first printable character (i.e., a<br />
ONE in bit 6 or 7). Detection of the first printable character, sets<br />
First Character Clock latch (FCCLK) internal to LSI chip ME25. Only when<br />
this latch is set will the printer respond to a carriage return code (or<br />
if the DSC option is used, to a LF, VT, or FF code) by printing the line<br />
of characters.<br />
4-11
4.5 SHIFT REGISTER (BUFFER)<br />
The printer storage buffer consists of two quad 81-bit shift register<br />
MOS elements (ME18 and ME19). These elements provide an 8 x 81-bit storage<br />
capacity or one full line of 80 characters. The extra character storage<br />
(i.e., 81 instead of 80) is used for storing a dummy character (a ONE in<br />
bit 8). Detection of this dummy character at the shift register output<br />
indicates that the 80th character for that line has just been shifted into<br />
memory.<br />
A high PRIME input to ME18 and ME19, disables all other inputs and<br />
asynchronously resets the entire register. When PRIME is low, the shift<br />
register operates in either the normal or the recirculate mode. With the<br />
Recirculate input (SRCL) low, each CLKTB1 or CLKTB2 pulse clocks the DS1-<br />
DS8 inputs into the shift register. With SRCL high, the register is in<br />
the recirculate mode. The first three stages in each shift register element<br />
are recirculated internally. The fourth stage in ME19 is recirculated by<br />
the external connection of TB4 to the Recirculate Input (R.I.). The R.I.<br />
terminal for the fourth stage in ME18, however, is tied to +5V. As a result,<br />
when the SRCL input is high, CLKTB recirculates the TB1-TB7 outputs<br />
back to the inputs and forces a ONE into the eighth stage (TB8).<br />
The actual shift register timing depends on which of the following<br />
printer operations is taking place: 1) a prime condition; 2) data reception<br />
3) reception of a carriage return code (octal 015) prior to the<br />
80th character in a line; or 4) ~rinting a line of characters.<br />
(I) Priming the Shift Register<br />
During a prime condition, LSI element ME16 generates a high<br />
PRIME signal. While PRIME is high, all shift register stages<br />
are automatically reset, independent of the data inputs.<br />
After PRIME goes low, SRCL remains high and a single CLKTB1<br />
pulse is generated. At this time, a ONE is clocked into bit 8<br />
(due to +5V at the recirculate input ME18 pin 15), generating<br />
a dummy character at that location.<br />
4-12
(2) Normal Data Input<br />
During normal data input from the external device, LSI element<br />
ME25 generates a CLKTB1 pulse, slightly delayed from data<br />
strobe, each time a printable character or a CR code has been<br />
received. The trailing edge of CLKTB1 then clocks data lines<br />
DS1-DS8 into the shift register.<br />
(3) Following a Carriage Return Code<br />
Following the reception of a carriage return code, LSI chip<br />
ME16 generates CLKTB2 pulses to the shift register, at the<br />
same rate as the OSC clock. This shifts the register until<br />
the dummy character appears at the output (TB8 goes high).<br />
The high TB8 then terminates the CLKTB2 pulses.<br />
(4) During Character Printing<br />
When printing a line of characters, during each DCWO interval<br />
(developed internally in LSI chip ME16), the video STROBE<br />
pulse generates a CLKTB2 pulse. This clocks the next consecutive<br />
character to the output of the shift register, where<br />
it remains until the next DCWO-STROBE interval.<br />
4-13
4.6 CHARACTER PRINTING<br />
When the dummy character appears at the shift register output<br />
(TB8), other than during a prime condition, the logic activates an<br />
electromechanical clutch which causes the print head to move from left<br />
to right across the page.<br />
As the print head carriage moves across the page, the timing fence<br />
(and light source) generate timing inputs to the video amplifier board.<br />
These timing signals are used by the logic to register the five full columns<br />
of dots in the printed character.<br />
Depending on whether a 5 x 7 or 9 x 7 character matrix is used<br />
for character generation, the logic uses either one or two ROM (Read-Only<br />
Memory) elements for each character set. One ROM defines the dot pattern<br />
for the five full-step columns, the other defines the dot pattern for the<br />
four half-step columns in a 9 x ? matrix.<br />
This section describes the character printing operation in the<br />
following sequence.<br />
Paragraph 4.6.1 Initiating the Printing Operation<br />
4.6.2 Character Registration and Timing<br />
4.6.3 Character Generator (ROM)<br />
4.6.4 Print Head Operation<br />
4.6.5 Power Driver Circuits<br />
4.6.1 INITIATING THE PRINTING OPERATION<br />
As data is received by the printer, the dummy character is shifted<br />
through the shift register. As the 80th character is received, the dummy<br />
character appears at the shift register output. If a carriage return code<br />
(octal 015) is received before the 80th character, this code is stored in<br />
the register and LSI chip ME16 generates CLKTB2 pulses to shift the register<br />
until the dummy character appears at the output. A high TB8 indicates<br />
dummy character.<br />
4-14
When TBB goes high, LSI chip ME16 generates a low CIPX signal.<br />
CIPX is inverted by ME21-10 to generate CIP, which is in turn inverted<br />
by ME21-B to generate CIPM. If the motor control option is not being<br />
used, CIPM is jumpered from ME26 pin 2 to ME26 pin 11, and becomes signal<br />
CIP (See Figure 4-5).<br />
r--------.<br />
I MOTOR I<br />
I CONTROL I<br />
I OPTION 1------,<br />
I REMOVE JUMPER I<br />
I ME26-2 to 11 I<br />
L<br />
J<br />
16 F!!~ .f~lLT.f~tl}6 W96<br />
LSI CIPX<br />
ME16 30 11<br />
POWER<br />
DRIVER<br />
BOARD<br />
RET.<br />
17 ------- 17<br />
PI0<br />
JI0<br />
W95<br />
FWD<br />
CLUTCH<br />
Figure 4-5.<br />
FORWARD CLUTCH INTERCONNECTION DIAGRAM<br />
A description of the optional motor control unit is contain in Section 4.B.4.<br />
The low CIP signal controls a driver circuit on the power driver<br />
board, the output of which activates the forward clutch.<br />
A limit switch is located at the right and left end of the printer.<br />
These switches (RTP switch on the left, EOP switch switch on the right) are<br />
activated by a magnet mounted on the underside of the carriage mechanism.<br />
Actuation of the RTP switch indicates the carriage is at its leftmost<br />
position. Actuation of the EOP switch indicates the carriage is at its<br />
right most position. The output of these two switches are applied to LSI<br />
chip ME16 where they are used to control the forward clutch logic (CTPX)<br />
and to detect failures in the video signal from the timing fence (LD).<br />
When the EOP switch is activated or when a control character is detected<br />
at the shift register output, CIPX goes high, turning off the forward<br />
clutch and returning the print head to the left margin.<br />
4-15
VIDEO<br />
VIDEO AMP<br />
STROBE<br />
ME2B-4<br />
DCWO<br />
(INTERNAL TO LSI<br />
CHIP ME16)<br />
---l 1--500 ±25 p S<br />
--I 1--600 pS<br />
--I 1--500 ±25 pS<br />
DLYSTB __ -'<br />
DCW3 --~-----.<br />
L--_..J<br />
CGl<br />
CG2<br />
CG3<br />
CG4<br />
PRINT TIMING FOR<br />
9 x 7 CHARACTER (A)<br />
CG5<br />
CG6<br />
CG7<br />
Figure 4-6.<br />
CHARACTER TIMING<br />
4-16
4.6.2 CHARACTER REGISTRATION AND TIMING<br />
As the carriage moves, the optical pick-up head and light source<br />
on the video amplifier assembly generates the video signal for controlling<br />
the print timing. As the print head and optical head assembly moves across<br />
the timing fence, the vertical slots on the timing fence interrupt light<br />
to the optical pick-up head, generating a video signal. The VIDEO AMP<br />
output then triggers the STROBE one-shot ME23 on the logic card, initiating<br />
the print timing shown in Figure 4-6.<br />
The STROBE one shot is adjusted for 475-525 usec. If a 9 x 7<br />
matrix is used, the leading edge of STROBE also triggers a delay one-shot<br />
(ME28-4) adjusted for a 600 usec output pulse. The trailing edge of this<br />
pulse triggers the Delayed Strobe (DLYSTB) one-shot which is adjusted<br />
to the same pulse width as STROBE. In normal character printing,STROBE<br />
is used for full-step timing and DLYSTB for the half-step timing.<br />
4.6.2.1 Video Amplifier<br />
The circuit used to amplify the video signal generated by the<br />
timing fence is located on the video amplifier assembly board, contained<br />
on the print head carriage.<br />
The video amplifier consists of a high gain amplifier with positive<br />
feedback. When the photo cell is dark, no current flows through it and the<br />
base of Q2 is held at +5 volts through resistor Rl. When Ql is turred off,<br />
Q2 is turned on through resistors R2 and R7. Q2 being on also turns on Q3<br />
through resistor R4.<br />
Because Q3 is on, the collector is held at approximately ground,<br />
thereby allowing the current to flow through R7 and holding Q2 on through<br />
the positive feedback. When the photo transistor detects light, current<br />
is allowed to flow through it, thereby drawing current through transistor<br />
Ql and resistor R2. Ql then turns on and turns transistor Q2 off by<br />
shunting the current away from the base of Q2. When Q2 turns off, Q3 also<br />
turns off and the collector of Q3 is held to +5 volts through R6. R7 serves<br />
to drive Q2 further into the cut-off region. Capacitors Cl and C2 are used<br />
for proper frequency response and noise suppression. Resistor R3 is used<br />
to prevent leakage by keeping Q2 from turning off.<br />
4-17
4.6.2.2 Timing Signals<br />
For normal character printing, five consecutive STROBE inputs<br />
to LSI chip ME16, generate timing outputs ~-~ as shown in Figure<br />
4-6. These timing intervals correspond to the five full-step columns<br />
in the character matrix. The quiescent state of this strobe counter is<br />
DCWO (internal to the chip) which corresponds to the space interval between<br />
characters. During DCWO, the STROBE input generates a CLKTB2<br />
pulse which clocks the next character to the output of the shift register.<br />
The DCW1-DCW5 timing outputs are used to address the appropriate column<br />
in the Ifu11-step" ROM (character generator).<br />
If a 9 x 7 character matrix is used, during each video interval<br />
both a STROBE pulse and a DLYSTB pulse of the same width is generated as<br />
shown in Figure 4-6. During normal character printing, four consecutive<br />
DLYSTB inputs to LSI chip ME16, generate timing outputs DCW01-DCW04. These<br />
four timing intervals correspond to the four additional ("half-step")<br />
columns in a 9 x 7 matrix. Timing signals (DCW01-DCW04) are used to<br />
address the appropriate column in the Iha1f-step" ROM (character generator).<br />
Du·ring elongated character printing, the UCC latch (internal to<br />
LSI chip ME16) allows alternate STROBE pulses to clock the internal<br />
strobe counter and alternate DLYSTB pulses to clock the delayed strobe<br />
counter. As a result, timing outputs DCWf-DCW5 and DCW01-DCW04 are<br />
twice as long during elongated character mode than during normal character<br />
mode.<br />
During the space interval between character (DCWO), timing signals<br />
DCWl-5 and DCW01-04 are all reset.<br />
4.6.3 CHARACTER GENERATOR (ROM)<br />
The logic board can contain up to four ROM elements, depending<br />
on the selected character generating capabilities of that printer.<br />
(1) 5 x 7, 64-Character Set - ME2 only or ME4 only.<br />
(2) 9 x 7, 64-Character Set - ME2 and MEa only, or ME4 and ME10<br />
only.<br />
4-18
{3} 9 x 7, 64-Character Set and 5 x 7, 64-Character Set - ME2,<br />
ME8 and ME4.<br />
{4} 9 x 7, 96-Character set - ME2, ME8, ME4 and MEIO.<br />
Each ROM (Character Generator) element has three inputs (in addition<br />
to the input voltages):<br />
{I}<br />
The modified character code - Outputs TBl-TB5 from the shift<br />
register are buffered and applied to five of the six character<br />
inputs to all ROMls. For the ROMls in element locations<br />
ME2 and ME8, the sixth character code input is controlled by<br />
TB6. For the ROMls in locations ME4 and MElO, the sixth character<br />
code input is controlled by CHADD7. By jumper option,<br />
CHADD7 can be TB6 or TB7.<br />
(2) Column Address - Timing outputs DCWl-DCW5 from LSI chip ME16,<br />
specify the five "full-step" columns in each 5 x 7 or 9 x 7<br />
character matrix in ROMls ME2 and ME7. Timing output DCWOl<br />
DCW04 specify the four "half-step" columns in each 9 x 7 matrix<br />
in ROMls ME8 and MEIO.<br />
{3} Timing - A low input to pin 28 of each ROM gates the 7-bit<br />
dot configuration of the addressed character and column to<br />
the output of that ROM. For the .full-step ROMls (ME2 and ME4),<br />
this timing input is STROBE ANDed with ROMTB8 or ROMTB8. By<br />
jumper option, ROMTB8 can be ±OV, +5V, TB7, TB8 or TB8, allowing<br />
the selected one of these inputs to enable the ROM. The STROBE<br />
pulse provides the timing input for gating the 7-bit dot pattern<br />
to the print head solenoids.<br />
For the half-step ROMls (ME8 and MElD), the timing input is<br />
ROME2 ANDed with ROMTB8 or ROMTB8. For normal character printing,<br />
ROME2 generated by LSI chip ME16, is coincident with Delayed<br />
Strobe signal DLYSTB. This effectively interleaves the<br />
dot pattern from the half-step ROMls with the dot pattern from<br />
the full-step ROMls.<br />
4-19
For elongated character printing, ROME2 is coincident with<br />
the STROBE signal. This combined with the fact that the<br />
DCW timing signals from LSI chip ME16 are twice as long<br />
during elongated character mode, causes the printed character<br />
to be twice as wide as normal characters. An example<br />
of the character (Y), both in normal and elongated style,<br />
is shown in Figure 4-7.<br />
9<br />
~<br />
NORMAL"y"<br />
ELONGATED"y"<br />
Figure 4-7.<br />
NORMAL AND ELONGATED CHARACTERS<br />
The seven outputs from all four ROMls are wire ORed together and<br />
gated out to the Power Driver board as signals CGI-CG7. In normal operation,<br />
the STROBE or DLYSTB signal gates the addressed dot column to the<br />
Power Driver board. The input to ME7 pins 1 and 2 is normally low holding<br />
the output constantly high, enabling the output CG gates. If, however,<br />
there is a failure in the -12V supply, then ME7-1 and 2 goes high forcing<br />
ME7-3 low disabling the CG gates.<br />
Note, the optional buffers and diodes (shown on the schematic)<br />
associated with the ROM elements are needed only if a +12V ROM is used.<br />
If only +5V ROMls are used, these additional buffers and diodes are not<br />
needed.<br />
4-20
4.6.4 PRINT HEAD OPERATION<br />
The print head is the device used to do the impact printing of<br />
the characters. The head contains seven solenoids that move the tungsten<br />
wires against the ribbon to form the column of dots on the paper. The<br />
position of these solenoids and the location of the tungsten wires in the<br />
head are shown in Section 1. Solenoid #1 controls the top dot and solenoid<br />
#7 controls the bottom dot in a column. The wires come from each solenoid<br />
and are positioned at a jewel located at the end of the head. The length of<br />
these wires is approximately 3.5 inches and each wire requires about one<br />
ounce of for.ce to begin its movement. The amount of force needed to move<br />
the wires 0.015 inch (i.e., the distance necessary to make a dot on the paper)<br />
is about 12 ounces.<br />
The total distance travelled by the wires is approximately 0.015-<br />
inch, but under normal operation, the end of the head is about 0.006 inch<br />
from the ribbon and paper. The reason for locating the wires closer than<br />
0.015 inch from the paper, is to account for the amount of force absorbed<br />
by the ribbon and paper upon impact.<br />
The electrical timing and mechanical movement of the wires is<br />
shown in Figure 4-8. As shown, a 475-525 microsecond pulse is used to<br />
complete the impact. The voltage used to drive the solenoids is +35<br />
volts unregulated. This voltage is about +35 to +38 volts when the pins are<br />
in an idle state, but drops to about +30 volts when all pins are engaged at<br />
the same time. From the beginning of the 475-525 microsecond drive pulse,<br />
about 200 microseconds is required before the wire starts to move in each<br />
solenoid. Once the wire starts moving~ an additional 300 microseconds is<br />
required before the wire makes an impact on the paper. Approximately 500<br />
microseconds more are required for the wire to retract to its normal position.<br />
4-21
--r-~~7m5~~<br />
. ~~~~~O~~LSES l I I<br />
~~<br />
MOTION OF .015"<br />
WIRE<br />
T<br />
DISCHARGE<br />
OF CURRENT<br />
---1 I-- 275 Il S<br />
____ ~I ~I _________ __<br />
L<br />
Figure 4-8.<br />
PRINT HEAD TIMING<br />
4.6.5 POWER DRIVER CIRCUITS<br />
4.6.5.1 Solenoid Drivers<br />
The wire ORed outputs from the character generator CG1-CG7 are<br />
applied to the solenoid power driver circuits where they are inverted,<br />
amplified and used to generate current pulses for firing the solenoid in<br />
each head.<br />
Since all solenoid driver circuits are identical and operate in<br />
the same manner, only the first one, consisting of inverter MEl (pins 5<br />
and 6) and Q1 will be described.<br />
When CGf is high, which is the normal inactive condition, the output<br />
of ME2 pin 6 is at ~OV and no current flows into the base of Q2. When CG1<br />
goes low, ME2 pin 6 goes high and current flows through R1 into the base of<br />
Ql, turning Q1 on. Since the other side of the solenoid (LIA) is connected<br />
to +35 volts, current flows through the solenoid to the collector of Q2.<br />
Resistor R4 limits the solenoid current (collector current) to approximately<br />
2.5 amps, which is required to fire the solenoid.<br />
When CG1 goes back high, Q2 again turns off. The current flowing<br />
through the solenoid then passes through diode CR2 and into capacitor C1.<br />
C1 acts as a parallel reasonant circuit with the inductance of the solenoid.<br />
R5 serves as a discharge pa,th for capacitor Cl.<br />
Rev. F 4-22
4.6.5.2 Forward Clutch<br />
Power for moving the print head from left to right across the page<br />
is transmitted from the main drive motor to an electromechanical clutch<br />
mechanism. The clutch is controlled by a low CIP signal from the logic<br />
board. This signal is applied to a driver circuit on the Power Driver<br />
card, the output of which activates the clutch.<br />
The forward clutch driver circuit is very similar to the solenoid<br />
driver circuit described in Section 4.6.5.1. A low CIP input causes the<br />
output of MEl pin 8 to go high, turning on Q5. This generates a current<br />
pulse to the forward clutch, activating the clutch. Resistor R24 limits<br />
the current amplitude. When CIP goes high, Q8 turns off, and current through<br />
the clutch decays through R23 and CR16.<br />
4.6.5.3 Clamp Circuit<br />
The CLAMP diodes connected to the bases of the input driver transistors<br />
Q2 and Q7, have their cathodes tied together and connected to the<br />
collector of transistor Q19 in the clamp circuit.<br />
When the printer is on, +5 volts on the base of Q19 and +4.7 volts<br />
on the emitter (developed by Zener diode CR2l) holds Q18 off. With Q18<br />
off, Q19 is also held off. Current flows through R49 and Zener diode<br />
CR22, thus providing a CLAMP voltage of +4.7 volts to the diodes. This<br />
back-biases the diodes so that they have no affect on the driver circuits.<br />
As power to the printer is turned off, the +5 volts turns off<br />
before the +35 volts. This forward-biases Q18, turning it on, which then<br />
turns on Q19. The CLAMP signal then goes to ground, causing the bases of<br />
all drivers circuits to be tied to ground through the CLAMP diodes. This<br />
prevents any of the driver circuits from activating during power turn off.<br />
4.7 PAPER MOVEMENT<br />
Three separate printer functions can cause a paper movement operation:<br />
line feed, form feed, and vertical tab. Each of these functions<br />
cause the paper to move by activating the Paper Movement Sol enoid (PMSOL),<br />
which in turn activates a clutch that mechanically links the main drive<br />
motor to the paper-feed tractors.<br />
4-23 Rev. F
For each line feed operation, the solenoid is energized 15 milliseconds<br />
for single line feeds and approximately 50 milliseconds for the<br />
double line feed option. At the end of this interval, a 60-90 millisecond<br />
line feed delay is generated to allow the clutch pawl and clutch mechanism<br />
to return home before another paper movement operation is allowed.<br />
In response to a form feed or vertical tab command, a dc level is<br />
applied to the solenoid, allowing continuous movement of the paper. In<br />
the standard 306 printer, this paper movement continues until it is either<br />
terminated by the reception of a delete code (octal 177) or an INPUT PRIME<br />
signal at the interface connector, or a paper time-out condition. However,<br />
if the optional Vertical Format Unit (VFU) is used, the paper movement is<br />
terminated when a hole is detected in the appropriate channel of the vertical<br />
format paper tape. The operation of the VFU is described in Section 4.7.4.<br />
To prevent the printer from "hanging up" in a paper movement condition<br />
which would waste both time and paper, LSI chip 25 contains a paper<br />
time-out circuit. This circuit is activated by any paper movement command.<br />
In the standard 306 printer, the Paper Time-Out (PMTO) interval is factoryadjusted<br />
for approximately 6-9 seconds. If, at the end of this time, paper<br />
is still advancing, the line feed solenoid command (PMSOL) is immediately<br />
deactivated, terminating the paper movement operation.<br />
As an option, this time-out interval can be adjusted from 2 to 12<br />
seconds via R38 which controls the Low-Frequency Oscillator (LFOC) input<br />
to LSI chip ME25.<br />
As paper moves in the printer, each line advance causes a line count<br />
switch located in the form feed mechanism to open and close. The two wires<br />
from this switch go to the interface connector via the logic card. As a<br />
result, a line count level from the input device is switched on and off by<br />
the printer for each line advance. If the 306 contains no optional VFU,<br />
the user's software can control vertical formatting by counting these line<br />
count pulses and terminating the paper movement operation when appropriate.<br />
4-24
4.7.1 LINE FEED<br />
The line feed operation can be generated by any of the following<br />
three conditions:<br />
(I) After printing a line of characters (and the automatic line<br />
feed is not disabled, El to E2 is connected) - The low-going<br />
forward clutch signal CIP, triggers the LF one-shot.<br />
(2) Receiving a line feed code (octal 012) - LSI chip ME25 decodes<br />
the line feed character and generates a 5-10 usec CSLF pulse,<br />
the trailing edge of which triggers the LF one-shot.<br />
(3) Pressing the optional LINE FEED switch on the operator panel -<br />
Pressing this switch causes REMLF to go low. This low input<br />
to LSI chip ME25 generates a 5-10 usec CSLF pulse; the trailing<br />
edge of which triggers the LF one-shot.<br />
LF<br />
(SEE SECTION 4.7.1)<br />
4 r- SEE NOTE<br />
DLyLF ___....,,1= 60-90 ms----.. IL. __<br />
BUSy __.... I<br />
I<br />
0-10 IlS ---.t t-B-<br />
ACKNLG--------------.....;.I-Lr<br />
2.5-5.0 IlS---I I--<br />
NOTE:<br />
15 MILLISECONDS FOR SINGLE LINE FEED,<br />
50 MILLISECONDS FOR DOUBLE LINE FEE~ OPTION<br />
Figure 4-9.<br />
LINE FEED TIMING<br />
4-25
The width of the LF pulse generated by any of the above conditions<br />
is adjustable. In the standard 306 printer, R82 and R83 are not used and<br />
jumper E5 to E6 is connected. In this configuration, R20 is adjusted so<br />
that a 15 millisecond LF pulse is generated.<br />
If the double line feed option controlled by the optional switch<br />
on the operator panel is used, then jumper E4 to E5 is connected and R82<br />
and R83 are used. With the switch in the "double line feed" position,<br />
DLF is an open circuit and R20 has no effect on pulse width. R82 should<br />
be adjusted to provide a 50 millisecond LF pulse. When the switch is<br />
placed in the "single line feed" position, DLF goes to +5V, placing R29<br />
in parallel with R82 and R83. With the switch in this position, R20 should<br />
be adjusted to provide a 15 millisecond LF pulse.<br />
While LF is high, LSI chip ME25 generates a low PMSOL signal which<br />
activates the line feed solenoid via the Power Driver board. The trailing<br />
edge of PMSOL triggers the 60-90 millisecond Delay Line Feed interval DLYLF.<br />
During both the LF and DLYLF intervals, the printer remains busy.<br />
4.7.2 FORM FEED<br />
A form feed operation can be generated by either of the following<br />
two conditions:<br />
(l) Receiving a form feed code (octal 014) - LSI chip ME25 decodes<br />
the form feed character and generates a low PMsoL signal<br />
to activate the line feed solenoid. If the DSC option is used<br />
(EI0-Ell), the line is printed before PMSOL is activated).<br />
(2) Pressing the optional TOP OF FORM switch on the operator panel -<br />
This generates a low TOFSW signal causing LSI chip ME24 to<br />
generate a low PMSOL signal.<br />
4-26
FORM FEED OR<br />
VERTICAL TAB<br />
(SEE SECTIONS<br />
4.7.2 & 4.7.3)_-""oJ<br />
PMSOL<br />
(WITH VFU OPTION)<br />
FFH OR VTH<br />
DLYLF __ ~ ____ ---J1==60-90 ms-=L<br />
BUSY __..J<br />
ACKNLG<br />
L<br />
0-10 JlS ---.j t-<br />
I I<br />
LJ<br />
2.5-5.0 JlS---l I--<br />
I<br />
I<br />
Figure 4-10.<br />
FORM FEED AND VERTICAL TAB TIMING<br />
The low PMSOL signal activates the line feed solenoid and generates<br />
a busy condition. This continues until one of the following<br />
conditions occurs:<br />
(1) The input device terminates the operation by sending a<br />
delete code (octal 177) or an INPUT PRIME signal, deactivating<br />
PMSOL.<br />
(2) A paper time-out condition is detected, at which time PMSOL<br />
is deactivated and the FAULT line is activated.<br />
(3) If the VFU is used, a hole is detected in channel 7 of the<br />
paper tape. This generates a high FFH input to LSI chip<br />
ME25, which deactivates PMSOL.<br />
For as long as PMSOL is active, the printer remains in a busy<br />
condition.<br />
4-27
4.7.3 VERTICAL TAB<br />
A vertical tab operation is generated by receiving a vertical tab<br />
code (octal 013). LSI chip ME25 decodes the vertical tab character and<br />
generates a low PMSOL signal. If the DSC option is used (E10-E11), the<br />
line is printed before PMSOL is activated.<br />
The low PMSOL signal initiates the paper movement and generates<br />
a busy condition. This continues until one of the following conditions<br />
occurs:<br />
(1) The input device terminates the operation by sending a<br />
delete code (octal 177) or an INPUT PRIME signal, deactivating<br />
PMSOL.<br />
(2) A paper time-out condition is detected, at which time PMSOL<br />
is deactivated and the FAULT line is activated.<br />
(3) If the VFU is used, a hole is detected in channel 5 of the<br />
paper tape. This generates a high FFH input to LSI chip<br />
ME25, which deactivates PMsoL.<br />
For as long as PMSOL is active, the printer remains in a busy<br />
condition.<br />
4.7.4 VERTICAL FORMAT UNIT (OPTIONAL)<br />
The vertical format unit (VFU) consists of a standard 8-channel<br />
paper tape reader, located on the upper left side of the printer. Movement<br />
of the paper tape in the VFU is caused by direct mechanical linkage<br />
to the gear train that drives the paper feed tractors. As a result,<br />
each line feed advances the paper by one line and the tape by one sprocket<br />
hole.<br />
Rev. E 4-28
UPPERSECTIoN-------------...,<br />
I I<br />
Pl19<br />
+5 VDC<br />
I R3 I<br />
L ____ :_-,<br />
-#1<br />
I<br />
fi.OWER-- SECTION<br />
I<br />
MElla I<br />
25C45aO<br />
I I I 02 I CHANNEL 7<br />
I ."'. ~ I<br />
I I 2SC45aO I<br />
I CHANNEL 5<br />
L.. _____ .J 01 I<br />
I<br />
L _________ J<br />
::OV<br />
J120<br />
!-'L=I N;:,..,;E Fc...:..: E E"'--jD a<br />
LF RET<br />
SPARE<br />
SPARE<br />
SPARE<br />
Figure 4-11.<br />
SCHEMATIC - VERTICAL FORMAT UNIT<br />
Holes detected in Channel 5 or 7 of the tape are amplified by a<br />
VFU amplifier contained in the tape reader unit. Each channel in the<br />
vertical format control tape reader contains an input photo transistor,<br />
driving an emitter follower amplifier. When the photo transistor receives<br />
light, current flows through it and into the base of the emitter follower<br />
generating a +5V output.<br />
The two amplifier outputs CHANNEL 5 and CHANNEL 7 are then applied<br />
to the logic board and ME25 as VTH and FFH. A 2-4 millisecond delay is<br />
designed into ME25 for noise immunity.<br />
4.7.5 LINE FEED SOLENOID DRIVER<br />
logic signal PMSOL from LSI chip ME25 is double-buffered by<br />
ME21 to generate PMSOLD to the Power Driver board. When PMSOLD goes<br />
low, ME1-10 on the Power Driver board goes high turning on Q16. This<br />
allows current to flow through R40, the line feed solenoid and into the<br />
collector of Q16, activating the solenoid. R51 limits the current flow.<br />
4-29 Rev. F
When PMSOLD goes high (inactive), the output of ME1-10 goes low,<br />
turning off Q16. The solenoid current then decays through R40 and CR9.<br />
The CLAMP input to the solenoid driver circuit is described in<br />
Section 4.6.5.3.<br />
4.8 SPECIAL FUnCTIONS<br />
In addition to the paper movement and character printing functions,<br />
the printer also performs the following special functions: Bell (optional),<br />
Delete, Paper Empty, and Motor Control (optional).<br />
4.8.1 BELL (OPTIONAL)<br />
The following description applies only if the optional speaker<br />
(526825001) and speaker amplifier is included in the printer. Reception<br />
of a bell code (007) or detection of a paper empty condition (~goes<br />
low), causes a BELL signal to be generated on LSI chip ME25 pin 39.<br />
This BELL signal is a 0.8 to 1.6 KHz output approximately one to two<br />
seconds in duration. BELL is amplified by Q1 and Q2, and the amplifier<br />
output (P3-5 and 7) drives the speaker.<br />
In the 306 printer, a BELL code does not create a busy condition.<br />
A paper empty condition, however, still generates a Busy.<br />
4.8.2 DELETE<br />
The delete code resets the printer logic by generating a prime condition.<br />
Reception of a delete code (octal 177) on the input data lines<br />
ANDed with the ungated data strobe DSTA, sets a latch in LSI chip ME25<br />
causing a low DCPRM output at pin 8 of that chip. The low DCPRM into<br />
LSI chip ME16 causes a high PRIME signal to be generated at ME16-37, resulting<br />
in the prime operation as described in Section 4.3.1.<br />
Note that since the delete code is gated with DSTA, the delete<br />
code is recognized by the printer even when the printer is busy.<br />
4-30
4.8.3 PAPER EMPTY<br />
A paper empty condition in the printer is detected by Paper Out<br />
switch S6 located in the path of the paper. With paper in the printer,<br />
signal PE is high. After the last page passes over the Paper Out switch,<br />
signal PE goes low. The low PE into LSI chip ME25: (1) sets a latch<br />
internal to the chip which causes a 1-2 second BELL output; (2) causes<br />
a high FAULT output, and (3) lights the PAPER OUT lamp on the operator<br />
panel.<br />
If the speaker option is used, the BELL output causes an audible<br />
alarm, warning the operator of the paper empty condition. The high FAULT<br />
output, in addition to causing a busy condition, also goes to the interface<br />
connector to indicate a fault status to the input device.<br />
To allow the printer to print the last form, the operator can<br />
press the OVERRIDE switch on the operator panel. This causes PE to go<br />
high for as long as the switch is pressed.<br />
4.8.4 MOTOR CONTROL (OPTIONAL)<br />
The motor control feature causes each print or paper movement<br />
command to initiate a 9-second delay. If no other print or paper movement<br />
command is received during this 9-second interval, a solid-state switch is<br />
deactivated which removes the 115 VAC from the main drive motor. The dc<br />
voltages to the printer electronics are not affected.<br />
The motor remains off until the next print or paper movement command<br />
is received, at which time the switch is activated and 115 VAC is immediately<br />
applied to the motors. If a print command is received, however, the clutch<br />
signal is delayed by approximately 250 milliseconds to allow the drive motor<br />
to get up to speed. This prevents the possibility of any distortion in<br />
the first few printed characters, if the 9 x 7 character option is used.<br />
The motor control logic is conta1ned on the logic board. The motor<br />
control switch (39-72001) is attached to a bracket located on the main drive<br />
motor.<br />
4-31
Referring to the timing diagram in Figure 4-12, one-shot ME31<br />
generates the 9-second interval during which time the Forward Clutch<br />
signal (CIPM), and the Paper Movement signal (PMSOLD) are monitored.<br />
CIPM<br />
'--_....... r<br />
PMSOL<br />
HLESS THANI<br />
I~ 9 SEC ~~ ___________________________________<br />
I LJ I<br />
1 1 I<br />
I ~t----- 9 SEC ----~I I<br />
9 - SEC ONE-SHOT -, I U I I r<br />
(ME31-3) L....J ------1---<br />
1<br />
MOTOR CONTROL --------------, OFF 'r<br />
ME26-8 ON .<br />
1<br />
1<br />
DELAY ONE SHOT-------------------u--......; 250 mS<br />
ME27-1<br />
I<br />
1<br />
: I r<br />
-.-I I-<br />
DELAY ENABLES<br />
MOTOR TO REACH<br />
NORMAL SPEED<br />
Figure 4-12.<br />
MOTOR CONTROL TIMING<br />
The trailing edge of either CIPM or PMSOL triggers the one-shot<br />
causing the output ME31 pin 3 to go high. The resulting low on gate ME26<br />
pin 9 keeps that gate disabled and keeps one-shot ME27 from being triggered.<br />
The high output from ME27 pin 1 gates each CIP input through to<br />
the Power Driver board as CYP.<br />
If another CIPM or PMSOL signal is received during this 9-second<br />
interval, the low-going leading edge resets one-shot ME31 for the duration<br />
of the signal. The solid-state switch and one-shot ME27 remain unaffected<br />
during this time due to the low input to gate ME26 pin 10 keeping that<br />
gate disabled. The trailing edge of the input signal then re-triggers<br />
one-shot ME31 for another 9-second interval.<br />
However, if no CIPM or PMSOL signal is received during the 9-second<br />
interval, one-shot ME31 times-out causing its output ME31 pin 3 to go low.<br />
4-32
The two high inputs to gate ME26 pins 9 and 10 then: 1) cause a high input<br />
to Delay one-shot ME27, and 2) cause the input to switch K1 to go low deactivating<br />
the switch and removing 115 VAC from the motors.<br />
No further action occurs until another CIPM or PMSOL signal ;s received.<br />
At this time, the high CIPM or PMSOL input causes a low at gate ME26 pin 9<br />
which: 1) activates switch K1 and turns on the motor, and 2) triggers Delay<br />
one-shot ME27. If a CIPM signal was received, this signal is inhibited from<br />
generating CIP by the low input to ME26 pin 12. When the Delay one-shot timesout<br />
(approximately 250 milliseconds later), CIPM generates signal CIP which<br />
activates the Forward Clutch Driver.<br />
4.9 POWER SUPPLIES<br />
The standard power input to the printer is 115 VAC, 60 Hz*. This<br />
input is fused through a 5 amp. S.B. fuse (F8), and applied through ON/OFF<br />
switch Sl to the transformer (T1) and to the main motor (M1) and motor<br />
control switch. Components C3 and R3 form a suppression circuit across<br />
the ON/OFF switch.<br />
The secondary of the multitap transformer develops the following<br />
voltages:<br />
27.5 VAC (Sl-S3)<br />
30 VAC center-tapped (S4-S6-S8)<br />
11 VAC center-tapped (S5-S6-57)<br />
The 30 VAC and 11 VAC voltages are used as inputs to the +5V, +12V<br />
and -12V power supplies on the logic board, where they are rectified, filtered<br />
and regulated. The unregulated dc outputs from these three power<br />
supplies are also regulated on the optional connector board, to provide<br />
dc voltages for the optional interface board. The 27.5 VAC is used to<br />
generate +35V unregulated.<br />
Connector P1-J1 is used for bringing the ac inputs to the logic<br />
card and connecting the filter capacitors and resistors to the +5V and<br />
+35V supplies. Connector P2-J2 is used for connecting the power supply<br />
outputs to the rest of the printer and for connecting +35V to the power drivers,<br />
*For the 230 VAC, 50 Hz option, a different transformer and motor is used.<br />
4-33
4.9.1 +5V REGULATOR (Figure 4-13)<br />
The 11 VAC output from the secondary winding of the transformer is<br />
rectified by diodes CR5 and CR6 and filtered by Cl and Rl located in the<br />
cavity. This filtered output is fused through Fl and regulated by regulator<br />
element VRI which maintains the +5 Volt output. Capacitors C11 and C21<br />
provide additional filtering for high frequency transients that might<br />
appear at the output. Resistor R43 is a bleeder resistor allowing some<br />
current flow through the regulator, keeping it in the active region.<br />
Overvoltage protection is provided by components CR11, R42 and Q4. With<br />
the output at a normal +5V, Zener diode CRll inhibits current flow through R42,<br />
holding the gate of SCR Q4 at ground. However, when the output voltage exceeds<br />
+6.8V, the Zener diode CRll conducts, developing a voltage across R42 and turning<br />
on SCR Q4. This shorts the input and blows fuse Fl.<br />
To simplify troubleshooting procedures for the +5V regulator, as well<br />
+ as the -12V supplies, the load may be removed from this supply by unplugging<br />
J2.<br />
4.9.2 +12V and -12V REGULATORS (Figure 4-14)<br />
The voltage generated by 30 VAC center-tapped secondary winding of T1<br />
is used as inputs to the +12V and -12V regulators. The operation of both<br />
circuits is identical to that of the +5V regulator described in Section 4.9.1.<br />
As in the +5V regulator, the load may be removed from these supplies<br />
simply by unplugging the J2 connector.<br />
In addition, a jumper connection allows either the +12V output (E24 to<br />
E25) or +5V output (E25 to E26) to be connected to the character generators,<br />
depending on whether a +12V or +5V ROM is used.<br />
4.9.3 +35V POWER SUPPLY (UNREGULATED) - Figure 4-15<br />
The 27.5 VAC output from the transformer is rectified by diode bridge<br />
CRI6, 17, 25 and 26 and filtered by R2-C2 to generate the +35V unregulated<br />
voltage for the power driver circuits. Four outputs from the logic board<br />
(35-1, -2, -3, -4), each individually fused, are used to power the nine driver<br />
circuits.<br />
4-34
T1 55<br />
11 VAC<br />
56<br />
11 VAC<br />
PI<br />
2<br />
.......,;.5,;..,7 ---4--1 5<br />
r------------------------------,<br />
jl CR5 LOGIC PWRjSUPPLY BOARD I<br />
Fl +15V + J2<br />
2 .5V 12<br />
CR6<br />
+5V REG.<br />
,<br />
TO<br />
CIRCUITS<br />
P2<br />
-~<br />
-{W<br />
~<br />
I<br />
W<br />
U"I<br />
PI<br />
I<br />
ON BOARD<br />
I I<br />
JI<br />
I~---~---------------------~~~<br />
I L ____________________________ ...J<br />
10<br />
PI<br />
6<br />
10<br />
Cl<br />
4700 MFD,<br />
25V<br />
!cAVITY - - ~<br />
I<br />
I<br />
I<br />
I<br />
I<br />
I<br />
I<br />
I<br />
~--- ~<br />
L----I4<br />
R1<br />
2.2Kn,<br />
P5<br />
8<br />
r-OPTIONAL INTERFACE-ADAPTER"I<br />
J5<br />
J6<br />
8 22 -<br />
+5 REG<br />
P<br />
I<br />
I<br />
I L ____________ ...J I<br />
; OPTIONAL'<br />
P6<br />
INTERFACE I<br />
BOARD I I<br />
I<br />
I<br />
I<br />
I<br />
I<br />
L ____ ....J<br />
Figure 4-13.<br />
+5V REGULATOR INTERCONNECTION DIAGRAM
;;0<br />
(l)<br />
<<br />
rr1<br />
54<br />
15 VAC<br />
56<br />
PI<br />
r------------------------------------<br />
I LOGICjPWR 5UPPL Y BOARD P5 i<br />
I 10 I<br />
Jl CR7 J'2<br />
r-~_-~1~8V~ 8<br />
-12V REG.<br />
TO CKT5.<br />
P2<br />
--ITh<br />
-{fr'<br />
15 VAC<br />
58<br />
7<br />
~<br />
I<br />
W<br />
0'\<br />
I<br />
I<br />
I<br />
I<br />
I<br />
I<br />
I<br />
I I<br />
L I<br />
___ _<br />
--------------------------~<br />
roPTIONALINTERFACEADAPTER~ i-OPTIONAL l<br />
J5 +12V J6 P6 INTERFACE I<br />
2 I---~<br />
±12V -12V<br />
P5<br />
2<br />
L-----I 3<br />
±OV<br />
REGULATOR<br />
I<br />
I<br />
I<br />
I<br />
L __________ -.J<br />
5 BOARD I<br />
I<br />
I<br />
I<br />
I<br />
L _____ J<br />
Figure 4-14. -12V REGULATOR INTERCONNECTION DIAGRAM
PI<br />
~SI=--_~ 9<br />
27.5 VAC<br />
S3<br />
fLOGIC/POWER SUPPLY BOARD- - - - - ---l<br />
I Jl I<br />
I 9 J2 I<br />
,<br />
I<br />
I L __ _<br />
I<br />
I<br />
I<br />
T<br />
_ _______ .J<br />
I<br />
P2<br />
4<br />
5<br />
1<br />
+35V-l W18<br />
+35V-2 W20<br />
+35V-3 W22<br />
+35V-4 W24<br />
P -<br />
rOWER DRIVER BOARD-i<br />
I<br />
I<br />
PI0<br />
I<br />
I<br />
I<br />
L1, L2 DRIVER I<br />
I<br />
I<br />
L3, L4 DRIVER<br />
I<br />
I<br />
L5, L6 DRIVER I<br />
I<br />
L7, FWD CLUTCH,<br />
LF SOL.<br />
Jl<br />
3<br />
C2<br />
10K MFD,<br />
WVDC 50V<br />
r-:------,<br />
I CAVITY<br />
I<br />
I<br />
I<br />
I<br />
I<br />
R2 !<br />
lKn 'j<br />
lW<br />
I<br />
I<br />
L I ______ - .....I I<br />
I<br />
I +35V RET.<br />
JI0<br />
I<br />
PI0<br />
I L<br />
________ J<br />
Figure 4-15.<br />
+35V UNREGULATED SUPPLY INTERCONNECTION DIAGRAM
4.10 OUTPUTS FROM LSI CHIPS (ME25 and MEI6)<br />
4.10.1 LSI CHIP ME25<br />
B1TSY (Busy)<br />
Generated on LSI chip ME25 pin 11.<br />
of the following conditions occurs:<br />
BUSY goes' low when any<br />
(1) CSBSY from LSI chip ME16 goes low;<br />
(2) During a prime condition (PRIME);<br />
(3) During a paper movement operation (PMSOL);<br />
(4) DCPRM from LSI chip ME25 goes low;<br />
(5) The carriage return code (or if the DSC option is used, the<br />
LF, VT or FF code) is clocked into the shift register;<br />
(6) FAULT from LSI chip ME25 goes high. ,<br />
(7) During the 60-90 msee delay following a paper movement operation<br />
ation (DLYLF).<br />
ACK (Acknowledge)<br />
Generated on LSI ME25 pin 13. ACK is a 2.5-5.0 usec pulse generated<br />
2.5-10 usec after the trailing edge of data strobe if the printer is<br />
not busy, or 2.5 10 usee after the trailing edge of the BUSY signal.<br />
(FAULT) Fault Indication<br />
Anyone of the following con<br />
Generated on LSI chip ME25 pin 9;<br />
ditions generates FAULT:<br />
(1) The printer is deselected (SLCT is low),<br />
(2) A paper-time out condition exists,<br />
(3) The printer is out of paper (PE is low), or<br />
(4) A failure is detected in the video signal (LD is low).<br />
4-38
SLCT ' (Select)<br />
Generated on LSI chip ME25 pin 40. Indicates the status of the<br />
Select latch within the chip. This latch is set either by receiving a<br />
select code (octal 021) or by pressing the SELECT switch on the operator<br />
panel when the printer is deselected. The flip-flop is reset either by<br />
receiving a deselect code (octal 023) or by pressing the SELECT switch<br />
when the printer is selected. The select and deselect codes affect the<br />
select latch even when the printer is busy.<br />
(BELL) Bell<br />
Generated on LSI chip ME25 pin 39. BELL is a 0.8 - 1.6 KHz signal<br />
of 1 to 2 second duration t generated by either a received bell code<br />
(octal 007) or a paper empty condition.<br />
cscr (Cause Line Feed)<br />
Generated on LSI chip ME25 pin 6. Any of the following input conditions<br />
will cause CSLF to go active (low):<br />
1. Receiving a Line Feed code {octal 012} on input data lines<br />
DS1-DS7. If the DSC option is used {jumper E10 to Ell}, the<br />
complete line of characters will be printed before CSLf goes<br />
low.<br />
2. Pressing the optional Line Feed switch on the operator panel.<br />
CSLF goes back high at the start of the Delayed Line Feed pulse (DLYLF).<br />
PMSOL (Paper Movement Solenoid)<br />
Generated on LSI chip ME25 pin 7. Any paper movement command (i.e.,<br />
line feed, form feed or vertical tab). The low PMSOL output activates a<br />
driver circuit on the Power Driver board, which in turn activates the paper<br />
movement solenoid on the form feed unit. This causes paper to advance in<br />
the printer.<br />
4-39
PMSOL remains low until one of the following conditions occurs:<br />
(1) A paper time-out condition is detected,<br />
(2) A power prime (PWRPRM) condition exists,<br />
(3) If the optional Vertical Format Unit (VFU) is used, a hole in<br />
channel 7 of the paper tape is reached (FFH) during a form feed<br />
operation, or<br />
(4) If the optional VFU is used, a hole in channelS of the paper<br />
tape is reached (VTH) during a vertical tab operation.<br />
DSCR (Decoded Carriage Return)<br />
Generated on LSI chip ME25 pin 12. DSCR goes active low when a control<br />
character (zeroes in bits 6 and 7) is loaded into the shift register.<br />
In normal operation, the only control code loaded into memory is a CR code<br />
(octal 015). However, with the DSC option (jumper E10 to Ell), in addition<br />
to the CR code, any of the following control codes may be loaded into memory:<br />
LF (octal 012), FF (octal 014), and VT (octal 013).<br />
DSCR goes active on the trailing edge of the gated data strobe and<br />
stays active until the printer is primed following the carriage return (and<br />
paper movement) operation.<br />
DCPRM (Decoded Prime)<br />
Generated on LSI chip ME25 pin 8. Any of the following conditions<br />
will cause DCPRM to go active (low):<br />
(1) Receiving a Delete code (octal 177),<br />
(2) Receiving a low INPUT PRIME signal at the interface connector,<br />
or<br />
(3) A power prime condition (PWRPRM).<br />
CLKTB1 (Clock Shift Register Pulse)<br />
Generated on LSI chip ME25 pin 14. The CLKTB1 pulses is used to<br />
clock input data into the shift register. It is generated by data strobe<br />
signal DSTA whenever both inhibit levels INH1 and INH2 (internal to the<br />
chip) are inactive.<br />
4-40
If the Gated Strobe (GDSTB) option is used (jumper E7 to E8), INHl<br />
is inactive when the printer is selected and the last input character has been<br />
acknowledged by the printer. If the GDSTB option is not used (jumper E8 to<br />
E9), then INH1 is always inactive. INH2 is inactive if the character on the<br />
input data lines can be stored in the shift register. This occurs whenever<br />
the input data lines contain a printable character (a ONE in bit 6 or 7) or<br />
after the first printable character is received, a carriage return code (octal<br />
015) is present on the data lines. If the DSC option is used (jumper E10 to<br />
Ell), a line feed (octal 012), vertical tab (octal 013) or form feed (octal 014)<br />
code, could be stored in the shift register after the first printable character<br />
is received.<br />
Upper Case (UPSC)<br />
Generated on LSI chip ME25 pin 15. A low UPSC pulse is generated<br />
whenever an elongated character code (octal 016) is present on the input data<br />
lines.<br />
4.10.2 LSI CHIP ME16<br />
fiCWI-DCWS (Strobe Counter Outputs)<br />
Generated on LSI chip ME16 pinos 12 (DCW1), 13 (DCW2), 14 (DCW3),<br />
15 (DCW4) and 16 (DCW5). The strobe counter which is internal to the chip<br />
is reset by an internal DCWO signal. DCWO, which normally represents the<br />
space interval between characters, is generated by either a Prime condition<br />
or by DCW5.<br />
During normal character printing, each video STROBE pulse increments<br />
the counter~ During elongated character printin g, every alternate STROBE<br />
increments the coutner, making each DCW interval twice its normal width.<br />
If the special timing option SPCG is used (which consists of cutting<br />
the etch between pin 6 of ME16 and ±OV), then the DCW1-DCW5 signals at the<br />
output pins of the chip are encoded from the internal DCW1-DCW5 signals as<br />
follows:<br />
External Signal<br />
DCW1<br />
Encoded from<br />
Internal Signals<br />
DCWl + DCW3 + DCW5<br />
4-41
External Signal<br />
DCW2<br />
DCW3<br />
DCW4<br />
DCWS<br />
Encoded from<br />
Internal Signals<br />
DCWI + DCW3 + DCWS<br />
DCW4 + DCWS<br />
DCW4<br />
DCWS<br />
DCWOI-DCW04 (Delayed Strobe Outputs)<br />
Generated on LSI chip ME16 pins 7 (DCWOl), 8 (DCW02), 9 (DCW03), and<br />
10 (=DC=W-0~4). The delayed strobe counter like the strobe counter is reset by<br />
DCWO.<br />
During normal printing of 9 x 7 characters, each DLYSTB pulse increments<br />
the counter. During elongated character printing, alternate STROBE<br />
pulses increment the counter making each DCWO interval twice its normal width.<br />
As in the strobe counter timing, if option SPCG is used, then the<br />
external DCWOI-DCW04 signals are related to the internal DCWOl to DCW05 intervals<br />
as follows:<br />
External Signal<br />
DCWOl<br />
DCW02<br />
DCW03<br />
DCW04<br />
Encoded from<br />
Internal Signal<br />
DCWOl + DCW03 + DCW05<br />
DCW02 + DCW03<br />
DCW04 + DCW05<br />
STROBE + DCW)<br />
ROME2 (ROM Timing)<br />
Generated on LSI chip ME16 pin 24. This signal is the timing input<br />
to the "half-step" character generator ROM (Read-Only Memory).<br />
During normal printing of 9 x 7 characters, each DLYSTB, (Delayed Strobe)<br />
pulse generates a ROME2 pulse. When printing elongated 9 x 7 characters, each<br />
video STROBE pulse generates a ROME2 pulse.<br />
OSC (Oscillator Output)<br />
Generated on LSI chip ME16, pin 25. The frequency of this system clock is<br />
100 KHz (min.) to 200 KHz (max.). Signal OSC is inverted by ME20-6 to generate<br />
OSCXT to the interface connector. Signal OSC is also used by both LSI chips to<br />
generate clocks 01 to 02 used internally by the LSI chips.<br />
4-42
CLKTB2 (Clock Shift Register Pulse)<br />
Generated on LSI chip ME16 pin 36. This active high pulse is generated<br />
by any of the following three conditions:<br />
1. During a prime condition, to load the du-my character into<br />
memory - At the end of the PRIME interval, Recirculate signal<br />
SRCL goes high and a single CLKTB2 pulse is generated. This<br />
forces a single ONE into bit 8 of that shift register location,<br />
forming the dummy character.<br />
2. During character printing, to shift the characters out of memory -<br />
Each STROBE pulse occurring during Strobe Counter interval DCWO<br />
(internal to LSI chip MEI6) generates a CLKTB2 pulse. This shifts<br />
the next character to the output of the shift register where it<br />
remains until the next STROBE DCWO interval.<br />
3. During the interval following the reception of a carriage<br />
return code - A low DSCR input to the chip ANDed with TB8 to<br />
allow each 02* clock to generate a CLKTB2 pulse.<br />
CIPX (Forward Clutch)<br />
Generated on LSI chip ME16 pin 30. This active low output is used<br />
to turn on the forward clutch when the printer is ready to print the received<br />
line of data.<br />
Signal C!PX goes low when the internal CIPF latch is set. CIPF gets<br />
set under the following conditions: (1) the printer is not being primed<br />
(PRIME), (2) the right limit switch is not activated (EOPSW), (3) a control<br />
character is not detected at the memory output (TB6 or TB7), (4) the left<br />
limit switch is activated (RTPSW), and (5) the dummy character is detected<br />
at the memory output (TB8). The internal CIPF latch then remains set either<br />
until the right limit switch is reached (EOPSW) or a control character appears<br />
at the memory output (TB6.TB7). Normally, this control character would be a<br />
carriage return code (octal 015). However, if the DSC option is used (jumper<br />
EI0 to Ell), the control character could be a carriage return (015), line<br />
feed (012), vertical tab (013), or form feed (014) code.<br />
*02 is a phase clock internal to LSI chip MEI6. The frequency of this 02<br />
clock is the same as the OSC output from LSI MEI6.<br />
4-43
SRCL (Shift Register Recirculate Input)<br />
Generated on LSI chip ME16 pin 38. A high SRCL signal along with<br />
a single CLKTB2 pulse is generated at the end of each PRIME interval.<br />
This clocks a dummy character into the shift register.<br />
ID (Light Detect)<br />
Generated on LSI chip ME16 pin 17. Signal LD is normally high<br />
indicating no error in the video circuit. However, if the print head<br />
travels from the left limit switch (RTPSW) to the right limit switch<br />
(EOPSW) with no STROBE pulse generated by the timing fence, then a latch<br />
is set within the chip causing LD to go low. This indicates an error<br />
condition. The internal LD latch can be reset only be de-selecting the printer.<br />
PRIME (Prime)<br />
Generated on LSI chip ME16 pin 37. PRIME goes active high for<br />
100-500 milliseconds during a Power Prime (PWRPRM) and approximately<br />
100-400 microseconds during any of the following conditions:<br />
(1) A low DCPRM input from LSI chip ME25,<br />
(2) The printer has just been selected (a low SLCT input to LSI<br />
chip ME16) and the Delete Inhibit (DELINH) option is not used<br />
(jumper E14 to E15 is not connected),<br />
(3) A line of data has just been printed (CIPX out of LSI chip ME16<br />
has just gone high).<br />
Prime initializes the printer logic, resets the shift register and<br />
loads a dummy character.<br />
CSBSY (Cause Busy)<br />
Generated on LSI chip ME16 pin 35. CSBSY goes active low when a<br />
dummy character (TB8) is detected at the shift register output and a Prime<br />
operation is not in progress. This condition indicates that the 80th character<br />
has just been loaded into the shift register (without a carriage return<br />
code). The low CSBSY signal then generates a low BUSY output from<br />
LSI chip ME25.<br />
4-44
SECTION 5<br />
REMOVAL, REPLACEMENT AND ADJUSTMENT PROCEDURES*<br />
5.1 INTRODUCTION<br />
This section describes the operation, removal/replacement and<br />
adjustments (if required) for each major mechanical assembly in the printer.<br />
5.2 MECHANICAL ASSEMBLIES<br />
The mechanical assemblies and their referenced figures are covered<br />
in the order listed below. Mechanical drawings and parts lists are contained<br />
in Section 8 of this manual.<br />
Section<br />
5.2.1<br />
5.2.2<br />
5.2.3<br />
5.2.4<br />
5.2.5<br />
5.2.6<br />
5.2.7<br />
5.2.8<br />
5.2.9<br />
5.2.10<br />
5.2.11<br />
5.2.12<br />
5.2.13<br />
5.2.14<br />
5.2.15<br />
5.2.16<br />
5.2.17<br />
5.2.18<br />
5.2.19<br />
5.2.20<br />
5.2.21<br />
Title<br />
Carriage Mechanism<br />
Platen<br />
Paper Pan<br />
Driving Mechanism (1)<br />
Driving Mechanism (2)<br />
Idl e Pull ey<br />
Reed Switch<br />
Base<br />
Frame<br />
Paper Feed (includes optional Tape Reader)<br />
Pin Feed<br />
Ribbon Feed<br />
Cover<br />
Operator Panel<br />
Electrical Components (1)<br />
Electrical Components (2)<br />
Electrical Components (3)<br />
Print Head and Associated Assemblies<br />
Motor Control, Option<br />
Vertical Format Unit (VFU), Option<br />
Printer Drive Mechanism, Model 306<br />
Figure and<br />
Reference Parts<br />
Symbol<br />
AA<br />
AB<br />
AC<br />
AD<br />
AE<br />
AF<br />
AG<br />
AH<br />
AI<br />
AJ<br />
AK<br />
AL<br />
AM<br />
AN<br />
AO<br />
AP<br />
AQ<br />
8-19<br />
5-18<br />
8-20<br />
5-28<br />
*All procedures in Section 5 have been updated for Rev. E manual.<br />
5-1 Rev.1
CARRIAGE MECHANISM -<br />
AA<br />
5.2.1 CARRIAGE MECHANISM (Figure AA)<br />
5.2.1.1 Operation<br />
The function of the carriage mechanism is to hold the print head under<br />
the best condition to print characters against the platen and to guide the<br />
head smoothly from left to right, and return it to the s~arting position after<br />
printing the last character.<br />
At the back left and right edge of the carriage (AA-51) there are six<br />
identical guide rollers (AA-52) that function to hold and slide the carriage<br />
along the rear guide bar (AB-7). Mounted on the bottom front of the carriage<br />
are two retainers (AA-I00) that also serve to hold the carriage unit, and at<br />
the same time, guide the moving head along the front guide bar AB-12.<br />
The print head bracket (AA-66) mounts on the carriage (AA-51) and<br />
slides forward and backward between a head bracket guide plate (AA-75)<br />
on the left. and the carriage on the right. The plate is adjustable using<br />
two screws (AA-78). Front and back movement of the carriage and head is<br />
accomplished by the use of a fork (AA-67) that rotates when the head<br />
adjusting knob (AA-58) is turned. As the calibrated head adjusting knob<br />
rotates, its eccentric cam and shaft with mounted fork contacts the under<br />
side of the moving head bracket (AA-66) and causes it to move forward or<br />
backward to a maximum of O.060-inch travel. The mechanical adjustment is<br />
determined by the thickness of the copies to be run. The head lock knob<br />
(AA-59) is mounted in the same plane as the head adjusting knob (AA-58)<br />
but to the left of the head bracket, and locks the common eccentric<br />
shaft to fix the position of the print head in relation to platen (AB-l)<br />
prior to printing.<br />
The print head mounts to the head bracket unit (AA-66) by four<br />
allen-head screws, two on each side of the head.<br />
When the carriage is positioned over the left or right<br />
reed switch (AG-l) a magnet underneath the carriage unit closes either<br />
the left or right reed switch, sending a signal to indicate the carriage<br />
position to electronic logic.<br />
The carriage and head drive forward by an adjustable driving belt<br />
(AE-9) attached to the underside of the carriage between the forward clutch<br />
drive pulley (AE-18) and idler pulley (AF-23). A spring (AG-20)<br />
attached to the underside of the carriage returns the carriage with the<br />
head to the home or starting position (left margin).<br />
A damper cylinder (AA-85), mounted on the extreme left side of the<br />
base (AH-l), effectively cushions the returning head and carriage mechanism.<br />
The damper action is also aided by an air regulating screw (AA-86) mounted<br />
on the left side of the carriage and is center aligned to that of the<br />
damper cylinder.<br />
Rev. E 5-2
CARRIAGE MECHANISM - AA<br />
Mounted at the front of the carriage unit (AA-51) is the video<br />
amplifier bracket (Fig. 8-1/120) supporting the video amplifier (See Figure<br />
7-18) and cabling to the power driver board (Fig. 7-16).<br />
Mounted at the back of the carriage unit (to right of the center<br />
line) are two ribbon guide rollers (AA-62) which maintain proper ribbon<br />
operating tension as the head moves out to the right while printing.<br />
5.2.1.2 Removal/Repl acement<br />
A. PRINT HEAD<br />
(With platen knob (AJ-17), Plate (AJ-18) and Screw (AJ-19) removed)<br />
1. Remove outside covers prior to disassembly, and loosen head<br />
locking knob (AA-59).<br />
2. Turn head adjusting knob (AA-58) for maximum gap between<br />
platen (See Figure 1-6/12) and front of head (Figure 1-6/1).<br />
3. Unplug solenoid fingerboard (Figure 8-19/9) from video<br />
amplifier connector below print head.<br />
4. Using a 3-32-in. diameter allen-wrench, remove at the top,<br />
on each side of head bracket unit (AA-66), two allen-head<br />
screws (4-40 x .50 19) and two No.4 internal lockwashers.<br />
5. Remove from the bottom, on each side of head bracket, two<br />
remaining screws (4-40 x .62 19) and two No. 4 internal<br />
lockwashers.<br />
B. CARRIAGE UNIT<br />
1. Remove print head (Refer para. 5.2.1.2A, steps 1-5).<br />
2. Remove video amplifier board (See Figure 1-6/2) by remov1ng<br />
screws, lockwashers, flatwashers (See Figure AA-96, 97,<br />
98) from bracket attached to carriage unit (AA-51).<br />
3. Remove left and right ribbon spool from printer.<br />
4. Remove left ribbon holder bracket (AL-8) by removing screws,<br />
lockwashers, flatwashers (AL-52, 53, 54).<br />
5. Remove right ribbon holder bracket (AL-55) by removing<br />
screws, lockwashers, flatwashers (AL-93, 94, 95).<br />
6. Remove nuts (AL-103) from ribbon feed bar (AL-101).<br />
7. Remove screws (AD-38) and washers (AD-39, 40).<br />
bracket (AD-34) out of the way.<br />
Rotate<br />
8. Slide the rear carriage bar (AB-7) out from carriage<br />
rollers (AA-52) by removing screws and lockwashers (AB-27, 28).<br />
9. Remove main driving belt (AE-9) by :"emoving two nuts (AA-I05)<br />
from belt tension axle (AA-I06).<br />
5-3 Rev. E
CARRIAGE MECHANISM -<br />
AA<br />
10. Remove carriage spring (AG-20) from D.B. guide plate (AA-107)<br />
located on underside of carriage.<br />
11. Lower retainer bracket (AA-101) by removing one inside screw,<br />
1 ockwasher , flat washer (AA-104, 103, 102). loosen the other side.<br />
12. Lift entire carriage unit from front carriage bar (AB-12).<br />
C. DAMPER CYLINDER<br />
1. Remove left ribbon spool (AL-113).<br />
2. Remove three screws, lockwashers, flat washers (AA-93, 95,<br />
94) from damper cylinder (AA-85) and remove.<br />
D. HEAD BRACKET UNIT<br />
1. To release head bracket unit (AA-66) from carriage unit<br />
(AA-51), remove head bracket guide (AA-75) by removing<br />
two screws and lockwashers (AA-76, 77). Remove center<br />
screw and fork (AA-68, 69, 67).<br />
2. Reassemble in reverse order.<br />
5.2.1.3 Adjustments<br />
A. DAMPER UNIT (AA-85)<br />
1. Piston unit AA-BO, mounted to the left side of carriage<br />
unit (AA-51) must be aligned on center line with that of<br />
the damper unit (AA-B5). Loosen three screws (AA-93) on<br />
damper, and adjust piston (AA-BO) to aline with damper<br />
when bottomed. Tighten screws on damper when alined.<br />
2. A critical adjustment of dampening effect for return<br />
carriage is the air adjusting screw (AA-B6) located on<br />
the top of the damper cylinder. Check for the following:<br />
Condition A<br />
Carriage should run out for a full line of characters (BO)<br />
and return to damper for repeat of BO character/line readout.<br />
Condition B<br />
Make sure printer is capable of one character-per-line<br />
printout.<br />
3. If either condition A or B is not met, adjust release of<br />
compressed air by turning screWltAA-B6) on damper. Air<br />
should eject properly from release hole on damper to meet<br />
above conditions, A and B; adjust accordingly.<br />
Note<br />
Avoid bottoming of piston to inside of<br />
damper cylinder on final adjustments.<br />
Rev. E<br />
5-4
CARRIAGE MECHANISM -<br />
AA<br />
B. CARRIAGE MOVEMENT AND RETAINERS (AA-I00) (FIG. 5-1 AND FIG. 8-1)<br />
To adjust for proper movement of carriage, perform the following<br />
steps:<br />
1. Remove return spring (AG-20) from carriage unit (AA-51).<br />
2. Remove two nuts (AA-105) from belt tension axle (AA-106) and<br />
remove main driving belt (AE-9).<br />
3. Loosen two screws (AA-104) at front of carriage holding upper<br />
and lower retainers (AA-I00). Slightly pivot right-hand side<br />
of retainer holder (AA-101) downward to loosen retainers on<br />
front guide bar (AB-12).<br />
4. Carriage should now move with hand pressure of about 60 to<br />
80 grams (2-3 oz.).<br />
5. Adjust retainer holder (AA-101) so that retainers (AA-100)<br />
are compressed against front guide bar so that a hand pressure<br />
of 100-150 grams (3.5-5 oz) will move carriage along the<br />
carriage bars.<br />
6. Re-install main belt removed in steo 2., including two nuts<br />
(AA-105) on the belt tension axle (AA-106).<br />
7. Carriage should move along carriage bars with a hand pressure<br />
of approximately 700 gms. (24.5 oz.).<br />
8. Re-install return spring removed in step 1.<br />
9. Loosen lock-nuts (BA-56) on left and right eccentric axles<br />
(BA-55). (See Figure 5-1)<br />
10. Turn slotted axles to loosen (or tighten) carriage bearing<br />
rollers (surface of roller is lightly touching carriage<br />
bar). Retighten axle nuts.<br />
11. Move carriage by hand and observe that rollers are moving<br />
smoothly and that carriage is not binding. Hand pressure<br />
should be approximately 1.4-1.8 kg (3 to 4 lbs.).<br />
12. If roller bearings are too tight (binding against carriage<br />
bar), repeat steps A.9 through A.1I.<br />
Figure 5-1.<br />
CARRIAGE MOVEMENT ADJUSTMENTS<br />
5-5 Rev. E
CARRIAGE MECHANISM - AA<br />
PLATEN - AB<br />
C. HEAD BRACKET GUIDE<br />
1. The head bracket guide {AA-75} is adjusted to ensure<br />
proper operation between the head bracket guide and<br />
the head bracket. Adjust two screws and washers {AA-76,<br />
77} on the top of the guide and two adjusting screws and<br />
nuts {AA-78, 79} at the side of the ~uide so that the<br />
two surfaces (guide and head bracket) contact, but do<br />
not bind when the adjusting knob {AA-58} is rotated.<br />
5.2.2 PLATEN {Figure AB}<br />
5.2.2.1 Operation<br />
As the print head moves to the right, supported by two removable<br />
front and rear guide bars (AB-12, 7), round metallic wires from the print<br />
head strike through the print ribbon leaving a dot configuration on the<br />
paper. Behind the paper, is a mounted platen (AB-l) providing the hard<br />
surface against which the solenoid wires impact.<br />
At the front of the printer, mounted on two vertical posts<br />
(part of the printer base) is located the flexible timing fence assembly<br />
63060179-5001, spring clasp 63508140-2001 (left), and a clamp<br />
63508106-2001 (right). (See Figure 8-2)<br />
The Model 306 timing fence (0.007-in. thick) contains 480 windows<br />
total for an 80-character run-out, and must be mounted at a prescribed<br />
distance from the left post. (Refer to para. 5.2.2.3)<br />
5.2.2.2 Removal/Replacement<br />
A. PLATEN<br />
Prior to removing platen (AB-1) perform the following steps<br />
(to allow clearance for removal):<br />
1. Remove two screws (AI-19) (on right side of frame, AI-I),<br />
and remove retainer holder (B), retainer bearing (D), and<br />
retainer holder (A) (AI-18, 17, 16). (These are support<br />
pieces for paper feed shaft (AI-15).<br />
Rev. E<br />
5-6
PLATEN - AB<br />
2. Slide paper feed shaft to right and remove.<br />
3. Remove screws (AD-2) on larger capacitor (AP-3), and set<br />
capacitor aside.<br />
4. Loosen check nuts (AB-6) on screws (AB-5) and remove<br />
screws at top and behind platen (AB-7).<br />
5. Remove screws, washers (AB-2, 4, 3) at the back of and<br />
underneath the platen, and remove platen from the<br />
front of the printer.<br />
6. To re-install platen, reverse disassembly steps A.l.<br />
through A.5. above.<br />
Note<br />
When re-insta11ing platen, adjust screws<br />
(AB-5) so that there is a gap of 0.15 rom<br />
(0.006-in.) between platen and print head.<br />
Tighten nuts (AB-6) making sure adjustment<br />
is maintained.<br />
B. REAR GUIDE BAR<br />
1. Perform steps found in para. 5.2.1.2B.4 through B.8.<br />
2. Re-assemble in reverse order of disassembly.<br />
C. FRONT GUIDE BAR<br />
(With Video Amplifier Board (Fig. 8-19/26) removed to prevent<br />
damage to timing fence)<br />
1. To remove front guide bar (AB-12), remove left and right<br />
screw (AB-30) with left guide bar set plate (AB-31) and<br />
right guide bar set plate (AB-32).<br />
D. TIMING FENCE ASSEMBLY 63060179-5001, FLEXIBLE (FIG. 5-2, 8-2)<br />
1. To remove timing fence, release clamp (Fig. 8-2/41) on right<br />
mounting post by loosening two screws, washers (Fig. 8-2/45,<br />
43, 44).<br />
2. Unhook timing fence from spring projection at back of<br />
spring clasp (Fig. 8-2/40) and remove.<br />
3. To remove spring clasp and clamp, from right and left mounting<br />
posts respectively, remove screws, washers (Fig. 8-2/45, 43, 44).<br />
(Some models may have shim/s between post and fence (See<br />
Fig. 5-2).<br />
5-7 Rev. E
PLATEN -<br />
AB<br />
Figure 5-2. TIMING FENCE MOUNTING, <strong>MODEL</strong> 306<br />
5.2.2.3 Adjustments<br />
Note, after adjusting flexible timing fence, refer to Section<br />
5.2.1S.3.C. for adjustment of lamp assembly and/or fibre optic head, if<br />
required.<br />
A. POSITIONING OF FENCE (SEE FIG~ 5-2)<br />
a. Pull tab of fence (42) to the right so that the first<br />
window of the fence is located 4.5-in. (114 mm) from<br />
right side of left support post. (Note that his dimension<br />
adjusts for a nominal 5/S-inch print margin on printing<br />
form) .<br />
b. Secure fence under right clamp (41) and when correct<br />
dimension has been applied, tighten hardware (43, 45).<br />
B. OPTIC HEAD (NO LOCATING DIMENSION) (SEE FIG. 5-2)<br />
1. Set fibre optic head by loosening adjusting screws found on<br />
top of video amplifier board (Fig. S-19/26), and place face<br />
of head as close to fence without touching. Tighten screws.<br />
Run optic head full length of timing fence insuring that it<br />
does not touch fence. (If fence still touches optic head,<br />
apply 0.005-in. thick shim/s (46) between clasp (40) and<br />
left post). This is done to maintain parallelism within<br />
0.05 mm (0.002-in.) between timing fence and left and right<br />
support post.<br />
Rev. E<br />
5-S
PLATEN - AB<br />
PAPER PAN -<br />
AC<br />
C. LIGHT ASSEMBLY (NO LOCATING DIMENSION)<br />
a. Loosen adjusting screws on top of video amplifier board and<br />
set light assembly at maximum distance from fence (toward<br />
operator). Tighten screws.<br />
D. MAINTENANCE<br />
Timing fence can be wiped clean using micro-wipes (lint free,<br />
no abrasives). For more extensive cleaning use mild soap and<br />
water. CAUTION: DO NOT USE ANY ORGANIC SOLVENTS<br />
5.2.3 PAPER PAN (Figure AC)<br />
5.2.3.1 Operation<br />
There are two methods used to feed paper to the printer. In the<br />
bottom method, the paper is hand fed into a center slot on the underneath<br />
portion of the base. A paper pan unit (front) (AC-I) is used to continue<br />
the path that guides the paper over the platen (AB-l) where it can be<br />
positioned on the pin feed holding units (AK) for print use.<br />
The second method of paper feed is somewhat like the bottom method,<br />
except paper is fed from the back of the printer between the paper pan<br />
unit (rear) (AC-7) and the paper pan unit (center (AC-4).<br />
An adjustable micro~switch (AC-8) is mounted on the back wall of<br />
the rear paper pan with the actuator arm (AC-I6) extending through a slot<br />
directly over the path of the paper. When paper runs out, the PAPER OUT<br />
lamp is lighted on the operator panel. For those models with the optional<br />
use of a speaker assembly 526825001, (Fig. AH) an audible buzzer signal<br />
is tripped by the switch.<br />
5.2.3.2 Removal IRepl acement<br />
A. PAPER PAN UNIT (REAR)<br />
The following procedure must be made prior to removing the papet<br />
pan, rear (AC-7).<br />
1. Remove capacitor bracket and capacitor (AI-23) by removing<br />
screw and washer (AI-27, 25) from right chassis frame<br />
(AI-I) (main motor side).<br />
2. Remove main motor guard (AD-4) by removing two screws and<br />
washers (AD-5, 6).<br />
5-9 Rev. E
PAPER PAN - AC<br />
3. Unplug the two cables (Fig. 1-9/3, 4) attached to component<br />
board assembly logic/power supply board (Fig. 1-8/1) and<br />
remove screws and washers from two support brackets (top)<br />
(AI-8, 10) and two support brackets (bottom) (AI-4, 6).<br />
4. Release bracket (part of logic/pwr. board 63060104) holding<br />
the input connector of the printer by removing screws and<br />
washers from base (AH-1) of printer. (Note that ground wire<br />
must be removed at same time).<br />
5. Remove input cable connector 630060119 (Fig. 1-8/8), from<br />
logic/power supply board, and set board to the side.<br />
6. Remove printer harness 526783001 with connector (J8) from<br />
logic/pwr. supply board (Fig. 7-12).<br />
Note<br />
To protect PAPER OUT switch actuator<br />
(AC-l6) mounted on the wall of paper<br />
pan the following steps should be<br />
followed:<br />
7.<br />
8.<br />
9.<br />
10.<br />
11.<br />
Remove capacitor (AP-3) by removing three screws (AP-2)<br />
Remove bracket (AP-1) supporting capacitors (AP-3) and<br />
(AP-4) by removing four screws (AP-2) from left frame<br />
(AI-12).<br />
Remove bracket (AI-4) by removing screws (AI-5).<br />
Remove paper pan unit (AC-7) from rear position of printer<br />
by removing one screw and washer (AC-13, 14) from each<br />
side of pan. Remove pan with mounted switch (AC-8) but<br />
avoid bending actuator arm (AC-16) on switch when removing<br />
or ins ta 11 i n9 .<br />
For installation of paper pan unit (rear) (AC-7), reverse<br />
disassembly procedure, para. 5.2.3.2A, steps 1 through 11.<br />
(Adjust Paper Out micro-switch (AC-8) for smooth flow of paper,<br />
if required).<br />
B. PAPER PAN UNIT (CENTER) (AC-4)<br />
Note<br />
To remove this middle unit of the three<br />
paper pan assemblies, para. 5.2.3.2.A.,<br />
steps 1 through 7 must first be performed<br />
prior to removal.<br />
1. Remove three screws and washers (AC-S, 6) from underneath<br />
printer. Move pan into center slot of base of printer.<br />
Rev. E 5-10
PAPER PAN - AC<br />
DRIVING MECijANISM - AD - (l)<br />
2. Pull paper pan outward from flanged position at rear of<br />
printer.<br />
3. To re-assemble, reverse order of disassembly procedure.<br />
C. PAPER PAN UNIT (FRONT) (AC-l)<br />
1. Perform the steps indicated at para: 5.2.1.2.A., steps 1<br />
and 2.<br />
2. Remove perforated bottom plate (AH-4) underneat the base<br />
(AH-l) of printer by removing four screws and washers<br />
(AH-5, 6).<br />
3. Remove bottom screws and washers (AC-5 and 6) from center<br />
pan (AC-4).<br />
4. Remove screws and washers (AC-2, 3) from each side, top of<br />
paper pan (AC-l).<br />
5. Slip paper pan tabs free of base holes, and pull paper pan<br />
upward from the top side of printer.<br />
6. To re-assemble, reverse order of disassembly.<br />
5.2.4 DRIVING MECHANISM (Figure AD, part 1)<br />
5.2.4.1 Operation<br />
For this portion of the driving mechanism (part 1 of 2) continuous<br />
drive power from the main motor (AD-49/50) is transmitted to the clutch units<br />
(Refer Fig. AD, part 2, which includes air gap and preload clutches) in the<br />
following manner:<br />
Motor* - motor pulley (AD-13/13-1) - belt (AD-15) - Center pulley<br />
AD-24) - Center shaft (AD-23) - Motor pulley (AD-30) - Timing belt<br />
(AD-41) - Driving pulley (AE-l) - To clutch unit.<br />
The center pulley (AD-24) is supported on both ends of a center<br />
shaft (AD-23) by brackets (AD-34) which contain bronze bearing<br />
retainers (B) (AD-35). Located at the back end of the center shaft is a<br />
drive ~ulley (AD-27) which transfers drive torque by means of an O-ring<br />
(AJ-29) to the paper feed mechanism. The center shaft also functions to<br />
rotate pulley (AD-30) via belt (AD-15) to continue drive power to the pulley<br />
(AE-l) for the clutch units (AE, part 2).<br />
The main motor is air cooled by a fan (AD-5l) mounted on the shaft<br />
of the motor. Air is vented directly through a grid outlet on the base<br />
of the printer to the outside. A safety guard (AD-4) covers the fan.<br />
To minimize vibration, the motor is cushioned on the base of the printer<br />
with the use of a small rubber mat (AD-49). Two holder brackets (AD-49)<br />
fix the motor in place on the base. A capacitor (AI-23) is used to filter<br />
noise, and the motor is grounded with a ground wire strap (AD-45).<br />
AC<br />
*The 220-volt, 50/60 Hz transformer and motor are optional, as well as the<br />
50 Hz pulley (See Figs. 8-4, 8-16).<br />
5-11<br />
Rev. E
DRIVING MECHANISM - AD - (1)<br />
This portion of the driving mechanism (Figure AD, Part 1) uses<br />
two pulley belts:· (1) timing belt (AD-I5) used between center pulley<br />
(AD-24) and motor pulley (AD-I3), and (2) timing belt (AD-4I) used between<br />
driving pulley (AE-I) and motor pulley (AD-30).<br />
5.2.4.2<br />
Replacement/Removal<br />
A.<br />
MAIN MOTOR<br />
1. Remove motor ca)acitor (AI-23) located just above mairr<br />
motor (AD-49/50 by removing screw (AI-7) and washer (AI-25)<br />
from right frame (AI-I).<br />
2. Remove motor fan safety guard (AD-4) by removing two screws<br />
(AD-5) and lockwashers (AD-6) from printer base (AH-I).<br />
3. Loosen nut (AD-22) located at back of bracket (AD-I6) using<br />
open end wrench, 5.5 mm (0.22-in.). Remove belt (AD-I5)<br />
from rna in motor pu 11 ey (AD-13).<br />
4. Remove two main motor holders ~upper) (AD-49) by removing<br />
screws, washers, and grommets AD-II, 12, 8) from motor<br />
holder (lower) (AD-49) and printer base. Note, that between<br />
the lower motor holder and motor there is a rubber cushion<br />
(AD-49) .<br />
5. Remove ground wire (AD-45) from motor by removing screw (AD-47)<br />
and washer (AD-46).<br />
6. To remove fan (AD-51), loosen screw (AD-51) on motor shaft.<br />
7. To re-assemble, reverse order of disassembly (Refer para.<br />
5.2.4.3.A. for correct belt tension adjustment).<br />
5.2.4.3<br />
Adjustments<br />
A.<br />
MAIN MOTOR PULLEY BELT {AD-I5l (REFER TO FIGURE 5-3~<br />
This belt is located between motor pulley (AD-l3) and center<br />
pulley (AD-24) and proper tension is applied as follows:<br />
1. Loosen nut (AD-22), located at back of bracket (AD-I6), with<br />
a 5.5 millimeter (O.22-in.) open-end wrench.<br />
2. Adjust position of tensioner (AD-I7) so that movement of<br />
belt (side away from tensioner) when hand depressed with<br />
a pressure of 500 grams (I7.60z.) travels inward to a<br />
maximum distance of 3-6 mm (0.I-0.2-in.). (Reference<br />
Figure 5-3)<br />
Rev. E<br />
5-12
DRIVING MECHANISM - AD - (1)<br />
B. PREVENTIVE MAINTENANCE, TENS lONER (AD-17)<br />
1. Apply oil to felt washers (AD-18), located on each side of<br />
right tensioner (AD-17), on a normally semi-annual preventive<br />
maintenance (PM) basis.<br />
AD-24<br />
500 GRAMS<br />
(17.6 OZ.)<br />
3-6 MM<br />
(0.1-0.2-IN.)<br />
AD-l7<br />
(IN FRONT OF BRACKET (AD-16)<br />
Figure 5-3. ADJUSTMENT OF TIMING BELT (AD-15)<br />
(View from back of printer, forward)<br />
C. TIMING BELT (AD-4l) (REFER TO FIGURE 5-4)<br />
This belt is located between the drive pulley (AE-l) of the<br />
electromagnetic clutch unit (AE-3) and the motor pulley<br />
(AD-30) of center shaft (AD-23). Adjustment of proper tension<br />
is as follows:<br />
1. Loosen nut (AD-22), located at front of bracket (AD-16),<br />
with a 0.22-in. (5.5 mm) open-end wrench.<br />
2. Adjust position of tensioner (AD-l7) so that movement<br />
of belt (AD-41) {side away from tensioner} when hand depressed<br />
with a pressure of 500 grams (17.6 oz.) travels<br />
inward to a maximum distance of 3-6 mm {O.I-0.2 in.}.<br />
(See Figure 5-4)<br />
3. Belt should not wobble when forward clutch is turned on.<br />
Motor should not be under strain (no .noise).<br />
D. PREVENTIVE MAINTENANCE, TENSIONER (AD-17)<br />
1. Apply oil to felt washers (AD~18) located on each side of<br />
right tensioner {AD-17} on a normally semi-annual pre<br />
·ventive maintenance (PM) basis.<br />
5-13<br />
Rev. E
DRIVING MECHANISM - AD - (1)<br />
DRIVING MECHANISM - AE - (2)<br />
AD-17<br />
(BEHIND BRACKET (AD-16)<br />
500 GRAMS<br />
(17.6 OZ.)<br />
3-6 MM<br />
(0.1-0.2-IN.)<br />
AE-I<br />
Figure 5-4. ADJUSTMENT OF TIMING BELT (AD-41)<br />
(VIEW FROM BACK OF <strong>PRINTER</strong>, FORWARD)<br />
5.2.5 DRIVING MECHANISM (Figure AE, Part 2)<br />
5.2.5.1 Operation<br />
The function of this driving mechanism (AE - part 2) is based upon<br />
two types of clutches used in the printer: (I) air gap clutch or (2) preload<br />
clutch (later design).<br />
A. DRIVING MECHANISM, AIR GAP CLUTCH<br />
This second portion of the driving mechanism (AE) pertains to<br />
power transmitted from the drive pulley (B) (AE-I) which rotates<br />
clutch shaft (part of AE-3). When the electromagnetic clutch<br />
unit (AE-3) is activated by logic signals, the clutch armature<br />
(AE-3-3) and driving pulley (C) (AE-IS) (for main drive belt)<br />
(AE-9) rotate under friction force (via rotor) causing the<br />
print head to move to the right. As the carriage, with magnet<br />
on the underside, moves over the right reed switch (AG-I), the<br />
signal current stops and the clutch armature is restored to<br />
open position by springs mounted on it, and torque drive between<br />
armature (AE-3-3) and rotor (part of AE-3) is disconnected. The<br />
electromagnetic clutch unit (AE-3) is prevented from rotating<br />
about its shaft by means of a clutch turning stopper (l) (AE-12)<br />
tab mounted on the base of the printer.<br />
Rev. E<br />
5-14
B. DRIVING MECHANISM, PRELOAD CLUTCH (FIGURE AE, PART 2)<br />
Note<br />
When using a PRELOAD CLUTCH (AE-36)<br />
(with splined armature) in Model 306,<br />
USE POWER DRIVER BOARD ASSEMBLt<br />
63060105-4005 configured especially<br />
for preloaded clutch operation and<br />
four or eight inches per second (IPS)<br />
paper slew speed. For AIR-GAP CLUTCH<br />
OPERATION, USE POWER DRIVER BOARD<br />
63060105-4001.<br />
This part 2 portion of the driving mechanism pertains to power<br />
transmitted from the driving pulley (AE-1) using a preload<br />
clutch assembly.<br />
Drive pulley (AE-1) - clutch shaft (AE-34) - rotor (AE-26) -<br />
splined armature (AE-27) - hub (AE-28) - spring (AE-29) - drive<br />
pulley (AE-18).<br />
The clutch shaft, with fixed drive pulley (AE-1), rotates continuously<br />
in a clockwise direction through slip clutch mechanism<br />
(AJ-40, 41, 46) in the paper feed mechanism (AJ)~ This rotation<br />
is maintained through a clutch field (AE-30) assembly, and when<br />
activated, the splined armature (AE-27) is pulled against the<br />
rotor, and friction torque is continued, causing the head and<br />
carriage to move in the forward direction (to the right). Drive<br />
is disconnected between splined armature and rotor when signals<br />
to the clutch field assembly (AE-30) are discontinued; the head<br />
and carriage are then under spring (AG-20) return to left margin.<br />
Because of a preload condition (surface to surface contact) between<br />
armature and rotor, there is no gap adjustment. The<br />
tension against the rotor is maintained by a clutch spring (AE-29)<br />
pressing between the fixed, forward driving pulley (AE-18) and<br />
the splined armature.<br />
The hub (AE-28) inserts into the splined armature maintaining<br />
torque drive for the mounted forward drive pulley at the<br />
opposite end.<br />
The clutch field unit (AE-30) is prevented from rotating about<br />
its shaft (part of pinned rotor) by means of a clutch turning<br />
stopper (AE-12) mounted directly to the base of the printer.<br />
5-15 Rev. E
DRIVING MECHANISM - AE - (2)<br />
5.2.5,2 Removal/Replacement<br />
A. MAIN DRIVING BELT UNIT (AE-9)<br />
1. To loosen or tighten main driving belt. (AE-9), adjust two<br />
nuts (AA-I05) located on under side of carriage (AA-51).<br />
2. To remove driving belt (AE-9) from carriage, perform the<br />
following:<br />
(a)<br />
(b)<br />
(c)<br />
Remove two nuts (AA-I05) from belt tension axle<br />
(AA-I06) .<br />
Disengage belt by unhooking T-end of belt from<br />
left side under carriage. Slide belt over and under<br />
idle pulley (AF-23) on the left. Pull belt to the<br />
right under driving pulley (C) (AE-18) and out.<br />
To replace belt, reverse disassembly procedure.<br />
Check adjustments at para. 5.2.5.3.A.<br />
B. DRIVING MECHANISM ASSEMBLY (AE) PART 2 (FORWARD DRIVE AND AIR-GAP<br />
CLUTCH ASS'Y<br />
1. To remove complete driving mechanism assembly as shown in<br />
Figure AE (1), perform the following steps:<br />
(a)<br />
(b)<br />
(c)<br />
(d)<br />
(e)<br />
Remove two nuts (AA-I05) on belt tension axle (AA-I06),<br />
and remove main driving belt (AE-9).<br />
Remove screw and washer (AE-13, 14) releasing anti-rotation<br />
stopper (AE-12) .<br />
Loosen two allen-head screws (AE-19) on driving pulley<br />
(AE-18).<br />
Loosen two allen-head screws (AE-2) on driving pulley<br />
(AE-l).<br />
Loosen nut (AD-22) on left side of tensioner axle<br />
(AD-19) (allowing slack to timing belt (AD-41).<br />
(f) Sl ide timing bel t (AD-41) off driving pull ey (AE-18).<br />
(g)<br />
(h)<br />
Remove screws, washers (AE-22, 23) and remove left<br />
bushing bracket (AE-21).<br />
Remove screws, washers (AE-22, 23) and remove right<br />
bushing bracket (AE-21).<br />
Rev. E<br />
5-16
DRIVING MECHANISM - AE - (2)<br />
(i) Release spacer CAE-17), driving pulley (AE-18), clutch<br />
armature (AE-3-3) from left side of the electromagnetic<br />
clutch unit shaft. (Nove aside main belt to start parts<br />
release).<br />
(j) Release spacer CAE-17), driving pulley (AE-l) and then<br />
electromagnetic clutch unit (AE-3, with shaft) from right<br />
side.<br />
(k) Verify proper adjustment of air-gap clutch prior to<br />
assembly (Refer to para. 5.2.5.3B).<br />
(1) Reverse procedure (a) through (j) to re-install.<br />
C. DRIVING MECHANISM ASSEMBLY (AE) PART 2 (FORWARD DRIVE AND PRELOAD<br />
CLUTCH ASS·Y<br />
1. To remove complete driving mechanism as shown in Figure AE,<br />
perform the following steps:<br />
(a)<br />
(b)<br />
(c)<br />
(d)<br />
(e)<br />
Perform para. 5.2.5.2.A. to remove main belt (AE-9).<br />
Loosen tensioner (AD-17) against belt (AD-4l).<br />
Remove screw and washer (AE-13, 14) releasing antirotation<br />
stopper (L) (AE-12).<br />
Loosen two allen-head screws (AE-19) on driving pulley<br />
(C) (AE-18).<br />
Remove screws and washers (AE-22, 23) on both left and<br />
right bushing brackets (AE-2l).<br />
(f) Slide loosened belt off driving pulley (C) (AE-18).<br />
(g)<br />
(h)<br />
5.2.5.3 Adjustments<br />
Remove driving pulley (AE-l) and clutch field ass·y<br />
(AE-30) from shaft.<br />
Remove pinned rotor (AE-34) (with shaft) splined<br />
armature (AE-27) hub (AE-28) spring (AE-29) and driving<br />
pulley (AE-18).<br />
(i) To replace preload clutch unit (AE-36), reverse disassembly<br />
procedure.<br />
(j) Check para. 5.2.5.3.C. for clutch bracket (AE-2l)<br />
adjustments.<br />
A. DRIVE BELT (AE-9) MAIN MOTOR (SEE FIGURE 5-5)<br />
The main drive belt is located between the drive pulley (C)<br />
(AE-18) arid the idler pulley (AF-23) on the idler pulley shaft<br />
(AF-22). With belt in normal operating position, perform the<br />
following steps:<br />
5-17 Rev. E
DRIVING MECHANISM - AE - (2)<br />
1. Adjust main drive belt tension, by turning adjusting nuts<br />
(AA-105) on belt tension axle (AA-I06).<br />
2. For correct operating tension, adjust belt so that movement<br />
(at midway point) corresponds to a hand depression of 500<br />
grams (17.6 oz.) for a maximum downward distance of 6 to 8 mm<br />
(0.2-0.3-in.).<br />
CARRIAGE<br />
500 GRAMS<br />
(17 . 6 OZ.)<br />
------l'-------<br />
6-8 MM<br />
(0.2 - 0.3-IN.)<br />
AE-18<br />
Figure 5-5.<br />
MAIN MOTOR BELT ADJUSTMENT (AE-9)<br />
B. FORWARD CLUTCH, ROTOR/ARMATURE (AIR-GAP) (FIG. 5-6)<br />
To ensure smooth and even clutch action, uniform clearance should<br />
exist between the engaging surfaces of the armature (AE-3-3) and<br />
rotor (part of AE-3) of the clutch unit.<br />
1. Perform para. 5.2.5.2 B.1.(a) through (i) prior to adjusting<br />
clutch unit.<br />
2. To adjust for clutch gap, perform the following steps:<br />
(a)<br />
Loosen three lock nuts on armature (AE-3-3).<br />
(b)<br />
Using an allen-wrench on the adjusting screws, adjust<br />
a clearance of 0.002-0.006 thousandths inch max.<br />
(0.06-0.16 mm) between armature and rotor. (See Figure<br />
5-6)<br />
(c) Tighten lock nuts and reverse disassembly steps<br />
(para. 5.2.5.2 B.1., steps (a) through (i) to install<br />
clutch unit. .<br />
Note<br />
Ensure that drive pulley (AE-18) is<br />
solidly against the clutch armature<br />
when completing the assembly adjustments.<br />
Rev. E<br />
5-18
DRIVING MECHANISM - AE - (2)<br />
AE-3<br />
CAUTION!<br />
NO LUBRICANT SHOULD BE USED<br />
ON THE ROTOR OR ARMATURE<br />
CLUTCH SURFACES.<br />
Figure 5-6.<br />
FORWARD CLUTCH ADJUSTMENT (AIR-GAP)<br />
C. BUSHING END-PLAY ADJUSTMENT APPLIES TO BOTH AIR-GAP AND PRELOAD<br />
CLUTCH REFER FIG. 5-7<br />
To ensure smooth rotation of clutch shaft (AE-34) (Preload) or<br />
AE-3 (air-gap), perform the following adjustments:<br />
1. Tighten screws (AE-22) on rear bushing bracket (AE-21).<br />
2. Loosen screws (AE-22) on front bushing bracket (AE-21).<br />
3. Insert flat guage between spacer (AE-17) and hub of drive<br />
pulley (AE-18). Maintain a gap of 0.002-0.004-in. max.<br />
(0.05-0.10 mm) and tighten bracket to this dimension.<br />
AE-17<br />
AE-18<br />
AE-34I'AE-3<br />
AE-22<br />
0.002-0.004-IN. MAX.<br />
(0.05-0.10 MM)<br />
SIDE VIEW<br />
Figure 5-7. BUSHING END-PLAY ADJUSTMENT FOR<br />
(FORWARD CLUTCH SHAFT (AIR-GAP AND PRELOAD CLUTCH)<br />
5-19
DRIVING MECHANISM - AE - (2)<br />
D. DRIVING MECHANISM (FIG. AE, PART 2)<br />
1. Bracket (AE-21)<br />
a. Maintain one back bracket (AE-21) supporting the<br />
drive mechanism as far left as possible prior to<br />
tightening screws, washers (22) (23). (See Fig. 5-7A)<br />
AE-21<br />
Figure 5-7A. LOCATION OF DRIVE PULLEY BRACKET (AE-21)<br />
Rev. E<br />
5-20
IDLER PULLEY ASSEMBLY -<br />
AF<br />
5.2.6 IDLER PULLEY ASSEMBLY (Figure AF)<br />
5.2.6.1 Operation<br />
The idler pulley assembly, located on the left side of the printer,<br />
is used to transmit power from the main belt (AE-Q) directly to the<br />
ribbon assembly mechanism (AL) for both forward and reverse drive.<br />
The unit consists of an idler drive pulley (AF-23) and torque limiter<br />
(brake) (AF-31) (part of idler drive pulley), spring return pulley (AF-33)<br />
and a pinion shaft (AF-22).<br />
For forward drive of both carriage and ribbon mechanism, power is<br />
transmitted from the drive pulley (AE-7) and main belt through the idler<br />
pulley (AF-23) to the drive pinion shaft (AE-22).<br />
A rack (AL-1), geared to the rotating pinion shaft maintains the<br />
drive for both the left and right ribbon movement (See Figure AL). The<br />
rack and pinion motion is continuous with the movement of the ribbon drive<br />
mechanism and carriage for forward and reverse direction.<br />
On reverse direction the carria~e return spring, under tension,<br />
is guided over the return pulley (AF-33). The fixed idler pulley (AF-23),<br />
now rotating counterclockwise, transmits reverse torque directly to the<br />
rack and pinion, setting up the condition for the next ribbon feed drive<br />
and carriage movement when the print head returns under spring tension<br />
to the left margin.<br />
The idler pulley and brake, spring return pulley, and pinion shaft<br />
are supported by an idle pulley holder (AF-40) which in turn mounts directly<br />
to the base of the printer. Should carriage or ribbon drive malfunction,<br />
a torque limiter device (brake) (part of idler pulley) permits slippage of<br />
pinion shaft protecting forward or reverse ribbon drive linkages.<br />
When the malfunction is eliminated, the brake is reset by moving<br />
carriage, by hand, to start position on the printer (See para. 5.2.6.3.A.<br />
for adjustments).<br />
5.2.6.2 Removal/Replacement<br />
A. IDLER PULLEY UNIT (AF)<br />
To remove entire idler pulley unit 527730001, perform the<br />
following steps:<br />
1. Remove two nuts (AA-105) on belt tension axle (AA-106) and<br />
remove main driving belt (AE-9).<br />
2. Remove carriage return spring (AG-20) between bottom of<br />
head/carriage at DB guide plate (AA-107) and return spring<br />
bracket (AG-17). Move carriage to right, out of the way.<br />
5-21 Rev. E
IDLER PULLEY ASSEMBLY -<br />
AF<br />
3. Remove nut, screw, washer (AL-121, 96, 120) holding left<br />
ribbon releaser (AL-33 and left rod link (AL-9B).<br />
4. Remove screws, washers (AL-52, 53, 54) and remove left<br />
ribbon holder plate (AL-B).<br />
5. Remove three screws (AA-93) and washers (AA-94, 95), and<br />
remove damper cylinder (AA-B5).<br />
6. Remove four screws, washers (AF-41, 42) from printer base<br />
(AH-1) and remove entire idler pulley unit (See Fig. AF).<br />
7. When replacing idler pulley unit, reverse removal steps 1<br />
through 6. (Note, in step 1, when replacing main belt,<br />
that the ribbon feed rack (AL-1 should be in left-most<br />
position, and the idler pulley support bracket (AF-40) is<br />
in extreme right position and parallel to center line of<br />
printer.<br />
B. IDLER PULLEY SHAFT (AF-22)<br />
1. To remove shaft and parts from idler pulley bracket support<br />
(AF-40) perform the following:<br />
(a) Apply removal procedures from para. 5.2.6.2.A.1. through<br />
5.2.6.2.A.6.<br />
(b)<br />
Remove snap ring (AF-34) from shaft (opposite end to<br />
pinion).<br />
Before removing nut (AF-30) in next<br />
step (c), bend nut holder (AF-29)<br />
so that nut can rotate.<br />
(c) Using a 5.5 mm (7/32-in.) wrench, remove nut (AF-30)<br />
and nut holder securing the two ends of brake shoe<br />
holders (AF-43).<br />
(d)<br />
Spread brake shoe holders (AF-43) (with attached brake<br />
shoes) and remove small threaded shaft (AF-2B) and<br />
attached spring (AF-27).<br />
(e) Using a 2 mm (0.07B-in.) allen wrench, loosen two<br />
set-screws on friction sleeve (AF-31), (note that<br />
when re-installing sleeve, keep idler pulley in side<br />
contact with sleeve and maintain one set-screw on<br />
fl at of shaft).<br />
Rev. E<br />
5-22
IDLER PULLEY ASSEMBLY - AF<br />
(f) Grasp pinion end of shaft and slide shaft from the<br />
fo" owi ng parts:<br />
(1) Retainer (AF-35) (left).<br />
(2) Spacer (AF-39) (Use needle nose pliers to replace).<br />
(3) Return pulley (AF-33).<br />
(4) Idler pulley (AF-23) (with holders, AF-43).<br />
(5) Friction sleeve (AF-31).<br />
(6) Retainer (AF-35) (right).<br />
(g) To re~assemble idler pulley shaft parts, reverse steps<br />
at para. B.1.(a) through B.1.(f)(1) - (6).<br />
C. IDLER PULLEY (AF-23) (PART OF BRAKE MECHANISM)<br />
1. To install break shoe holders (AF-43) (with attached brake<br />
shoes) on idler pulley, perform the following steps:<br />
(a) Remove complete idler pulley assembly (AF).<br />
para. 5.2.6.2.A.1. through 6.<br />
Refer to<br />
(b) Remove idler pulley shaft (AF-22) (and parts). Refer<br />
to para. B.1.(a) through B.1.(f) 4.<br />
•<br />
(c) Remove snap rings (AF-26), and remove brake shoe<br />
holders (AF-43) (with attached break shoes).<br />
(d)<br />
5.2.6.3 Adjustment<br />
Replace brake shoe holders, and secure with snap<br />
ri ngs (AF -26) .<br />
(e) To re-assemble idler pulley unit and shaft, reverse<br />
steps B.1.(a) through B.1.(f)(6).<br />
(f) To install complete idler pulley (AF), reverse steps<br />
in para. 5.2.6.2.A.1. through 5.2.6.2.A.7.<br />
A. IDLER PULLEY (AF-23)(PART OF TORQUE LIMITER (BRAKE) MECHANISM)(FIG.5-8)<br />
1. Perform removal steps at para. 5.2.6.2.A.1. through 5.<br />
2. Using a 5.5 mm (7/32-in.) wrench, turn nut (AF-30) on small<br />
threaded shaft (AF-28) (holding spring (AF-27) until tension<br />
is off the spring.<br />
3. Finger tighten nut until it comes to rest on top surface of<br />
nut holder (AF-29) (with brake shoe holder (AF-43) underneath).<br />
4. Tighten nut three turns from starting position.<br />
Note<br />
To restore torque limiting device (brake),<br />
if malfunction occurs, eliminate cause of<br />
malfunction and reset brake by moving<br />
carriage by hand to start position on<br />
printer.<br />
5-23 Rev. E
IDLER PULLEY ASSEMBLY -<br />
REED SWITCH - AG<br />
AF<br />
AF-29<br />
AF-27---=...:'!IIi r-~~<br />
5.2.7 REED SWITCH (AG)<br />
5.2.7.1 Operation<br />
Figure 5-8. TORQUE LIMITING DEVICE (BRAKE)<br />
Note<br />
Tightening nut (AF-30) three turns (from<br />
finger tightened position) is the equivalent<br />
of 6 kg Cm (5 in. lbs) of torque to establish<br />
break away of the shaft (AF-22), i.e., the<br />
point at whic~ shaft will slip if malfunction<br />
occurs.<br />
WARNING<br />
<strong>PRINTER</strong> RIBBON DRIVE MAY BE DAMAGED IF<br />
OIL OR GREASE CONTAMINATES IDLER PULLEY<br />
BRAKE MECHANISM.<br />
Two reed switches (AG-1) that control end of print (EOP) (right)<br />
and ready to print (RTP) (left) are located above the back of the power<br />
driver heat shield at the front of the printer. The bottom of the reed<br />
switch holders (AG-9,12) are mounted to the base of the printer; and<br />
at the top of the holders, the non-conductive holder (AG-2) and the reed<br />
switch (AG-1) are fastened to the adjustable reed switch bracket (AG-7)<br />
by two more separate screws and nuts.<br />
The spring (AG-20) for the carriage return is fastened to a return<br />
spring bracket (AG-17) on the left side of the printer, coils around the<br />
return pulley located on return pulley holder (AG-21) and ;s then looped<br />
under and over second return pulley (AF-33) of shaft (AF-22). It is then<br />
attached to the underside of the carriage, sl;qhtly to the left of the<br />
main drive belt tension axle (AA-106) on the D.B. guide plate (AA-107).<br />
Rev. E 5-24
REED SWITCH -<br />
AG<br />
5.2.7.2 Removal/Replacement<br />
A. REED SWITCH (LEFT AND RIGHT) (SEE FIG. 5-9)<br />
1. Remove screw, washers (AG-3, 4, 5) and nut (AG-6) from<br />
both reed switches (AG-l).<br />
2. Remove insulating adjusting holders (AG-2) by removing<br />
screws (AG-15) mounted to reed switch holders (AG-7).<br />
3. To remove adjustin9 holders (AG-7) remove screws (AG-8)<br />
and washers (AG-25).<br />
4. To remove reed switch bracket holders (AG-9, 12) from<br />
base of printer, remove screws (AG-13, 10) and lockwashers<br />
(AG-ll, 14).<br />
5. To re-assemble reed switch assembly, reverse steps 1<br />
through 4 above.<br />
8<br />
25~<br />
1<br />
2<br />
16<br />
7 I<br />
Figure 5-9. REED SWITCH ASSEMBLY, LEFT (AG)<br />
5-25<br />
Rev. E
REED SWITCH - AG<br />
5.2.7.3 Adjustments<br />
A. LEFT REED SWITCH - STATIC ADJUSTMENT (SEE FIG. 5-10)<br />
1. Adjust left reed switch (AG-1) by lo~sening screws<br />
(AG-8) and washers (AG-25) on bracket (AG-7).<br />
2. Slide left reed switch so that the distance between outside,<br />
right edge of adjusting holder (AG-2) and the<br />
back portion of the left post that holds the front carriage<br />
bar (AB-12) is 33 millimeters (1.3 inches).<br />
7<br />
o<br />
5<br />
6<br />
AH-1<br />
~---&.---,<br />
o<br />
33 MM~<br />
(1. 3- IN.)<br />
Figure 5-10. LEFT REED SWITCH (AG-1) STATIC-ADJUSTMENT<br />
B. RIGHT REED SWITCH - DYNAMIC ADJUSTMENT<br />
1. The test for the right-hand limit switch (AG-1) is to ensure<br />
80 characters printed. Lines should be transmitted without<br />
a carriage return (CR) signal, or exactly 80 characters, to<br />
ensure that right limit switch (reed) turns off forward<br />
clutch and returns print head to home or left starting<br />
position.<br />
Note<br />
Ensure that the 80th character printed<br />
is a whole one (5 or 9 column).<br />
Rev. E<br />
5-26
<strong>PRINTER</strong> BASE -<br />
FRAME - AI<br />
AH<br />
5.2.S<br />
<strong>PRINTER</strong> BASE {Figure AH}<br />
5.2.S.1<br />
Operation<br />
The all aluminum metal base is a self-contained, single unit<br />
structured from cast aluminum, oxide protected, which supports the complete<br />
electronic and mechanical assemblies in the printer.<br />
A perforated guard plate {AH-4} is located directly under the<br />
power driver assembly.<br />
Four 2 x 5-inch removable rubber feet {AH-2} support the base.<br />
An optional speaker {AH-3} is shown mounted in the front,<br />
right-hand corner of the base {AH-1} using two mounting screws {AH-16}<br />
and bracket (AH-15).<br />
5.2.S.2<br />
Adjustment<br />
1. Speaker Option<br />
For electrical installation of speaker option, two wires located<br />
at the front, right-hand side of the base are connected to the<br />
speaker. The wires are identified as: W91-white/red {coming<br />
from connector JS at pin 7} and the return wire, W104-white/orange<br />
(coming from connector JS, pin 5). {Refer to Wirinq Diagram (Fig.<br />
7-S) for Model 306 Printer mechanism). .<br />
5.2.9 FRAME (Figure AI)<br />
5.2.9.1 Operation<br />
Two chassis frames ri9ht and left (AI-I, 12) support {I} the<br />
paper feed guide shaft (AI-20) (upon which are mounted two pin feed<br />
tractor units (Refer to Figure AK) and (2) the paper feed shaft (AI-IS)<br />
which is geared {Refer to Figure AJ} for line feeding of the printer<br />
paper. The paper feed shaft rotates on bronze bearings {retainers -<br />
AI-17} which are held by retainer holders (AI-16, IS) to the chassis by<br />
screws {AI-19}.<br />
5-27 Rev. E
FRAME -<br />
AI<br />
Located on the left end of the shaft (AI-20) (inside the left<br />
frame, AI-I2), is a small pin feed stopper (AI-34) which is adjustable<br />
when establishing the left print-out margin using perforated multiform<br />
paper (See para. 5.2.9.3.).<br />
Four brackets (AI-4, 6, 8, 10) attached to the chassis frames<br />
(AI-I, 12) support the logic/power supply printed circuit board, which<br />
stands in a vertical position at the back of the printer.<br />
Capacitor (AI-23) for main motor is mounted by bracket at the<br />
bottom right of the right-hand frame (AI-I).<br />
5.2.9.2 Replacement/Removal<br />
A. PAPER FEED SHAFT (AI-IS)<br />
1. Refer to para. 5.2.10.2 and perform paras. A and then B,<br />
step 1 through 4 prior to removing paper feed shaft (AI-I5).<br />
USE NEXT STEP 2. FOR REPLACING BEARING ONLY.<br />
2. Remove screws (AI-I9) on left frame (AI-I2) and remove<br />
retainer holder (A) (AI-I6) with retainer (bearing) (AI-I7)<br />
and retainer holder (B) (AI-I8).<br />
3. Remove screws (AI-I9) on right frame (AI-I) and remove<br />
retainer holder (B) (AI-I8) and retainer holder (A) (AI-I6)<br />
with retainer (D) (bearing) (AI-I7).<br />
4. Slip shaft through left paper feed holder (AK-20), belt<br />
paper guides (AK-IO), and right pf holder (AK-I) to the<br />
right, and remove.<br />
5. To reassemble, reverse order of disassembly.<br />
B. PAPER FEED GUIDE SHAFT (AI-20)<br />
1. Loosen both locking knobs (AK-I8) on paper feed guide shaft<br />
(AI-20).<br />
2. Remove nut (AI-22) at right end of guide shaft.<br />
3. Loosen allen-head screw (AI-3S) on pin feed stopper (AI-34).<br />
4. Remove slotted head screw (AI-2I) from left end of shaft.<br />
5. Slide shaft (AI-20) from the two pin feed tractors (AK-23,<br />
24) .<br />
6. To re-assemble, reverse order of disassembly.<br />
Rev. E<br />
5-28
5.2.9.3 Adjustments<br />
FRAME - AI<br />
PAPER FEED - AJ<br />
A. PIN FEED STOPPER (AI-34) (MAINTAINING 5/8-IN. NOMINAL PAPER MARGIN)<br />
1. Loosen set-screw (AI-35) on pin feed stopper and maintain<br />
O.2-in. (5 mm) dimension between stopper and left chassis<br />
(AI-12). Tighten screw.<br />
2. Perform para. 5.2.2.3.A. timing fence adjustment.<br />
3. Set left paper guide plate (AK-21) flush to stopper and<br />
lock knob (AK-18).<br />
4. Check for 5/8-in. nominal margin for print out on paper.<br />
5. Recheck fence dimension adjustment (step 2) if margin is<br />
not 5/8-in. nominal.<br />
5.2.10 PAPER FEED (Figure AJ)<br />
5.2.10.1 Operation<br />
A. STANDARD OPERATION<br />
Paper can be moved manually by pulling out and rotating the<br />
platen knob (AJ-17). For the standard Model 306 printer the<br />
vertical formatting is controlled by the user's software<br />
and a line count switch. Each line generates a line pulse to<br />
the interface connector on the printer. By keeping count of<br />
these pulses, the user's software can terminate the paper<br />
movement. Drive torque to operate the form feed clutch is<br />
supplied by the center shaft (AJ-37) through an O-ring (AJ-29). Any<br />
paper command will energize the solenoid magnet (AJ-65). The<br />
armature will then retract from rest position toward the<br />
magnet pole piece pulling the solenoid slide with it. This<br />
releases the clutch unit (AJ-40, 41). As the clutch release<br />
pawl (AJ-79) is released, three internal bearings (AJ-46) in<br />
the clutch assembly grip the clutch shaft (AJ-37) and rotate<br />
it 180 degrees. This half revolution is equal to paper movement<br />
of 1/6 of an inch, or one line. At the end of a line<br />
feed, the solenoid slide will engage both the releaser pawl<br />
(AJ-79) and clutch tab on the inner cam (AJ-40) disengaging<br />
the clutch (the three bearings retract from the shaft).<br />
At the conclusion of a line feed, a back stopper pawl (AJ-31)<br />
which rides on the back stop cam and gear (AJ-49), will drop<br />
in behind the notched lobe of the cam and prevent counter<br />
rotation of the clutch shaft (i.e., downward movement of<br />
multi-part paper).<br />
5-29 Rev. E
5.2.10.2 Removal/Replacement<br />
A. PAPER FEED KNOB (AJ-17)<br />
1. Remove screw (AJ-19), ornamental plate (AJ-18), and kno&.<br />
B. PAPER FEED GEAR (AJ-74)<br />
To remove paper feed gear, perform the following:<br />
1. Perform step A.1. at para. 5.2.10.2.<br />
2. Remove snap ring (AJ-16), flat washer (AJ-15), and spring<br />
(AJ-14). (Be careful Of spring tension on washers when removing).<br />
3. Remove paper feed gear, coupling (AJ-73) and knob coupler<br />
(AJ-12) as one piece.<br />
4. Loosen allen-screw (AJ-74) on PF gear and remove from PF<br />
coupling (AJ-73).<br />
5. For removal of remaining paper feed shaft, refer to<br />
Figure AI-15, Section 8 and para. 5.2.9.2.A.<br />
6. Reverse steps B.1. through B.4. to re-assemble.<br />
c.<br />
The above parts are removed from shaft (AJ-37) in the following<br />
manner:<br />
1. Remove snap ring (AJ-39) just inside right PF chassis (AJ-30)<br />
on shaft (AJ-37).<br />
2. Remove snap ring (AJ-4i) from cam (AJ-40).<br />
3. Loosen allen screws (AJ-50) on inner cam (AJ-40).<br />
Rev. E<br />
5-30
5.2.10.3 Adjustments<br />
PAPER FEED -<br />
4. Loosen allen screws (AJ-62) on cam and gear (AJ-49).<br />
5. Loosen allen screws (AJ-52) on counter (AJ-51).<br />
6. Remove snap-ring (AJ-39) on shaft (AJ-37) (just inside<br />
PF chassis, AJ-53).<br />
7. Remove O-ring (AJ-29) from pulley (AJ-44).<br />
8. Pull shaft (AJ-37) from left chassis (AJ-53), but<br />
keep inner cam and pulley together as there are three internal<br />
bearings (AJ-46) contained on the inside of part AJ-41, releaser,<br />
which may scatter.<br />
9. To assemble, reverse disassembly procedure placing O-ring<br />
(AJ-29) over pulley AJ-44 as shaft is threaded through parts.<br />
When parts are assembled, place O-ring over the driving pulley<br />
(AD-27) .<br />
A. CLUTCH, INNER CAM/ARMATURE SLIDE<br />
To adjust proper distance of armature slide (part of chassis,<br />
AJ-30) with respect to holding the raised tab on paper feed<br />
clutch, inner cam (AJ-40) (prior to line feed release), perform<br />
the following steps: (Refer to Fig. 5-11 below and mechanical<br />
drawing (Fig. AJ, Section 8).<br />
1. Loosen bolts (AJ-75) and washers (AJ-68, 69) on clutch<br />
magnet frame (AJ-63) mounted to right-hand paper feed<br />
chassis (AJ-30).<br />
2. Slide magnet from on paper feed chassis slots so that the<br />
gap between armature slide and raised tab on inner cam (AJ-40)<br />
is from 0.004-0.012-in. max. (0.1-0.3 mm). Tighten screws<br />
and washers.<br />
AJ<br />
AJ-49<br />
Figure 5-11.<br />
TWO ADJUSTMENTS, PAPER FEED MECHANISM (AJ)<br />
5-31 Rev. E
PAPER FEED - AJ<br />
PIN FEED UNIT - AK<br />
B. PAPER FEED CAM AND GEAR (AJ-49)/BACK STOPPER (AJ-31)<br />
As the raised tab on inner cam (AJ-40) and clutch release pawl<br />
(AJ-79) strike the armature slide (completing a line feed), it<br />
is at this pOint that the back stopper pawl (AJ-31) (See Fig.<br />
5-12) drops off the notched end of the cam (AJ-49) (Fig. 5-11)<br />
and must be adjusted in this position (preventing counter rotation<br />
or downward movement of paper).<br />
1. Loosen allen screws (AJ-62) on stop cam (AJ-49) and maintain<br />
a gap of 0.003-0.007-in. max (0.08-0.18 mm) between back<br />
stopper and notch on cam (See Fig. 5-12). Tighten allen<br />
screws on stop cam when gap is attained.<br />
C. LINE FEED COUNTER<br />
The line feed counter (AJ-51) must be adjusted so that both<br />
magnets clear the reed switch housing (AJ-4) when activating<br />
the internal switch.<br />
1. Loosen two allen-head screws (AJ-52) on line counter<br />
(AJ-51).<br />
2. With the armature slide (AJ-64) holding both the tab on the<br />
inner cam (AJ-40) and clutch release pawl (AJ-79) (clutch<br />
off), set the counter so that within a 90 degree rotation<br />
the switch is activated, and then comes to a stop beyond the<br />
reed switch housing at each line feed.<br />
5.2.11 PIN FEED UNIT (Figure AK)<br />
5.2.11.1 Operation<br />
Pin feed tracotrs, left and right (AK-19) Provide pin guides for<br />
paper to travel vertically up or down. To move paper down, pull paper<br />
feed knob (AJ-17) outward and rotate counterclockwise; to move paper up,<br />
rotate clockwise. Tractors are adjustable and are locked in position by<br />
fixing knobs (AK-18). Paper holders (AK-l, 20) are used to keep paper on<br />
pin feed tractors when printer is in use.<br />
Direct coupling of paper feed knob and paper feed shaft (See Figure<br />
AI-15) is accomplished by serrated portion of spring activated knob inserting<br />
into opposing serrated coupler (AJ-12).<br />
5.2.11.2 Replacement/Removal<br />
A. PIN FEED UNITS<br />
1. Perform steps A and B of para. 5.2.10.2<br />
2. Perform step A, steps 3 and 4 of para. 5.2.9.2.<br />
3. Loosen two fixin9 knobs (AK-18) on left and right pin feed<br />
units (Figure AK).<br />
4. Remove nut (AI-22) on paper feed guide shaft (AI-20) at<br />
right frame (AI-I).<br />
Rev. E<br />
5-32
PIN FEED UNIT -<br />
AK<br />
5. Loosen allen screw (AI-35) on pin feed stopper (AI-34).<br />
6. Remove screw (AI-21) on paper feed guide shaft at left<br />
frame (AI-12).<br />
7. Remove shaft from left side.<br />
8. To assemble, reverse order of disassembly.<br />
5.2.11.3 Adjustments<br />
A. PIN FEED HOLDERS AND PAPER GUIDE PLATES (LEFT AND RIGHT)<br />
1. Clearance between pin feed holders (AK-1, 20) and spring<br />
activated paper guide plates (AK-14, 21) should be<br />
0.065 ± O. 015-inch (1. 65 ± 0.4 mm). Adjust cl earance by<br />
bending right angle metal stopper located just above top<br />
hinge pin hole of pin feed holders, left and right (See<br />
AK-1, 20).<br />
B. PIN FEED BELT UNITS<br />
1. For proper tension of pin feed belt units (AK-19), adjust<br />
on the paper feed guide shaft (AI-20) as follows:<br />
a. Loosen fixing knobs (AK-18).<br />
b. Remove screw's (AK-ll) to remove belt paper guide<br />
(AK-10) .<br />
c. With a 1.5 millimeter (O.059-in.) allen-wrench, loosen<br />
set-screw (AK-2) on paper feed holders (AK-1, 20).<br />
d. Rotate eccentric stop sleeve (AK-7). Test for<br />
flexibility of pin feed timing belt units (AK-19) so<br />
that they are under similar tension on each side, (not<br />
too flexible or too tight). Tighten set-screws.<br />
e. Re-install belt paper guides (AK-10), and tighten screws<br />
(AK-ll).<br />
f. The difference between the pins in the left and right<br />
horizontal plane should be minimal. Adjust as follows:<br />
(1) Loosen fixing knobs (AK-18) at top of left and<br />
right pin feed holders (AK-l, 20).<br />
(2) Slide pin feed units together in middle of paper<br />
shaft.<br />
(3) Open both paper guide plates (AK-14, 21).<br />
(4) Loosen two allen-head set-screws (AK-6) on one<br />
pin feed driving pulley (AK-5) with a 1~ millimeter<br />
(0.06-in. ) allen-wrench.<br />
5-33 Rev. E
C. PIN FEED STOPPER<br />
PIN FEED UNIT - AK<br />
RIBBON FEED - AL<br />
(5) Align pins on belt (AK-19) in same plane. (Sight<br />
stoppers on pin feed holders (AK-l, 20) for<br />
reference points in same horizontal plane, or<br />
insert straight edge supported on stoppers to<br />
check alignment of pins).<br />
(6) Actual alignment can be done by hand moving<br />
the belt or pull paper knob (AJ-17) outward and<br />
rotate feed shaft (AI-15), which rotates eccentric<br />
sleeve (AK-3).<br />
(7) When left and right pin feed belts are aligned,<br />
tighten two set-screws (AK-6) on both driving<br />
pulleys (AK-5).<br />
1. Refer to para. 5.2.9.3 for adjustment of pin feed stopper<br />
(AI-14) if loosened from shaft (AI-20).<br />
5.2.12 RIBBON FEED (Figure AL)<br />
5.2.12.1 Operation<br />
As the printer operates, a left and right ribbon feed mechanism,<br />
mechanically linked so ~s to function when the print head moves, feeds the<br />
print ribbon obliquely across the face of the platen (AB-I). The slightly<br />
upward angle is maintained by right ribbon spool being located l~-inches<br />
higher with respect to the left lower ribbon spool allowing use of the<br />
entire ribbon surface. Two rollers (AA-62), mounted in advance of the<br />
moving print head on the same carriage, guide the ribbon across the jewel<br />
of the print head. A safety device protects the ribbon mechanism from<br />
being damaged allowing slippage in main drive (Refer to para. 5.2.6.3.A.).<br />
A. RIBBON FEED MECHANISM - LEFT<br />
Torque transmission route is as follows:<br />
Idler pulley (AF-23) - Idler pulley shaft (pinion)<br />
(AF-22) - ribbon fee9 rack (AL-1 ribbon pawl operator link (L)<br />
CAL-20) ribbon pawl operator (L) (AL-9) ribbon feed pawl (L)<br />
(AL-II) - ribbon feed ratchet (L) (AL-189) ribbon with spool<br />
(AL-113 )<br />
B. RIBBON FEED MECHANISM - RIGHT<br />
Torque transmission route is as follows:<br />
Idler pulley, (AF-23), Idler pulley shaft (pinion)<br />
(AF-22) - ribbon feed rack (AL-I) - Ribbon feed bar (AL-IOI) -<br />
ribbon pawl operator link (R) (AL-l12) - ribbon pawl operator<br />
(R) (AL-56) - ribbon feed pawl (R) (AL-58) - ribbon feed ratchet<br />
(R) (AL-190) ribbon with spool (AL-113).<br />
Rev. E<br />
5-34
RIBBON FEED - AL<br />
C. CONNECTING ROD LINK, LEFT AND RIGHT SPOOL<br />
Torque transmission route for ribbon feed mechanism depends<br />
upon position of left ribbon releaser (AL-33) or right ribbon<br />
releaser (AL-82). The two operate in tandem by a connecting<br />
rod link (L) (AL-98) and connecting rod link (R) (AL-97)<br />
which is adjustable on the right side of the left rod link.<br />
The position of the two connecting rod links is controlled by<br />
ribbon release holder (AL-46) located to the left of the<br />
ribbon releaser (L) (AL-33). The holder consists of a<br />
spring arm and roller upon which the ribbon releaser (AL-33)<br />
will ride under tension, but remains positioned when set<br />
for either right or left movement of the ribbon.<br />
D. FORWARD AND REVERSE CONTROL RIBBON MOVEMENT<br />
Tension of ribbon is held by ribbon holder (L) (AL-27) and<br />
(R) (AL-76) in conjunction with ribbon releasers (R) (AL-82),<br />
(L) (AL-33), guide rollers (L) (AL-42), (R) (AL-89), and<br />
ribbon tension rollers (L), (AL-37), (R) (AL-86).<br />
If the ribbon, rotating on the ribbon spool (AL-113),<br />
approaches the end, two eyelets or stop plate on the ribbon<br />
pull the releaser rods (AL-82, 33) and the direction of the<br />
ribbon is reversed.<br />
E. RIBBON MOVEMENT - RIGHT<br />
For the transfer of ribbon movement to the right, right rod<br />
links (AL-97) must be in position to the right, the gear<br />
teeth of the spool feed ratchet (R) (AL-190) engages with<br />
drive ribbon feed pawl (AL-58) rotating ribbon spool (AL-113)<br />
clockwise. A ribbon stop pawl (R) (AL-79) prohibits reverse<br />
motion of feed ratchet when ribbon feeds to the right.<br />
F. RIBBON MOVEMEN~ - LEFT<br />
For the transfer of ribbon movement to the left, left rod<br />
link (AL-98) must be in position to the left, gear teeth<br />
on spool feed ratchet (L) (AL-189) engages with drive ribbon<br />
feed pawl (L) (AL-11) rotating left ribbon spool (AL-113)<br />
counterclockwise. A ribbon stop pawl (L) (AL-30) prohibits<br />
reverse motion of feed ratchet when ribbon feeds to the left.<br />
G. STOPPERS - LEFT AND RIGHT (At-1lS, 49)<br />
For proper movement of the ribbon pawl operators (AL-9, 56)<br />
two stoppers (AL-115, 49) are adjusted to maintain optimum<br />
movement of the ratchets (AL-189, 190) (ribbon rotation) with<br />
respect to the transference of drive from the rack and<br />
pinion (AL-1, AF-22) through the left ribbon pawl operator<br />
link (AL-20).<br />
5-35 Rev. E
RIBBON FEED -<br />
AL<br />
H. SUMMARY OF RIBBON MOVEMENT FUNCTION<br />
In summary, if motion of ribbon is set for right movement, the<br />
right feed pawl drives the right feed ratchet, while left<br />
feed ratchet and left stop pawl is disengaged and inactive.<br />
On the other hand, if motion is set for left movement of ribbon,<br />
the left feed pawl drives the left feed ratchet, while the<br />
right feed ratchet and right stop pawl is disengaged and inactive.<br />
5.2.12.2 Removal/Replacement<br />
A. RIBBON HOLDER PLATE (Al-B), (LEFT)<br />
1. Disconnect ribbon releaser (l) (AL-33) from ribbon rod<br />
link (l) CAl-98) by removing screw (l) (Al-96).<br />
2. Remove entire ribbon holder plate (Al-B) by removing<br />
four screws (AL-52) and washers (AL-53, 54) from left<br />
chassis frame (AI-12).<br />
3. To replace, reverse order of disassembly.<br />
B. RIBBON HOLDER PLATE (Al-55), (RIGHT)<br />
1. Disconnect ribbon releaser (R) (Al-B2) from ribbon rod<br />
link (R) (AL-97) by removing screw (R) (AL-96).<br />
2. To remove entire ribbon holder plate (AL-55) perform the<br />
foll owi ng:<br />
a. Remove two nuts (Al-l03) and washer (Al-102) from<br />
right-hand side of ribbon feed bar CAL-10l}.<br />
b. Remove four screws (AL-93) and washers CAl-94, 95)<br />
from right chassis frame (AI-l).<br />
c. Remove screws (AD-3B), washers (AD-39, 40) from<br />
bracket (AD-34) and remove entire ribbon holder plate<br />
(AL-55) .<br />
3. To replace, reverse order of disassembly.<br />
C. RIBBON FEED RACK (AL-l)<br />
1. Prior to removing ribbon feed rack (AL-1), perform para.<br />
5.2.12.2.A.2. and swing left ribbon holder plate out of the<br />
way.<br />
2. Move carriage and head to the right, and fasten temporarily.<br />
Remove two nuts (AL-l03) and washer (AL-l02) from left<br />
side of ribbon feed bar (AL-lOl).<br />
Rev. E<br />
5-36
RIBBON FEED - AL<br />
3. Remove two screws (AL-6) and washers (AL-7) from printer<br />
base post (below left end of platen {AB-l} on side).<br />
4. Remove two screws (AL-6) and washers (AL-7) from<br />
printer base post (at left end of rear guide bar, AB-7)<br />
and remove ribbon rack feed.<br />
5. To re-assemble, reverse steps 1 through 4.<br />
5.2.12.3 Adjustments<br />
A. RACK AND IDLER PULLEY SHAFT (PINION) (AL-l, AF-22)<br />
(Perform steps from para. A.I through A.3 to adjust rack and<br />
pinion).<br />
1. Idler Pulley Assembly Positioning (AF-21)<br />
a. Remove damper (AA-85).<br />
b. Remove left ribbon holder plate (AL-8).<br />
c. Loosen four screws, washers (AF-4I, 42) holding idler<br />
pulley ass'y (AF-21) to base of printer.<br />
d. Move idler pulley assembly (AF-21) so that unit is<br />
located to the extreme right position of mounting holes.<br />
Unit must be parallel to center line of printer (Refer<br />
to Fig. 5-12).<br />
Figure 5-12.<br />
LOCATING IDLER PULLEY ASSEMBLY<br />
e. Replace damper (AA-85).<br />
f. Proceed to next step, 2.<br />
2. Ribbon Feed Rack (AL-l)<br />
a. Starting Position Adjustment<br />
(I) Push carriage (Fig. 8-1/51) containing piston<br />
(AA-80) to left margin until piston bottoms in<br />
damper cylinder (AA-85).<br />
5-37 Rev. E
RIBBON FEED -<br />
AL<br />
(2) Loosen four screws (AL-6) holding rack guide<br />
place (AL-2) to printer.<br />
(3) Raise rack guide plate (AL-2) upwards away from<br />
pinion (AF-22).<br />
b. Rack and Pinion Adjustment<br />
(1) Move ribbon feed bar (AL-101) by hand so that<br />
rack (AL-1) can be adjusted in next step (2).<br />
(2) Maintain 7 mm (0.27-inch) between ribbon feed<br />
rack (AL-1) and guide rack (AL-2). (See Fig. 5-13)<br />
--1 r-7 MM<br />
AL-1 AL-2<br />
AL-101<br />
Figure 5-13.<br />
LOCATING DIMENSION FOR RIBBON FEED RACK<br />
(3) When performing next step (4), adjust guide plate<br />
so that rack is in a horizontal plane and meshes<br />
evenly with pinion gear when head is run out to<br />
extreme right by hand.<br />
(4) Maintain allowable standard backlash of 0.1 mm<br />
(0.004-in.) between rack and pinion teeth. (Move<br />
rack guide plate up or down into spline of shaft<br />
(AF-22) to establish backlash adjustment, (See Fig.<br />
5-14) .<br />
(5) When those steps in paras. 2.b.1. through 2.b.3<br />
have been performed correctly, tighten four rack<br />
guide screws (AL-6).<br />
3. Torgue Limiting Device (Brake) (AF-23)<br />
a. Perform steps found at para. 5.2.6.3.A.2 through A.4.<br />
b. Replace ribbon holder plate (AL-8).<br />
Rev. E<br />
5-38
RIBBON FEED - AL<br />
Figure 5-14.<br />
RACK AND PINION ADJUSTMENT, RIBBON MECHANISM<br />
B. RIBBON REVERSE MECHANISM<br />
(Perform steps from B.1 through B.5 for adjustment of Ribbon<br />
Reverse Mechanism)<br />
1. Dimensioning of Left and Right Ribbon Holder Plates (AL-8, 55)<br />
(Perform steps from B.1 through B.5 for adjustment of Ribbon<br />
Reverse Mechanism)<br />
a. Left Ribbon Holder Plate (AL-8) (Fig. 5-15)<br />
(I) Maintain parallelism of plate with respect to<br />
printer base and apply distance of 16-17 mm<br />
(O.6-0.67-in.) between top of plate and top of rear<br />
guide bar (AB-7). See Figure 5-15.<br />
(2) Tighten mounting screws, washers (AL-52, 53, 51)<br />
of bracket when parallelism and correct distance<br />
has been attained.<br />
5-39 Rev. E
RIBBON FEED - AL<br />
LEFT RIBBON<br />
HOLDER PLATE<br />
CAL-B)<br />
Figure 5-15.<br />
REAR GU ID E BAR<br />
(AB-7)<br />
p'<br />
f<br />
16-17 MM<br />
(0.6 0.67-IN.)<br />
!<br />
a<br />
LOCATING DIMENSION FOR LEFT RIBBON HOLDER PLATE<br />
WITH RESPECT TO REAR GUIDE BAR'<br />
b. Right Ribbon Holder Plate (AL-55) (Fig. 5-16)<br />
(1) Maintain parallelism of bracket (AL-55) with respect<br />
to printer base and apply a distance of 41-42 mm<br />
(1.6-in.) between top of bracket and top of rear<br />
guide bar (AB-7).<br />
(2) Tighten mounting screws, washers (AL-93, 94, 95)<br />
of bracket when parallelism and correct distance<br />
has been attained.<br />
11<br />
I<br />
41-42 MM<br />
(1.6-IN. )<br />
RIGHT RIBBON<br />
HOLDER PLATE<br />
(AL-55)<br />
REAR GUIDE BAR<br />
(AB-7)<br />
Figure 5-16.<br />
LOCATING DIMENSION FOR RIGHT RIBBON HOLDER PLATE<br />
WITH RESPECT TO REAR GUIDE BAR<br />
Rev. E<br />
5-40
2. Left Pawl Operator Adjustment (AL-9)<br />
RIBBON FEED - AL<br />
(a) Set carriage (containing mounted piston, AA-80) at<br />
extreme left margin until piston bottoms into damper<br />
cylinder (AA-85).<br />
(b) Set left releaser (AL-33) to the left.<br />
(c) Loosen screw (AL-50) on left pawl operator stopper<br />
(AL-49) and reset stopper with high side touching the<br />
right side of the left pawl operator (See Fig. 5-17).<br />
Tighten screw.<br />
LEFT OPERATOR (AL-9)<br />
STOPPER (AL-49)<br />
(<br />
'------- SCREW (AL-50)<br />
WASHER'(AL-51)<br />
Figure 5-17.<br />
LEFT OPERATOR AND STOPPER ADJUSTMENT<br />
3. Ad'ustment for Left and Ri ht<br />
a. Ribbon Feed Bar - Left Side (Fig. 5-18)<br />
(1) Loosen both nuts (AL-103) on left side of ribbon<br />
feed bar.<br />
(2) Establish a gap of 0.2 mm (0.008-in.) between<br />
washer (AL-102) and ribbon feed plate (AL-1).<br />
(3) Tighten nuts (AL-103) up to washer while holding<br />
gap at the same time.<br />
5-41 Rev. E
RIBBON FEED -<br />
AL<br />
AL-101<br />
Figure 5-18.<br />
RIBBON FEED PLATE AND GUIDE BAR (LEFT SIDE)<br />
b. Ribbon Feed Bar - Right Side (Fig. 5-19)<br />
(1) Loosen left nut (AL-103) on left side of ribbon<br />
pawl operator link (AL-112).<br />
(2) Maintain 0.1 mm (0.004-in.) gap between nut and<br />
right ribbon pawl operator link (AL-112).<br />
(3) Do not tighten nuts until step 4.b. has been<br />
performed. ~ t-0.1 MM<br />
(0.004-IN.)<br />
RIBBON FEEO BAR<br />
AL-112<br />
(AL-101)<br />
Figure 5-19.<br />
AL-103<br />
ADJUSTING NUTS FOR RIGHT PAWL OPERATOR MOVEMENT<br />
4. Right Pawl Operator (AL-57) Starting Position<br />
a. Set left side of right pawl operator (AL-56) at a<br />
distance of 0.5-1.5 mm (0.02-0.06-in.), as shown in<br />
Fig. 5-20).<br />
b. To adjust and maintain 0.5-1.5 mm (0.02-0.06-in.),<br />
between plate and operator, as shown in Fig. 5-20, adjust<br />
and tighten nuts (AL-103) referred to in Figure 5-19 (Note<br />
that right stop pawl (AL-79) and right feed pawl (AL-58)<br />
are fully engaged (Fig. 5-20).<br />
Rev. E<br />
5-42
RIBBON FEED -<br />
AL<br />
RIGHT PAWL OPERATOR<br />
(AL-56)<br />
(AL-55)<br />
0.5-1.5 MM<br />
(0.02-0.06-;n.)<br />
RIGHT STOP PAWL<br />
(AL-79)<br />
Figure 5-20.<br />
RIGHT FEED RATCHET<br />
(AL-74)<br />
RIGHT PAWL OPERATOR STARTING POSITION<br />
5. Ribbon Reverse Adjustment (Left and Right)<br />
a. Remove left and right ribbon spools.<br />
b. On left support plate (AL-8) of ribbon feed mechanism,<br />
loosen screw, washer (AL-47, 48), and pivot control<br />
spring (AL-46) upward and towards the front of the<br />
printer (to avoid contact with ribbon releaser (AL-33)<br />
(Fig. 5-21).<br />
c. Loosen two screws, washers (AL-99, 100) just enough<br />
so that the ribbon rod links (AL-98, 97) can slide independently<br />
from each other.<br />
d. Adjust the ribbon rod links (AL-98, 97) so that the<br />
cam (part of left and right ribbon releasers - AL-33<br />
82) is just contacting the left and right ribbon pawls<br />
(AL-11, 58) at that point where the ribbon feed pawls<br />
are fully engaged with their respective left and right<br />
ribbon feed ratchets (AL-189, 190) (See Fig. 5-21).<br />
e. When the conditions in step 4 are met, tighten two<br />
screws (AL-99) in rod links (AL-97, 98).<br />
f. Replace the control spring (AL-46); adjust the control<br />
spring so that the pOinter or spur on the ribbon releaser<br />
left (AL-33) is just before top dead center on the control<br />
spring roller, and then tigh .. ten the screw, washer<br />
(AL-47, 48) (Refer to Fig. 5-22),<br />
5-43 Rev. E
RIBBON FEED - AL<br />
SURFACE ~<br />
CONTACT<br />
AL-189<br />
AL-190<br />
Figure 5-21.<br />
AL-11<br />
AL-58<br />
PAWL, RATCHET AND CAM MOVEMENT<br />
\\ JUST BEFORE<br />
SPRING AND ROLLER \~TOP DEAD CENTER<br />
(AL-46) \<br />
AL-47<br />
LEFT<br />
RIBBON RELEASER<br />
(AL;..33)<br />
Figure 5-22.<br />
SPUR ON LEFT RELEASER (AL-114) AND ROLLER (AL-46)<br />
Rev. E<br />
5-44
5.2.13 COVER (Figure AM)<br />
COVER - AM<br />
OPERATOR PANEL - AN<br />
5.2.13.1 Operation<br />
The covers to the Model 306 printer consist of three structural<br />
foam parts: The main cover, top cover and form feed cover.<br />
The main cover is the largest of the three and mounts over the<br />
printer, fastening to two posts in the front, and two posts at the back.<br />
The top cover dovetails into the back of the main cover that<br />
contains two hinged tabs. If the top cover is closed, it will normally<br />
come to rest into two opposing clips (on the main cover) acting as a<br />
locking device. An aperature exposing the operator panel is located on<br />
the left side.<br />
The form feed cover is the smalles in size and functions as<br />
an access to the optional vertical format unit (VFU), when installed.<br />
This cover has hinged tabs and a clip into which it normally rests. A<br />
recessed well allows hand removal when required.<br />
5.2.13.2 Removal/Replacement<br />
A. MAIN COVER REMOVAL<br />
1. Remove scrp.w, ornamental plate and platen knob (AJ-19,<br />
18, 17).<br />
2. To ~emove cover (AM-1) remove two screws and washers<br />
(AM-11, 12) from two front posts (part of base, AH-1) and<br />
two screws (AM-13) from near posts.<br />
3. When replacing cover (AM-1), reverse procedure of para.<br />
A.1 through A.2.<br />
5.2.14 OPERATOR PANEL (Figure AN)<br />
5.2.14.1 Opera t ion<br />
The operator panel is located on the left front of the printer<br />
where it mounts by bracket to two posts. An additional angular bracket<br />
provides support to the panel.<br />
Refer to Operator Manual for control functions indicated on the<br />
operator panel.<br />
5.2.14.2 Rep 1 acemen t/ Remova 1<br />
A. OPERATOR PANEL<br />
1. Remove main top cover (AM-1).<br />
2. To remove operator panel (AN-6) remove four screws (AN-7)<br />
and washers (AN-8, 9) from base posts on left side, front<br />
of printer.<br />
5-45 Rev. E
5.2.15 ELECTRICAL COMPONENTS (Figure AO)<br />
ELECTRICAL COMPONENTS - AO<br />
ELECTRICAL COMPONENTS - AP<br />
ELECTRICAL COMPONENTS - AQ<br />
PRINT HEAD & ASSOC. ASS' Y<br />
5.2.15.1 Operation<br />
The power transformer unit (AO-1) (115 volt, 50 or 60 Hz), (220 volt,<br />
50 or 60 Hz is optional), mounts at the back, on left side of the printer<br />
with four mounting screws. .<br />
The AC power cord (AO-4) is supplied with the printer, and the AC<br />
input circuit carries a 3 amp slo-blo fuse (AO-7) (refer to Fig. 7-8, wiring<br />
diagram). The fuse cartridge is located at back of printer on the right,<br />
seen from back of printer (Fig. 8-i).<br />
Main motor connector wiring (AO-8) is shown on the transformer<br />
(Fig. AO-1).<br />
5.2.16 ELECTRICAL COMPONENTS (Figure AP)<br />
5.2.16.1 Operation<br />
The two capacitors shown are mounted together on a single bracket<br />
(AP-l) which is connected to the left frame (AI-12).<br />
Capacitor (AP-3) is used in the 35-volt power supply (unregulated)<br />
(Refer to Section 4, Theory of Operation, para. 4.9.3).<br />
Capacitor (AP-4) is used in the +5-volt power supply (Refer to<br />
Section 4, Theory of Operation, para. 4.9.1).<br />
5.2.17 ELECTRICAL COMPONENTS (Figure AQ)<br />
5.2.17.1 Operation<br />
Main harness unit (AQ-1) is supplied with two connectors.<br />
Fig. 7-9 for wiring diagram).<br />
(Refer to<br />
5.2.18 PRINT HEAD AND ASSOCIATED ASSEMBLIES (Fig. 8-19)<br />
5.2.18.1 Operation<br />
A. PRINT HEAD (FIG. 8-19)<br />
1. Detach top cover (AM-6) from inserted position in main<br />
top'cover (AM-I).<br />
2. Release lock-knob (22A) and then rotate adjusting knob<br />
(22) so that head moves to maximum travel away from<br />
platen (AB-1) allowing sufficient gap between print head<br />
and print ribbon.<br />
Rev. E<br />
5-46
PRINT HEAD & ASSOC. ASS r Y<br />
3. Unplug print head fingerboard connector (9) from connector<br />
(34) on video amplifier board (26).<br />
4. Remove upper screws, washers (16, 17) and lower screws,<br />
washers (18, 17) holding print head to print head support<br />
bracket (20). Use diagonal method of removal, e.g.,<br />
upper left, lower right, upper right, lower left.<br />
5. To install print head, reverse removal/replacement procedure,<br />
para. A.1. through A.4., and refer to Operator<br />
Manual for Forms Thickness Control prior to printing.<br />
B. CARRIAGE (FIG. 8-19)<br />
1. Refer to removal/replacement procedure of print head<br />
carriage (24) in para. 5.2.1.2.B.1. through B.10.<br />
C. POWER DRIVER BOARD (FIG. 8-19)<br />
1. Refer to para. 5.2.18.2.A.1. and detach top cover (AM-6).<br />
2. Unplug ribbon cable connector board (31) from holding<br />
clips of power driver board (33) connector (34). Refer<br />
to Section 7 for electrical component board assembly,<br />
Power Driver 63060105-4001 (air-gap clutch) or 63060105-4005<br />
(preload) •<br />
3. Release ribbon cable ass'y (31) comin~ from video amplifier<br />
board (26) to the power driver board (33) by removing<br />
screw, washer (35, 36) from cable clamp (37) of cable<br />
tray located on the front of the power driver heat sink<br />
(48).<br />
4. Remove entire heatsink bracket (48), which includes<br />
attached power driver board (33), by removing three countersunk<br />
metric screws (38) at front of printer attached to<br />
printer frame unit (Ref. AH/12).<br />
5. To re-install power driver unit, reverse above disassembly<br />
procedure.<br />
D. VIDEO AMPLIFIER AND CABLE ASSEMBLY (FIG. 8-19)<br />
1. Perform steps 1 , 2, and 3 of para. 5.2.18.2.C.<br />
2. Unplug print head fingerboard (9) from holding clips<br />
(2) View A on connector (34) of the video amplifier board<br />
(26) •<br />
3. Remove entire video amplifier board (26) and attached<br />
cables (31) by removing screws, washers (28, 29, 30)<br />
(View A) from bracket support (47) attached to front of<br />
print head carriage (24).<br />
5-47 Rev. E
5.2.18.3 Adjustments<br />
PRINT HEAD & ASSOC. ASS' Y<br />
4. To install video amplifier and cable assemblYt reverse<br />
order of disassembly procedure of this para. 5.2.18.2.0.1.<br />
through 0.3.<br />
A. PRINT HEAD<br />
Once the print head (13) is bracket mounted to the carriage (24)<br />
with attaching hardware (Ref: para. 5.2.18.2.A.), there are<br />
no more adju.stments except for operator procedure. Refer to<br />
Operators Manual t Forms Thickness Control.<br />
B. CARRIAGE (LA-9)<br />
1. Refer to para. 5.2.1.3.B. for complete carriage adjustments.<br />
C. AOJUSn~ENT OF FIBRE OPTICS HEAD 8 AND LAMP ASSEMBLY 43<br />
RELATIVE T TIMING FENCE 27 F R CHARACTER GENERATION<br />
FIG. 8-19<br />
1. Bracket (47) (See also Fig. 8-1 t item 120)<br />
(a) Loosen screws and washers (28, 29, 30) and push upward<br />
on right side of bracket so that top of right angle<br />
bend is flush and parallel with surface of printer<br />
carriage unit. Tighten allen screws (28) so that<br />
slight tap would shift position of bracket.<br />
2. Lamp Holder Housing (43)<br />
(a) Remove screw, washers (6, 39, 40) holding lamp<br />
assembly (41) and lamp (42). Set assembly aside<br />
with attaching hardware.<br />
(b) Loosen screws and washers (6, 7) on top of video<br />
amplifier board (26) holding lamp holder housing (43).<br />
(c) Move housing backwards (towards operator) on screw<br />
adjusting slots of board to maximum distance. Tighten<br />
screw and washers. (See Fig. 5-23)<br />
3. Fibre Optics Head (8)<br />
(a) Loosen screws, flatwashers (6, 7) holding optic head<br />
to video amp. board (26).<br />
(b) Move optics head toward timing fence (27) but not<br />
touching. (See Fig. 5-23). Allow lead of optic<br />
bundle (part of fibre optic head, 8) to hang freely.<br />
Rev. E<br />
5-48
PRINT HEAD & ASSOC. ASS (Y<br />
Note<br />
The following adjustments must be made<br />
to simulate correctly aligned lamp<br />
(GE-379) so that when adjustments are<br />
final, the lamp (42) is inserted and<br />
this light source is then directed<br />
properly through the timing fence (27)<br />
to slit on fibre optic head (8) (Fig.<br />
5-23).<br />
(c) Adjust front face of fibre optics head so that it is<br />
physically parallel with timing fence and as close to<br />
fence without touching (Fig. 5-23).<br />
(1) If face of optics head is not parallel with respect<br />
to the vertically suspended timing fence,<br />
physically bend the bracket (47) slightly up or<br />
down to maintain vertical parallelism. Tighten<br />
screws (6) on optic head (8).<br />
(2) Move print head by hand along front and rear guide<br />
bars (25, 21) all the way to the right and back<br />
to starting position to ensure that timing<br />
fence and the face of the fibre optic head surfaces<br />
do not touch each other.<br />
(3) If surfaces are contacting, re-check timing<br />
fence alinement at para. 5.2.2.3.A.<br />
4. Sighting Through Lamp Housing (43)<br />
(a)<br />
From a position in front of flexible timing fence, and<br />
with fibre optic bundle pointing to a light source,<br />
sight through lamp housing timing and observe<br />
illuminated slit on optics head (8) on other side of<br />
fence. When sighting, make sure light slit is ~ompletely<br />
blocked by any black line on the timin~ fence<br />
(See Fig. 5-24/A) (adjust by carriage movement).<br />
The following two conditions may apply to<br />
the illumination in previous step 4.(a)<br />
when the slit on optics head is out of<br />
alinement with respect to the black line<br />
on timing fence (Fig. 5-24, A).<br />
(b)<br />
(c)<br />
(d)<br />
If the bracket (and board, 47, 26) holding the optics<br />
head is too high on right (Figure 5-24, B), tap bracket<br />
to aline slit and black line as shown in Figure 5-24, A).<br />
If the bracket holding the optics bundle is too high<br />
on the right (Fig. 5-24, C), tap bracket to aline<br />
slit and black line as shown in Fig. 5-18, A).<br />
When correct alinement has been attained, tighten and<br />
secure bracket (47) with the two mounting screws and<br />
washers (Fig. 8-19/28, 29, 30) to printer carriage (24).<br />
5-49 Rev. E
PRINT HEAD & ASSOC. ASS' Y<br />
5. Final Mechanical Adjustments for Optics Signal in Character<br />
Generation Timing<br />
(a) Insert lamp (42) (GE-379) into socket assembly (41)<br />
attached to lamp retainer (part of lamp ass'y), but note<br />
that prior to insertion into lam ass' , be certain lam<br />
filament inside lam is in a vertical lane paralleling<br />
slit with respect to the opposing fibre optics head (for<br />
maximum blockage of light by black line on fence (Fig.<br />
5-24, A). Insert lamp retainer (part of lamp ass'y), and<br />
tighten screws, washers (6,39, 40).<br />
(b) Install optic bundle lead of fibre optic head (8)<br />
into photo cell housing ass'y (3) installed on the<br />
top center of video amplifier board (25). Tighten screw,<br />
washer (4, 5) on clamp of photo cell housing.<br />
MAXIMUM MOVEMENT<br />
¢ BEFORE TIGHTENING<br />
SCREW<br />
BUNDLE<br />
LAMP<br />
ASSEMBLY<br />
Figure 5-23.<br />
FIBER OPTICS<br />
PICK UP HEAD<br />
FIBER OPTICS PARALLEL<br />
TO TIMING FENCE<br />
(AS CLOSE AS POSSIBLE,<br />
BUT NOT TOUCHING)<br />
FIBRE OPTICS HEAD, ADJUSTMENT FROM OPTIC FENCE<br />
(A) CORRECT ALINEMENT -BLACK LINE OF FENCE<br />
PARALLEL & VERTICAL WITH SLIT ON OPTIC HEAD<br />
SLIT<br />
(B) BRACKET TOO HIGH ON LEFT<br />
(C) BRACKET TOO HIGH ON RIGHT<br />
Figure 5-24.<br />
FIBRE OPTICS HEAD ALINEMENT AND FLEXIBLE TIMING FENCE<br />
Rev. E 5-50
MOTOR CONTROL ASSEMBLY OPTION<br />
5.2.19 MOTOR CONTROL ASSEMBLY OPTION<br />
Note that choice of Kit used is based on the following part numbers:<br />
5.2.19.1<br />
a. Kit, Motor Control 63060188-6001, 110 volts.<br />
b .. Kit, Motor Control 63060188-6002, 230 volts.<br />
Operation<br />
The motor control operates to turn the main motor on and off when<br />
the printer is not receiving data.<br />
5.2.19.2 Removal/Replacement<br />
1. Remove main cover.<br />
2. Disconnect wht/blk and wht/brn wires (coming from the<br />
logic wiring harness) to terminals 3 and 4 on the relay<br />
(See Fig. 5-25).<br />
3. Disconnect two red wires coming from power wiring harness<br />
at back of motor (BD-1), to terminals 1 and 2 from the<br />
relay (See Fig. 5~25).<br />
Note<br />
For installation of Motor Control Option, reverse above<br />
steps. On Logic/Power supply board 63060104 (Fig. 7-14),<br />
remove jumper from ME26, pin 2 to ME26, pin 11.<br />
MOTOR CONTROL<br />
SOLID STATE RELAY<br />
Figure 5-25.<br />
MOTOR CONTROL LOCATION AND INSTALLATION<br />
5-51 Rev. E
VERTICAL FORMAT UNIT (VFU) -<br />
OPTION<br />
5.2.20 VERTICAL FORMAT UNIT (VFU) - OPTION<br />
5. 2. 20.1 0 per a t ion<br />
The VFU tape movement is electro-mechanically controlled by a<br />
shaft coupled to the form feed mechanism (paper drive). The tape advances<br />
by one sprocket hole each time a line feed is performed. As a result,<br />
with both the tape and top of form properly aligned, any Top of Form<br />
command (TOF) will advance the paper to the Top of Form position.<br />
Similarly any Vertical Tab Code (VT) from the input data lines will advance<br />
the paper movement six lines or one inch (Centronics' standard VFU tape)<br />
(See para. 5.2.20.3 for paper tape reader (VFU) adjustments).<br />
5.2.20.2 Removal/Replacement<br />
A. VERTICAL FORMAT UNIT 63060125-5003 (FIGURE 8-20) AND (FIGURE 8-1/3)<br />
Remove/replace tape reader assembly 63060125-5003, or -5002<br />
(alternate) using kit no. 63060173-6002 from parts list shown<br />
in Figure 8-20.<br />
1. Using a 1/16-in. (1.6 mm) allen wrench, loosen two 6-32<br />
allen head screws (item 10 from kit) on right-hand coupling<br />
(item 11 from kit). Coupling is projecting to the left<br />
through right chassis frame, AI-Ion form feed shaft<br />
(BJ-37). (Refer to Fig. 5-26)<br />
2. Using a 1/16-in. (1.6 mm) allen wrench, loosen two allen<br />
head screws (item 10 from kit) on left-hand coupling<br />
(item 11 from kit) located on shaft (Fig. 5-26 of<br />
VFU unit).<br />
3. Remove the left and right couplings after removing<br />
connecting drive shaft (item 9 of kit).<br />
4. Disconnect VFU connector (Fig. 8-20/19) from logic<br />
harness connector at back of printer.<br />
5. Cut two cable ties (Fig. 8-20/29) located on back spacer<br />
rod (Fig. 8-20/7) holding cable ass'y (Fig. 8-20/18).<br />
6. Remove the VFU assembly from left chassis frame (AI-12)<br />
by removing three nuts washers (kit part no.'s 5, 6, 8)<br />
from the VFU spacer rods (Fig. 8-20/7).<br />
7. To replace or install VFU unit, reverse steps 0.1. through<br />
0.5. and use Fig. 5-26 for reference.<br />
Rev. E<br />
5-52
VERTICAL FORMAT UNIT (VFU) -<br />
OPTION<br />
ALLEN HEAD<br />
SCREWS<br />
PAPER FEED SHAFT<br />
(REF. MANUAL AJ-37)<br />
Figure 5-26.<br />
COUPLING<br />
DRIVE<br />
SHAFT<br />
(ALLOW 1/8" BETWEEN<br />
PAPER FEED SHAFT AND<br />
DRIVE SHAFT)<br />
·'On<br />
'------I--•. ~<br />
ALLEN HEAD<br />
SCREWS<br />
VFU DRIVE<br />
SHAFT<br />
(ALLOW 1/8" BETWEEN<br />
VFU SHAFT AND DRIVE<br />
SHAFT)<br />
REMOVAL/REPLACEMENT OF DRIVE SHAFT 63060142-5001 AND<br />
COUPLINGS 63060144-2002 FOR VFU ASSEMBLY<br />
5.2.20.3 Adjustments<br />
A. PAPER TAPE READER ADJUSTMENT/MAINTENANCE (SEE FIG. 5-27)<br />
The following procedure details the adjustment and maintenance<br />
for the alining of the paper tape holes with respect to the<br />
tape reader holes (infra red light source) in the lower vertical<br />
format unit.<br />
1. Raise upper tape reader (Sensor) (Fig. 8-20/20) to expose<br />
paper tape containing channel holes and sprocket drive<br />
holes.<br />
2. Loosen two set-screws on right-hand coupler on form feed<br />
shaft (Fig. 5-26).<br />
3. Manually rotate drive shaft (Fig. 5-26) in a clockwise<br />
direction and observe the Top of Form (TOF) (channel 7)<br />
and the Vertical Tab (VT) hole (channel 5) as they move<br />
toward the rectangular slit holes on the lower tape reader<br />
(Fig. 5-27).<br />
4. At the point where the leading edges of both the VT and<br />
TOF holes align with the front edges of the slits or light<br />
holes on the top of the lower tape reader, stop turning<br />
the shaft. (Fig. 5-27)<br />
5. Tighten screws on the right coupler loosened in para.<br />
A.2. above.<br />
5-53 Rev. E
VER.TICAL FORMAT UNIT (VFU) - OPTION<br />
<strong>PRINTER</strong> DRIVE MECHANISM<br />
6. When testing for Top of Form (TOF) alinement, in relation<br />
to the print out on the paper form, make sure that the<br />
form does not stop one line before, or one line beyond<br />
TOF position. Repeat steps A.l. through A.5. to re-aline,<br />
if required.<br />
Note<br />
Pressing Top of Form switch on<br />
operator panel allows hole on<br />
paper tape to move over the light<br />
source. Sensing the light source<br />
through the paper tape hole by the<br />
upper tape reader holes immediately<br />
stops tape motion.<br />
..<br />
DIRECTION . . . . : . . .<br />
OF . : .' " :::::::.::~. ~::':: :~.'"..,,' ~:'<br />
TAPE ...<br />
TRAVEL<br />
VERT TAB<br />
(CHANNEL 5)<br />
TOP OF FORM<br />
(CHANNEL 7)<br />
Figure 5-27.<br />
PAPER TAPE READER ADJUSTMENT<br />
5.2.21 <strong>PRINTER</strong> DRIVE MECHANISM, <strong>MODEL</strong> 306<br />
The overall drive mechanism of the Model 306 is shown in Figure 5-28.<br />
The name of the part or assembly is keyed to the parts list along with the<br />
reference symbol number that can be used for a cross reference to any figure<br />
number in Section 8 for that part.<br />
Rev. E<br />
5-54
o<br />
U'1<br />
I<br />
U'1<br />
U'1<br />
:;:c<br />
~<br />
<<br />
.<br />
Figure 5-28. <strong>PRINTER</strong> DRIVE MECHANISM, <strong>MODEL</strong> 306
FIGURE 5-28. SUBASSEMBLY PARTS LIST, <strong>MODEL</strong> 306<br />
;::0<br />
(1)<br />
<<br />
01<br />
J<br />
01<br />
Ol<br />
1. RACK GUIDE PLATE (AL)<br />
2. RIBBON FEED RACK (AL)<br />
3. SOLENOID, PRINT HEAD (Fig. 8-19/10 and 15)<br />
4. PRINT HEAD Fig. 8-19/13<br />
5. HEAD ADJUSTING KNOB (Fig. 8-19/22)<br />
6. CARRIAGE ROLLER (AA)<br />
7. CARRIAGE (AA)<br />
8. CARRIAGE GUIDE BAR, REAR (AA)<br />
9. RETURN IDLER PULLEY AND BRACKET (AG)<br />
10. MULTI-FORM PAPER<br />
11. PIN FEED ASSEMBLY (AK)<br />
12. FIXING KNOB (AK)<br />
13. PAPER FEED GUIDE SHAFT (AI)<br />
14. PAPER FEED SHAFT (AI)<br />
15. PAPER FEED IDLER GEAR (AJ)<br />
16. PAPER FEED CAM (AJ)<br />
17. CLUTCH, INNER CAM, RELEASER, AND PAWL<br />
18. CLUTCH PULLEY (AJ)<br />
19. CLUTCH SHAFT (AJ)<br />
20. O-RING (AJ)<br />
21. PLATEN KNOB (AJ)<br />
22. PAPER FEED GEAR (AJ)<br />
23. CENTER SHAFT (AD - PART 1)<br />
24. DRIVING PULLEY (AD - PART 1)<br />
25. TIMING BELT (140-L, AD - PART 1)<br />
26. MOTOR PULLEY (AD-PART 1)<br />
27. TIMING BELT (150-L, AD - PART 1)<br />
28. DRIVING PULLEY (AE-1, PART 2)<br />
29. TENSIONER (L) (AD - PART 1)<br />
30. CENTER PULLEY (AD - PART 1)<br />
31. MOTOR FAN (AD - PART 1)<br />
32. MOTOR (llOV, 60Hz) OR OPTIONAL 220V, 50Hz<br />
(AD-1, PART 1)<br />
33. MOTOR PULLEY (AD - PART 1)<br />
34. ELECTROMAGNETIC CLUTCH UNIT AND ROTOR (AE)<br />
35. CLUTCH ARMATURE (AE)<br />
36. DRIVING PULLEY (C) (AE)<br />
37. MAIN DRIVE BELT UNIT (AE)<br />
38. REED SWITCH AND BRACKET (AG)<br />
39. FRONT CARRIAGE BAR (AA)<br />
40. FIBRE OPTICS HEAD (8-19/8J<br />
41. TIMING FENCE (AB)<br />
42. LAMP ASSEMBLY (FIG. 8-19/41)<br />
43. VIDEO AMPLIFIER ASS' Y (FIG. 8-19/26)<br />
44. CARRIAGE SPRING (AG)<br />
45. RETURN PULLEY (AF)<br />
46~ IDLE PULLEY AND SAFETY ADJUST (AF)<br />
47. IDLE PULLEY SHAFT (PINION) (AE)
SECTION 6<br />
MAINTENANCE<br />
This section contains the following maintenance information:<br />
Paragraph<br />
6.1<br />
6.2<br />
6.3<br />
6.4<br />
Description<br />
Electrical Adjustments<br />
Preventive Maintenance<br />
Troubleshooting Guide<br />
Recommended Tools<br />
In addition, detailed removal, replacement and adjustment procedures<br />
for all mechanical assemblies are contained in Section 5. Associated mechanical<br />
drawings and list of materials are in Section 8. Detailed theory<br />
of operation on the electronics portion is contained in Section 4 and<br />
associated drawings and lists of materials are in Section 7.<br />
6.1 ELECTRICAL ADJUSTMENTS<br />
All electrical adjustments located on the Logic/Power Supply board<br />
(63060104) are summarized in the following table. All mechanical adjustments<br />
are described in detail in Section 5.<br />
Item<br />
No. Function<br />
Signal<br />
Name<br />
Element-<br />
Pin<br />
Adj.<br />
Resistor<br />
Pulse<br />
Width<br />
1 Video Strobe Pulse STROBE ME23-6* R25 500-25<br />
+<br />
usee<br />
2 Strobe Delay Interval ME28-4 R31 600 usec<br />
3 Delayed Strobe Pulse DLYSTB ME28-5 R33 500-25<br />
+<br />
usec<br />
4 Single Line Feed Pulse LF ME32-13 R20 15 msec<br />
5 Double Line Feed Pulse<br />
(Optional)<br />
LF ME32-13 R82 50 msec<br />
*ME23-6 signifies element ME23, pin 6.<br />
6-1 Rev. F
6.2 SERIES 300 PREVENTIVE MAINTENANCE<br />
The following Preventive Maintenance (PM) procedures apply to the<br />
Series 300 printers.<br />
FREQUENCY OF P.M.<br />
TIME REQUIRED<br />
CLEANING MATERIAL<br />
6 MONTHS<br />
1 HOUR (APPROXIMATELY)<br />
TWO SOFT CLEAN CLOTHS<br />
MEDIUM BRISTLE CLEANING BRUSH<br />
RECOMMENDED TOOLS<br />
Refer to Section 6.4 of the Maintenance Section.<br />
LUBRICANTS RECOMMENDED:<br />
Lightweight Oil (choice of three):<br />
1) Teilus No. 27 (Shell), CDCC Spec No. 30050005.<br />
2) Teressa No. 43 (Esso), CDCC Spec. No. 30050006.<br />
3) Vaculine No. 1405 (Mobil), CDCC Spec. No. 30050007.<br />
Grease<br />
Rheo1ube - No. 723 ms, CDCC Spec. No. 30050004<br />
Oil<br />
Anderol No. 465, CDCC Spec No. 30050002<br />
PREPARATION<br />
1. Obtain print sample prior to beginning of P.M.<br />
2. Clean printer with vacuum cleaner, if available.<br />
Rev. F 6-2
1. CARRIAGE ASSEMBLY AND TIMING FENCE<br />
a) Using a soft clean cloth, wipe both sides of timing fence. If<br />
necessary,-use a mild detergent. (See Figure 1)<br />
CAUTION:<br />
.<br />
NEVER USE AN ORGANIC SOLVENT, AS THIS WILL DAMAGE<br />
TIMING FENCE.<br />
b) Wipe the carriage guide bars, all rollers and platen.<br />
c) Lightly lubricate guide bars using lightweight oil (See Figure 1).<br />
d) Remove print head from carriage.<br />
e) Using an eye loupe, verify that print wires align flush with face<br />
of print head jewel. (Make sure that print wires are not recessed<br />
in the jewel). (See Figure 1)<br />
f) Re-mount print head on carriage assembly.<br />
? /1<br />
- I<br />
/11<br />
$'/ II<br />
~ I I<br />
,<br />
.............. L'<br />
Id-1f<br />
Figure 1. CARRIAGE ASSEMBLY AND TIMING FENCE<br />
6-3 Rev. F
2. PAPER FEED ASSEMBLY<br />
a) Apply a drop of lightweight oil on the paper feed clutch gear<br />
and sliding shaft of the solenoid armature. (Oil is intened<br />
for clutch bearing lubrication). (See Figure 2)<br />
Figure 2.<br />
PAPER FEED ASSEMBLY<br />
3. RIBBON FEED ASSEMBLY<br />
a) Inspect ratchets, pawls, and springs for wear and mesh (left<br />
and right).<br />
b) Clean and lubricate all gears and springs with grease and oil<br />
as indicated. (See Figure 3)<br />
c) Verify that both ribbon spools rotate freely when both ribbon<br />
releasers are in neutral position (neither spool engaged).<br />
Figure 3.<br />
RIBBON FEED ASSEMBLY<br />
Rev. F<br />
6-4
OIL<br />
(2 Places)<br />
Figure 3.<br />
RIBBON FEED ASSEMBLY<br />
4. DRIVE ASSEMBLY<br />
a) Inspect gears for proper mesh and wear.<br />
b) Oil felt tensioner washers. (See Figure 4)<br />
Figure 4.<br />
DRIvE ASSEMBLY<br />
6-5 Rev. F
:;0<br />
m<br />
<<br />
."<br />
SERIES 306 TROUBLESHOOTING GUIDE<br />
0'\<br />
W<br />
306 <strong>PRINTER</strong><br />
SERVICE GUIDE<br />
The following information is intended to aid service personnel<br />
to develop good service procedures and troubleshooting techniques in<br />
servicing Centronics Model 306 printer_<br />
When servicing the printer for any reason, a brier inspection<br />
and verification of the printer areas described below may well prevent<br />
potential failures in the future_<br />
To perform this inspection, first remove the printer covers.<br />
Then, with printer power turned off, check the following areas:<br />
~RI~ MALFUNCTION<br />
<strong>MODEL</strong><br />
306<br />
SVHPTIl1<br />
~~'O~TAL~~~_·<br />
~ I"E,,"ITTEST - "mAL<br />
_________ :<br />
HEAD HOV(S BUT ~10 PRISTI~/POOR REGISTRATION OR [RRATIC PRINT<br />
MISSING DOTS, POOR OR INTERMITI[NT REGISTRATION All CHARACTERS<br />
MISSWG OR [J:TRA DOTS. CERTAIN CHARACTERS ONLY<br />
PROIABlE<br />
CAUSE<br />
•<br />
IElI<br />
fBI<br />
lEi)<br />
-t<br />
:;;0<br />
0<br />
c<br />
o;J<br />
r-<br />
I'TI<br />
en<br />
:I:<br />
0<br />
0<br />
-t<br />
-:z<br />
en<br />
en<br />
c<br />
0'\<br />
I<br />
0'\<br />
Turn power on:<br />
1. Verify that the timing fence is clear and that a proper gap<br />
exists between the optics and the timing fence.<br />
2. Verify that the carriage guide bar is clean and free of<br />
caked-on dirt.<br />
3. Verify proper main drive belt tension.<br />
4. Verify smooth. free carriage motion.<br />
5. Check damper operation. Verify that there is no binding and<br />
that the piston O-ring is intact and lightly greased.<br />
6. Check that the RTP and EOP switches are not loose.<br />
7. Check that the line feed O-ring and pulleys are clean and do<br />
not slip.<br />
8. Verify uniform clutch gap.<br />
9. Verify proper pin alignment on pin-feed tractor units.<br />
10. Verify proper pin feed belt tension.<br />
11. Verify proper backstop pawl spring tension.<br />
12. Verify smooth line feed clutch operation.<br />
L I~jES<br />
ACROSS PAGE<br />
CARRIAGE I"OV[MEIH ERRATIC<br />
CARRIAGE STICKS OR BINDS<br />
CARRIAGE Jl()vES FORWARD aUT OOES NOT RETURN<br />
CLUTCH ON<br />
CLUTCH OFF<br />
CARRIAGE DOES NOT MOvE FORWARD<br />
~CA~RR~IA~G~E~DO~ES~N~O~T~RE~ru~R~N~AL~L~TM~E~~~Y~T~O~L~E"~ _____________ ~<br />
NO RIBBON FEED D-1<br />
~ __ ~~E~RAA~T~IC~MO~VE~HE~NT~~~~~~ __________________ fiEID<br />
SCRDLLlNG OR FDLDING<br />
•<br />
TOO SLACK<br />
b<br />
~FO~,,"~S~R~UNr~~AY~~~~ ________________________ ~~<br />
PAPER TIME OUT<br />
PAPER RUNS CONTINUOUSLY<br />
PAPER SKEW OR JAM<br />
He FO,," FEEO<br />
~ER~AA~T~IC~L~IN~E:S:PA:CI:NG~ __________________________ ~<br />
~NO~L~I~NE~F~EE~O;;~~ _________________________ :~<br />
~~~LT~I;PL~E~LI~N~E~FE~EO~~ ________________________ ~~<br />
~IN~TE~RH~I~n~EN~T~O~PE~AA~TI~ON~ _________________________ ~<br />
c·.<br />
-C<br />
I'TI<br />
If optional Vertical Format Unit is used, check VFU paper<br />
tape position over the light holes to insure proper detection<br />
of vertical tab and form feed signals.
0\<br />
I<br />
.....<br />
::0<br />
CD<br />
. <<br />
A. POWER<br />
A-I<br />
TOTAL<br />
1. Damaged power card.<br />
2. Open AC line fuse.<br />
3. Open SV supply fuse, FI.<br />
A-2 IIiTERMITTEIiT - PARTIAL<br />
1. Defective +SV logic board.<br />
2. Defective +12V logic board.<br />
3. Improper AC line voltage.<br />
B. PRINTING<br />
8-1 HEAD MOVES BUT NO PRINT/POOR<br />
REGISTRATlOIl OR ERRATIC PRINT<br />
1. Improper print head position.<br />
2. Dirty fingerboards or circuit<br />
board connectors.<br />
3. Dirty or defective timing fence.<br />
4. Improper adjustment of optic<br />
bundle.<br />
S. Improper optic lamp filament<br />
al ignment.<br />
6. Defective optic lamp or lamp<br />
socket.<br />
7. Improper alignment of timing<br />
fence to optic slit.<br />
S. Defective video amplifier.<br />
g. Defective ribbon cable.<br />
10. Defective +SV logic board.<br />
I!. Defective +12V logic board .<br />
12. Defective driver board.<br />
B-2 MISSING DOTS, POOR OR INTERMITTENT<br />
PIN REGISTRATION, ALL CHARACTERS<br />
1. Improper print head position.<br />
2. Dirty fingerboards or circuit<br />
board connectors.<br />
3. Dirty or defective timing<br />
fence.<br />
4. !mproper damper piston and<br />
cyll nder alignment.<br />
5. Defective RTP or EOP switch.<br />
6. Defective logic board fus ...<br />
7. Improper optical system<br />
alignment.<br />
S. Defective video amplifier.<br />
g. Defective ribbon cable.<br />
10. Defective driver board.<br />
II. Improperly adjusted or defective<br />
print wire solenoids.<br />
B-3 MISSING OR EXTRA DOTS. CERTAIN<br />
CHARACTERS ONLY<br />
1. Defective ROM.<br />
2. Def~ctive P.C. runs In character<br />
generator.<br />
B-4 LINES ACROSS PAGE<br />
I. Improperly installed print head<br />
cover.<br />
2. Ir.lproper penetration adjustment.<br />
3. Defective print wires.<br />
4. Defective ribbon cable.<br />
5. Poor logic board to driver board<br />
connee t 1 on.<br />
t. Defective driver board.<br />
7. Defective logic board.<br />
C. DRIVE<br />
C-I<br />
CARRIAGE HOVEMEilT ERRATIC<br />
1. Improper clutch gap.<br />
2. Improper main drive belt tension.<br />
3. Dirty carriage guide bar.<br />
4. Improper penetration adjusb'lent.<br />
5. Improper ribbon drive rack and<br />
pinion adjustment.<br />
6. Improper cylinder and damper<br />
pi
:;0<br />
CD<br />
<<br />
6.4 RECOMMENDED TOOLS<br />
"'T'I<br />
cEnTRonics<br />
dMII c~ corp.<br />
It ...<br />
CENTRONICS TOOL KIT<br />
(83002399-8001)<br />
ITEM<br />
DESCRIPTION<br />
PART<br />
NUMBER<br />
PART<br />
ITEM DESCRIPTION NUMBER<br />
0\<br />
I<br />
(Xl<br />
1.<br />
2.<br />
3.<br />
4.<br />
5.<br />
6.<br />
7.<br />
8.<br />
9.<br />
Un1versal Handle<br />
Extension 4-Inch<br />
4 l1li1 Nut Oriver<br />
5.5 l1li1 Nut Driver<br />
7 nm Nut Driver<br />
8 nm Nut Dri ver<br />
10 l1li1 Nut Driver<br />
Phillips Head Screwdriver<br />
Slotted Head Screwdriver<br />
30600002-3001<br />
30600002-3002<br />
30600002-3003<br />
30600002-3004<br />
30600002-3005<br />
30600002-3006<br />
30600002-3007<br />
30600002-3008<br />
30600002-300!><br />
13. 8 l1li1 Combinat10n Open End. Box Wrench 30600002-3012<br />
14. 10 nm Combination Open End. Box Wrench 30600002-3013<br />
15. 17 l1li1 Combination Open End. Box Wrench 30600002-3014<br />
16. 19 l1li1 Comb1nation Open End. Box Wrench 30600002-3015<br />
17. 3/32-Inch "T" Handle Hex Key 30600002-3016<br />
18. 5/32-Inch "T" Handle Hex Key 30600002-3017<br />
19. 1/16-Inch Hex Key 30600002-3025<br />
20. .050-Inch Hex Key 30600002-3024<br />
21. 1.5 l1li1 Hex Key 30600002-3020<br />
22. 2.0 l1li1 Hex Key 30600002-3019<br />
23. 2.5 l1li1 Hex Key 30600002-3021<br />
24. 3.0 l1li1 Hex Key 30600002-3022<br />
25. Spanner Wrench 63003105-3001<br />
10.<br />
Needle Nose Plier<br />
30600002-3010<br />
26. 4 l1li1 Snap R1nger Holder 63002399-3018<br />
27. 5 nm Snap R1ng Holder 63002399-3019<br />
28. Spring Hook 63002399-3020<br />
~ { II.<br />
12.<br />
(11 & 12)<br />
5 x 5.5 mm Open End Wrench<br />
6 x 7 mm Open End Wrench<br />
30600002-3023<br />
30600002-3011<br />
29. Tool Pouch 30600002-3018
SECTION 7<br />
ELECTRICAL DRAWINGS AND LISTS OF MATERIALS<br />
This section contains the schematic, Wlrlng and assembly diagrams<br />
and lists of materials for all the electronic assemblies in the Model 306.<br />
7-1 Rev. E
;c<br />
(1)<br />
<<br />
.,<br />
Item<br />
3<br />
5<br />
I<br />
10<br />
11<br />
12<br />
13<br />
14<br />
15<br />
16<br />
17<br />
18<br />
19<br />
20<br />
""-J 21<br />
I<br />
24<br />
N<br />
25<br />
REF<br />
26<br />
27<br />
Item<br />
28<br />
29<br />
30<br />
31<br />
32<br />
33<br />
34<br />
35<br />
36<br />
37<br />
38<br />
39<br />
Symbol<br />
Part<br />
Number<br />
Nomenclature<br />
63002431" -1 Head As semb 1 y<br />
63060107 -1 Video Amp. and Cable Assy<br />
See Note<br />
4A<br />
63060105-6 Camp. Bd. Assy. Pwr Driver.<br />
(Darlington - Ref)<br />
63060104-1 Camp. Bd. Assy. Logic/Pwr<br />
01-01-01 Supply Bd. (5 x 7)<br />
63060119-1 Cable Assy.<br />
39030019 Fuse. 3 Amp Slo-Blo (FE,<br />
63060180 Connector Bracket<br />
30000000 Insulation Varnish<br />
63002278-10 Shim<br />
63002294-1 Ribbon Guide<br />
63002293-1 Twin Spool and Ribbon Assy<br />
63060117-1 Clamp. Ribbon Cable (Tray)<br />
63060194-1 Timing Fence Kit<br />
34000007 Screw. Pan/Phil 3-48 x Ii 19<br />
See Note 1 021300106 Nut. Hex. M3.0 PO.5<br />
34000014 Nut. Hex. 3-48<br />
63060165-1 Conn. Bd. Support Bracket<br />
34000018 Washer. Flat No.3<br />
See Note 1 63060166-1 Logic Board Spacer<br />
35060007 #853 "Scotch Brand" Polyestertape<br />
63060145-1 Spacer. Heatsink<br />
35437107 Screw Pan/Phil 8-32 x .31 long<br />
63060122 Leve 1 Breakdown<br />
63060164-1 Ribbon Change Decal. Install. Dwg.<br />
34838007 Washer Lock #8<br />
MOTOR CONTROL OPTION<br />
Part<br />
Symbol NUr:1ber Nomenclature<br />
See Note 5 39070004 Relay. Solid, Tate (4.5-10 VDC/<br />
230 VAC)<br />
See Note 5 39072001 Relay. Sol id State (4.5-10 VDC/<br />
115 VAC)<br />
63060135-1 Insulator Board<br />
31460009 Terminal, Female<br />
35010001 Boot<br />
34000031 Srr~w, Pan/Slot M3 PO.5 X 30 19<br />
34000032 Washer. Lock M3<br />
LIST OF MATERIALS<br />
ALPHA/NUMERIC<br />
<strong>PRINTER</strong> ASSEMBLY 306 (5 X 7)<br />
LM#63060111<br />
Quantity<br />
AR<br />
AR<br />
2<br />
4<br />
2<br />
4<br />
AR<br />
1<br />
REF<br />
4<br />
Quantity<br />
40<br />
41<br />
42<br />
43<br />
44<br />
45<br />
46<br />
47<br />
48<br />
49<br />
50<br />
51<br />
52<br />
53<br />
Item<br />
54<br />
55<br />
56<br />
63<br />
88<br />
89<br />
90<br />
91<br />
92<br />
93<br />
94<br />
95<br />
2A<br />
4A<br />
SPEAKER OPTION<br />
526825001 Speaker Bracket Assy<br />
34000033 Screw. Pan/Slot ~14 PO.7 X 6 19<br />
34000034 Washer. Lock fl4<br />
TAPE READER OPTION<br />
63060173-1 Kit. Form Feed<br />
63060176 Spacer<br />
INTERFACE CARO OPTION<br />
Symbol Number Nomenclature<br />
36615511-70 Spacer, Plastic 5/16" x 11/16"<br />
34527387 Screw. Pan Hd. 1.38 19<br />
63060109 Connector Board<br />
CONTROL PANEL OVERLAY OPTIOII<br />
See Note 3 63060183 Control Panel Overlay<br />
ITEMS 64 THRU 87 NOT USED<br />
See Note 4 562-201-053-01 Rasic flachine 115V, 60 Hz (Brother<br />
Item)<br />
See Note 4 562-201-558-02 Basi c Machi ne 230V. 50 Hz (Brother<br />
Item)<br />
39030008 Fuse 2A, Slo-Blow<br />
34815007 Washer, Lock, Int. No. 4<br />
34114161 SCR. Hex. Socket. Cap. 4-40 x .50 19<br />
34114201 SCR. Hex. Socket. Cap. 4-40 x .62 1 g<br />
63060221-1 Deca 1. Ampere<br />
PAPER CUTTE~ AND SEPARATOR OPTION<br />
6306G196-1 Paper Cutter and Copy Separator<br />
Installation Assembly<br />
See Note 6 63002323-1 Head Assy<br />
See Note 6 63060105-5 Camp. Bd. Assy. Power Driver<br />
(Darlington, Ref)<br />
Quantity<br />
REF<br />
I
THE INfORMATIOHCONTAINEO HEREIN IS<br />
PROPRIETARY AND IS NOT TO BE RELEASfD<br />
ciR REPRODUCED WITHOUT WRITTEN PER·<br />
MISSION Of CENTRONICS dati comput. corp.<br />
~ov<br />
RcZ<br />
t::""'!<br />
SOLl¥<br />
+<br />
DATA I<br />
CATAI<br />
RET<br />
DATA "2<br />
DATA a<br />
RET<br />
DATA 3<br />
DAT""'"<br />
P.e:T<br />
0"'1''''''\<br />
DATA4<br />
RET<br />
p~<br />
V<br />
'6<br />
+.5V<br />
l'<br />
''''<br />
U<br />
17<br />
X<br />
20<br />
BUSY<br />
FAULT<br />
ME2.0<br />
P'l<br />
C BUSY<br />
:3 BUSY<br />
RET<br />
L<br />
FAULT<br />
7 5S<br />
F<br />
2<br />
J<br />
:;::'LC'T<br />
DATA<br />
OUT<br />
PE<br />
OATA<br />
~ OUT<br />
-rSv<br />
R24<br />
2·2 K<br />
C:2!:'l<br />
1-<br />
C5LF 28 Q<br />
CLR<br />
Ceo "<br />
-i?c ,u.~<br />
: ~l ~<br />
"tov<br />
~~<br />
15 WG9 1-4<br />
A<br />
NEGa<br />
7~123<br />
PMSOL<br />
'N<br />
~ov<br />
ME.32.<br />
71123<br />
6<br />
Q 5 DLYL.<br />
I<br />
I<br />
I<br />
......<br />
I<br />
W<br />
;0<br />
ro<br />
<<br />
D"'T'" 5<br />
D"'TA 5<br />
RET<br />
DATA CD<br />
DATA cD<br />
RET<br />
DATA 7<br />
OATA7<br />
... ET<br />
DATAa<br />
DATAS<br />
F>.ET<br />
~<br />
STROBE<br />
DATA<br />
STROBE<br />
RET<br />
INPUT PRIME<br />
INPU'- PRIME<br />
RE'-<br />
5<br />
'5<br />
M<br />
II<br />
IN<br />
1"1<br />
N<br />
IZ<br />
Y<br />
21<br />
I
THE INFORMATION CONTAINED HEREIN IS<br />
PRQPRIET ARY ~ND IS NOT TO BE RELEASED<br />
OR REPRODUCED WITHOUT WRlnEN PER·<br />
MISSION OF CENTRONICS dab compuUlr corp.<br />
r--------------------------------------------------------------~~------._----------__o+5V<br />
----------------------+-------~~~--------Dtov<br />
.....<br />
I<br />
~<br />
051<br />
OS2<br />
D53<br />
0,54<br />
27<br />
2(0<br />
Z5<br />
i?4<br />
ME24 DSs-<br />
23<br />
+ov 0----0-'<br />
E9<br />
c.B<br />
+SV O---j<br />
200PF<br />
~IG<br />
...--_---,<br />
THE INFORMATION CONTAINED HEREIN IS<br />
PROPRIETARY AND IS NOT TO BE RELEASED<br />
OR REPRODUCED WITHOUT WRITTEN PER<br />
MISSION OF CENTRONICS d-U tornp..lbr cotp.<br />
J2.<br />
"'5V :t"OV -IZV<br />
.......<br />
I<br />
AJ<br />
/'I)<br />
<<br />
r<br />
)<br />
Tel<br />
THE INFORMATION CONTAINED HEREIN 1$<br />
PROPRIETARY AND IS NOT TO BE RELEASED<br />
OR REPRODUCED WITHOUT WRITTEN ftER<br />
MISSION Of CENTRONICS d-. ~ corp.<br />
ME4<br />
$V<br />
IIJ 20 ZI 2Z<br />
5<br />
9<br />
II<br />
13<br />
U~E wHE"""" NORE<br />
T ... A ..... ONE CHAR.<br />
GEN. 15 REQUIR.ED.<br />
R70 R7 I<br />
7~K. 751(<br />
5<br />
9<br />
"<br />
13<br />
Ie<br />
MEZ<br />
5V<br />
2.,<br />
25<br />
24<br />
"3<br />
16<br />
'T8IZZ<br />
~<br />
TBI2.q<br />
TelZS<br />
TBIZG<br />
R7Z R73 R7-1 R75 R7tt<br />
15K .75K 75k 751< 7SK<br />
-I~V<br />
.....<br />
I<br />
0\<br />
3<br />
5<br />
MEB<br />
5v<br />
7 9)(7<br />
ONLY<br />
II<br />
13<br />
ZIO<br />
25<br />
TB 122<br />
TB'i2'3<br />
24<br />
Tei'Tii<br />
23 T"B'"iFS<br />
110 TBi2'(;<br />
DCWIZOI<br />
OCWIZQ:;<br />
P3<br />
A CGI<br />
B CG2<br />
C CG3<br />
D CG4<br />
E :::G5<br />
F CGG<br />
H CIO?<br />
ME?<br />
... 5 V<br />
DCWlZ04<br />
DCWIZ03<br />
R79 NOT~S: ('::0>"")<br />
411( 5. Ace JuMPER!. ... ~ !.HOw,",<br />
Rao<br />
~7K<br />
-IZV<br />
w~e.t.J<br />
I'-lTER~A."'TLD<br />
C.IRC,UI'T'S, A..RE. t.lo,. U\t.C<br />
e, U~E. WHE.~ ONE.<br />
• CH"'RA.'TE.R 66.N 1~<br />
REQUIQED.<br />
7. FOR t-AvO£.L ;t,Ob ME. Ie., ... tl'<br />
I~ TO BE. A. Qu .... O el.<br />
FOA. MODI:..L 'Soa ME.la<br />
'Mal' 1~ TO B'- A<br />
QUot..c 131<br />
I<br />
I '- ____ .J<br />
L _____ _<br />
9)'.7 ONLY<br />
DCWo)4<br />
I<br />
I\-----I_.J,.,;;;;....I..:;~~~.:.:.:... ..... ~ ......<br />
_ ..J SHEET40F5<br />
Figure 7-4.<br />
SCHEMATIC DIAGRAM, LOGIC/P.S. BOARD (+5V) (SHEET 4 OF 4)
THe INFOIUIATtoN CONTAINED HEREIN IS<br />
PROPIltfiAR't' AND IS NOT TO BE RELEASED<br />
OR REPtIOOUCED WITHOUT WRIITEN PER·<br />
MI80N Of CENTRONICS dati COI'ftIIIIt8I' corp.<br />
"'"\5V<br />
C~I<br />
PIO<br />
21---"'l<br />
c.~2.<br />
IN4002.<br />
JII<br />
D<br />
L-I<br />
SOL-ENOl 0<br />
c.a,s<br />
PIO<br />
7<br />
JII<br />
.-------.--------j 3 ;;;';LENOID<br />
+<br />
.... 15V<br />
• '35'-1-1<br />
+\5V<br />
C.I~A<br />
IN400 ..<br />
E<br />
L-2-<br />
';'OL-l!.NOI\)<br />
ca.'"<br />
8<br />
e.E! '?-<br />
IN400Z.<br />
2<br />
Lc"<br />
.:;;QL.E.NOI'\)<br />
-...a<br />
I<br />
-...a<br />
e.G, :3<br />
4 1--t---'-1<br />
~<br />
C2. RIO<br />
~4.Mf<br />
~~V<br />
+ C.3<br />
c"e.n...<br />
-:,w<br />
"t~Ofo<br />
+35V-\<br />
CRe;,<br />
IN4=2.<br />
T4..41f<br />
50Y<br />
"-15<br />
(D8...<br />
~w<br />
'1.SCYc<br />
+35V-2<br />
F<br />
L-=-<br />
=aLENOID<br />
C,",7<br />
9<br />
+<br />
c.(p<br />
~...,+<br />
50v<br />
CRI.q.<br />
IN"'lOO2..<br />
\«:;0<br />
(06.
AI<br />
CD<br />
<<br />
THE INFORMATIONCOHTAINED HEREIN IS<br />
MQPRIETARY AND IS NOT TO BE RELEASED<br />
OR REPRODUCED WITHOUT WRITTEN PER·<br />
MISSION OF CENTRONICS datil compu_ corp.<br />
P<br />
~"'!>'i!!o<br />
\ 2.!l. 10<br />
C.I P<br />
CLAMP<br />
PIO<br />
MEl<br />
.;.15V<br />
\ 5 f---+--~9'-17~GXr9"'---+---t<br />
QI'5<br />
c.gl~<br />
II? III<br />
w~'104<br />
'-~2~r-~~--~5~¥Jtv------~I~<br />
C:~.lv<br />
t !lola<br />
IN4002<br />
~----------------------~17<br />
L--__________ {) 'J:.ov<br />
F"OR"" .... ~t:><br />
j;
________<br />
LI LZ L3 L4<br />
I a<br />
• .of:5V<br />
I<br />
..,..<br />
- flii I<br />
~J<br />
r "t;OY<br />
i<br />
R" R""1<br />
1 K 4701
A:J<br />
CD<br />
<<br />
......<br />
I<br />
....<br />
o<br />
P8<br />
J3<br />
- r-<br />
N.2 I--<br />
•<br />
•<br />
e - ~<br />
- ~<br />
0<br />
E<br />
l7.;; ~<br />
~<br />
•<br />
~<br />
•<br />
H
------ -<br />
I<br />
I<br />
E =<br />
~ ~~ ~<br />
3 ::: i 1:<br />
Il-D..-.'d- ~<br />
I<br />
pe L'" , f) a c. 3 D 4 EO 5 F " H ... J e "" ., l- 10 M " 1'4 I, P 13 .. 14 S 15 T '" U J 7 \I La W ,., )( 1.0 Y II ~ ;a<br />
.J8 [A I e z c , 0 'I E 5 II' " .-t 7 J 8 '" :oJ L 10 I'< " t< 12 P 13 R 1'15 15'- !, U 11" Ie w 19 1\
;:c<br />
CD<br />
<<br />
4<br />
I 3<br />
+<br />
2 1 1<br />
I<br />
""<br />
IIYISfONS<br />
."CliP~ --....~<br />
0<br />
0<br />
-<br />
'T~O V<br />
... 1<br />
. Eo \ 2.Z.K.<br />
o---~<br />
>4.'2- E."I<br />
('>'IIE.c)<br />
-,<br />
I/2.W<br />
{
This illustration is intended to aid the reader in following the<br />
306/500 wiring diagram (#63060123).<br />
STANDARD:<br />
WITHOUT<br />
CONNECTOR CARD<br />
LOGIC/PWR. SUP. BOARD<br />
#63060104<br />
DO<br />
J1 J2<br />
<strong>PRINTER</strong> HARNESS INPUT CABLE J13<br />
#527753001 J8<br />
---------------'<br />
RS232<br />
INTERFACE<br />
#63004113-4001<br />
J9 #63060119-4003<br />
~----------------~<br />
NON-STANDARD<br />
~ITH CONNECTOR CARD<br />
AND RS232 {EXAMPLE} INTERFACE INSTALLED<br />
~
(This page intentionally left blank)<br />
7-14
",00 ItiOWN.<br />
". COMPONe .... 'T OESICiNAT.O .... S! ME3, ... £!!',M .. ~.ME!!'.Me.\l,ME'Z,<br />
M&'3, "'''''' "'oJO .... ",!:i P.R. FOR RIOFER5!>';C:" ON"T •<br />
... ITEM 7"'''''''',",1) '!IoT06E US"O A!Io ;;IPT.O .... ON~"(.<br />
~ sae. SHEE.T 3 FOfl .... 'EWS A .... O TAel.EsI.n .... wOm.<br />
...... I MU~T eE MOU",,.eD AS SIoiOWN.<br />
7. V'/HI! .... MOTOR COlolTflOI-,OPTIOH '%.,IS '5.P£,CIl"IEO<br />
P.C.MlVC ... U ..... ~ rRO .... l.oIr..l't 10101 .. £ LOU\.nCOt.l<br />
"'£3. AJ..IO ...... a9 "~!.HOWW ",aoVL .... NO \)l "Otll'lIOW ... 00<br />
~~~~~\~~I~~II~_~'N!U.t.JTH£ FOLLOWIWb le.. PIW LOCATIOIJ$<br />
1~:~~~\~~~\f~,IJ!~~ ~~~~ti$n~DW"'LM ~L17 I$U~&.r><br />
~EFEfl~I'tCE DFlAWII-lw.~:<br />
=HEt-tATIC D'A.C;;RAM.-,"~O"OL'"<br />
"'PoTWOR"'- M.~$TeR-"30~OOL;!..u;:y r:<br />
L.IST OF MATERLA.L-LM"306010
:;0<br />
(l)<br />
<<br />
IEVISIONS<br />
CODE FOR TAB ,-ES 1.!L A'~""7<br />
G<br />
Sec-:-Io,," JB-E<br />
5ECT .:IN lA-JA.<br />
",rA. f' 2/1<br />
, '-<br />
L<br />
"""'-<br />
+-<br />
o<br />
o<br />
YIEWJ:-=<br />
SCAl..EO;;./l<br />
·c<br />
Figure 7-13.<br />
PC BOARD ASS'Y, LOGIC/POWER SUPPLY BOARD (SHEET 2 OF 2)
LIST OF MATERIALS<br />
LOGIC/P~R. SCPo BD. 500<br />
(Reference: Ass'y Dwg. ;63060104, Rev. F4)<br />
....,<br />
I<br />
...... ....,<br />
:;c<br />
I'D<br />
<<br />
['T'I<br />
Part<br />
NOTES:<br />
Item Symbol Number<br />
IS C21,C22, C26 21103003<br />
1. See Sheet 2 of drawing for board assembly conffguratfon<br />
to determine LM items required.<br />
1SA C21,C22. C26 21103004<br />
2. The option code should be stamped on the component side of<br />
16<br />
the board fn the upper left-hand corner. to define the options. 17<br />
character set and jUffipers contained on the board. The key to<br />
18 CR1. CR2 38100904<br />
thfs 6-dfgft option code is as follows:<br />
)ftJ-;<br />
19 CR5. CR6.CR17 381309C1<br />
~ - - - -- - - - - - - - CR16.CR2S. 38130901<br />
CR26<br />
20 CR7. CR8 38040020<br />
OPTIONS (See Table I) 21 CRll 38052350<br />
CHAR. SET CONFIG. (See Table II) 22 CR12 38047420<br />
JUMPERS (See Table III) 23 CR13 38052460<br />
24<br />
25<br />
STANDARD BOARD 5 x 7 CHAR. GEN - NO OPTIONS 26<br />
27 MEl. ME7 15574000<br />
Itell Symbol<br />
Part MEl7 35574000<br />
Number Nomenclature Quantity 28<br />
1 6306(1013-1 Component Boa rd 1 29 ME3. ME9 35474070<br />
2 63060185 Heat Sink/Mounting Bkt. 1 30 HE20. ME21 35474040<br />
3 C1. C2 21102000 Capacitor. .001 uf. 1KV 2 HE24. ME29 35474040<br />
4 C3 22505002 Capacitor. 5 uf 16V 31<br />
5 C4 22506002 Capacitor. 50 ufo 2SV 32 HE30 35474060<br />
6 C5, C24 21104001 Capacitor, .1 uf. 16V 2 33 MEl8. MEl9 35514810<br />
7 34 ME2.2 35474050<br />
8 C8 21201000 Capacitor. 200 pf 35 "E23 35474121<br />
9 C9 21101001 Capacitor. 100 pf. 1KV 36<br />
10 C10 22106002 Capacitor. 10 uf. 25V 37 HE32 35474123<br />
11 C13, C25. Cll 22107002 Capacitor, 100 uf. 2SV 3 38<br />
12 C12 22507000 Capacitor. 500 uf 1 39<br />
13 40 HE16 35512010<br />
14 41 HE25 35512009<br />
42 R1. R3. R5. 41102926<br />
R7. R9. Rll. 41102926<br />
R13. R15 41102926<br />
R34. R23. 41102926<br />
R35. R84 41102926<br />
R86, R87 41102926<br />
R88 41102926<br />
Nomenclature<br />
Quantfty<br />
Capacitor, .01 uf 3<br />
Capacitor •.. 01 ufo SOY. Seet Note 12<br />
Diode. WG904 2<br />
Diodp.. 30S1 6<br />
Diode. 30S1<br />
Diode. IN4002 2<br />
Diode. IN5235<br />
Diode. IN4742<br />
Diode. IN5246 1<br />
Integrated Circuit 74LOO 2<br />
(See Dwg. ME17) 74LOO<br />
REF<br />
Integrated Circuit 7407 2<br />
Integrated Circuit 7404 4<br />
Integrated Circuit 7404<br />
Integrated Circuit 7406 1<br />
QUAO 81 (See Table II) 2<br />
Integrated Circuit 7405 :.<br />
Integrated Circuit 74121<br />
Integrated Circuit 74123 1<br />
Integrated Circuit lSI No. 2 1<br />
Integrated Circuit. LSI No.1 1<br />
Resistor. 1K. laW. ~10% 15<br />
Resistor. 1K. laW ... 10%<br />
Resistor. 1K. laW. -10%<br />
Resistor, 1K, laW, ~10%<br />
Resistor, 1K, loll, .. 10%<br />
Resistor, 1K, laW, .. 10%<br />
Resistor, 1K, laW, -10%
::c<br />
LIST OF ~TERIALS<br />
CD<br />
LOGIC/PIIR. SUP. BO. 5eo<br />
< (Reference: Ass'y Dwg .• 63060104, Rev. F4)<br />
(T1<br />
Part<br />
Itlll1 Symbol Humber Nomenc I a tu re<br />
Part<br />
~antity<br />
Item Symbol Number Nomenclature Quantity<br />
43 R2,R4,R6 41681926 Resistor, 680 ohms, \W, :10% 9<br />
71 Q6, Q4 382444"0 Transistor, 2N4442<br />
RS,RI0,R12 41681926 Resistor, 680 ohms,<br />
2<br />
~w, !10~<br />
72 Q5 38200300 Transistor, Tip 30<br />
R14,R16 41681926 Resistor, 680 ohms, \W, !10~<br />
1<br />
73<br />
R18 41681926 Resistor, 6S0 ohms, \W, :10%<br />
74 VR1 35203090 Voltage Regulator LM 309<br />
44 R17,R19 41471926 Resistor, 470 ohms, ~W, !10~ 2<br />
74A VRI 35207800 Voltage Reg uGH 7805 See Note 12 REF<br />
45 R20 46203381 Resistor, 2CK Pot 1<br />
75 XME18, 19 31410001-6 Socket. 16 Pin 2<br />
46 R21,R43 41472926 Resistor, 4.7K, ~W, :10~ 3 76 30050000 Silicone Compound AR<br />
R22 41472926 Resistor, 4.7K, \W, :10~<br />
77 39690010-2 Strap 1<br />
47 R24 41222926 Resistor, 2.2K, ~W, !10~ 1<br />
79 Jl 31300008-1 Connector, Mo1ex; 1360P 1<br />
48 R25 46103910 Resistor, 10K Pot 1<br />
80 31240021-2 Pin, Mo1ex, Male, 02-09-2133 10<br />
49<br />
81 J2 31340008-2 Connector, Molex, 1360 R-1<br />
50 R36 41752g26 Resistor, 7.5K, ~W, :10~ 1<br />
82 31240021-1 Pin, Molex, Female. 02-09-1133 12<br />
51 R37 41184926 Resistor. 180K, ~W. :10% 1<br />
83 31350003 Fuse Clip (102068 Cramer) 12<br />
52 84 35000004-5 Washer Ins. Nylon<br />
53 R39.R40 41221926 Resistor. 220 ohms. ~W. :10~ 2<br />
85 34517147 Screw. Pan HO/Phi1. No. 4-40 x 7/16 19 3<br />
54 R41 41473926 Resistor. 47 ohms. ~W. !10S<br />
86 34517107 Screw. Pan HO/Phil. No. 4-40 x 5/16 19 2<br />
55 R46.R42 41101926 Resistor, 100 ohms. ~W. !10~ 2<br />
87 34815007 Washer. Lock. Int. Tooth No. 4 5<br />
...... 56 R44.R47 41103926 Resistor. 10K. ~W. !10S 2<br />
88 34912007 Washer. Flat. No. 4<br />
I<br />
2<br />
..... 57 R45 41331026 ReSistor. 330 ohms. 2W 1<br />
89 34712007 Nut. Hex. No. 4-40 UNC -2S 5<br />
en 58 90 30000000 Insulating Varnish. Glypt1<br />
AR<br />
59 91 39690200-9 Sleeving. Ins. Teflon .25 19 AR<br />
60 R70. R71 41753926 Resistor. 75K. ~W. !IOS 7<br />
92 30070000 Solder (60/40) AR<br />
R72. R73 41753926 Resistor. 75K. ~W. !10~<br />
93 39610000-5 Wire. Sus. No. 22 AWG AR<br />
R74. R75 41753926 Resistor. 75K. ~W. !10S<br />
95 62000116-1 Caution label 1<br />
R76 41753926 Resistor. 75K. ~W. !10~<br />
96 31410000 Socket. '821-23011-404 2<br />
61 R79. R80 41473926 Resistor. 47K. W. !10~ 2<br />
97 31410001-04 Socket. 28 Pin 1821-23011-284 1<br />
62 98 ME18. MEl9 35514811 Integrated Ckt. QUAO 133 See Table II 2<br />
63 99<br />
64 100<br />
65 F1 39030011 Fuse. 3 AMP 1<br />
101<br />
66 F2 39030018 Fuse •• 5 AMP 1<br />
102<br />
67 F4. F5 39030019 Fuse. 3 ASS 4<br />
103<br />
F6. F7 39030019 Fuse. 3 ASS<br />
104<br />
68 105<br />
6' ME2 See Ass Dw9 Sheet 3. Table III and 62000112 REF<br />
70 Q3 38239060 Transistor. 2N3906 1<br />
ME4 See Assy Dwg Sheet 3. Table III and 62000112· REF
LIST OF MATERIALS<br />
LOGIC/PWR. SUP. BD. 500<br />
(Reference: Ass'y Dwg. #63060104. Rev. F4)<br />
Item<br />
Symbol<br />
7 C6. C7<br />
18 CR3. CR4<br />
37 ME28<br />
46 R30. R32<br />
48 R31. R33<br />
100 Basic Bd.<br />
ME2<br />
ME4<br />
ME8<br />
9 x 7 CHAR. GEN.<br />
Part<br />
Number<br />
21224000<br />
38100904<br />
35474123<br />
41472926<br />
46103910<br />
63060104<br />
Nomenc 1 a ture<br />
Capacitor •. 22 uf<br />
Diode, WG904<br />
Integrated Circuit. 74123<br />
Resistor, 4.7K, \W. ±10%<br />
Resistor. 10K, Pot<br />
5 x 7 Logic/Pwr. Sup. Bd. 500<br />
See Assy Dwg Sheet 3, Table III, and 62000112<br />
See Assy Dwg Sheet 3, Table III, and 62000112<br />
See Assy Dwg Sheet 3, Table III, and 62000112<br />
Quantity<br />
2<br />
2<br />
2<br />
2<br />
REF<br />
REF<br />
REF<br />
~EI0 See Assy Dwg Sheet 3, Table III, and 62000112 REF<br />
Item Symbol<br />
20 CR27<br />
42 RZ6<br />
44 R28<br />
47 R27<br />
49 R29<br />
68 Ql<br />
69 Q2<br />
SPEAKER OPTION W<br />
Part<br />
Number Nomenclature Quantity<br />
38040020 Diode. IN4002<br />
41102926 Resistor, lK. \W, !10% 1<br />
41471926 Resistor, 470 ohm, \W. ±10% 1<br />
41222926 Resistor, 2.2K. \W. !10: 1<br />
41220016 Resistor. 22 ohm. lW. !10%<br />
38239040 Transistor, 2N3904<br />
38300050 Transistor, MPS u05<br />
Item Symbol<br />
62 R83<br />
63 R82<br />
DOUBLE LINE FEED OPTION X<br />
Part<br />
Number<br />
Nomenc 1 a ture<br />
41203925<br />
462033Bl<br />
Resistor, 20K, \W. !5%<br />
Resistor. 20K Pot<br />
Quantity<br />
1<br />
MOTOR CONTROL OPTION Z<br />
;;0<br />
CD<br />
. <<br />
3 C18<br />
10 C19<br />
14 C17<br />
15 C20<br />
15A C20<br />
35 ME27<br />
36 ME26<br />
38 ME31<br />
42 R52. R85<br />
46 R53<br />
58 R51<br />
59 R54<br />
64 R91<br />
65 C16<br />
66 R92<br />
21102000<br />
22106002<br />
21123000<br />
21103003<br />
21103004<br />
35474121<br />
35474000<br />
35205550<br />
41102926<br />
41472926<br />
41203926<br />
41684926<br />
41102946<br />
22206002<br />
41103926<br />
Capacitor, .001 uf<br />
Capacitor. 10 uf<br />
Capacitor, .022 uf, 16V<br />
Capacitor, .01 uf<br />
Capacitor, .01 uf See Note 12<br />
Integrated Circuit. 74121<br />
Integrated Circuit 7400<br />
Integrated Circuit 555<br />
Resistor, 1K, \W, !10%<br />
Resistor, 4.7K, \W, !10%<br />
Resistor, 20K. \W, !10%<br />
Resistor, 680K, \W. !10%<br />
Resistor, lK, ~W, !10%<br />
Capacitor, 20 ufo 25V<br />
Resistor, 10K, \W, !10%<br />
1<br />
1<br />
1<br />
1<br />
2<br />
1<br />
1
Figure 7-14<br />
INTENTIONALLY OMITTED<br />
Rev. F<br />
7-20
(<br />
\<br />
·H<br />
G<br />
~'~I.~(j!.;"t-A<br />
~;)/, '~II".J<br />
~'!; ...... OT~ , ...<br />
IJI"7_~ r:}l-- .~ 0 -.. 'D." "),\2,14)!O,I'.r.;~-;<br />
G<br />
~~~ :O~:~T~~~~. __<br />
9 hND~<br />
. E<br />
......<br />
I<br />
N<br />
.....<br />
D<br />
c<br />
t-.!OTES:<br />
I ..... I..L INTEGFlATEoU CIRCUITS AI":l: T,(PICALL-r<br />
MOUN'-I=-L..o<br />
e MI\.RI< .12 HIGH 8Lr.--' -.-:i,~",CTERS AND ,-OCATE.<br />
APPRO)
__ n IN<br />
LIST OF MATERIALS<br />
PC BOARD ASSEMBLY<br />
POWER DRIVER WIO BRAKE<br />
(Reference: Ass'y No. 63060105-4005. Rev. 013)<br />
ITEM<br />
PART NO. NUMENCLATURE gTY PER.<br />
1 630600-03.:=2001--flL--BD---AW- 30b OR.UlER---__ n._nnn_nnn_ .. n_·l ___<br />
.2 63060113-2001 HEAT SINK/MTG BKT PWR DR. 306 . 1<br />
1 ·3 63002300-2001 CLIP, P.C. BOARD 2<br />
4 2241)5003-1001 -----..CAIL.EUC.r.ROLYTIC.-4UF- 50V 7<br />
I 6<br />
5 38100904-1001 DIODE WG904 9<br />
38040020-1001 DIODE 51 RECTIFIER IN4002 9<br />
--2- 38047321 100-1---1.) IOOE--·l~.i'iE R. _m 4732 A - 2<br />
8 22106002~1001 CAP ELECTROLYTIC 10UF 25~ 1<br />
...... 9 31230011-1001 CONNECTOR EDGE 20 PIN 1<br />
!---1.o.---3-5-4-U•.ot>.o.=l.o.Ol----- ---c·- nn_ -1 N T.E GRA 1= E 0 (,-1. R CU I T 7406 2<br />
I 14 38201110-1001 TRANSISTOR TIPlll 2<br />
1538239060-1001 TRANSISTOR PNP GEN PUR 2N3906 1<br />
-,-l.6---- 38300050..~QO.l.---. --_n-UANS-LSrOR-NPNHIVOL T MPS- VOS . 1-<br />
20 41102926-1001 RES CARRON 1 K 1/4W 10% 9<br />
23 43158105~1001 RES WW 1.5 OHM lOW 5~· 7<br />
.cc---2-4-----.4-0.6.8.03-25-",,-l,.Q0-l.----.- -, -..------ ---RES 68 OHM 3-1/4W 5% 7<br />
25 41222926-1001 RES CARRON 2.2 K 1/4W 10% 2<br />
i 26 41101026-1001 RES CARBON 100 OHM 2W 10% 1<br />
~.~~-c---4 .. U-OZ0-2~-1001 ---.---R-€-S--C-ARWN---1K 2W 10% ... 1-<br />
29 41221926-1001 RES CARBON 220 OHM 1I4W 10% 1<br />
30 41471946-.1001 RES CARRON 410 OHM 1I2W lot 1<br />
~:l-2----- -3500.()O~=.£OO~---··-----.wASHfR.",..NY-lON INSULATOR #4X 3/16 2<br />
33 30050000-0001 SILICONE COMPOUND AIR<br />
34 30000000-0001 INSULATING VARNISH AIR<br />
~5 34M+l'()~001~f.w.-4/40.x5/16.pAN HD- PHIL 55; 5,<br />
~6 34517145-2001 SCREW 4/40X7/16 PAN HD PHIL 55 • 9<br />
37 34815005-2001 WASHER #4 INT TOOTH LOCK 5S 15<br />
-~~8-----·--34-7-l-lO'O.s=2.oo-l------··-·-- -NU r -HE X-4!40 S 5 15 .<br />
i 39 30070000-0001 SOLDER AIR<br />
i 40 .34517165-2001 SCREW 4/40Xl/2 PAN HD PHIL 55 2<br />
!,.-4.l- 34000019-2001 -------·--WASHEi{ #6 -f.kAl-··-·f18RE--··· -.- ..__ .. ml__ .... -2-<br />
43 366000.04-2006 STANDOFF LCBS-12 PLASTIC I 5<br />
44 63060114-2001 SHIELD POWER DRIVER I 1<br />
-45------n_-3-%1-0000"..-OO-O 5<br />
.-. W IRE - BUSS /I 22 A W G<br />
A I R<br />
48 39690.200-0020 TUBING TEFLON TFT 200. #20 NAT AIR<br />
50 63060346-6001 KIT fRANS TIP 141 & INSULATOR I 1<br />
;...~O-A-~3060347-6001<br />
KI T-... -TRAN~--2~3a8-----·& .. ·lN~ULATOR-·... - .. -- .. AIR--<br />
55 222060o.2~lo.Ol CAP ELECTROLYTIC 20UF 25V \ 1<br />
56 43120.055-10.0.1 RES WW 12 OHM 5W 5~ 1<br />
,~1-n-4-3 56805-b=-l-OO-l- RE.s.~.w-5.buOHM· .. Sw.· .. l 0.%. .. ·1-···<br />
52 41221016-10.01 RES CARBON 220 OHM lW 10.% 1<br />
59 30040002-0.0.0.1 CONFORMAL COATING AIR<br />
i 60 34000050-2001 -WASHER #4-~bA+--1/400Xlt-l2T.HK - ·---·---9--<br />
REF 6306000.4-9001 PC BO DO 306 DRIVER AIR<br />
:BEf, ••. 6;3060l'()~r90Ql SCHEM 0 I AG PWR DRVR 300./50.0. SR "AIR<br />
:':"~:';": .-:'w.~. ,.~ ~N .~................:':•• ,:.~;•• ...:;.:....... ~, •• -~;.,.'.-':'<br />
•••••• _1'<br />
Rev. F 7-22
REVISIONS<br />
41 SEE t-IOTE S<br />
4S<br />
21<br />
'2.e.E;. NO~E. 3 50<br />
11<br />
20<br />
20<br />
"',f''( SL.OT '-""r;...."T'5.~<br />
P","S e.,... .. ~ ~<br />
6"''T'N~E.'"<br />
.... ,<br />
NOTeS:<br />
\. Ao...OD· 61....0SWL..1i1-.;:o.\oo(. '1/B.I-I.\C,f'r c.14 ......!:Ol ...... c.rl2.!';L5,<br />
Io...ND LO':='_"T"E:.. l>...P>=>RolO&OOO
LIST OF MATERIALS<br />
PC BOARD ASSEMBLY<br />
VIDEO AMP. AND CABLE ASSY<br />
(Reference: Ass'y No. 63060107-4001, Rev. B10)<br />
ITEM<br />
PART NO.<br />
NOME\lCLATURE<br />
QTY PER<br />
1<br />
2<br />
3<br />
4<br />
5<br />
6<br />
7<br />
R<br />
9<br />
10<br />
11<br />
12<br />
14<br />
1!'><br />
17<br />
18<br />
20<br />
21<br />
23<br />
27<br />
28<br />
31<br />
32<br />
33<br />
35<br />
36<br />
39<br />
40<br />
41<br />
42<br />
43<br />
44<br />
45<br />
47<br />
48<br />
50<br />
51<br />
52<br />
REF<br />
REF<br />
63060006-2001<br />
3 1 2 'i 0 0 11 - 1 00 L<br />
21821004-1001<br />
21472004-1001<br />
41224926-1001<br />
41473926-1001<br />
'tl472926-1001<br />
41103926-1001<br />
41102926-1001<br />
41474926-1001<br />
3B23'-I060-1001<br />
)rl23
.. YISIONS'"<br />
c ~~~:;."" ",~'i..~~.t,~.; ~<br />
C I REv. P If tto 1.3060()Z8<br />
l ~c~ PElf (CO 7';'000 .!!<br />
( I'IEV'SED ~ ~c.o 7501.o01~<br />
4- ("a "'~DIS.'~!.~_-.iR-ff~OI'l--
LIST OF MATERIALS<br />
PC BOARD ASSEMBLY<br />
CONNECTOR CARD<br />
(Reference: Ass'y #63060109-4001, Rev.<br />
Rev. F<br />
7-26
3<br />
2<br />
o<br />
\<br />
"'001,4002-, 400~,<br />
1I\010,40l\,<br />
Q"O\~ O~~"'(<br />
~~~~ ______________ ~~ __ ~.D<br />
20<br />
;c'~on/<br />
.J<br />
-~--- , ~400'\ """" <br />
A...' .. , 'FO~ G\OOz., oar.-OO .... ,<br />
,,"OOCo, ~OO'& .... ~OO~,40\Z ""'~"()<br />
SEC. NOTE \<br />
B'-"c..~ WIR..E. (T~R""'\N,o...~E:c::.<br />
1iIo.."T:"' £..~ O;::OR a..OOl,a-.OOdt,<br />
o"OOS") a..OO"l .,""tOIO .... 401 \ ON\ ..:,-R£'.<br />
~. PE:...R\AA..NE..N\"\..-"< \.A.A.I?I.."-. \""C'E."" \ "'... I\T~<br />
'UMGf _____ "" 0<br />
a ___<br />
~~~'( ~'C:...\J\,"::>\Ot-..), \......E:..,T .... R .!a..,""'D 'e::.OA.t-=\D<br />
c.o.......,,~ \C:.vA....,:t ,ON ""-I.U'""eE.~ APPR,)XIMAT£l Y AS 5 HO\NN. .-<br />
CEnTRDnlCS<br />
---<br />
~OR GIro::'OI, 4l"OO'Z.l 4I,.,:)o~,a.O\O,40\\,d,.O\2. .. c.\)~ \TE""1t.'C..~.OO IN '-C»-.U~~.<br />
~.."".. 'P .'2..c, t ...<br />
FO~ 0.00"'" '",p,-.,) 4,::)~~ .. C.u,\ITEtfl.7/2f"" ,\o.nnIN _ONG.<br />
~~~~~~~~_~'':;~_~'~.~'''~~~~~! ~ ~. - EU·PSED p.:: BOARD TIME A INDICAT 55 Y,<br />
Z.<br />
"::l'piI.,\p ."Z.S .'No<br />
h ..:.U, BI.....o....c..,,- .. Q...t...."::) ....".~e..~ ~~="'\ 1C,.'l"\ -\ \.2~ IN<br />
LONu. ~ ..... ~\~ ,\'Z.. \"-1 ·~C \\'No U'?\NG \'\'i::..'t.,\ B. 'Ep...M\~t>...'e:.<br />
E"'P'O'~'T~ ~-:>Wt--l ~""'-l 0;=''0:..,--0 C~ C)~~<br />
3 2<br />
It.<br />
Figure 7-18.<br />
PC BOARD ASS'Y, ELAPSED TIME INDICATOR (OPTION)
ITEM<br />
1<br />
3<br />
4<br />
7<br />
8<br />
10<br />
13<br />
14<br />
17<br />
20<br />
REF<br />
REf<br />
PART NO.<br />
63001084-2COI<br />
63002642-2001<br />
33453421-2001<br />
39648505-C004-2<br />
3007COCO-0001<br />
35811200-1001<br />
38052311-1001<br />
41222946-1001<br />
41754925-1001<br />
39648505-0004-0<br />
63001085-9C01<br />
63002641-
REV I SION 5<br />
SE.E NOTI; \<br />
3 4- ::, b<br />
I<br />
THE INFORMATlONCONTAINEDHERE. IN IS ,<br />
PROI'RIETARY AND IS NOT TO BE RELEASED<br />
OR REPRODUCED WITHOUT WRllTEN PER·<br />
MISSION OF CENTRONICS dati compuw< D)'I>-<br />
REi=<br />
/r-@-<br />
,,,-'0'-/o,~1-\ ~o. DIMB DIM '110. \1t.~~<br />
-4001 9.00 ~.oo .::t-.OO be".<br />
-4002 9.00 ~.oo ..'-'- I....Et:>.-OS .2" II-lCH OJ...i.<br />
BO"'l""H E-"-'D'S. /lo...f-ID "'T'!--l 2.E.FOI.."5sE.M6L,(.<br />
3 ,-0; 1"><br />
REVISION LEVEl OF DASH NO'S<br />
UVIlION<br />
4001 E MOQ£L 30'"<br />
4062 F <strong>MODEL</strong> IOIAL<br />
4003 E <strong>MODEL</strong> 500<br />
4004 A I-1ODEL SCOD<br />
.A:JR ~/Sf 0'= MArsR.IAt.,.<br />
.sEe ~H ~80~o//9<br />
UNLESS OTHERnlSE<br />
SPECIFIED ••<br />
I.C..,.t.r;ITAIOC".~1<br />
._ ...... """' .... n<br />
1 D .... ~ .. OI
LIST OF MATERIALS<br />
DATA INPUT CABLE 306<br />
(Reference: Ass'y No. 63060119-4001 t Rev. E)<br />
ITEM PART NO. N (l ~ E ,'J C L A T U R E<br />
1 31230038-1001 CONNECTOk EO(,!: 44 PIN<br />
2 31310019-1016 C ON:'-l 36 CONL~C T NOT KEYED<br />
3 39648505-0004-2 wIRE TYPE R 26AWG RED<br />
4 39648505-0004-9 WIRE TYPE B 26AWG WHITE<br />
5 39648505-0004-4 WIRE TYPt:: B .2 6AWG YELLOW<br />
6 39648505-0004-0 wIRE TYPf: B 26AhG BLACK<br />
7 39690000-0001 TAPE LACING W HI T1::: .010Xl/16W<br />
8 31460000-2003 TERMINAL KING NO 8 22-24 AWG<br />
9 30070000-0001 SOLDER<br />
10 39690001-0004 SLEEVING SHRINK BLACK 1/11 10<br />
QTY PER<br />
1<br />
1<br />
9.8<br />
10.3<br />
4.5<br />
2.8<br />
AIR<br />
1<br />
AIR<br />
AIR<br />
Rev. F 7-30
_n~<br />
......OF~ ...<br />
UVISIONS<br />
5<br />
A. 400S CR,£lrt.U.o PER. £co 13002:!o3'-' >te;,.!!I~c:f!'.A,<br />
'£~~~~L ~~L~Ec.o 73Q02770 9-·lS'I~...JJJ<br />
SEE NOTE 7<br />
I<br />
9<br />
TABLE :II:<br />
DASH WI E FR M WI 0<br />
-4001 poD J 14-315<br />
-
LIST OF MATERIALS<br />
W2 CABLE ASSEMBLY<br />
(Reference: Ass'y #63002258-4003, Rev. J)<br />
ITEM<br />
PA:{T ~O.<br />
NOMENCLATURE<br />
QTY PER<br />
1<br />
2<br />
3<br />
5<br />
6<br />
7<br />
8<br />
9<br />
REF<br />
63001024-2001<br />
31310019-1016<br />
31460000-2003<br />
39648505- 0004-9<br />
39648505-0004-4<br />
39648505-0004-2<br />
39690000-0001<br />
30070000-0001<br />
63001025-9001<br />
PC BD AW PARALLEL TIMER FIN BD 1<br />
CONN 36 CONTACT NOT KEYED 1<br />
TERMINAL RING NO 8 22-24 AWG 1<br />
WIRE TYPE B 26AWG WHITE<br />
AIR<br />
WIRE TYPE B 26AWG YELLOW<br />
AIR<br />
WIRE TYPt B 26AWG REJ<br />
AIR<br />
TAPE LACING WHITE .010Xl/16W AIR<br />
SOLDE~<br />
AIR<br />
PC BD DD PARALLEL TIMER FIN BO AIR<br />
Rev. E<br />
7-32
SECTION 8<br />
MECHANICAL DRAWINGS AND PARTS LISTS<br />
This section contains drawings and parts lists for the following<br />
major mechanical assemblies in the 306 printer and is updated for Rev. E.<br />
Reference<br />
Figure Designation Descri. pti on<br />
8-i Location of Model 306 Subassemblies<br />
8-1 AA Carriage<br />
8-2 AB Platen<br />
8-3 . AC Paper Pan<br />
8-4 AD Driving Mechanism (I)<br />
8-5 AE Driving Mechanism (2) (Air-Gap Clutch)<br />
8-5A AE Driving Mechanism (2) (Preload Cl utch')<br />
8-6 AF Idler Pulley<br />
8-7 AG Reed Switch<br />
8-8 AH Base<br />
8-9 AI Frame<br />
8-10 AJ Paper Feed<br />
8-11 AK Pin Feed<br />
8-12 AL Ribbon Feed (Part 1 of 2)<br />
8-13 AL Ribbon Feed (Part 2 of 2)<br />
8-14 AM Cover<br />
8-15 AN Operator Panel<br />
8-16 AO Electrical Components (1)<br />
8..,17 AP Electrical Components (2)<br />
8-18 AQ Electrical Components (3)<br />
8-19 Print Head and Associated Assemblies<br />
8-20 Tape Reader Assembly (Option)<br />
8-20A Tape Reader Assembly (Alternate item)<br />
8-1/8-2
Figure 8-i. <strong>MODEL</strong> 306 SU8ASSEMBLIES<br />
KEY<br />
NO. FIGURE DESCRIPTION<br />
1 8-12 Ribbon Feed - AL (Part 1 of 2)<br />
2 8-12 Twin Spool with Ribbon - AL-113<br />
3 8-..20 Vertical Format Unit (Option)<br />
4 7-1 Head Ass'y. Fig. 8-19<br />
5 8-14 Cover - AM<br />
6 7-14 logic/Power Supply Ass'y<br />
7 8-9 Frame - AI<br />
8 8-9 Frame - (AI-C)<br />
9 8-9 Frame - (AI-B)<br />
10 8-9 Frame - (AI-E)<br />
11 8-9 Frame - (AI-D)<br />
12 8-19 See Item 37<br />
13 8-11 Pin Feed - AK<br />
14 7-19 Connector Board 63060109 - See also Fig. 7-15<br />
15 7-13 Main Harness Connector (J8) - See also Fig. 8-18<br />
16 7-12 Main Harness 526783001 - See also Fig. 8-18<br />
17 8-10 Paper Feed - AJ<br />
18 8-4 Driving Mechanism (Part 1 of 2) - AD<br />
19 8-12 Ribbon Feed (Part 1 of 2) - AL<br />
20 8-8 Base - AH<br />
91 8-5 Driving Mechanism - AE (part 1) or AE (part 2)<br />
22 8-4 Driving Mechanism (Part 1 of 2) - AD<br />
23 5-25 Motor Control Unit (Option)<br />
24 8-2 Platen - AB<br />
25 8-8 Speaker (Option) - AH<br />
26 7-18 Video Amplifier Ass'y (See also Fig. 8-19. item 26)<br />
27 8-1 Carriage - AA<br />
28 8-15 Operator Panel - AN<br />
29 808 Base - (AH-12)<br />
3D 8-7 Reed Switch - AG<br />
31 8-19 Print Head and Associated Assemblies. item 16<br />
32 8-19 Print Head and Associated Assemblies. item 17<br />
33 8-19 Print Head and Associated Assemblies. item 18<br />
34 7-16 Power Driver Board Assembly (See also Ffg .• 8-19/33)<br />
35 8-3 Paper Pan - AC<br />
36 B-6 Idler Pulley - AF<br />
37 B-17 Electrical Components (Part 2 of 3)<br />
38 B-I0 Paper Feed (AJ-l)<br />
39 8-20 Vertical Format Unit (VFU - Option) (Kit Item 5)<br />
40 8-20 Vertical Format Unit (VFU - Option) (Kit Item 8)<br />
41 8-20 Vertical Format Unit (VFU - Option) (Kit Item 6)<br />
42 7-21 Cable Ass'y. Data Input<br />
43 B-16 Transformer Unit (AO)<br />
44 8-16 In-Line Fuse. 3-Amp. Slo-Blo (AD). See item 42 and 42-1 ,r- ~<br />
45 8-20 Refer to item 9 of VFU Kit<br />
8-4
15<br />
0)<br />
I<br />
U1<br />
rJJJ<br />
I<br />
I<br />
I<br />
I<br />
lU<br />
I<br />
I<br />
,<br />
I<br />
I<br />
,<br />
I<br />
•<br />
I<br />
I<br />
I<br />
I<br />
I<br />
I<br />
I<br />
,. I<br />
109 ~fiJ<br />
108~<br />
107<br />
:;c<br />
CD<br />
<<br />
.<br />
L..----A----<br />
Figure 8-1. CARRIAGE - AA
Figure AA Carriage<br />
Figure AA Carriage<br />
Reference Part<br />
Number Number Part Hlsme Quantity Reference Part<br />
Number Number Part Name Quantity<br />
AA-O 526872001 Carriage Unit 1<br />
Note: This unit is assembled with AA-7S 011401016 Screw for AA-75 2<br />
parts covering from reference AA-79 021400106 Nut for AA-78 2<br />
number AA-51 through AA-65.<br />
AA-80 527575001 Piston unit 1<br />
AA-OO 526871001 Carriage. complete unit 1 AA-S1 081021070 O-ring for AA-SO 1<br />
Note: This unit is assembled with<br />
parts covering from reference<br />
AA-S2 025050236 Washer for AA-BO 1<br />
number AA-O through AA-79 AA-S3 028050247 Spring washer for AA-SO 1<br />
and AA-I0l through AA~109.<br />
except AA-105.<br />
AA-S4 021500106 Nut for AA-SO 1<br />
AA-S5 527571000 Damper cylinder 1<br />
AA-51 526873001 Carriage 1<br />
AA-86 007401416 Screw for AA-S5 1<br />
AA-52 527242001 Roller 6<br />
AA-S7 021400106 Nut for AA-S6 1<br />
AA-53 048030346 Snap ring 6<br />
AA-93 007501B16 Screw for AA-S5 3<br />
AA-54 526875001 Axle for AA-52 4<br />
AA-94 025050236 Washer for AA-93 3<br />
I AA-55 526876001 Eccentric Axle for AA-52 2 AA-95 028050247 Spring washer for AA-93 3<br />
00<br />
'" AA-56 021400106 Nut for AA-54. 55 6 AA-96 007400816 Screw for video amp. bracket 2<br />
AA-57 028040247 Spring washer for AA~54. 55 6 AA-97 o2B040247 Spring washer for AA-96 2<br />
AA-58 525544001 Head adjusting knob 1 AA-98 025040236 Washer for AA-96 1<br />
AA-59 525025001 Head lock knob 1 AA-100 526937001 Retainer 2<br />
AA-60 02S040247 Sprtng washer for AA-59 1 AA-IOI 526936001 Retainer holder 1<br />
AA-61 526877001 Carriage ribbon guide axle 1 AA-I02 025040236 Washer for AA-101 1<br />
AA-62 526878000 Ribbon guide roller 2 AA-103 028040247 Spring washer for AA-104 2<br />
AA-63 048020346 Snap ring for AA-61. AA-70 2 AA-104 007400716 Screw for AA-I01 2<br />
AA-64 02S040247 Spring washer for AA-61. AA-70 2 AA-105 021500106 Nut for AA-106 2<br />
AA-65 021400106 Nut for AA-61. AA-70 2 AA-I06 526879001 Belt tension axle 1<br />
AA-66 526947000 Head bracket 1 AA-I07 526880001 o.B. Guide plate 1<br />
AA-67 525002001 Fork for head adjustment 1 AA-I08 028050247 Spring washer for AA-I06 1<br />
AA-68 007400716 Screw for AA-67 1 AA-I09 021500106 Nut for AA-106 1<br />
AA-69 028040247 Spring washer for AA-68 1 AA-110 025040136 Washer for AA-54 1<br />
AA-70 526910001 Head ribbon guide. axle 1<br />
120 63060107-4001 Reference item 21. Video Amp. bracket ...<br />
AA-75 525047000 Head bracket guide 1 Section 7<br />
1<br />
AA-76 007301416 Screw for AA-75 2<br />
~-77 028030247 Spring washer for AA-76 2
00<br />
I<br />
~<br />
;0<br />
ro<br />
<<br />
Figure 8-2.<br />
PLATEN - AS
Figure AB Platen'<br />
Reference Part<br />
Number Number Part Name Quantity,<br />
AB-l 526722001 Platen 1<br />
AB-2 017402216 Screw for AB-l 2<br />
AB-3 025040236 Washer for AB-2 2<br />
AB-4 028040247 Spring Washer for AB-2 2<br />
AB-5 017402216 Screw for AB-l 2<br />
AB-6 021400106 Nut for AB-5 2<br />
AB-7 526919001 Guide Bar for Carriage (Rear) 1<br />
AB-12 ~2692000l Guide Bar for Carriage (Front) 1<br />
CO<br />
AB-27 007502016 Screw for AB-7 2<br />
I<br />
CO AB-28 028050247 Spring Washer for AB-27 2<br />
AB-30 007401016 Screw for 31, AB-32 4<br />
AB-31 526960001 Guide Bar Set Plate (l) 1<br />
AB-32 526961001 Guide Bar Set Plate (R) 1<br />
63060194-6001 Timing Fence Kit (Series 300)<br />
Note: This unit is assembled<br />
with items 40 through 43,<br />
44, 45 and 46.<br />
40 63508140-2001 Clasp Timing Fence<br />
41 63508106-2001 Clamp Timing Fence<br />
42 63060179-5001 Timing Fence Ass'y, 80 Char. 306<br />
1<br />
43 34000032-2001 Washer M3 Lock<br />
4<br />
43A 028030247-2001 Washer Spring (Alternate)<br />
AR<br />
44 34000052-2001 Washer<br />
2<br />
44A 025030236-2001 Washer (Alternate)<br />
AR<br />
45 34000048-2001 Screw M3 PO.5 x 6 MM Filister<br />
4<br />
45A 001300716-2001 SCI" .. AR<br />
458 34000091-2001 Screw M3 x PO.5 X 6 MM Lg Pan/Slot<br />
AR<br />
46 63500113-2001 Timing Fence Shim<br />
AR
00<br />
I<br />
1.0<br />
A<br />
(REVERSED 180°)<br />
;0<br />
(!)<br />
<<br />
Figure 8-3.<br />
PAPER PAN - AC
;;0<br />
CD<br />
<<br />
Figure AC Paper Pan<br />
Reference<br />
Number<br />
Part<br />
Number<br />
Part Name<br />
Quantit<br />
co<br />
I<br />
I-'<br />
0<br />
AC-1 526520001<br />
AC-2 007400716<br />
AC-3 028040247<br />
AC-4 526526001<br />
AC-5 007400716<br />
AC-6 028040247<br />
AC-7 526530001<br />
AC-8 527237001<br />
AC-9 007021616<br />
AC-10 025630236<br />
AC-ll 028020247<br />
AC-12 021020106<br />
AC-13 007400716<br />
AC-14 028040247<br />
AC-15 525675001<br />
AC-16 526940001<br />
526992001<br />
Paper pan unit (front)<br />
Screw for AC-1 2<br />
Spring washer for AC-2 2<br />
Paper pan unit (center) 1<br />
Screw for AC-4 3<br />
Spring washer for AC-5 3<br />
Paper pan unit (rear) 1<br />
Micro-switch<br />
Screl'l for AC-8 2<br />
Washer for AC-9 2<br />
Spring washer for AC-9 2<br />
Nut for AC-9 2<br />
Screw for AC-7 4<br />
Spring washer for AC-13 4<br />
Insulating tube 2<br />
Actuator arm for item AC-2 1<br />
Micro-switch unit 1<br />
Note: This unit assembled with<br />
parts covering AC-8 and<br />
AC-16.
2~ 35.<br />
27' b<br />
~ ''\<br />
28<br />
ex><br />
I<br />
....<br />
31<br />
\ ~<br />
30 I ~t:'r",<br />
41 ~~33 35<br />
~ ~2<br />
31<br />
;;0<br />
t1)<br />
. <<br />
Figure 8-4. nRIVING MECHANISM (PART 1 OF 2) - AD
;;u Figure AD Driving Mechanism - Part 1<br />
.<br />
CD<br />
<<br />
Figure AD Driving Mechanism - Part 1<br />
o:::J Reference Part<br />
Number Number Part Name<br />
Quantity Reference Part<br />
Number Number Part Name Quantity<br />
AD-4 526778001 Motor Fan Cover 1<br />
AD-5 007400716 Screw for AD-4 1<br />
AD-39 028040247 Spring Washer for AD-38 4<br />
AD-40 025040236 Washer for AD-38<br />
AD-6 028040247 Spring i':asher for AD-5 1<br />
4<br />
AD-41 526747001 Timing Belt 150-L<br />
AD-8 510101001 Grommet for AD-7 4<br />
1<br />
AD-42 007401016 Screw for AD-16 2<br />
AD-ll 526645001 Screw for AD-7 4<br />
AD-43 028040247 Spring Washer for AD-42 2<br />
AD-12 510061001 Washer for AO-ll 4<br />
AO-44 025040236 Washer for AD-42 2<br />
AD-13 526509001 Motor Pulley (60 Hz) 1<br />
AD-45 515456001 Ground ~!ire for AD-1 1<br />
AD-13-1 . 526508001 Motor Pulley (50 Hz) (Option) 1<br />
AD-46 550719001 External Lock-Washer for AD-45 2<br />
AD-14 525744991 Screw for AD-13 2<br />
AD-47 007400516 Screw for AD-45 2<br />
AD-15 526746001 Timing Belt 140-l 1<br />
AD-49 526986001 Motor Set (110V 50/60 Hz) standard, 1<br />
AD-16 526923001 Tensioner Bracket 1 includes mto. set, also motor requires<br />
AD-17 525703001 Tensioner (ll 2<br />
no P.M. - (Long life ball bearings).<br />
AD-18 51146001 Felt Washer 4 AD-50 526987001 Motor Set (220V, 50/60 Hz) Option, 1<br />
includes mtg. set, also motor requires<br />
AD-19 526649001 Screw (l) 2<br />
OJ<br />
no P.M. (Long life ball bearings).<br />
I<br />
...... AD-20 025030133 Washer for AD-19 2 AD-51 526994001 Main Motor Fan and Set-Screw, used 1<br />
N<br />
AD-21 028030247 Spring Washer for AD-19 2 for AD-49 and AD-50 .<br />
AD-22 021300106 Nut for AD-19 2<br />
AD-23 526633001 Center Shaft 1<br />
AD-24 526628001 Center Pu 11 ey 1<br />
AD-25 525743001 Set-Screw for AD-24 2<br />
AD-27 526926001 Driving Pulley 1<br />
AD-28 525743001 Set-Screw for AD-27 2<br />
AD-30 526509001 Motor Pulley 1<br />
AD-31 525744001 Screw for AD-30 2<br />
AD-32 526634001 Washer for AD-30 1<br />
AD-33 048050346 Snap Ring for AD-23 1<br />
AD-34 526925001 Bracket for AD-23 2<br />
AD-35 526681001 Retainer (B) 2<br />
AD-36 526637001 Retainer Bracket 2<br />
AD-37 007400416 Screw for AD-36 4<br />
AD-38 007400816 Screw for AD-34 4
co<br />
I<br />
......<br />
W<br />
;::c<br />
(l)<br />
<<br />
Figure 8-5. DRIVING MECHANISM (AE, PART 2) (THIS DRAHING APPLIES TO AIR-GAP CLUTCH ONLY)
Ffgure AE DRIVING MECHANISM (1) (AIR-GAP)<br />
Reference Part<br />
Number Number Part Name Quantfty<br />
AE-l 526643001 Driving pulley 1<br />
AE-2 525744001 Set-screw for AE-l 2<br />
*AE-3 526860001 Electromagnetic clutch unit 1<br />
Note: This unit includes rotor,<br />
shaft, clutch field ass'y,<br />
and spring pin.<br />
*AE-3-3 526715001 Clutch armature<br />
CO AE-9 5~6882001 Driving belt unit<br />
I<br />
...... AE-12 525631001 Clutch turning stopper (l) 1<br />
~<br />
AE-13 007400616 Screw for AE-12 1<br />
AE-14 025040236 Washer for AE-13 1<br />
AE-17 526943001 Spacer 2<br />
AE-18 526950001 Drivin9 pulley (C) 1<br />
AE-19 525743001 Set-screw for AE-18 2<br />
AE-20 525092001 Bushing unit 2<br />
AE-21 525090001 Bushing bracket 2<br />
AE-22 525752001 Bolt for AE-21 4<br />
AE-23 025060236 Washer for AE-22 4<br />
AE-24 007400616 Screw for AE-21 6<br />
*When using an air-gap clutch assembly (AE-3-3 and AE-3), use power driver<br />
board 63060105-1 only.
00<br />
I<br />
......<br />
U'1<br />
;.u<br />
I'D<br />
<<br />
Figure 8-5A. DRIVING MECHANISM (AE, PART 2) (THIS DRAWING APPLIES TO PRELOAD CLUTCH ONLY)
Figure AE DRIVING MECHANISM (2)<br />
(This Parts Llst App1les to Preload Clutch 0n1y)<br />
Reference Part<br />
Number Number Part Name Quantlty<br />
AE-l 526643001 Drlving pulley<br />
AE-2 525744001 Set-screw for AE-l 2<br />
AE-9 526882001 Driving belt unit<br />
AE-12 525631001 Clutch turning stopper (L)<br />
AE-13 007400616 Screw for AE-12 1<br />
AE-14 025040236 Washer for AE-13<br />
AE-17 526943001 Spacer 2<br />
AE-18 526950001 DrlVe Pulley (C) 1<br />
AE-19 525743001 Set-screw for AE-18 2<br />
CO AE-20 525092001 Bushing unit 2<br />
I<br />
~ AE-21 525090001 Bushing bracket 2<br />
0\<br />
AE-22 525752001 Bolt for AE-21 4<br />
AE-23 025060236 Washer for AE-22 4<br />
AE-24 007400616 Screw for AE-20 6<br />
AE-26 527678001 Clutch rotor<br />
AE-27 52768~OOI Clutch armature<br />
AE-28 527681001 Hub 1<br />
AE-29 527679001 Clutch spring 1<br />
AE-30 526717001 Clutch field assembly 1<br />
AE-34 526642001 Shaft (Short with pinned rotor) 1<br />
AE-35 047401842 Spring pin 1<br />
*AE-36 529019001 Pre-load clutch complete unit<br />
Note: Thfs unit is assembled with<br />
parts covering from reference<br />
number AE-26 through AE-30<br />
and AE-34, 35.<br />
*When using a preload clutch ass8'llblv (AE-36) in Model 306, apply power<br />
driver board assembly 63060105-5 (Refer to Section 7) configured<br />
especially for splined clutch operation (preload) and for four<br />
or eight inches per second (IPS) paper slew speed.
co<br />
I<br />
.......<br />
.......<br />
;:0<br />
(1)<br />
< Figure 8-6. IDLER PULLEY - AF
Figure AF IDLER PULLEY<br />
Reference Part<br />
Number Number Part Name Quantity<br />
AF-21 527730001 Idler pulley assembly 1<br />
Note: This unit is assembled with parts<br />
covering from reference AF-22. 23.<br />
arid 26 to AF-43.<br />
AF-22 5277729001 Idler pulley shaft 1<br />
AF-23 527688001 Idler pulley 1<br />
AF-26 048020346 Snap rfng 2<br />
(XI<br />
AF-27 527701001 Sprfng for AF-43 1<br />
I<br />
.....<br />
AF-28 527702001 Tr.f'eaded shaft for AF-26 1<br />
(XI<br />
AF-29 527703001 Nut holder 1<br />
AF-30 021300113 Nut 1<br />
AF-31 527704001 Frfctfon sleeve 1<br />
AF-32 525744001 Screw 2<br />
AF-33 526655000 Return pulley 1<br />
AF~34 048060346 Snap rfng for AF-22 1<br />
AF-35 526680001 Retafner (C) 2<br />
AF-36 525209001 P.F. retainer 2<br />
AF-37 525207001 Holder 2<br />
AF-38 007400516 Screw 4<br />
AF-39 526917001 Spacer 1<br />
AF-40 526904001 Idler pulley holder 1<br />
AF-41 007400816 Screw for AF-40 4<br />
AF-42 028040247 Sprfng washer for AF-41 4<br />
AF-43 529214001 Brake Shoe Holder (includes attached brake<br />
shoe)<br />
2
~18<br />
2<br />
~19 11<br />
I<br />
00<br />
I<br />
.....<br />
\0<br />
2<br />
:;c<br />
.<br />
en<br />
<<br />
Figure 8-7. REED SWITCH - AG
Figure AG Reed Switch<br />
Reference Part<br />
Number Number Part Name Quantity<br />
AG-1 525721001 Reed switch (Left and Right) 2<br />
AG-2 525725001 Adjusting holder for AG-1 2<br />
AG-3 001301403 Screw for AG-l 2<br />
AG-4 025030133 Washer for AG-3 2<br />
AG-5 028030247 Spring washer for AG-3 2<br />
AG-6 021300106 Nut for AG-3 2<br />
AG-7 525169001 Reed switch holder 2<br />
AG-8 007300716 Screw for AG-7, 9 4<br />
AG-9 526911001 Reed switch holder (L) 1<br />
OJ<br />
I<br />
N<br />
......<br />
I 2<br />
~7<br />
i<br />
)<br />
16<br />
o<br />
~ 3<br />
;0<br />
(J)<br />
<<br />
Figure 8-8.<br />
BASE - AH
Figure AH Base<br />
Reference Part<br />
Number Number Part Name Quantity<br />
AH-l 526962001 Base 1<br />
AH-2 526739001 Rubber Foot 4<br />
AH-3 526740001 Screw for AH-2 8<br />
AH-4 526753001 Bottom Plate 1<br />
AH-5 007400816 Screw for AH-4 4<br />
AH-f' 025040236 Wasner for AH-5 4<br />
AH-7 526741001 Plate for AH-2 8<br />
AH-8 526816001 Rating Plate 110V -120V 1<br />
AH-8-1 526954001 Rating Plate 220V -240V 1<br />
AH-9 001021014 Screw for AH-8. 8-1 2<br />
AH-I0 021020106 Nut for AH-8. 8-1 2<br />
AH-ll 028020247 Spring Washer 2<br />
AH-12 004400816 Mtg Screw for Power Oriver Board<br />
63060105 (Refer to Fig. 7-16)<br />
3<br />
63060189-6001 Speaker Unit (Option) Kit 1<br />
Note: Assembled with reference No's<br />
AH-13 through AH-18.<br />
AH-13 526825001 Speaker and bracket ass 'y 1<br />
AH-14 526824001 Speaker 1<br />
AH-15 526766001 Speaker Bracket 1<br />
AH-16 007400816 Screw for AH-15 2<br />
AH-17 526767001 Clamp for AH-14 3<br />
AH-18 007300416 Screw for AH-17 3<br />
8-22
20<br />
STANDARD ER BOARD<br />
6306010 •<br />
LOGIC/4P(OR~ SECTION 7)<br />
12<br />
21 ..,<br />
~/I<br />
I<br />
J<br />
I<br />
~ I )()<br />
~<br />
Q<br />
~<br />
OJ -, ,<br />
8<br />
(Xl<br />
I<br />
N<br />
W<br />
,<br />
4<br />
~/~<br />
" 14<br />
13<br />
Vol
;0<br />
I'D<br />
< .<br />
Il'<br />
Fi gure AI Frame<br />
Reference Part<br />
Number Number Part Name Quantity<br />
AI-l 526545001 Frame (R) 1<br />
AI-2 525752001 Bolt for AI-l 2<br />
AI-3 02B060247 Spring Washer for AI-2 2<br />
AI-4 526705001 PC Boa rd Ho 1 der (RL) 1<br />
AI-5 007400416 Screw for AI-4 2<br />
AI-6 526706001 PC Board Holder (LL) 1<br />
AI-7 007400816 Screw for AI-6. 8. 10. 23 7<br />
AI-8 526707001 PC Board Holder (RU)<br />
AI-lO 526708001 PC Board Holder (LU) 1<br />
AI-12 526546001 Frame (L)<br />
AI-13 525752001 Bolt for AI-12 2<br />
AI-14 028060247 Spring Washer for AI-13 2<br />
AI-IS 526538001 Paper Feed Shaft 1<br />
AI-16 525207001 Retainer Holder (A) 2<br />
00 AI-17 525208001 Retainer (0) 2<br />
I<br />
N AI-18 525209001 Retainer Holder (B) 2<br />
~<br />
AI-19 007400516 Screw for AI-l. 12 4<br />
AI-20 526539001 Paper Feed Guide Shaft 1<br />
AI-21 007401016 Screw for AI-20 1<br />
AI-22 021400106 Nu t for AI -20 2<br />
AI-23 526624001 Capaci tor 1<br />
AI-25 025040236 Washer for AI-24 1<br />
AI-34 525551001 Pin Feed Stopper<br />
AI-35 525743001 Screw for AI-34 1<br />
AI-36 525674001 Connector 1<br />
A 33680123-05 Tinnerman Clip (Logic board mtg. hardware) 4<br />
B 34527207 Screw (Logic board mtg. hardware) 4<br />
C 34000019 Fibre washer (Logic board mtg. hardware) 4<br />
0 36615511-70 SpaL~~ (used with any optional interface<br />
board) and standard board.<br />
4<br />
E 34527407 Screw (used with standard board<br />
and interface board.<br />
4
1"',<br />
I "<br />
I<br />
"<br />
I<br />
I<br />
I I<br />
I I<br />
I<br />
I<br />
I<br />
I<br />
I<br />
I<br />
I<br />
I<br />
I<br />
26<br />
28<br />
'47<br />
23<br />
~~j<br />
(Xl<br />
I<br />
N<br />
U'1<br />
•<br />
ROTATED 90'<br />
A 50 ASSEMBLED)<br />
(PARTS 40,42,43,41,<br />
;;c<br />
Cl)<br />
< .<br />
Figure 8-10.<br />
PAPER FEED - AJ
Figure AJ Paper Feed<br />
Reference Part Reference Part<br />
Number Number Part Name Quantity Number Number Part Name Quantity<br />
AJ-l 526544001 Bracket Reed Switch, Line Counter AJ-35 028030247 Spring washer for AJ-32<br />
AJ-2 001400816 Screw for AJ-l 2 AJ-36 021300106 Nut for AJ-32<br />
AJ-3 028040247 Spring washer for AJ-2 2 AJ-37 526672001 PF clutch shaft<br />
AJ-4 525721001 Reed switch, line counter AJ-38 525353001 Bearing for AJ-37 2<br />
AJ-5 525725001 Adjusting holder for AJ-4 AJ-39 048040346 Snap ring for AJ-37 2<br />
AJ-6 001301403 Screw for AJ-4 AJ-40 526607001 PF clutch inner cam 1<br />
AJ-7 025030133 Washer for AJ-6 AJ-41 525333001 FF clutch releaser<br />
AJ-8 028030247 Spring washer for AJ-6 AJ-43 048020346 Snap ring for AJ-42 2<br />
AJ-9 021300106 Nut for AJ-6 1 AJ-44 526927001 PF clutch pulley<br />
AJ-10 007300516 Screw for AJ-5 2 AJ-45 526686000 Bearing insert (press-fitted)<br />
AJ-12 525769001 Paper Feed Knob Coupler 1 AJ-46 508532001 Roller 3<br />
AJ-13 525748001 Screw for AJ-12 2 AJ-47 048080346 Snap ring for AJ-37 1<br />
AJ-14 525768001 Spring for AJ-12 AJ-48 510062001 Spring for AJ-40 2<br />
AJ-15 025060136 Washer for AJ-12 AJ-49 526685001 PF cam 1<br />
AJ-16 048050346 Snap ring for AJ-12 AJ-50 525743001 Screw for AJ-49 2<br />
AJ-17 526821001 Paper feed knob AJ-51 526602001 One line counter (L)<br />
(X) AJ-18 526719001 Ornamental plate for AJ-17 AJ-52 525747001 Screw for AJ-51 2<br />
I<br />
N<br />
0\<br />
AJ-19 526745001 Screw for AJ-17 AJ-53 526668001 PF chassis (L) 1<br />
AJ-20 526675001 Paper feed idle gear AJ-54 526666001 PF chassis shaft 3<br />
AJ-21 526674001 Axle for AJ-20 AJ-55 028048247 Spring washer for AJ-54 3<br />
AJ-22 048040346 Snap ring for AJ-21 AJ-56 021400106 Nut for AJ-54 3<br />
AJ-23 025050236 Washer for AJ-21 2 AJ-57 021400106 Nut for AJ-54 3<br />
AJ-24 028050247 Spring washer for AJ-21 AJ-58 025040236 Washer for AJ-54 6<br />
AJ-25 021500106 Nut for AJ-21 AJ-59 028040247 Spring Washer for AJ-54 3<br />
AJ-26 526673001 PF idle gear holder AJ-60 021400106 Nut for AJ-54 3<br />
AJ-27 007400816 Screw for AJ-26 2 AJ-61 511091001 Spring for AJ-31 1<br />
AJ-28 025040236 Washer for AJ-27 2 AJ-62 525743001 Screw for AJ-49 2<br />
AJ-29 526867000 O-ring 1 AJ-63 527856001 Clutch Magnet Core 1<br />
AJ-30 526687001 PF chassis (R) AJ-64 525351001 Armature 1<br />
(with riveted armature slide) AJ-65 527027001 Clutch Magnet Cojl 1<br />
AJ-31 525753001 Back Stopper Pawl AJ-66 527026001 Spring for AJ-64 1<br />
AJ-32 007300803 Screw for AJ-31 AJ-68 028030247 Spring Washer for AJ-67 2<br />
AJ-33 503092001 Washer for AJ-32 AJ-69 025030236 Washer for AJ-67 2<br />
AJ-34 525756001 Collar for AJ-32 AJ-72 527599001 PF Gear 1<br />
AJ-73 526964001 PF Coupling (Short) 1<br />
AJ-74 52743000 PF Screw for item 72 2
Figure AJ - Paper Feed (cont'd)<br />
ex><br />
I<br />
N<br />
-.....J<br />
-ex><br />
I<br />
N<br />
ex><br />
Reference Part<br />
Number Number Part Name Quantity<br />
AJ-70 527032001 Clutch Magnet Unit 1<br />
Note: This part is assembled with<br />
parts covering reference number<br />
AJ-63 through AJ-66.<br />
AJ-71 526957001 Paper Feed Assembly 1<br />
Note: This part is assembled with<br />
parts covering reference<br />
number AJ-29 through AC-41,<br />
AJ-43 through AJ-57, and<br />
AJ-61 through AJ-69, AJ-75,<br />
and AJ-79.<br />
AJ-72 527599001 PF Gear<br />
AJ-73 526964001 PF Coupling (Short)<br />
AJ-74 52743000 PF Screw for Item AJ-73<br />
AJ-75 527249001 Bolt for AJ-63<br />
AJ-76 526993001 PF Gear Unit<br />
AJ-77 526605001 PF Clutch Unit<br />
Note: This unit is assembled with<br />
parts covering from reference<br />
no's AJ-40 through AJ-48.<br />
AJ-78 526699001 Line Counter, Reed Switch Unit<br />
Note: This unit is assembled with<br />
parts covering from reference<br />
no's AJ-4 to AJ-9.<br />
AJ-79 526608021 Clutch Release Pawl<br />
1<br />
1<br />
1<br />
2<br />
1<br />
1<br />
2<br />
:;:0<br />
(J)<br />
17<br />
17<br />
'--- A _----I<br />
'--- B -----'<br />
co<br />
I<br />
N<br />
\D<br />
" " ;>,.<br />
r~<br />
13 r<br />
12<br />
10<br />
10<br />
LEFT<br />
RIGHT<br />
;;0<br />
ro<br />
<<br />
Figure 8-11.<br />
PIN FEED - AK
;;0<br />
CD<br />
<<br />
.<br />
Figure AK Pin Feed<br />
03<br />
Reference Part<br />
Number Number Part Name Quantity<br />
AK-l 525281001 PF holder (R)<br />
AK-2 525747001 Screw for AK-l 2<br />
AK-3 525287001 PF driving sleeve 2<br />
AK-4 525288001 Washer for AK-3 2<br />
AK-5 525289001 PF driving pulley 2<br />
AK-6 525746001 Screw for AK-5 4<br />
AK-7 525290001 PF stop sleeve 2<br />
AK-8 525291001 Washer for AK-7 2<br />
AK-9 525292001 PF idle pulley 2<br />
AK-10 525294001 Paper gu1de (for belt) 2<br />
AK-11 525295000 Screw (internal thread) for AK-IO 4<br />
AK-12 001300716 Screw for AK- 11 4<br />
00<br />
I<br />
AK-13 025030236 Washer for AK-12 4<br />
w<br />
0<br />
AK-14 525296001 Paper guide plate (R) 1<br />
AK-15 525297001 Shaft for AK-14 2<br />
AK-16 048015346 Snap ring for AK-15 4<br />
AK-17 525298001 Spring for AK-14 1<br />
AK-18 525552001 Locking Knobs 2<br />
AK-19 525300001 Timing belt unit 2<br />
AK-20 525305001 PF holder (L)<br />
AK-21 525309001 Paper guide plate (L)<br />
AK.,22 525298001 Spring for AK-21<br />
AK-23 525280001 Pin feed unit (R)<br />
Note: This part is assembled with parts<br />
covering reference number AK-1<br />
throug h AK- 19<br />
AK-24 525304001 Pin feed unit (L)<br />
Note: This part is assembled with parts<br />
covering reference number AK-2<br />
through AK-13. AK-15. AK-16 and<br />
AK-18 through AK-22.
00<br />
I<br />
W<br />
..-<br />
98<br />
91<br />
;;0<br />
CD<br />
<<br />
~<br />
100~~<br />
99~<br />
FlgU . re 8-12. RIBBON FEED - AL (PART 1 OF 2)
:;0<br />
Cl)<br />
<<br />
~~/<br />
103 102<br />
I I<br />
I<br />
&"~I<br />
I·<br />
7<br />
co<br />
I<br />
W<br />
N<br />
71<br />
Figure 8-13. RIBBON FEED - AL (PART 2 OF 2)
Figure AL Ribbon Feed<br />
Reference Part Reference Part<br />
Number Number Part Name Quantity Number Number Part Name Quantity<br />
AL-1 526928001 Ribbon feed rack AL-40 526578001 Spring for AL-37<br />
AL-2 526728001 RF rack guide plate AL-41 048020346 Snap ring for AL-37<br />
AL-3 526603001 Shaft for AL-1 (L) AL-42 526580000 Guide roller<br />
AL-4 028040247 Spring washer for AL-3 AL-43 526579001 Axle for AL-42<br />
Al-5 021400106 Nut for AL-3 AL-44 028040247 Spring washer for AL-43<br />
AL-6 007400816 Screw for AL-2 4 AL-45 025040336 Washer for AL-43<br />
Al-7 028040247 Spring Washer for AL-6 4 AL-46 526581001 R releaser holder<br />
AL-8 527742001 Ribbon holder p1at~ (L) AL-47 007300516 Screw for AL-46<br />
AL-9 526598001 R pawl operator (L) AL-48 025030236 Washer for AL-47<br />
AL-10 526692001 R pawl operator roller AL-49 526813001 R pawl operator (L) stopper<br />
AL-11 526594001 R feed pawl (L) AL-50 007300716 Screw for AL-49<br />
AL-12 526595001 Spri ng for AL-ll AL-51 028030247 Spring Washer for AL-50<br />
Al-13 048020346 Snap ring for AL-11 AL-52 007400816 Screw for AL-8 4<br />
CO<br />
I AL-14 028040247 Spring washer for AL-10 AL-53 028040247 Spring Washer for AL-52 4<br />
w AL-15 021400106 Nut for AL-10 AL-54 025C40236 Washer for AL-52 4<br />
Al-16 526570001 Screw for AL-9 AL-55 526695001 Ribbon Holder (R) 1<br />
AL-17 526569001 Washer for AL-16 AL-56 526697001 R pawl operator (R)<br />
AL-18 028030247 Spring washer for AL-16 AL-57 526692001 R pawl operator roller<br />
AL-19 021300106 Nut for AL-16 AL-58 526567001 R feed pawl (R)<br />
AL-20 527741001 R pawl operator link (L) AL-59 526568001 Spring for AL-58<br />
AL-21 526565001 Ro 11 er for AL-20 AL-60 048020346 Snap ring for AL-58<br />
AL-22 048020346 Snap ring for AL-20 AL-61 028040247 Spring washer for AL-56<br />
AL-26 048030346 Snap ring for AL-25 AL-62 021400106 Nut for AL-56<br />
Al-27 526817001 Ribbon holder (L) AL-63 526570001 Screw for AL-56<br />
AL-28 048020346 Snap ring for AL-27 AL-64 526569001 Washer for AL-63<br />
AL-29 511198001 Spring for AL-27 AL-65 028030247 Spring washer for AL-63 1<br />
AL-30 526591001 Ribbon stop pawl (L) AL-66 021300106 Nu t for AL-63<br />
AL-31 526592001 Spring for AL-30 526932001 R pawl operator link unit<br />
AL-32 048020346 Snap ring for AL-30 Note: This is assem~led wtth<br />
Al-33 526596001 Ribbon releaser (L)<br />
parts covering from<br />
reference number AL-68<br />
Al-34 526731001 Screw for AL-33<br />
to AL-70. AL-112. AL-128<br />
AL-35 028030247 Spring washer for AL-34 and AL-129<br />
AL-36 021300106 Nut for AL-34 AL-68 007400816 Screw for AL-128 3<br />
AL-37 526694001 R tension roller Unit (L) AL-69 028040247 Spring washer for AL-68 3<br />
AL-70 025040236 Washer for Al-68 3
Figure AL - Ribbon Feed (con't)<br />
AL-ll6 007300616 Screw for AL-115 2<br />
Reference Part AL-ll7 028030247 Spring washer for AL-116 2<br />
Number Number Part Njlme Quantity<br />
AL-ll8 025030236 Washer for AL-116 1<br />
AL-71 526585001 Shaft for AL-55 2<br />
AL-1l9 021300106 Nut for AL-123 1<br />
AL-72 028040247 Spring washer for AL-71 2<br />
JI.L-120 028030247 Spring washer for AL-96 2<br />
AL-73 021400106 Nut for AL-71 2<br />
AL-l21 021300106 Nut for AL-96 2<br />
AL-75 048030346 Snap ring for AL-74 1<br />
AL-122 028030247 Spring washer for AL-123 1<br />
AL-76 526817001 Ribbon holder (R) 1<br />
AL-123 526831001 Screw for AL-20 1<br />
AL-77 048020346 Snap ring for AL-76 1<br />
526547001 Ribbon feed assembly (right) 1<br />
AL-78 511198001 Spring for AL-76 1 Note: Assembled with parts covering<br />
reference number AL-55 throUQh<br />
AL-79 526560001 Ribbon stop 'pawl (R) 1<br />
Al-73. AL-75 through AL-92.<br />
AL-112 and Al-190.<br />
AL-80 526561001 Spring for AI-79 1<br />
AL-81 048020346 Snap ring for AL-79 1 526587001 Ribbon feed assembly (left) 1<br />
AL-82 526571001 Ribbon releaser (R) 1 Note: Assembled wfth parts ~overing<br />
AL-83 526731001 Screw for AL-82 1<br />
reference number AL -8 through<br />
AL-22. AL-26 through AL-51.<br />
AL-84 028030247 Spring washer for AL-83 1 AL-115 through AL-1l9. AL-122.<br />
AL-123 and AL-189.<br />
AL-85 021300106 Nut for AL-83 1<br />
AL-86 526574001 R tension roller unit (R) 1<br />
AL-87 526578001 Spring for AL-86 1<br />
AL-126 025040130 Washer for AL-3 1<br />
AL-88 048020346 Snap ring for AL-86 1<br />
526696001 R pawl operator unit (R) 1<br />
(X)<br />
AL-89 526580000 R 9uide roller<br />
Note: This unit is assembled with<br />
I<br />
parts coverin9 from AL-56<br />
w AL-90 526579001 Axle for AL-89 1 to AL-62.<br />
~<br />
AL-91 028040247 Spring washer for AL-90 I AL-128 526804001 R pawl operator link (R) plate 1<br />
AL-92 025040336 Washer for AL-90 I AL-129 526805001 Sleeve 2<br />
AL-93 007400816 Screw for AL-55 4 526698001 R pawl operator unit (L)<br />
AL-94 028040247 Spring washer for AL-93 4 Note: This unit is assembled with<br />
AL-95 025040236 Washer for AL-93 4 parts covering from .AL-9 to<br />
AL-96 526929001 Screw for AL-33. 82 2<br />
AL-15.<br />
AL<br />
AL-97 526930001 R rod link (R) I<br />
526599001 R pawl operatQ~ link unit (L) I<br />
AL-98 526931001 R rod link (L) 1<br />
Note: This unit is assembled<br />
with parts covering from<br />
AL-99 007400816 Screw for AL-97, 98 2 reference number AL-20 to<br />
AL-IOO 025040236 Washer for AL-99 2 AL-22.<br />
AL-I01 526914001 Ribbon feed bar I AL 526694001 R Tension roller unit (L) I<br />
AL-I02 025030236 Washer for AL-IOI 2<br />
Note: This unit is assemble<br />
with parts covering from<br />
AL-I03 021301)106 Nut for AL-101 6<br />
reference no. AL-37 to AL-39.<br />
AL-1I2 526915-01 R pawl operator link (R) 1 AL 526555001 Ribbon Feed Unit I<br />
AL-113 63002293 Ribbon with spool (twin-spool) 1 Note: This unit is assembled<br />
AL-'15 526832001 R pawl operator (L) stopper 1 with parts covering from<br />
reference number AL-l t.o AL-5<br />
and AL-126.<br />
AL-189 527774001 R Feed ratchet (l)<br />
Al-190 527775001 R Feed ratchet (R)<br />
300 63002294·2001 Ribbon Guide Cap 2
00<br />
I<br />
W<br />
U1<br />
::0<br />
CD<br />
. <<br />
Figure 8-14.<br />
COVER - AM
Figure AM Cover<br />
Reference Part<br />
Number Number Part Name Quantity<br />
AM-1 526736001 Cover<br />
AM-2 526630001 Spring for AM-1 2<br />
AM-3 007401416 Screw for AM-2 4<br />
OJ AM-4 025040236 Washer for AM-3 8<br />
I<br />
w AM-5 021400106 Nut for AM-3 4<br />
en<br />
AM-6 526738001 Top cover 1<br />
AM-7 526799001 Form feed cover<br />
AM-a 526636001 Spring for AM-7 1<br />
AM-9 007300516 Screw for AM-7 2<br />
AM-10 025030236 Washer for AM-9 2<br />
AM-11 007401416 Screw for AM-l 2<br />
AM-12 025040236 Washer for AM-11 2<br />
AM-13 526613001 Screw for AM-1 2
I<br />
I<br />
I<br />
I<br />
I<br />
I<br />
I<br />
I<br />
I<br />
I<br />
I<br />
I<br />
3<br />
SELECT<br />
SWITCH<br />
F5RMS~<br />
OVERRIDE 16<br />
6<br />
Figure 8-15.<br />
OPERATOR PANEL - AN<br />
8-37<br />
Rev. E
Figure AN - Operator Panel<br />
Reference Part<br />
Number Number Part Name ~lInt1ty<br />
AN-2 526765001 Screw for AN-I 2<br />
AN-3 526750001 Select Switch 2<br />
AN-4 526752001 Pilot Lamp 2<br />
AN-5 525864002 Button 3<br />
SA 390925Q4-1001 Line Feed Switch (Option) (SPST)<br />
(Optfon)<br />
1<br />
58 39092000-1001 Single/Double Line Feed Switch<br />
(Option) (SPOT)<br />
I<br />
5C 39092502-1001 Top of Form Switch (Option) (SPST) I<br />
AN-6 526661001 Operator Panel 1<br />
AN-7 007400816 Screw for AN-6 4<br />
AN-a 028040247 Spring Washer for AN-7 4<br />
AN-9 025040236 Washer for AN-7 4<br />
AN-I6 526935001 Tube, Insulatfon 2<br />
AN-17 63060183-3003 Control Panel (Blk. 8kgd.) I<br />
AN-25 529054001 Power Swf tch I<br />
AN-26 529050001 Cap, for AN-25 I<br />
8-38
~10<br />
~11<br />
*SECTION 7,63060104, ITEM 79<br />
Figure 8-16.<br />
ELECTRICAL COMPONENTS (PART 1 OF 3) - AO<br />
8-39 Rev. E
Figure AO Electrical Components (part 1 of 3)<br />
Reference Part<br />
Number Number Part Name Quantity<br />
AO-l 526792001 Transformer unit - 110 volts (50<br />
or 60 Hz)<br />
1<br />
AO-l-l 526866001 Transformer unit - 220 volts (50<br />
or 60 Hz) (Option)<br />
1<br />
AO-2 007401016 Screw for AO-l 4<br />
AO-3 025040136 Washer for AO-2 4<br />
AO-4 526782001 Supply cord 1<br />
AO-5 526772001 Nylon collar for AO-4 1<br />
AO-6 526773001 Fuse holder 1<br />
AO-S 526812001 Motor connector wire 1<br />
AO-9 525675001 Insulating tube 2<br />
00<br />
AO-I0 007400516 Screw for AO-5 1<br />
.a:. • AO-ll 550719002 Washer for AO-I0 1<br />
0<br />
AO-12 525674001 Cap, splice insulator, No. 3 5<br />
AO-13 526902001 Arc - suppression unit 1<br />
AO-14 007400716 Screw for AO-13 1<br />
AO-15 025040136 Washer for AO-14 1<br />
AO-16 526900001 Clamp, cable 1<br />
AO-17 526903001 Wire (B) 1<br />
AO-IS 5267S5001 Connector<br />
Molex 03-09-1121 (wft~ mtg ears) 1<br />
Molex 03-09-1122 (wft~out mtg ears) 1<br />
AO-42 528352001 Fuse, 3 Amperes. 110 Volts 1<br />
AO-42-1 528351001 Fuse. 2 Amperes. 220 Volts 1
Figure 8-17. ELECTRICAL COMPONENTS (PART 2 OF 3) - AP<br />
8-41 Rev. I
Figure AP Electrical Components (part 2 of 3)<br />
Reference Part Part Name Quantity<br />
Number<br />
Number<br />
AP-2 007400416 Screw for AP-3. 4. 7 7<br />
AP-3 526791001 Electrolytic Capacitor Ass'y (50V.<br />
10.000 uf)<br />
1<br />
AP-4 526789001 Electrolytic Capacitor Ass'y (25V.<br />
4700 uf)<br />
1<br />
AP-6 007300416 Screw for AP-4 2<br />
AP-7 526948001 Bracket. Capacitor 1<br />
8-42 Rev. 8
4<br />
TO DRIVER BOARD 63060105<br />
(SEE WIRING DIAGRAM FlG. 7-9. JI0)<br />
7<br />
00<br />
I<br />
~<br />
W<br />
7<br />
5<br />
TO J2 CONNECTOR<br />
(SEE LOGIC/PWR<br />
BOARD 63060104<br />
FIG. 7-14. ITEM 81<br />
;;c<br />
(1)<br />
<<br />
\J<br />
8<br />
Figure 8-18. ELECTRICAL COMPONENTS (PART 3 OF 3) - AQ
co<br />
I<br />
+=-<br />
+=-<br />
Figure AQ<br />
Reference<br />
Number<br />
AQ-l<br />
AQ-2<br />
AQ-4<br />
AQ-5<br />
AQ-6<br />
AQ-7<br />
AQ-8<br />
AQ-9<br />
AQ-IO<br />
AQ-ll<br />
Electrical Components (Part 3 aT 3)<br />
Part<br />
Number Part Name Quantity<br />
526783001 Wire Harness Unit 1<br />
525907000 Clamp. Cable. No.9 2<br />
525758000 Clamp. Cable, No. 5 1<br />
120679001 Clamp, Cable, Type B 2<br />
007400716 Screw for AQ-2. 4. 5. 9 7<br />
025040136 Washer for AQ-6 7<br />
207221600 Cap. Splicing 4<br />
5255567000 Clamp. Cable, No. B 2<br />
525673001 Connector, 44 Pin (J8) 2<br />
526793001 Cc,nnector 1<br />
Molex 03-09-2121<br />
:;:c<br />
CD<br />
'1<br />
Figure 8-19.<br />
PRINT HEAD AND ASSOCIATED ASSEMBLIES<br />
8-45 Rev. E
Figure 8-19. PRINT HEAD AND ASSOCIATED ASSEMBLIES, <strong>MODEL</strong> 306<br />
Reference Part Reference Part<br />
~ ~ Part Name Quantity ~umber Number Part Name Quantity<br />
34517167-2001 Screw, 4-50 x \-in. 19, Pan/Phil Hd 2 26 63060107-4001 Video Amplifier Bd. Ass'y<br />
2 63002300-2001 Clip, P.C. Board 2 27 63002440-2001 Flexible Mylar Timing Fence<br />
3 63002257-5001 Photocell and Housing Ass'y 1 28 007400816-2001 Screw for Video Amp. Bracket 2<br />
4 34517247-2001 Screw, 4-4Q x \-in. 19 2 (Ref: AA-96)<br />
5 34912007-2001 Washer, Flat, No. 4 4 29 028050247-2001 Washer, Lock, (Ref. AA-97) 2<br />
6 34507087-2001 Screw , 2-56 x ~-in. 19, Pan/Phil Hd 5 30 025040236 Washer, Flat (Ref: AA-98) 1<br />
7 34902007-2001 Washer, Flat, No. 2 31 63060146-4001 Ribbon Cable Ass'y (part of item 26)<br />
8 63002248-2001 Fibre Optics Head 1 32 63060114-5001 Shield Ass'y 1<br />
63002437-4001 Print Head Ass'y, Die Cast, 7-Wire Ruby 1 33 63060105-4005 P.C. Board, Power Driver 1<br />
Note: This unit is assembled with 34 31230011-1001 Connector, EdgE, 20-pin 2<br />
parts covering from reference 35 007400815-2001 Screw for item 37<br />
no. 9 through 15.<br />
36 025040235-2001 l~asher, Flat for item 35 1<br />
OJ 9 63001039-2002 Fingerboard, Solenoid, Head 1<br />
I<br />
37 63060117-5001 Clamp, Ri-bon Cable, Tray 1<br />
~ 10 63002476-4002 Solenoid Ass'y 6<br />
m<br />
38 004400815-2001 Screw for item 33<br />
3<br />
11 63002483-2001 Cover, Diecast Print Head 1<br />
39 34805007-2001 Washer, Int. Lock, No. 2 1<br />
12 63002122-2001 Nut, Locking, Solenoid 7<br />
40 34902007-2001 Washer, Flat, 110. 2<br />
13 63002462-4001 Head Subassembly 1<br />
41 63002598-2001 Lamp, Socket Assembly<br />
14 34507067-2001 Screw 2-56 x 3/16-in. 19, Pan/Phil Hd 2<br />
42 37253790-1000 Lamp (GE-379)<br />
14A 34805007-2001 Washer, Int, Lock, No. 2 2<br />
43 63002259-2001 Housing, Lamp<br />
15 63002476-4001 Solenoid Ass'y 1<br />
44 34712007-2001 Nut, 4-40 for item 1 2<br />
16 34114161-2001 Screw, Hex, Socket Cap, 4-40 x \-in. 19 2<br />
45 34815007-2001 Washer, Int. Lock, No. 4 for item 1 2<br />
17 34815007-2001 Washer, Int. Tooth, Lock 4<br />
46 31240456-2002 Key (located between pin card D) 1<br />
18 34114201-2002 Screw, Hex,.Socket Cap, 4-40 x 5/8-in. 19 2<br />
47 63060115-2001 Mtg. Bracket, Video Amp. Bd. (Refer 1<br />
19 021500106-2001 Nut, Main Belt Adjust (Ref: BA-105) 2 to Fig. 8-1, item 120)<br />
20 526947000-2001 Head Bracket (Ref: AA-111) 48 63060113-2001 Heatsink/Mtg. Bracket 1<br />
21 527506001-2001 Rear Guide Bar (Ref: AB-7)<br />
22 525544001-2001 Head Adjusting Knob (Ref: AA-58)<br />
22A 525025001-2001 Head Lock Knob (Ref: AA-59)<br />
23 527511001-5001 Drive Belt Unit (Ref: AE-9)<br />
24 526873001 Carriage (Ref: AA-51)<br />
25 527507001 Front Guide Bar (Ref: AB-12)
19 NOT USED ON<br />
SERIES 300/500<br />
REFAI-12 ~~<br />
~~5<br />
11 ~ -8./<br />
16 ~ 6 ./'"REF<br />
. KIT ITEMS<br />
33<br />
32<br />
:::0<br />
CP<br />
. <<br />
Figure 8-20.<br />
TAPE READER ASSEMBLY 68060125-5003 (OPTION)
LIST OF MATERIALS<br />
SERIES 300 VERTICAL FORMAT UNIT (VFU) ASSEMBLY (OPTION)<br />
LIGHT EMITTING DIODE (LED)<br />
(6 LINES PER INCH/4 INCHES PER SEC. (IPS) (180 0 DRIVE)<br />
Part Reference Part<br />
Item Number Nomenclature !l!!antitl ~ Number Nomenclature .ll!'antitl<br />
63060173-6001 Kit, Vertical Format Unit (VFU) 1 8 36400003-2001 Timing Belt<br />
(Top Assembly). Complete 1<br />
9 36011005-2001 Bearing. Bronze<br />
Note: This kit is assembled with the 6<br />
following parts covering from<br />
10 34527207-2001 Screw 6/32 x 5/8-in. 19, Phil Hd<br />
2<br />
item 1 through item 14. 11 34722007-2001 Nut, Hex, No. 6/32<br />
9<br />
12 33115144-2018 Reta i ni ng Ri ng<br />
1 63060125-5003 LED Tape Reader Ass'y, Model 306 1<br />
4<br />
lA 63060125-5002 Tape Reader Ass'y, 306, 6 LPI, 2-Channel, 1<br />
13 63060162-5001 Spur Gear Ass'y, 14T, 24P<br />
2<br />
(Alternate item, incandescent) 14 63060161-5001 Intermediate Gear Pulley Ass'y<br />
1<br />
2 39092504-1001 Switch Pushbutton, SPST 1 15 63060159-5001 Timing Pulley, 28 Teeth, Molded<br />
1<br />
3 63060174-3001 Decal, Top of Form 1 16 34828005-2001 Washer, No.6, Split-Lock, SS<br />
9<br />
4 39648505-0006-9B Wire, Type B, 22 AWG Wht/Gry (for AR 17 34922005-2001 Washer, No.6, Flat, SS<br />
Top of Form Switch)<br />
3<br />
18 63002671-4002 LED Tape Rdr. (VFU) Ass'y, AMER Drive<br />
1<br />
5 34722007-2001 Nut, Hex, No. 6/32 3 Note: This assembly is made up of parts<br />
6 34922007-2001 Washer, No.6, Flat 3 covering from item 19 through 37<br />
7 63060142-5001 Shaft Ass'y Drive 1 19 Molex, 1625-12R Connector, Recept., 12-Pin (with ears) 1<br />
(X) 8 34828005-2001 Washer, No.6, Split Lock, SS 3 2U 528539001-5001 LED Tape Reader Unit, Upper Ass'y 1<br />
I<br />
..j::o,<br />
9 63060252-6001 Kit, Shaft Coupling, 300/500 1 21 007200416-2001 Screw for items 21, 23, 36 5<br />
(X)<br />
Note: This unit is assembled with parts 22 525388001-2001 Lid for item 20 1<br />
from item 10 through 11. 23 529386001-4001 PC Board for Light Emitting Diode (LED) 1<br />
10 33922061-2001 Set-Screw, 6-32 x 3/16-in. 19 4 24 525377001-2001 Plate, Spring for item 20 1<br />
11 63060144-2002 Coup 11 ng, Shaft 2 25 007300416-2001 Screw for item 24 2<br />
12 34855005-2001 Washer, ~, Int. Tooth, SS 1 26 63002674-5001 LED Tape Reader Unit, Lower Ass'y 1<br />
13 31240020-2010 Pin Terminal, Female 4 (Modified with American Drive Gear,<br />
item 28)<br />
14 31340064-1002 Conn. Recpt., 12 POS. (with ears) 1<br />
27 528532001-5001 LED Tape Reader, Lower 1<br />
The following assembly breakdown represents those parts contained in item 1<br />
28 63060134-2001 Spur Gear, 36 Teeth, 24P (American Drive) 1<br />
of the VFU kit and are keyed by number into Fiqure 8-20. 29 39695231-2001 Cable Tie, 3-5/8-in. Lg 2<br />
30 525746001-2001 Set-screw for item 31 2<br />
1 63060125-5003 LED Tape Reader Ass'y<br />
31 525363001-2001 Sprocket for Tape 1<br />
Note: This unit is assembled with parts<br />
and subassemblies item 2 through 25<br />
32 007301216-2001 Screw for item 33 2<br />
2 63060126-2001 Plate Mounting, Tape Reader 2<br />
33 525374001-2001 Cover for item 37<br />
34 528475000-1001 Light Emitting Diode (LED)<br />
3 63060127-2001 Shaft, Driver 1<br />
2<br />
4 63060128-2001 Shaft, Pulley, Idler 1<br />
35 528535001-2001 Bracket. LED PC Board<br />
36 048030346-2001 Snap Ring for item 28<br />
5 63060129-2001 Shaft, Pu 11 ey 1<br />
6 63060131-2001 Shaft, Pivot, Tape Reader Cover 1<br />
37 33912045-2001 Set-Screw for item 13, 14, 15 3<br />
7 63060132-2001 Spacer Rod 3
8 7<br />
6<br />
5<br />
4<br />
3 2<br />
"VISIONS<br />
o<br />
o<br />
c<br />
4<br />
c<br />
-<br />
----- --~"-<br />
"-<br />
\<br />
TOP 'JI'E..V"<br />
c.~\...'C..";:;.<br />
NOT 5~C'NN<br />
22<br />
';='RDNT "-J\E-'N<br />
c..p...,~'-£...'Q NO, ~,"OWN<br />
:;c<br />
CO<br />
<<br />
A<br />
, __.~ CEMRDnU:S@<br />
_:l- .....<br />
AL~~~~E·-~·D ""'E~"":~<br />
t--<br />
...,.. ic_ -.. ___<br />
~=Q<br />
,,0
TAPE READER ASSEMBLY (OPTION)<br />
PART 2, ALTERNATE<br />
LIST OF MATERIALS<br />
VERTICAL FORMAT UNIT ASSEMBLY (OPTION), INCANDESCENT,<br />
(6 LINES PER INCH/4 INCHES PER SEC. (IPS) (1800 DRIVE), ALTERNATE ITEM<br />
Part<br />
Item Number Nomenclature guantit~<br />
63060125-5002 Tape Reader Ass'y<br />
Note: This unit is assembled with parts<br />
from item 1 through 36.<br />
63060126-2001 Plate Mounting, Tape Reader 500 2<br />
2 63060127-2001 Shaft Driver, 500 1<br />
3 63060128-2001 Shaft Pulley, Idler<br />
4 63060129-2001 Shaft Pulley<br />
5 65008518-5001 Adapter Plate Ass'y<br />
9 63060132-2001 Spacer Rod 3<br />
14 65008508-5001 Spur Gear Ass'y, 24T Molded 1<br />
18 36400003-2001 Timing Belt 1<br />
19 36011005-2001 Bearing Bronze 6<br />
22 65008500-4002 Tape Rdr. Ass'y, 2-Channel, 38T Dr. 1<br />
25 34722007-2001 Nut, Hex No. 6/32 6<br />
26 345271 07 -2001 Screw, 6/32 x .31 19, Phil 4<br />
27 34825007-2001 Washer, No.6, Int. Tooth Lock 2<br />
28 33115144-2018 Retaining Ring 3<br />
30 63060162-5001 Spur Gear Ass'y, 14T 24P 2<br />
31 63060161-5001 Intermediate Gear Pulley Ass'y 1<br />
32 63060159-5001 Timing Pulley, 28 Teeth, Molded 1<br />
34 30000000-0001 Insulating Varnish AR<br />
35 34828005-2001 Washer, No.6, Split Lock, 5S 8<br />
36 34922005-2001 Washer, No.6. Flat, SS 2<br />
8-50
APPENDIX A<br />
SIGNAL GLOSSARY<br />
This signal listing is keyed directly to the 306 printer schematic drawings.<br />
those drawings are listed alphabetically with their source and destinations.<br />
All siqnal mnemonics contained on<br />
The following notation is used to identify the source and destination locations:<br />
pin 1 located on schematic 63060138, sheet 1.<br />
23-1/38-1 signifies element ME23,<br />
SIGNAL<br />
NAME<br />
SIGNAL<br />
DESCRIPTION SOURCE DESTINATION NAME DESCRIPTION SOURCE<br />
DESTINATION<br />
ACK<br />
BELL<br />
BUSY<br />
CG1-CG7<br />
CHADD7<br />
CIP<br />
CIPM<br />
em<br />
Acknowledge - A 2.5-5.0 usec pulse 25-13/38-2 P4-Z/38-1<br />
used to indicate completion of the<br />
input of a character or end of a<br />
functional operation.<br />
DATA STROBE A 1.0 usec (min.) pulsed used to P4-Y/38-1<br />
clock data from the input device<br />
to the printer logic.<br />
DCPRM Decoded Prime - Prime corrmand 25-8/38-2<br />
from LSI chip #1 to LSI chip #2<br />
causes prime condition.<br />
A 1 to 2-second pul se used to pro- 25-39/38-2 R27/38-1<br />
duce an audi b 1 e tone in the opti ona 1<br />
speaker located at the front of the<br />
printer. DCW1-DCWS Five full step data write pulses MEl6/38-2<br />
from LSI chip #2 to ROM character<br />
Status signal indicating to the input 25-11/38-2 20-1/38-1 generator.<br />
device that the printer is not ready<br />
to receive data. DCWOl-DCW04 Four half step data write lines ME16/38-2<br />
to half-step ROM for 9 x 7 dot<br />
Seven signal LINES from the char- MEl & ME7/ P10-2, 3, 4, matrix.<br />
acter generators to the driver 38-4 6, 7, 8, 9/<br />
board, which fire print wires 1-7. 38-1 DLF Double Line Feed - Operator panel, P3-20/38-1<br />
double line feed switch option.<br />
Character address 1 ine 7. 22-2/38-3 4-16/38-4<br />
DLYLF Delay Line Feed - A 90 ms pulse 32-5/38-1<br />
Carriage in Print - Signal used to 26-11/38-3 2-9/06-2<br />
drive the pri nt head forward.<br />
Carriage in Print - Signal to Motor 21-8/38-1 26-2/38-3<br />
Control Unit, is a comnand to<br />
drive print head in forward direction.<br />
Carriage in Print - Signal from LSI 16-30/38-2 21-11/38-1<br />
chip 12, comnand to turn on forward<br />
clutch.<br />
fo 11 owi ng any paper movement<br />
comnand. Allows settle-out time<br />
for the fonn feed mechanical parts.<br />
DLYSTB Delay Strobe - A 500 us pulse used 28-5/38-1<br />
to generate data write signals in<br />
LSI chip #2 for the half step character<br />
generators.<br />
DS1-DS8 Buffered input data 1 to 8. ME24 & ME29/<br />
38-1<br />
16-31/38-2<br />
ME4/38-4<br />
ME10/38-4<br />
E4/38-1<br />
25-37/38-2<br />
16-22/38-2<br />
ME19 & MEl8/<br />
38-3<br />
CLKTBI<br />
CLKTB2<br />
CSBSY<br />
Clock pulse used to clock input data 25-14/38-2 22-9/38-3<br />
into memory reg i s ter . Used for<br />
loading data only.<br />
DSCR Decoded Carri age Return - Comnand 25-12/38-2<br />
from LSI chip HI to LSI 12 to shift<br />
data to memory output and backfill<br />
shift register with zeroes.<br />
Clock pulse used to shift memory. 16-36/38-2 22-3/38-3<br />
Not used when loading data. DSTA Data Strobe A signal used to infonn 29-10/38-1<br />
LSI chip HI that input data lines<br />
Cause Busy - Corrmand from LSI chip 2 16-35/38-2 2S-10/38-2 should be strobed into memory.<br />
to LSI chip 1 to cause a busy condition,<br />
when durrmy character is detected<br />
at memory output.<br />
msw End of Print Swtich - Tenninates a P3-2/38-2<br />
full 1 ine of print, 80 characters.<br />
16-33/38-2<br />
25-20/38-2<br />
16-19/38-2<br />
CSLF<br />
Cause Line Feed - Line feed corrrnand 25-6/38-2 32-3/38-1 FAULT Printer fault signal to input 25-9/38-2<br />
from LSI chi p #1.<br />
connector.<br />
P4-L/38-1<br />
:;0<br />
(l)<br />
<<br />
DATA 1 -<br />
DATA 8<br />
The 8 input data lines coming from P4-V, T, U,<br />
the input device to the printer. X. S, M, W,<br />
N/38-1<br />
FFH Fonn Feed Hole - Vertical Fonnat P3-V/38-2<br />
Unit option, ChannelL<br />
25-29/38-2
:;0<br />
I'D<br />
<<br />
SIGNAL<br />
NAME<br />
DESCRIPTION<br />
SOURCE<br />
DESTINATION<br />
SIGNAL<br />
NAME DESCRIPTION SOURCE DESTINATION<br />
INPUT PRiME<br />
GDSTB<br />
LD<br />
LF<br />
A level from the input connector<br />
causing the printer electronics<br />
to be printed.<br />
Gated Strobe - Gates strobe with<br />
ACK whi ch prevents CLKTB1 unti 1<br />
the rising edge of ACK and prevent<br />
over-running the buffer.<br />
Light Detect - Status signal to<br />
input connector, indicating the<br />
video circuit is not functioning.<br />
Line Feed - 15 ms signal generates<br />
PMSOL during line feed.<br />
P3-2/38-2 16-10/38-2<br />
25-17/38-2 E8/38-2<br />
16-17 /3B-2 P4-A/3B-1<br />
32-13/38-1 25-30/38-2<br />
ROME2 Signal which enables half-step ROM 16-24/38-2 17-9/38-4<br />
character generators.<br />
ROMTB8 Enable signal used to select optional 21-12/38-3 17-13/38-4<br />
character sets by use of TB8.<br />
Rfi5SW Ready to Print switch, informs LSI P3-4/38-2 16-28/38-2<br />
chip #2 that carriage is at left<br />
position.<br />
SELECT LAMP Operator panel, SELECT indicator.<br />
SELSW Opera tor pane 1, SELECT switch. P3-W/38-2 25-3/38-2<br />
SLCT' Select 25-40/38-2 22-5/38-1<br />
:x:<br />
I<br />
N<br />
LFOC<br />
LINE COUNT<br />
PULSE &<br />
RETURN<br />
MOTOR<br />
CONTROL<br />
OSC<br />
J!!<br />
PMSOL<br />
PMSOLD<br />
PRIME<br />
PWR PRM<br />
mu<br />
Low frequency oscillator (option),<br />
allows 3-12 second paper movement<br />
time out.<br />
Level from input connector, switched<br />
on and off by i nterva 1 1 i ne count<br />
switch.<br />
Signal to motor control solenoid<br />
which turns on AC motor. (Option)<br />
Oscillator - 100KHz to 200 KHz<br />
clock provides timing for printer<br />
operati ons.<br />
Paper Empty signal indicating a<br />
paper empty condition.<br />
Paper Movement solenoid - Used to<br />
activate line feed solenoid during<br />
a line feed, form feed or vertical<br />
tab operation.<br />
PMSOL Driver command to power<br />
driver.<br />
Prime signal, 100-400 usec pu1 se<br />
from LSI chi p *l used to reset<br />
printer logic.<br />
Power Prime - Automatic prime genera<br />
ted by turni ng on power to the<br />
printer.<br />
Remote Line Feed signal. Operator<br />
panel, LINE FEED switch option.<br />
C8/38-2 25-37/38-2<br />
LF Count SW<br />
26-8/3B-3<br />
P3-P/3B-2<br />
16-25/38-2 25-4/38-2<br />
20-11/38-1 25-34/38-2<br />
25-7/38-2 2-05/38-1<br />
21-6/38-1 2-11/06-2<br />
16-37/38-2 25~38/38-2<br />
25-5 & 16-321<br />
38-2<br />
P3-2/38-2 25-33/38-2<br />
SLCT Select status signal to input 22-6/:>8-1 16-40/38-2<br />
connector.<br />
SPEAKER<br />
Speaker opti on<br />
SRCL Shift Register Clear - Signal from 16-38/38-2 18-2 & 19-2/<br />
LSI chip 2 used to clear shift 38-3<br />
registers.<br />
STROBE Strobe - A 500 usec pulse used to 23-1/38-1 E37/38-4<br />
generate character address Signals<br />
to the ROM during character printing.<br />
m-m Shift register outputs 1-7. ME18, 19/38-3 ME4/38-4<br />
TB8 Shift register output 8. 22-12/38-3 22-11/38-3<br />
1M Shift register output 8 used to 22-10/38-3 E-33/38-3<br />
select additional ROM or individual 16-34138-2<br />
expanded characters.<br />
E-17/38-2<br />
T88' Same as TB8 18-4/38-3<br />
TOFSW TOP OF FORM switch. Operator P3-1/38-2 25-32/38-2<br />
panel option.<br />
UJ5SC Expanded Character Mode - Command 25-15/38-2 E20-38-2<br />
from LSI chip 1 to chip 2 to print<br />
elongated characters.<br />
VIDEO AMP Video Amplifier Output - 1.4 ms P3-9/38-1 23-5/38-1<br />
square wave used to trigger STROBE<br />
one shot.<br />
VTH Vertical Tab Hole - Vertical Format P3-4/38-2 25-28/38-2<br />
Unit option.
APPENDIX B<br />
PARALLEL INTERFACE SPECIFICATION<br />
FOR CENTRONICS <strong>PRINTER</strong>S<br />
B.1 INTERFACE TIMING<br />
In general, the data transfer sequence consists of the input device<br />
placing the appropriate code on the data lines to the printer and then<br />
generating a data strobe pulse. The printer, after a slight delay, responds<br />
with an acknowledge pulse, of if the received data causes a busy condition,<br />
the printer first activates the busy line for the duration of the busy<br />
condition and then responds with an acknowledge pulse.<br />
As a standard feature in all printers except the 101, data strobe<br />
is not recognized until the last character has been acknowledged (gated<br />
data strobe). As an option, however, data strobe can be recognized at any<br />
time.<br />
Normal Data Input - No Busy<br />
The diagram in Figure B-1 shows the timing involved in transferring<br />
data which does not cause a busy condition.<br />
PARALLEL DATA<br />
DATA STROBE<br />
ACKNOWLEDGE<br />
.h.ollsL -11.0",SI<br />
I(MIN} "<br />
I<br />
I<br />
I<br />
, (MIN) r<br />
Pl-------------------------------------------<br />
l-1.0 ",S (MIN)<br />
I 500", S (MAX)<br />
I I r<br />
r---ACKNOWLEDGE DELAY--_o i-ACK-I<br />
101/l01A/101S<br />
101AL 102A 102AL 301 306<br />
500 501<br />
ACK DELAY<br />
7 usee<br />
2.5-10 usee 7 usee 2.5-10 usee 2.5-10 usee 2.5-10 usee<br />
2.5-10 usee 2.5-10 usee<br />
ACK<br />
4 usee<br />
2.5-5.0 usee 4 usee 2.5-5.0 usee 2.5-5,1) usee 2.5-5.0 usee<br />
2.5-5.0 usee 2.5-5.0 usee<br />
Figure B-1.<br />
NORMAL DATA INPUT<br />
B-1<br />
Rev. E
Data Input Causing Busy<br />
The diagram in Figure B-2 shows the interface timing involved in<br />
transferring any data which causes a busy condition in the printer.<br />
DATA<br />
-l1.0J,lSL --!1.o/-lsL<br />
=-=-=-=----:::-==_::_=_:: I (M IN) I . I (M IN) I -<br />
DATA STROBE I 11--------------------<br />
-l 1-1.0 J,lS (MIN)<br />
I I 500 J,lS (MAX)<br />
BUSy ____________ t0M~~~~~~1 ,<br />
-I BUSY DELAY I<br />
.... ----BUSY-----t.\ r~~~AY<br />
ACKNOWLEDGE ___________________.......<br />
, r<br />
I-ACK-j<br />
101/10IA/IOIS* 10lAL 102A 102AL<br />
BUSY DELAY 0 0-1.5 usee 0 0-1. 5 usee<br />
ACK DELAY 0 0-10.0 usee 0 0-10.0 usee<br />
ACK 4 usee 2.5-5.0 usee 4 usee 2.5-5.0 usee<br />
BUSY<br />
Line Feed 75-105 msec . 75-105 msec 75-105 msec 16 msec (single<br />
LF)<br />
75-105 msec<br />
(multiple LF)<br />
Vertical Tab (I-inch) 300-310 msec 300-310 msec 300-310 msec 300-310 msec<br />
Fonn Feed (II-inches) 3-3.5 sec 3-3.5 sec 3-3.5 sec 3-3.5 sec<br />
De 1 ete 3 msec 100-400 usec 3 msec 100-400 usee<br />
Bell 2 sec 0 2 sec 0<br />
Se I ect 3 msec 100-400 usee" 3 msec 100-400 usec**<br />
Deselect Untl1 printer Unt il pri nter Untl1 printer Until printer<br />
is selected is selected is selected is selected<br />
Pri nt Corrmand 6 msec/char 6 msec/char 470-500 msec 410-415 msec<br />
plus 75-105 plus 75-105 (total) (total)<br />
msec LF msec LF<br />
(Return time-no busy) (240 msec max) (240 msec max) (0) (0)<br />
301 306<br />
0-1. 5 usee 0-1.5 usee<br />
0-10.0 usee 0-10.0 usee<br />
2.5-5.0 usee 2.5-5.0 usee<br />
70-100 msec 75-105 msec<br />
160-200 msec 300-310 msec<br />
1.5-2.0 sec 3-3.5 sec<br />
100-400 usee 100-400 usee<br />
0 0<br />
100-400 usee" 100-400 usec**<br />
Until printer Untl1 pri nter<br />
is selected is selected<br />
6 msec/char 8.4 msec/char<br />
plus 70-100 plus 75-105<br />
msec LF msec LF<br />
(270 msec max) (270 msec max)<br />
500 SOl<br />
0-1.5 usee 0-1. 5 usee<br />
0-10.0 usee 0-10.0 usee<br />
2.
82. PARALLEL INTERFACE SIGNALS<br />
All standard Centronics printers are supplied with an Amphenol ~57-<br />
40360, 36-pin interface connector (Centronics #31310019). The pin assignmer.ts,<br />
na~e, source and description for each interface signal are listed below.<br />
Parallel<br />
Interface<br />
Connector<br />
Pin I, 19*<br />
2, 20<br />
3, 21<br />
4, 22<br />
5, 23<br />
6, 24<br />
7, 25<br />
8, 26<br />
9, 27<br />
IG, 28<br />
II, 29<br />
12<br />
13<br />
14<br />
15<br />
Signal<br />
Name<br />
DATA STROBE<br />
DATA 1<br />
DATA 2<br />
DATA 3<br />
DATA 4<br />
DATA 5<br />
DATA 6<br />
DATA 7<br />
DATA 8<br />
BUSY<br />
PE<br />
SLCT<br />
!ov<br />
CSCXT<br />
16 ~V<br />
17<br />
18<br />
31, 30<br />
32<br />
34<br />
35<br />
36<br />
Chassis Gnd<br />
+5V<br />
INpUT PRIME<br />
Source<br />
Input Device<br />
Input Device<br />
Input Device<br />
Input Device<br />
Input Device<br />
Input Device<br />
Input Device<br />
Input Device<br />
Input Device<br />
Printer<br />
Printer<br />
Pri r. t£'r<br />
Printer<br />
Printer<br />
Printer<br />
Input Device<br />
~ Printer<br />
Line Count<br />
Pill c;e><br />
line Count<br />
Pulse Return<br />
Not Used<br />
Description<br />
A 1.0 usec pulse (min.) used to<br />
clock data from the processor to<br />
the printer logic.<br />
Input data levels. A high represents<br />
a binary ONE, a low represents a ZERO.<br />
All printable characters (i.e., codes<br />
having a ONE in DATA 6 or DATA 7) are<br />
stored in the printer buffer. Control<br />
characters (i.e., codes having a ZERO<br />
in both DATA 6 and DATA 7), are used<br />
to specify special control functions.<br />
These codes ?ore net stored in the<br />
buffer except when they specify a<br />
print command and are preceded by at<br />
least one printable character in that<br />
line.<br />
Acknowledge pulse indicates the input<br />
of a character into memory or the end<br />
of a functional operation.<br />
A level indicating that the printer<br />
cannot receive data.<br />
A level indicating that the printer<br />
is out of paper.<br />
A level indicating that the printer<br />
is selected.<br />
(Formerly SS signal old~r version)<br />
A 10C KHz (Models 101, lOlA. 102A. lOIS)<br />
or 100-200 KHz (All other models)<br />
A level which causes the printer to<br />
be pril'led. (Not in 101)<br />
A level that indicates a paper empty.<br />
light detect. or a deselect condition.<br />
(Not in 101)<br />
Both sides of the line count switch<br />
appear at the interface connector.<br />
This switch is opened and closed<br />
during each line feed operation. A<br />
level delivered to the switch would<br />
be pulsed off and on each time a line<br />
feed operation is performed. (Series 300 and 500)<br />
(Series 300 Gild 500)<br />
·Second pin number indicates twisted pair return (tOV).<br />
**Active low signals are specified by a line over the signal name. Active high<br />
signals have no line.<br />
8-3 Rev. E
Logical TRUE<br />
B3. BASIC SIGNAL SPECIFICATIONS<br />
A high signal is defined as a logical TRUE or a logical ONE if it is in the range<br />
of +2.4 volts to +5.0 volts, not to exceed a peak positive voltage of 5.5 voJts.<br />
".<br />
Logical FALSE<br />
A low signal is defined as a logical FALSE or a logical ZERO if it is in the<br />
range of 0.0 volt to +0.4 volt, not to exceed a peak negative voltage of -0.5 volt.<br />
Level<br />
A signal which is present for two or more clock times or whose pulse width is not<br />
critical is defined as a level (e.g., the data inputs).<br />
Pulse<br />
A signal whose width is critical is defined as a pulse (e.g., DATA STROBE) and<br />
the width is specified. Pulse width is measured at +2.4 volt for a true condition<br />
and +0.4 volt for a false condition.<br />
Delay lime<br />
Delay time is defined as the interval between the specified signal at the receiving<br />
end of a cable and reference signal in the receiving unit. It is measured<br />
at the +2.4 volt point for a logical ONE and +0.4 volt for a logical ZERO.<br />
Switching Time<br />
Switching time is defined as the rise or fall of a signal, whichever is greater.<br />
It is specified between +0.4 volt and +2.4 volts. Maximum switching time for<br />
signals is 0.2 usec (not including set-up and hold times).<br />
Current Requirements<br />
For a high input signal to the printer, the input device must be able to source<br />
0.320 milliamps at +2.4 volts. For a low input; the input device must be able to<br />
sink 14 milliamps.<br />
For a high output from the printer, the printer can source up to 0.320 milliamps<br />
at +2.4 volts. For a low output, the printer can sink up to 14 milliamps.<br />
Line Terminations<br />
Data lines are terminated in the printer by 1000 ohms to +5 volts. DATA STROBE<br />
and INPUT PRIME lines .are terminated by 470 o MIS to +5 volts.<br />
8-4 Rev. E
Input Voltage<br />
84. POWER INPUT AND GROUNDING SPECIFICATIONS<br />
Voltage requirements for the printer are:<br />
115 VAC !10%, 60 Hz or,<br />
230 VAC ±10%, 50 Hz<br />
The printer shall be independently connected to the primary power<br />
source by means of a 3-wire grounded outlet and shall contain conversion. regulation,<br />
and sequencing equipment required for correct performance.<br />
The turn-on surge current in all Centronics printers takes the form<br />
of a decaying exponential waveform. with approximately a 250 millisecond<br />
time constant. The values of the initial surge current and the steady state<br />
operating current (with the printer not printing) are shown in the following<br />
table.<br />
Operating Current<br />
Model Surge Current (with printer not printing)<br />
101/101A 48 amps (max. peak to peak) 2.8 amps (RMS)<br />
102A 52 amps (max. peak to peak) 3.3 amps (RMS)<br />
306 28 amps (max. peak to peak) 2.3 amps (RMS)<br />
Equipment Ground<br />
The green wire (building ground) of a power cable for the printer shall be securely<br />
fastened to the frame. The white wire (neutral AC) shall not be<br />
grounded to the frame.<br />
D.C. Ground<br />
The return wire of the interconnecting line. twisted pair shall be grounded to<br />
the DC ground. This connection shall be made as close as practical to the signal<br />
source and load.<br />
8-5/8-6 Rev. E
u ~ PI WEST .. ~flC.<br />
2739 w. Palm Lane. Phoenix. Az 85009<br />
(602) 269-1953<br />
CSP-100 SPECIFICATION<br />
SIMPLIFIED EIA RS-232 TO CENTRONICS INTERFACE<br />
Input<br />
Asynchronous Serial Data EIA-Level<br />
1 Start Bit<br />
7 Data Bits plus Parity<br />
or 8 Data Bits<br />
1 or 2 Stop Bits<br />
See Back<br />
1 '2.. 3 Y.<br />
Function 1<br />
7 Rit"c: X<br />
2 3<br />
4<br />
8 Bits 0<br />
Odd<br />
Even<br />
.1 Stop<br />
2 Stop<br />
. Parity<br />
No Parity !<br />
X- Inserted<br />
0- Removed<br />
X<br />
0<br />
X<br />
0<br />
X<br />
0<br />
Invert BusyJ<br />
Insert Stra<br />
Cut Trace on<br />
back of board<br />
Via West Standard<br />
1200 Baud, 7 Data Bits<br />
Odd Parity, 1 Stop Bit<br />
Baud Rate Strapping<br />
B 600<br />
a a - 4800<br />
a 0 - N/C<br />
a a - 2400<br />
G---8 -<br />
a a - 300<br />
a a - 9600<br />
Select only one<br />
1200 Std.
I:EnTROnll:S<br />
centronics data computer corp.<br />
hudsoo. n.h. 03051<br />
teIeptme (603) 883-0111<br />
eastern region: (617)272-8545 (mass.)<br />
central region: (513)294-0070 (ohio)<br />
western region : (714)979-6650 (calif.)<br />
centronics data computer (canada) ltd.<br />
mississauga, ontario (416)625-0770<br />
centronics data computer (u.k.) lt d.<br />
cheam, surrey (01 )643-0821/7<br />
centronics data computer (germany) gmbh<br />
6 frankfurt/main 663321/2<br />
© .<br />
Gopyright 1976 Centronics Data Computer Corp.<br />
All rights reserved<br />
Pa.tents pending in USA and other countries.<br />
(Pri nted in USA 3/76 )<br />
Spe ci f ications subject t o change w ithout notice .