NOTE - KIP
NOTE - KIP
NOTE - KIP

Create successful ePaper yourself
Turn your PDF publications into a flip-book with our unique Google optimized e-Paper software.
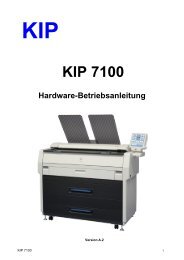
<strong>KIP</strong> 7770 User Manual<br />
Version A.0
Thank you for purchasing the <strong>KIP</strong> 7770.<br />
This USER'S MANUAL contains functional and operational explanations for the <strong>KIP</strong> 7770.<br />
Please read this USER'S MANUAL carefully before using the Printer.<br />
Please keep this USER'S MANUAL for future reference.<br />
1. When this product is installed in North America.<br />
This device complies with part 15 of the FCC Rules. Operation is subject to the following two<br />
conditions: (1) This device may not cause harmful interference, and (2) this device must<br />
accept any interference received, including interference that may cause undesired operation.<br />
FCC CAUTION<br />
Changes or modifications not expressly approved by the party responsible for compliance could<br />
void the user’s authority to operate the equipment.<br />
Note: This equipment has been tested and found to comply with the limits for a Class A digital<br />
device, pursuant to part 15 of the FCC Rules. These limits are designed to provide reasonable<br />
protection against harmful interference when the equipment is operated in a commercial<br />
environment. This equipment generates, uses, and can radiate radio frequency energy and, if<br />
not installed and used in accordance with the instruction manual,, may cause harmful<br />
interference to radio communications. Operation of this equipment in a residential area is likely<br />
to cause harmful interference in which case the user will be required to correct the interference<br />
at his own expense.<br />
This device complies with Part 15 of FCC Rules and Industry Canada licence-exempt RSS<br />
standard(s). Operation is subject to the following two conditions: (1) this device may not cause<br />
interference, and (2) this device must accept any interference, including interference that may<br />
cause undesired operation of this device.<br />
Contains FCC ID: VP8-13551 Contains IC: 7391A-13551<br />
2. When this machine is installed in Europe<br />
This equipment complies with the requirements in Pub.22 of CISPR Rules for a Class A<br />
computing device.<br />
Operation of this equipment in a residential area may cause unacceptable interference to radio<br />
and TV reception requiring the operator to take whatever steps are necessary to correct the<br />
interference.<br />
Do not install Machine around other electronic equipment or other precision instruments.<br />
Other devices may be affected by electrical noise during operation.<br />
If the Machine is installed near other electronic equipment, such as a TV or a radio,<br />
interference to said equipment, such as noise or flickering, may occur.<br />
Use a separate power line and install the PRINTER as far as possible from said equipment.<br />
<strong>KIP</strong> 7770 is an ENERGY STAR qualified multifunction device.<br />
The International ENERGY STAR ® Office Equipment Program is an international program that<br />
promotes energy saving through the penetration of energy efficient computers and other office<br />
equipment. The program backs the development and dissemination of products with functions that<br />
effectively reduce energy consumption. It is an open system in which business proprietors can<br />
participate voluntarily. The targeted products are office equipment such as computers, monitors,<br />
printers, facsimiles, copiers, scanners, and multifunction devices. Their standards and logos are<br />
uniform among participating nations.<br />
(1)
The symbol shown indicates that this product conforms to Directive<br />
2002/96/EC of the European Parliament and the council of 27 January<br />
2003 on waste electrical and electronic equipment (WEEE) and does not<br />
apply to countries outside of EU.<br />
The symbol shown indicates that this product conforms to<br />
SJ/T11364-2006 of People’s Republic of China Electronic<br />
Industry Standard and does not apply to countries outside of<br />
People’s Republic of China.<br />
The symbol shown indicates that this product conforms to GB<br />
18455-2001 11364-2006 of National Standard of the People’s<br />
Republic of China and does not apply to countries outside of<br />
People’s Republic of China.<br />
(2)
Safety Warning<br />
The following warnings are very important in order to safely use this product.<br />
These notes are important in preventing danger to the operator or operation of the printer.<br />
The following symbols are found throughout the USER’S Manual and have the following meaning:<br />
WARNING<br />
This WARNING mark means that there is a possibility of death or serious<br />
injury if you ignore or do not follow the said instruction.<br />
CAUTION<br />
This CAUTION mark means that there is a possibility of injury or physical<br />
damage if you ignore or do not follow the said instruction.<br />
When marked with this symbol, “DO NOT ATTEMPT”<br />
When marked with this symbol, “pay close attention to”<br />
(3)
WARNING<br />
Ground the product with a correct ground source or you may be electrically<br />
shocked.<br />
1. The Power source should be as follows:<br />
220 to 240V plus 6% or minus 10%, 50/60Hz, 20A or higher<br />
2. Use a circuit with a dedicated breaker.<br />
3. Install the product as close to the wall outlet as possible.<br />
4. If you wish to move the printer, please contact your service personnel.<br />
1. Do not remove the screw and do not open the cover if not instructed to<br />
do so in this User’s Manual. If you ignore this warning, you may be burnt<br />
or receive an electric shock due to a hot item or electrically charged part<br />
inside of the printer.<br />
2. Do not disassemble or tamper with the printer.<br />
It may result in a fire or an electrical shock.<br />
1. Do not plug in the printer into a multi-wire connector in which some other<br />
equipment is plugged into.<br />
It may cause a fire due to outlet overheating.<br />
2. Do not damage the Power Cord by stepping on or placing heavy items<br />
on it.<br />
If the Power Cord is damaged, it may cause a fire or you may receive<br />
an electric shock. REPLACE THE CORD IF DAMAGED!<br />
1. Do not put a flower vase, a flowerpot or any water-filled item on the<br />
product.<br />
Spilt water could cause a fire or an electric shock.<br />
2. If the product generates an abnormal smell or noise, turn it off and<br />
unplug it from the wall electrical outlet immediately.<br />
Do not throw the toner into a fire or other sources of heat, as it can<br />
explode.<br />
(4)
CAUTION<br />
Do not install the printer in a humidified room or a dusty room.<br />
Also, do not install the printer on an unstable floor as injuries may occur.<br />
1. Unplug the printer before you move it.<br />
The power cord may be damaged and it may result in a fire or electric<br />
shock.<br />
2. If you do not use the printer for a long duration (holidays, company<br />
shutdown) turn off and unplug the printer from the outlet for safety.<br />
Do not pull the cord when you unplug the printer as you may damage the<br />
Power Cord.<br />
There are hot items inside of the printer.<br />
Take great care not to touch these items when you remove mis-fed media.<br />
Ventilate the room well if you print in a small area.<br />
(5)
POWER CORD INSTRUCTION<br />
The installation of (or exchange to) a power plug which fits in the wall outlet of the installation<br />
location shall be conducted in accordance with the following:<br />
WARNING<br />
Select a power plug which meets the following criteria;<br />
- The plug has a voltage and current rating appropriate for the product’s rating marked on<br />
its name plate.<br />
- The plug meets regulatory requirements for the area.<br />
- The plug is provided with a grounding pin or terminal.<br />
If the appropriate plug does not fit the wall outlet in the installation, the customer shall install an<br />
appropriate outlet.<br />
Connector Type:<br />
Configuration Standard Rating Usually found in<br />
IEC60320:C19 20A 250V (UL)<br />
16A 250V (IEC)<br />
Plug Type: Model Rating 220-240V<br />
Configuration Standard Rating Usually found in<br />
NEMA6-20 20A 250V North America<br />
(UL Listed)<br />
CEE7/7 16A 250V European countries<br />
KS C 8305 16A 250V Korea<br />
AS/NZS 3112 16A 250V Australia<br />
New Zealand<br />
GB1002<br />
GB2099.1<br />
16A 250V<br />
China<br />
IRAM 2073 16A 250V Argentina<br />
Cord Type<br />
Standard Rating Usually found in<br />
SJT 3X12AWG Long
Chapter 1<br />
Before Use<br />
Page<br />
1. 1 Installation Requirements 1- 2<br />
1. 2 Originals Prohibited from Duplication 1- 3<br />
1. 3 Features 1- 4<br />
1. 4 Specifications 1- 5<br />
1. 5 Appearance 1- 7<br />
1. 5. 1 Front 1- 7<br />
1. 5. 2 Rear 1- 8<br />
1. 6 Optional Configurations 1- 9<br />
1. 7 Specifications for Printing Media 1-10<br />
1. 7. 1 Available Print Size 1-10<br />
1. 7. 2 Media not to be used 1-11<br />
1. 7. 3 Maintaining Media 1-12<br />
1. 7. 4 Environmental Condition - Correction 1-13<br />
1-1<br />
Chapter 1 Before Use
1. 1 Installation Requirements<br />
The following conditions are required for installation of the equipment.<br />
1. Power source should be rated as follows.<br />
220V - 240V plus 6% or minus 10%, 50/60Hz, 20A or higher<br />
2. The equipment must be on an exclusive circuit.<br />
3. The outlet must be near the equipment and easily accessible.<br />
1. Make sure to connect this equipment to a grounded outlet.<br />
2. For PLUGGABLE EQUIPMENT, the socket-outlet shall be installed near<br />
the equipment and shall be easily accessible.<br />
1. The installation site must not have open flames, dust or ammonia gases.<br />
2. The equipment must not be exposed to the air vents from air conditioners.<br />
It may affect the image quality.<br />
3. The equipment should not be exposed to the direct sunlight.<br />
Please draw curtains to block any sunlight.<br />
When you open the Upper Unit to remove a mis-feed, do not expose the<br />
Photoconductive Drum to strong (intense) light as this will damage the Drum.<br />
Ozone will be generated while this equipment is use, although the quantity generated is<br />
within safe levels. (See certifications.)<br />
Ventilate the room, if required.<br />
The site temperature range = 10 to 32 degrees Centigrade, with the humidity between<br />
15% to 85% RH. (NON-CONDENSING)<br />
Keep the printer away from water sources, boilers, humidifiers or refrigerators.<br />
Keep ample room around the equipment to ensure comfortable operation.<br />
(Refer to the following figure.)<br />
The equipment must be leveled and the floor strength must be ample to sustain the<br />
weight of the equipment.<br />
800mm / 32” or larger<br />
Rear<br />
Printer<br />
Left: 50mm / 2” Right: 300mm / 12”<br />
or larger or larger<br />
Front<br />
800mm / 32” or larger<br />
1-2<br />
Chapter 1 Before Use
1. 2 Originals Prohibited from Duplication<br />
It is not necessarily allowed to copy every kind of original.<br />
You may be punished by the law if only you possess the copy of some kind of original.<br />
We recommend you to consider enough before you copy such original.<br />
[Originals prohibited from copying by the law]<br />
1. It is not allowed to copy Currency (Bill, Money, Bank Note, etc.), Government issued<br />
Negotiable Instruments (National Bonds, Security, Local Debt Bonds, etc.).<br />
2. It is not allowed to copy Foreign Currency or Foreign Negotiable Instruments.<br />
3. It is not allowed to copy unused postal stamps or government postcards without permission<br />
to make replica from Government.<br />
4. It is not allowed to copy Government issued revenue stamps, certificate stamps which are<br />
prescribed by Liquor Tax Act or the Commodity Tax Act.<br />
[Special items to be cared]<br />
1. It is warned by the government to copy private issued securities (stock certificate, draft,<br />
check, goods ticket, etc.), commutation ticket or book of tickets, excluding that some specific<br />
company copies such originals as many as it requires for its own business.<br />
2. We recommend you not to copy freely such originals as government issued passport, public<br />
or private issued licenses, automobile inspection certification, IDs and tickets like pass or<br />
meal.<br />
Reference Law<br />
Regulations to control fake currency and<br />
Bond.<br />
Control Law against Forged & faked<br />
Foreign Currency, Bill, Bank Note and Bond<br />
Forged postal stamps control law<br />
Forged revenue stamps control law<br />
Currency similarity securities Control Law<br />
Prohibited items to copy<br />
Currency (Bill, Money, Bank Note, etc.),<br />
Government issued Negotiable Instruments<br />
(National Bonds, Security, Local Debt Bonds,<br />
etc.)<br />
Foreign Currency or Foreign Negotiable<br />
Instruments<br />
Unused postal stamps or government postcards<br />
Government issued revenue stamps, and<br />
certificate stamps prescribed by Liquor Tax Act<br />
or Commodity Tax Act<br />
Private issued securities (stock, draft, check,<br />
goods ticket, etc.), commutation or book tickets<br />
[Originals protected by the copyright]<br />
It is prohibited to copy such originals as book, music, paintings, printed copy, maps, drawings,<br />
movie and pictures which are protected by the copyright, except for personnel or family use or<br />
similar purpose.<br />
1-3<br />
Chapter 1 Before Use
1. 3 Features<br />
• <strong>KIP</strong> 7770 Digital Printer can make a print in a speed of 120mm per second.<br />
The maximum print size is 36 inches (914mm) wide, and the minimum one is 8.5 inches<br />
(210mm) for cut sheet media, and 11 inches (294mm) for roll media.<br />
• The print image is more stabilized than before since we adopt a minute toner for monocomponent<br />
development.<br />
• Density Compensation Process provides consistent image density in various environments.<br />
• The combination of <strong>KIP</strong> Contact Development System and mono-component minute toner can<br />
produce a high definition line, distinctive grayscale and consistent solid black.<br />
The <strong>KIP</strong> HDP process generates no Waste Toner.<br />
• Flange type loading mechanism eases operator’s media loading work.<br />
• Easy access to USB port allows users to provide efficient productivity by using “File to Print” /<br />
“Scan to USB” (option).<br />
• Some optional stacking items are available, such as “High Capacity Print Tray” that can stack<br />
about 100 prints (plain paper/bond) ejected to the rear side, and “Paper Exit Kit” that can sort<br />
the prints to front ejection and rear ejection and then stack them on front tray and rear tray.<br />
• The <strong>KIP</strong> 7770 adopts 12.1 inch screen for the UI, wider than 10.4 for our old products.<br />
The capacitive multi-touch screen offers smooth, various and intuitive user operation that a<br />
pressure sensing device lacks.<br />
• The Energy Star ® guideline 2009 compliant<br />
1-4<br />
Chapter 1 Before Use
1. 4 Specifications<br />
Subject<br />
Specification<br />
Model <strong>KIP</strong> 7770<br />
Configuration<br />
Console<br />
Printing method<br />
Electro photography<br />
Photoconductor<br />
Organic Photoconductive Drum<br />
Print speed<br />
120mm per second<br />
(Inch) E: 5 sheets/min D Landscape: 9 sheets/min<br />
(Metric) A0: 5 sheets/min A1 Landscape: 9 sheets/min<br />
Print head<br />
LED<br />
Resolution<br />
600dpi x 2400dpi<br />
Print width Maximum 36” (914mm)<br />
Minimum Roll: 11” / 297mm<br />
Cut sheet (Portrait): 8.5” / 210mm<br />
Print length<br />
Warm up time<br />
Maximum<br />
(Standard)<br />
6,000mm (bond, 36” / A0 wide only)<br />
or “5 x Standard length” (bond)<br />
“2 x Standard length” (vellum)<br />
“1 x Standard length” (film)<br />
24,000mm<br />
(Option)<br />
Minimum 8.5” (210mm)<br />
<strong>NOTE</strong>: If the print is longer than the maximum listed above, its<br />
image quality or the reliability of paper feeding is not<br />
guaranteed.<br />
Less than 2 minutes<br />
(23 degrees Centigrade, 60% RH and the rated voltage / Bond)<br />
First print time 21 seconds (A0 from Roll 1)<br />
Fusing method<br />
Roll Fuser<br />
Development method Dry type with non-magnetic mono-component toner<br />
Exposure method LED<br />
Charging method Corona<br />
Transfer method Corona<br />
Separation method Corona<br />
Input power<br />
220V - 240V plus 6% or minus 10%, 50/60Hz, 20A<br />
Power consumption Maximum 3120W or less<br />
Stand by 1100W (Average)<br />
Printing 2100W (Average)<br />
Cold Sleep 2.5W<br />
230V, 50/60Hz and Dehumidify Heater is ON<br />
Acoustic noise<br />
less than 65db (Printing)<br />
less than 55db (Standby)<br />
Ozone<br />
less than 0.05ppm (Average)<br />
Dimensions<br />
1370mm (Width) x 725mm (Depth) x 950mm (Height) (w/o UI)<br />
1702mm (Width) x 725mm (Depth) x 1377mm (Height, max) (w/ UI)<br />
Weight<br />
Approx. 333kg (2 Roll type)<br />
Approx. 375kg (4 Roll type)<br />
Media<br />
(Recommended Media)<br />
US model:<br />
Plain Paper 64g/m 2 to 80g/m 2 , US Bond (PB-20)<br />
Tracing Paper US Vellum (XV-20)<br />
Film<br />
4MIL (PF-4DME)<br />
Europe/Asia model:<br />
Plain Paper 64g/m 2 to 80g/m 2 , Diamond Plain Paper (80g/m 2 )<br />
Tracing Paper Gateway Tracing Paper (73g/m 2 )<br />
Film<br />
NSF4MIL Film<br />
(continued on the next page)<br />
1-5<br />
Chapter 1 Before Use
Subject<br />
Environmental condition<br />
for usage<br />
Interface<br />
Storage of consumables<br />
Specification<br />
Temperature: 10 to 32 degrees Centigrade<br />
Humidity: 15 to 85% RH<br />
Ethernet (10 BASE-T, 100 BASE-TX, 1000 Base-T)<br />
Serial port (RS232-C)<br />
USB 2.0<br />
(Media)<br />
Wrap the media surely to shut out the humidity.<br />
(Toner cartridge)<br />
Keep the toner cartridge away from the direct sunlight, and store<br />
it in the condition of 0 to 35 degrees Centigrade and 10 to 85%<br />
RH.<br />
<strong>NOTE</strong><br />
The above specifications are subject to change without notice.<br />
1-6<br />
Chapter 1 Before Use
1. 5 Appearance<br />
1. 5. 1 Front<br />
2<br />
1<br />
3<br />
5<br />
4<br />
Name of part Function<br />
1 User Interface (UI) This is a Touch Screen, and many user operations are available.<br />
PLEASE DO NOT push the LCD area too strong.<br />
2 Top Cover Open here to clear the mis-feed paper.<br />
3 Manual Table Open here to insert a cut sheet or to pull the Upper Frame Unit.<br />
4 Roll Decks Each Roll Deck drawer holds 2 rolls of print media.<br />
5 Power Switch You can turn on/off.<br />
1-7<br />
Chapter 1 Before Use
1. 5. 2 Rear<br />
1<br />
2<br />
4<br />
3<br />
5<br />
6<br />
7<br />
Name of part Function<br />
1 Exit Cover Open the Exit Cover when you remove the mis-fed media.<br />
2 Dehumidify Heater<br />
Switch<br />
Press “H” to turn on the Dehumidify Heater, and press “L” to turn it<br />
off.<br />
3 Inlet Socket Connect the power cord here.<br />
4 Breaker It is possible to shut off supplying the AC power.<br />
5 USB connector<br />
(USB2.0)<br />
Connect the cable to this terminal for a <strong>KIP</strong> Scanner (option).<br />
(max.5Vdc)<br />
6 COM Port Connect the cable from a finishing device (option).<br />
(D-Sub Connector 9 pins: max.12Vdc (Small))<br />
7 LAN Port Connect the LAN Cable to connect the <strong>KIP</strong> 7770 to the network.<br />
(Do not connect a telephone line.)<br />
1-8<br />
Chapter 1 Before Use
1. 6 Optional Configurations<br />
You can combine the <strong>KIP</strong> 7770 Printer with optional outer devices.<br />
<strong>KIP</strong> 7770 + <strong>KIP</strong> Scanner<br />
<strong>KIP</strong> Scanner<br />
<strong>KIP</strong> 7770<br />
<strong>KIP</strong> 7770 on network<br />
Scanner<br />
Controller<br />
<strong>KIP</strong> Scanner<br />
USB2.0<br />
Other printers<br />
<strong>KIP</strong> 7770<br />
Workstation<br />
WEB<br />
Please contact your dealer for further information of integrating <strong>KIP</strong> 7770 to your network and other<br />
devices.<br />
1-9<br />
Chapter 1 Before Use
1. 7 Specifications for Printing Media<br />
1. 7. 1 Available Print Size<br />
Available print size is as follows.<br />
Minimum<br />
Maximum<br />
Width<br />
11”/ 297mm (Roll)<br />
8.5”/ 210mm (Cut Sheet)<br />
36” / 914mm<br />
Length 8.5”/ 210mm 6m<br />
<strong>NOTE</strong><br />
It is possible to print longer than 6 meters as an option.<br />
Call your service personnel if you would like to print over 6 meters as the user can not<br />
change this setting in the printer.<br />
If you print longer than 6 meters, the image quality or the reliability of media feeding is<br />
not guaranteed.<br />
1-10<br />
Chapter 1 Before Use
1. 7. 2 Media not to be used<br />
Do not use the following kinds of printing paper. Doing so may damage the printer.<br />
Excessively curled<br />
Folded<br />
Creased<br />
Torn<br />
Punched<br />
1-11<br />
Chapter 1 Before Use
Pre-printed<br />
Extremely slippery<br />
Extremely sticky<br />
Extremely thin and soft<br />
OHP Film<br />
CAUTION<br />
Do not use the paper with staple, or do not use such conductive paper as aluminum foil and<br />
carbon paper.<br />
The above may result in a danger of fire.<br />
<strong>NOTE</strong><br />
(1) Print image may become light if printed on a rough surface of the paper.<br />
(2) Print image may become defective if the print paper has an excess curl.<br />
(3) It will cause paper mis-fed, poor print image or creasing if you use a paper that does not<br />
satisfy the specifications.<br />
(4) Do not use a paper of which surface is very special, such as thermal paper, art paper,<br />
aluminum foil, carbon paper or conductive paper.<br />
(5) Vellum exposed to air over a long period tends to cause a defective printing.<br />
It is recommended to remove one round on the surface of the vellum roll from the<br />
beginning.<br />
(6) Remove fully any adhesive from the roll that may remain due to tape placed by the media<br />
supplier.<br />
(7) Do not use papers with unpacked (exposed in high / low temperature & humidity) in a<br />
long period. Such papers may result in mis-feed, defective image or paper creasing.<br />
(8) It is recommended to trim the leading edge by using Initial Cut Key on the User Interface<br />
(UI) before making a long print.<br />
1. 7. 3 Maintaining Media<br />
Keep the paper in the custody taking care of the following matters.<br />
1. Do not expose the paper to the direct sunlight.<br />
2. Keep the paper away from high humidity. (It must be less than 70%)<br />
3. Put the paper on a flat place, do not damage the media.<br />
4. If you will keep paper which you has already been unpacked, put it into the plastic bag to<br />
avoid humidity in the media.<br />
1-12<br />
Chapter 1 Before Use
1. 7. 4 Environmental Condition - Correction<br />
Take a necessary treatment according to the environmental condition as shown below.<br />
Humidity(%) Possible problem<br />
Low “Void of image”, “crease of paper” and<br />
other problems occurs when you print<br />
with plain paper and vellum.<br />
40%<br />
70%<br />
High<br />
“Void of image” occurs when you print<br />
with vellum.<br />
“Void of image” occurs when you print<br />
with plain paper and vellum.<br />
“Void of image”, “crease of paper” and<br />
other problems occurs when you print<br />
with plain paper and vellum.<br />
Necessary treatment<br />
1. Install the humidifier in the room, and<br />
humidify the room air.<br />
2. Remove the media from the machine<br />
right after the completion of print, and<br />
keep it in a plastic bag.<br />
If you will not make print soon, remove<br />
the vellum from the machine and keep it<br />
in a plastic bag.<br />
Remove the paper from the machine after<br />
everyday use, and keep it in a plastic bag.<br />
If you will not make print soon, remove<br />
the media from the machine and keep it in<br />
a plastic bag.<br />
1. Turn on the Dehumidify Heater.<br />
2. Remove the media from the machine<br />
right after the completion of print, and<br />
keep it in a plastic bag.<br />
<strong>NOTE</strong><br />
(1) <strong>KIP</strong> 7770 is equipped with the Dehumidify Heater.<br />
Using it in high humidity environment (65% or higher) is recommended.<br />
Refer to [2.7 Dehumidifying Roll Media].<br />
(2) “Void of image” and “crease of paper” will occur in case of extremely high or low humidity.<br />
Normal Print<br />
Crease of paper<br />
If the media is humidified;<br />
Normal Print<br />
Loss of image<br />
If the media is humidified;<br />
(continued on the next page)<br />
1-13<br />
Chapter 1 Before Use
<strong>NOTE</strong> (cont.)<br />
(3) Re-appearance of image (solid black image especially) may occur if you print with a<br />
humidified film.<br />
When film is installed under the high humidity environment (higher than 60%RH), we<br />
also recommend that you turn on the Dehumidify Heater.<br />
Normal print<br />
Re-appeared image<br />
1-14<br />
Chapter 1 Before Use
Chapter 2<br />
Basic Operations<br />
Page<br />
2. 1 Turning on <strong>KIP</strong> 7770 2- 2<br />
2. 2 Turning off <strong>KIP</strong> 7770 2- 4<br />
2. 3 Replacing Roll Media 2- 5<br />
2. 4 Replacing Toner Cartridge 2-13<br />
2. 5 Placing Cut Sheet Media 2-17<br />
2. 6 Canceling Sleep Mode 2-18<br />
2. 7 Dehumidifying Roll Media 2-19<br />
2. 8 Stacking Prints on High Capacity Print Tray (option) 2-21<br />
2-1<br />
Chapter 2 Basic Operations
2. 1 Turning on <strong>KIP</strong> 7770<br />
1. Plug the printer into an exclusive wall outlet.<br />
WARNING<br />
(1) Do not handle the Power Plug with wet hands, or you may receive an electrical shock.<br />
(2) Ground the printer for safety.<br />
(3) Do not plug the printer into a multi-wiring connector in which other devices are plugged<br />
into. It may overheat the outlet and may result in a fire.<br />
(4) The outlet must satisfy the following rated power condition.<br />
220V to 240V plus 6% or minus 10%, 50/60Hz, 20A or higher<br />
2. There is Power Switch on the right-front of the printer.<br />
Press “ ” side to turn on the printer.<br />
Press this side.<br />
2-2<br />
Chapter 2 Basic Operations
3. The User Interface (UI) starts operating, and displays UI Screen in one minute.<br />
Ready Indicator on the UI will flash during warming up.<br />
Ready Indicator<br />
The UI screen may vary depending on your system configuration.<br />
(Shown with available options)<br />
4. When Ready Indicator stops flashing, the <strong>KIP</strong> 7770 is ready for operation.<br />
<strong>NOTE</strong><br />
It is impossible to make any prints while Ready Indicator is<br />
flashing in orange. Please wait until it turns in green.<br />
2-3<br />
Chapter 2 Basic Operations
2. 2 Turning off <strong>KIP</strong> 7770<br />
1. Press “ ” side on the Power Switch to turn off the printer.<br />
Press this side.<br />
CAUTION<br />
(1) <strong>KIP</strong> 7770 and the UI look to be shut down when you turn off <strong>KIP</strong> 7770. However, the<br />
embedded controller is still operating in approximately 2 minutes after Power Switch<br />
operation for the controller’s shutdown.<br />
Do not unplug the <strong>KIP</strong> 7770 before the controller’s shutdown. Doing so may damage<br />
data or the device.<br />
(2) If you use Dehumidify Heater for Roll Decks, the printer should be plugged while the<br />
printer is OFF. Refer to [2.7 Dehumidifying Roll Media].<br />
2-4<br />
Chapter 2 Basic Operations
2. 3 Replacing Roll Media<br />
Reference<br />
(1) When the printer is running out of a roll media, the UI Screen will<br />
display “Roll Replacement” sign.<br />
Follow the later procedure (or as noted in the UI’s User Guide) to load a new roll media.<br />
Please refer to your KS8 Touch Screen Operator’s Guide for the UI screen.<br />
(2) It is recommended that a tracing paper /<br />
vellum roll is loaded to Roll Deck 3 or 4<br />
for 4 Roll type, Roll Deck 1 for 2 Roll<br />
type.<br />
Roll 1 Roll 2<br />
Roll 3 Roll 4<br />
Front<br />
Rear<br />
(3) This section describes how to install a roll media to Roll Deck 1.<br />
The same procedure is applied to Roll Deck 2 / 3 / 4, unless otherwise noted.<br />
<strong>NOTE</strong><br />
A paper mis-feed tends to occur just before out of a roll paper.<br />
2-5<br />
Chapter 2 Basic Operations
1. Open Roll Deck (1).<br />
Holding both Flanges (2), lift and remove a roll media or an empty roll core (2).<br />
2<br />
2<br />
1<br />
3<br />
2. Raise the green lever (4) on Flange (2). Remove both Flanges (2) from the roll core (3).<br />
3<br />
4<br />
2<br />
2<br />
2<br />
3. Hold the shown part of the right Slide Guide (5). Move it to match your roll media’s width.<br />
The right and left Side Guides will automatically move together.<br />
5<br />
Hold here to slide<br />
2-6<br />
Chapter 2 Basic Operations
4. Insert each Flange (2) into both ends of the roll media core to be installed.<br />
2<br />
<strong>NOTE</strong><br />
(1) Fully insert Flange into the roll media core so that the inside rim of Flange evenly touches<br />
the side face of the roll media.<br />
Inside Rim<br />
OK<br />
Inside Rim<br />
NG<br />
Gap<br />
Correct: Fully inserted<br />
Wrong: not touching roll side<br />
(2) Flange has Stoppers (6) with sharp edge.<br />
Be sure not to touch them.<br />
6: back<br />
6<br />
2-7<br />
Chapter 2 Basic Operations
5. Push both the levers (4) down in either way. Position them flat against Flange to secure the roll<br />
media.<br />
4 4<br />
6. Lift the roll media by holding both Flanges. Lower Flanges onto Slide Guides (5).<br />
5<br />
(Continued on the next page)<br />
2-8<br />
Chapter 2 Basic Operations
<strong>NOTE</strong><br />
(1) Note the rewinding direction.<br />
OK<br />
Rear: Deck back<br />
NG<br />
Rear: Deck back<br />
Front: to media path<br />
Front: to media path<br />
Correct: Edge comes from bottom<br />
Wrong: Edge comes from top<br />
(2) The outside rim (7) of Flange should meet the black triangle (8) marked on Slide Guide.<br />
Otherwise the roll media may fall in Roll Deck or result in an incorrect media feeding.<br />
OK<br />
NG<br />
8<br />
8<br />
7<br />
7<br />
Correct<br />
Wrong<br />
2-9<br />
Chapter 2 Basic Operations
7. Insert the leading edge under Guide Plate (9) until it touches the feeding roller (10).<br />
Front Deck (Roll 1 / 3) Rear Deck (Roll 2 / 4)<br />
9 9<br />
10<br />
10<br />
9 9<br />
10 10<br />
10<br />
Roll 1<br />
Roll 2<br />
Roll 3<br />
10<br />
Roll 4<br />
2-10<br />
Chapter 2 Basic Operations
8. Rotate the green knob (11) to the arrow direction (away from front) so that the feeding rollers<br />
catch the leading edge.<br />
Front Deck (Roll 1 / 3) Rear Deck (Roll 2 / 4)<br />
11<br />
11<br />
Roll 1<br />
Roll 2<br />
Roll 3<br />
Roll 4<br />
9. Push Roll Deck (1) to firmly close it.<br />
1 1<br />
<strong>NOTE</strong><br />
(1) Be sure to close Roll Deck fully until it locks at the correct position.<br />
A paper jam may occur if it is not locked firmly.<br />
(2) Be sure not to catch your finger in between Roll Deck drawers.<br />
2-11<br />
Chapter 2 Basic Operations
10. When you close Roll Deck, “Define Roll” screen will appear on the UI screen.<br />
Choose the correct width and type, and press “Initial Cut” button (with scissors icon) for the<br />
corresponding Roll Deck.<br />
2-12<br />
Chapter 2 Basic Operations
2. 4 Replacing Toner Cartridge<br />
WARNING<br />
There is combustible powder in the toner cartridge.<br />
Do not burn up the used toner cartridge.<br />
Reference<br />
When the toner is empty, the UI Screen will display Toner Empty sign.<br />
Follow the later procedure (or as noted in the UI’s User Guide) to<br />
replace the Toner Cartridge with a new one (genuine).<br />
<strong>NOTE</strong><br />
(1) The <strong>KIP</strong> 7770 will indicate Toner Empty sign if an incorrect toner cartridge or no toner<br />
cartridge is installed to the printer.<br />
(2) At the machine’s installation, some amount of initial toner powders will be supplied to the<br />
machine. Thus Toner Empty sign might appear slightly earlier for the first installed toner<br />
cartridge than usual.<br />
1. Open the Manual Table.<br />
Manual Table<br />
2. Pull out the Upper Frame Unit to your side (front) with holding both handles.<br />
Handle<br />
Upper Frame Unit<br />
2-13<br />
Chapter 2 Basic Operations
3. Push the Joint rightward to release the Toner Cartridge.<br />
(The joint will be latched on the right.)<br />
Joint<br />
<strong>NOTE</strong><br />
Slide the Joint until it clicks to unlock the toner cartridge.<br />
Not doing so may damage the toner supply system.<br />
4. Press and hold the green lever. Rotate Toner Cartridge body (not the Cap of Cartridge) to the<br />
arrow direction in order to close the toner supply opening.<br />
Approximately 2 rotations will be enough to close<br />
the opening, but rotate Toner Cartridge until it<br />
stops completely.<br />
1 2<br />
5. Keep pressing the green lever. Lift up Toner<br />
Cartridge and remove it.<br />
2<br />
1<br />
<strong>NOTE</strong><br />
If your hand or your clothing is soiled by toner, dust the toner.<br />
If it is unable to dust it, wash the clothing with the cold water.<br />
(Do not use the hot water at this time because the toner will soak into fiber.)<br />
2-14<br />
Chapter 2 Basic Operations
6. Peel off the wrap on the toner supply hole of Toner Cartridge.<br />
Shake a new Toner Cartridge several times right and left to make the toner smooth.<br />
7. Press the green lever down until it clicks. Insert the far left pin on Toner Cartridge into the slot<br />
firmly. (Please direct the opening on Toner Cartridge downward at this time.)<br />
1<br />
2<br />
<strong>NOTE</strong><br />
Please confirm that the green lever firmly locks the Toner Cartridge at the correct position.<br />
(It must be at a level position.)<br />
OK<br />
NG<br />
Correct: Green Lever in position<br />
Wrong: Toner Cartridge not locked<br />
2-15<br />
Chapter 2 Basic Operations
8. Slightly pull Toner Cartridge rightward and insert the swelling tab in the arrowed slot.<br />
1<br />
2<br />
9. Rotate Toner Cartridge to the arrow direction in 180 degrees or more.<br />
(The new Toner Cartridge is closed firmly so as<br />
not to lose the toner during the transportation)<br />
<strong>NOTE</strong><br />
Even if the Joint is not fit to the Toner Cartridge,<br />
when you turn on the printer, it is automatically fit<br />
properly.<br />
10. Push in Upper Frame Unit firmly. Close the Manual Table.<br />
Upper Frame Unit<br />
Manual Table<br />
2-16<br />
Chapter 2 Basic Operations
2. 5 Placing Cut Sheet Media<br />
1. Open Manual Table.<br />
Manual Table<br />
2. There are several size markings on Manual Table which indicate possible feed positions.<br />
Place a cut sheet in a required size on the table between its concerning size markings then<br />
insert it into Manual Feeder.<br />
When the leading edge touches the feeding roller, the machine automatically carries and sets<br />
the sheet at the proper position.<br />
Size Markings<br />
Manual Table<br />
<strong>NOTE</strong><br />
(1) As a curly cut sheet will cause a mis-feed, straighten the sheet as far as possible before<br />
printing. And set the sheet in “curl down” direction as a mis-feed can be avoided. “Curl up”<br />
sheets tend to result in a mis-feed.<br />
OK<br />
NG<br />
Correct (curl down)<br />
Wrong (curl up)<br />
(2) Setting a cut sheet to the bypass feeder while printing may cause a paper jam.<br />
Be sure to check the printer is idle (not processing a print job) before setting a cut sheet.<br />
2-17<br />
Chapter 2 Basic Operations
2. 6 Canceling Sleep Mode<br />
The <strong>KIP</strong> 7770 has two Sleep Modes to reduce the power consumption.<br />
The <strong>KIP</strong> 7770 will enter Sleep Mode after a certain period of inactivity.<br />
In the default setting;<br />
• Warm Sleep Mode will start after a 15 minute of inactivity in order to reduce the power<br />
supply for Fuser Unit.<br />
• Cold Sleep Mode will start after a 60 minute of inactivity to stop the power supply for Fuser<br />
Unit and some other components.<br />
Sleep Mode is canceled and the machine gets ready when;<br />
• the machine receives a print job through the network.<br />
• an original is inserted into a <strong>KIP</strong> Scanner (option).<br />
• you tap on the UI screen.<br />
<strong>NOTE</strong><br />
(1) It may take time for the printer to get ready.<br />
(2) Tapping on the UI screen can cancel the screensaver but cannot recover temperature on<br />
Fuser Unit. It may need another waiting time to start warming up for printing.<br />
2-18<br />
Chapter 2 Basic Operations
2. 7 Dehumidifying Roll Media<br />
If the roll paper is extremely humid, it may cause poor prints.<br />
You will experience most likely “creasing” and “voids”.<br />
Normal Print<br />
Creasing<br />
If the media is humidified;<br />
Normal Print<br />
Voids<br />
If the media is humidified;<br />
<strong>NOTE</strong><br />
Re-appearance of image (especially solid black image) may occur if you print with a<br />
humidified film.<br />
When film is installed under the high humidity environment (higher than 60%RH), we also<br />
recommend that you turn on the Dehumidify Heater.<br />
Normal print<br />
Re-appeared image<br />
Turn on the Dehumidify Heater if the room air has too much humidity (65% or higher) to prevent<br />
the above kinds of print defect.<br />
You may be able to fix the above kinds of problem.<br />
2-19<br />
Chapter 2 Basic Operations
<strong>NOTE</strong><br />
(1) There are several dehumidifying settings which can be set by service personnel.<br />
When these settings are determined, the dehumidifier functions.<br />
With any setting, the printer must be plugged in and the switch noted above must be in<br />
the “H” position.<br />
Call your service personnel if you would like to change the switch setting.<br />
Note that the user can not change the setting.<br />
(2) To achieve the best image quality, we recommend that you use media that is unpacked<br />
from the manufacture right before installing it into the printer.<br />
If media is unpacked long before installation, poor image quality may occur.<br />
“Dehumidify Heater Switch” is located on the left-rear side of the machine.<br />
Press “H” to turn on the Dehumidify Heater.<br />
Press “H” side.<br />
Dehumidify Heater Switch<br />
2-20<br />
Chapter 2 Basic Operations
2. 8 Stacking Prints on High Capacity Print Tray (option)<br />
High Capacity Print Tray has the ability to stack about<br />
100 sheets of ejected prints behind the printer.<br />
“High Capacity Print Tray” Stack Capacity:<br />
High Capacity Print Tray<br />
Media Type<br />
Plain Paper<br />
Bond<br />
Tracing Paper<br />
Vellum<br />
Film<br />
Number of sheets<br />
(approx.)<br />
100 sheets<br />
10 sheets<br />
1 sheets<br />
Note<br />
The correct stack capacity of these number of sheets can be<br />
achieved when all pages are;<br />
- in any 1 standard size<br />
- included in 1 print job and printed without any interruption.<br />
For larger print sizes (D/A1 portrait, E/A0), please use the extension tray.<br />
Insert the extension tray’s hooking part on the base tray.<br />
Extension Tray<br />
Extension Tray<br />
1. Flip up the extension tray.<br />
Extension Tray<br />
2-21<br />
Chapter 2 Basic Operations
2. With holding the extension tray, slide it completely to the arrow direction.<br />
3. Lower the extension tray and insert the hooks on the base tray.<br />
Hook<br />
For use of thin vellum / tracing paper and film in D/A1 portrait or E/A0, press the lever down.<br />
In most sizes / types, the lever should remain up.<br />
Lever<br />
Lever<br />
Lever UP: most size, type<br />
Lever DOWN: Large Tracing, Vellum, Film<br />
<strong>NOTE</strong><br />
This equipment is exclusive use of stacking ejected prints from the printer.<br />
Please contact your local dealer for other outer devices (Scanner, Auto Stacker, Folder, etc).<br />
See the device’s documents if you use one. That might include additional information for<br />
usage / notice of the printer.<br />
2-22<br />
Chapter 2 Basic Operations
Chapter 3<br />
Error Correction<br />
Page<br />
3. 1 Paper Jam 3- 2<br />
3. 1. 1 Roll Deck Section (J-01, J-02, J-03, J-04) 3- 3<br />
3. 1. 2 Manual Feeder Section (J-05) 3- 5<br />
3. 1. 3 Paper Feeder Section (J-10, J-11, J-12) 3- 6<br />
3. 1. 4 Fuser Section (J-13, J-14) 3- 9<br />
3. 1. 5 Outer Device (J-21, J-22) 3-17<br />
3. 2 Open Cover Errors 3-18<br />
3. 2. 1 Roll Deck Open 3-18<br />
3. 2. 2 Upper Frame Unit / Top Cover Open 3-19<br />
3. 2. 3 Exit Cover Open 3-20<br />
3. 3 Other Errors 3-21<br />
3. 3. 1 Roll Replacement 3-21<br />
3. 3. 2 Toner Empty 3-21<br />
3. 4 Call Service Errors 3-22<br />
3-1<br />
Chapter 3 Error Correction
3. 1 Paper Jam<br />
If a paper jam occurs, the UI screen will show its location and the corresponding error code (J-**).<br />
Please refer to the following figure to check the jam location.<br />
(Error Codes are described on the later pages.)<br />
Fuser Section<br />
J-13, J-14<br />
Paper Feeder Section<br />
J-10 / J-11 / J-12<br />
Outer Device<br />
J-21, J-22<br />
Manual Feeder Section<br />
J-05<br />
Roll Deck Section<br />
J-01<br />
J-02<br />
J-03<br />
J-04<br />
(J-03/J-04 for 4<br />
Roll model only)<br />
Front<br />
Roll 1 Roll 2<br />
Roll 3 Roll 4<br />
Outer Device<br />
(Auto Stacker,<br />
Folder, etc.)<br />
Rear<br />
<strong>NOTE</strong><br />
(1) Take care not to get paper cuts on your hand.<br />
(2) Take off your ring, bracelet or watch when clearing paper jam. If they touch to internal<br />
components, it may result in a burn, an electric shock or damage to components.<br />
(3) Gently remove a jammed paper. When it does not reach Fuser Unit, toner on it may spill<br />
off.<br />
If toner gets into eyes or your mouth, immediately rinse them with water and contact a<br />
doctor.<br />
(4) Gently remove a jammed paper. When it does not reach Fuser Unit, toner on it may spill<br />
off on your cloth.<br />
Dust off your cloth. Use cold water to wash in out. Using hot water may leave a stain.<br />
(5) If a paper jam occurs using multiple copy and set copy, Jam Recovery screen will<br />
appear in the UI. Jam Recovery reprints the removed sheet(s).<br />
Refer to KS8 Touch Screen Operator’s Guide for further information.<br />
(6) Pictures/Figures in this section are shown with 4 Roll model.<br />
3-2<br />
Chapter 3 Error Correction
3. 1. 1 Roll Deck Section (J-01, J-02, J-03, J-04)<br />
When a Paper Mis-feed occurs in the Roll Deck, the UI shows J-01 / J-02 / J-03 / J-04.<br />
J-01: Roll 1 (Upper Roll Deck)<br />
J-02: Roll 2 (Upper Roll Deck)<br />
J-03: Roll 3 (Lower Roll Deck)<br />
J-04: Roll 4 (Lower Roll Deck)<br />
(J-03/J-04 for 4 Roll model only)<br />
J-01<br />
J-02<br />
Roll 1 Roll 2<br />
J-03<br />
J-04<br />
Roll 3 Roll 4<br />
Front<br />
Rear<br />
Clear the Paper Mis-feed using the following procedure:<br />
1. Open the Roll Deck in issue. And then rewind the roll onto the media core.<br />
Roll Deck<br />
2. If the leading edge of the media is torn or folded, cut it off.<br />
3-3<br />
Chapter 3 Error Correction
3. Set the roll media correctly.<br />
Front Deck (Roll 1 / 3) Rear Deck (Roll 2 / 4)<br />
<strong>NOTE</strong><br />
The outside rim of Flange should meet the black triangle marked on Slide Guide. Otherwise<br />
the roll media may fall in Roll Deck or result in an incorrect media feeding.<br />
OK<br />
NG<br />
Out of position<br />
Correct<br />
Wrong<br />
4. Close the Roll Deck.<br />
3-4<br />
Chapter 3 Error Correction
3. 1. 2 Manual Feeder Section (J-05)<br />
When a Paper Mis-feed occurs in the Manual Feeder, the UI shows J-05.<br />
J-05: Manual Feeder<br />
J-05<br />
Roll 1 Roll 2<br />
Roll 3<br />
Roll 4<br />
Front<br />
Rear<br />
Clear the Paper Mis-feed using the following procedure:<br />
1. Pull out the Mis-fed paper from the Manual Feeder, and if the leading edge of the paper is torn<br />
or folded, replace it with a new one.<br />
3-5<br />
Chapter 3 Error Correction
3. 1. 3 Paper Feed Section (J-10, J-11, J-12)<br />
When a Paper Mis-feed occurs in the Paper Feed Section, the UI shows J-10 / J-11 / J-12.<br />
J-10: Front region<br />
J-11: Middle region<br />
J-12: Middle-Rear region<br />
J-10 J-11 J-12<br />
Roll 1 Roll 2<br />
Roll 3 Roll 4<br />
Front<br />
Rear<br />
Clear the Paper Mis-feed using the following procedure:<br />
1. Open the Manual Table.<br />
Manual Table<br />
3-6<br />
Chapter 3 Error Correction
2. Pull out the Upper Frame Unit to your side (front) with holding both handles.<br />
Handle<br />
Upper Frame Unit<br />
3. Pull up both knobs, and then push the Top Cover to rear side.<br />
Top Cover<br />
Knob<br />
Knob<br />
Top Cover<br />
Top Cover<br />
3-7<br />
Chapter 3 Error Correction
4. Remove the mis-feed paper.<br />
Print<br />
5. Close Top Cover.<br />
Top Cover<br />
6. Close Upper Frame Unit and Manual Table.<br />
Upper Frame Unit<br />
Manual Table<br />
3-8<br />
Chapter 3 Error Correction
3. 1. 4 Fuser Section (J-13, J-14)<br />
When a Paper Mis-feed occurs in the Fuser Section, the UI shows J-13 / J-14.<br />
J-13, J-14: Fuser Unit<br />
J-13, J-14<br />
Roll 1 Roll 2<br />
Roll 3 Roll 4<br />
Front<br />
Rear<br />
Clear the Paper Mis-feed using the following procedure:<br />
1. It is necessary for a printer with High Capacity Print Tray (option) to move it aside to “release<br />
position”.<br />
First remove stacked prints from the tray.<br />
If your system does not have High Capacity Print Tray, go to step 4.<br />
Prints<br />
High Capacity<br />
Print Tray<br />
Support Rod<br />
3-9<br />
Chapter 3 Error Correction
2. Flip up the Lock Lever on the top of the Support Rod.<br />
Slide the Lock Slide down to release the tray.<br />
Tray<br />
(side section)<br />
Lock Lever<br />
Lock Slide<br />
Support Rod<br />
<strong>NOTE</strong><br />
Please note that the tray may slightly bounce at the time of release.<br />
3-10<br />
Chapter 3 Error Correction
3. With holding the thick wire(s) on the overlapping area of the tray, lift up the entire tray.<br />
Insert the hooks into the holes on the tray rest. (release position)<br />
Hold the wire(s) here<br />
Hold the wire(s) here<br />
Lift up the entire tray<br />
Operation Position<br />
Release Position<br />
Operation Position<br />
<strong>NOTE</strong><br />
(1) Do not hold a thin wire to carry the entire tray.<br />
(2) You cannot open Exit Cover until you move the tray from “operation position” to “release<br />
position”.<br />
(3) Do not place any heavy object on the tray with mounted at “release position”.<br />
3-11<br />
Chapter 3 Error Correction
4. Open Exit Cover.<br />
Exit Cover<br />
WARNING<br />
There are extremely hot parts inside the Heater Unit. Do not touch any parts in the Heater<br />
Unit, or you will be burnt.<br />
Also the mis-fed media can be very hot. Be careful not to get burnt when you remove it.<br />
5. If it is possible to access the mis-fed paper, pull it out backward gently.<br />
Be careful not to tear the mis-fed paper.<br />
If it is possible to access it, close Exit Cover.<br />
High Capacity Print Tray requires relocation. See<br />
step 12.<br />
If it is not possible, go to the next step.<br />
6. Open the Manual Table.<br />
Print<br />
Manual Table<br />
3-12<br />
Chapter 3 Error Correction
7. Pull out the Upper Frame Unit to your side (front) with holding both handles.<br />
Handle<br />
Upper Frame Unit<br />
8. Pull up both knobs, and then push the Top Cover to rear side.<br />
Top Cover<br />
Knob<br />
Knob<br />
Top Cover<br />
Top Cover<br />
3-13<br />
Chapter 3 Error Correction
9. Remove the mis-fed paper.<br />
Print<br />
10. Close Top Cover.<br />
Top Cover<br />
11. Close Upper Frame Unit and Manual Table.<br />
Upper Frame Unit<br />
Manual Table<br />
For the printer with High Capacity Print Tray, go to step 12 on the next page for its<br />
relocation.<br />
3-14<br />
Chapter 3 Error Correction
12. Hold the thick wire parts of the tray and insert the hook parts at the “lock position” on the top<br />
face of the printer’s rear beam.<br />
Hold the wire(s) here<br />
Hold the wire(s) here<br />
Lift up the entire tray<br />
Operation Position<br />
Release Position<br />
Operation Position<br />
<strong>NOTE</strong><br />
(1) Do not hold a thin wire to carry the entire tray.<br />
(2) Ejected prints will be stacked incorrectly on Print Tray until you move it from “release<br />
position” to “operation position”.<br />
3-15<br />
Chapter 3 Error Correction
13. Lift the Support Rod to the printer. Fully slide the Lock Slide upward. Slightly push the tray<br />
down to catch its bottom hooking part on the top of the Support Rod.<br />
Push down<br />
Lock Slide<br />
Support Rod<br />
14. Fully press the Lock Lever down to lock the tray.<br />
Lock Lever<br />
<strong>NOTE</strong><br />
To fit the Lock Lever in position, fully slide the Lock Slide upward.<br />
Lock Lever<br />
not fit in<br />
3-16<br />
Chapter 3 Error Correction
3. 1. 5 Outer Device (J-21, J-22)<br />
When a Paper Mis-feed occurs in the Outer Device, the UI shows J-21 / J-22.<br />
J-21, J-22: Outer Device<br />
(Auto Stacker, Folder, etc)<br />
J-21, J-22<br />
Clear the mis-feed using the following procedure:<br />
1. As for the way to clear the mis-feed, refer to the User’s Manual for the Outer Device.<br />
3-17<br />
Chapter 3 Error Correction
3. 2 Open Cover Errors<br />
When any deck/cover is open (not closed firmly), the UI Screen will display “Door Open” or any<br />
other prompt screen.<br />
Close the concerning deck/cover as it is impossible to print, if this error exists.<br />
3. 2. 1 Roll Deck Open<br />
“Replace Roll” screen will appear on the UI screen when Upper / Lower Roll Deck is open.<br />
Completely push the concerning Roll Deck toward the printer to firmly close it.<br />
<strong>NOTE</strong><br />
The above screen will be indicated if the Roll Deck is not locked correctly, although it may<br />
look closed.<br />
Open and close the Roll Deck again, pushing until locked. Ensure both sides of the roll deck<br />
are in their correct position.<br />
OK<br />
NG<br />
Correct: firmly closed<br />
Wrong: not closed completely<br />
3-18<br />
Chapter 3 Error Correction
3. 2. 2 Upper Frame Unit Open / Top Cover Open<br />
If either Upper Frame Unit or Top Cover is open, the UI screen shows “Door Open”.<br />
Check if the Upper Frame Unit and the Top Cover are closed firmly.<br />
Top Cover<br />
Upper Frame Unit<br />
OK<br />
Correct: Both Top Cover / Upper Frame Unit closed firmly<br />
NG<br />
NG<br />
Push backward<br />
Push forward<br />
Wrong: Top Cover open<br />
Wrong: Upper Frame Unit open<br />
3-19<br />
Chapter 3 Error Correction
3. 2. 3 Exit Cover Open<br />
If Exit Cover is open, the UI screen shows “Door Open”.<br />
Check if Exit Cover is closed firmly.<br />
Exit Cover<br />
3-20<br />
Chapter 3 Error Correction
3. 3 Other Errors<br />
3. 3. 1 Roll Replacement<br />
When the printer is running out of an installed roll media, the UI Screen will display “Roll<br />
Replacement” sign.<br />
If there is no suitable roll media required for the current print job, the UI Screen will display “Roll<br />
Replacement” sign as well. Please load the required roll media to any Roll Deck.<br />
For the roll replacement procedure, refer to [2.3 Replacing Roll Media] on page 2-5.<br />
3. 3. 2 Toner Empty<br />
When the printer is running out of toner, the UI Screen will display “Toner Empty” sign.<br />
For the toner cartridge replacement procedure, refer to [2.4 Replacing Toner Cartridge].<br />
3-21<br />
Chapter 3 Error Correction
3. 4 Call Service Errors<br />
If any of the following Error Codes for a significant failure appears in the UI screen;<br />
PLEASE CALL YOUR TRAINED SERVICE PERSONNEL TO RESOLVE THE ERRORS.<br />
No operation should be done by the customer.<br />
Error Code<br />
E - 01<br />
E - 02<br />
E - 03<br />
E - 04<br />
E - 06<br />
E - 07<br />
E - 14<br />
E - 16<br />
E - 21<br />
E - 27<br />
E - 40<br />
E - 51<br />
Name of the error<br />
Fuser Temperature Rising Error<br />
Fuser Over Temperature Error<br />
Main Motor Error<br />
Developer Error<br />
Counter Error<br />
Cutter Error<br />
Fuser Motor Error<br />
Wire Cleaning Error<br />
Fuser Thermostat Error<br />
Toner Density Detect Error<br />
Outer Device Error<br />
High Voltage Power Error<br />
If any of the Error Codes listed above appears;<br />
1. Turn off <strong>KIP</strong> 7770, and turn it on after an interval of 30 seconds or more.<br />
2. If the same error code appears, turn off <strong>KIP</strong> 7770, and then unplug the printer from the wall<br />
outlet after an interval of two minutes for KS8 shutdown.<br />
Call your service personnel.<br />
3-22<br />
Chapter 3 Error Correction