Jet-X Central Technique.pdf - Bonerepmedical.com
Jet-X Central Technique.pdf - Bonerepmedical.com
Jet-X Central Technique.pdf - Bonerepmedical.com

Create successful ePaper yourself
Turn your PDF publications into a flip-book with our unique Google optimized e-Paper software.
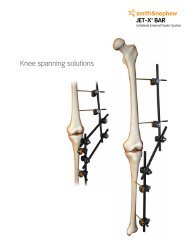
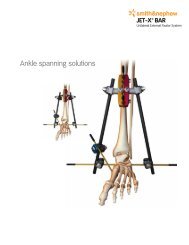
Fracture Reduction and<br />
Adjustment (Cont.)<br />
Each ball joint on the JET-X CENTRAL Unilateral<br />
External Fixator provides 360° of rotation about<br />
the axis of the fixator, within 40° of angulation, for<br />
smooth anatomical reduction.<br />
Final Fixator Tightening<br />
Step Ten<br />
After reduction is achieved, ensure the pin clamp<br />
bolts, ball joint bolts, telescoping lock bolt and hinge<br />
bolt are all securely tightened with the 6mm Allen<br />
Wrench. No torque wrench is necessary. Tighten<br />
the ball joint bolt until the gap in the housing is<br />
<strong>com</strong>pletely closed.<br />
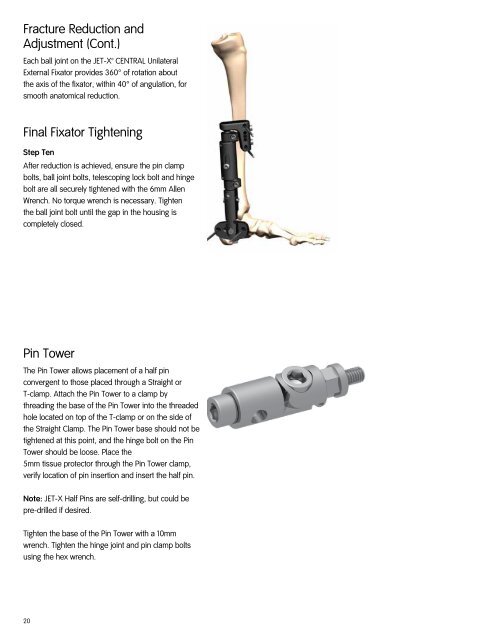
Pin Tower<br />
The Pin Tower allows placement of a half pin<br />
convergent to those placed through a Straight or<br />
T-clamp. Attach the Pin Tower to a clamp by<br />
threading the base of the Pin Tower into the threaded<br />
hole located on top of the T-clamp or on the side of<br />
the Straight Clamp. The Pin Tower base should not be<br />
tightened at this point, and the hinge bolt on the Pin<br />
Tower should be loose. Place the<br />
5mm tissue protector through the Pin Tower clamp,<br />
verify location of pin insertion and insert the half pin.<br />
Note: JET-X Half Pins are self-drilling, but could be<br />
pre-drilled if desired.<br />
Tighten the base of the Pin Tower with a 10mm<br />
wrench. Tighten the hinge joint and pin clamp bolts<br />
using the hex wrench.<br />
20