Lighting - Martin Ego Series - SXS Events
Lighting - Martin Ego Series - SXS Events
Lighting - Martin Ego Series - SXS Events

Create successful ePaper yourself
Turn your PDF publications into a flip-book with our unique Google optimized e-Paper software.
and Phone: courtesy Audio-Visual 0870 of 080 Services 2342<br />
mail: enquiries@sxsevents.co.uk<br />
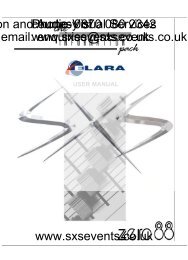
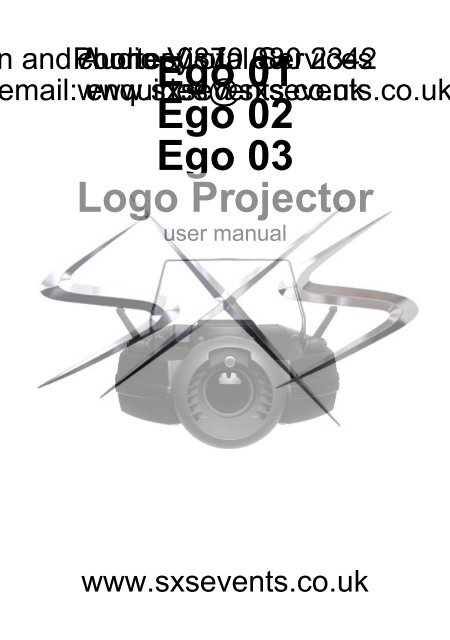
<strong>Ego</strong> 01<br />
www.sxsevents.co.uk<br />
<strong>Ego</strong> 02<br />
<strong>Ego</strong> 03<br />
Logo Projector<br />
user manual<br />
www.sxsevents.co.uk
Measurements are expressed in millimeters.<br />
324<br />
Phone: courtesy 0870 of 080 2342<br />
and Audio-Visual Services<br />
mail: www.sxsevents.co.uk<br />
enquiries@sxsevents.co.uk<br />
305<br />
150<br />
248<br />
© 2002-2004 <strong>Martin</strong> Professional A/S, Denmark.<br />
All rights reserved. No part of this manual may be reproduced, in any form or by any means,<br />
without permission in writing from <strong>Martin</strong> Professional A/S, Denmark.<br />
www.sxsevents.co.uk<br />
Printed in Denmark.<br />
P/N 35000109, Rev. G
Introduction . . . . . . . . . . . . . . . . . . . . . . . . . . . . . . . . . . . . . . . .4<br />
<strong>Ego</strong> 01 / Logo Projector . . . . . . . . . . . . . . . . . . . . . . . . . . . . . . . . . . . . . . . . . 4<br />
and Phone: courtesy Audio-Visual 0870 of 080 Services 2342<br />
mail: enquiries@sxsevents.co.uk<br />
<strong>Ego</strong> 02 . . . . . . . . . . . . . . . . . . . . . . . . . . . . . . . . . . . . . . . . . . . . . . . . . . . . . . . 4<br />
<strong>Ego</strong> 03 . . . . . . . . . . . . . . . . . . . . . . . . . . . . . . . . . . . . . . . . . . . . . . . . . . . . . . . 5<br />
Safety information . . . . . . . . . . . . . . . . . . . . . . . . . . . . . . . . . . . . . . . . . . . . . . 5<br />
Unpacking<br />
www.sxsevents.co.uk<br />
. . . . . . . . . . . . . . . . . . . . . . . . . . . . . . . . . . . . . . . . . . . . . . . . . . . . 6<br />
AC power . . . . . . . . . . . . . . . . . . . . . . . . . . . . . . . . . . . . . . . . . .7<br />
Installing a plug on the mains lead . . . . . . . . . . . . . . . . . . . . . . . . . . . . . . . . . 7<br />
Installation . . . . . . . . . . . . . . . . . . . . . . . . . . . . . . . . . . . . . . . . .8<br />
Overhead mounting . . . . . . . . . . . . . . . . . . . . . . . . . . . . . . . . . . . . . . . . . . . . . 8<br />
Operation from the floor . . . . . . . . . . . . . . . . . . . . . . . . . . . . . . . . . . . . . . . . . 9<br />
Linking multiple <strong>Ego</strong>s for simultaneous control . . . . . . . . . . . . . . . . . . . . . . . . 9<br />
Operation . . . . . . . . . . . . . . . . . . . . . . . . . . . . . . . . . . . . . . . . .10<br />
Setting the trig mode . . . . . . . . . . . . . . . . . . . . . . . . . . . . . . . . . . . . . . . . . . . 10<br />
Adjusting the effects . . . . . . . . . . . . . . . . . . . . . . . . . . . . . . . . . . . . . . . . . . . 10<br />
Focusing the <strong>Ego</strong> . . . . . . . . . . . . . . . . . . . . . . . . . . . . . . . . . . . . . . . . . . . . . 11<br />
Selecting the gobo on an <strong>Ego</strong> 2 . . . . . . . . . . . . . . . . . . . . . . . . . . . . . . . . . . 11<br />
Operation with the optional remote control . . . . . . . . . . . . . . . . . . . . . . . . . . 12<br />
Basic service . . . . . . . . . . . . . . . . . . . . . . . . . . . . . . . . . . . . . .13<br />
Cleaning . . . . . . . . . . . . . . . . . . . . . . . . . . . . . . . . . . . . . . . . . . . . . . . . . . . . 13<br />
Lamp maintenance . . . . . . . . . . . . . . . . . . . . . . . . . . . . . . . . . . . . . . . . . . . . 14<br />
Fuses . . . . . . . . . . . . . . . . . . . . . . . . . . . . . . . . . . . . . . . . . . . . . . . . . . . . . . 15<br />
Gobo replacement or removal (<strong>Ego</strong> 2) . . . . . . . . . . . . . . . . . . . . . . . . . . . . . 16<br />
Firmware updates . . . . . . . . . . . . . . . . . . . . . . . . . . . . . . . . . . . . . . . . . . . . . 16<br />
Troubleshooting . . . . . . . . . . . . . . . . . . . . . . . . . . . . . . . . . . .17<br />
Specifications . . . . . . . . . . . . . . . . . . . . . . . . . . . . . . . . . . . . .18<br />
www.sxsevents.co.uk<br />
3
and Audio-Visual Services<br />
mail: www.sxsevents.co.uk<br />
enquiries@sxsevents.co.uk<br />
1<br />
INTRODUCTION Phone: courtesy 0870 of 080 2342<br />
Thank you for selecting a <strong>Martin</strong> <strong>Ego</strong>. The <strong>Ego</strong> series features 250 watt<br />
flower effects with sharp projection quality optics in a moulded compositeplastic<br />
casing. They incorporate a 250-watt halogen lamp and a precise<br />
focus adjustment that produces crisp projections.<br />
Variable behavior tuning, by adjusting the dynamic, allows you to modify<br />
the aggressiveness of the effect in relationship to the music - relaxed,<br />
intermediate or quick. The <strong>Ego</strong> operates in either automatic or musicactivated<br />
trigger mode.<br />
A convenient handle and lens protection ring make for easy transport and<br />
handling. A remote control is also available that enables the simultaneous<br />
control of multiple <strong>Ego</strong> fixtures.<br />
EGO 01 / LOGO PROJECTOR<br />
The <strong>Ego</strong> 01 provides a flower effect with a range of gobos and colors on a<br />
single effect wheel. In addition to variable behavior tuning, effect wheel<br />
and mirror dish rotation speeds are controllable.<br />
The Logo Projector is the same as the <strong>Ego</strong> 01, but it is primarily used to<br />
project images around a specific theme.<br />
EGO 02<br />
The <strong>Ego</strong> 02 features an overlapping color wheel system offering more<br />
than 200 color combinations and a manually selectable image effect<br />
(etched gobo or textured glass gobo pattern). An interchangeable gobo<br />
slot is available so that you can incorporate your own custom patterns or<br />
accessories. In addition to variable behavior tuning, the rotation speeds of<br />
the color wheels and mirror dish are also controllable.<br />
www.sxsevents.co.uk<br />
4 <strong>Ego</strong> user manual
EGO 03<br />
and Phone: courtesy Audio-Visual<br />
The <strong>Ego</strong> 03 is a<br />
0870<br />
kaleidoscopic<br />
of<br />
effect<br />
080 Services<br />
with a range<br />
2342<br />
of gobo and color<br />
combinations on a single effect wheel that are projected onto a series of<br />
mail: www.sxsevents.co.uk<br />
enquiries@sxsevents.co.uk<br />
mirrored tunnels. In addition to variable behavior tuning, effect wheel and<br />
mirrored-tunnel rotation speeds are controllable.<br />
SAFETY INFORMATION<br />
Warning!<br />
This product is not for household use. It presents risks of<br />
lethal or severe injury due to fire and heat, electric shock, and<br />
falls.<br />
Read this manual before powering or installing the fixture, follow the<br />
safety precautions listed below and observe all warnings in this manual<br />
and printed on the fixture. If you have questions about how to operate the<br />
fixture safely, please contact a <strong>Martin</strong> distributor for assistance. Refer any<br />
service operation not described in this manual to a qualified technician.<br />
Do not modify the fixture or install other than genuine <strong>Martin</strong> accessories<br />
and upgrade kits.<br />
Avoiding electric shocks<br />
• Disconnect the fixture from AC power before removing or installing the<br />
lamp, fuses, or any part, and when not in use.<br />
• Always ground (earth) the fixture electrically.<br />
• Use only a source of AC power that complies with local building and<br />
electrical codes and has both overload and ground-fault protection.<br />
• Do not expose the fixture to rain or moisture.<br />
• Refer all service to a qualified technician.<br />
• Never operate the fixture with missing or damaged lenses and/or covers.<br />
Protecting yourself and others from burns and fire<br />
• Never attempt to bypass the thermostatic switch or fuses. Always replace<br />
defective fuses with ones of the specified type and rating.<br />
• Ensure that the air flow through fans and vents is free and unobstructed.<br />
• Keep all combustible materials (for example fabric, wood, paper) at least<br />
0.1 meters (4 inches) away from the fixture. Keep flammable materials<br />
well away from the fixture.<br />
• Do not illuminate surfaces within 0.3 meters (12 inches) of the fixture.<br />
www.sxsevents.co.uk<br />
Introduction 5
• Provide a minimum clearance of 0.1 meters (4 inches) around fans and air<br />
vents.<br />
• Replace the lamp if it becomes defective or worn out, or before usage<br />
exceeds the maximum service life. When replacing the lamp, allow the<br />
fixture to cool for at least 5 minutes before opening the fixture or removing<br />
the lamp. It can take up to 15 minutes for the fixture to cool completely.<br />
• Never place filters or other materials over the lens or mirror drum.<br />
• The exterior of the fixture can become hot. Allow the fixture to cool for at<br />
least 5 minutes before handling.<br />
• Do not operate the fixture if the ambient temperature (Ta) exceeds 40° C<br />
(104° F).<br />
• Do not stare directly into the light.<br />
• Never operate the fixture without all lenses and covers installed: an<br />
unshielded lamp emits dangerous UV radiation that can cause burns and<br />
eye damage.<br />
and Phone: courtesy Audio-Visual 0870 of 080 Services 2342<br />
mail: www.sxsevents.co.uk<br />
enquiries@sxsevents.co.uk<br />
Preventing injuries due to falls<br />
• When suspending the fixture above ground level, verify that the structure<br />
can hold at least 10 times the weight of all installed devices.<br />
• Verify that all external covers and rigging hardware are securely fastened<br />
and use an approved means of secondary attachment such as a safety<br />
cable.<br />
• Block access below the work area whenever installing or removing the<br />
fixture.<br />
UNPACKING<br />
The packing material is carefully designed to protect the fixture during<br />
shipment - always use it to transport the fixture.<br />
The <strong>Ego</strong> comes with the following:<br />
• 3-meter, 3-wire IEC power cable<br />
• User manual<br />
www.sxsevents.co.uk<br />
6 <strong>Ego</strong> user manual
and Audio-Visual Services<br />
mail: www.sxsevents.co.uk<br />
enquiries@sxsevents.co.uk<br />
2<br />
AC Phone: courtesy POWER 0870 of 080 2342<br />
The <strong>Ego</strong> has an auto-ranging power supply that can operate in the<br />
following voltage ranges at 50-60 Hz:<br />
• 90-130 volts<br />
• 200-250 volts<br />
INSTALLING A PLUG ON THE MAINS<br />
LEAD<br />
The fixture‘s mains lead may require a grounding-type cord cap that fits<br />
your power distribution cable or outlet. Consult a qualified electrician if<br />
you have any doubts about proper installation.<br />
Warning!<br />
Important!<br />
For protection from dangerous electric shock, the fixture must<br />
be grounded (earthed). The AC mains supply shall have<br />
overload and ground-fault protection.<br />
Verify that the feed cables are undamaged and rated for the<br />
current requirements of all connected devices before use.<br />
Following the cord cap manufacturer‘s instructions, connect the yellow<br />
and green wire to ground (earth), the brown wire to live, and the blue wire<br />
to neutral. The table below shows some pin identification schemes.<br />
Wire Pin Marking Screw color<br />
brown live “L” yellow or brass<br />
blue neutral “N” silver<br />
yellow/green ground green<br />
www.sxsevents.co.uk<br />
AC power 7
and Audio-Visual Services<br />
mail: www.sxsevents.co.uk<br />
enquiries@sxsevents.co.uk<br />
3<br />
INSTALLATION Phone: courtesy 0870 of 080 2342<br />
The <strong>Ego</strong> can be hung overhead with a clamp (not included), mounted<br />
vertically on a wall, or placed on the floor.<br />
Warning!<br />
Block access below the work area before proceeding. Always<br />
use a secure means of secondary attachment.<br />
OVERHEAD MOUNTING<br />
To hang the <strong>Ego</strong> on an overhead support, ceiling, or wall:<br />
1 Verify that the structure can<br />
support at least 10 times the<br />
weight of all installed fixtures,<br />
clamps, cables, auxiliary<br />
equipment, and other items.<br />
2 If hanging the fixture with a<br />
rigging clamp, verify that the<br />
clamp is undamaged and is<br />
designed for the fixture‘s weight.<br />
Bolt the clamp securely to the<br />
mounting bracket on the fixture<br />
with a grade 8.8 (minimum) M12<br />
bolt and lock nut, or as<br />
recommended by the clamp<br />
manufacturer, through the clamp<br />
hole in the mounting bracket.<br />
3 If permanently installing the<br />
fixture, verify that the hardware<br />
(not included) and mounting<br />
surface can bear at least 10 times<br />
the fixture‘s weight.<br />
4 Working from a stable platform,<br />
clamp or fasten the fixture to the<br />
structure.<br />
8 <strong>Ego</strong> user manual<br />
Rigging clamp<br />
Safety cable<br />
www.sxsevents.co.uk
5 Install a safety cable that can hold at least 10 times the weight of the<br />
fixture through the handle of the of the fixture.<br />
and Phone: courtesy Audio-Visual 6 Loosen the swivel 0870 locks, of tilt the fixture 080 Services<br />
to the desired 2342 angle, and retighten.<br />
mail: www.sxsevents.co.uk<br />
enquiries@sxsevents.co.uk<br />
7 Verify that the fixture is at least 0.3 meters (12 in.) from the surface to be<br />
illuminated and at least 0.1 meters (4 in.) from any combustible materials.<br />
Verify that the clearance around the air vents is at least 0.1 meters (4 in.).<br />
OPERATION FROM THE FLOOR<br />
To operate the <strong>Ego</strong> from the floor:<br />
1 Set the fixture on the floor so that the<br />
mounting bracket is under the fixture. Adjust<br />
the mounting bracket and tighten both swivel<br />
locks. Note that the fixture may not be placed<br />
so that the clearance around the air vent is<br />
impaired.<br />
2 Verify that the fixture is stable, that it is at<br />
least 0.3 meters (12 in.) from the surface to<br />
be illuminated and at least 0.1 meters (4 in.)<br />
from any combustible materials. Verify that<br />
the clearance around the air vents is at least<br />
0.1 meters (4 in.).<br />
Do not operate the fixture while it lies flat<br />
without the mounting bracket extended as<br />
this reduces the air flow to the fan; the fixture<br />
may overheat and then the thermostatic<br />
switch will temporarily cut the power.<br />
LINKING MULTIPLE EGOS FOR<br />
SIMULTANEOUS CONTROL<br />
You can link multiple <strong>Ego</strong>s, of any type, using speaker cables with stereo<br />
mini-jack connectors for the purpose of controlling them using the optional<br />
remote control.<br />
The remote control is connected with a cable to the Remote In socket of<br />
the first <strong>Ego</strong> fixture. Additional cables are used from the Remote Out<br />
sockets to the Remote In sockets of subsequent fixtures, and so on, until<br />
all the <strong>Ego</strong> fixtures are connected in a daisy chain. There is no need to<br />
terminate this link.<br />
www.sxsevents.co.uk<br />
Installation 9
and Audio-Visual Services<br />
mail: www.sxsevents.co.uk<br />
enquiries@sxsevents.co.uk<br />
4<br />
OPERATION Phone: courtesy 0870 of 080 2342<br />
To achieve optimal results the use of smoke effects together with your <strong>Ego</strong><br />
is recommended.<br />
The lamp turns on as soon as power is applied. The effect wheel/s and<br />
mirror dish begin to rotate. The action is varied whenever trigger signals<br />
are generated as a result of sounds picked up by the built-in microphone<br />
(manual trig) or randomly (when the fixture is in auto trig mode).<br />
SETTING THE TRIG MODE<br />
The Idle Speed dial on the control panel is used to set the trigger mode;<br />
when the Idle Speed dial is set:<br />
• In the Auto Trig zone trigger signals are generated randomly in Auto Trig<br />
mode. This will result in unsynchronized operation that is not in time with<br />
music.<br />
• Out of the Auto Trig zone, the fixture is in Manual Trig mode and the builtin<br />
microphone will generate trigger signals as a result of sounds that it<br />
picks up. This will result in synchronous operation in time with any music<br />
that is being played. When trigger signals are not being received, the<br />
effect wheel will idle at a speed that is relative to how far clockwise the Idle<br />
Speed dial is set.<br />
ADJUSTING THE EFFECTS<br />
Dynamic<br />
The Dynamic dial on the control panel is used to set the aggressiveness of<br />
the effect, regardless of which trig mode is set. When the dial is wound<br />
fully anti-clockwise the fixture will react relatively passively, and the level<br />
of aggressiveness will increase the further clockwise that the dial is<br />
wound.<br />
www.sxsevents.co.uk<br />
10 <strong>Ego</strong> user manual
The separately orderable remote control unit can be used to link multiple<br />
<strong>Ego</strong>s and allows the simultaneous adjustment of their dynamics. See<br />
—Operation with the optional remote control“ on page 12 for more<br />
information.<br />
and Phone: courtesy Audio-Visual 0870 of 080 Services 2342<br />
mail: www.sxsevents.co.uk<br />
enquiries@sxsevents.co.uk<br />
Adjusting the speed of effect wheel<br />
As long as the Idle Speed dial is not in the Auto Trig zone it is used to<br />
adjust the speed of rotation of the effects wheel/s between trigger signals.<br />
FOCUSING THE EGO<br />
Adjust the focus using the thumb screw next to the lens.<br />
SELECTING THE GOBO ON AN EGO 2<br />
There are two manually-selectable gobos in an <strong>Ego</strong> 2, one of which is<br />
always in the optical path. One is a fixed piece of textured glass and the<br />
other interchangeable position is delivered with an etched gobo installed.<br />
This gobo can be removed (see —Gobo replacement or removal (<strong>Ego</strong> 2)“<br />
on page 16).<br />
To change the gobo that is currently in the optical path:<br />
1 Disconnect the fixture from AC power and allow it to cool. It can take up to<br />
15 minutes for the fixture to cool completely.<br />
2 Remove the six access screws from the cover and lift it off. The gobo<br />
holder is located between the lamp and the mirror dish.<br />
3 Loosen the thumb screw on the gobo holder.<br />
www.sxsevents.co.uk<br />
Operation 11
4 Pull the tab away from the fixture base to select the textured glass, push it<br />
towards the fixture to select the etched gobo position.<br />
and Phone: courtesy Audio-Visual 0870 of 080 Services 2342<br />
mail: www.sxsevents.co.uk<br />
enquiries@sxsevents.co.uk<br />
5 Tighten the thumb screw.<br />
6 Replace the fixture cover and tighten the access screws, taking care not to<br />
trap any loose wires.<br />
7 Adjust the focus (see —Focusing the <strong>Ego</strong>“ on page 11).<br />
OPERATION WITH THE OPTIONAL<br />
REMOTE CONTROL<br />
The (separately orderable) remote control can<br />
be used to simulations control multiple <strong>Ego</strong><br />
fixtures that are connected (see —Linking multiple<br />
<strong>Ego</strong>s for simultaneous control“ on page 9).<br />
A LAMP ON/OFF button is used to turn the<br />
fixtures on and off.<br />
A combined dimmer and intensity dial is used to<br />
set the intensity of the light and the<br />
aggressiveness of the effect, regardless of which<br />
trig mode is set. When the dial is set at the<br />
beginning of the Dynamic scale, the fixture will<br />
react relatively passively, and the level of<br />
aggressiveness will increase the further<br />
clockwise that the dial is wound.<br />
www.sxsevents.co.uk<br />
12 <strong>Ego</strong> user manual
and Audio-Visual Services<br />
mail: www.sxsevents.co.uk<br />
enquiries@sxsevents.co.uk<br />
5<br />
BASIC Phone: courtesy SERVICE 0870 of 080 2342<br />
This chapter describes the maintenance procedures that you can perform<br />
yourself:<br />
• Cleaning (see below)<br />
• Lamp maintenance (see page 14)<br />
• Replacing fuses (see page 15)<br />
• Gobo replacement/removal (see page 16)<br />
• Updating firmware (se page 16)<br />
CLEANING<br />
Regular cleaning of the elements in the optical path, as well as the fans<br />
and air vents, is vital to maintaining the operational quality of the <strong>Ego</strong>.<br />
Important!<br />
Excessive dust, smoke fluid, and particulate buildup degrades<br />
performance and causes overheating and damage to the<br />
fixture that is not covered by the warranty.<br />
Cleaning the fan and air vents<br />
To maintain adequate cooling, dust must be cleaned from the fan and air<br />
vents periodically. Remove dust from the fan and air vents with a soft<br />
brush, cotton swab, vacuum, or compressed air.<br />
Cleaning optical components<br />
Clean the optical components regularly. The presence of smudges or dust<br />
on optical surfaces can reduce the strength of the light output and the<br />
quality of the effects.<br />
Use care when cleaning optical components and work in a clean, well lit<br />
area. The coated surfaces are fragile and easily scratched. Do not use<br />
solvents that can damage plastic or painted surfaces.<br />
www.sxsevents.co.uk<br />
Basic service 13
1 Disconnect the fixture from power and allow the components to cool<br />
completely.<br />
and Phone: courtesy Audio-Visual 0870 of 080 Services 2342<br />
2 Remove the fixture cover. You may want to remove the lamp for cleaning<br />
(see the related steps in —Installing a lamp in the <strong>Ego</strong>“ on page 14).<br />
3 Vacuum or gently blow away dust and loose particles with compressed air.<br />
mail: www.sxsevents.co.uk<br />
enquiries@sxsevents.co.uk<br />
4 Remove stuck particles with an unscented tissue or cotton swab<br />
moistened with glass cleaner or distilled water. Do not rub the surface: lift<br />
the particles off with a soft repeated press.<br />
5 Remove smoke and other residues with cotton swabs or unscented<br />
tissues moistened with isopropyl alcohol. A commercial glass cleaner may<br />
be used, but residues must be removed with distilled water. Clean with a<br />
slow circular motion from center to edge. Dry with a clean, soft and lintfree<br />
cloth or compressed air.<br />
6 Replace the fixture cover and tighten the access screws, taking care not to<br />
trap any loose wires.<br />
LAMP MAINTENANCE<br />
The following lamp types are supported:<br />
• Philips ELC/5H, 24 V / 250 W, 500 hour halogen lamp (included)<br />
• Osram ELC-7/X, 24 V / 250 W, 700 hour halogen lamp<br />
• Philips ELC/8H, 24 V / 250 W, 800 hour halogen lamp<br />
• Osram ELC, 24 V / 250 W, 50 hour halogen lamp<br />
Installing any other lamp may damage the fixture!<br />
Allow the lamp to cool for at least 5 minutes before packing and moving<br />
the fixture. To avoid possible damage, remove the lamp when shipping the<br />
fixture.<br />
Warning!<br />
Always disconnect the fixture from AC power and allow it to<br />
cool for 5 minutes before installing the lamp.<br />
Installing a lamp in the <strong>Ego</strong><br />
1 Disconnect the fixture from AC power. If replacing a lamp, allow it to cool<br />
for at least 5 minutes before removing the lamp-access cover. The lamp<br />
cools faster with the cover in place. It can take up to 15 minutes for the<br />
fixture to cool completely.<br />
2 Remove the six access screws from the cover and lift it off.<br />
www.sxsevents.co.uk<br />
14 <strong>Ego</strong> user manual
3 If replacing a lamp, grasp the old<br />
lamp by the reflector and pull it out<br />
of the holder. Then pull the socket<br />
courtesy off the lamp. Do not pull of the wires.<br />
4 Push the socket fully onto the pins<br />
www.sxsevents.co.uk<br />
of the new lamp.<br />
5 Clean the glass bulb with the cloth<br />
supplied with the lamp,<br />
particularly if your fingers touched<br />
the glass. A clean, lint-free cloth<br />
wetted with alcohol may also be<br />
used.<br />
and Phone: Audio-Visual 0870 080 Services 2342<br />
mail: enquiries@sxsevents.co.uk<br />
6 Gently push the lamp into the<br />
holder until it snaps into place.<br />
7 Replace the fixture cover and<br />
tighten the access screws, taking care not to trap any loose wires.<br />
FUSES<br />
The <strong>Ego</strong> uses a time-delay fuse for protection against current overload.<br />
An indication that the fuse may have blown is that when power is applied<br />
the lamp does not light and the fan does not operate.<br />
If the fuse blows repeatedly, there is a fault with the unit that requires<br />
service by a <strong>Martin</strong> technician.<br />
Never bypass the fuse or replace it with one of another size or rating.<br />
Replacing the main fuse<br />
1 Unplug the mains cable from the<br />
input socket.<br />
2 Remove the six access screws from<br />
the cover and lift it off<br />
3 The fuse can be found on the circuit<br />
board, a diagram of which can be<br />
found on the inside of the fixture<br />
cover. Use this to locate the fuse.<br />
4 Remove the fuse and replace the<br />
fuse with one of the same type. The<br />
fuse rating is listed on the serial<br />
number label that can be found on<br />
the back of the fixture.<br />
www.sxsevents.co.uk<br />
Basic service 15
5 Replace the fixture cover and tighten the access screws, taking care not to<br />
trap any loose wires.<br />
and Phone: courtesy Audio-Visual 0870 of 080 Services 2342<br />
mail: www.sxsevents.co.uk<br />
enquiries@sxsevents.co.uk<br />
GOBO REPLACEMENT OR REMOVAL<br />
(EGO 2)<br />
You can replace (or remove) the etched gobo in an <strong>Ego</strong> 2 with another<br />
aluminium gobo that has:<br />
• An outside diameter of 22.5 mm + 0/- 0.3 mm (0.886 in. +0/- 0.012 in)<br />
• A maximum image diameter of 17 mm (0.669 in)<br />
• A maximum thickness of 1.8 mm (0.071 in)<br />
To replace (or remove) the gobo:<br />
1 Unplug the mains cable from the input socket.<br />
2 Remove the six access screws from the cover and lift it off. The gobo<br />
holder is located between the lamp and the mirror dish.<br />
3 Remove the thumb screw on the gobo holder and lift it out to access the<br />
interchangeable gobo holder.<br />
4 The currently installed gobo can be pressed out of the holder gently with<br />
your thumb.<br />
5 If you a replacing the gobo, create a gap using a flat head screwdriver,<br />
and place the new gobo in the holder.<br />
6 Return the gobo holder to its normal position.<br />
7 Replace and tighten the thumb screw.<br />
8 Replace the fixture cover and tighten the access screws, taking care not to<br />
trap any loose wires.<br />
FIRMWARE UPDATES<br />
The factory installed firmware version is indicated on the serial number<br />
label.<br />
Firmware is installed using a <strong>Martin</strong> AVR Uploader and a PC. To install the<br />
firmware update, prepare the AVR Uploader as described in its user<br />
manual, connect the uploader to the AVR Upload socket on the control<br />
panel, and apply power to the fixture. See the AVR user manual for more<br />
information.<br />
www.sxsevents.co.uk<br />
16 <strong>Ego</strong> user manual
and Audio-Visual Services<br />
mail: www.sxsevents.co.uk<br />
enquiries@sxsevents.co.uk<br />
6<br />
TROUBLESHOOTING Phone: courtesy 0870 of 080 2342<br />
problem probable cause(s) suggested remedy<br />
No light No power to the fixture Check connections<br />
No action<br />
Blown fuse<br />
Burned out lamp<br />
Fixture to hot<br />
Sound too low to activate<br />
control circuit<br />
Electrical malfunction<br />
If fan does not function<br />
either then check and<br />
replace fuse if necessary.<br />
Install new lamp<br />
Allow to cool<br />
Improve air flow around<br />
fixture<br />
Increase volume<br />
Move speakers closer<br />
Refer to service technician<br />
Fuse blows repeatedly Electrical malfunction Refer to service technician<br />
www.sxsevents.co.uk<br />
Troubleshooting 17
A<br />
and SPECIFICATIONS Phone: courtesy Audio-Visual 0870 of 080 Services 2342<br />
mail: www.sxsevents.co.uk<br />
enquiries@sxsevents.co.uk<br />
PHYSICAL<br />
Size without standard bracket (L x W x H) 305 x 324 x 150 mm (12 x 12.8 x 5.9 in)<br />
Weight . . . . . . . . . . . . . . . . . . . . . . . . . . . . . . . . . . . . . . . . . . . . . . . . 3.8 kg (8.4 lb)<br />
CONSTRUCTION<br />
Housing . . . . . . . . . . . . . . . . . . . . . . . . . . . . . . . . . . . . . . . . . . . . . composite plastic<br />
Finish. . . . . . . . . . . . . . . . . . . . . . . . . . . . . . . . . . . . . . . . . . . . . . . . . . . . . . . . .black<br />
THERMAL<br />
Maximum ambient temperature (T a ) . . . . . . . . . . . . . . . . . . . . . . . . . 40° C (104° F)<br />
INSTALLATION<br />
Minimum distance to combustible materials . . . . . . . . . . . . . . . . . . . . . 0.1 m (4 in)<br />
Minimum distance to illuminated surfaces. . . . . . . . . . . . . . . . . . . . . . 0.3 m (12 in)<br />
Minimum clearance around fan and air vents . . . . . . . . . . . . . . . . . . . . .0.1 m (4 in)<br />
CONTROL AND PROGRAMMING<br />
Stand-alone triggers . . . . . . . . . . . . . . . . . . . . . . . . . . . . . . . . . . . . . . music or auto<br />
ELECTRICAL<br />
Input . . . . . . . . . . . . . . . . . . . . . . . . . . . . . . . . . . . . . . . . . 3-prong IEC male socket<br />
AC Power . . . . . . . . . . . . . . . . . . . . . auto-ranging 90-130 V / 200-250 V, 50-60 Hz<br />
Power and current consumption (@ 230 V, 50 Hz). . . . . . . . . . . . . . . . . 240 W, 1 A<br />
Power and current consumption (@ 110 V, 60 Hz) . . . . . . . . . . . . . . . . 250 W 2.2 A<br />
Main fuse. . . . . . . . . . . . . . . . . . . . . . . . . . . . .3.15 A T (time delay), P/N 05020013<br />
ACCESSORIES<br />
<strong>Ego</strong> remote control . . . . . . . . . . . . . . . . . . . . . . . . . . . . . . . . . . . . . . P/N 91611055<br />
Osram ELC-7/X, 24 V / 250 W, 700 hour halogen lamp . . . . . . . . . . P/N 97000108<br />
Philips ELC/5H, 24 V / 250 W, 500 hour halogen lamp. . . . . . . . . . . P/N 97000107<br />
Osram ELC, 24 V / 250 W, 50 hour halogen lamp . . . . . . . . . . . . . . P/N 97000104<br />
Half-coupler clamp . . . . . . . . . . . . . . . . . . . . . . . . . . . . . . . . . . . . . . P/N 91602005<br />
www.sxsevents.co.uk<br />
18 <strong>Ego</strong> user manual