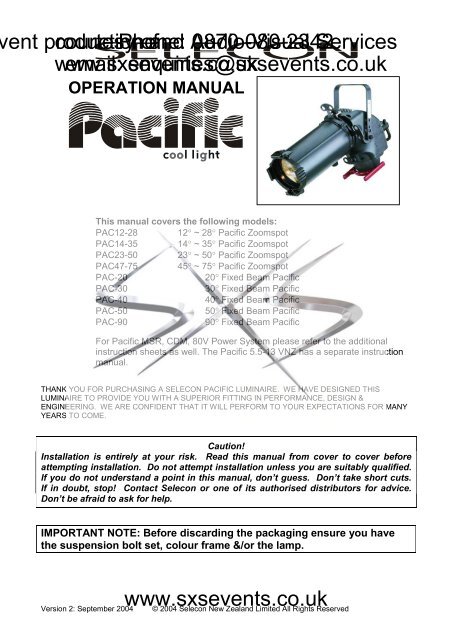
Lighting - Selecon Pacific Profile Manual - SXS Events
Lighting - Selecon Pacific Profile Manual - SXS Events
Lighting - Selecon Pacific Profile Manual - SXS Events

Create successful ePaper yourself
Turn your PDF publications into a flip-book with our unique Google optimized e-Paper software.
ent production courtesy Phone: of and Audio-Visual 0870 080 2342 Services<br />
www.sxsevents.co.uk<br />
email: enquiries@sxsevents.co.uk<br />
OPERATION MANUAL<br />
This manual covers the following models:<br />
PAC12-28 12° ~ 28° <strong>Pacific</strong> Zoomspot<br />
PAC14-35 14° ~ 35° <strong>Pacific</strong> Zoomspot<br />
PAC23-50 23° ~ 50° <strong>Pacific</strong> Zoomspot<br />
PAC47-75 45° ~ 75° <strong>Pacific</strong> Zoomspot<br />
PAC-20<br />
20° Fixed Beam <strong>Pacific</strong><br />
PAC-30<br />
30° Fixed Beam <strong>Pacific</strong><br />
PAC-40<br />
40° Fixed Beam <strong>Pacific</strong><br />
PAC-50<br />
50° Fixed Beam <strong>Pacific</strong><br />
PAC-90<br />
90° Fixed Beam <strong>Pacific</strong><br />
For <strong>Pacific</strong> MSR, CDM, 80V Power System please refer to the additional<br />
instruction sheets as well. The <strong>Pacific</strong> 5.5-13 VNZ has a separate instruction<br />
manual.<br />
THANK YOU FOR PURCHASING A SELECON PACIFIC LUMINAIRE. WE HAVE DESIGNED THIS<br />
LUMINAIRE TO PROVIDE YOU WITH A SUPERIOR FITTING IN PERFORMANCE, DESIGN &<br />
ENGINEERING. WE ARE CONFIDENT THAT IT WILL PERFORM TO YOUR EXPECTATIONS FOR MANY<br />
YEARS TO COME.<br />
Caution!<br />
Installation is entirely at your risk. Read this manual from cover to cover before<br />
attempting installation. Do not attempt installation unless you are suitably qualified.<br />
If you do not understand a point in this manual, don’t guess. Don’t take short cuts.<br />
If in doubt, stop! Contact <strong>Selecon</strong> or one of its authorised distributors for advice.<br />
Don’t be afraid to ask for help.<br />
IMPORTANT NOTE: Before discarding the packaging ensure you have<br />
the suspension bolt set, colour frame &/or the lamp.<br />
Version 2: September 2004<br />
www.sxsevents.co.uk<br />
© 2004 <strong>Selecon</strong> New Zealand Limited All Rights Reserved
<strong>Pacific</strong> Operation <strong>Manual</strong> 2<br />
ent production courtesy Phone: of and Audio-Visual 0870 080 2342 Services<br />
Important!<br />
www.sxsevents.co.uk<br />
email: enquiries@sxsevents.co.uk<br />
Read this manual from cover to cover before attempting to install, operate or maintain the luminaires to which<br />
it relates. It contains important installation, operating, maintenance and safety procedures. The customer must<br />
strictly comply with them.<br />
Along with such procedures mentioned in this document, the customer should also observe such other<br />
procedures generally applicable to lighting equipment.<br />
Follow the instructions in this manual carefully. <strong>Selecon</strong> accepts no responsibility if the customer fails to do<br />
so.<br />
For each customer, operating conditions will vary, sometimes greatly. Such variations may affect the<br />
luminaires’ performance. <strong>Selecon</strong> has no control over the customer’s unique operating environment. Hence,<br />
<strong>Selecon</strong> makes no representations or warranties concerning the luminaires’ performance under the<br />
customer’s actual operating conditions. All operating parameters must be validated for each customer<br />
application by the customer’s technical experts.<br />
If the customer does not follow the installation, operating, maintenance and safety procedures in this manual,<br />
as well as those generally applicable to lighting equipment, the luminaire may not perform as expected. More<br />
seriously, it may cause property damage, personal injury or other losses.<br />
<strong>Selecon</strong> accepts no liability for direct, indirect, incidental, special, or consequential damages resulting from the<br />
customer’s failure to follow the installation, operating, maintenance and safety procedures in this manual or<br />
those generally applicable to lighting equipment. The foregoing limitation extends to damages for personal<br />
injury, property damage, loss of operations, loss of profits, loss of product or loss of time, whether incurred by<br />
the customer, the customer’s employees or a third party.<br />
<strong>Selecon</strong> used all due care in preparing this manual. However, <strong>Selecon</strong> accepts no liability for errors or<br />
omissions. <strong>Selecon</strong> reserves the right to change the specifications of its luminaires, or the information in this<br />
manual, without necessarily giving its customers notice thereof.<br />
Installation, operation and maintenance are entirely at the customer’s risk.<br />
<strong>Selecon</strong>’s luminaires should be installed, operated and maintained by suitably qualified personnel. Such<br />
personnel should have previous experience with lighting equipment as well as general electrical experience.<br />
This manual is intended to provide general guidance to such suitably qualified personnel. For specific<br />
guidance and technical support, contact <strong>Selecon</strong> or its authorised representative.<br />
Information in this manual shall not be deemed a warranty, representation or guarantee concerning a<br />
luminaires’ suitability or fitness for a specific purpose.<br />
Subject to the right to use its luminaires, <strong>Selecon</strong> does not convey any right, title or interest in its intellectual<br />
property, including, without limitation, its patents, copyrights and know-how.<br />
Version 2: September 2004<br />
www.sxsevents.co.uk<br />
2<br />
© 2004 <strong>Selecon</strong> New Zealand Limited All Rights Reserved
<strong>Pacific</strong> Operation <strong>Manual</strong> 3<br />
ent production courtesy Phone: of and Audio-Visual 0870 080 2342 Services<br />
www.sxsevents.co.uk<br />
email: enquiries@sxsevents.co.uk<br />
Lamp module GKV 600/800W Lamp Module 80V 1200W Lamp Module BP1000W Lamp Module CDM 150<br />
…………..Blue Handle Red Handle Black Handle<br />
The <strong>Pacific</strong> is a new concept in luminaires. Please read this information carefully to<br />
ensure that you are fully conversant with its operation.<br />
Safety Warnings 4<br />
Operating your luminaire for the first time 4<br />
Centering the lamp 5<br />
Optimising the output 6<br />
Lamps 6<br />
Mounting your luminaire 7<br />
To mount on a theatre standard scaffold pipe 7<br />
To mount on a telescopic stand 7<br />
Adjustable Yoke 7<br />
Operating your luminaire 8<br />
Pan and Tilt Adjustment 8<br />
Focusing <strong>Pacific</strong> Zoomspot models 8<br />
Focusing <strong>Pacific</strong> Fixed Beam <strong>Profile</strong>s 8<br />
Shutter System 8<br />
Accessory mounting positions 9<br />
Rotatable Lens tube 10<br />
Interchangeable lens assemblies 10<br />
Colour Filter Life 10<br />
Safe Practice 11<br />
Rigging Check-list 11<br />
Maintenance 11<br />
Safety 12<br />
Limited Warranty 13<br />
Accessories and codes 13<br />
Contacting <strong>Selecon</strong> 13<br />
Spare Parts Diagram 14<br />
Version 2: September 2004<br />
www.sxsevents.co.uk<br />
3<br />
© 2004 <strong>Selecon</strong> New Zealand Limited All Rights Reserved
<strong>Pacific</strong> Operation <strong>Manual</strong> 4<br />
ent production courtesy Phone: of and Audio-Visual 0870 080 2342 Services<br />
Safety Warnings<br />
D<br />
www.sxsevents.co.uk<br />
email: enquiries@sxsevents.co.uk<br />
Not for residential use.<br />
CAUTION: Hot Surfaces, Avoid contact by persons or materials.<br />
The <strong>Pacific</strong> has some hot surfaces. Be careful to avoid burns. Take care with the<br />
lamphouse and heat-sink. We suggest the use of leather gloves when focusing these<br />
luminaires.<br />
SAFETY - Mains Power Isolation<br />
The <strong>Pacific</strong> range is fitted with a micro-switch that automatically disconnects the mains<br />
power when the lamp holder is removed. However, it is also recommended that the<br />
luminaire should always be electrically isolated from mains power before re-lamping,<br />
cleaning or servicing.<br />
CAUTION: Risk of fire - Use with maximum 1000 watt lamp<br />
CAUTION: For the 575W MSR model <strong>Pacific</strong>, use only a high-pressure lamp of the proper<br />
size and type in this lamp system.<br />
These luminaires are not suitable for mounting on a normally flammable surface<br />
These luminaires are not suitable for outdoor use. They are rated at IP00<br />
The luminaire should be at least 1.0 metre away from the nearest object it is lighting.<br />
1.0m<br />
= 90 o The <strong>Pacific</strong> range can be operated only through a range of angles 90° either side of<br />
horizontal.<br />
Operating your luminaire for the first time<br />
When first opening the packing box for your luminaire,<br />
please note that the lamp holder module is mounted to the<br />
lamphouse. Before inserting a lamp into the module, we<br />
suggest that you practice the motion of removing and<br />
inserting the lamp holder module from the lamphouse.<br />
Rear Lip<br />
2<br />
1<br />
Front'T'<br />
Loosen the thumb-screw at the front of the lamp holder<br />
module by about 5mm. Holding the lamp holder module by<br />
the Handle, slide it forward until both the rear lip and the<br />
front 'T' of the lamp holder module clear their home<br />
positions. Reverse this action to replace the lamp holder and<br />
then tighten the thumb-screw to lock the lamp holder module<br />
into position.<br />
Version 2: September 2004<br />
www.sxsevents.co.uk<br />
4<br />
© 2004 <strong>Selecon</strong> New Zealand Limited All Rights Reserved
<strong>Pacific</strong> Operation <strong>Manual</strong> 5<br />
ent production courtesy Phone: of and Audio-Visual 0870 080 2342 Services<br />
Familiarise yourself with the way the Lens Tube can be rotated by loosening the lens tube locking clamp and<br />
turning www.sxsevents.co.uk<br />
email: the tube. Note how enquiries@sxsevents.co.uk<br />
the colour frames are locked into the front of the lens tube with the colour frame<br />
locking clip and plunger.<br />
The <strong>Pacific</strong> provides for mounting 2 gobo holders. Practice inserting them into both the front and rear position<br />
as it is easier to familiarise yourself with something new while it is on the ground rather than up in the air.<br />
Lamp Replacement & adjustment:<br />
Isolate electrically before re-lamping the luminaire. Also be aware that the lamp or luminaire may still<br />
be hot, so exercise necessary caution to avoid burns.<br />
To ensure optimum performance from your <strong>Pacific</strong> luminaire, follow the steps below:<br />
Centering the lamp<br />
1<br />
2<br />
Remove the lamp holder module as described above.<br />
Set the level of the metal cup holding the lamp base. The metal cup has a line around it. This level is<br />
factory set to the optimum position, and the luminaire output is then confirmed with test equipment.<br />
The optimum position has the line level with the edge of the module.<br />
3<br />
4<br />
5<br />
6<br />
First level the cup with the edge of the module by adjusting the three levelling screws. Then set to the<br />
correct height as detailed above.<br />
Remove the old lamp. Align the pins of the new lamp to the correct holes and push the lamp firmly<br />
home. Do not touch the quartz envelope of the lamp with your fingers - use the plastic or paper<br />
sheath supplied to insert the lamp.<br />
Carefully replace the lamp holder module and tighten the thumbscrew to lock it into position.<br />
Reconnect the luminaire to the power supply.<br />
Turn on the luminaire to approximately 30%. This makes the peak easier to see, and reduces the<br />
stress on the filament. Set the beam angle to its widest with a sharp edge.<br />
Centre the lamp in the middle of the beam if necessary, by adjusting the three levelling screws.<br />
Version 2: September 2004<br />
www.sxsevents.co.uk<br />
5<br />
© 2004 <strong>Selecon</strong> New Zealand Limited All Rights Reserved
<strong>Pacific</strong> Operation <strong>Manual</strong> 6<br />
ent production courtesy Phone: of and Audio-Visual 0870 080 2342 Services<br />
Optimising the output<br />
The lamp position can be altered to 'peak' or 'Flat' light output. The peak<br />
beam gives a central hot spot falling off evenly to the beam edges. This<br />
setting is useful for normal stage lighting purposes where beams are<br />
overlapped to achieve an even cover. Flat adjustment provides a visually<br />
even light beam suitable for gobo projection. Take care to move the lamp<br />
carefully as the lamp filament is burning white hot and at its most vulnerable.<br />
Don't over-tighten the knobs, finger tight pressure is all that is required.<br />
1 Adjust the beam to its narrow angle, with a sharp edge.<br />
2<br />
3<br />
4<br />
5<br />
www.sxsevents.co.uk<br />
email: enquiries@sxsevents.co.uk<br />
Peak the output (turn the centre gear clockwise) until you see light<br />
flare around the edge of the beam.<br />
Turn the centre gear anti-clockwise until the flare is removed and<br />
you have a clean sharp-edged beam. This is the position of<br />
maximum light output.<br />
Lamp tilt gear<br />
Peak-Flat gear<br />
A useful technique to check how well the lamp is centred is to push two of the shutters into the beam,<br />
and then check if any reflection off the shutters is visible in the beam. If so, adjust the screw on the<br />
side opposite to the reflection until it disappears.<br />
To set a ‘FLAT’ beam, turn the centre gear anti-clockwise until the distribution appears even across<br />
the beam.<br />
Lamps<br />
The <strong>Pacific</strong> range is available with 5 different lamp holder modules.<br />
The lamp holder module with a RED handle has a GY9.5 type for use with BP1000W 'Blue-pinch' type lamps<br />
or 650W lamps. Lamps suitable for this module include:<br />
GAD 1000W Blue Pinch, 220-240V GAB 1000W Blue Pinch, 230V<br />
GAC 1000W Blue Pinch, 115V<br />
M38 300W, 2000 hrs M40 500W, 2000 hrs<br />
T/25, T/18 500W, 500 hrs T/26, T/27 650W, 500 hrs<br />
The lamp holder with a BLUE handle has a TP-22 (G9.5) Lampbase and is designed to run with GKV600<br />
range of lamps. Lamps suitable for this module include:<br />
GKV: 600W 220V -240V, 300 hour GLB: 600W, 240V, 1500 hrs<br />
GLC: 575W, 115V, 300 hour GLA: 575W, 115V, 1500 hrs<br />
GKV: 800W 220V -240V, 300 hour<br />
Important note: The GKV range of lamps uses a very compact filament in order to achieve its highly efficient<br />
output. For this reason, the lamp filaments are close to each other and are therefore sensitive to shocks.<br />
Great care should be taken when adjusting the lamp and focusing the luminaire to avoid shocks.<br />
For information on the 80V 1200W lamp module, 575 MSR lamp module, and 150w CDM lamp module,<br />
please refer the separate instruction sheets.<br />
Important Note: The quoted performance figures are achieved with Philips lamps. Other manufacturers<br />
lamps can be used, but no assumptions should be made as to relative performance.<br />
Please refer to the instructions of the lamp manufacturer when disposing of failed lamps.<br />
Version 2: September 2004<br />
www.sxsevents.co.uk<br />
6<br />
© 2004 <strong>Selecon</strong> New Zealand Limited All Rights Reserved
<strong>Pacific</strong> Operation <strong>Manual</strong> 7<br />
ent production courtesy Phone: of and Audio-Visual 0870 080 2342 Services<br />
www.sxsevents.co.uk<br />
email: enquiries@sxsevents.co.uk<br />
Mounting your luminaire<br />
A Safety Bond MUST always be used when rigging<br />
luminaires on bars, ladders, etc. The safety bond is<br />
passed through the luminaire lamp-house anchor ring<br />
located at the rear of the luminaire and around the bar.<br />
This is the only recommended anchor point for the<br />
luminaire. Be careful to allow sufficient slack to allow the<br />
luminaire to be focused freely.<br />
Extra safety bond attachment points have also been provided<br />
for accessories, etc, on the lens tube and on the lamp-holder<br />
handle. Safety bonds are available from <strong>Selecon</strong> or your<br />
distributor.<br />
The <strong>Pacific</strong> uses universal burning position lamps. When<br />
possible however, it is considered best practice to mount the<br />
luminaire so the yoke is horizontal and with the lamp base<br />
down. Please note also that the maximum tilt angles of the<br />
luminaire are 90 either side of horizontal.<br />
To mount on a theatre standard scaffold pipe<br />
(48mm O.D.) Use a theatre hookclamp (Order Code: 20HC).<br />
Your luminaire is supplied with an M12 (or ½” for the US) set<br />
screw, two washers and a nut. Pass the set screw through the<br />
yoke hole from the inside, put on a washer, then the<br />
hookclamp, another washer and then tighten the nut.<br />
To mount on a telescopic stand<br />
Loosen the yoke mounting bolts. Slide the yoke forward along<br />
the lens tube until the yoke can be reversed under the<br />
luminaire. Reverse the yoke and slide back along the lens tube.<br />
Tighten the yoke mounting bolts and bolt the stand's spigot onto<br />
the set screw. (Stand Order Code: STDTH)<br />
Adjustable Yoke<br />
To enable the <strong>Pacific</strong> VNZ to be balanced, the yoke can be<br />
adjusted along the length of the barrel. Loosen the yoke<br />
mounting bolts. Slide the yoke forward or backwards until the<br />
desired balance point is achieved. Tighten the yoke mounting<br />
bolts. This operation is best done when initially setting up<br />
the luminaire.<br />
D<br />
1.0m<br />
: The Luminaire should be at least 1.0 metre<br />
away from the nearest object it is lighting.<br />
Version 2: September 2004<br />
www.sxsevents.co.uk<br />
7<br />
© 2004 <strong>Selecon</strong> New Zealand Limited All Rights Reserved
<strong>Pacific</strong> Operation <strong>Manual</strong> 8<br />
ent production courtesy Phone: of and Audio-Visual 0870 080 2342 Services<br />
www.sxsevents.co.uk<br />
email: enquiries@sxsevents.co.uk<br />
Operating your luminaire<br />
Please note that as the Handles and knobs on the <strong>Pacific</strong> range can reach high temperatures<br />
depending on the position or orientation of the luminaire, and that gloves should always be worn<br />
when focusing these luminaires.<br />
Pan and Tilt Adjustment<br />
To pan the luminaire, loosen the nut at the top of the yoke and adjust, then retighten. To tilt, loosen the<br />
locking clamp handle on the side of the luminaire, tilt and retighten finger tight. Note that the maximum tilt<br />
angles for the <strong>Pacific</strong> are 90° either side of horizontal.<br />
Focusing <strong>Pacific</strong> Zoomspot models<br />
The beam of the <strong>Pacific</strong> can be adjusted to a well controlled softedged<br />
focus useful when merging one beam to the next, or to a<br />
hard-edged focus useful for projections, specials, etc. The<br />
variable beam of your <strong>Pacific</strong> luminaire is altered by adjusting the<br />
front or rear lens in relation to each other. The front lens defines<br />
the beam spread; the rear, the focus degree of "softness" or<br />
"sharpness" of the beam edge or shutters.<br />
To focus your zoomspot, first define the beam size required using<br />
the front lens. Then set the hardness/ softness of the beam with<br />
the focus lens.<br />
Finger tight pressure only is necessary to lock the lens off in their<br />
chosen positions.<br />
Focus<br />
Zoom<br />
Focusing <strong>Pacific</strong> Fixed Beam <strong>Profile</strong>s<br />
The beam angle is defined (20, 30, 40, 50 or 90 depending on the model), the lens (two in the case of the 90°<br />
model) can be moved to adjust the beam to in focus (sharp), or out of focus (soft). A scale is moulded into the<br />
bottom of the lens tube. The ‘scale’ allows you to record your preferred beam settings. The following colour<br />
coded lens holders and knobs are used to indicate the various beam angles:<br />
20 degree: RED 40 degree: GREY 90 degree: BLACK<br />
30 degree: BROWN 50 degree: BLUE with short lens tube<br />
To set a soft focus, move the lens forward of the hard focus position. Note: If you move it too far, the beam will<br />
become unusable and may cause the colour filter to burn.<br />
Shutter System<br />
The shutters are used to mask a portion of the beam, shaping it, masking light off scenery, curtains, etc. Note<br />
that on the <strong>Pacific</strong> range of luminaires, the shutters are not removable.<br />
NOTE: Do not run the luminaire with all the shutters closed, as this may cause the luminaire to overheat<br />
Version 2: September 2004<br />
www.sxsevents.co.uk<br />
8<br />
© 2004 <strong>Selecon</strong> New Zealand Limited All Rights Reserved
<strong>Pacific</strong> Operation <strong>Manual</strong> 9<br />
ent production courtesy Phone: of and Audio-Visual 0870 080 2342 Services<br />
www.sxsevents.co.uk<br />
email: enquiries@sxsevents.co.uk<br />
Accessory mounting positions<br />
The <strong>Pacific</strong> range provides good image projection right across the beam. The rotatable gobo holder comprises<br />
the holder and a spring clip to hold the pattern flat against the holder. The holder can be rotated in the slot to<br />
align the image as required on the stage.<br />
NOTE: The <strong>Pacific</strong> range has several different pattern holders:<br />
19PACGHM<br />
19PACGHMG<br />
19ACGHA<br />
19ACGHAG<br />
19ACGHB<br />
19ACGHBG<br />
19PACGHPLPH<br />
For 'M' size patterns used in the 12-28 and 5.5-13 Zoomspot<br />
For 'M' size Glass patterns used in the 12-28 and 5.5-13 Zoomspot<br />
For 'A' size patterns used in the 23-50 and fixed beams<br />
For 'A' size Glass patterns used in the 23-50 and fixed beams<br />
For 'B' size patterns – available for use with all (see note below) but the 14-35 has been<br />
specifically designed to take a B size pattern<br />
For 'B' size patterns – available for use with all (see note below) but the 14-35 has been<br />
specifically designed to take a B size pattern<br />
For plastic transparencies<br />
Note that when a ‘B’ size gobo is used in the 12-28 Zoomspot, only 60% of the image area will be projected<br />
due to the 50mm (2”) gate size. When a ‘B’ size gobo is used in a 23-50 or 45-75 zoom or fixed beam unit,<br />
part of the light beam will be wasted.<br />
A unique feature of the <strong>Pacific</strong> range is the ability to use plastic transparencies for projection instead of<br />
conventional steel or glass gobos. This can only be done if the <strong>Pacific</strong> is configured correctly. For detailed<br />
information please refer to our website : www.seleconlight.com/english/support/gobos-desktop.com<br />
The <strong>Pacific</strong> provides for mounting 2 gobo holders, one forward<br />
of, and the other behind the shutter assembly.<br />
The front mounting slot will house:<br />
•<br />
•<br />
•<br />
A <strong>Selecon</strong> rotatable pattern holder<br />
An adjustable Iris<br />
A motorised Gobo holder (eg Rosco/ DHA)<br />
The rear slot will house a <strong>Selecon</strong> rotatable pattern holder<br />
To fit an accessory in the front mounting slot<br />
Slide the gobo slot cover forward to reveal the Aperture. Slide the accessory in front of the shutter plate, into<br />
the moulding slot. Ensure the pattern spring clip faces to the front of the luminaire. Slide the gobo slot cover<br />
back into place to lock in the accessory.<br />
To fit an accessory in the rear mounting slot<br />
Slide the pattern holder against the rear shutter plate into the moulding slot. The pattern spring clip must face<br />
the rear of the luminaire. Push the pattern holder home firmly so the dimple sits under the moulding lip,<br />
ensuring it can’t fall out.<br />
Version 2: September 2004<br />
www.sxsevents.co.uk<br />
9<br />
© 2004 <strong>Selecon</strong> New Zealand Limited All Rights Reserved
<strong>Pacific</strong> Operation <strong>Manual</strong> 10<br />
ent To production insert courtesy an Iris Phone: of and Audio-Visual 0870 080 2342 Services<br />
www.sxsevents.co.uk<br />
email: enquiries@sxsevents.co.uk<br />
To mount the Iris (20IRIS), slide into the front mounting slot and push to the bottom of the slot. Slide the slot<br />
cover back to lock the Iris into position. If the slot cover is not pushed back, the Iris will be loose in the<br />
mounting slots, causing potential focus or imaging problems.<br />
Rotatable Lens tube<br />
The lens tube can be rotated to position the shutters for the best cut, or to move the focus knobs into an<br />
optimum operating position.<br />
1.<br />
2.<br />
3.<br />
4.<br />
Check that the colour frame clip is closed, securing the colour frame accessory. Ensure any pattern<br />
holders or Iris/ accessory is secured in the gate mounting slots (refer above)<br />
Loosen the top lens tube clamp<br />
Rotate the lens tube to the required position<br />
Screw the lens tube locking clamp back into position to secure the lens tube.<br />
Interchangeable lens assemblies<br />
For the <strong>Pacific</strong> fixed beam and 23-50 zoom models the lens assemblies are interchangeable so you can, for<br />
example, change a 20 luminaire to a 40 luminaire, or 23-50 zoom luminaire. Unscrew the lens assembly knob,<br />
and then slide the plastic lens assembly out of the front of the lens tube. Replace it with the desired beam<br />
angle lens assembly.<br />
Lens assemblies are colour coded as follows:<br />
20 degrees Red 40 degrees Grey<br />
30 degrees Brown 50 degrees Blue<br />
23-50 zoom Front Lens Black 23-50 zoom Rear Lens Black<br />
Colour Filter Life<br />
The <strong>Pacific</strong> optical system has been optimised for maximum colour life in the "useable" range of beam angles.<br />
As the <strong>Pacific</strong> uses very compact filament lamps, and as there are no restrictions as to how far the lenses can<br />
move, it is possible to position a lens in a way that the lenses focus point coincides with the colour filter, thus<br />
causing it to rapidly deteriorate. The beam of light at these lens positions is not useable. With the <strong>Pacific</strong> fixed<br />
beam Models, gel life can be maximised by using the optimised peak/flat setting for each model. We<br />
recommend the following settings to maximise gel life:<br />
20 degree: peak or flat 40 degree: flat 90 degree: flat<br />
30 degree: peak 50 degree: peak or flat<br />
Version 2: September 2004<br />
www.sxsevents.co.uk<br />
10<br />
© 2004 <strong>Selecon</strong> New Zealand Limited All Rights Reserved
<strong>Pacific</strong> Operation <strong>Manual</strong> 11<br />
ent production courtesy Phone: of and Audio-Visual 0870 080 2342 Services<br />
Safe Practice<br />
Heat<br />
www.sxsevents.co.uk<br />
email: enquiries@sxsevents.co.uk<br />
The <strong>Pacific</strong> incorporates an innovative design to effectively remove the heat out of the luminaire, away from<br />
the critical heat-sensitive components such as the lamp base and wiring. The components that form part of<br />
the heat removal system, the heat-sink and lamp house, will operate at temperatures which can burn you!!!<br />
Take care in handling the luminaire. We recommend the use of gloves when focusing.<br />
Tilt Lock<br />
Take care when releasing the tilt lock as the luminaire may suddenly swing down. Hold the lens tube with one<br />
hand and release the tilt lock with the other.<br />
Handles<br />
The rear handle on the lamp house is designed to assist positioning of the luminaire during focusing. When<br />
cold, cable can be wrapped around it for storage. Do not operate the <strong>Pacific</strong> with cable wrapped around the<br />
handle.<br />
Carry the luminaire by the Yoke or rear handle, NEVER by the lamp holder handle<br />
The lamp module handle is designed for holding the lamp module when removing and mounting it into the<br />
luminaire. It is not suitable for use during focusing.<br />
Mains Isolation<br />
The <strong>Pacific</strong> range is fitted with a micro-switch that automatically disconnects the mains power when the lamp<br />
holder is removed. However, it is also recommended that the luminaire should always be electrically isolated<br />
from mains power before re-lamping, cleaning or servicing.<br />
Rigging Check-list<br />
When rigging your luminaire check:<br />
•<br />
•<br />
•<br />
•<br />
•<br />
Lens tube clamp is securely screwed home<br />
All safety anchor bonds are fitted<br />
Any accessories are correctly installed and secured<br />
Colour frame retention clip is locked down<br />
Lamp Module is secured in position and its thumb screw is finger tight.<br />
Maintenance<br />
Reflector and Mirror: Unscrew the screw that secures the heat sink into place. Lift out the heat sink. Wipe the<br />
reflector and mirror with a soft cloth to remove accumulated dust. To clean the coated side of the mirror,<br />
remove the lens tube and access through the front opening of the lamphouse. Take care when doing this as<br />
the edges of the opening are sharp. When finished, reverse the above process.<br />
The coated side of the mirror must always face the inside of the luminaire. To determine which side of<br />
the mirror is coated, touch the surface of the mirror with your fingernail. If the reflection in the mirror<br />
is touching you finger nail, then this is the coated side. If the reflection if about 3mm from your finger,<br />
then this is the non-coated side, and should face the heat sink. If you put any fingerprints on the<br />
mirror, do not forget to wipe them clean before replacing the mirror.<br />
Note: severe contamination of the front or rear of the mirror could lead to loss of heat transfer and result in<br />
over heating.<br />
A soft cloth soaked in a mild detergent solution or alcohol can be used to remove dirt from the mirror.<br />
Lens: The assembly can be removed out of the luminaire, clean with a soft cloth. To remove baked-on dust<br />
use a window cleaner.<br />
The above are the only maintenance tasks which can be safely carried out by non approved<br />
personnel. Refer below - Safety & Maintenance note.<br />
Version 2: September 2004<br />
www.sxsevents.co.uk<br />
11<br />
© 2004 <strong>Selecon</strong> New Zealand Limited All Rights Reserved
<strong>Pacific</strong> Operation <strong>Manual</strong> 12<br />
ent production courtesy Phone: of and Audio-Visual 0870 080 2342 Services<br />
Safety<br />
www.sxsevents.co.uk<br />
email: enquiries@sxsevents.co.uk<br />
<strong>Selecon</strong> has manufactured this luminaire in accordance with recognised best practices to recommended<br />
international safety standards. It is your responsibility to maintain this luminaire in good & safe working<br />
condition.<br />
Repairs should only be carried out by suitably qualified persons. Do not operate the luminaire with cracked<br />
lens, damaged cable, etc. Consult your <strong>Selecon</strong> distributor for assistance. Only replace damaged parts with<br />
authorised <strong>Selecon</strong> spares.<br />
N.B. Luminaire Cable - Your <strong>Selecon</strong> luminaire is fitted with special heat resistant flexible cable, replace with<br />
genuine <strong>Selecon</strong> spare part cable kit only - refer to your <strong>Selecon</strong> distributor. (Replacement cables are<br />
supplied complete with necessary terminal connectors.)<br />
Cable Conductor colour codes:<br />
Brown<br />
Blue<br />
Green/Yellow<br />
- Phase, Live<br />
- Neutral<br />
- Earth<br />
Limited Warranty<br />
<strong>Selecon</strong> New Zealand Ltd. (“<strong>Selecon</strong>”) warrants its luminaires against defects in<br />
materials or workmanship. The term of this warranty is based on the product usage<br />
and is from the date of delivery.<br />
Usage – Entertainment, Theatre Term - Three Years<br />
Entertainment, Theatre relates to the typical conditions found in a theatre performance<br />
venue viz:<br />
4 – 6 hrs per day, six days per week.<br />
Usage – Architectural, Display Term - One Year<br />
Architectural, Display relates to typical usage such as display lighting in a Museum<br />
viz:<br />
10 – 12 hrs per day, seven days per week.<br />
Other – ALL Electromechanical / Electronic Devices Term - One Year<br />
This warranty is void in any of the following circumstances: (a) The luminaire has been misused, neglected,<br />
damaged or abused. (b) The luminaire has been improperly installed, operated, repaired or maintained. (c)<br />
The luminaire has been modified. (d) The luminaire has been connected to other equipment with which it is<br />
not compatible. (e) The luminaire has been used or stored in conditions outside its electrical or environmental<br />
specifications. (f) The luminaire has been used for purposes other than for which it was designed. (g) The<br />
luminaire has been used outside its stated specifications and operating parameters.<br />
Correct installation of the luminaire is the owner’s responsibility.<br />
To assert a warranty claim, complete <strong>Selecon</strong>’s return authorisation form (available from <strong>Selecon</strong>). Return the<br />
luminaire to <strong>Selecon</strong> or its authorised agent.<br />
If <strong>Selecon</strong> accepts the warranty claim, <strong>Selecon</strong> will provide, or arrange for, service, repair or replacement as<br />
<strong>Selecon</strong> shall determine in its sole discretion. <strong>Selecon</strong> shall bear the cost of such service, repair or<br />
replacement. However, the owner shall bear the cost of freight and insurance on the luminaire, both ways. If<br />
<strong>Selecon</strong> does not wish to service, repair or replace the defective luminaire, it shall refund the purchase price.<br />
<strong>Selecon</strong>’s sole responsibility is to repair, replace or service a luminaire subject to a valid warranty claim.<br />
Under no circumstance will <strong>Selecon</strong> be liable for direct, indirect, incidental, special or consequential costs or<br />
damages, including dismantling and re-installation costs, loss of operations or profits, to the maximum extent<br />
permitted by law.<br />
<strong>Selecon</strong> accepts no liability for personal injury or property damage resulting from failure to heed relevant<br />
operating and safety procedures specified by <strong>Selecon</strong> or imposed by law.<br />
This is an express warranty. <strong>Selecon</strong> disclaims any other express or implied warranties, including warranties<br />
of merchantability or fitness for purpose, to the maximum extent permitted by law.<br />
Some jurisdictions do not allow limitations or disclaimers of implied or statutory warranties. Some jurisdictions<br />
do not allow disclaimers or exclusions of consequential or incidental damages. Therefore, the above<br />
disclaimers, limitations and exclusions may not apply in all jurisdictions in which <strong>Selecon</strong> sells its luminaires.<br />
This warranty gives the owner specific legal rights. The owner may have other rights or remedies pursuant to<br />
the laws in its territory. Nothing in this limited warranty should be construed as limiting or restricting any other<br />
statutory right or remedy of the owner, except for such limitations or restrictions herein as may be allowed by<br />
Version 2: September 2004<br />
www.sxsevents.co.uk<br />
12<br />
© 2004 <strong>Selecon</strong> New Zealand Limited All Rights Reserved
<strong>Pacific</strong> Operation <strong>Manual</strong> 13<br />
ent the production law courtesy of the territory. Phone: of and Audio-Visual 0870 080 2342 Services<br />
<strong>Selecon</strong> has a policy of continual product improvement and specifications are subject to change without<br />
notice.<br />
www.sxsevents.co.uk<br />
email: enquiries@sxsevents.co.uk<br />
Accessories and codes<br />
Gobo holder for 'M' size patterns (5.5-13,12-28 Zoomspot)<br />
19PACGHM<br />
Gobo holder for 'M' size Glass patterns (5.5-13,12-28 Zoomspot)<br />
19PACGHMG<br />
Gobo holder for 'A' size patterns (23-50, 45-75 and Fixed Beams)<br />
19ACGHA<br />
Gobo holder for 'A' size Glass patterns (23-50, 45-75 and Fixed Beams) 19ACGHAG<br />
Gobo holder for 'B' size patterns (14-35 Zoomspot)<br />
19ACGHB<br />
Gobo holder for 'B' size Glass patterns (14-35 Zoomspot) 19ACGHBG<br />
Gobo holder for plastic transparencies<br />
19PACGHPLPH<br />
Iris<br />
20IRIS<br />
Suspension Hook-clamp<br />
20HC<br />
Safety bond<br />
20SC<br />
Safety Mesh for 5.5-13 zoom<br />
20SM20<br />
Safety Mesh for 12-28, 14-35 and 45-75 zooms, 90 Fixed Beam<br />
18PACSM1228<br />
Safety Mesh for 23-50 zoom, Fixed Beams<br />
19PACSMFB<br />
Spare colour frame for 5.5-13 zoom<br />
20CFSF2020<br />
Spare colour frame for 12-28, 14-35 and 45-75 zooms, 90 Fixed Beam 20CFSF12<br />
Spare colour frame for 23-50 zoom, Fixed Beam s<br />
19PACCF<br />
<strong>Pacific</strong> Heat Sink Guard<br />
19PACLM6<br />
Lamp holder module 1000W<br />
19PACLM1<br />
Lamp holder module 575W MSR<br />
19PACLMMSRI<br />
Lamp holder module 575W MSR Hot Restrike<br />
19PACLMHRMSR<br />
Lamp holder module 80V 1200W inc power supply<br />
18PAC80VASS2<br />
Electronic ballast for 575W MSR<br />
18PACMSRELBP<br />
Lens Assembly 20<br />
18PACL20<br />
Lens Assembly 30<br />
18PACL30<br />
Lens Assembly 40<br />
18PACL40<br />
Lens Assembly 50<br />
18PACL50<br />
Lens Assembly 12-28 front<br />
19PACL1228F<br />
Lens Assembly 12-28 rear<br />
19PACL1228R<br />
Lens Assembly 23-50 front<br />
19PACL2650F<br />
Lens Assembly 23-50 rear<br />
19PACL2650R<br />
Lens Tube for 23-50 (including lenses)<br />
19PACTUBE2650<br />
Lens Tube for 12-28 (including lenses)<br />
19PACTUBE1228<br />
Lens Tube for 14-35 (including lenses)<br />
19PACTUBE1435<br />
Lens Tube for 45-75 (including lenses)<br />
19PACTUBE4575<br />
Lens Tube for 90 degree (including lenses)<br />
18PACTUBE90<br />
Lens Tube for other 23-50/fixed beam (excluding lenses)<br />
19PACTUBE<br />
Lens Tube for 12-28 (excluding lenses)<br />
19PACTUB1228<br />
Lens Tube for 5.5-13 (including lenses)<br />
18PAC513LT<br />
<strong>Pacific</strong> Universal Lamphouse<br />
19PACHSE<br />
Heavy Duty Yoke for 5.5-13 zoom<br />
19PAC513HD<br />
Contacting <strong>Selecon</strong><br />
<strong>Selecon</strong> New Zealand Ltd<br />
19-21 Kawana Street, Northcote, Auckland 1310, New Zealand<br />
Tel: 64-9-481 0100, Fax: 64-9-481 0101<br />
E-mail: selecon@seleconlight.com<br />
Internet: www.seleconlight.com<br />
Please contact <strong>Selecon</strong>, or check our web site to find the <strong>Selecon</strong> distributor nearest to you.<br />
Version 2: September 2004<br />
www.sxsevents.co.uk<br />
13<br />
© 2004 <strong>Selecon</strong> New Zealand Limited All Rights Reserved
Spare Parts Diagram<br />
18<br />
12 14 15 16<br />
13 11<br />
10<br />
17<br />
3<br />
4<br />
5<br />
2<br />
courtesy of Event Phone: production 0870 and 080 Audio-Visual 2342 Services<br />
www.sxsevents.co.uk email: enquiries@sxsevents.co.uk<br />
1a,b,c<br />
20<br />
19<br />
7<br />
Wiring Diagram<br />
45<br />
Mains in Live: Brown<br />
Mains in Neutral: Blue<br />
Mains in Earth: Green<br />
21<br />
6a,b<br />
55 Micro-switch<br />
4<br />
55<br />
30a,b<br />
11a,b<br />
22<br />
49<br />
9a,b<br />
26<br />
23<br />
48<br />
50a,b<br />
8<br />
28<br />
54<br />
56 57<br />
5<br />
51,52,53<br />
Version 2: September 2004 © 2004 <strong>Selecon</strong> New Zealand Limited All Rights Reserved<br />
24<br />
Lamp<br />
Base<br />
27<br />
29-1,2,3,4<br />
25<br />
24<br />
28<br />
31<br />
34<br />
35<br />
47<br />
32<br />
44<br />
33<br />
45<br />
46<br />
36 37<br />
40<br />
38<br />
39<br />
41 42<br />
43<br />
19-21 Kawana St, Northcote, Auckland, New Zealand<br />
Tel: 64-9-4810100, Fax: 64-9-4810101<br />
e-mail:selecon@seleconlight.com<br />
website: www.seleconlight.com<br />
www.sxsevents.co.uk<br />
Product Codes: PAC-20, PAC-30, PAC-40, PAC-50, PAC-12/28, PAC-28/50, Drawing Date: 10/10/2000, Drawn by: OD<br />
<strong>Pacific</strong> Spare parts<br />
No Code Description<br />
PACPLA002,3,4,5 Handle Blue Black Gray Red<br />
PACPLA010<br />
PACPLA011<br />
COMELE001<br />
Lamp holder molding<br />
Lamp holder molding lid<br />
Micro-switch<br />
Terminal insulation box<br />
1<br />
2<br />
3<br />
4<br />
5<br />
6<br />
7<br />
8<br />
9<br />
10<br />
11<br />
12<br />
13<br />
14<br />
15<br />
16<br />
17<br />
18<br />
19<br />
20<br />
21<br />
22<br />
23<br />
24<br />
25<br />
26<br />
27<br />
28<br />
29<br />
30<br />
31<br />
32<br />
33<br />
34<br />
35<br />
36<br />
37<br />
38<br />
39<br />
40<br />
41<br />
42<br />
43<br />
44<br />
45<br />
46<br />
47<br />
48<br />
49<br />
50<br />
51<br />
52<br />
53<br />
54<br />
55<br />
56<br />
57<br />
PACSPIN003,001<br />
PACPLA026set<br />
PACEL001/002<br />
PACSPR002/003<br />
PACPLA030<br />
PACMET002<br />
ACCPLA001<br />
PACYOK001<br />
PACCAS002<br />
PACPLA025<br />
PACLEN001<br />
COMPLA001<br />
PACCASOO1-C<br />
PACPLA028<br />
PACSHT001,2,3,4<br />
PCAREF001<br />
PACPLA012<br />
PACSHT025<br />
PACPLA001<br />
PACSPR001<br />
PACMET003<br />
ACCSPR001<br />
PACPLA007<br />
PACPLA006<br />
See price list<br />
PACPLA0xxx<br />
PACPLA013<br />
PACEXT003<br />
PACEXT002<br />
PACEXT001<br />
PACPLA031<br />
PACLOOM001,2<br />
Lamp spinning 600w or 1kw<br />
Lamp adjust outer gears/knobs<br />
Lamp base 600w or 1kw<br />
Lamp spring, 600w or 1kw<br />
<strong>Pacific</strong> rear handle<br />
Screw M4 x 16<br />
Screw M8 x 25 Hex set screw<br />
Spring Washer M8<br />
Flat Washer M8<br />
Screw M5 x 12<br />
Washer Shakeproof M5<br />
Yoke Locking Disc<br />
Handle Yoke locking<br />
Coach Bolt M8<br />
<strong>Pacific</strong> Yoke<br />
Heat Sink<br />
Lamp adjust Centre gear<br />
<strong>Pacific</strong> Dichroic mirror<br />
Nut M5<br />
Screw M5 x 20<br />
Lens tube locking knob<br />
Lens tube locking clamp<br />
Lamp module Thumb screw<br />
Shutter plate 1,2,3= 1228,4=<br />
2350<br />
<strong>Pacific</strong> Reflector<br />
Shutter Blade<br />
Gobo holder slot cover<br />
<strong>Pacific</strong> fixed beam lens tube<br />
Shutter plate spring<br />
Fixed beam lens holder rod<br />
Colour frame plunger spring<br />
Roll pin 5.5mm<br />
Colour frame plunger<br />
Colour frame locking clip<br />
Lens Assembly Module<br />
Lens focus knob, 19,21,22,23<br />
12-28 lens tube front molding<br />
Screw 6 x 38<br />
Extrusion lens tube top<br />
Extrusion lens tube right<br />
Extrusion lens tube left<br />
Nut M4<br />
Screw 6 x 1 1/4<br />
Screw M4 x 45<br />
12-28 lens tube rear molding<br />
Screw M4 x 10<br />
Washer M4 Shakeproof<br />
Earth lug<br />
<strong>Pacific</strong> wire loom 1=600 2=1K<br />
QC terminal 4.8mm female<br />
QC terminal 6.3mm female<br />
QC terminal 6.3mm male