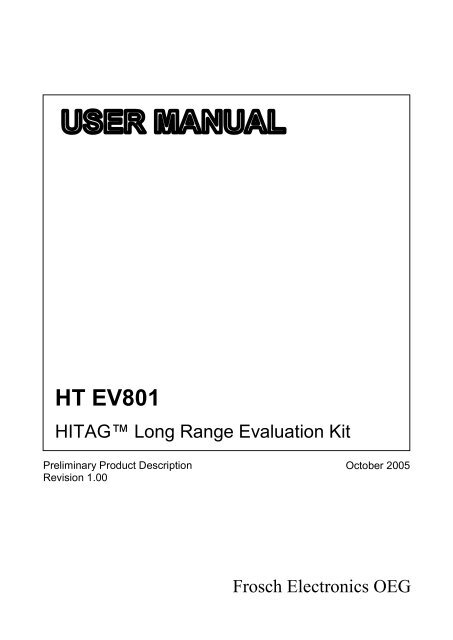
HT EV801 HITAG⢠Long Range Evaluation Kit - AdvanIDe
HT EV801 HITAG⢠Long Range Evaluation Kit - AdvanIDe
HT EV801 HITAG⢠Long Range Evaluation Kit - AdvanIDe

You also want an ePaper? Increase the reach of your titles
YUMPU automatically turns print PDFs into web optimized ePapers that Google loves.
<strong>HT</strong> <strong>EV801</strong><br />
HITAG <strong>Long</strong> <strong>Range</strong> <strong>Evaluation</strong> <strong>Kit</strong><br />
Preliminary Product Description<br />
Revision 1.00<br />
October 2005<br />
Frosch Electronics OEG
October 2005 Rev. 1.0 <strong>Long</strong> <strong>Range</strong> <strong>Evaluation</strong> Description<br />
- is the name of one of the universal and powerful product lines of the 125 kHz family. The<br />
HITAG product family is used both in the proximity area (reading range up to about 300 mm)<br />
and in the long range area (reading range up to 2 m).<br />
Developing our HITAG products, utmost consideration was given to security and reliability. The<br />
use of cryptography guarantees highest data security.<br />
Using optimized antennas and powerful transponders operating ranges of up to 2 m can be<br />
achieved.<br />
The central part of every HITAG Read/Write Device is the HITAG Core Module, which ensures<br />
full compatibility for every HITAG Read/Write Device.<br />
Easy integration and application of the HITAG Core Module is due to its:<br />
small size<br />
standard interfaces<br />
flexible supply voltage<br />
To give you the possibility for an easy and quick start with our HITAG products we offer a<br />
HITAG <strong>Long</strong> <strong>Range</strong> <strong>Evaluation</strong> <strong>Kit</strong>.<br />
Easy application certainly is an important factor in making the <strong>Long</strong> <strong>Range</strong> <strong>Evaluation</strong> <strong>Kit</strong><br />
suitable for evaluation purposes. You will be able to present your ideas and demonstrate the<br />
performance of your system with the help of the HITAG <strong>Evaluation</strong> <strong>Kit</strong>.<br />
Page 2 of 36<br />
<strong>HT</strong><strong>EV801</strong> REV.1.00.doc/RF
October 2005 Rev. 1.0 <strong>Long</strong> <strong>Range</strong> <strong>Evaluation</strong> Description<br />
<strong>Long</strong> <strong>Range</strong> <strong>Evaluation</strong> <strong>Kit</strong> Description<br />
TABLE OF CONTENTS<br />
1. General Remarks.................................................................................................... 6<br />
1.1. Scope of Delivery ....................................................................................................6<br />
1.2. Specifications...........................................................................................................6<br />
1.3. Hardware Startup.....................................................................................................7<br />
1.3.1. Housing........................................................................................................7<br />
1.3.2. Connecting the Read/Write Device to your PC and with the Power Supply...7<br />
1.3.3. Connecting the external Antenna ..................................................................7<br />
1.4. Software Startup ......................................................................................................8<br />
1.4.1. System Requirements ...................................................................................8<br />
1.4.2. Installation ...................................................................................................8<br />
1.4.3. Starting the Demo-Program..........................................................................8<br />
2. General Definitions for the Demo-Software ......................................................... 9<br />
3. Serial Port Menu ................................................................................................... 10<br />
3.1. Open/Close ............................................................................................................10<br />
3.2. Exchange Data.......................................................................................................11<br />
3.3. Predefined Data .....................................................................................................12<br />
4. HITAG 1 Transponders ........................................................................................ 13<br />
4.1. Memory Partitioning..............................................................................................13<br />
4.2. Operating HITAG 1 Transponders .........................................................................15<br />
4.3. Transponder...........................................................................................................15<br />
5. HITAG 2 Transponders ........................................................................................ 17<br />
5.1. Memory Partitioning..............................................................................................17<br />
5.2. Operating Hitag2 Transponders..............................................................................18<br />
5.3. Public Mode A.......................................................................................................19<br />
5.4. Public Mode B.......................................................................................................20<br />
6. MIRO Transponders ............................................................................................. 21<br />
6.1. Memory size ..........................................................................................................21<br />
6.2. Operating MIRO Transponders ..............................................................................21<br />
7. R/W-Device............................................................................................................ 22<br />
8. Error Messages .................................................................................................... 25<br />
9. Configuration of hitag Transponders.............................................................. 26<br />
Page 3 of 36<br />
<strong>HT</strong><strong>EV801</strong> REV.1.00.doc/RF
October 2005 Rev. 1.0 <strong>Long</strong> <strong>Range</strong> <strong>Evaluation</strong> Description<br />
9.1. Security Mechanism...............................................................................................26<br />
10. Personalizing your Read/Write Device and the Transponders ................ 27<br />
10.1. General Definitions................................................................................................28<br />
10.1.1. HITAG 1 Transponders ..............................................................................28<br />
10.1.2. HITAG 2 Transponders ..............................................................................30<br />
10.2. Personalization Concept.........................................................................................31<br />
10.3. Changing Keys and Passwords...............................................................................31<br />
10.3.1. HITAG 1 Transponders ..............................................................................31<br />
10.3.2. HITAG 2 Transponders ..............................................................................33<br />
11. Ordering Information ................................................................................... 34<br />
Page 4 of 36<br />
<strong>HT</strong><strong>EV801</strong> REV.1.00.doc/RF
October 2005 Rev. 1.0 <strong>Long</strong> <strong>Range</strong> <strong>Evaluation</strong> Description<br />
Definitions<br />
Data sheet status<br />
Objective specification<br />
This data sheet contains target or goal specifications for product development.<br />
Preliminary specification This data sheet contains preliminary data; supplementary data may be<br />
published later.<br />
Product specification<br />
Limiting values<br />
This data sheet contains final product specifications.<br />
Limiting values given are in accordance with the Absolute Maximum Rating System (IEC 134).<br />
Stress above one or more of the limiting values may cause permanent damage to the device.<br />
These are stress ratings only and operation of the device at these or at any other conditions above<br />
those given in the Characteristics section of the specification is not implied. Exposure to limiting<br />
values for extended periods may affect device reliability.<br />
Application information<br />
Where application information is given, it is advisory and does not form part of the specification.<br />
Life support applications<br />
These products are not designed for use in life support appliances, devices, or systems where<br />
malfunction of these products can reasonably be expected to result in personal injury. Customers<br />
using or selling these products for use in such applications do so on their own risk and agree to<br />
fully indemnify Philips for any damages resulting from such improper use or sale.<br />
Page 5 of 36<br />
<strong>HT</strong><strong>EV801</strong> REV.1.00.doc/RF
October 2005 Rev. 1.0 <strong>Long</strong> <strong>Range</strong> <strong>Evaluation</strong> Description<br />
1. General Remarks<br />
1.1. Scope of Delivery<br />
The Proximity <strong>Evaluation</strong> <strong>Kit</strong> comprises the following components:<br />
<br />
<br />
<br />
<br />
<br />
1 HITAG proximity read/write device<br />
1 Interface cable<br />
1 Power supply<br />
1 CD-Rom with evaluation software, data sheets and product information<br />
Transponders<br />
The <strong>Long</strong> <strong>Range</strong> <strong>Evaluation</strong> <strong>Kit</strong> comprises the following components:<br />
<br />
<br />
<br />
<br />
<br />
<br />
1 HITAG <strong>Long</strong> <strong>Range</strong> read/write device<br />
1 Flat cable antenna (optional PCB antenna)<br />
1 Interface cable<br />
1 Power supply<br />
1 CD-Rom with evaluation software, data sheets and product information<br />
Transponders<br />
1.2. Specifications<br />
Power supply: <strong>HT</strong>EV401 9 - 16 VDC<br />
<strong>HT</strong><strong>EV801</strong><br />
+/- 15 VDC<br />
Supply current: <strong>HT</strong>EV401 max. 150 mA<br />
<strong>HT</strong><strong>EV801</strong><br />
max. +550/-400 mA<br />
Frequency: 125 kHz (optional 134,2 kHz at <strong>HT</strong>EV901)<br />
Temperature: 0° - 70° C<br />
Interface: RS232<br />
Page 6 of 36<br />
<strong>HT</strong><strong>EV801</strong> REV.1.00.doc/RF
October 2005 Rev. 1.0 <strong>Long</strong> <strong>Range</strong> <strong>Evaluation</strong> Description<br />
1.3. Hardware Startup<br />
Metallic environment and electromagnetic interferences (e.g.: monitors, keyboards) have a<br />
negative effect on the reading and writing range!<br />
1.3.1. Housing<br />
Front View<br />
Serial interface<br />
connector<br />
external antenna<br />
connector<br />
power supply<br />
connector<br />
1.3.2. Connecting the Read/Write Device to your PC and with the<br />
Power Supply<br />
Connect the supplied interface cable to the serial interface on your IBM compatible PC. Plug the<br />
power supply-cable into a power socket (100-240 VAC at 47-63 Hz).<br />
1.3.3. Connecting the external Antenna<br />
The delivered or user defined antennas may be connected at the external antenna connector.<br />
Concerning the design of <strong>Long</strong> <strong>Range</strong> antennas please refer to the Antenna design guide<br />
delivered from Philips Antenna Design for the HITAG <strong>Long</strong> <strong>Range</strong> System at<br />
http://www.semiconductors.philips.com/acrobat_download/other/identification/ht038713.pdf.<br />
Page 7 of 36<br />
<strong>HT</strong><strong>EV801</strong> REV.1.00.doc/RF
October 2005 Rev. 1.0 <strong>Long</strong> <strong>Range</strong> <strong>Evaluation</strong> Description<br />
1.4. Software Startup<br />
1.4.1. System Requirements<br />
In order to use the <strong>Evaluation</strong> Software the following system requirements must be satisfied:<br />
Intel Pentium 233MHz or higher<br />
64 MByte RAM<br />
serial interface<br />
1.4.2. Installation<br />
Start HitagDemoSetup.exe in<br />
“<strong>HT</strong><strong>EV801</strong> CD\Frosch Electronics\Software\<strong>Evaluation</strong>Software” and follow the<br />
instructions there. The evaluation software will be installed on your PC<br />
1.4.3. Starting the Demo-Program<br />
Press Start-All programs-Frosch Electronics-HitagDemo-HitagDemo<br />
Page 8 of 36<br />
<strong>HT</strong><strong>EV801</strong> REV.1.00.doc/RF
October 2005 Rev. 1.0 <strong>Long</strong> <strong>Range</strong> <strong>Evaluation</strong> Description<br />
2. General Definitions for the Demo-Software<br />
Platform Select Window<br />
Fine Selection Window<br />
<br />
Status Window<br />
Command Window<br />
Platform Select Window: Choose serial port, reader or transponder specific platform<br />
Fine Select Window: Subdivision of the Platform<br />
Command Window: In this window Commands can be send by pressing the specific buttons<br />
Status Window: displays the serial data transfer<br />
Page 9 of 36<br />
<strong>HT</strong><strong>EV801</strong> REV.1.00.doc/RF
October 2005 Rev. 1.0 <strong>Long</strong> <strong>Range</strong> <strong>Evaluation</strong> Description<br />
3. Serial Port Menu<br />
3.1. Open/Close<br />
To start communication to the reader you always have to open the port by pressing the<br />
“Open” Button. The software opens the port and sends a GetVersion command. For versions<br />
higher than 3.xx the software uses the full range of commands (HitagS), for Versions like<br />
2.32 (<strong>HT</strong>RM400/800 of Philips) or if no reader is detected the software has a limited range of<br />
commands (no HitagS Crypto…).<br />
Page 10 of 36<br />
<strong>HT</strong><strong>EV801</strong> REV.1.00.doc/RF
October 2005 Rev. 1.0 <strong>Long</strong> <strong>Range</strong> <strong>Evaluation</strong> Description<br />
3.2. Exchange Data<br />
User specific commands can be defined and sent in Hex or Ascii format, EXOR, adding or no<br />
BCC can be added automatically.<br />
Page 11 of 36<br />
<strong>HT</strong><strong>EV801</strong> REV.1.00.doc/RF
October 2005 Rev. 1.0 <strong>Long</strong> <strong>Range</strong> <strong>Evaluation</strong> Description<br />
3.3. Predefined Data<br />
Choose out of predefined Data specified in file “HitagDemo.exe.ini”. This file can be<br />
modified according your needs<br />
Page 12 of 36<br />
<strong>HT</strong><strong>EV801</strong> REV.1.00.doc/RF
October 2005 Rev. 1.0 <strong>Long</strong> <strong>Range</strong> <strong>Evaluation</strong> Description<br />
4. HITAG 1 Transponders<br />
4.1. Memory Partitioning<br />
The 2 KBit EEPROM memory on the transponder is divided into 16 blocks. Every block consists<br />
of 4 pages with 4 bytes (at 8 bits) each.<br />
Addressing is done page by page and access is gained either page by page or block by block<br />
entering the respective start address. In case of block read (or write) the transponder is processed<br />
from the start to the end of the block.<br />
The drawing below describes the memory configuration on the Demokit transponder:<br />
secret<br />
secret*)<br />
Block 0<br />
Block 1<br />
Block 4<br />
Block 7<br />
Block 8<br />
user data<br />
user data<br />
r/w *)<br />
public<br />
secret<br />
Serial Number<br />
Configuration<br />
Key A<br />
Key B<br />
Logdata 1B<br />
Logdata 0A<br />
Logdata 1A<br />
Logdata 0B<br />
wo *)<br />
r/w *)<br />
public<br />
user data<br />
r/w<br />
ro<br />
r/w<br />
wo<br />
0<br />
read only<br />
read/write<br />
write only<br />
neither read nor write<br />
Block 15<br />
Configuration of the memory is<br />
done in the configuration page<br />
*) Areas (or settings) marked with an asterisk *) may be configured by the client.<br />
The memory location described above and marked with an asterisk *) has been configured by<br />
Philips, whereby the content of some of the memory areas is free, some allocated.<br />
Block 0 defines the serial number, the configuration of the memory area and the keys, Block 1<br />
the logdata.<br />
Memory locations marked with "secret" can only be accessed after a mutual authentication. An<br />
enciphered data communication is used in that area.<br />
Memory locations marked with "public" can be accessed without mutual authentication, no<br />
encryption is used.<br />
Transponders delivered with this Demokit are configured as follows:<br />
Blocks 4 to 7 of the transponder are public and read-write.<br />
Page 13 of 36<br />
<strong>HT</strong><strong>EV801</strong> REV.1.00.doc/RF
October 2005 Rev. 1.0 <strong>Long</strong> <strong>Range</strong> <strong>Evaluation</strong> Description<br />
The table shows that the logdata can be both written and read, keys can only be written. That<br />
means that keys and logdata can be changed.<br />
Important! You have to be very careful when changing keys and logdata as inconsiderate<br />
use results in loss of access to the secret area on the transponder. See Chapter 10 for a<br />
detailed description.<br />
Page 14 of 36<br />
<strong>HT</strong><strong>EV801</strong> REV.1.00.doc/RF
October 2005 Rev. 1.0 <strong>Long</strong> <strong>Range</strong> <strong>Evaluation</strong> Description<br />
4.2. Operating HITAG 1 Transponders<br />
Operating a HITAG 1 transponder the screen will be displayed as follows:<br />
4.3. Transponder<br />
Get Snr:<br />
Reads the serial numbers of all the transponder located in the field of the<br />
antenna. Please be aware that the <strong>Long</strong> <strong>Range</strong> kit is not able to perform an<br />
anti-collision!<br />
GetSnr (Repeated): Reads the serial numbers of all the transponder continuously, performing a<br />
HF Reset at the beginning of each cycle.<br />
SelectSnr: Before it is possible to read or write, one transponder out of the table in the<br />
left window has to be selected by marking it with the cursor and pressing<br />
the SelectSnr button.<br />
Write Config: After selection of a transponder the current configuration is displayed in<br />
this window. The transponder configuration bits can be set or cleared here<br />
and the whole page is re-written to the transponder after pressing the<br />
button.<br />
Page 15 of 36<br />
<strong>HT</strong><strong>EV801</strong> REV.1.00.doc/RF
October 2005 Rev. 1.0 <strong>Long</strong> <strong>Range</strong> <strong>Evaluation</strong> Description<br />
Read Page:<br />
Read Block:<br />
Write Page:<br />
Write Block:<br />
TagAuthent:<br />
On entering a page number (0-63) one page (4 bytes) of the transponder is<br />
read and displayed on the screen.<br />
On entering a page number (0-63) one whole block (15 bytes) of the<br />
transponder is read and displayed on the screen, i.e. block 16 for page 61,<br />
block 4 if you choose page 16, …..<br />
On entering a page number (1-63) and 4 bytes of numbers in the<br />
corresponding page this page (4 bytes) is written to the transponder.<br />
On entering a page number (4-63) and 16 bytes of numbers in the<br />
corresponding block this block (full 16 bytes) is written to the transponder.<br />
Before sending commands in secret mode, an authentication procedure has<br />
to be performed either with key set A or key set B.<br />
Note: You can only write to a page in the corresponding mode public (Pwd) or secret<br />
(Crypto)<br />
Page 16 of 36<br />
<strong>HT</strong><strong>EV801</strong> REV.1.00.doc/RF
October 2005 Rev. 1.0 <strong>Long</strong> <strong>Range</strong> <strong>Evaluation</strong> Description<br />
5. HITAG 2 Transponders<br />
5.1. Memory Partitioning<br />
The memory of the transponder (TAG) consists of 256 bits EEPROM and is organized in 8 pages<br />
with 32 bits each. The READ and WRITE instructions always read or write a whole page, and the<br />
address transmitted by the base station represents the page address.<br />
Depending on the mode of operation the EEPROM is organized in the following way:<br />
crypto mode:<br />
password mode:<br />
Page<br />
Content<br />
0 ID number<br />
1 32 bit Key: "KEY LOW"<br />
2 16 bit Key " KEY HIGH"<br />
3 8 bit Configuration,<br />
24 bit Password TAG<br />
4 read/write Page<br />
5 read/write Page<br />
6 read/write Page<br />
7 read/write Page<br />
Page<br />
Content<br />
0 ID number<br />
1 Password RWD<br />
2 reserved<br />
3 8 bit Configuration,<br />
24 bit Password TAG<br />
4 read/write Page<br />
5 read/write Page<br />
6 read/write Page<br />
7 read/write Page<br />
Page 17 of 36<br />
<strong>HT</strong><strong>EV801</strong> REV.1.00.doc/RF
October 2005 Rev. 1.0 <strong>Long</strong> <strong>Range</strong> <strong>Evaluation</strong> Description<br />
5.2. Operating Hitag2 Transponders<br />
Operating a HITAG 2 transponder the screen will be displayed as follows:<br />
Get SnrReset:<br />
Read Page:<br />
Write Page:<br />
Configuration:<br />
Reads the serial number of the transponder located in the field of the<br />
antenna.<br />
Marked pages of the transponder are read and displayed on the screen.<br />
Marked pages are written to the transponder.<br />
Personalization: Is done in background depending the configuration<br />
of the transponder. Gives access to the key and password stored on the<br />
transponder (TAG).<br />
Key is used to encrypt the data sent to and received from the<br />
transponder.<br />
Password TAG is sent from transponder to read/write device and can be<br />
verified by the latter depending on the configuration of the read/write<br />
device (see also chapter 10)<br />
Submenu used to change the configuration of the transponder (see also<br />
chapter 9), a write to page 3 has to be performed after changes done in the<br />
configuration window<br />
Page 18 of 36<br />
<strong>HT</strong><strong>EV801</strong> REV.1.00.doc/RF
October 2005 Rev. 1.0 <strong>Long</strong> <strong>Range</strong> <strong>Evaluation</strong> Description<br />
5.3. Public Mode A<br />
Operating a HITAG 2 transponder in Public Mode A the screen will be displayed as follows:<br />
Page 19 of 36<br />
<strong>HT</strong><strong>EV801</strong> REV.1.00.doc/RF
October 2005 Rev. 1.0 <strong>Long</strong> <strong>Range</strong> <strong>Evaluation</strong> Description<br />
5.4. Public Mode B<br />
Operating a HITAG 2 transponder in Public Mode B the screen will be displayed as follows:<br />
Page 20 of 36<br />
<strong>HT</strong><strong>EV801</strong> REV.1.00.doc/RF
October 2005 Rev. 1.0 <strong>Long</strong> <strong>Range</strong> <strong>Evaluation</strong> Description<br />
6. MIRO Transponders<br />
6.1. Memory size<br />
In the 64 bit memory the unique 40 bit serial numer of the transponder is stored as well as 24 bits<br />
header and parity bits. The data are read only and cannot be changed.<br />
6.2. Operating MIRO Transponders<br />
Operating a MIRO transponder the screen will be displayed as follows:<br />
Page 21 of 36<br />
<strong>HT</strong><strong>EV801</strong> REV.1.00.doc/RF
October 2005 Rev. 1.0 <strong>Long</strong> <strong>Range</strong> <strong>Evaluation</strong> Description<br />
7. R/W-Device<br />
Get Version:<br />
Reads the version and programming date of the firmware and the serial<br />
number of the Core Module.<br />
Page 22 of 36<br />
<strong>HT</strong><strong>EV801</strong> REV.1.00.doc/RF
October 2005 Rev. 1.0 <strong>Long</strong> <strong>Range</strong> <strong>Evaluation</strong> Description<br />
StartFFT:<br />
ReadLRStatus:<br />
Set PowerDown:<br />
Set BCD:<br />
SetBaudRate:<br />
SetOutput:<br />
ReadInput:<br />
Port Commands:<br />
DSP Version:<br />
This command starts the Fast Fourier Transformation (FFT) of the Digital<br />
Signal Processor. This command is to be used as often as required<br />
depending on the noisefloor of the environment. Note that no TTF<br />
transponder is in the field when starting FFT<br />
This command can be used to check the antenna status (broken or badly<br />
detuning antennas can be detected).<br />
Antenna drivers can be switched on or off.<br />
This command adjusts the timing of the read/write device to the antenna.<br />
The command has to be operated once, when an antenna is connected for<br />
the first time or changed, it can be done with or without successing FFT.<br />
Baudrates from 9600 to 57600 kHz can be chosen, be aware that after a<br />
power reset the Baudrate switches back to 9600.<br />
Out1-4 can be cleared or set, only Out1 is available at the <strong>HT</strong>RM801.<br />
Read status of In1/2.<br />
Not in use.<br />
Not in use.<br />
*) The commands Fast Fourier and Set BCD are only enabled when using HITAG <strong>Long</strong> <strong>Range</strong><br />
Read/Write Devices.<br />
Page 23 of 36<br />
<strong>HT</strong><strong>EV801</strong> REV.1.00.doc/RF
October 2005 Rev. 1.0 <strong>Long</strong> <strong>Range</strong> <strong>Evaluation</strong> Description<br />
KeyInitMode:<br />
This command is necessary to get access to the secret keys that are stored<br />
in the EEProm of the Core Module and that are used for Authenticate the<br />
transponders.<br />
Page 24 of 36<br />
<strong>HT</strong><strong>EV801</strong> REV.1.00.doc/RF
October 2005 Rev. 1.0 <strong>Long</strong> <strong>Range</strong> <strong>Evaluation</strong> Description<br />
8. Error Messages<br />
Error messages and the message function OK are displayed in the status line.<br />
Function OK System is working correctly.<br />
Serial error Error on the serial interface.<br />
NOTAG There is no transponder in the communication<br />
field of the antenna<br />
or a not initialized <strong>HT</strong>2 Public A or B is in the<br />
communication field of the antenna<br />
or a <strong>HT</strong>2 Crypto was accessed using the wrong<br />
key.<br />
TIMEOUT error There is not enough energy to write to the transponder.<br />
AUTHENT error An error occured during the authentication process.<br />
QUIT error The acknowledgement was not received correctly.<br />
CRYPTO not initialized A cryptographic command was transmitted without<br />
authentication.<br />
<strong>HT</strong>2 authentication error No conformity between password RWD stored in<br />
the read/write device and password RWD stored<br />
on the transponder,<br />
or a <strong>HT</strong>2-Crypto Tag was accessed using the Password<br />
mode.<br />
incorrect password TAG No conformity between password TAG stored in<br />
the read/write device and password TAG stored<br />
on the transponder.<br />
EEPROM error Read/write device EEPROM check sum error.<br />
EEPROM wrong old data On comparison old and new data (for keys and<br />
passwords) prove inconsistent.<br />
EEPROM write protected Parts of the EEPROM on the read/write device<br />
were locked using the configuration menu and a<br />
write access to this part was tried.<br />
EEPROM read protected Parts of the EEPROM on the read/write device<br />
were locked using the configuration menu and a<br />
read access to this part was tried.<br />
Page 25 of 36<br />
<strong>HT</strong><strong>EV801</strong> REV.1.00.doc/RF
October 2005 Rev. 1.0 <strong>Long</strong> <strong>Range</strong> <strong>Evaluation</strong> Description<br />
9. Configuration of hitag Transponders<br />
9.1. Security Mechanism<br />
All the data necessary for the authentication of the transponder and the read/write device as well<br />
as data needed for encryption can be protected from being read and from being written on the<br />
read/write device using special commands.<br />
This mechanism has 3 levels:<br />
Level 0:<br />
Level 1:<br />
Level 2:<br />
All security relevant data can be read and written.<br />
The data cannot be read any more. If you want to change an entry, you have to<br />
know the old value. Otherwise writing access will be denied.<br />
The internal data are locked and can neither be read nor written. At this level it is<br />
impossible for the user to change the stored data.<br />
The following data are subject to the mechanism described above:<br />
Key information A and B <br />
Logdata 0A, 0B for HITAG 1 transponders<br />
Logdata 1A, 1B<br />
<br />
Key information<br />
<br />
Password TAG for HITAG 2 transponders<br />
Password RWD<br />
<br />
You cannot reset levels, e.g. from level 2 to level 1. Once a security level has been<br />
chosen it becomes irreversible.<br />
If you want to write the key and passwords to or read them from the read/write device you have<br />
to enter the KeyInit Password.<br />
If you do not know this password, you will not be able to enter the personalization<br />
and configuration submenus of the read/write device as you cannot read this<br />
password from the read/write device.<br />
To change the KeyInit Password you have to know the current value.<br />
The default password is set to 0x00000000 by Philips.<br />
After entering the correct KeyInit Password access to the personalization and configuration<br />
submenus of the read/write device is granted.<br />
Page 26 of 36<br />
<strong>HT</strong><strong>EV801</strong> REV.1.00.doc/RF
October 2005 Rev. 1.0 <strong>Long</strong> <strong>Range</strong> <strong>Evaluation</strong> Description<br />
10. Personalizing your Read/Write Device and the<br />
Transponders<br />
Note: It is NOT NECESSARY to personalize the read/write device and<br />
the transponders in order to operate the <strong>Evaluation</strong> <strong>Kit</strong>!<br />
A pre - personalization was done by Philips.<br />
In order to profit from the full functionality of the HITAG system, the <strong>Evaluation</strong> <strong>Kit</strong>, however,<br />
supports all cryptographic features.<br />
This requires the use of some secret data (keys, logdata and passwords). The process of loading<br />
these data into the read/write device is called personalization. The same personalization<br />
procedure has to be carried out on your transponders. The read/write device and the transponders<br />
are personalized by Philips by means of defined Transport Keys, Transport Logdata and<br />
Transport Passwords ( HITAG 1 Keys and Logdata are set to 0x00000000, HITAG 2 Key is set<br />
to 0x4D494B524F4E, HITAG 2 Password TAG to 0xAA4854 and HITAG 2 Password RWD to<br />
0x4D494B52).<br />
Therefore you can operate the <strong>Evaluation</strong> <strong>Kit</strong> without changing any data. If you want to use own<br />
keys, logdata or passwords you have to personalize read/write device and transponders as it is<br />
described in the following chapters.<br />
Make sure you are in a safe environment while writing secret data to the transponder or the<br />
read/write device. This prevents possible listening in to the communication between HOST and<br />
read/write device.<br />
On the next few pages you find a description of how to personalize your read/write device. In<br />
Chapter 10.3. the loading of own keys, logdata and passwords into the read/write device and the<br />
transponder is described in exact order.<br />
Page 27 of 36<br />
<strong>HT</strong><strong>EV801</strong> REV.1.00.doc/RF
October 2005 Rev. 1.0 <strong>Long</strong> <strong>Range</strong> <strong>Evaluation</strong> Description<br />
10.1. General Definitions<br />
In order to be able to read data from the secret area of a transponder, you have to carry out a<br />
procedure called authentication. To do this you need special data (keys).<br />
After transmitting the according command the authentication is automatically carried out by the<br />
HITAG Read/Write Device.<br />
10.1.1. HITAG 1 Transponders<br />
10.1.1.1. Definition of the Keys<br />
Keys are cryptographic codes, which determine data encryption during data transfer between<br />
read/write device and transponder.<br />
Two keys (Key A and Key B) which you can use independently of each other, have been installed<br />
for security and flexibility reasons. The identity of either Key A or Key B on the read/write<br />
device and on the transponder is sufficient (see table under 10.1.1.2.).<br />
The keys are predefined by Philips by means of defined Transport Keys (both keys show<br />
the same bit map). They can be written only.<br />
10.1.1.2. Definition of the Logdata<br />
Logdata represent "passwords" needed to gain access to secret areas on the transponder. A pair of<br />
logdata is included with every cryptographic key (Key A and Key B). This logdata pair has to be<br />
identical both on the transponder and the read/write device.<br />
ad Key A: Logdata 0 A "Password" which the transponder sends to<br />
the read/write device and which is verified<br />
by the latter.<br />
Logdata 1 A "Password" which the read/write device<br />
sends to the transponder and which is<br />
checked for identity by the latter.<br />
ad Key B:<br />
Logdata 0 B and<br />
Logdata 1 B<br />
analogous to Key A<br />
The logdata are also predefined by Philips using defined Transport Logdata (all logdata show the<br />
same bit map). They can be read and written. Logdata 0A and 1A, as well as Logdata 0B and 1B<br />
do not have to show the same values, but all Logdata have to be identical on the read/write device<br />
and on the transponder!<br />
Page 28 of 36<br />
<strong>HT</strong><strong>EV801</strong> REV.1.00.doc/RF
October 2005 Rev. 1.0 <strong>Long</strong> <strong>Range</strong> <strong>Evaluation</strong> Description<br />
So it is important that the following values are in accordance with each other, i.e. the respective<br />
data on the read/write device and on the transponder have to be identical pairs:<br />
on the read/write<br />
device<br />
on the transponder<br />
KEY A KEY A <br />
LOGDATA 0A LOGDATA 0A Set A<br />
LOGDATA 1A LOGDATA 1A <br />
KEY B KEY B <br />
LOGDATA 0B LOGDATA 0B Set B<br />
LOGDATA 1B LOGDATA 1B <br />
Attention:<br />
Keys and Logdata only can be changed if the Transport Keys and the<br />
Transport Logdata are known!<br />
Page 29 of 36<br />
<strong>HT</strong><strong>EV801</strong> REV.1.00.doc/RF
October 2005 Rev. 1.0 <strong>Long</strong> <strong>Range</strong> <strong>Evaluation</strong> Description<br />
10.1.2. HITAG 2 Transponders<br />
10.1.2.1. Definition of the Keys<br />
Keys are cryptographic codes, which determine data encryption during data transfer between<br />
read/write device and transponder.<br />
The key is predefined by Philips by means of a defined transport key.<br />
10.1.2.2. Definition of the Passwords<br />
Passwords are needed to gain access to the transponder. A pair of passwords is stored in every<br />
transponder. This password pair has to be identical both on the transponder and the read/write<br />
device.<br />
Password TAG:<br />
Password RWD:<br />
Password that the transponder sends to the read/write device and which<br />
may be verified by the latter (depending of the configuration of the<br />
read/write device).<br />
Password that the read/write device sends to the transponder and which is<br />
checked for identity by the latter.<br />
The passwords are also predefined by Philips using defined transport passwords. They can be<br />
read and written. Password TAG and Password RWD do not have to show the same values, but<br />
all passwords have to be identical on the read/write device and on the transponder!<br />
The passwords are predefined by Philips by means of defined transport passwords.<br />
So it is important that the following values are in accordance with each other, i.e. the respective<br />
data on the read/write device and on the transponder have to be identical pairs:<br />
on the read/write<br />
device<br />
on the<br />
transponder<br />
KEY KEY<br />
Password TAG Password TAG<br />
Password RWD Password RWD<br />
Page 30 of 36<br />
<strong>HT</strong><strong>EV801</strong> REV.1.00.doc/RF
October 2005 Rev. 1.0 <strong>Long</strong> <strong>Range</strong> <strong>Evaluation</strong> Description<br />
10.2. Personalization Concept<br />
To enable utmost security and flexibility Philips worked out a personalization concept that shall<br />
be shortly described in the following:<br />
The first stage is a test that is done by the producer respectively Philips. Here the unique serial<br />
number is fixed and transport keys and transport passwords are pre-programmed.<br />
In the next stage the customers program their own keys and passwords (so nobody besides them<br />
can access the transponders) and configure the memory of the transponders. We recommend to<br />
lock sensitive areas, that means for example to prevent the possibility to change keys and<br />
passwords for the user.<br />
In the last stage the user just reads from and writes to the memory of the transponders.<br />
10.3. Changing Keys and Passwords<br />
You can change keys and passwords using the menu options in the personalization submenu for<br />
the read/write device and for the transponders. You have to be careful when carrying out such a<br />
change.<br />
Entering the personalization submenu for the read/write device requires a password you have to<br />
enter only once when running the demosoftware. The default password is set to 0x00000000 by<br />
Philips.<br />
You do not have to change this data in order to operate the Demonstration <strong>Kit</strong>!<br />
If you want to change keys and passwords, please, strictly follow the steps below:<br />
Set Transponder Access to Single access! (See chapter 3.1)<br />
Place transponders one after the other directly on the antenna or hold them directly to it!<br />
(0-distance)<br />
10.3.1. HITAG 1 Transponders<br />
10.3.1.1. Changing Keys<br />
Please, note the order of the steps!<br />
1. Access the transponder (using the Transport Keys).<br />
2. Change a key (e.g.: Key A) on the transponder, i.e., using transponder personalization<br />
submenu, see chapter 4.3.<br />
3. Change Key A on the read/write device to the new value (using the Personalization submenu,<br />
see Chapter 4.4).<br />
Caution: On the transponder the key can only be written, which means that you cannot call up the<br />
entry! Moreover, you need to know the old value if you want to change the key on the read/write<br />
device! (If you enter wrong values the message Wrong old data is displayed.)<br />
Only after carrying out correctly steps 1 through to 3 may the second key be changed following the<br />
steps described above. Conveniently you change both keys to the same value!<br />
Page 31 of 36<br />
<strong>HT</strong><strong>EV801</strong> REV.1.00.doc/RF
October 2005 Rev. 1.0 <strong>Long</strong> <strong>Range</strong> <strong>Evaluation</strong> Description<br />
10.3.1.2. Incorrect Procedures Changing Keys<br />
You change both keys on the read/write device and then try to access the transponder. This is<br />
not possible (the status line displays the message Authentication error) because there is no<br />
identity between any of the keys on the transponder and the read/write device.<br />
You change only one key (e.g.: Key A) on the read/write device; the second key (in this<br />
example B) remains the Transport Key. Then you try again to access the transponder. In this<br />
case you will gain access because one key (here it is Key B) on the transponder and the<br />
read/write device is still identical. Therefore, the status line briefly displays the message<br />
Authentication error (after the first failed attempt to gain access using the changed key) then<br />
the message Function OK appears.<br />
The same scenario applies if you first change one or both of the keys on the transponder but leave<br />
the keys on the read/write device unchanged (transport keys).<br />
10.3.1.3. Changing Logdata<br />
Change logdata using the same procedure as described for changing keys. Be careful to change<br />
them by pairs (on the read/write device and on the transponder):<br />
1. Change, for example, Logdata 0A on the transponder (by overwriting Page 5).<br />
2. Change Logdata 0A on the read/write device to the new value.<br />
3. Change Logdata 1A on the transponder (by overwriting Page 6).<br />
4. Change Logdata 1A on the read/write device to the new value.<br />
Again, you need to know the old values before they can be changed on the<br />
read/write device. Therefore, we recommend that you use a table to record<br />
changed keys and logdata during the first phase of getting to know the system!<br />
When you change a key, this does not mean that you also have to change the corresponding<br />
logdata and the other way round.<br />
Page 32 of 36<br />
<strong>HT</strong><strong>EV801</strong> REV.1.00.doc/RF
October 2005 Rev. 1.0 <strong>Long</strong> <strong>Range</strong> <strong>Evaluation</strong> Description<br />
10.3.2. HITAG 2 Transponders<br />
10.3.2.1. Changing the Key<br />
Please, note the order of the steps!<br />
1. Access the transponder in crypto mode (using the Transport Key).<br />
2. Change the key on the transponder, using the transponder personalization submenu (see<br />
chapter 5.2.1). You do not need to change the password.<br />
3. Change the key on the read/write device to the new value (using the RW-Device<br />
personalization submenu, see chapter 5.2.2).<br />
Only after carrying out correctly steps 1 through to 3 the transponders are accessible with the new key.<br />
10.3.2.2. Incorrect Procedures Changing the Key<br />
You change the key on the read/write device and then try to access the transponder. This is not<br />
possible (the status line displays the message NOTAG) because there is no identity between<br />
the keys on the transponder and the read/write device.<br />
The same scenario applies if you first change the key on the transponder but leave the key on the<br />
read/write device unchanged (transport key).<br />
10.3.2.3. Changing Passwords<br />
Change passwords using the same procedure as described for changing the key. Be careful to<br />
change them by pairs (on the read/write device and on the transponder).<br />
1. Access the transponders in password mode.<br />
2. Change one Password (e.g.: Password TAG) on the transponders using the transponder<br />
personalization submenu (see chapter 5.3.1).<br />
3. Change Password TAG on the read/write device to the new value (using the RW-Device<br />
personalization submenu, see chapter 5.3.2).<br />
Only after carrying out correctly steps 1 through to 3 (executing a read-access test the message<br />
Function OK has to be displayed in the status line) may the second password be changed following<br />
the same steps described above.<br />
When you change e.g. Password TAG, this does not mean that you also have to change Password<br />
RWD and the other way round.<br />
Page 33 of 36<br />
<strong>HT</strong><strong>EV801</strong> REV.1.00.doc/RF
October 2005 Rev. 1.0 <strong>Long</strong> <strong>Range</strong> <strong>Evaluation</strong> Description<br />
10.3.2.4. Incorrect Procedures Changing Passwords<br />
You change the Password RWD on the read/write device and then try to access the<br />
transponder. This is not possible (the status line displays the message incorrect Password<br />
RWD) because there is no identity between the Password RWD on the transponder and on the<br />
read/write device.<br />
You change the Password TAG on the read/write device and then try to access the<br />
transponder. This is not possible (the status line displays the message incorrect Password<br />
TAG) because there is no identity between the Password TAG on the transponder and on the<br />
read/write device. This only applies, if you enabled checking of the Password TAG (see<br />
chapter 9.3.1) in the read/write device.<br />
The same scenario applies if you change the passwords on the transponders but leave the<br />
passwords on the read/write device unchanged (transport passwords).<br />
11. Ordering Information<br />
Type Name Description Ordering Number<br />
<strong>HT</strong>EV401 HITAG Proximity <strong>Evaluation</strong> <strong>Kit</strong> 125 kHz E31003<br />
<strong>HT</strong><strong>EV801</strong> HITAG <strong>Long</strong> <strong>Range</strong> <strong>Evaluation</strong> <strong>Kit</strong> 125 kHz E31001<br />
<strong>HT</strong>EV901 HITAG <strong>Long</strong> <strong>Range</strong> <strong>Evaluation</strong> <strong>Kit</strong> 134,2 kHz E31002<br />
Page 34 of 36<br />
<strong>HT</strong><strong>EV801</strong> REV.1.00.doc/RF
Frosch Electronics OEG<br />
Customized RFID Solutions<br />
Münzgrabengürtel 10<br />
8010 Graz<br />
Austria<br />
Tel.:<br />
Fax:<br />
mail to:<br />
+43 697055/0<br />
+43 697055/12<br />
info@froschelectronics.com<br />
www. froschelectronics.com<br />
All rights are reserved. Reproduction in whole or in part is prohibited without the prior written consent of the copyright owner.<br />
The information presented in this document does not form part of any quotation or contract, is believed to be accurate and reliable and may be<br />
changed without any notice. No liability will be accepted by the publisher for any consequence of its use. Publication thereof does not convey nor imply<br />
any<br />
license under patent- or other industrial or intellectual property rights.