FiT RAID Subsystem - Axus
FiT RAID Subsystem - Axus
FiT RAID Subsystem - Axus

You also want an ePaper? Increase the reach of your titles
YUMPU automatically turns print PDFs into web optimized ePapers that Google loves.
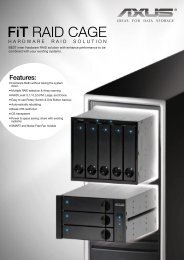
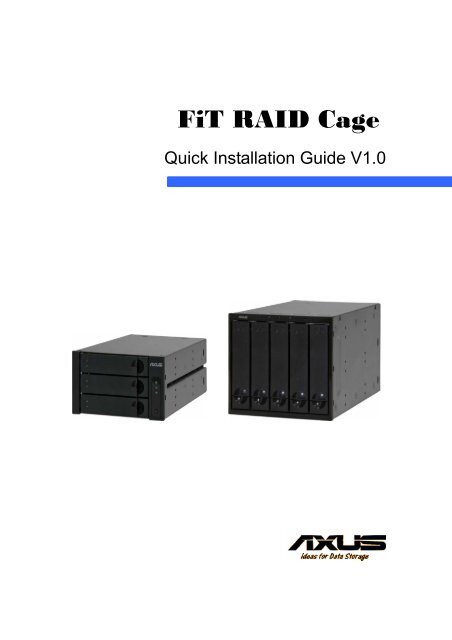
<strong>FiT</strong> <strong>RAID</strong> Cage<br />
Quick Installation Guide V1.0
<strong>FiT</strong> <strong>RAID</strong> Cage<br />
Thank you for purchasing <strong>FiT</strong> Series <strong>RAID</strong> cage. This quick<br />
installation guide will help you to quickly install and setup <strong>FiT</strong> Series<br />
<strong>RAID</strong> cage. If you want to setup advanced configurations for <strong>FiT</strong><br />
Series <strong>RAID</strong> cage, please refer to <strong>FiT</strong> user’s manual in CD for more<br />
information.<br />
Box Contents<br />
• <strong>FiT</strong> <strong>RAID</strong> Cage x 1<br />
• HDD Trays x 3 (for <strong>FiT</strong>300E-I only)<br />
• HDD Trays x 5 (for <strong>FiT</strong>500E-I only)<br />
• Fan Module x 1 (pre-installed)<br />
• SATA to SATA Cable x 1<br />
• User’s Manual & software CD x 1<br />
• Quick Installation Guide<br />
<strong>FiT</strong> <strong>RAID</strong> Cages<br />
Front View<br />
<strong>FiT</strong>300E-I<br />
<strong>FiT</strong>500E- I<br />
Quick Installation Guide - 2 -
<strong>FiT</strong> <strong>RAID</strong> Cage<br />
<strong>FiT</strong> <strong>RAID</strong> Cage LED Status:<br />
LED<br />
Status<br />
Power<br />
Fail<br />
Link/Access<br />
Disk Power<br />
Disk Fail<br />
LED is “Blue” when the system is power on.<br />
LED is “Red” when system or hardware is<br />
failed.<br />
LED is “Blue” when system links to a<br />
computer machine; LED is blinking as “Blue”<br />
when data is accessed.<br />
LED is “Blue” when disk is normal.<br />
LED is “Red” when disk is failed.<br />
Rear View<br />
<strong>FiT</strong>300E- I<br />
<strong>FiT</strong>500E- I<br />
Quick Installation Guide - 3 -
<strong>FiT</strong> <strong>RAID</strong> Cage<br />
System Requirements & Hardware Installation<br />
Computers with SATA interface on the motherboard. About systems<br />
support <strong>RAID</strong> volumes beyond 2TB and multiple volumes (port<br />
multiplier), please refer to the compatibility list and white paper from<br />
AXUS for more information.<br />
<strong>FiT</strong> <strong>RAID</strong> cage requires available 5.25” drive bays of host computers<br />
for installation. Two available 5.25” drive bays are necessary for<br />
<strong>FiT</strong>300E-I and three 5.25” drive bays for <strong>FiT</strong>500E-I. In addition, <strong>FiT</strong><br />
<strong>RAID</strong> cage shares the power supply with the host computer. Follow<br />
below steps to install <strong>FiT</strong> <strong>RAID</strong> cage into the computer chassis.<br />
Step1. Remove covers of empty 5.25” drive bays on the host<br />
computer. Carefully insert <strong>FiT</strong> <strong>RAID</strong> cage into the chassis<br />
and push it inward until it is flushed to the chassis front<br />
panel.<br />
Step2. Plug power cables into two 4-pin power connectors. Use<br />
the SATA cable to connect <strong>FiT</strong> <strong>RAID</strong> cage and the<br />
motherboard of host computer.<br />
Quick Installation Guide - 4 -
<strong>FiT</strong> <strong>RAID</strong> Cage<br />
Step3. Secure <strong>FiT</strong> <strong>RAID</strong> cage with screws.<br />
Step4. Install disks in hard drive trays then insert trays into <strong>FiT</strong><br />
<strong>RAID</strong> cage. Make sure the tray handlers are locked.<br />
IMPORTANT!<br />
Not all of the computer chassis are available for<br />
<strong>FiT</strong> <strong>RAID</strong> cages. Users must make sure an<br />
enough space in chassis before installation.<br />
Quick Installation Guide - 5 -
<strong>FiT</strong> <strong>RAID</strong> Cage<br />
Quick setup<br />
Setup <strong>RAID</strong> volume by Rotary Switch<br />
<strong>FiT</strong> <strong>RAID</strong> cage supports a <strong>RAID</strong> rotary switch at back for setting up your <strong>RAID</strong> volume<br />
immediately. No. 0~7 present different modes of <strong>RAID</strong> volume. By <strong>RAID</strong> rotary switch,<br />
<strong>FiT</strong> <strong>RAID</strong> cage would consume all of hard drives you inserted to create a single <strong>RAID</strong><br />
volume. Each <strong>RAID</strong> mode is described as below:<br />
<strong>RAID</strong><br />
Modes<br />
GUI<br />
R5<br />
Large<br />
PM<br />
R0<br />
R1/R10<br />
Clone<br />
R3<br />
Create <strong>RAID</strong> volumes via <strong>FiT</strong> Manager<br />
Create a <strong>RAID</strong>5 volume which requires at<br />
least 3 x HDDs<br />
Create a big volume without <strong>RAID</strong> feature<br />
Create no <strong>RAID</strong> volume as JBOD mode<br />
Create a <strong>RAID</strong>0 volume which requires at<br />
least 2 x HDDs<br />
Create a R1/R10 volume which requires at<br />
least 2 or 4 x HDDs<br />
Create a clone volume and all of hard disk is<br />
backup to each other<br />
Create a <strong>RAID</strong>3 volume which requires at<br />
least 3 x HDDs<br />
i. Create a <strong>RAID</strong> volume<br />
(1) Turn the rotary switch to one of<br />
<strong>RAID</strong> modes.<br />
(2) Hold pressing “Set/Mute” button<br />
and power on the host computer.<br />
(3) Release “Set/Mute” button about<br />
5 seconds after the computer startup.<br />
<strong>FiT</strong>300E-I<br />
Quick Installation Guide - 6 -
<strong>FiT</strong> <strong>RAID</strong> Cage<br />
<strong>FiT</strong>500E-I<br />
ii.<br />
Delete a <strong>RAID</strong> volume<br />
(1) Turn the rotary switch to “PM” mode.<br />
(2) Hold pressing “Set/Mute” button and power on the host computer.<br />
(3) Release “Set/Mute” button about 5 seconds after the computer startup.<br />
IMPORTANT!<br />
Because of different models, the <strong>RAID</strong> Mode<br />
reference may be different. <strong>FiT</strong> <strong>RAID</strong> cages are default<br />
setup at GUI mode; please refer to <strong>RAID</strong> Mode<br />
indication at cage’s rear for setting gap at one of <strong>RAID</strong><br />
modes.<br />
NOTE!<br />
Setup <strong>RAID</strong> Volume by GUI: see the <strong>FiT</strong> user’s manual.<br />
Quick Installation Guide - 7 -
<strong>FiT</strong> <strong>RAID</strong> Cage<br />
One Button Backup<br />
<strong>FiT</strong> <strong>RAID</strong> cage provides users<br />
an easiest way to backup data by<br />
pushing Mute/Backup button. Please refer to the user’s manual for more information.<br />
Quick Installation Guide - 8 -