Surgical Technique PDF - Ortho Providers
Surgical Technique PDF - Ortho Providers
Surgical Technique PDF - Ortho Providers

Create successful ePaper yourself
Turn your PDF publications into a flip-book with our unique Google optimized e-Paper software.
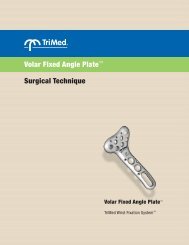
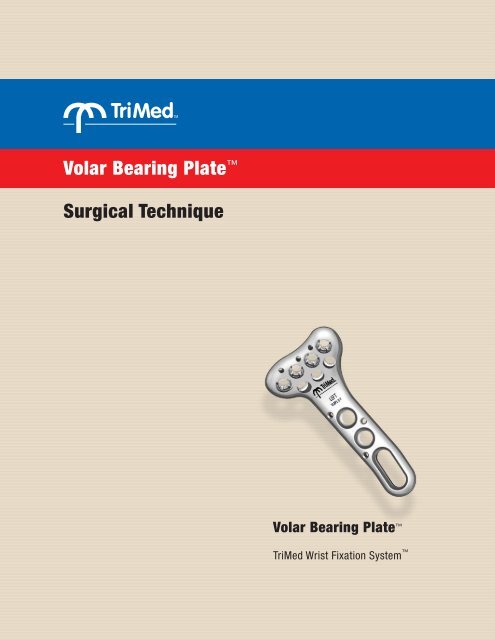
Volar Bearing Plate <br />
<strong>Surgical</strong> <strong>Technique</strong><br />
Volar Bearing Plate <br />
TriMed Wrist Fixation System
TriMed Wrist Fixation System <br />
1<br />
Exposure (standard or extended FCR approach)<br />
• Through the distal limb of a modified Henry volar<br />
approach, continue the dissection between the<br />
FCR and the radial artery.<br />
• Expose the radial shaft by reflecting the pronator<br />
quadratus from its radial and distal insertions.<br />
• If needed, release the distal portion of the<br />
brachioradialis.<br />
2<br />
Fracture Reduction and<br />
Provisional Fixation<br />
• Reduce the fracture manually. Transtyloid K-wires<br />
may be used for provisional fixation.<br />
• Align plate along the radial border of the radial<br />
shaft. Secure with K-wires proximally and check<br />
position, or fix with a 3.2mm cortical screw in the<br />
slotted hole.<br />
• Insert a 1.1mm (.045”) K-wire into a distal<br />
pinhole to confirm subchondral position of the<br />
pegs using a 10° lateral image.<br />
3<br />
Positioning Pegs in Distal Bearing Holes<br />
(using Peg Guide)<br />
• Assemble Peg Guide and Peg Guide Extender and<br />
thread guide into a distal bearing.<br />
• Aim guide to desired position, finger tighten to<br />
lock, and confirm trajectory with C-arm.<br />
• Remove the extender handle, and drill peg hole<br />
with 1.75mm (blue) drill bit. Measure depth with<br />
drill guide.
Volar Bearing Plate <br />
<strong>Surgical</strong> <strong>Technique</strong><br />
4<br />
Fine-Tuning the Reduction<br />
• Into a central distal bearing hole, thread a peg<br />
1–2 turns, but do not tighten. Repeat with a<br />
second peg into an adjacent hole.<br />
• With the pegs not fully seated, correct residual<br />
angulation by manual manipulation of the<br />
distal fragment.<br />
• When angulation is restored, simply tighten the<br />
pegs into the bearing holes until each peg is fully<br />
seated and locked.<br />
5<br />
Final Fixation<br />
• Complete fixation with additional screws<br />
proximally and pegs distally.<br />
• Confirm that all screws and pegs are fully seated<br />
prior to closing incision.<br />
*Alternative PEG POSITIONING <strong>Technique</strong><br />
Positioning Pegs in Distal Bearing Holes<br />
(using Free-Hand <strong>Technique</strong>)<br />
• Insert Quick Guide and the 1.75mm (blue) drill bit<br />
into a distal bearing hole.<br />
• Rotate guide and bit to the desired position and<br />
confirm trajectory with C-arm.<br />
• Drill peg hole. Measure depth with drill guide.
TriMed Wrist Fixation System <br />
Volar Bearing Plate <br />
Tips<br />
1. Contour the plate with the plate benders as needed. This may alter the trajectory of the fixed angle pegs, but will not<br />
affect the ability to place pegs subchondral in bearing holes.<br />
2. A 2.3mm cortical screw can be used in a fixed angle hole to draw the distal fragment and the plate together.<br />
3. If a technique inserting pegs first is preferred, insert pegs into the fixed angle holes to aid in levering the distal<br />
fragment into place.<br />
4. The Bearing Reduction Tool can be used to re-establish the alignment of the bearings to the drilled holes before<br />
inserting the pegs.<br />
Volar Bearing Plate<br />
standard<br />
VLBPL-x-7<br />
VLBPR-x-7<br />
x = 3–11 screw holes<br />
wide<br />
VLBPL-5-5<br />
VLBPR-5-5<br />
Bearing<br />
Reduction Tool<br />
BRT<br />
Plate Benders<br />
PLTBNDR-L<br />
PLTBNDR-R<br />
Pegs<br />
threaded<br />
TPEG-xx<br />
14mm to 32mm<br />
smooth<br />
UPEG-xx<br />
14mm to 28mm<br />
Cortical<br />
Bone Screws<br />
HEX3.2-xx<br />
08mm to 20mm<br />
(incl. 11,13, and 15mm)<br />
TRX2.3-xx<br />
10mm to 32mm<br />
Quick Guide<br />
QGUIDE-1.75<br />
Peg Extender<br />
and Peg Guide<br />
PEG-XTNDR<br />
PEG-GUIDE<br />
Instrument Tray and Implant Caddies<br />
The Volar Bearing Plate <br />
is a component of the<br />
TriMed Wrist Fixation System .<br />
TriMed, Inc. / 27533 Avenue Hopkins / Valencia, CA 91355 USA / 800-633-7221 / www.trimedortho.com<br />
Patent Coverage: TriMed, Inc. products are covered by patents issued in the U.S. and in foreign jurisdictions. The presently issued U.S. patents are:<br />
5,709,682; 5,718,704; 5,931,839; 5,941,878; 6,077,266; 6,113,603; 7,037,308; 7,044,951; 7,195,633; 7,267,678; 7,540,874.<br />
The TriMed Volar Bearing Plate has U.S. and international patents pending. TriMed Volar Bearing Plate is a trademark of TriMed, Inc.<br />
©2011 TriMed, Inc. All rights reserved. TME 808-27 (R 11-11)