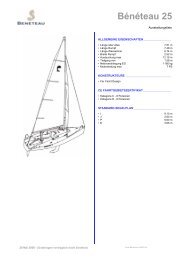
NORTH SAILS ITALIA Bénéteau 25 O.D. Tuning Guide ... - Platu 25
NORTH SAILS ITALIA Bénéteau 25 O.D. Tuning Guide ... - Platu 25
NORTH SAILS ITALIA Bénéteau 25 O.D. Tuning Guide ... - Platu 25

You also want an ePaper? Increase the reach of your titles
YUMPU automatically turns print PDFs into web optimized ePapers that Google loves.
<strong>NORTH</strong> <strong>SAILS</strong> <strong>ITALIA</strong><br />
Bénéteau <strong>25</strong> O.D.<br />
<strong>Tuning</strong> <strong>Guide</strong><br />
North Sails One Design sails<br />
ONE DESIGN CLASS<br />
<strong>NORTH</strong> <strong>SAILS</strong> <strong>ITALIA</strong><br />
North Sails Italia srl – Via Pontevecchio 42 – 16042 CARASCO (GE) – ITALY<br />
Tel. +39 185 35261 – Fax +39 185 350481 - E-mail: vittorio@it.northsails.com<br />
Web Site: www.northsails.it
<strong>NORTH</strong> <strong>SAILS</strong> <strong>ITALIA</strong><br />
North Sails Italia srl – Via Pontevecchio 42 – 16042 CARASCO (GE) – ITALY<br />
Tel. + 39 0185 35261 – Fax + 39 0185 350481 - E-mail: vittorio@it.northsails.com<br />
Web Site: www.northsails.it<br />
Bénéteau <strong>25</strong> <strong>Tuning</strong> <strong>Guide</strong><br />
North Sails One Design sails<br />
INTRODUCTION 3<br />
1. BOAT PREPARATION 3<br />
HULL 3<br />
KEEL 4<br />
RUDDER 4<br />
DECK LAYOUT 4<br />
2. MAST TUNING 5<br />
BEFORE STEPPING THE MAST 5<br />
WITH THE MAST UP 6<br />
FINE MAST TUNING 7<br />
3. SAIL TRIM 9<br />
MAINSAIL 9<br />
GENOA 10<br />
DOWNWIND – SPINNAKER 11
<strong>NORTH</strong> <strong>SAILS</strong> <strong>ITALIA</strong><br />
Bénéteau <strong>25</strong> <strong>Tuning</strong> <strong>Guide</strong><br />
North Sails One Design sails<br />
Introduction<br />
Bénéteau <strong>25</strong> Class Association is a “pure” class, so we recommend you not to modify the boat beyond what<br />
is permitted by the class rules (and commonly done on the racing boats, in order to improve the<br />
hydrodynamic efficiency and the manoeuvres easiness). The obtainable advantage would be anyway limited,<br />
but the damage to the class and the racing people very big. This is the concept inspiring this tuning guide,<br />
and this is what we at North Sails believe.<br />
Hull<br />
1. Boat preparation<br />
Class rules don’t allow modifications to the hull, above all no lightening is allowed, nor is in the class<br />
“spirit” to go to the class rules limit. The year 2000 boats and the following are generally heavier than the<br />
previous ones (minimum weight is actually 1240 Kgs), but feature lower positioned weight and seem to have<br />
the same speed in all conditions. Here there are anyway some of the interventions that is allowed to do on the<br />
boat in order to make her faster.<br />
We all know that a smooth bottom makes every boat faster, and the Bénéteau <strong>25</strong> is no exception to this rule.<br />
Make sure that your bottom is always as clean and smooth as possible. We recommend you to make<br />
homogeneous the surface filling every hollow. Anyway, the best thing to do is to ask your local class<br />
measurer before starting to work on the boat, in order to make sure you are not infringing the rules. When<br />
you have finished smoothing the bottom, it is a good idea to polish it using a Teflon cleaner, which is good<br />
both for cleaning and to keep the seaweed away when the boat is on the water during a race series. If you<br />
need to keep the boat on the water for long periods of time, a carbon or VC System antifouling will be good<br />
in order to make your boat fast, if you, after varnishing, use a 1200 waterproof sand paper in order to make<br />
totally smooth the surface. The “plug” for the engine propeller can’t be totally sealed, because class rules<br />
prescribe that it has to remain working; it has anyway to follow perfectly the shape of the bottom and, very<br />
important, it has to be closed very strongly with a proper rubber band; if you don’t do so, it will open itself<br />
during the race causing loss of speed. The engine locker lets also the water coming from the cockpit go out,<br />
and this is another reason because it has not to be sealed. It is on the contrary allowed, and good to be done,<br />
to seal well the vacuum between the engine locker and the engine rest cocker, making a (very!) light<br />
bulkhead between the two. Try to seal as well as possible also the lockers covers using rubber gaskets.<br />
3
<strong>NORTH</strong> <strong>SAILS</strong> <strong>ITALIA</strong><br />
Keel<br />
The Bénéteau <strong>25</strong> appendages, finished quite roughly by the yard, need some interventions in order to prepare<br />
the boat for racing. The class allow any intervention on appendages, with the following limits: you can’t take<br />
away weight from the original keel (that is anyway difficult for the cast iron), and you have to meet the<br />
measures of the patterns – ask your local Class Association for them. You have to align the keel blade with<br />
the rudder blade, and to make the keel perfectly symmetrical. The keel weight, certified by the builder, has to<br />
be between 520 and 500 Kgs, so it is a good idea to increase the weight in order to meet the maximum of 520<br />
Kgs in order to improve the stability. It is in fact allowed to add weight.<br />
It is important to improve the junction between keel and hull (often very bad) using filler or, even better,<br />
gelcoat, watching out not to change the surfaces geometry and not to touch the cast iron. Furthermore, class<br />
rules specifically allow trailing edges on keel and rudder, what you have to do bringing the 90° angle to<br />
approximately 30°, but only by one side. This will make the keel blade asymmetrical, but will eliminate low<br />
speed vibrations. When the boat surfs, anyway, you will anyway feel the boat vibrating.<br />
Rudder<br />
Class rules don’t allow to modify rudder’s shape, but only to modify the aft edge in order to eliminate<br />
vibrations. You have to intervene exactly as you did on the keel, making the angle approximately 30° instead<br />
of 90°, only by one side. The surface has to be as smooth as possible; if the boat is new, it is a good idea to<br />
control that the rudder is as light as allowed (7,6 Kgs).<br />
Deck layout<br />
Since the Bénéteau <strong>25</strong> has to be driven like a true dinghy, the deck layout has to be studied with accuracy. If<br />
not, the crew won’t have the possibility to move through the deck properly. Anyway, the Bénéteau <strong>25</strong><br />
features a very well studied deck plan, and class rules allow only very little modifications to it.<br />
The goal is to improve the efficiency adapting it to the different characteristics of your crew, in order to<br />
maximize the velocity and the easiness of the controls. Class rules allow to use foot straps both for the driver<br />
and the mainsail trimmer, indicating also limits to their fixing points. If you do this, you can also lower the<br />
lifeline between the aftmost stanchions and their relative pushpits, making the lifeline pass through a padeye<br />
fixed in between them on the rail. In this way, both the helmsman and the mainsail trimmer can hike out<br />
having the feet fixed to the straps. It is always good to place this system, because the GPR feet supports fit<br />
only to short people and make taller people “suffer” too much.<br />
We are convinced that it is good to take advantage of this possibility. There are several reasons in favour of<br />
these modifications:<br />
- You can introduce without any damage the character of the mainsail trimmer: the ones hiking on the<br />
straps can straighten the boat at least as the ones on the rail. The helmsman, in strong wind<br />
conditions, can keep the concentration high on tactics, working together with the mainsail trimmer,<br />
as he doesn’t have to play on the mainsail sheet.<br />
- The position of the body becomes a lot more comfortable: the footrests on the cockpit fit well only to<br />
short legs, while tall people has to “suffer” too much to remain on the windward side in strong<br />
winds, as the lifeline prevents your back from straighten. This is mainly true for the foremost<br />
liferests, clearly too external. Don’t forget that you can place new footrests where you like.<br />
- In light wind conditions, the mainsail trimmer will anyway come right forward the headsail trimmer<br />
letting the helmsman play with the mainsail sheet. In these conditions, in fact, his job is a lot easier.<br />
Place therefore (securely, in order to avoid unwanted baths) a padeye half way between the aftmost stanchion<br />
and the relative pushpit on the rail, both sides. Rules allow 50 mm tolerance from this so found center, you<br />
4
<strong>NORTH</strong> <strong>SAILS</strong> <strong>ITALIA</strong><br />
have to take advantage of it placing the padeye (and, as a consequence, the weight of helmsman and mainsail<br />
trimmer) as forward as possible. Make the lifelines pass through these padeyes, filling the gap to the pushpits<br />
using an Aramid or Poliethylene rope (which has to feature a breaking strength at least equal to the one of a 3<br />
mm wire cable (4 mm spectra are perfect). The max length of the strop is 40 cm, but the real limit is given by<br />
the lifelines tension: placing 10 Kg weight between the two central stanchions, the lifeline would not get<br />
closer than 10 cm to the deck. You obviously have to get close to this limit, avoiding the risk of a<br />
disqualification due to a crooked stanchion.<br />
After having finished this job, do some trials in order to place the foot straps, remembering that you can’t<br />
race if you don’t place at least one of them by each side of the cockpit. Here the solution we prefer:<br />
- Place for the helmsman a foot strap above the aftmost external footrest, both sides, and another one<br />
above the central footrest, to be used on both tacks.<br />
- Place for the mainsail trimmer a foot strap right above the foremost foot rest, both sides, and another<br />
one above two new foot rests to be placed 50 cm inside the named ones, both sides.<br />
A total of seven foot straps and two new footrests, which will allow both to always find the best placement of<br />
the weight in the different wind conditions, and to have rest if you don’t manage to hike hard all along the<br />
race. Keep in mind that concentration is often more important than hiking!<br />
Try to obtain a “clean” zone between the mast and the companionway for the two crewmembers that have to<br />
pass there tacking. Cut the exceeding ends of the halyards, by-pass the purchases if you don’t need them, but<br />
first of all check the class rules before changing blocks, purchases and cleats.<br />
With reference to winches, it is better to use the most powerful and widest mounted by the yard (32:1), in<br />
order to reduce the number of turns necessary for holding the sheet in strong wind conditions: it is important<br />
to maintain the possibility to tune the jib properly.<br />
Class rules define a minimum lifelines tension, be close to this limit in order to get the best possible<br />
advantage by the hiking of the crew.<br />
Materials like aramids and poliethylene are allowed for all the manoeuvres; it is good to use them for<br />
halyards and sheets, you can obtain more lightness (important in light wind conditions) and less stretch<br />
(important in all conditions) in comparison with polyester.<br />
Put a small batten all along the bow ending approximately <strong>25</strong> cm above it, in order to prevent the spinnaker<br />
sheets from falling down the boat and around the keel. Use a small line or a rubber band, using the layout<br />
you prefer, and pass it between the aft part of the bow pulpit and the first stanchion, both sides, in order to<br />
prevent the genoa leech from falling in the water. It is necessary also to study a system using a rubber band<br />
in order to stop the genoa in rest – otherwise it will hoist itself, and the most nervous of your crew will<br />
become mad… Put a small line or a short rubber band between the lifeline and the top shrouds, both sides.<br />
This way the spinnaker sheets won’t remain between the shroud and the stanchion, risking to make the<br />
spinnaker break.<br />
2. Mast tuning<br />
Before stepping the mast<br />
Preparing the mast for the best boat speed in every condition is quite easy. We tune the mast with the<br />
maximum rake allowed by the boat rig supplied by the yard, in order to induce more windward helm in light<br />
5
<strong>NORTH</strong> <strong>SAILS</strong> <strong>ITALIA</strong><br />
wind conditions. So we use the lowest hole in every condition, taking into account that it is not allowed to<br />
mount a turnbuckle on the forestay.<br />
First of all, before stepping the mast, you have to check that the spreaders have the correct angle and, above<br />
all, are perfectly symmetrical. That is necessary in order to properly control the mast bending. Here you find<br />
some stuffs that have to be done before stepping the mast:<br />
1. Set up a dinghy windex on the top of the mast.<br />
2. Set up on the top of the mast a long batten that acts on the backstay in order to keep it away from the<br />
mast. The batten hasn’t to be too strong, because it is a little work it has to do in order to make the<br />
top batten pass the backstay.<br />
3. Measure the transverse position of the mast collar. A lot of mast collars are not perfectly on the<br />
centerline, so you have to center the mast while fixing it. This is very important in order to have the<br />
mast perfectly straight and the same tension on both lower shrouds.<br />
4. Put 5 marks using tape on the lower spreaders. Measure <strong>25</strong> cm from the point where the upper<br />
shrouds meet the spreader and put here the external part of your tape mark. Then make 4 further<br />
marks (best using two colours) leaving 7,5 cm from the external part of the one to the external part<br />
of the other.<br />
With the mast up<br />
1. Set up the mast and fix the only the forestay to the maximum length, using the lowest hole. Class<br />
rules don’t indicate limits to mast rake, but the lowest hole has proved to be the best in every<br />
condition. You have to set up the mast step this way: without shroud tension, with the forestay only<br />
in, put the mast completely straight and lying on the aft edge of the mast collar and place the mast<br />
step in this point. Watch out not to put it inverse-bended, choose if you are between one hole and<br />
another the aft one. Normally, if you have a three-holed mast step, the right one is the central one.<br />
Now stop the mast in the mast collar: push it completely forward if it was straight and lying on the<br />
aft edge of the mast collar, if you had to choose the aft hole of the mast step, so the mast is already<br />
bending, you have to push it only partially forward.<br />
2. Center the mast transversally using only the upper shrouds, without tension on the lowers,<br />
intermediates and backstay (you have to set up it on the stern only at the end of the mast tuning<br />
session, and you have to measure shrouds and forestay tensions always without any tension on the<br />
backstay). Pull approximately in the same way the two turnbuckles, with moderate tension in order<br />
not to induce errors in measurements due to the top mast moving. Then use both the genoa and the<br />
mainsail halyard and measure two identical points on the toerail, both sides, as external as possible<br />
(for example, a little bit forward the attachment point of the shrouds on the toerail using the genoa<br />
halyard, a little bit aft the attachment point of the shrouds on the toerail using the mainsail halyard).<br />
Best thing is to use the measurement tape hoisted instead of the halyards for these measures, above<br />
all if they are stretchy. Tighten and loose the upper shrouds in order to make the two measurements<br />
even. Since you reach this goal, you have to move the upper shroud turnbuckles in parallel: don’t try<br />
to straighten the mast moving them differently from one side to the other, you’d loose the correct<br />
position of the mast.<br />
3. Now tighten moderately the lower shrouds, checking that the mast is completely straight on a<br />
transversal plan, without drawing dangerous “S”s. It is not so easy this kind of check; probably you<br />
can obtain the best result looking at the mast from behind the luff groove, both sides of the boom.<br />
4. As final check to this process, measure the tension on your forestay. With the shrouds in base<br />
position (16 uppers-14 lowers), the Loos Tension PT-2 tension gauge should begin to mark 5.<br />
6
<strong>NORTH</strong> <strong>SAILS</strong> <strong>ITALIA</strong><br />
5. Now, measure the mast bending using the main halyard stopped on the aft part of the mast at boom<br />
height. You should have 6-7 cm prebending. Remember that main halyard gets out of the mast some<br />
centimeters away from the mast aft face, so when you control the bending take it into account. Prebending<br />
is basic in mast tuning in order to make your sails offer the best performance, so use the best<br />
accuracy in this phase moving the mast in the mast collar, if necessary, in order to obtain these<br />
numbers.<br />
6. Finally, with the mast at this base tuning, tighten the intermediate shrouds without really pulling<br />
them, exactly in the same way both sides. Check then the mast as you did before from behind the luff<br />
groove. The quarter turns too are important!<br />
Fine mast tuning<br />
It is important to modify shrouds tension in order to change the sails’ shape according with the wind. Very<br />
often you will have to use mainsail and light genoa, so shrouds tensions are basic in order to make them<br />
flatter or deeper. A lot of tension on the shrouds and the backstay reduces the power on the sails delivering a<br />
lot of tension to the forestay and a lot of bending to the upper part of the mast; on the contrary, loose shrouds<br />
and backstay make the sails more powerful thanks to a loose forestay and a less bended upper part of the<br />
mast.<br />
In the Bénéteau <strong>25</strong> shrouds tuning is quite difficult, involving uppers, lowers and intermediates. We think it<br />
is more useful to develop a tuning technique that doesn’t involve intermediates (not too easy to tune), which<br />
you have to fix once while stepping the mast and stop. The lowers tuning will have to follow the varying<br />
tension of the intermediates due to the varying tension of the uppers, which, pulled, pull down the spreaders.<br />
Understanding the correlation between the upper, lower and intermediate tension is important. In light to<br />
medium winds the uppers should have more tension than the lowers. This allows the middle of the mast to<br />
bend forward, flattening the main to keep flow attached and sagging the forestay to increase power in the<br />
genoa. Note: As you increase tension equally on both shrouds, the lowers become tighter relative to the<br />
uppers.<br />
As the breeze increases, the tension on the lowers equals that on the uppers and then in high winds the lowers<br />
are tighter than the uppers. This helps stiffen the middle of the mast, which makes the headstay tighter (and<br />
jib flatter) and allows us to tighten the backstay very tight without over bending the mast relative to the<br />
mainsail.<br />
7
<strong>NORTH</strong> <strong>SAILS</strong> <strong>ITALIA</strong><br />
SHROUDS TUNING<br />
Tension * Turns<br />
Wind (knots) Uppers Lowers Uppers Lowers Headstay<br />
0-5 8 5 -3,0 -2,5 0<br />
6-8 11 8 -2,0 -1,5 0<br />
8-10 13 11 -1,0 -1,0 0<br />
10-12 15 13 -0,5 -0,5 0<br />
12-14 16 14 0,0 0,0 5<br />
14-16 18,5 15,5 +0,5 +0,5 8<br />
16-18 20 19 +1,0 +1,0 9<br />
18-20 21 20 +1,5 +1,5 10<br />
20-22 22 22 +2,0 +2,0 12<br />
> 23 23 23 +2,5 +2,5 14<br />
*Measurements done using the Loos Tension PT-2 tension gauge; remember that different gauges<br />
show different numbers.<br />
Note: Before going out, put the uppers at 16 and the lowers at 14, which is your base setting.<br />
It is important to sight up the back of the mast when sailing upwind to be sure the mast is straight side to side<br />
when the boat is powered up with the crew on the rail. This will serve as an ultimate final check to your<br />
tuning. Note that the top of the mast will bend off slightly in heavy air.<br />
In order to tune your mast easily and quickly on the water, it is a good idea to buy four tools having the same<br />
diameter of the shrouds screw ends that go into the turnbuckles (the end that has to be stopped while turning<br />
the turnbuckle). These tools have to be fixed one to the other and locked to the upper and lower shrouds<br />
ends. Use tape in order to lock them perfectly and prevent them from tearing the spinnaker. This way, you<br />
can turn the turnbuckles only, without keeping locked the shrouds ends using another tool. The turnbuckles<br />
8
<strong>NORTH</strong> <strong>SAILS</strong> <strong>ITALIA</strong><br />
have then to be fixed one to the other either using a short line which goes inside the turnbuckles bodies or,<br />
even better, a short batten. The above table is a simple tool we use to make tuning the rig on the water easy.<br />
Use a Loos Tension Model PT-2 tension gauge for all tuning. Once you have established the base setting on<br />
16/14, you can use this chart to count half turns up or down for the wind speed you are going to be racing in.<br />
You should ”set up for the lulls.” That is, tune your rig for the lightest wind speed you anticipate seeing in<br />
the course of the race. It is much easier to de-power the boat in a puff than power up an over tight rig in<br />
a lull.<br />
Remember to fix properly your turnbuckles once you have finished your tuning.<br />
3. Sail Trim<br />
Proper sail trim is a vital component of good boat speed in the Bénéteau <strong>25</strong> class As the boats are being<br />
sailed more and more like dinghies; aggressive and consistent sail trim is vital in order to keep the boat at<br />
maximum speed during constantly changing wind velocity. The following outline of sail trim will get you<br />
started towards having good consistent boat speed. Practice is the best way to get better at trimming your<br />
sails. Either by racing more or setting up two or three boat tuning sessions you’ll find that practice makes<br />
perfect. Ideally you will develop a true feeling for the correct trim, it is a good idea both to mark your sheets<br />
for reference and to trim sails following the feelings of the helmsman.<br />
Our goal when trimming the sails upwind is to keep the boat as flat and as easy to steer as possible.<br />
Ideally you want to steer the boat using sail trim and weight placement as much as possible. Use the helm as<br />
little as possible, thus reducing drag.<br />
For example, if we are fighting a lot of weather helm and are sure we have the rig tuned right and the correct<br />
amount of power in the sails, we will want to experiment with trimming the headsail slightly (to pull the bow<br />
down) and maybe easing the mainsheet or traveller which will also help to lighten the helm and bring the<br />
bow down.<br />
Conversely, if the helm is light and the boat always heels too much in the puffs we will want to look at<br />
easing the headsail and trimming the mainsheet. This will bring the bow up a couple of degrees, thus<br />
smoothing your steering, which keeps the boat tracking upwind.<br />
Downwind we are looking to also keep the helm neutral. Just like upwind we need to work the sails and crew<br />
weight in order to keep steering to a minimum. Watch some of the top boats downwind and you will find that<br />
their crews are constantly in motion to keep the boat flat so the skipper does not have to use the tiller.<br />
Mainsail<br />
The mainsail sheet purchase has to be as powerful as possible (6:1). In order to make the shortest possible<br />
the sheet, fix a 40 cm Spectra “core” line 10 mm diameter to the boom and the upper purchase block. Put a<br />
ratchet on the lower block, if there is not.<br />
Trim the mainsheet in order to make the boom nearly on the centreline, 5-10 cm down in light-medium<br />
wind. If the mainsheet is too tight (evidenced by the top batten hooking to weather and too round) you will<br />
slow down. In light air and choppy water, the top batten should be parallel or twisted off slightly. Always<br />
check the top telltale on the leech of the main. It should be flying 50/60% of the time within 10 knots of<br />
wind; above you will use more backstay and the upper part of the sail will get flatter, the top telltale has to be<br />
flying 100% of the time.<br />
9
<strong>NORTH</strong> <strong>SAILS</strong> <strong>ITALIA</strong><br />
Pull the traveller car to windward until the boom is close to the centreline, 5/10 cm down. Keep the boom<br />
close to the centreline up to 10 knots. As the wind increases above 10 knots, first of all pull the backstay and<br />
then gradually drop the traveller to keep the helm and heeling under control.<br />
The shelf foot – the mainsail panel closest to the boom – should never be fully open while sailing upwind.<br />
The outhaul has to be eased so that the clew of the mainsail is approximately 3 cm away from the<br />
measurement band at the end of the boom in light winds (0-6 knots), above this wind, the foot has to be<br />
completely tightened.<br />
The cunningham is used to position the draft in the main. In a new sail, we use no Cunningham up to 12<br />
knots; then enough to remove most of the wrinkles above 12 knots; and then progressively tighter in higher<br />
winds so there are no wrinkles. A used sail will need more Cunningham and luff tension in order to move the<br />
draft forward.<br />
We use no boom vang upwind to 8 knots (just pull tight enough to remove slack). At 9 knots it is snug and<br />
gets progressively tighter until at 15 knots it is very tight. The vang tension helps bend the mast down low,<br />
which flattens the lower sections of the main. It also allows you to play the mainsheet in strong puffs by<br />
maintaining leech tension (be sure you have installed the class legal 10:1 vang).<br />
As the wind increases above 7 knots, we tighten the backstay correspondingly. Set up the most multiplied<br />
purchase possible (16:1). Pulling on the backstay does two things. First, the mast bends, the upper half of the<br />
main flattens and the leech opens up – which relieves the helm and heeling. Second, it makes the forestay<br />
tighter, which flattens the entry of the headsail and eases the leech – thus increasing pointing ability and<br />
reducing leech tension, whenever you adjust the backstay you should adjust the mainsheet. The limit of the<br />
backstay tension is given from the top batten of the mainsail: when it is completely flat, further tension on<br />
the backstay is negative making the mast bend not properly and reducing tension on the shrouds (because<br />
they are swept aft). The backstay tuning on the puffs and the lulls is essential in order to keep the boat<br />
powerful and pointing high.<br />
Downwind – main: Ease the sheet until a luff appears, and then trim slightly. Set the vang so the top batten<br />
is parallel to the boom. The cunningham, backstay and outhaul should all be eased for maximum power<br />
downwind.<br />
Genoa<br />
The standard method for determining the genoa lead position is to head up slowly and watch the genoa luff.<br />
The lead will be set properly when the luff breaks evenly from top to bottom. When the top breaks first move<br />
the lead forward. Moving the lead forward increases leech tension and makes the bottom of the sail fuller. If<br />
the bottom breaks first, move the lead aft. Moving the lead aft flattens the bottom of the sail and decreases<br />
leech tension. Remember that every centimetre is important for a correct trim.<br />
Once you have found a correct base trim, you have to trust in the marks on the spreader in order to repeat fast<br />
trims in every condition, looking at the position of the leech in comparison to the marks through the window.<br />
You will keep the sheets crossed unless you have less than six knots of wind. The standard trim has to be<br />
always within the second and the fourth mark on the spreader. Very rarely you will have to position the leech<br />
on the most internal mark, only in close duels with other boats. Only in light winds and choppy conditions<br />
you will go for the most external mark upwind, in order to make the boat more powerful on the waves.<br />
You will have to pay particular attention to the barberhauler trimming, which has always to pull inside the<br />
genoa sheet within 5 and 15 centimeters (15 cm only in medium-light wind conditions and low wave).<br />
Measure these distances and make marks on the rope, obviously if it is purchased (as recommendable) the<br />
marks have to be consequently spaced.<br />
10
<strong>NORTH</strong> <strong>SAILS</strong> <strong>ITALIA</strong><br />
In very light air we are looking for a smooth luff to keep the draft forward and make steering easy, and an<br />
open leech to reduce stalling. As the breeze increases we trim the sheet harder to power up. We also let some<br />
wrinkles show in the luff, which optimizes the genoa entry and enables you to point higher. When we reach<br />
maximum genoa conditions, we ease the sheet to open the slot and reducing heeling, and pull the luff smooth<br />
to keep the draft forward. The best way to obtain this is pulling and easing genoa Cunningham very<br />
frequently, following the wind and the waves.<br />
Some crews have purchased the genoa halyard. We don’t suggest it, unless your number 2 (central) hasn’t<br />
enough strength to tighten properly the halyard, because the fine trim of the luff is done perfectly using the<br />
genoa cunningham. Anyway, this is the way to purchase the halyard: place a padeye just underneath the<br />
genoa halyard sheave on the mast, under the top of the forestay. Then make the rope coming out of the mast<br />
there pass through a small block having a snap shackle to be fixed to the genoa and splice its end to the<br />
above padeye. Remember you will need approximately twice the length of the original halyard, but you can<br />
reduce the diameter of it. Even the light genoa has no problem to be fully hoisted using this system, as it has<br />
enough room from its head to the halyard sheave.<br />
The heavier your crew and the bigger the waves, the longer you can keep the genoa medium-light up. If the<br />
apparent wind is above 16-18 knots wind speed, it is time to change to the medium-heavy genoa. You don’t<br />
have to use other sails on your boat, unless you start in more than <strong>25</strong> knots true wind. That’s very rare in the<br />
Bénéteau <strong>25</strong> class… Never reef the mainsail. We sail normally 400 Kgs crew weight, try to be always close<br />
to this limit.<br />
Downwind – Spinnaker<br />
The spinnaker should be at full hoist at all times. The general rule of trim is to allow 5-10 cm of curl in the<br />
luff of the sail. The outboard end of the pole should be even with the free floating clew (move it continuously<br />
in order to obtain this result!) and the pole should remain perpendicular to the apparent wind. Use the upper<br />
pole ring for most conditions. If you are going slowly, try raising the pole a couple of inches.<br />
Downwind – light air: Concentrate on good communication between helmsman and spinnaker trimmer. The<br />
goal is to sail as low as possible while still maintaining good pressure in the spinnaker (measured by tension<br />
on the sheet). Try not to sail too high which translates into longer distances, but do not sail too low at a slow<br />
pace. Do not open too much the outboard end of the pole, it flattens the spinnaker. It is very important to<br />
constantly trim both the spinnaker guy and the spinnaker uphaul. Do not mind if you move the pole more<br />
than the spinnaker sheet, you are on the right way!<br />
Downwind – heavy air: Do not allow the pole to rest on the headstay at any time. Always maintain at least<br />
5-8 cm distance between the headstay and pole. When there are big puffs, ease the sheet 10-15 cm to help the<br />
boat accelerate. Trim as the puff subsides. Keep a hand on the vang, ready to release it if the boat starts to<br />
spin out. Hike very hard on the reaches.<br />
Downwind tips<br />
1. Pole height is important and changes in increments of 2 cm have a big effect on the spinnaker. The break<br />
(or curl) should appear at the front of the first central panel. If the spinnaker breaks higher than this, the pole<br />
is too low and should be raised. If the break is lower, the pole is too high and should be lowered.<br />
2. An efficient foreguy system is crucial. Every up and down, or back and forth motion of the pole (and<br />
hence the spinnaker) is wasted energy; that energy will not be pulling the boat forward.<br />
3. An efficient system for launching and retrieving the spinnaker is a must. We recommend a deep cockpit<br />
launching bag. Call us if you would like one made for your Bénéteau <strong>25</strong>.<br />
11
<strong>NORTH</strong> <strong>SAILS</strong> <strong>ITALIA</strong><br />
Final Tips<br />
• Always sail at maximum crew weight<br />
• Keep the boat as flat as possibile, apart from very very light wind conditions<br />
• Don’t hesitate to change your tunings, if you feel you are slow<br />
• In strong wind conditions, don’t worry if the windward genoa telltale is stalling<br />
• Keep weight concentrate and central<br />
• Trim the boat for the lulls you expect to find in the first windward leg<br />
• Go fast and have fun!<br />
12