Marine Instrumentation Guide Volume 1 - Faria Instruments
Marine Instrumentation Guide Volume 1 - Faria Instruments
Marine Instrumentation Guide Volume 1 - Faria Instruments

You also want an ePaper? Increase the reach of your titles
YUMPU automatically turns print PDFs into web optimized ePapers that Google loves.
<strong>Marine</strong> <strong>Instrumentation</strong> <strong>Guide</strong><br />
<strong>Volume</strong> 1<br />
Warranty, Technical Support<br />
And<br />
Troubleshooting Manual<br />
R<br />
M A R I N E I N S T R U M E N T S<br />
385 Norwich-New London Turnpike, Uncasville, CT USA 06382-0983<br />
Tel: (860)-848-9271 Fax: (860)-848-2704 Customer Service: (800)-473-2742 ext.-229<br />
Internet: www.faria-instruments.com e-mail: faria@faria-instruments.com<br />
R<br />
Suggested Retail Price $4.00
© Copyright 1997 by the T.G. <strong>Faria</strong> ® Corp.<br />
No part of this publication may be reproduced in any form, in an electronic retrieval system or otherwise,<br />
without the prior written permission of the company.
March 1997<br />
Dear Valued Customer,<br />
As one of the marine industry’s leading suppliers of after-market and original equipment gauges, we at<br />
<strong>Faria</strong> ® <strong>Marine</strong> <strong>Instruments</strong> realize that building some of the world’s finest products is in itself not<br />
enough. Our service must match our quality. In keeping with this commitment, we are happy to<br />
introduce our Warranty, Technical Service and Troubleshooting Manual. We are certain that instrument<br />
users of all levels, from builders to boaters, will find this a useful tool in solving instrumentation related<br />
problems, making the sport more enjoyable for all.<br />
Happy Boating!<br />
Ted Genard<br />
Manager, Customer Service<br />
R<br />
MARINE INSTRUMENTS<br />
385 Norwich-New London Tpke. Uncasville, CT 06382-0983<br />
Phone 860-848-9271/848-1241 FAX 860-848-2704<br />
Customer Service: 800-47FARIA<br />
Internet: www.faria-instruments.com e-mail: faria-@faria-instruments.com<br />
i
CONTENTS<br />
<strong>Volume</strong> 1 Page<br />
Part I: Warranty <strong>Guide</strong><br />
Warranty: Transferable Limited Lifetime ........................................................................................3<br />
Warranty: <strong>Marine</strong> OEM, Dealer Direct ..........................................................................................4<br />
<strong>Marine</strong> <strong>Instrumentation</strong> Facts ..........................................................................................................5<br />
Part II: Technical <strong>Guide</strong><br />
TACHOMETERS<br />
Operation ..................................................................................................................................9<br />
Application ...............................................................................................................................9<br />
Calibration ................................................................................................................................9<br />
Troubleshooting......................................................................................................................10<br />
SYNCHRONIZERS<br />
Operation ................................................................................................................................11<br />
Calibration ..............................................................................................................................11<br />
Troubleshooting......................................................................................................................11<br />
SPEEDOMETERS<br />
Operation ................................................................................................................................12<br />
Troubleshooting......................................................................................................................12<br />
GAUGES: FUEL, OIL PRESSURE, WATER TEMPERATURE, RUDDER ANGLE, TRIM<br />
Operation ................................................................................................................................13<br />
Troubleshooting......................................................................................................................13<br />
VOLTMETERS<br />
Operation ................................................................................................................................15<br />
Troubleshooting......................................................................................................................15<br />
AMMETERS<br />
Operation ................................................................................................................................16<br />
Troubleshooting......................................................................................................................16<br />
Appendices<br />
Appendix........ I: Instrument Dimensional Drawings (Basic Styles)<br />
Appendix....... II: Outboard Tachometer Applications Table<br />
Appendix......III: <strong>Faria</strong> Instrument Tester Instructions<br />
Appendix..... IV: Gauge Troubleshooting Quick Reference <strong>Guide</strong><br />
Appendix.......V: Sending Unit Resistance Values Table<br />
Appendix..... VI: Choosing the Proper Sender<br />
iii
<strong>Volume</strong> 2 of the <strong>Marine</strong> <strong>Instrumentation</strong> <strong>Guide</strong> is available separately and<br />
contains the following:<br />
Installation Instruction Sheets Page<br />
Compass...........................................................................................................................................1<br />
Gauges<br />
Ammeter ..........................................................................................................................................3<br />
Battery Conditioner Indicator ..........................................................................................................4<br />
Clock................................................................................................................................................5<br />
Fuel Level ........................................................................................................................................6<br />
Sender, Fuel level (Standard <strong>Marine</strong>) ............................................................................................8<br />
Sender, Fuel Level (Metric) .........................................................................................................10<br />
Fuel Pressure..................................................................................................................................12<br />
Hourmeter ......................................................................................................................................13<br />
Oil Pressure....................................................................................................................................14<br />
Operator Warning System (OMC).................................................................................................16<br />
Rudder Angle Indicator..................................................................................................................17<br />
Sender, Rudder Angle..................................................................................................................19<br />
Temperature, Water / Oil ...............................................................................................................20<br />
Temperature, Outboard Cylinder Head..........................................................................................22<br />
Trim................................................................................................................................................23<br />
Vacuum / Boost..............................................................................................................................24<br />
Voltmeter, 12VDC & 24VDC .......................................................................................................25<br />
Voltage Adapters, 24VDC .............................................................................................................26<br />
Warning Light Indicator (Mercury) ...............................................................................................27<br />
Water Pressure ...............................................................................................................................28<br />
Instrument Tester ...........................................................................................................................29<br />
Speedometer...................................................................................................................................31<br />
Synchronizers<br />
Synchronizer ..................................................................................................................................32<br />
Synchronizer (Bracket Mount).......................................................................................................33<br />
Tachometers<br />
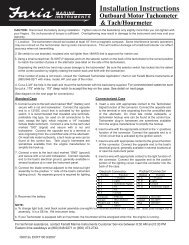
Inboard Gas / Ignition Tachometer & Tach/Hourmeter.................................................................35<br />
Magnetic Pick-up Tachometer & Tach/Hourmeter........................................................................36<br />
Outboard Motor Tachometer & Tach/Hourmeter..........................................................................38<br />
Outboard Motor Tachometer & Operator Warning System...........................................................40<br />
Variable Ratio Alternator & Switching Diesel Tachometer & Tach/Hourmeter...........................41
Part I
Transferable Limited LIFETIME Warranty<br />
During the first 36 month from date of original retail purchase (12 months on Personal Watercraft and<br />
fog resistant lenses), any instruments that fail due to defects in materials or workmanship will be repaired or<br />
replaced at <strong>Faria</strong> ® <strong>Marine</strong> <strong>Instruments</strong>’ option at no charge. The warranty is further extended indefinitely<br />
beyond the initial 36 months period by enclosing the nominal fee as listed below when submitting a warranty<br />
claim.<br />
To submit a warranty claim, call <strong>Faria</strong> ® Customer Service at 1-800-473-2742 weekdays' 8:30 a.m. until<br />
5:00 p.m. Eastern time. One of our marine applications specialists will review the problem with you in detail. If<br />
no solution is found, you will be given an authorization number to return the instrument. The instrument must be<br />
packaged to prevent damage while in transit and sent with prepaid postage, your name, address, daytime<br />
telephone number, sales receipt, and a brief description of the problem. Send to FARIA ® MARINE<br />
INSTRUMENTS, WARRANTY SERVICE, 385 NORWICH-NEW LONDON TURNPIKE, UNCASVILLE, CT<br />
06382-0983. It will be promptly returned to you provided postage is prepaid with an average turnaround of five-<br />
(5) working days. Instrument styles that are no longer manufactured may be replaced with a similar instrument of<br />
equal or greater value. Flux-Gate compass systems should be returned with sensor. For warranty service beyond<br />
the initial 36-month warranty period, be certain to include your check or money order as follows:<br />
Battery Condition Indicator $11.00*each<br />
Clock or Hourmeter $22.00*each<br />
Flux-Gate Compass $65.00*each<br />
Gauge, Voltmeter, or Ammeter $ 8.50*each<br />
Speedometer $13.00*each<br />
Synchronizer $30.00*each<br />
Tachometer $25.00*each<br />
Tach/Hourmeter, 2” Operator Warning System $40.50*each<br />
Tachometer with Warning System $45.50*each<br />
Removal, reinstallation expenses, any damage to an instrument resulting from natural disasters, misuse,<br />
neglect, accident, misapplication, improper installation, unauthorized repair or alteration, and instruments<br />
purchased prior to March 1, 1985, are not covered by this warranty. <strong>Instruments</strong> returned to <strong>Faria</strong> ® <strong>Marine</strong><br />
<strong>Instruments</strong> that are not covered under this warranty will be repaired or replaced at our nominal service rates or<br />
returned to you as is, at your option. <strong>Faria</strong> ® <strong>Marine</strong> <strong>Instruments</strong> expressly disclaims any liability for incidental<br />
or consequential damage caused by product defects. Some states do not allow the exclusion or limitation of<br />
consequential damages, so the above may not apply to you. The warranty herein is in lieu of any other expressed<br />
warranty of merchantability of fitness or any other obligation on the part of <strong>Faria</strong> ® <strong>Marine</strong> <strong>Instruments</strong>, THE<br />
THOMAS G. FARIA ® CORPORATION, or the seller. All implied warranties are limited to the initial 36 month<br />
period. Some states do not allow limitation on how long an implied warranty lasts, so the above limitation may<br />
not apply to you. This warranty gives you specific legal rights, and you also have other rights, which vary from<br />
state to state. *These fees are in effect as of 6/1/98 and are subject to change without notice.<br />
385 Norwich-New London Turnpike, Uncasville, CT 06382-0983 USA<br />
Tel: 860-848-9271 Fax: 860-848-2704 Customer Service: 800-473-2742<br />
Internet: www.faria-instruments.com e-mail: faria@faria-instruments.com<br />
3
IS0090A 7/12/99 ECR15443
DEALER-DIRECT<br />
<strong>Marine</strong> OEM Warranty<br />
Supplement to the Transferable Limited LIFETIME Warranty<br />
During the first 24 months from the date of original purchase (12 months on Personal Watercraft), <strong>Faria</strong> ®<br />
<strong>Marine</strong> <strong>Instruments</strong> will provide an advance replacement at no charge, shipped within 24 hours freight prepaid<br />
and will pay $13.50 labor/freight reimbursement for replacement of any <strong>Faria</strong> ® marine instrument purchased<br />
after May 31, 1994 returned to <strong>Faria</strong>, and found to be defective due to materials or workmanship.<br />
To submit a Dealer-Direct Warranty claim, call <strong>Faria</strong> ® Customer Service at 1-800-473-2742 x 229. One of<br />
our marine application specialists will review the problem with you in detail. If no solution is found, a<br />
replacement will be shipped at no charge directly to you the next business day, freight prepaid. Upon receipt,<br />
simply return the original instrument in the same box along with the complete warranty tag, postage prepaid to:<br />
<strong>Faria</strong> ® <strong>Marine</strong> <strong>Instruments</strong> Warranty Service<br />
385 Norwich-New London Turnpike<br />
Uncasville, CT 06382-0983<br />
You will be paid $13.50 labor/freight reimbursement for each <strong>Faria</strong> ® marine instrument returned and found<br />
to be defective. No instruments will be returned.<br />
4
Battery Connection Warning<br />
MARINE INSTRUMENTATION FACTS<br />
Disconnecting the battery(s) while the engine is running by either removing the battery cables(s) from the<br />
battery post(s) or by inadvertently turning the battery switch to the “off” position will cause an extremely high<br />
voltage to be produced on the 12 volt line. This voltage is applied to the tachometer, gauges, and other 12 volt<br />
powered electrical equipment and will almost surely cause immediate failure (component turn out) of instruments<br />
and any equipment which is operating at the time.<br />
Less obvious, yet just as destructive, are loose connections on ammeters or bad connections between battery<br />
cables and battery posts caused by corrosion and/or frayed cables. Also included in this category are defective,<br />
cracked, or corroded battery switches and isolators.<br />
This damage is due to the fact that in almost all battery started engine applications, the battery acts as a<br />
voltage limiter. To prevent this damage, battery terminals and clamps should be cleaned and tightened<br />
periodically. Cracked, corroded, or otherwise defective battery switches or isolators should be replaced.<br />
A few minutes to address these critical items will help to ensure long instrument life and reliable operation<br />
of all your electrically operated equipment.<br />
Meter Movement Stops<br />
Some marine tachometers have no internal meter stops which now permit 360 degrees of pointer movement.<br />
When the ignition is shut off, the pointer will fall to approximately to the 6 o’clock position. When the ignition<br />
is switched back on, the pointer will go to zero and then to the correct RPM when engine is started.<br />
Other models will stop on zero with no power applied but have the potential for pegging at the maximum<br />
RPM’s or if the switch on the back of the tach is between positions.<br />
To remedy this, the engine is started and revved up to RPM’s greater than mid-range. This will allow the<br />
tach to re-synchronize itself and operate normally. The tach can also be shut off, and a magnet used on the face<br />
of the lens to return the pointer to zero. Either of these methods can be used (with switch on back of the tach in<br />
the correct position) to return to normal operation.<br />
Lens Fogging<br />
Most marine instruments have small vents in their cases to allow a way out for moisture that finds its way in.<br />
It is possible for moist air to be drawn into the vents when the air inside the tachometer or gauge cools down after<br />
the instrument is turned off. The morning sun can draw this moisture up against the lens, causing fogging. This<br />
same sun will help force the moisture back out of the instrument as well. Turning on the instrument with the<br />
instrument light “on” can also speed up moisture removal. Fogging is not abnormal, nor will it harm your <strong>Faria</strong> ®<br />
instrument, which is built to withstand the harsh environment.<br />
Radio Transmissions<br />
Some interference (erratic operation) may be noticed on tachometers or synchronizers during radio<br />
transmissions. This will neither damage the instrument nor affect its accuracy when not transmitting.
Part II
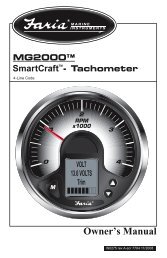
Operation<br />
TACHOMETERS<br />
Electronic tachometers work by counting pulses generated by the ignition system, alternator, tach signal<br />
generator, or magnetic pickup sender. The tach is hooked up to +12VDC, Ground, and one of the signal sources<br />
listed above. By selecting the right tach and setting the switch on the back to the correct position, you let the<br />
tachometer know how many pulses are sent per each engine revolution. From this information, the tach displays<br />
the correct engine speed. See Appendix I for tachometer dimensions. Instrument part numbers are located on a<br />
label attached to the outside of the case (i.e. TC0000A).<br />
Application<br />
4 cycle engines: The tach signal terminal is connected to the negative terminal on the ignition coil or to a<br />
transistorized tach driver circuit connected to the ignition system. This circuit will have a wire (usually gray) for<br />
connection to the tach. The correct tachometer will have a white label on the side indicating which switch<br />
position is for each engine type. This label will include 4, 6, and 8 cylinder engines for positions 1, 2, and 3.<br />
2 cycle engines: The tach signal terminal is usually connected to the unrectified AC output of the<br />
alternator/lighting coil. Sometimes it is hooked directly to the stator output wire (usually yellow) other times a<br />
gray tach output lead is provided. The correct tach for this application will have a white label on the side with<br />
switch positions for 4, 6, 8, 10, 12, or 20 pole alternators. The number of poles on the alternator can be<br />
determined by checking the <strong>Faria</strong> ® Outboard Tachometer Application table. (See Appendix II)<br />
Diesel engines: The tachometer signal terminal is hooked up to 1 of 3 things: a) the alternator, b) a tach<br />
signal generator that is spun by the mechanical take-off, or c) a magnetic pickup sensor which counts gear teeth.<br />
a) The alternator tach, which is also called a variable ratio tach, is hooked up to the AC output terminal on<br />
the alternator. This terminal can be marked in a variety of different ways: AC, AUX., S, R, TACH, or<br />
nothing at all. Once installed, the tach is then calibrated to that specific engine by using a shop tach or a<br />
known “no load” governor speed. The white label on this tach gives the formula: [Crankshaft pulley<br />
dia./alternator pulley dia. x No. of Alt. Poles = N]. “N” is used to determine the correct switch setting.<br />
Another adjustment on the back allows for fine tuning.<br />
b) The Switching Diesel Tach is hooked up to a tach signal generator which is spun by the engines’<br />
mechanical take-off. One of the signal generator’s wires is grounded to the engine and the other is connected<br />
to the tach’s signal terminal. The white label on this tach is marked: ½:1, 1:1, 1.5:1, 2:1, which<br />
corresponds to the different mechanical take-off ratios.<br />
c) The Mag Pickup Tach hooks up to a magnetic pickup sensor which counts gear teeth. Here neither of the<br />
wires is grounded to the block. They are both routed up to the tachometer as a twisted pair. One hooks to the<br />
signal terminal and the other to the ground terminal on back of the tach. The switch is set to the approximate<br />
number of teeth that the sensor sees on each engine revolution. Another adjustment on the back allows fine<br />
tuning to the exact number of teeth. The label is marked in ranges generally from 80 to 200 gear teeth.<br />
Calibration<br />
Set up a calibrated “shop tach” or “strobe tach” to monitor the engine’s true RPM. Start the engine and<br />
(after an appropriate warm-up period and with the shift in neutral) increase it’s speed to the boat’s normal<br />
cruising RPM read on the shop tach. Set the coarse adjustment switch to the proper position described on it’s<br />
label. Remove the stop-plug or paper label corner (at the 8-o’clock position on the rear of the case for most) and<br />
insert a 5/16” Allen wrench into the “fine adjustment” trimpot, rotating it CW or CCW as necessary to indicate<br />
the true RPM.<br />
9
Troubleshooting<br />
Symptom recognition is the first step in effective instrumentation troubleshooting. Tachometers usually<br />
exhibit the following symptoms: a) dead, b) pegged, c) erratic, d) reading high, e) reading low, and f)<br />
sticky. More thorough tests of all tach’s (except magnetic pick-up) can be conducted using the <strong>Faria</strong> ®<br />
<strong>Instrumentation</strong> Tester. (See Appendix III).<br />
Symptom:<br />
A. Dead - This is usually caused by: a) No power applied, b) No signal supplied, or c) Tach damaged by<br />
electrical transients caused by disconnecting the battery with the engine running.<br />
1. Check to see if power is applied to tach by switching the instrument power supply switch on and off. As<br />
power is applied, the pointer should jump slightly. If it does not, check to see that the wires are installed on<br />
the correct terminals and that 12 volts are actually applied to the terminals themselves.<br />
2. If tach indicates that power is applied, check for the presence of a signal on the signal terminal. Measure<br />
the signal between the signal and ground terminals. This should read in excess of 2 volts DC.<br />
3. If power and signal are present, then it is possible that the tach has been damaged by electrical transients.<br />
See the enclosed technical bulletin for details.<br />
B. Pegged - This condition occurs on tach’s with internal mechanical pointer stops. It is caused by removing<br />
power from the tach while it is running in excess of mid-scale RPM’s or by the switch on back of the tach being<br />
in between positions. When power is re-applied, the tach pointer attempts to go clockwise to zero but cannot<br />
because the internal stop is in the way. Read “<strong>Marine</strong> <strong>Instrumentation</strong> Facts” for details on how to correct this<br />
condition.<br />
C. Erratic - This symptom is caused 99% of the time by an intermittent connection between the wire and the ring<br />
or spade connector. Often the wire’s insulation is pushed into the crimp area and crimped. The center conductor<br />
casually touches the connector allowing the tach to work most of the time but causing a nightmare for the<br />
technician. Electrical noise also can cause erratic readings. See “Reading High” for further information.<br />
D. Reading High - This is usually caused by the switch on the back of the tach being in the wrong position. If<br />
the number of cylinders or alternator poles selected by the switch is too low, the tach will read high. If a variable<br />
alternator or mag pick-up tach is being used, then further calibration may be necessary, as this calibration is done<br />
by the end user. See ‘Calibration’. Excessive electrical noise may also cause the tach to read high. These noise<br />
spikes are counted by the tach as engine RPM’s. The wire affected by the noise can be identified by connecting<br />
one wire at a time to the tachometer directly from the battery or the signal source on the engine.<br />
E. Reading Low - If the number of cylinders or alternator poles selected by the switch is too high, then the tach<br />
will read low. If a variable ratio or mag pick-up tachometer is being used, further calibration by the end user may<br />
be necessary. See ‘Calibration’.<br />
F. Sticky - If the tach appears to “stick” during operation, slightly loosen nuts holding backclamp and check<br />
operation. If tach now operates properly and is not loose in panel, tach now should provide suitable service. If<br />
tach continues to stick during operation -- replace tach.
Operation<br />
SYNCHRONIZERS<br />
Electronic synchronizers work by comparing the pulse frequencies generated by the ignition systems,<br />
alternators, tach signal generators, or magnetic pickup senders of dual engine installations. The synchronizer is<br />
hooked up to +12VDC, Ground, and to each tachometer’s signal source. By selecting the right synchronizer<br />
(magnetic pickup’s use synchronizers that function only in that application) and setting the switch on the back to<br />
the correct position, you let the synchronizer compare the frequency of pulses sent per each engine’s revolution.<br />
From this information, the synchronizer displays a variance in engine speed by swinging it’s pointer toward the<br />
slower engine. See Appendix I for synchronizer dimensions. Instrument part numbers are located on a label<br />
attached to the outside of the case (i.e. SY0000A).<br />
Calibration<br />
Start the engines and (after an appropriate warm-up period and with shifts in neutral) increase their speeds to<br />
the boat’s normal cruising RPM. (Both tach’s must be properly calibrated). Set the coarse adjustment switch<br />
to the proper position described on it’s label. Remove the stop-plug (at the 8-o’clock position on the rear of the<br />
case for most) and insert a 5/16” Allen wrench into the “fine adjustment” trimpot, rotating it CW or CCW as<br />
necessary to center the synchro.<br />
Troubleshooting<br />
Symptom:<br />
A. Dead - This is usually caused by: a) No power applied, b) No signal supplied, c) Sync damaged by<br />
electrical transients caused by disconnecting the battery with the engine running.<br />
1. Check to see if power is applied to sync by switching the instrument power supply switch on and off. As<br />
power is applied, the pointer should jump slightly. If it does not, check to see that the wires are installed on<br />
the correct terminals and that 12 volts are actually applied to the terminals themselves.<br />
2. If sync indicates that power is applied, check for the presence of a signal on the signal terminals. Measure<br />
the signal between the signal and ground terminals. This should read in excess of 2 volts DC.<br />
3. If power and signals are present, then it is possible that the sync has been damaged by electrical transients.<br />
See the enclosed technical bulletin for details. Replace the synchronizer.<br />
B. Pegged (reading high/reading low) - This condition occurs when the synchronizer is in the wrong switch<br />
position or is not calibrated. Another adjustment on the rear of the synchronizer allows for fine tuning. See<br />
‘Calibration’.<br />
C. Erratic - This symptom is caused 99% of the time by an intermittent connection between the wire and the ring<br />
or spade connector. Often the wire’s insulation is pushed into the crimp area and crimped. The center conductor<br />
casually touches the connector allowing the sync to work most of the time but causing a nightmare for the<br />
technician. Electrical noise can also cause erratic readings. These noise spikes are counted by the sync as engine<br />
RPM’s. The wire affected by the noise can be identified by connecting one wire at a time to the synchronizer<br />
directly from the battery or signal source on the engine.<br />
D. Sticky - If the sync appears to “stick” during operation, slightly loosen nuts holding backclamp and check<br />
operation. If sync now operates properly and is not loose in panel, sync now should provide suitable service. If<br />
sync continues to stick during operation -- replace sync.
Operation<br />
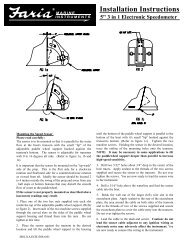
SPEEDOMETERS<br />
Pitot tube type speedometers operate by pressure from the water being forced into the pitot tube. This<br />
pressure is then transmitted through flexible tubing to the bourdon tube movement inside the speedometer<br />
head where it is converted into a speed reading by the movement mechanism. See Appendix I for<br />
speedometer dimensions. Instrument part numbers are located on a label attached to the outside of the<br />
outside of the case (i.e. SE0000A).<br />
Troubleshooting<br />
Symptom:<br />
Speedometer does not register or sticks during operation - Slightly loosen nut(s) holding backclamp and check<br />
operation. If speedometer now operates properly and is not loose in panel, it should now provide suitable<br />
service.<br />
If the speedometer continues to stick, follow the tubing from the speedometer head to the pitot tube water<br />
pickup, checking for any sharp bends or kinks that may be impeding the air flow to or from the speedometer<br />
unit. Also check for blockage at the pitot tube inlet hole.<br />
NOTE: Compressed air at NOT MORE THAN 20 PSI may be used to check speedometer movement for free<br />
operation. This is equivalent to approximately 40 MPH. Due to variation in air gauges, etc., this is not a<br />
valid test for accuracy.<br />
If tubing is free of obstructions, water pickup is not restricted, and unit continues to stick in operation,<br />
replace the speedometer.<br />
If unit is not registering at all, check for breaks in the tubing and loose connections at the pitot tube and the<br />
back of the speedometer. If loose connections are apparent, remove tubing from pitot tube or speedometer<br />
head respectively, cut back tubing approximately 1/2” with a sharp knife and reattach. No adhesive is<br />
recommended due to the fact that it may be introduced into the speedometer movement and cause a<br />
malfunction. If speedometer still does not register, replace the speedometer
Operation<br />
GAUGES<br />
FUEL, PRESSURE, TEMPERATURE RUDDER ANGLE & TRIM<br />
Gauges operate by sending a low amperage current through the gauge’s meter to ground via a sending unit<br />
with variable resistance. The resistance of the sending units increase or decrease with the changes in<br />
pressure, temperature, tilt, etc. As the sender’s resistance varies, the amount of current allowed to flow<br />
through it to ground changes and the meter deflects. See Appendix I for gauge dimensions. Instrument part<br />
numbers are located on a label attached to the outside of the case (i.e. GA0000A).<br />
Troubleshooting<br />
See Appendix IV for a quick reference troubleshooting guide.<br />
Symptom:<br />
A. Gauge appears to “stick” during operation - Slightly loosen nuts holding backclamp and check operation.<br />
If gauge now operates properly and is not loose in panel, gauge now should provide suitable service. If<br />
gauge continues to stick during operation -- replace gauge.<br />
B. Gauge is inoperative:<br />
1) To test for voltage to the gauge (use a 12-volt test light or voltmeter for testing):<br />
a) Turn key switch to ON position. Connect the test light or voltmeter lead to the ignition “I” terminal of<br />
the gauge and the other lead to the ground “G” or “GND” terminal of the gauge. If test light lights<br />
or approximately 12 volts is indicated on the test meter, the ignition and ground lead connections<br />
are good.<br />
b) If test light does not light or there is no reading on the test voltmeter, check the positive 12 volt power<br />
source at the key switch of fuse block. If power is available at those points, correct the lead<br />
problem or replace any blown fuses.<br />
c) If test light still does not light or voltmeter still shows no voltage, check ground lead and connections<br />
by connecting one lead of test light or voltmeter to a known source of B(+) and the other lead to<br />
the ground terminal of the gauge. If lamp lights or voltage is indicated on the voltmeter while<br />
touching the ground terminal of the gauge, the ground connection to the gauge is good. If lamp<br />
does not light or voltmeter does not show voltage, check ground connection to gauge, ground wire,<br />
and ground connection to ground source.<br />
2) To test gauge operation and sending unit connections (after performing electrical checks above):<br />
a) Turn key switch to OFF position. Connect a jumper lead between the “S” terminal and the “G” or “GND”<br />
terminal of the gauge. Turn key switch to ON position. If the gauge registers a full scale reading<br />
under those conditions, the gauge is good. If less than full scale reading is indicated, the gauge is<br />
defective and should be replaced. Note: European resistance gauges will operate in reverse.<br />
b) If no reading is indicated, remove sending unit lead wire from sending unit on the engine. Turn the<br />
key switch to the “ON” position. Ground the sending unit lead wire to a good ground and note the<br />
gauge reading. If the gauge registers a full scale reading, the sending unit may be defective.
c) Remove jumper lead. Remove sending unit lead wire from the sending unit on the engine. Turn the<br />
key switch to ON position. Ground the sending unit lead wire to a good ground and note the gauge<br />
reading. If the gauge now (after grounding the sending unit lead wire) registers a full scale<br />
reading, the sending unit is defective and should be replaced. See Appendix V & VI.<br />
NOTE: Intermittent readings usually indicate loose connections or shorted wiring. Check all<br />
connections and wiring if the above checks do not pinpoint a specific defect.<br />
C. Gauge is out of calibration - Disconnect sending unit lead wire from gauge. Connect test resistance as<br />
shown in the sending unit resistance value table (See Appendix V) between sender (S) terminal of gauge<br />
and ground. Gauge should indicate the approximate range indicated in chart. If readings on gauge do not<br />
match those on table (gauge pegs early or doesn’t read) and ohms resistance is correct as measured by an<br />
ohmmeter, gauge may not be correctly matched to sender, or gauge is out of calibration.<br />
D. Sending Unit is defective - Disconnect sending unit lead from gauge “sender” terminal. Using ohmmeter,<br />
test sending unit resistance per the sending unit resistance value table (See Appendix V). If sending unit<br />
shows “0” ohms or open circuit, check sending unit at the motor and/or wiring for defects.
Operation<br />
VOLTMETERS<br />
A voltmeter indicates the battery voltage and the general condition of the battery charging system. The<br />
meter requires no warm-up and indicates voltage changes instantly. See Appendix I for gauge dimensions.<br />
Instrument part numbers are located on a label attached to the outside of the case (i.e. VP0000A).<br />
Troubleshooting<br />
Symptom:<br />
A. Gauge appears to “stick” during operation - Slightly loosen nuts holding backclamp and check operation. If<br />
gauge now operates properly and is not loose in panel, gauge now should provide suitable service. If gauge<br />
continues to stick during operation, replace gauge.<br />
B. No voltage reading is noted on the voltmeter:<br />
1. If the indications are normal (engine starts, lamps lights, etc.) proceed with this test, otherwise, check<br />
battery voltage with a test voltmeter, or a 12 volt test light.<br />
2. Check for voltage at voltmeter by connecting test voltmeter or 12 volt test light to “+” and “-” terminals of<br />
voltmeter; turn ignition switch on.<br />
a) If light does not light, or if test voltmeter reads the same as installed voltmeter, the problem is in the<br />
battery charging system or wiring. See manufacturer’s shop manual for trouble-shooting procedure.<br />
b) If test voltmeter indicates correct voltage; typically 14 volts with engine running and at least 12 volts<br />
with no accessories on and engine off (see engine shop manual for details), then replace voltmeter.
Operation<br />
AMMETERS<br />
An ammeter indicates the current flow through the battery charging system. A “center zero” ammeter,<br />
during charging, shows a (+) positive reading indicating current flowing to the battery (charge). A (-)<br />
negative reading indicates current flowing away from the battery (discharge). See Appendix I for gauge<br />
dimensions. Instrument part numbers are located on a label attached to the outside of the case (i.e.<br />
AP0000A).<br />
Troubleshooting<br />
Symptom:<br />
A. Ammeter appears to “stick” during operation - slightly loosen nuts holding backclamp and check operation.<br />
If gauge now operates properly and is not loose in panel, gauge now should provide suitable service. If gauge<br />
continues to stick during operation -- replace gauge.<br />
B. Ammeter reads ‘backward’ - shows (charge) with the engine off with a load on the battery and (discharge)<br />
with the engine running. Ammeter installed incorrectly, reverse leads at the rear of the ammeter.<br />
C. Ammeter does not read “charge” or “discharge” - Ammeter is dead (open circuit). Check for bad connections<br />
in the charging circuit that may have caused a surge of current burning out the ammeter. Replace the<br />
ammeter.
Appendix
4 - INCH TACHOMETERS & SYNCHRONIZERS<br />
Note: Case diameter dimension is panel hole requirement<br />
Appendix I (Sheet 1 of 4)
5 - INCH COMPETITION SQUARE<br />
TACHOMETERS, SYNCHRONIZERS & SPEEDOMETERS<br />
Note: Case diameter dimension is panel hole requirement.<br />
Appendix I (Sheet 2 of 4)
4 - INCH SPEEDOMETERS<br />
Note: Case diameter dimension is panel hole requirement.<br />
Appendix I (Sheet 3 of 4)
2 - INCH GAUGES<br />
Note: Case diameter dimension is panel hole requirement.<br />
Appendix I (Sheet 4 of 4)
Outboard Tachometer Applications<br />
Make / Year Model # of Poles<br />
Chrysler 35 HP, 70 HP & up 12<br />
1968 - 1983 55 & 60 HP 20<br />
Force 50 HP through early 1987 (A,B models) 8<br />
1984 - 1999 35 HP (1986 & later)<br />
40 HP (1991 & later)<br />
50 HP (1992 B models & later)<br />
70 HP (1991 & later)<br />
90 - 120 HP L-Drive (1991 B & later)<br />
145 HP L-Drive (1991 & later)<br />
12<br />
Honda<br />
Through 2000<br />
8, 9.9, 15 HP<br />
(Tiller handle models require:<br />
Honda harness: #32197-ZH8-003)<br />
20 to 30 HP 4<br />
75 HP, 90 HP, 115 HP, 130 HP<br />
35 to 50 HP 6<br />
Mercury/<strong>Marine</strong>r 18,25,48,60HP <strong>Marine</strong>r through 1983<br />
1977 - 2000 8, 9.9, and 15 HP(4stroke)(after1998)<br />
(See note “e”) Less than 40 HP - All Before 1999 4<br />
40 HP(serial # 582399 and before)<br />
8, 9.9(Before 1999)& 50HP (4 stroke) 6<br />
6 to 25 HP 1999 & up 10<br />
25 HP & 30 HP (4 stroke)<br />
40 HP (after serial # 582399)<br />
45 HP (1987)<br />
50 HP & above 12<br />
135, 150, 200, 225 HP, DI<br />
3.0L EFI 225 & 250 HP<br />
Pro Max 3.0L 300 HP EFI<br />
OMC All 2 cylinders less than 70 HP 10<br />
1977 - 2000 9.9 HP & 15 HP (2 cylinder, 4 stroke)<br />
for 88 HP {90} & 50 HP, 2 cylinder (1993 & later)<br />
112 HP {115} an 60 HP, 3 cylinder (1985 & later) 12<br />
OMC voltage reg. 70 HP & greater, including sea drives<br />
kit is recommended All FICHT models<br />
Suzuki Less than 55 HP - All<br />
through 2000 60 HP, 65 HP thru 1985 4<br />
50 - 60 HP Cabrea<br />
9.9 HP & 15 HP (4 stroke)<br />
25 HP & 30 HP (1993 & later) 6<br />
55 HP & 65 HP (1985 & later)<br />
75 HP & up (1985 & later)<br />
75 HP and up (Cabrea)<br />
115 HP and up (1988 & later) 12<br />
DF 60/70 (4 stroke)<br />
Tohatsu / Nissan 8 HP thru M40C (all 2 cylinder) 4<br />
through 2000 M40D thru M90A (all 3 cylinder) 6<br />
(See note “e”). 115 HP, 120 HP, 140 HP (all 4 cyl.) 12<br />
Yamaha 6 HP - 25 HP (2 cylinder)<br />
1984 - 2000 C25 - C40 (except C30) 4<br />
F/T 9.9, C30 & C60<br />
25 U2 (3 cylinder)<br />
30 & 40 HP, 50EJ 6<br />
50T - 70, F15<br />
F/T 50, P75, F25,F40, F43, F44, F115<br />
C75 - C150, F80 12<br />
90 - 250, F100, HPDI Z150 & Z200<br />
Notes:<br />
a. 6000 RPM tachs are for Inboard & I/O gas engine applications only<br />
b. 7000 RPM & 8000 RPM tachs are for all outboard motor applications only.<br />
c. Electrical pulses per revolution are equal to 1/2 the number of alternator poles.<br />
d. Older model outboards (prior to 1977) may have the tach signal wire originating at the ignition system though they are alternator equipped.<br />
All alternator tachometers may be used on these systems by disconnecting the tach signal wire at the engine and connecting that wire to the<br />
unrectified alternator signal at the rectifier. Be certain the number of alternator poles match the tachometer pole setting of the tach.<br />
e. Strong alternator interference on some TOHATSU / NISSAN outboards and some Mercury 90HP outboards may require wiring a .1mf, 100<br />
volt non-polarized capacitor between the signal and ground stud terminals.
Appendix II
R<br />
MARINE INSTRUMENTS<br />
Description: <strong>Faria</strong> ® Tachometer and Gauge Tester.<br />
The <strong>Faria</strong> ® Tachometer and Gauge Tester is an engine tachometer (signal) and a gauge (sender) substitution box<br />
designed to check the correct operation of engine electrical instrumentation.<br />
The unit may be used with a 115VAC or a 12VDC external battery source.<br />
TACHOMETER FREQUENCY:<br />
Rotate clockwise for increasing revolutions per minute and counterclockwise for decreasing RPM.<br />
GAUGE RESISTANCE:<br />
Rotate clockwise for decreasing resistance (higher gauge readings in most cases) and counterclockwise for increasing<br />
resistance (lower gauge readings in most cases).<br />
INSTRUMENT SELECT:<br />
With switch “up” toward ‘TACHOMETER’ position; outboard alternator tachometers, inboard and inboard/outboard<br />
4-cycle gas engine tachometers and diesel tachometers driven by diesel pulse generators or magnetic pick-ups may<br />
be tested for operation.<br />
With switch “down” toward ‘GAUGE’ position; 12 volt gauges which operate anywhere in the resistance range of 0-<br />
1000 ohms may be tested for operation.<br />
SEND: (Sender) (Green) IGNITION: (+) (Red) GROUND: (-) (Black)<br />
ZERO: (STD IGN ALT)/(MAG PICK-UP DIESEL)<br />
[UP] - For 4-cycle gas engines, alternator, and diesel pulse generator signal source tachometers.<br />
[CENTER] - Zero indicating tachometer is “live”.<br />
[DOWN] - For testing diesel tachometers that use a magnetic pick-up as a signal source.<br />
POWER: (AC) / (DC) adjacent LED will light indicating power is “on”<br />
[UP] - Selector switch for 115VAC<br />
[CENTER] - Off<br />
[DOWN] - 12VDC external battery power<br />
Gauge Tester Instructions
Appendix III (Sheet 1 of 2)
To test any instrument: (bench test, out of boat)<br />
a.) Plug tester into a 115VAC outlet<br />
b.) Set ‘POWER’ switch to “OFF” (center position)<br />
c.) Insert banana plugs into corresponding color coded connectors on front of box.<br />
d.) Connect alligator clips to corresponding terminals on rear of gauge or tachometer to be tested; (red to ignition or<br />
battery (+) terminal, green to signal or sender terminal, & black to ground (-) terminal)<br />
e.) Switch ‘POWER’ switch to “AC” position (up).<br />
f.) Switch ‘INSTRUMENT SELECT’ switch to position corresponding to instrument being tested.<br />
(i.e.: (A) up for all tachometers, (B) down for all gauges ).<br />
A.) To test a Tachometer;<br />
a.) Switch ‘STD IGN-ZERO-DIESEL’ switch to ‘ZERO’, tach should go to “zero”.<br />
b.) Switch ‘STD IGN-ZERO-DIESEL’ switch to setting appropriate to tach being tested, as described above.<br />
c.) Start with Tachometer Frequency Adjust control in full counterclockwise position (min.).<br />
d.) Slowly rotate control knob in a clockwise direction. As tachometer begins to indicate/change RPM reading,<br />
continue to rotate knob slowly until the highest reading is obtained. (May be less than full scale.)<br />
e.) Rotate control counterclockwise until pointer returns to lowest reading (may not be zero); repeat procedure and<br />
check for smoothness of operation.<br />
f.) Set ‘POWER’ switch to ‘OFF’ (center) position<br />
g.) Remove alligator clips from back of gauge.<br />
B.) To test a Gauge:<br />
a.) Start with Gauge Resistance in either full clockwise (min.) or full counterclockwise (max.) position.<br />
b.) Slowly rotate control knob until gauge pointer moves from initial starting position.<br />
c.) Continue rotating control knob until gauge reads full scale opposite from initial starting position.<br />
d.) Return control knob to initial starting position. Pointer should return to original starting position smoothly.<br />
e.) Repeat test and observe pointer for smoothness of operation.<br />
To test any instrument: (in a boat, using the boat’s 12VDC power)<br />
a.) Disconnect the signal wire from the instrument.<br />
b.) Connect alligator clips to the corresponding terminals on the back of the gauge after positively identifying them<br />
visually, with a wiring diagram, or a voltmeter.<br />
c.) Set ‘POWER’ switch to ‘DC’ position (down).<br />
d.) Turn boat’s ignition switch “ON”.<br />
e.) Follow procedure outlined above for tachometer or gauge testing.<br />
f.) When test is complete, shut boat’s ignition switch ‘OFF’, return ‘POWER’ switch to ‘OFF’ (center) position.<br />
g.) Remove alligator clips from instrument terminals.<br />
h.) Reconnect the signal wire to the instrument.<br />
OPTIONAL OMC SYSTEM CHECK TESTER:<br />
To test a System Check Tachometer or Operator Warning System gauge:<br />
a.) Plug the tester into a 115V AC outlet.<br />
b.) Connect the instrument to the test box with the 8 pin connector cable.<br />
c.) Turn the “POWER” switch to the AC position as described above. The four warning lights will<br />
simultaneously come on and alarm will sound once indicating that the lights and alarm circuits are<br />
functional. The lights will then sequentially go out from left to right. If a light or the alarm stays on the<br />
instrument is defective.<br />
d.) To further test tachometer sweep proceed as above in section: A.) To test a Tachometer, parts:<br />
a.) through, e.).<br />
e.) To test individual warning lights and the alarm for either a tachometer or warning light gauge. Apply a<br />
tachometer signal to the instrument as in section: A.) part: d.), press the appropriate light button. If<br />
the instrument is working properly the warning light will come on and stay lit and the alarm will sound<br />
for 12 seconds. If the light goes out or the alarm stays on the instrument is defective.<br />
f.) Set “POWER” switch to “OFF” (center) position.<br />
g.) Remove 8 pin connector cable.
Appendix III (Sheet 2 of 2)
YES<br />
GAUGE TROUBLESHOOTING QUICK REFERENCE GUIDE<br />
Loosen Back<br />
Clamp. Does<br />
it Work?<br />
NO<br />
Bad Gauge<br />
Clamp was<br />
too Tight,<br />
Snug it up<br />
& Recheck.<br />
Gauge<br />
Sticking<br />
12 Volt or<br />
Gnd Fault<br />
Check Fuses<br />
and<br />
Connections<br />
Bad Gauge<br />
Bad Wire<br />
Bad Sender<br />
NO<br />
LIGHT<br />
NO<br />
NO<br />
NO<br />
Observe<br />
Gauge<br />
Gauge<br />
Inoperative<br />
Hook Test<br />
Light to 12 volt<br />
& Gnd on<br />
Gauge<br />
LIGHT<br />
OK<br />
Jumper Signal<br />
Post to Gnd.<br />
Full Scale?<br />
Gnd the Wire<br />
At Sender.<br />
Full Scale?<br />
YES<br />
Check Ohms at<br />
Sender.<br />
Correct?<br />
YES<br />
Bad<br />
Sender/Wire<br />
Connection<br />
Appendix IV<br />
Gauge<br />
Reading<br />
Incorrectly<br />
Are Terminals Dirty<br />
or Loose?<br />
NO<br />
Is Gauge<br />
Calibrated to Test<br />
Ohms<br />
YES YES<br />
Incorrect or<br />
Bad Sender<br />
YES<br />
NO<br />
Clean or<br />
Tighten<br />
Connections<br />
Bad Gauge
Sending Unit Resistance Values<br />
UP MID DOWN<br />
TRIM GAUGE ohms ohms ohms<br />
Mercury / Force 160 38.7 10<br />
Force (70 & 75 HP only) 10 20.6 41.8<br />
OMC Outboard 10 44 88<br />
OMC Cobra Stern 70 29.5 11<br />
OMC Sea Stern Drive 88 44 1<br />
Yamaha 1996 450 240 100<br />
Yamaha 1997 (And newer) 550 330 100<br />
Volvo SX Cobra 146 --- 11<br />
Volvo SX (MD Mod) 70 --- 3<br />
Volvo SX (HU Mod, NC Mod) 146 --- 11<br />
Volvo DP (White)* 180 --- 10<br />
Volvo DP-S (NC Mod)* 146 --- 11<br />
* Uses “Black Box” for Trim signal<br />
All resistance values shown for Oil Pressure, Water Temperature & Fuel gauges are for single station.<br />
(Dual station senders have 1/2 the resistance value of single station senders.)<br />
0-80 psi 0-100 psi 0-150 psi 350 psi 0-400 psi<br />
(5-Bar) (7-Bar) (10-Bar) (25-Bar)<br />
OIL PRESSURE GAUGE psi ohms psi ohms psi ohms psi ohms psi ohms<br />
0 240 0 240 0 240 0 1<br />
American <strong>Marine</strong> Sender 40 103 40 103 75 103 200 44<br />
80 33.5 100 33.5 150 33.5 400 88<br />
0 10 0* 10 0 10 0* 10<br />
European <strong>Marine</strong> Sender 40 95 90 112 12.5 95 200 95<br />
80 180 150 180 25 180 400 180<br />
* For use with Competition series 150 psi, 400 psi & Dress White 400 psi<br />
100°F - 250°F 40°C - 120°C<br />
WATER TEMPERATURE °F ohms °C ohms<br />
100 450 40 450<br />
American <strong>Marine</strong> Sender 175 99 65 99<br />
250 29.6 120 29.6<br />
40 281<br />
European <strong>Marine</strong> Sender 80 68<br />
120 22<br />
EMPTY MID FULL<br />
FUEL LEVEL ohms ohms ohms<br />
American <strong>Marine</strong> Sender 240 103 33.5<br />
European <strong>Marine</strong> Sender 10 180<br />
60°F - 220°F 20°C- 100°C<br />
CYLINDER HEAD TEMP °F ohms °C ohms<br />
60 1195 20 1040<br />
<strong>Faria</strong> ® <strong>Marine</strong> Sender Only 140 192 60 192<br />
(Single Station Sender) 220 46.5 100 56<br />
RUDDER ANGLE PORT STARBOARD<br />
INDICATOR ohms ohms<br />
Sender 10 180<br />
Appendix V
Choosing the Proper Sender:<br />
Senders are designated by the following descriptions and must be selected in combinations of one each<br />
from A, B, & C.<br />
(For example: Single station, American resistance, Standard ground)<br />
A<br />
Single<br />
Dual<br />
B Resistance b American<br />
European<br />
C Ground c<br />
Standard<br />
Floating<br />
Station a<br />
Notes:<br />
a. Station: It is the sender that is unique in a dual station application. The gauge is the same in either single or<br />
dual applications.<br />
b. Resistance: Choose your sender to electrically match your gauge not just the manufacturer. Some sender<br />
manufacturers make both resistance types; and, some instrument manufacturers may use either resistance type<br />
depending on the gauge. There is usually no visual way alone to determine the resistance type.<br />
c. Ground: Standard ground is the most common having battery negative (-) connected directly to the engine<br />
block. Sending units may have one (1) terminal (signal). In a floating ground system, the battery negative is<br />
not connected to the engine block so merely threading in the sender does not supply ground. Floating ground<br />
senders will have two (2) terminals (signal & ground). Both sender terminals may be wired to the appropriate<br />
gauge terminal or the sender’s ground may be wired directly to the battery negative. A floating ground sender<br />
may be used in a standard ground system but not vice versa.<br />
For technical assistance, contact <strong>Faria</strong> ® <strong>Marine</strong> <strong>Instruments</strong> Customer Service between 8:30 a.m. and 5:00 p.m. Eastern time<br />
weekdays at (860) 848-9271 or (800) 473-2742.
Appendix VI
IS0100D<br />
R